A Primer On Concrete Countertops — Precast vs. Pour In Place
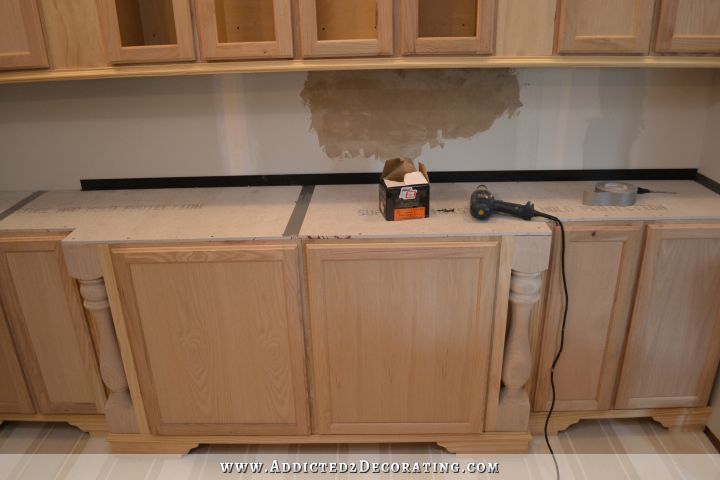
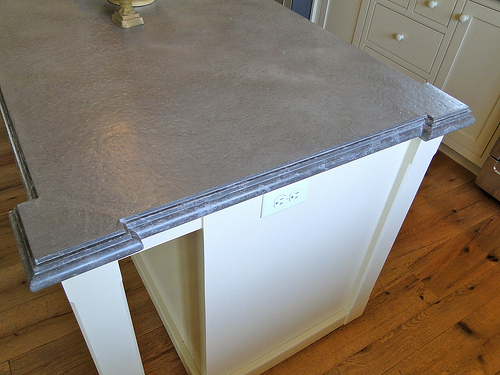
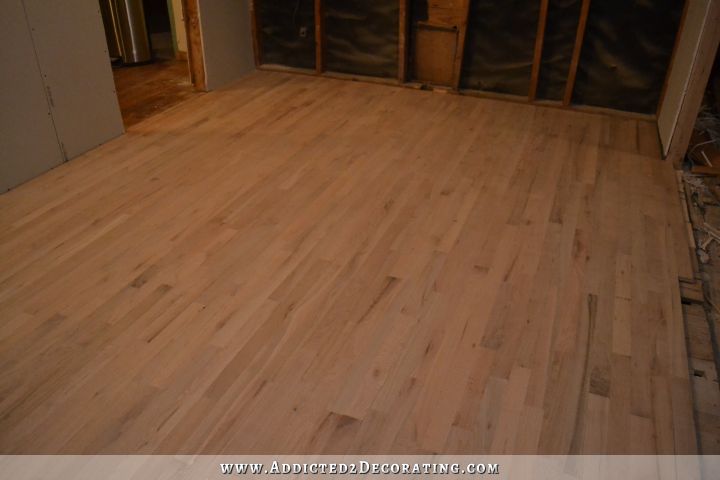
I finally started prepping for my concrete contertops yesterday!! I didn’t get very far at all, but it felt great to at least get something done. In fact, this is the sum total of my countertop progress yesterday.
Since I haven’t gotten far enough to do an official “Part 1” post, I thought I’d start with a little primer on concrete countertops and answer some of the most-asked questions I’ve been getting about concrete countertops and about this whole “pour in place” business.
I heard about concrete countertops for the first time about 11 years ago when I came across a book in Barnes & Noble called Concrete Countertops: Design, Forms, and Finishes for the New Kitchen and Bath by Fu-Tung Cheng. I was intrigued at the idea of using concrete as a countertop material, but as I read the book and looked at the pictures, the process seemed so labor intensive and non-DIY-friendly to me.
His method, which produced precast concrete countertops, and which was pretty much the only method used for many years (as far as I know), and is still widely used today. This method starts with taking measurements of your countertop area, and then building a mold (in your garage or some other large work area like that) out of melamine-covered particle board to match the dimensions of the countertop you needed. Using the precast method, you have to take into account sink and faucet placement and be sure that the mold includes holes for these items.
Here’s a picture of a precast concrete countertop mold from DIY Network.

After the mold is built and caulked, the concrete is poured into the mold. The main difference between this precast method and the pour in place method is that when you pour the concrete into the precast mold, the top of the countertop is on the bottom against the melamine mold. Once the concrete is dry, the mold is disassembled and the concrete is removed and flipped over before putting it into place on the cabinets.
This method has some obvious advantages, but also some real disadvantages.
First, the disadvantages:
- Building the mold can be tricky and quite labor intensive for a DIYer, especially if you have any non-90-degree angles or curves on your countertops, and especially considering that you have to keep in mind that you’re building the mold upside down and then the countertop will be flipped over. If you’ve got any awkward corners or shapes, in addition to holes for a sink, faucet, etc., it can get really confusing.
- Adding any fancy edge profiles to precast countertops can also be tricky, so most DIYers just stick with straight 90-degree edges.
- The concrete is heavy!! Once you break away the mold, you have to carry the countertop and put it into place. That might be fine for little countertops like the ones I’ll need here that are 24″ x 24″ and 18″ x 24″…
…but what about the one I’ll need here that’s about 110″ x 40″? Can you imagine how heavy that countertop is going to be?
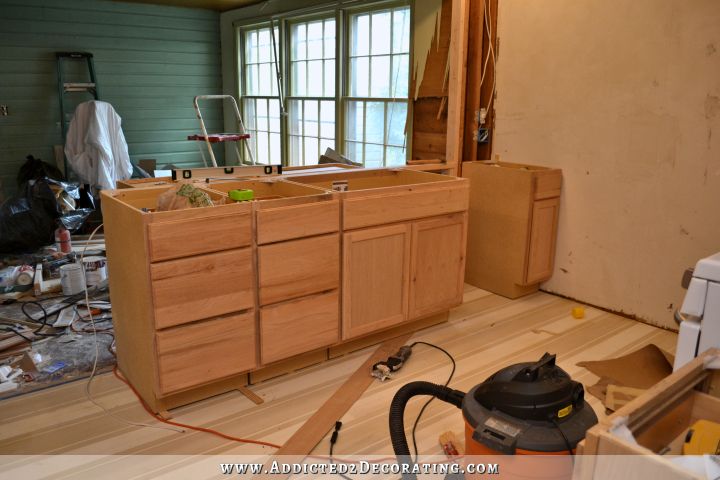
Of course, it’s not impossible to precast a countertop like that. Moving it and putting it into place would be about like moving and installing a piece of granite that large. But it’s just not really DIY friendly.
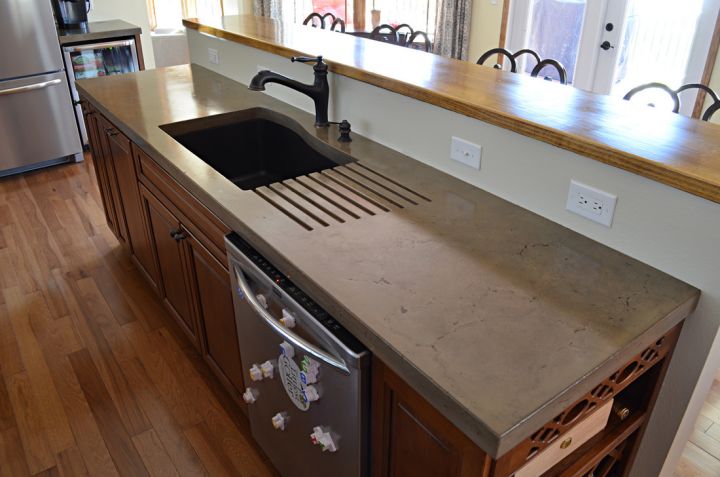
The advantages of precast countertops are that you can get really creative with the mold by adding things like integrated drain boards, like this countertop created by Formed Stone Design in Illinois.
And if you’re willing to put the time, creativity, time, thought, and time into it, you can get super creative with things like an unusual integrated sink shape. Check out this guitar-shaped sink by Chris Havill via Concrete Network.
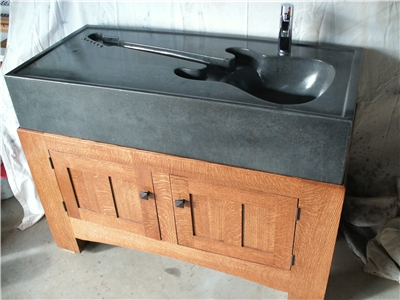
But truthfully, I don’t think I’ve ever seen a DIYer do anything like this. But this is the type of creativity that you’ll often see from the pros who do precast concrete countertops.
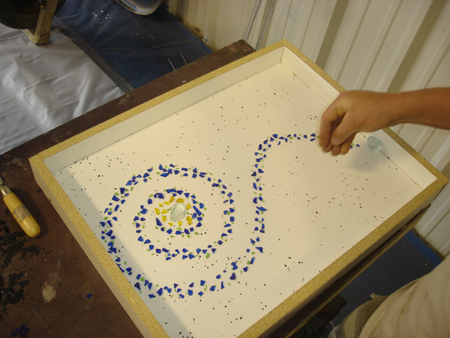
One thing that DIYers can do, and that is actually quite easy to do with precast countertops, is embedding interesting items into the concrete, like fossils or colored glass. The aggregate goes in first, and then the concrete is placed on top. Here’s an example of a glass swirl design being placed into a mold before the concrete is poured. This photo is from Concrete Countertop Institute.
You can also add these decorative items to pour-in-place countertops, but for some reason it seems easier to do (at least to me) with precast countertops.
So you can see that the options with precast concrete countertops are limitless, and especially when those molds and concrete are in the hands of skilled pros. But like I said, DIYers who use precast countertops tend to stick with the very basics.
The other option for DIYers is to pour the countertops in place. This is a newer method developed by some very smart people who realized that the precast method wasn’t so DIY friendly and decided to help us DIYers out a bit.
I came across this whole idea of pour-in-place concrete countertops for the first time about two years ago (I think) when I saw a video on YouTube by Concrete Countertop Solutions. I was amazed at the (comparative) simplicity of the process.
You can see the short 3-minute video I’m talking about here:
That’s the short version. There are much more detailed videos available.
Ever since I first saw that video, I’ve wanted to try pouring my own pour-in-place concrete countertops. Over the last couple of years, I’ve watched their videos countless times, just dreaming of the opportunity to do this myself.
The basic (very basic and very abbreviated) pour-in-place process is that you cover your cabinets with with a solid material like concrete board or plywood, you build a form around the edges, and then you pour the concrete into the form. Once the concrete is dry, you remove the form from the edges.
The type of solid material base that you use (concrete board, plywood, etc.), and the type of mold products that you use around the edges, will depend fully on the company where you purchase your supplies, and the instructions that they give for using their products.
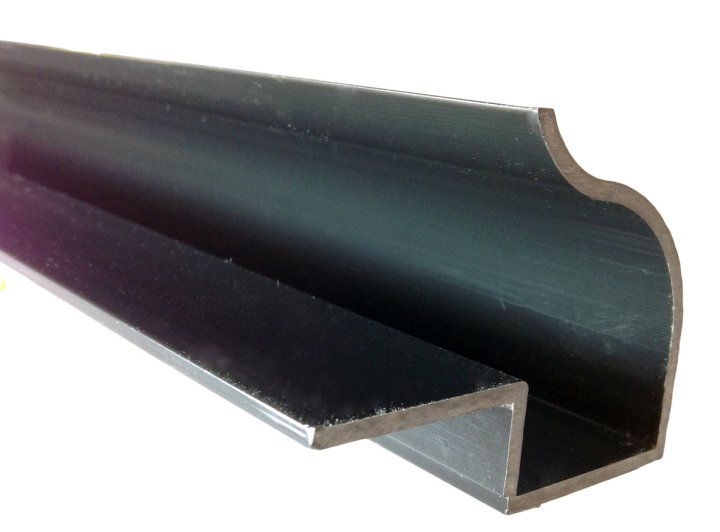
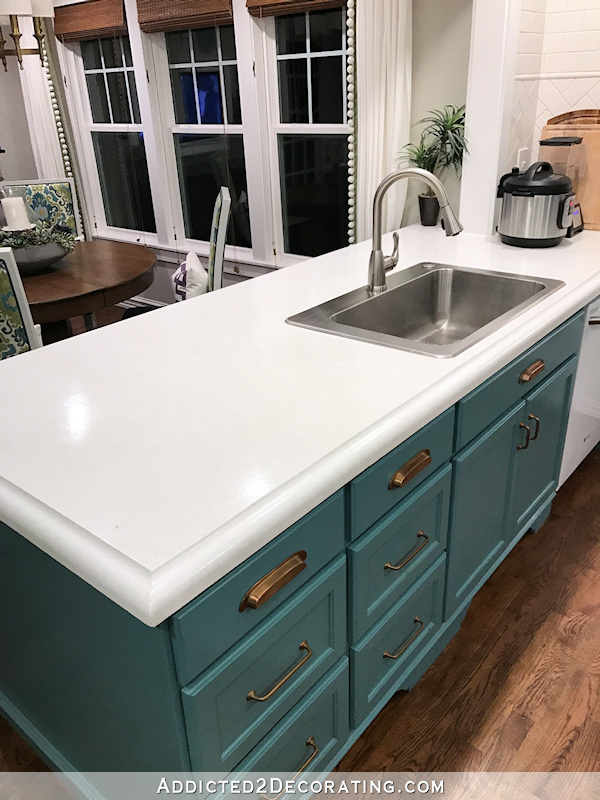
I’m personally sticking with the products and instructions given by Concrete Countertop Solutions, and I’ll be using their Z Countertop edge forms. They suggest using concrete backerboard as the base, and you can see here that I’ve installed Hardibacker concrete board on the wall of cabinets. That’s about as far as I’ve gotten.
Next I’ll apply the straight back edge pieces along the wall, and then attach the edge profile of my choice (I’ll be using the ogee edge) along the edges where I want the decorative edge.
Once the molds are attached all the way around the countertop area and secured together with duct tape, I’ll then pour the concrete into the mold. And then once the concrete has dried, I’ll break away the plastic edge molds to reveal the decorative concrete edges.
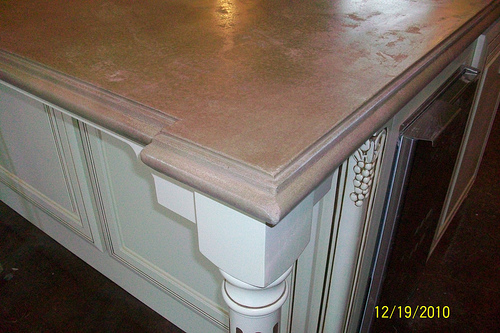
Here are some examples of pour-in-place concrete countertops done with this system.
After a couple of years of dreaming about pouring my own concrete countertops, I’m pretty darn excited to make them a part of my kitchen remodel. After deciding to go with concrete, I reached out to Ed at Concrete Countertop Solutions (he’s the creator of the product and the owner of the company) to see if he would be willing to provide me with the products to pour my own countertops if I would in turn share the process and outcome with all of you. I was thrilled when he agreed!!
So I do want to make it clear that I was provided the materials to do my own countertops free of charge, but they didn’t ask me to do it. I approached them after two years of watching their videos and dreaming of using their products. 🙂
Now I do want to point out that Concrete Countertop Solutions isn’t the only company around that makes products for pour-in-place concrete countertops. Over the last two years, I’ve come across a couple of other companies that have seen a need for this type of product and have tried to meet that need. But the reason that I decided to reach out to Concrete Countertop Solutions instead of those other companies is simple. Their products impressed me more, and their process seemed the easiest.
As a comparison, here’s a video showing the products and process from another company called Stegmeier Corporation. After watching the Concrete Countertop Solutions videos showing their products and process, and then watching this Stegmeier video about a year ago, I remember thinking to myself, “What an absolute mess! I don’t think they could have made that any more difficult if they tried!“
I know that sounds mean. Sorry. But I remember watching this and just being so shocked at the difference between the two. One seems so straightforward and easy. The other seems so long, drawn out, and complicated.
So I just wanted to share that to show that there are different companies and different methods providing products for pour-in-place concrete countertops, but after researching this process for about two years, I’m convinced that the Concrete Countertop Solutions products are the easiest for DIYers. And that’s exactly why I reached out to them specifically.
And now I realize that somehow, this post is starting to sound like a commercial. 😀
That wasn’t quite my intention. I just wanted to give a little info on the two main methods* for casting concrete countertops, and give you some insight into why I chose the pour-in-place method, as well as why I chose the particular products I did.
And just to clarify, Concrete Countertop Solutions is not paying me to write this post or any other posts about their products. They did provide the materials free of charge, but that’s only after I did my own thorough research, decided that I wanted to use their products, and contacted them to see if they would be willing to provide the products if I shared the process and results with all of you.
Hopefully I can make some real progress today, and share the details with you tomorrow. But don’t get your hopes up…you won’t be seeing actual concrete just yet. I still have lots of prep work to do, and I still have to finish the cabinet installation on the peninsula. I’m really trying my hardest to be ready to actually pour the countertops this weekend.
(*Concrete countertops can also be sprayed into a precast form. I have never even once seen a DIYer attempt to make sprayed concrete countertops. The equipment needed isn’t really available to DIYers, and the process is one that looks like it takes quite a bit of practice to master. But it’s pretty darn cool to watch! You can click here to watch a video of the process.)
Update:
My concrete countertops are finished! If you want to see how they turned out, you can jump right to the finished product here…
If you’d like to read about the whole process, you can start with Step 1 here…

Addicted 2 Decorating is where I share my DIY and decorating journey as I remodel and decorate the 1948 fixer upper that my husband, Matt, and I bought in 2013. Matt has M.S. and is unable to do physical work, so I do the majority of the work on the house by myself. You can learn more about me here.

Excellent post Kristi- Excellent!
Out of curiosity, do you know about how much this would have cost if you had paid for the materials? And in terms of countertop a DIYer could do, is it still considerably less than if you had gone with a butcher block or some other surface you could have done yourself?
I don’t have that info, but I promise I’ll get it! 🙂 Several people have asked, so I’ll do a whole cost breakdown and see if I can come up with a cost per square foot so that you and others can get an idea of what it would cost in your own kitchen, and see how it compares to some other solid surface.
As far as butcher block, the stuff that I had in the condo (which I LOVED) was the thick oak butcher block from IKEA. It was so reasonably priced, and a great bargain for that product. Sadly, they’ve discontinued the one I used. I’ve checked at other places, and I’ve been shocked at the price. The price is actually comparable to granite, but it requires a heck of a lot more maintenance to keep it looking nice. I love, love, love butcherblock, and I actually wish I had an island or something that I could use butcherblock on. But I don’t think I’d ever use it in a whole kitchen again, and particularly not around a sink.
I had concrete countertops in my old house. The person who did them built the forms around my existing laminate countertops and poured the concrete in them. It had a decorative edge that he go by using molding around his forms. After the concrete was cured (I think this is the right term) he stained them with stain used on scored concrete floors and sealed them. They turned out very pretty. However, the edges that overlapped above my dishwasher did have a few chips after some time since they were hit with different items while loading the dishwasher. Overall I was very pleased. They were beautiful and very cost efficient since I had a lot of counter space and other options were very expensive. I can’t wait to see how yours turn out. Looking forward to seeing more progress on your kitchen and I am dying to see the cabinets painted. I love the columns you used and the decorative feet on the cabinets. Hopefully I will get to build another house in the next couple of years and I plan on using much of your detail to hopefully get a custom look kitchen on a stock cabinet budget!!!! You are a great inspiration to all of us out there who dream about being able to build and decorate with imagination and creativity!!!
Yaaaaaay!!! Countertops!!!
Thanks a lot!! Lol! Now I am thinking these look great and I may need to check into them for an outdoor kitchen? My husband will be thrilled! Excited to see how they turn out – the pictures of the countertops look beautiful!
Concrete countertops are perfect for an outdoor kitchen. You can see lots of examples of concrete countertops in outdoor kitchens in the photo gallery on the Concrete Countertop Solutions website.
This is exactly what I was thinking of too!!! The outdoor kitchen that we are dreaming about would be the perfect place to have the poured concrete countertops!
We actually have a HUGE (read: heavy) conference table made out of stained concrete. The legs had to be specially made to uphold the weight of the concrete top but it is Beautiful! And we’ve had it at my office since 2000, still looks great and we get compliments every time someone new sees it!
I can’t wait to see how yours turn out!!!
I’m so stinkin’ excited that you’re getting to this!
BTW, came across this and I thought of you saying that you were going to do the wood on your ceilings. Love the beam w/wood plank look in these pics. Enjoy! http://www.houzz.com/projects/405362/Family-Style
I can see what you mean about the difference. The onlything that bothers me is that we all know the mostimportant thingin any project is the prep work. The second company seems to be all about prep work. Truthfully, I got tired of watching and listenting to that fella drone on. I killed the sound andmoved on. Iguess the smart moveis don’t do concreete backsplash;!!!! The counter that they shoulded finishedwere stonning! I would live to know a cost per sq ft so to compare with other options. I could see me and my husband getting into this. I did love the intefrated drain board in the pre cast. Thatwas pretty cool. As always looking forward to the ndxt chapter~Blessings
I definitely agree that prep work is the most important thing when doing pretty much any home improvement project. I just don’t necessarily think that a longer, more drawn out, much more complicated process including lots of busy work equals better prep work. 🙂
Plus, Buddy Rhodes, who I pretty much consider the king of concrete, uses Z Counterform from Concrete Countertop Solutions when he demonstrates pour-in-place countertops. So if he recommends them, I’m sticking with them. 🙂
I agree. It did seem like a lot of busy work tomake it seem more tedious than necessary. As I said, I never gotpast the back splash, looked way too mess for me. We’ve poured a concrete porch one story up and it was pretty straight forward. Build the frame, we didhave to use crushed stone first, rebar, then pour and level. The finess is in the leveling. At counter height it won’t be hard on the knees, butcould be tough on the back. Think about wearing a back brace if you can. Don’t think it will hurt and it might help. Stock up on epsom salts for a good long soak each night! I sound like I’m your Mother, LOL. That’s what comes from having 4 kids and being from a family of 7. I hear my Mother’s voice every time I open my mouth! Not such a bad thing ha,ha! Looking forward to tomorrow~Blessings
I may have missed it but have you decided to add a color to your concrete countertops? If so, what color?! This is exciting to watch! I check my email notifications quite frequently every day to see if you’ve added an update!! Can’t wait to see the finished kitchen!! Good luck! By the way, you’re my HERO! I am trying to gain the courage to tackle some of my own DIY projects. Hubby just doesn’t seem to have enough time to handle all my ideas! ;D
I’m using white concrete mix for my countertops, so my finished countertops will be white. And that’s exactly what I wanted, so I won’t be staining or tinting them at all. BUT…if you wanted a different color, you could certainly add a tint to the mixture, or stain them afterwards.
Kristi, that sounds lovely! And thank you for your quick response!!
Nice! Do you put stain in the concrete, or do you stain after the countertop is cured? What color are you going to use?
I’m not using any coloring in mine. My finished countertops will be white, which is the color of the concrete mix.
But I’ve seen it done both ways. There are tints that you can mix in with concrete, or you can stain the concrete after the countertops have cured.
I also love white subway tile! Sometimes the reason you see something often is simply because it looks good, so I would go with what pleases me. You don’t have to please the world: just you.
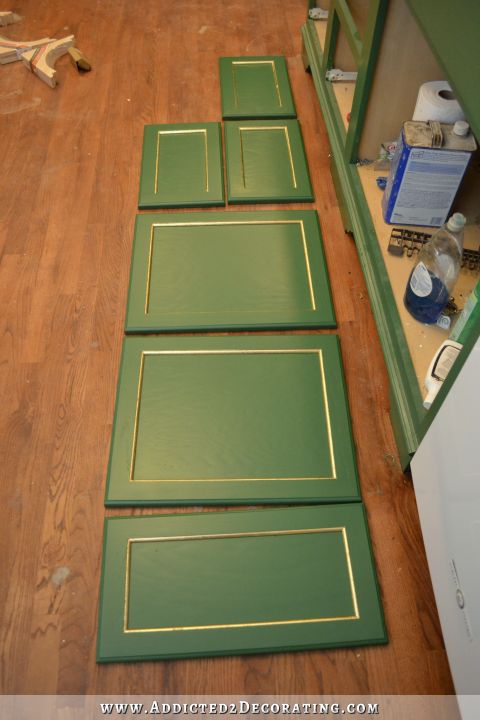
Something has been concerning me: How do you plan to paint around and behind the decorative posts?
I’m going to use my sprayer, and hope and pray that it will reach all of the visible areas. 🙂
That’s the one thing I wish I had primed and painted before I installed them. But I got a bit carried away, and didn’t even think about it. I talked more about there here: https://www.addicted2decorating.com/fridge-wall-progress-converting-wood-cabinet-doors-to-glass-and-your-faqs-answered.html
I can’t wait to see your countertops. I have a tip for you regarding the painting it the tight spots- I use a kitchen sponge! I just cut about a 1″x 2″ piece of sponge, saturate it with paint, squeeze out most of it and then squish it into the tiny crevasses. Works like a charm!
Way cooool! I saw this picture on their website; is this what yours will look like? http://farm9.static.flickr.com/8287/7605694738_542b5b7525.jpg
I sure hope so! 🙂
Lol. I hope so too, but what I was referring to was the white color of this one. I know yours will have the ogee edge, but I think the mottled, sort of marbled appearance shown in this pic will look exactly appropriate in your kitchen. Will you be doing a test project, like a tabletop or something before you begin, or are you just going to jump in with all four feet? 😉
My husband and I have discussed concrete countertops for a couple of years and I will be interested in the process you are doing and how well it turns out. Can’t wait to see them!
Will have to watch videos off-work time 🙂 So excited to see this process! May be the way for me to get new counters!
I am very excited about what you are creating in your new kitchen. It’s so much fun to watch your progress. However, since I have lots and lots of elegant crystal (which I love) I will never choose a hard countertop for myself. I want something as gentle on my crystal as possible because I love using it all the time. I don’t want it just for show. I guess formica laminate countertop just fits my life better. But I do drool over what others create in their kitchens.
I was thinking of your back splash. why don’t you make your own with paper like you did your lamps and cover them with polyurathan?
I decided to go with plain ‘ole white subway tiles. 🙂
Excellent post kristi. I am really looking forward to seeing this. We just put in new counters and we did consider concrete but chickened out because the kitchen is large. However we are redoing the laundry room next and I am really wanting to do the concrete. As this counter is straight forward unlike the kitchen it seems like a much more doable DIY project for me. Super excited for you to tackle this. All the best.
Kristi, you’ve talked about a stain that can be applied after the concrete is poured to tint or add color to the countertops. That begs the question of how will you protect your gorgeous new white concrete countertops FROM staining in future (such as from tomato sauce, red wine, etc.)? I’m wondering if there is a sealant of some sort that you can apply? If so, does it have to be reapplied periodically and how often? I’m curious about that. I love the look of the white concrete, it’s going to be gorgeous in your kitchen!
They do have to be sealed, and there are many different concrete sealers available on the market. I’m using this one, which is supposed to have a satin finish.
http://concretecountertopsolutions.com/products/stains-and-sealers/z-siacryl-14-sealer
Ah, good to know! Thank you for the information!
You are fearless, girl! I can’t wait to see them, I’m sure it will be amazing. We all benefit from all your research and so glad that you share what you find with us.
I’m wanting to do concrete countertops for my outdoor kitchen, and you so have me wanting to do them myself. I’ll watch your progress and decide later. LOVE IT
I’ve never thought of concrete countertops as a DIY project. This little review/tutorial is very useful.