Bathroom Built-In Storage – Tiled & Trimmed
Happy Monday, y’all! I actually made really good progress on my bathroom built-in storage this weekend. I had no major mishaps to speak of, and things are starting to take shape in this corner of the bathroom.
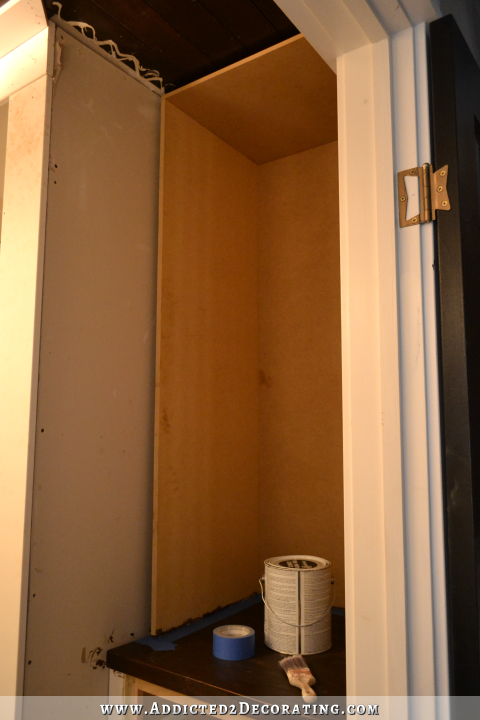
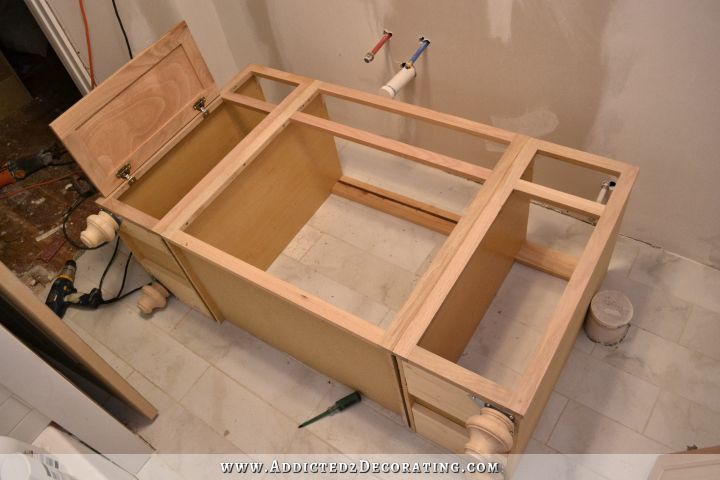
After getting the back piece wedged in there so tightly last week, and realizing that the box I was building, in its original size, wouldn’t fit into that space around the door trim even if the back piece fit the width of the area perfectly, I decided to cut the width of the box down by a couple of inches so that it would fit. That just required trimming down the back piece and the top piece and then reassembling the pieces.
Once it was built, my brother came over and helped me lift it into place. It was heavy, and working in such a tight space was very challenging! I even had to remove the crown moulding above the bathtub to get the box to fit. But we finally (after three tries) got it into place.
Once it was in place, I had to measure and cut the opening for the electrical outlet. I used my Dremel Multi-Max for that, and since I had used these adjustable outlet boxes in the bathroom, it made it very easy to move the box out to be flush with the inside of the cabinet.
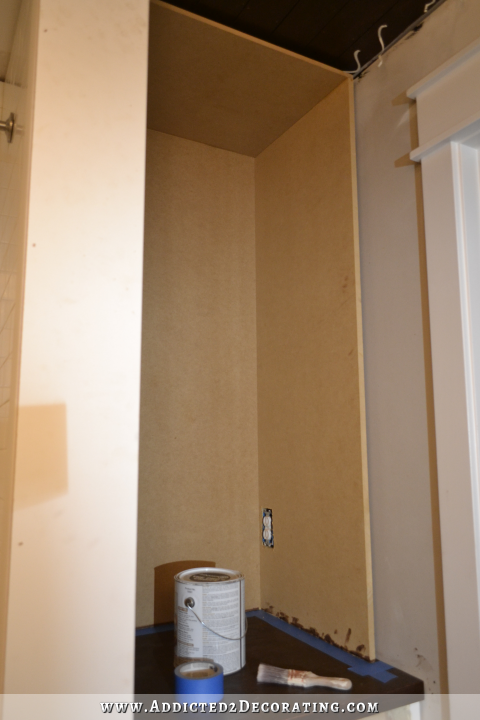
Then I primed the inside of the cabinet with Zinsser oil-based Cover Stain, and once that was dry, I was ready for tile.
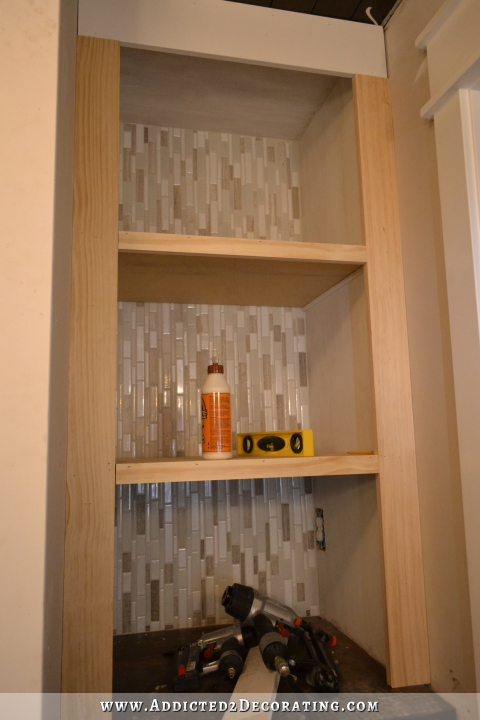
I installed this tile vertically, and to be quite honest, this wasn’t a decision I made based on the design. I decided to do this based on (1) ease of installation, and (2) the fact that vertical installation would make it less obvious if the shelves didn’t end up perfectly level.
By installing the tile vertically, I was able to use whole sheets of mosaic tile on almost the entire thing. I did have to use my tile saw to cut the two sheets at the top, which took less than five minutes.
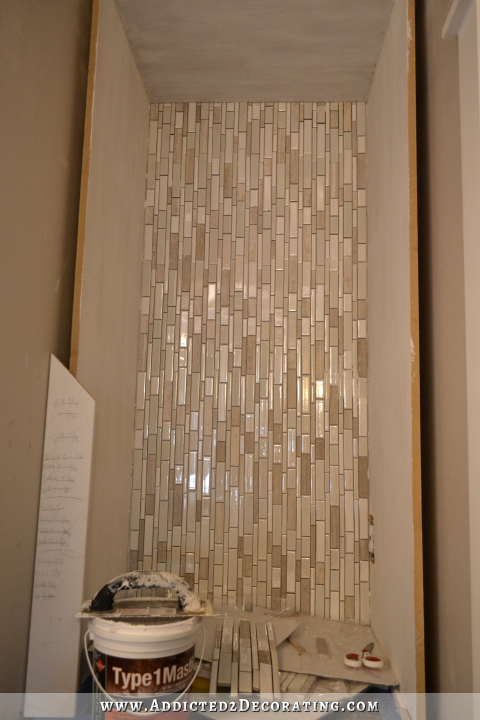
And then I had to come back and fill in all of the spaces at the bottom with individually cut pieces. That took quite a bit more time, but probably didn’t take more than 30 minutes in all.

If I had installed these horizontally, every single sheet of mosaic would have to have been cut. But it wasn’t just the ease of application that made me decide to install it vertically. I also considered the fact that absolutely nothing in this corner of the bathroom is perfectly straight, square, plumb or level. That’s just part of the challenge of working on an old house. And I didn’t want to take the chance of installing the tiles horizontally, and then having the shelves be just slightly off from the horizontal lines of the tile. Even a difference of as little as 1/8″ would have driven me crazy every single time I had to look at it. So, vertical it was.
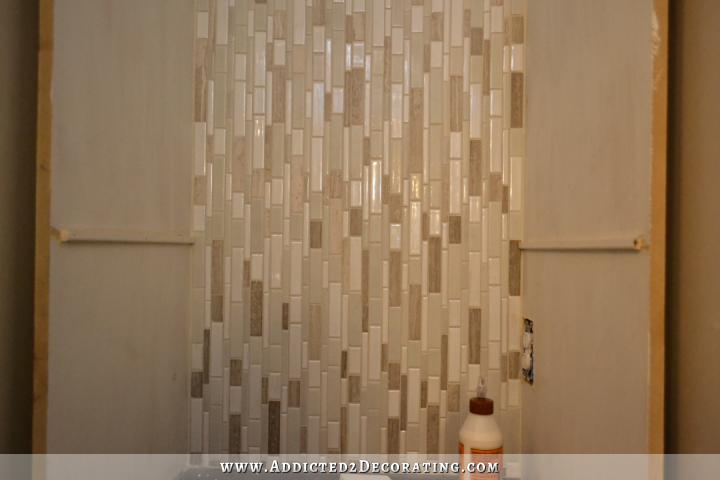
After I grouted the tile, I installed the supports for the shelves. I just used some small trim that I had on hand, and cut it down even smaller with my table saw. Then I attached them to the sides with wood glue and 1-inch finishing nails. After measuring and marking for placement, I also used the level to get them placed perfectly before nailing them on.
I had originally thought I would use glass shelves, but those shelves (for tempered glass) would run about $100 to $120, and quite frankly, I’m tired of spending money on this bathroom. So I decided to just use what I had on hand, which of course, is MDF. 🙂 I did have to purchase a couple of pieces of lumber, but that was less than $10. I can handle that.
So I ended up using some leftover 3/4-inch MDF for the shelves, which I cut to size using my circular saw. I notched out the front corners before installing the shelves, and then ran a bead of wood glue along the top of the side supports, placed the MDF on top, and then nailed the MDF to the side supports (through the top of the shelves and into the side supports) using 1.5-inch finishing nails.
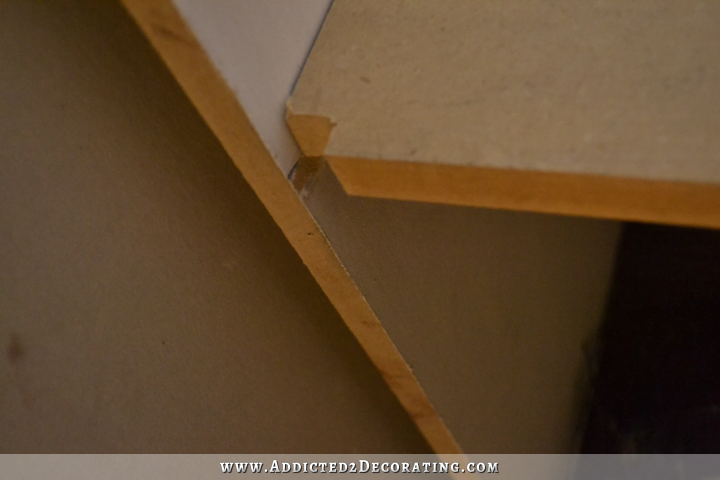
The reason I cut those notches is because I want to light this cabinet, and as I was considering different lighting options, the best one I could think of that would provide even light on all three shelves, is to use tape LED lights placed on the inside of the front trim. In order to do that, the tape light needs to be able to run continuously from top to bottom on both sides, and those notches will allow that. And I knew that they would be covered once the trim was added.
Speaking of trim, that went on next. And again, since I was in an “I’m tired of spending money” mood, I made the decision to use some leftover 1 x 6 MDF board for the top trim — a decision I regret. It’s really a bad idea to trim out a built-in (or a separate bookshelf) with a combination of different materials, because the different materials are never going to be exactly the same thickness.
Y’all know I love my MDF, but I always suggest trimming out bookshelves, bookcases, and other built-ins with real solid wood lumber because it actually gives the structure a great deal of support, and will keep MDF shelves from bowing if you place heavy items on them. But I was in a cheap mood, and didn’t feel like buying a 1 x 6 piece of lumber when I had 1 x 6 scraps of MDF at home already. Bad decision.
But anyway, I used 1 x 6 along the very top, and then attached 1 x 4’s along the sides, attached with wood glue and 1.5-inch finishing nails.
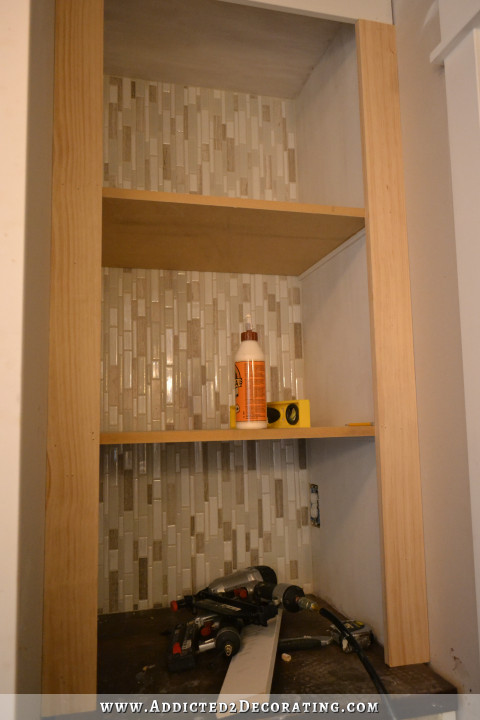
And then I used 1 x 2’s along the front edges of the shelves, attached in the same way.
That’s as far as I got, and while it’s good progress, there’s still so much to do on this to finish it — wood filling, sanding, priming, sanding, painting. I also need to re-install the 1 x 4’s and the crown moulding around the top, baseboards along the floor, and a bit of wainscoting (with tile) on the small amount of wall that shows in this corner. I probably have about two more days of work left on this corner built-in before it’s finished.
So just an FYI, it’s possible that I’ll be posting less over the next three weeks. My father-in-law will arrive on Friday evening (the 17th). That gives me just five days to get this messy house cleaned up (yep, it’s still awful!), get the sawdust under control, put tools away, stock the fridge, and just do some general preparation for his two-week stay. And then while he’s here for the following two weeks, I’m still not quite sure what we’ll be working on, or if it’ll be blog post-worthy. If it is, you can be sure I’ll be here sharing! If not (or if it’s not quite worthy of daily sharing), there may be some longer than usual gaps in posting. If I have my way, we’ll be getting all of my ceilings drywalled while he’s here. Just wanted to give y’all a heads up so that if I’m not here for a couple of days back-to-back, you’re not left wondering if something bad has happened to Matt or anything like that. 🙂 I’m really not quite sure what to expect while he’s here, so we’ll just play it by ear. But I’ll be back to normal posting after he leaves. Sound good? 🙂

Addicted 2 Decorating is where I share my DIY and decorating journey as I remodel and decorate the 1948 fixer upper that my husband, Matt, and I bought in 2013. Matt has M.S. and is unable to do physical work, so I do the majority of the work on the house by myself. You can learn more about me here.
Looking good. And thanks for the warning about posting less. I honestly worry that something happened to you or Matt or the fur babies! Lol. Can hardly wait for the afters of your time with your Father- in- law . Enjoy your family time!
Have to concur w/Shiela F. about the heads up for us worry warts. Thanx, it is appreciated! The shelf is looking so pretty already. Enjoy the visit with your FIL and here’s hoping he helps you with drywall! 😉
It looks really good. Your efforts have paid off. Thanks for letting us know about random posting and that Matt is ok.
Family time is precious…enjoy every minute…take some time to just chill and enjoy this time..it is spring…the flowers are in bloom….and work will wait…unfortunately…but time spent with family is beyond redemption…go and have some fun!
just a quick question…wondering why you installed the MDF around the sides and back as opposed to just using the drywall that is already there and connecting the shelves to the studs that are already in place and tiling along the drywall back instead? Love the way this is turning out and excited to see the finished product.
I have the exact same questions!
Kristi’s answer on the original post: “I decided to use a back and basically build it like a box so that the open shelving area would be perfectly square and plumb. My walls are definitely not perfectly square and plumb, and I thought if I just relied on the wall as the backing, it might be really noticeable that they’re out of square and not perfectly plumb once I put the glass shelves in.”
You are the sweetest to let us know what is going on! We all really care about you and your family. Have fun with your father in law. Enjoy taking some time off. We will all be here when you get back. 🙂 The cabinet looks really good! I love how you explain your thinking through things. You thought of things that I would never even know to consider, i.e., the notches for the lighting. Great job! You are getting so close to the finish line! Congratulations!
I love the vertical tile 🙂
Looks great so far and I love the vertical tile….that’s what I voted for!
I hope you enjoy some great family time and accomplish what is in your heart to get done. I love to clean….too bad I’m in MI. I’d help you tidy up before company!
Looks great!!
I’d say if your FIL is willing maybe you should knock out all the ceiling drywalling that is needed in the house.
You are beyond amazing to have company in the midst of this job. I never ever tire of reading this blog! Thanks for the head’s up, that is exactly what I would be worrying about.
Glad you went with wood shelves instead of glass, it makes it look more built in. Will you be showing the tub access in the cabinet or did you change your mind? Have fun getting a ton of projects done in the next few weeks and we will all be excitedly waiting for the reveals!!
I asked the same question earlier about tub access and Kristi advised she was “leaving that to future Kristi to deal with”.
I am truly in awe of every post of yours I read. I have an older, basic builder home and you have given us the inspiration and courage to start making it our dream home! Enjoy your visitor!
So great!! Love the tile and wood shelves – the look is marvelous 🙂
I’m looking forward to see what the built-in looks like in the next few days, but do take some time off for yourself and relax before starting on all that work you want to get done with your FIL! Even if that means leaving the thing half finished (I do love the decision against glass shelves btw :))
It’s very sweet of you to warn ahead of you posting fewer posts and even though I hate missing my daily fix of A2D, I think it’s much more worth using the time with your FIL constructively. Hope you can enjoy some free time as well together!
I had a funny experience yesterday at coffee hour after church. I was chatting with a friend, who is well known in our area for her ability to re-decorate her house by doing all the fabulous hard work herself, much like you, Kristie. I suggested to her that she would enjoy Addicted2decorating and she exclaimed that she already does! So, here in our small town in our small church in Arkansas, you are famous–and sincerely admired. Keep up the good work and enjoy your visit with your FIL–but do try to post often–I’m addicted to finding out what you have been doing lately.
Hi Kristi, can’t wait to see it all finished. I really like the way you installed the tile, and how the darker pieces compliment the stained top of the base. What a great use of wasted space! You will have more storage than most folks have in the bathroom. I hope you and Matt enjoy the two weeks with his Dad. That is a long time to have a house guest! I will keep my fingers crossed that he can help you with some heavy lifting. Does your father in law have to travel far? Not sure if you ever mentioned where Matt hailed from. Blessings
Kristi, its looking great and, of course, I love the vertical tile. I’m sure you won’t remember but using it vertically was a suggestion of mine way back when you were deciding on how to finish out this corner. I was only thinking of the design at the time so thanks for adding your practical reasons for the decision. I know you are looking forward to having Matt’s dad visit for a while (and his help). See you when you get back to posting.
It is coming along great!! I think you will be happy with the wooden shelves instead of glass. Also, thanks for the heads up that you won’t be posting as often, I would certainly have been wondering if everything was ok!! Enjoy your company!
Looks super!!! I can’t remember if you said already bur are you planning to paint the interior the teal – that would be gorgeous :)!!!
Your powder room is looking great! Hope you and Matt enjoy your time with his Dad. It’s wonderful that he’s able to come and help with your renovations. Thanks for letting us know that you’re not going to be posting as often as your normally do. You can certainly put me in with the group of other “worriers” who love your blog!
Love, love, love, love your work!!!! I will truly miss your posts but enjoy the time with family!! Looking forward to seeing your finished bathroom!!
Unless he is following you on facebook, I know he’ll be very surprised to see what all you’ve finished since he was there last. I, too, hope he helps install drywall. But I’m sure you’ll appreciate anything he helps with. Don’t work him too hard.
Always enjoy your posts. Have fun with family!
I love the tile on the back of your shelving unit! With lighting on each shelf it will really shine! Great progress. Enjoy the visit with your father-in-law and I hope you’re able to get a couple of other projects a. completed. b. started. c. continued. d. none of the above because you were busy doing ‘fun family’ stuff. e. all of the above because we had more energy than we knew what to do with. : )
I was thinking that a go pro video camera would be awesome for us to see what you are doing. You describe it well but seeing is a whole new level.
I bet you and matts dad get some ceilings dry walled. It’s going to be a long three weeks.
I love the look of the vertical tile also…very nice…hope you enjoy your family time…and get lots done while you have a helping hand..
When you said that you were not going to be posting regularly, I got this pit in my stomach— similar to when Jon and Sherri from YHL said goodbye! I really look forward to my time with you each day, and I can’t wait to hear great stories when you return. Most important is family though, so enjoy! Blessings you you Kristi!
It looks wonderful!! I’m so glad it all went together as you had hoped.
Thank you for the FYI!!! 14 of us would have been banging on your door to find out if you were okay! Old ladies, such as myself, worry :^)
Blessings,
J
I will miss your posts but I know you sure will feel good to get everything cleaned up. That’s always a great bonus for me when I have company coming. I’m sure you’re looking forward to having a helper too. I hope you enjoy your visit. 🙂
Love what you did with the tile, it adds some contrast to the horizontal placement of the tile in other parts of the room. I don’t know why, but it reminded me of running water or rain when I saw the vertical tiles, it just has movement to my eye.
Thanks for letting us know about potential sporadic posting for the next couple weeks. When someone posts consistently and then disappears for a while, I become concerned. Several blogs I follow just *poofed* into thin air, the bloggers just stopped posting with no explanation which always makes me wonder what happened. I didn’t want to have to come over there to check on you and Matt, especially since I live in Southern California – it’s an awfully long drive to Waco!
– Kimberly
Wonderful inspiration- it looks like it’s coming on nicely! Do you have the finished product yet?
Do you think if you put vertical tile above your vanity you couldn’t go horizontal at the half way with the mosaics?