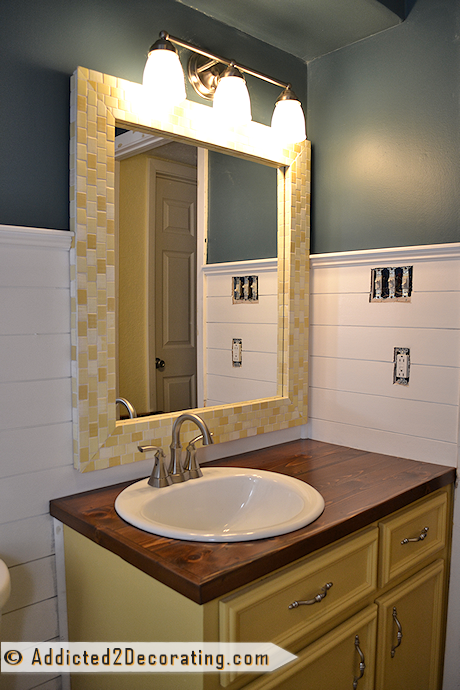
Bathroom Makeover Day 4 – The Vanity Of My Vanity Countertop
Evidently my new wood countertop that I made for my bathroom vanity didn’t like having her cracks exposed to the world. Or at least that’s what my mom told me.
Well, okay…maybe she didn’t word it quite like that. 😀
(It’s possible that I’ve breathed too many fumes lately. I’m feeling a bit loopy. LOL)
Anywho…I do remember her mentioning cracks, and then there was something about toothpaste, and then there were a bunch of other words that all boiled down to, “Kristi, how the heck are you going to keep that countertop clean?”
And while I’ve never been the queen of practicality, I realized that my mom did have a good point. (Just this time, Mom! Don’t let this go to your head!) 😀
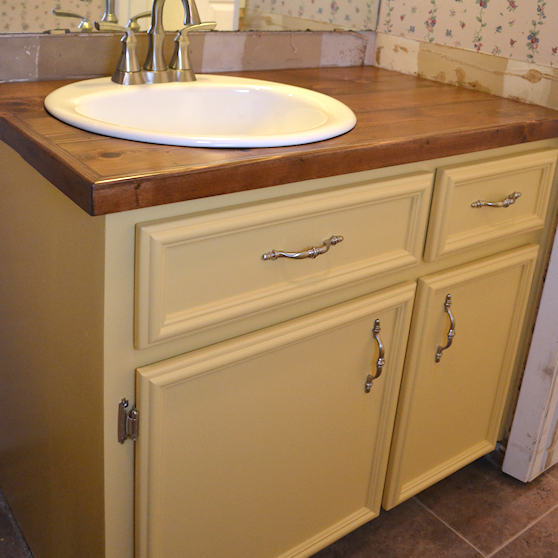
So yesterday, I made my fifteenth trip to Home Depot this week, and picked up some wood filler. I still wanted the cracks to look darker, like they naturally did when I just stained them, so I picked up this walnut wood filler.
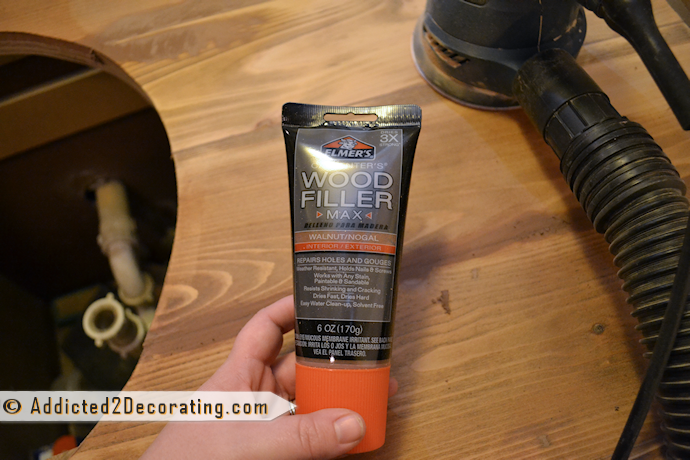
They didn’t have the tubs of walnut filler (I guess only the natural color wood filler comes in the tub sizes), so I had to grab one of these squeeze tubes. I really don’t like these, especially if I’m needing to fill in quite a bit of space.
So after wrestling with the darn tube, squeezing with all my might to get enough out to fill those gaps, feeling my attitude shifting southward, and hearing some unladylike words roll off my tongue (don’t worry, Mom…I didn’t say those words!!) 😀 , I finally came to my senses and just whacked the top of the tube off.

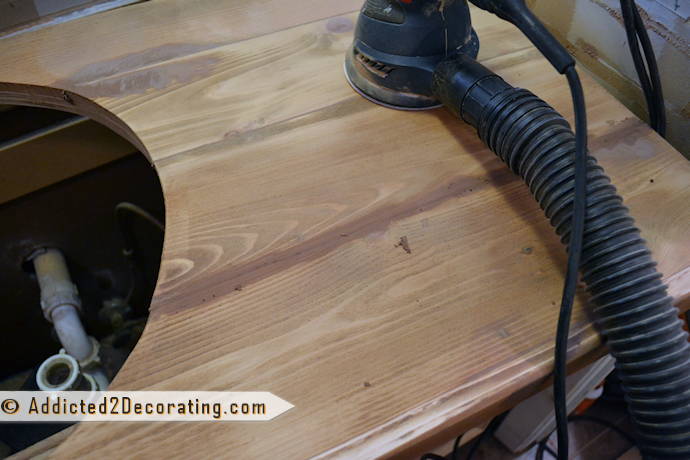
Then the process was very quick. I slathered the wood filler in all of the cracks, and as you can see, I used a liberal amount.

But it was nothing that my electric sander couldn’t handle! So after everything was dry, it only took a few minutes to sand it down smoothly.
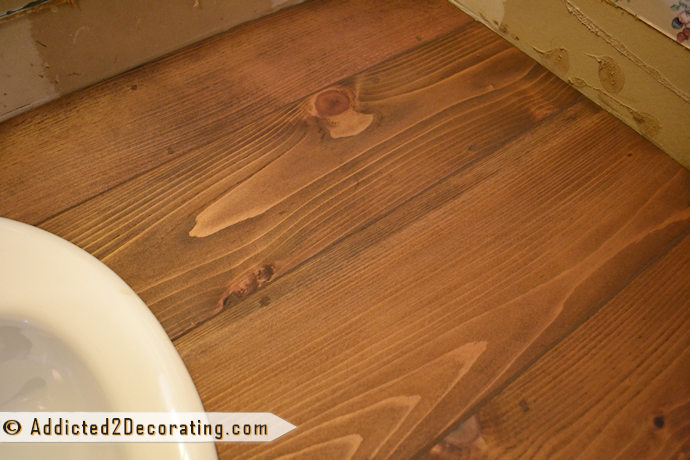
Then, I decided to go darker with the stain color. I’m sad to say that the original stain I used actually turned a bit orange over the next day. And if you know me BUT.AT.ALL, then you know I hate orange or orangish-yellow wood.
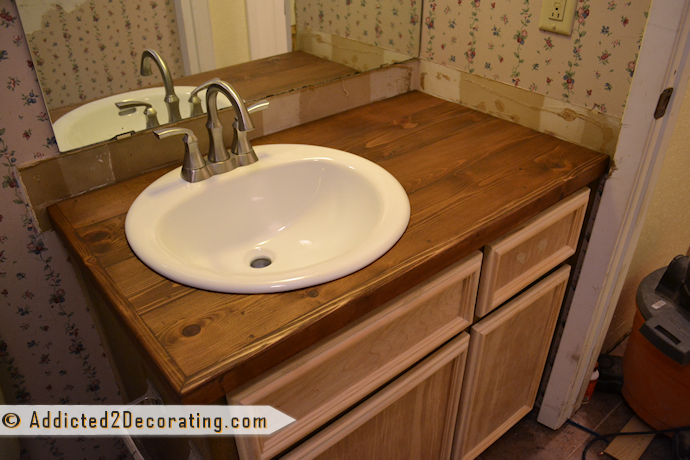
So I went back to my standard. Minwax Special Walnut. And I’m so glad I did, because I absolutely love it!

And all’s well that ends well, right? Now my mom can sleep peacefully at night without having nightmares of toothpaste getting stuck in the cracks of my vanity countertop. 😀
And did you see my doors and drawer fronts? I finished those up yesterday as well. I posted an update on yesterday’s post, and then shared it on my Facebook page. But here’s a peek for those of you who missed it. The view in the picture I posted as an update to yesterday’s post shows them a bit better.
So , barring any unforeseen circumstances, as well as any follow up emails from my mom with concerns about toothpaste getting stuck in other areas 😀 , I should now be free to move on to paint next. Here’s hoping that tomorrow will reveal a completely finished bathroom vanity!

Addicted 2 Decorating is where I share my DIY and decorating journey as I remodel and decorate the 1948 fixer upper that my husband, Matt, and I bought in 2013. Matt has M.S. and is unable to do physical work, so I do the majority of the work on the house by myself. You can learn more about me here.


Did you poly the top? If so, what kind and how many coats?
I haven’t yet, but I definitely will. I’ll do a minimum of three coats, and then evaluate if I need to do more.
I.LOVE.THIS! Love the idea of a wooden counter top and you have made it easy and affordable. I follow a lot of DIY blogs, but your projects are always beautiful, practical and EASY! Can’t wait for the rest of the bathroom transformation.
Dang girl!, you have been busy. Loooooking good!! Have to say, you are a “Jill” of all trades. So, what color will you use on the cabinet? No, don’t tell me, let it be a surprise!!
Maggie
Gorgeous, as always! And I agree that the darker color looks better by far.
The darker stain looks so much better! I’m with you on orange/yellow wood tones!
Glad to know I’m not the only crazy who used a wood countertop for her bathroom vanity. I used a solid wood door though (I had 76″ of countertop to cover) so I didn’t have the crack issue like you did. It’s such an unexpected material for a bathroom, although it gets used in kitchens all the time. Hope you’re as pleased with yours as I am mine! Check it out here if you’d like, thanks!
http://moxiedesignstudio.wordpress.com/2013/01/06/megans-bathroom-remodel/
Do you find that the poly changes the colour at all? (It’s all just looking soooo good! I’m loving following all the stuff you’ve done in your place!)
Always listen to your mother. 🙂
Loving watching your bathroom come together! Looks great so far!
This is so exciting to see what you’ve done each day! I liked the color of your ‘cracked’ countertop because I like a lighter tone BUT this darker tone is stunning. Also happy you won’t be picking dried toothpaste (and other assorted bathroom items) out of your cracks! The wood filler should do the trick.
This is just beautiful! Very Nice…
It’s looking great! Hurry up and slap some paint on it already! I’m dying over here 😉
always love your ideas, not feeling brave enough to tackle this yet, but I am enjoying watching you and your latest transformation!
Kristi, you crack me up. Sorry, bad joke. Your bathroom is looking so gorgeous! I showed my husband this last night, I want to try this somewhere in my house!
Kristi, you’re on fire this week! Keep it up.
we did wood plank counter tops in our kitchen and at first, every time the counter got splashed with water we were left with an ugly white area that would fade away after a little while. i wondered if we’d used the wrong poly so i am super excited to see what kind you use for that adorable bathroom vanity!
I seriously can’t wait to see this vanity painted! Why am I so excited? I guess I just love a good makeover and this is a great one! Love it.
Looks so pretty! I feel the same way you do about the yellowish/orange wood, yuck!! All the woodwork in our home is that color and we are painting it all white. It looks so much better, cleaner, and fresher. My husband and I will be working on our small downstairs bathroom this weekend. We are having a bathroom prepping date night tonight 🙂
Hi, I was wondering how your going to protect the top as it will get water on it. How are you going to seal it. Will you be using a outdoor sealer? Pam
Christy, I’m so glad you and your Mom made that decision (my Mom is always right too!) That was the first thing I wondered about on yesterday’s post. It looks absolutely stunning…I can’t wait to see the cabinets painted!
OOps, spelled your name wrong 🙁 Sorry Kristi….