Cased Opening Progress (Patched Hardwood Floor & Door Casing Installed)
The last time I showed you progress on my new cased opening from the dining room into the kitchen, it was kind of a mess. I had cut the new opening and did the rough framing to make the structure sound (which you can read about here), but I had a long way to go before it actually looked good.
Last weekend I worked on patching the hardwood floor and finished that up (as much as I’m going to do for now anyway). The day before yesterday, I installed the casing on the dining room side of the opening. And then yesterday I worked on repairing the tile and installing the casing on the kitchen side of the opening.
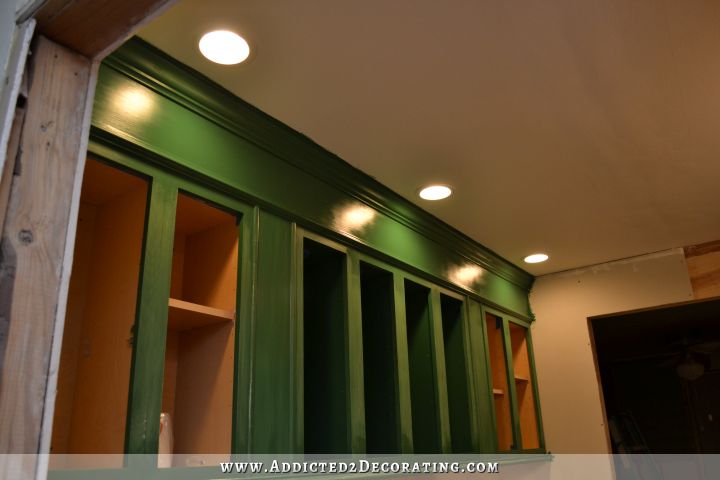
Like everything else, all of the trim still needs to be wood filled, sanded, caulked, and painted, but I’m pretty excited about how it’s looking so far! Here are a few pictures that I took last night after I finished up the picture frame molding on the left side of the opening.
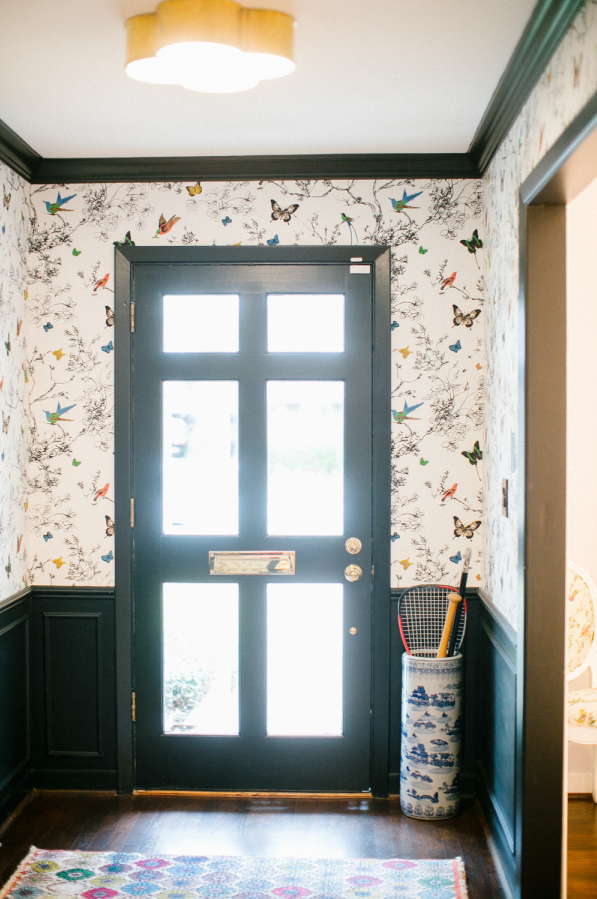
Here’s the (very poorly lit) view of the finished cased opening from straight on. I’ll get better daytime photos at some point, but this will do for now…
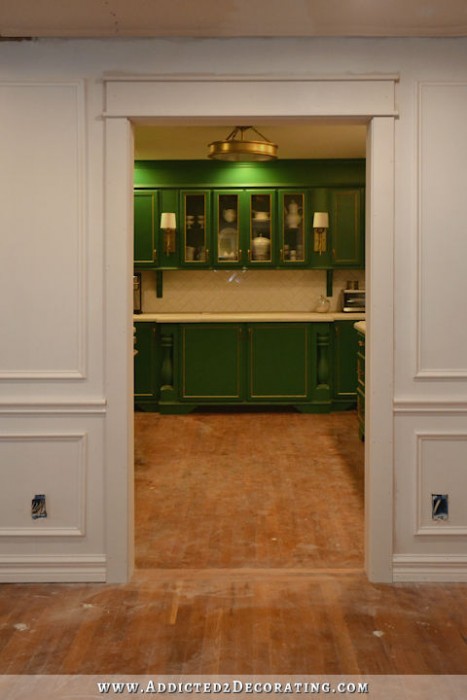
Please kindly overlook my filthy floor. 🙂 I’m not going to even try to get it clean until I’m completely finished with all of the drywall mudding and sanding in these rooms. I try my hardest to keep most of the dust vacuumed up as I go, but it still gets tracked all over the place.
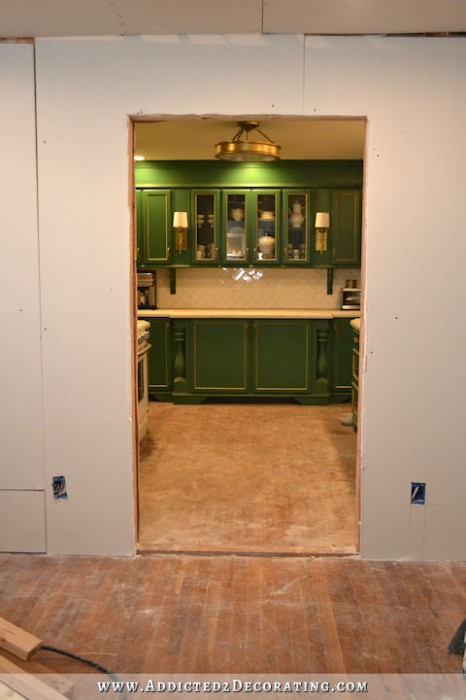
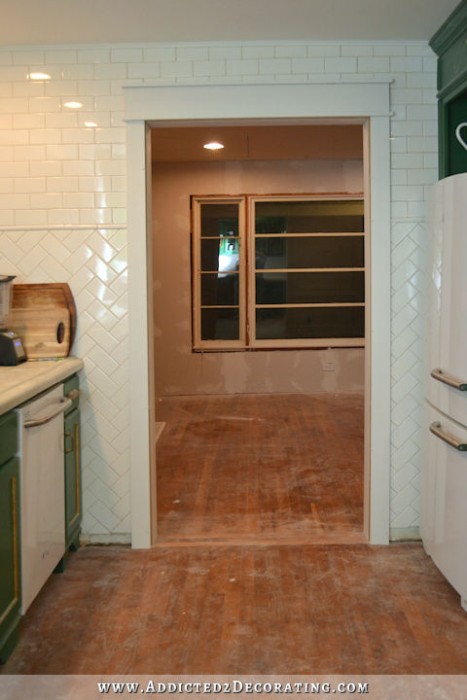
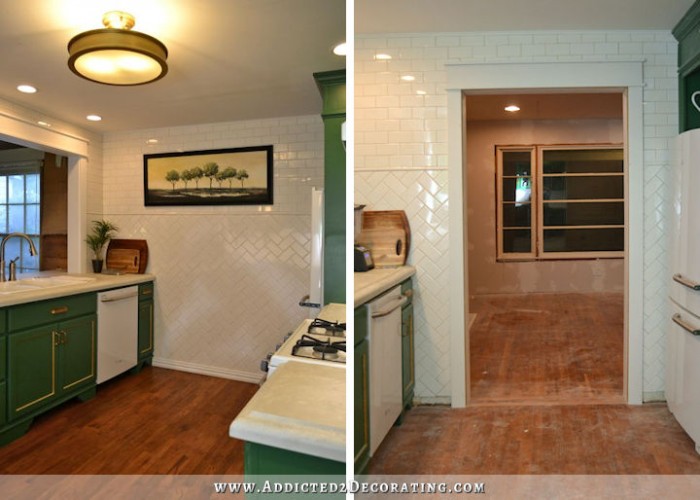
And here’s the view of the new cased opening from the front door of the house…
Again, I took these last night, so that back room (breakfast room and future pantry area) are dark, but during the day that room is filled with light. It’s wonderful to be able to see all the way through those areas. This cased opening really made the house feel more open and spacious.
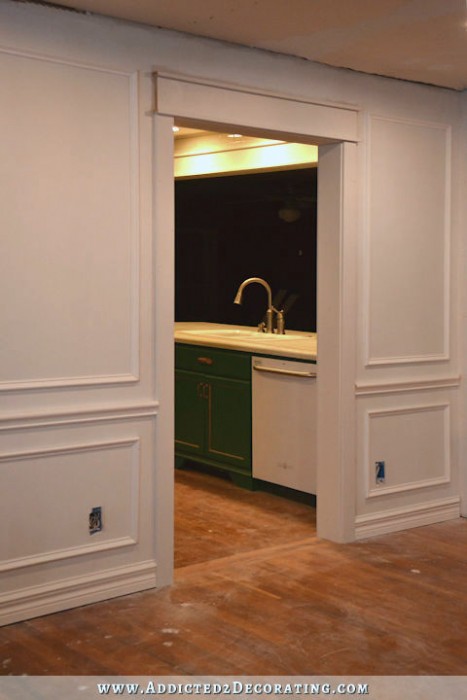
And finally, here’s the view from the kitchen…
As I was taking that picture, I realized that I forgot to replace the baseboards that I removed on that wall. Oops! 😀
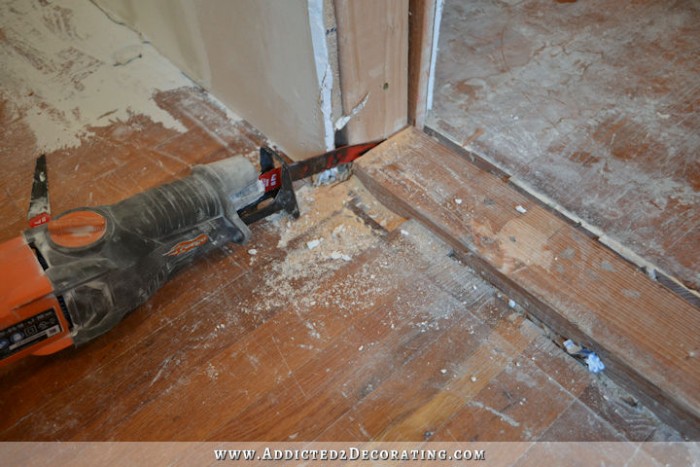
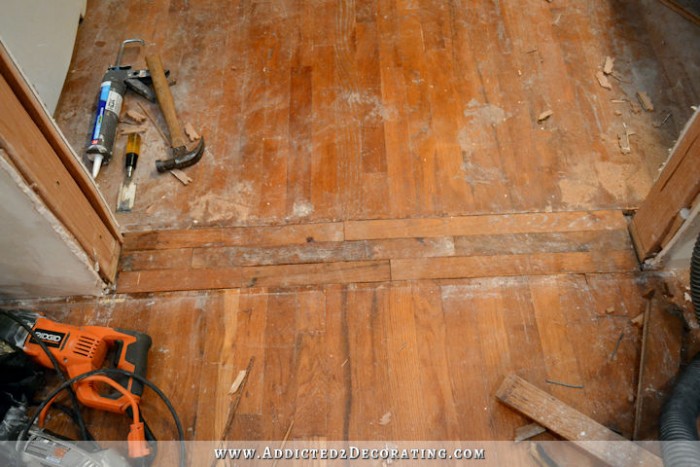
The hardest part of this whole thing wasn’t cutting the doorway, or even repairing the tile on the kitchen side (which was actually the easiest part). The hardest part was having to patch the hardwood floor. After removing the wall, I had this base plate to contend with.

I used my reciprocating saw to cut through the base place right along the studs on each side of the opening.
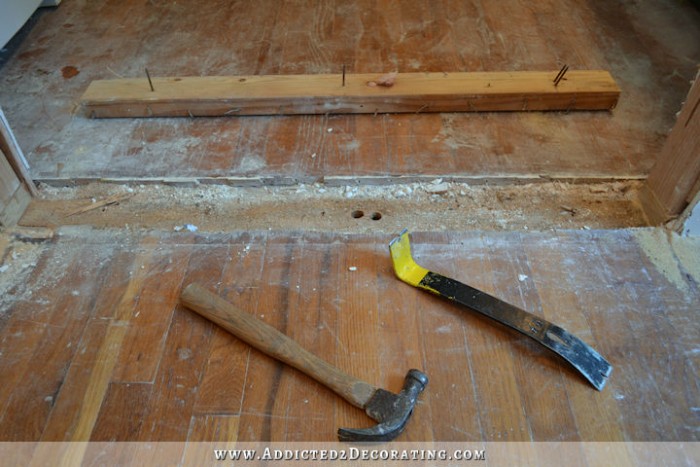
And then I used a prybar and hammer to remove that section. It took quite a bit of prying to get it out (those old nails didn’t want to let go!), but it finally came out.
Since the original floorboards in the dining room and the new floorboards in the kitchen aren’t perfectly aligned, there was no way to feather in new boards to make the floor continuous.
(Do you like how I said that as if I would have actually feathered in boards if only they had been lined up properly? 😀 Truth be told, there’s no way in heck I would have tried to do that. The results would have been disastrous.)
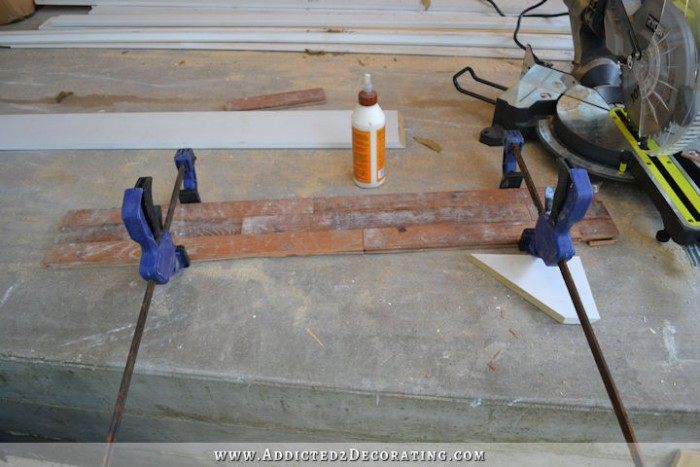
So my only option was to make a transition strip between the dining room and kitchen. Fortunately, I still had a bag of old flooring boards that I had removed from the closet in the original hallway bathroom. I’m so glad I held on to those boards! This is the second area I’ve patched with them, and I still have one more area that needs patching. I glued and clamped three rows of boards together to make the transition strip, and cut them to the width of the doorway.
The hardest part of the whole thing was cutting the edges of the existing flooring straight and wide enough so that the transition strip would fit. I’m not gonna lie…it wasn’t really smooth sailing. It was frustrating and difficult. I used both the reciprocating saw and the Dremel Multi-Max to get the job done. In hindsight, I wish I had just gone to Home Depot and purchased one of those tiny circular saws. That would have made quick work of it and would have made straighter, nicer cuts, but I wasn’t in a money-spending mood that day, so I managed to get it done with the tools I had.
I secured the transition strip with glue (lots and lots of glue), and I also face-nailed some of the boards. I hate having to face-nail flooring boards, but sometimes there’s just not another way to do it.
I had some pretty significant gaps, so I used this wood filler to fill them.
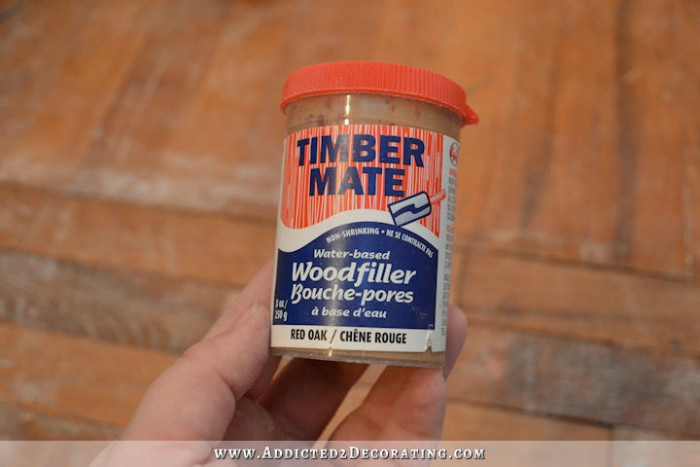
I did quite a bit of research to find the best wood filler for hardwood floors, and this one had great reviews on Amazon, so I went for it. It’s unlike any other wood filler I’ve ever used. It’s very dense and hard (almost like a molding clay), and it stinks. In fact, it smells like formaldehyde, and as soon as I opened the container, I was taken back to my high school biology class when I had to dissect a cat. 🙁
Anyway, it got the job done, and of course, the smell went away. I used a very generous amount of the wood filler, and let it dry for a couple of days before sanding the area down. And sanding it down took some effort since the boards were old and not perfectly aligned. I actually had to start with 50-grit sandpaper on my belt sander to get everything sanded smooth. Then I finished up with 150-grit sandpaper on my rotary sander.
I thought it looked pretty good at that point! I was actually pleasantly surprised.

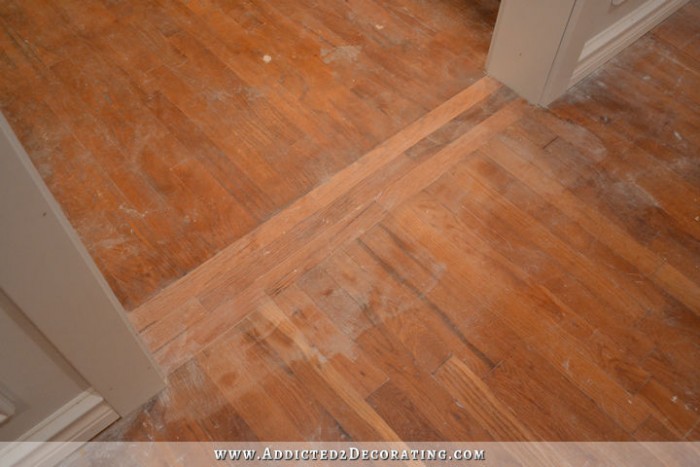
If you’ll remember, the kitchen has new red oak flooring, and the rest of the house has decades-old red oak flooring. Even though they’re the same wood, they don’t look the same when treated with Waterlox. So back when I remodeled the kitchen, I actually had to stain the kitchen floor to match the rest of the house. I taped off the transition strip, and then carefully tried to touch up the stain on the kitchen floor. It’s not perfect, but I’ll work with it later and see if I can get it looking a bit better.

(I have no idea why the kitchen floor and the dining room floor look so completely different in color in the above picture. You’ll see in these next photos that they’re really more similar in color.)
Then I used a paper towel to rub a light coat of Waterlox onto the old flooring boards. Waterlox takes about three coats, and sometimes four, to reach its full depth of color, so that area is still looking really light with its one thin coat of Waterlox.
But that’s as much as I’m going to do for now. As soon as I get through with all of the construction-type projects in here, and I’m ready to start on decorating projects, I plan to give the whole floor a quick spot-sanding to remove any scratches and scuffs, and then I’m going to give the entire floor a new coat of Waterlox. So I’ll give this transition area more attention at that point, and make sure it has all of the coats needed to reach its full depth of color and blend in with the rest of the floor.
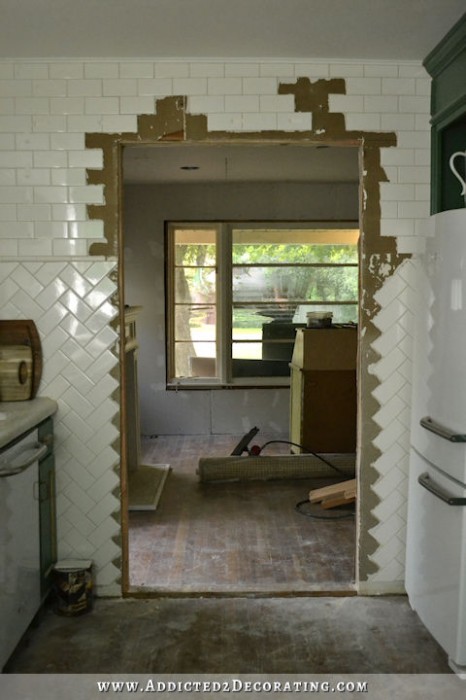
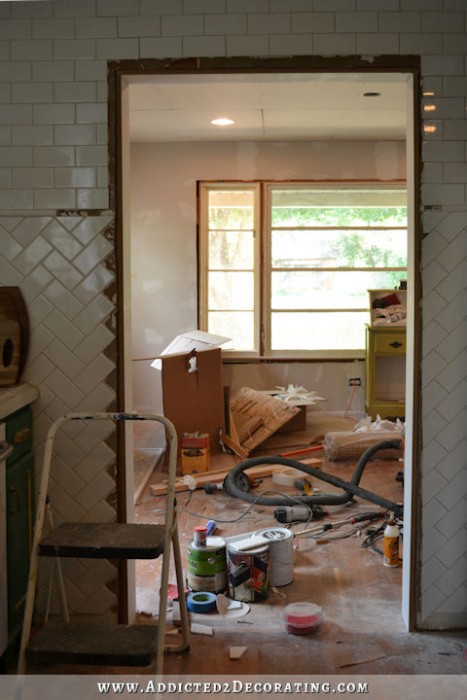
Once the transition piece was finished, I could focus on framing out the doorway. The dining room side was easy, but the kitchen side required an extra step since I had to repair the tile. That part was pretty easy and only took me about 45 minutes. Here’s how it looked after I repaired the tile, and before I added the door casing.
The whole cased opening project was a lot of work, but it was SO worth it!!
It just feels like a doorway was meant to be there, right? 🙂

Addicted 2 Decorating is where I share my DIY and decorating journey as I remodel and decorate the 1948 fixer upper that my husband, Matt, and I bought in 2013. Matt has M.S. and is unable to do physical work, so I do the majority of the work on the house by myself. You can learn more about me here.


I have even older floors in my old house, so I can appreciate the work and attention to detail it takes to patch any area. You’ve done a marvelous job, and yes, it DOES look like that doorway was always there, or should have been!
So pretty! All of it! One quick question though, how did you attach the casing on the tile side? I’m thinking you nailed it where possible to other pieces of casing, but did you use adhesive to attach it to the tiles?
Yep! I used construction adhesive (Loctite) on the outer edges, and nailed them to the door jambs on the inner edges.
Looks fab. Also looks little it was always there, just hidden behind the wall. I do have one question though, what’s happened to the beautiful painting that your mum did for you? Will you maybe place that in the sun room?
I’m not sure where it’ll end up, but I’ll find a place for it. 🙂
I wondered about that also. I’m sure you will find a place for that beautiful painting.
Great job on the door trim, tile repairs and the flooring. I like hoe the threshold turned out.
Hmm, maybe when you tackle the breakfast room? That way it will still be seen near the kitchen for which it was made…
I was wondering the same thing! I’m glad you will use it somewhere, its a very beautiful painting!
Also, I know you don’t reference it every post, but a change like that has got to be great to give your husband multiple paths through the house, I do a happy dance in my head whenever you complete something that is both beautiful AND functional for your family.
The door way does look like it has always been there. Good job!
Do you have any idea how talented you are? I read your blog daily and it brings me joy. This comment is filled with admiration for a talented woman and I hope, in some small way, I can send you a little of the joy you bring to me.
I’ll second that!! I am busy and stressed, but it does me a lot of good to take a few minutes out and see what you’ve come up with next!! Thanks.
Looks great. I have a question: Do you butt the tile up to the woodwork, or let it run under?
The tile goes under the woodwork. Doing it the other way is so much harder (MUCH more work) and never looks as clean along the edges of the door casing. The only thing you have to keep in mind when you do it my way (tile under the trim pieces) is that you have to be sure that the door jams are wide enough to not only cover the framing and drywall, but also to cover the edges of the tile. I had to buy boards much wider than I needed and then use my table saw to rip them down to the right width for my door jambs.
That door is just what the kitchen needed. I can’t wait to see daytime pictures. All that light must be something to see. You did a wonderful job. Everything looks terrific.
I love it!! What a smart decision! Happy diying!!
The doorway looks great! And your kitchen light that led to this amazing kitchen, is shining beautifully in this doorway!
I can’t believe how natural and original that doorway looks. As you were tiling the kitchen and talking about what kind of artwork to hang there, did anyone comment that that wall NEEDs a doorway? It is PERFECT!
Actually, several people did suggest putting a doorway there. But at the time, I was planning on using that front room as a living room, and for the life of me, I couldn’t think of a furniture arrangement/seating arrangement that would work with a doorway there. But when I finally decided to use that room as a dining room, it not only made the doorway possible, but it also made so much more sense.
I love the painting from your Mother. But this door way is so ooooo much better! I know how you love trees and now you have nature’s painting to look at from your kitchen! And it will be an even better picture when seen through your new window! Thank you soooo much for sharing with us! I look forward to your posts every day!
Sheila F.
These room are amazing!! When your guests walk into your home, they are going to be breathless!! I love, love, love it. The outside looks like a simple, little house—then when they open the door—BAM! It is unbelievable!!! You are amazing–thank you for sharing all these great tutorial. I am learning so much….and I am so excited to see what you accomplish every day.
Lovely, just lovely, Kristi. Cheers, Ardith
You amaze me with what you have done with your home. It is going to be beautiful when you are finished. I love, love, love the color of your kitchen.
I love the new doorway. But I know how much you hate seeing the dishwasher from the front door view. Have you thought about making a green panel (like your kitchen cabinets) to attach to the front of the dishwasher to help disguise it? Either way, the house is looking amazing – you’re one tough cookie!
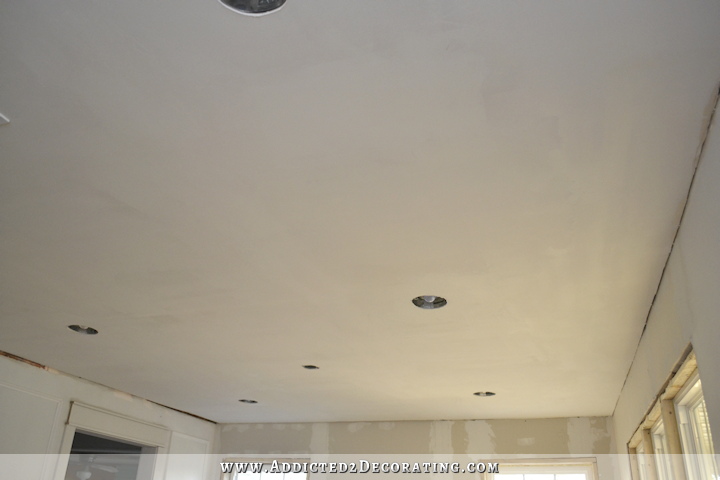
I remember that you lamented the lack of a can light over near the fridge when the wall was solid. Looks like you took care of that “dark corner” problem, too! I like the doorway. Well done!
i get so concerned about the work you do and never cover your beautiful floors!! Do you have to spend a lot of time then repairing scratches and dents?? Our builder did not cover our newly installed hardwood floors whe we were building as he did finishing work and I have cried for 4 years over all the scratches I still keep finding????????????
I probably have a very strange attitude about my floors. 🙂 I refinished them before we moved in so that I could get rid of all of the green carpet and carpet glue. The floors looks gorgeous when I was finished, but they looked far from new. They’re almost 70 years old, and even after they were refinished, they still had random scratches, nail holes/nails, etc. I also was very aware of the fact that they’d probably get even more worn and scratched as I remodeled each room. But that’s one reason I chose Waterlox for my floors. Floors sealed with Waterlox can be re-coated when needed, unlike polyurethane. So as I finish each room/area, I plan to do a quick sanding of the floor in that room, and give it one final coat of Waterlox before I begin decorating each room/area.
They won’t look new. They’ll never look new. But strangely, while I’m not generally one who likes worn/aged/antiqued things, I don’t mind my floors looking 70 years old at all. I think it adds character to the house. 🙂 So when mishaps happen (like me accidentally shooting nails into my floor last night when I was putting together the last two frames for the walls), those things don’t bother me at all. I think the beauty of having old floors to begin with is that new scratches and dings just blend in, whereas with new, perfect floors, every scratch and ding looks out of place and becomes pretty noticeable.
LOVE this!!! Your wainscoting is looking soooo fab!!!!! I can’t wait to see the whole picture! I think the floor looks so great! I like that little transition strip! Piece by piece, you are making this home into a work of art. I simply would never have thought it possible by looking at all the pics when you first bought the home. I was thinking, “What did she get herself into??” Now I’m thinking, “Wow, this is so amazing! Unbelievable!!” You are a gifted woman!
Wow!! That doorway frames the kitchen so perfectly it’s like you planned it from the start!! It’s perfection!!! 🙂
Great job Kristi!!! Someone already posted this, but the doorway looks so natural like its always been there. I am completely in love with your kitchen and the new door way has such a perfect view inside now. Not to mention all the extra natural light you will get from the opening. Love all the white dishes in the cabinets. You never cease to amaze me. I wish I had a time machine so I could fast forward to the future to see the house complete.
It looks so beautiful!! You did a great job. =)
I love the character of that transition strip! Great job, Kristi. Admire your perseverance.
Sometimes I think you must actually be four people …. I am in awe of your talent and ability to get these projects done so quickly. That door opening is amazingly beautiful and perfectly done. You inspire me!
Fabulous job with the transition strip! I need to do some of that in my workshop, but I don’t think it will end up looking that nice. The wall framing looks beautiful. I completely agree about all the drywall dust on floors, it is never ending and so hard to clean up, after I sweep mine look like they always have a haze on them.
I was a little sad when I read that the tiled wall was making way for a doorway, but oh my gosh, what a wonderful view from the kitchen into the dining area. It makes the kitchen sing. Well done!!!!
So impressed! Awesome job.
Oh Kristi….it’s so pretty!!! At one time you mentioned you wanted to even the refrigerator with counter by cutting the wall behind it and pushing it back a few more inches. Are you still planning something like that? What will you create on the music room side?
Absolutely – always thought doorway was great idea
You have done another amazing job Kristi. You never cease to amaze me with what you do. The floor and the door opening looks fantastic and it looks like the doorway was really meant to be there. The picture framing on the walls is looking awesome!
Can I just say your FREAKING AMAZING..at what you can do… wish I where you…!!!!
OMG! Love it! Love it! Love it!
Love love love the doorway there! Great idea. Gives it a more open feel.
It turned out really well, good place to have an opening. So where is your mom’s charming tree picture going to go? Are those the new windows in in the dining room?
Your house is really coming together. Love the wainscoting!Good job!
WOW, Kristi, just WOW! This looks AMAZING! It opens it up and really makes both rooms look bigger and brighter! I LOVE the fact that there is a gorgeous opening there instead of another wall, though the tiled wall was FAB! Seriously, when are you coming to my house to whip me into shape so I can get stuff done on my old house? You make it look SO easy.
Well Kirsti. Love the way the doorway frames the beautiful Kitchen. What a beautiful job in all manner of patching up. It looks so lovely,along with the view you will gain through the window. Another job done and very professional. Thanks for sharing.
I can’t wait for your new windows! That front one really looks awful now that the room and view is so beautiful! I am excited for you to have some fun with the decorating, but I am also excited for you to get the breakfast room done so there won’t be a black hole staring back at you in your pictures. Imagine opening your front door and seeing the entry, music room, dining room kitchen and breakfast room all at one time. WOW. Then when the sun room gets added on in the back it will be just amazing. All the “public” rooms will be on display, while all the private rooms will be by invitation. It is open concept but without that huge hollow cave feeling. You have really nailed it so far. Can’t wait to see it all done. Hope I live long enough~ Blessings.
Wow, wow, wow. I love how the doorway from the DR side frames the most decorative part of your beautiful kitchen. When I decorated my own DR I tried to take into consideration the view each person would have from every side of the table – I would love to be sitting at your table facing that kitchen! Mmm-mmm good!
Great work Kristi!
I like the way you made the transition boards… not just one big plank but the several boards so three “boards” wide, and staggered! It looks good.
Did I ever tell you that I LOVE your kitchen? Well, I am telling you now… it is a beautiful kitchen, and it makes me want to paint mine (mine has two different “whites”) beige cabinets and white walls.
Kristy,
How does it feel to be an “INSPIRATION”? Even though I’m at a season in my life where I can’t do a lot of stuff in my house (as much as it needs it!) Just reading your blog lets me plan, dream and see the possibilities! That makes not being able to fix it all NOW much easier. Thank you so much for what you do, and do well.
Kristi, you do amazing work! I wish I had the skills and abilities you do. I look forward to reading you posts. Keep up the great work!
Your posts are better than an episode of This Old House! That transition is done the way ALL transitions SHOULD be done, IMHO! I hate when a raised strip is used…And I don’t have to consider a wheelchair! Great job, beautiful house!
Wow! Just wow!
Sorry, hit enter by mistake.
I’ve just changed my gloves from warm white to daylight LED’s and the difference is amazing!
This looks awesome! We are doing a very similar thing to our home and this was exactly what I needed to read! Great job!