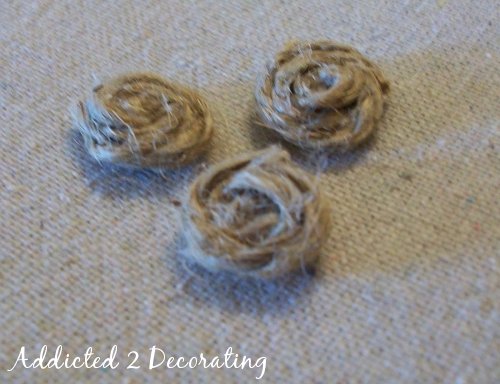
Jute Rosette Buttons
I had intended to share the DIY instructions for my eating area valance today, but that proved to be a little more involved that I had expected. So I’ll have that next week.
So today, I decided to end the week with something a little more basic. I used these little jute rosette “buttons” in two places in J & A’s master bedroom. I used them in place of regular buttons on the newly-upholstered diamond-tufted chair back…

And I also used larger ones as embellishments on the ottoman slipcover…

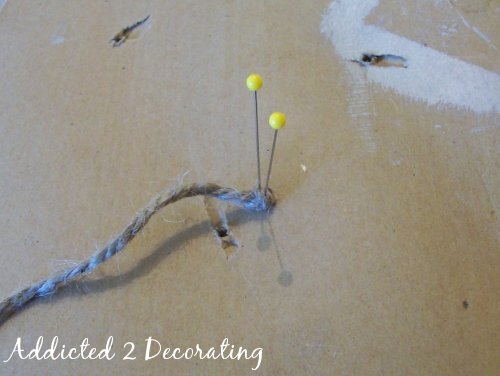
Then I placed a bead of fabric glue around the edge of the knot.
And then wrapped the jute around the knot.
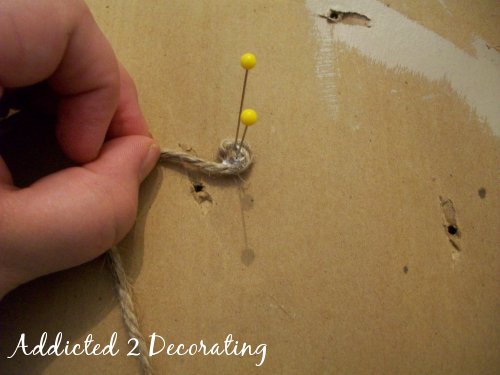
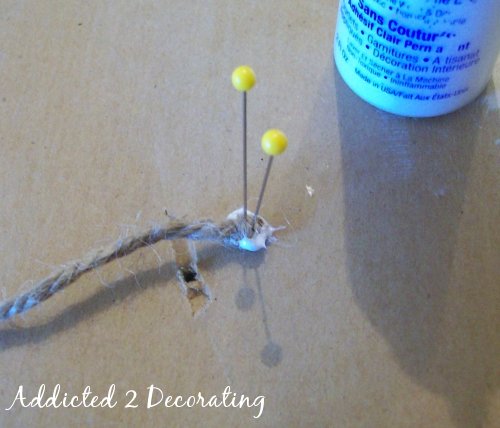
I continued, applying glue, wrapping, applying glue, wrapping, until I had the “button” the size I wanted. Then I snipped the jute, placed a little dab of glue on the end, tried to tuck it underneath the button as best I could (some of them wouldn’t really cooperate, but it didn’t matter), and then held it in place with a third straight pin.
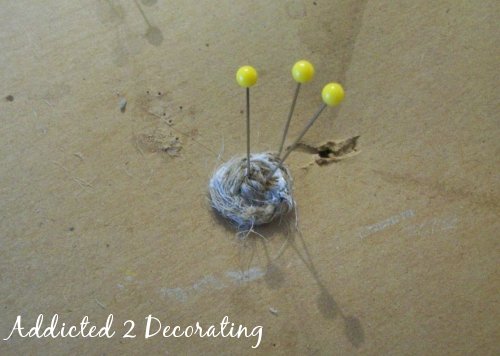
I found that it was best not to let them dry completely on the cardboard…for obvious reasons (which is why I recommend wax paper). So I let them dry just a couple of hours, and then removed them and set them aside for about 24 hours to let them dry completely.
I mean, really…how much easier could that be?! And just think of all the things you could do with these cute little things!
Hope you have a great weekend!

Addicted 2 Decorating is where I share my DIY and decorating journey as I remodel and decorate the 1948 fixer upper that my husband, Matt, and I bought in 2013. Matt has M.S. and is unable to do physical work, so I do the majority of the work on the house by myself. You can learn more about me here.

Wow, it couldn't be easier. And so many uses for these. Thanks for the tip.
very cute! will be making some of these for some projects
These are adorable! I can’t wait to try these out. Thanks for sharing!