DIY Semi-Flush Ceiling Light For My Music Room – Part 1
Well, I finally started on my music room ceiling light. I decided to make my own after searching and searching (literally for months) and not finding anything I liked and that was in my price range for that room. I did come across a couple of semi-flush lights that I absolutely loved from a company called Coleen & Company, but there’s just no way I could ever pay $2800 for one light. So I decided to make a light inspired by their Daphne Semi Flush light.
Unfortunately, I worked on it over the last three days, and still haven’t finished it. But that’s probably a good thing because even with only part of the project to show you today, I have 35 (!!) pictures to show you. So are you ready for the longest post ever that doesn’t actually end with a finished project? 😀 Here goes…
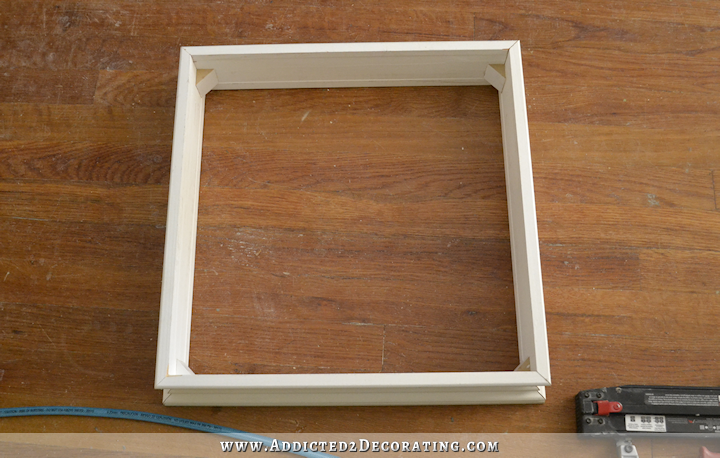
I started with this really pretty casing moulding that I found at Lowe’s. It’s sold by the 8-foot length, and I just needed one. Then I cut four 18-inch lengths, mitered on the corners. I also used some scrap MDF (I should have used real wood for this!!) and cut some small triangular pieces for the corners using my miter saw.

I put the moulding pieces together using wood glue and my 18-gauge nail gun, and then added the corner pieces using both wood glue and high temp hot glue.

Here’s what it looked like at this point…
After using my nail gun to make the main box, I realized that it would be a heck of a lot easier and cleaner to put the rest of the light box together with just wood glue and high temp hot glue. If I had to do it over again, I would just use hot glue and wood glue for the whole thing. The hot glue holds it immediately, and the wood glue forms a long-lasting permanent bond. There’s no need for nails. So just assume from this point forward that every single piece of this light is attached with both wood glue and hot glue, unless I state otherwise.
Anyway, with the main box put together, I determined which side would be the bottom (I wanted the most decorative detail on the top), and then cut some thick lattice (about 1/4-inch thick) and adhered it inside the bottom of the box with about 3/8-inch of the lattice showing below the box.
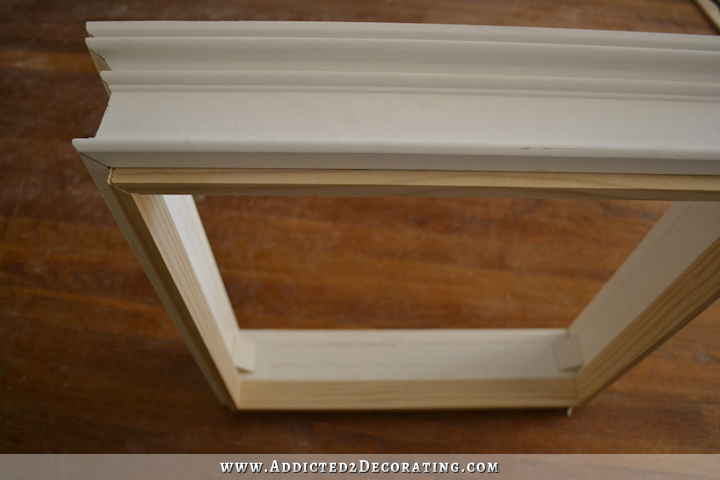
I made sure that the amount of reveal on the lattice was perfectly even all the way around because that lattice would eventually be where the glass diffuser sits.
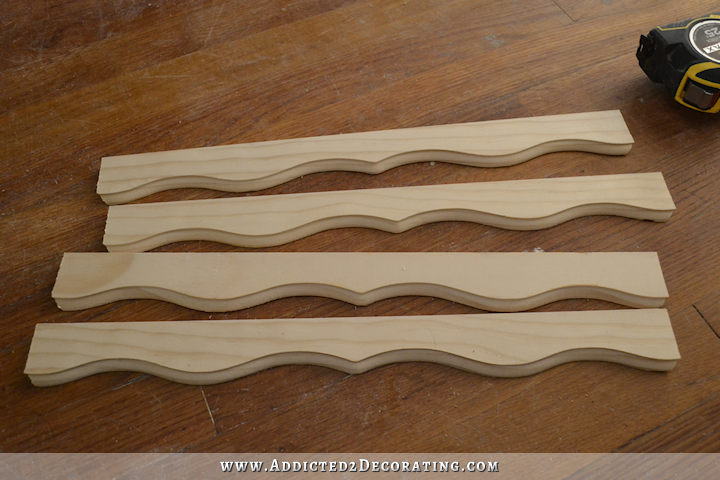
Next I made the decorative part to go around the bottom of the light box. The inspiration light had a wave design, but there was no way I could make something that intricate. So instead I used this scalloped moulding that I found at Home Depot. It’s sold by the 8-foot piece. Cutting it was a bit challenging because the design has one point, and then two curves, one point, two curves, and so on. I had to make sure that the points were exactly in the middle, and that I was cutting at the exact same spot on all of the curves so that they would meet just right at the corners, which were mitered.
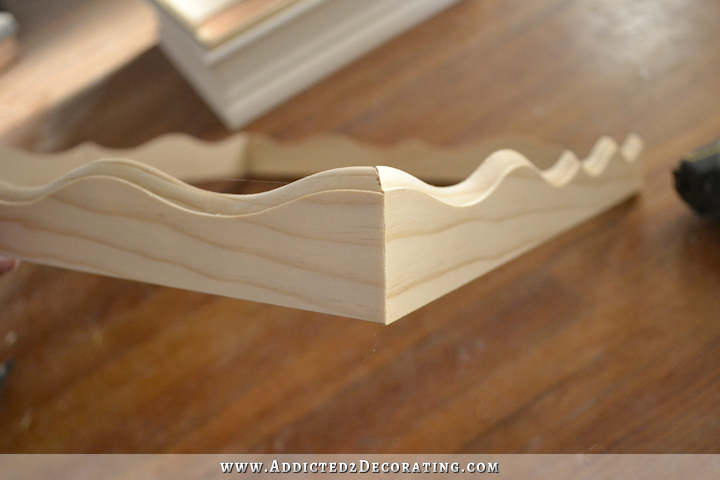
Using hot glue and wood glue, I put the scalloped frame together.

I made the corners meet on the curved edge as closely as possible, even if it meant that the flat edge would be off just a bit. The flat edge would be eventually covered up, but the scalloped edge would be the one that shows, so it needed to be as close to perfect (after sanding, wood filler, and caulk, of course) as possible.
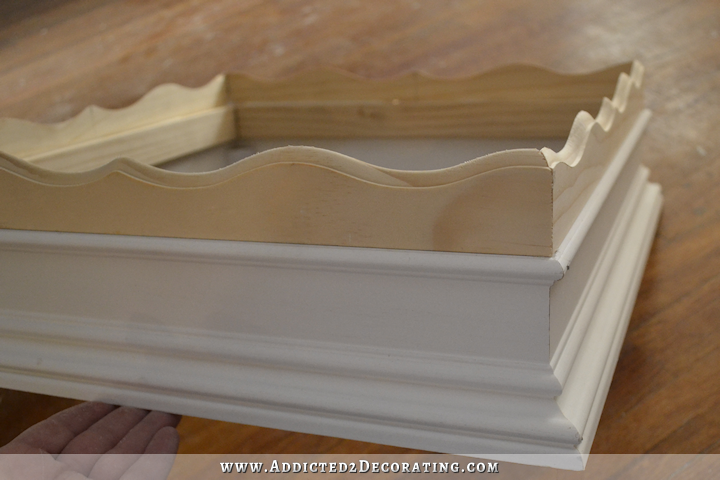
Then I attached the scalloped piece to the main box, fitting it around the lattice.
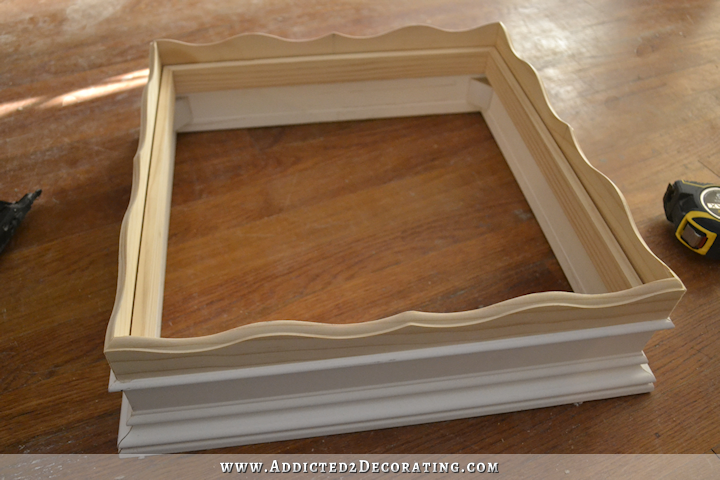
Here’s how the outside of the light box looked at this point…
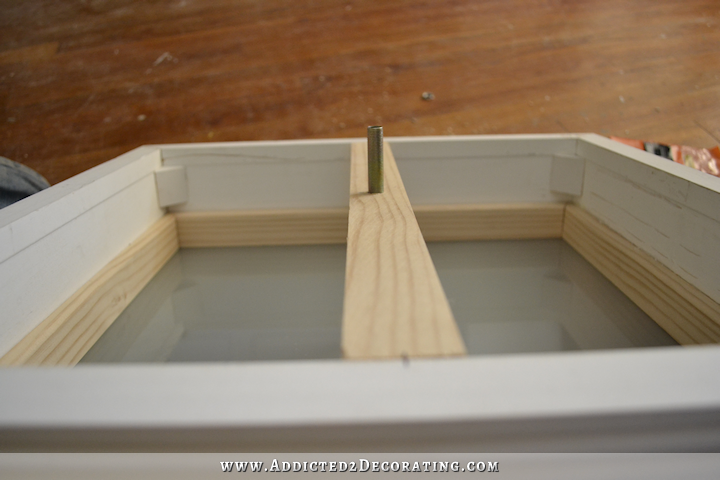
Next I cut and adhered two pieces of lattice inside the box sitting on top of the other lattice. I attached the small pieces on opposite sides of the light box.

And then I attached a long piece of lattice across the middle that rested on those short pieces.

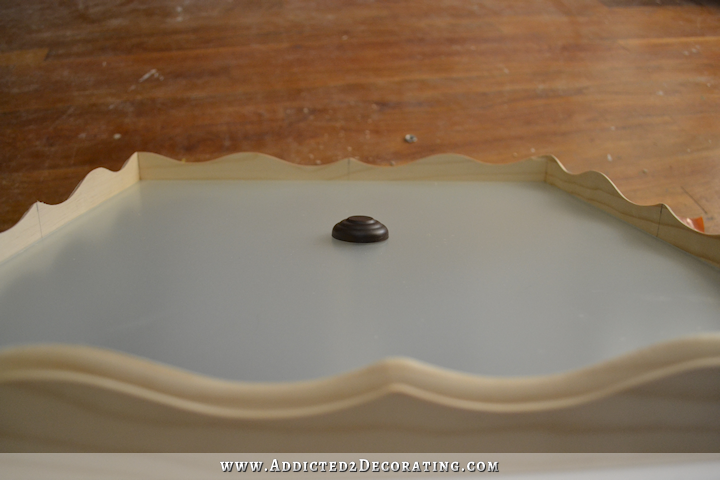
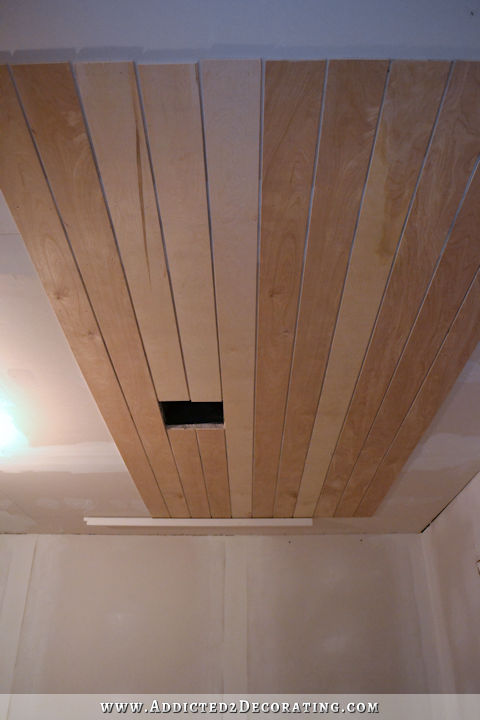
Then I marked the very center of the lattice, and drilled a 3/8-inch hole large enough so that a threaded nipple could fit through. It was a snug fit, but it fit.
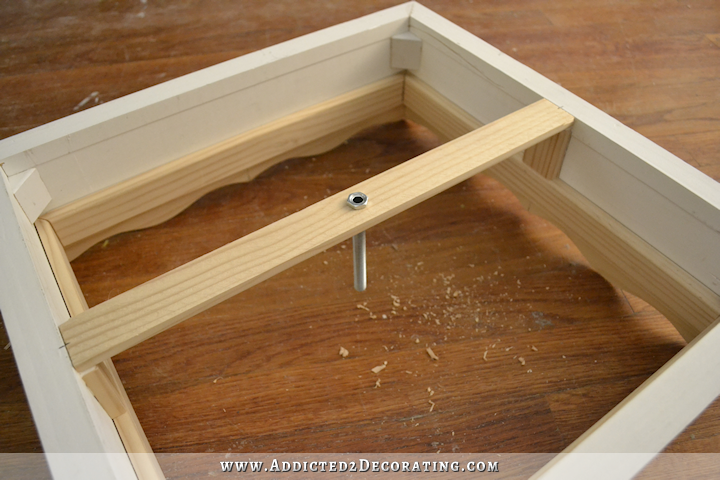
The one I used in the picture above was one that I had on hand, but it was way too short. So I ended up having to buy a package of two 6-inch threaded nipples from Home Depot. I knew the 6-inch was too long, but I could cut it off with my hack saw. So I threaded it through the top lattice support piece, turned the light box upside down, and placed the glass in place.
I had the glass cut at a local glass shop (Freddy’s Glass, for you locals) and they also drilled the hole in the middle for me. You can also see here how the glass sits on the lattice around the edges. And you can also see that the threaded nipple is about an inch too long.

I attached the little finial thing. (I have no idea what that piece is called, but I swiped it from an old light that I had. Home Depot sells really small ones.) Once the finial was tightened onto the nipple, I kept turning to thread the nipple up through the support lattice piece on top of the light box.
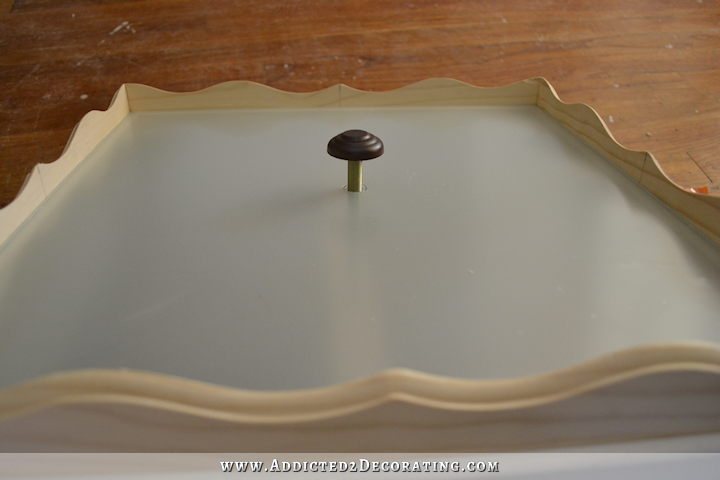
I kept turning until the finial was flush with the glass…
And then when I turned it over, I could see exactly how much needed to be cut off.
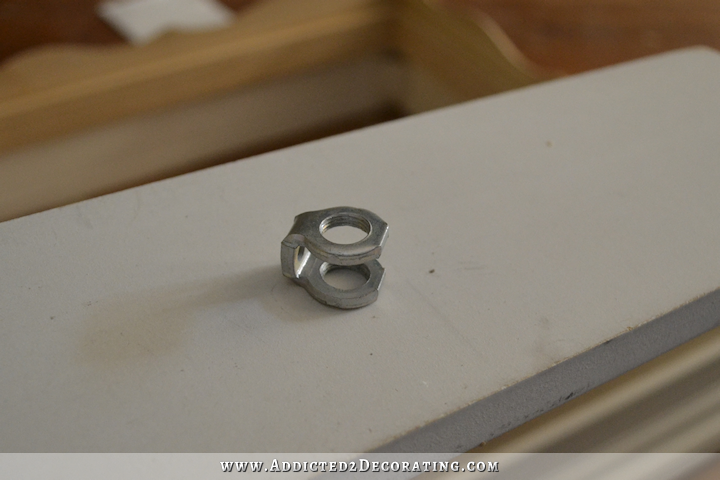
I added a washer, lock washer, and nut, and then measured the excess so that I would know exactly how much to cut off with my hack saw.

With it cut off, it looked like this…

This next step really wasn’t needed, but I happened to have some of this JB Weld SteelStik.
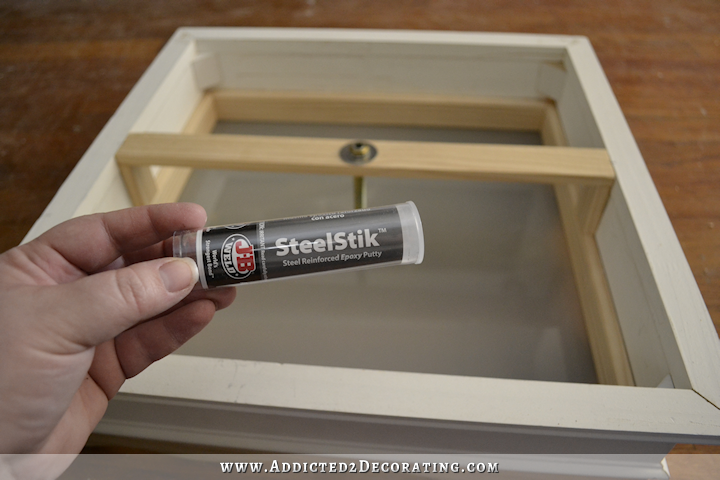
So I cut off some of the putty and mixed it well with my fingers, and then pressed it around the top to hold everything together nicely. It does dry VERY hard, so there are no do-overs if you mess it up.

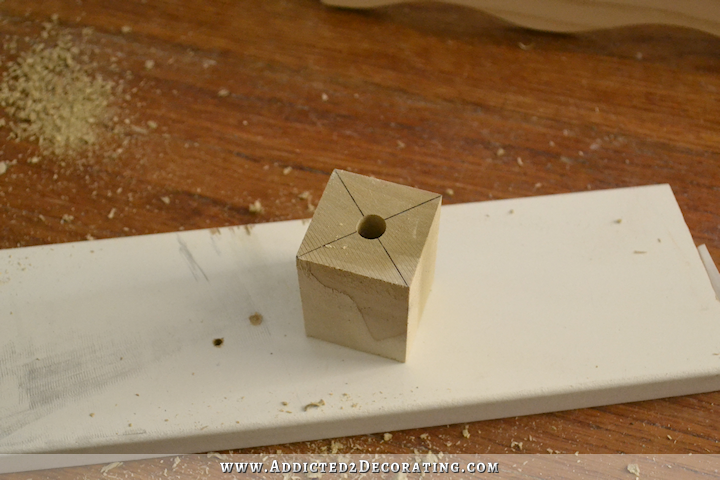
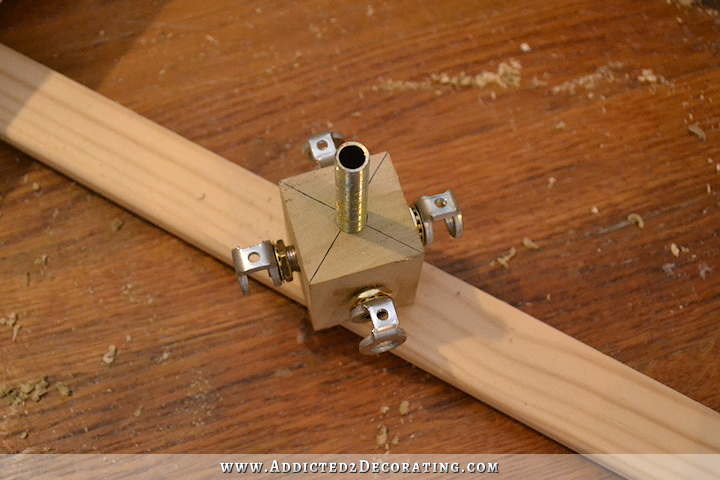
Next I needed to work on creating a place for the actual light sockets. I cut a 1.5″ x 1.5″ x 2″ piece of wood, and then on the top and bottom, I marked the center with an “X”.
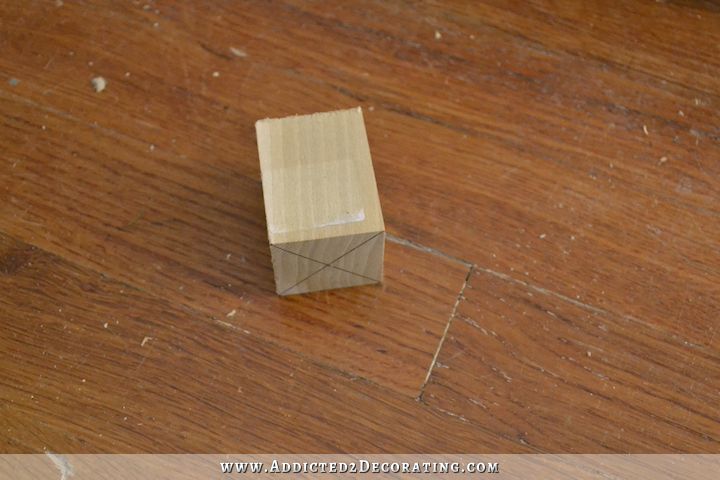
Then I used my 3/8-inch drill bit to drill a hole right through the center from top to bottom. (A drill press would have come in handy right here, but I don’t have one.)
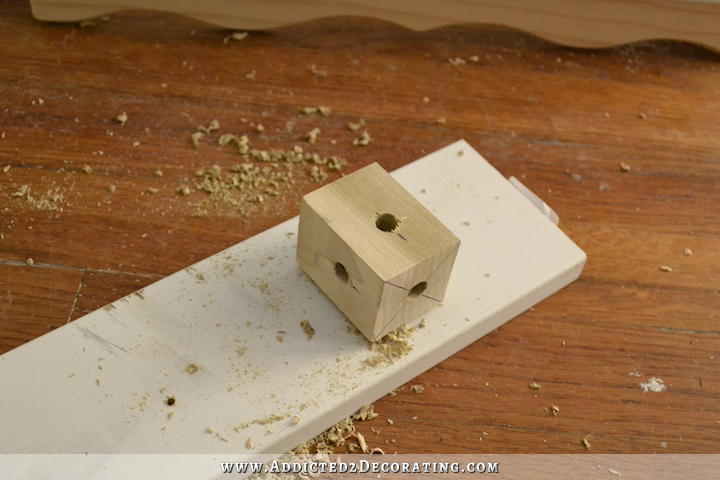
Then I drilled a hole on each of the four sides. These holes didn’t need to meet the center hole. They just needed to be about 3/8-inch deep or so.
I threaded that block of wood onto the nipple, and glued it to the top dowel support piece.
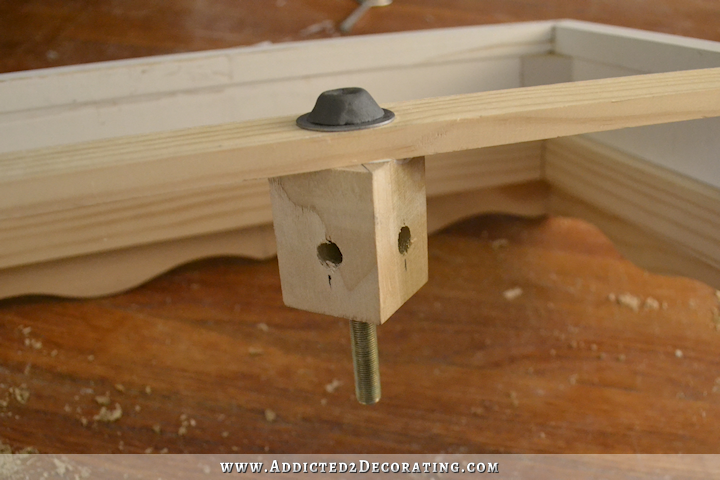
When I flipped the light box upside down, it looked like this…

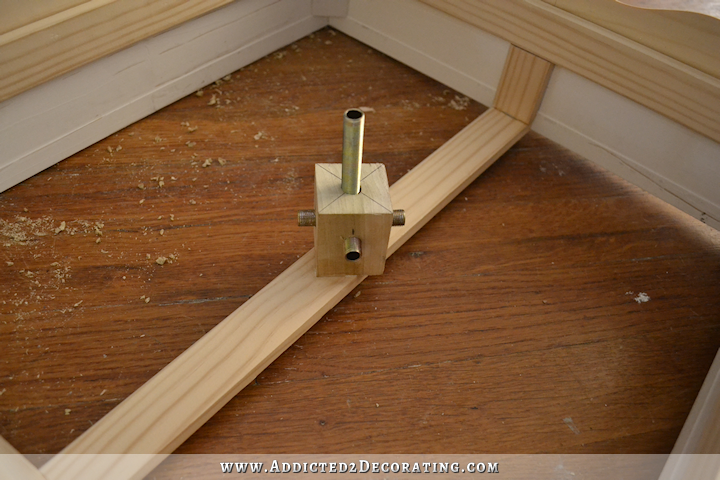
Then I inserted 3/4-inch nipples into each of the four holes on the sides of the wood block.
Then I needed to attach these pieces called 1/8 IP hickeys. These are used when you don’t want wires to actually go through the nipples, but you want a gap where the wire can come out. I purchased these from a local light supply store (The Village Lamplighter in Lorena, for you locals).
And onto each nipple, I threaded a nut, a lock washer, and a hickey, and tightened them really well.
Then I took another 3/4-inch nipple, and threaded three washers onto it. These washers just acted as spacers.
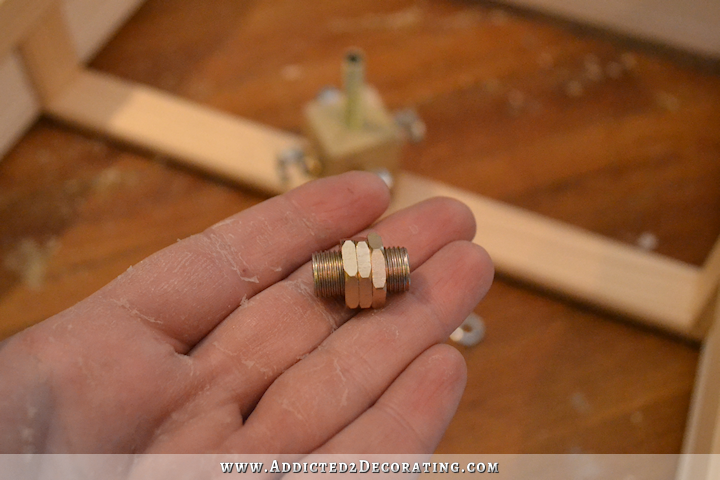
And I threaded one end into the hickey, and onto the other end I threaded the keyless socket.

With all four sockets attached, the inside of my light box (upside down) looked like this…

And here it is with actual light bulbs.

Those light bulbs are regular incandescent, but I’ll only be using LED lights in this light box. I just didn’t happen to have any on hand when I took that picture.
Then I just had a couple of things left to finish building the light box. First, I added screw hooks to the corners where the chain would attach. This is where I realized that I should have used real wood instead of MDF for the corner pieces, because small pieces of MDF aren’t strong enough to hold the weight of this light. So I had to cut small pieces of real wood, attach them on top of the MDF pieces, and then screw the screw hooks into the wood pieces. I also added a load of wood glue to each corner after attaching the screw hook to make it VERY secure.

And here’s how everything looked, right side up, at this point…

And the final step to building this light box was to add one more small piece of trim where the scalloped moulding met the main box. I used very small cabinet trim from Home Depot, which is sold is 8-foot lengths.

There’s still a ton of finish work to do on this, but so far I really like how it’s turning out. I should be able to get it finished today, and show you the finished and installed light tomorrow!
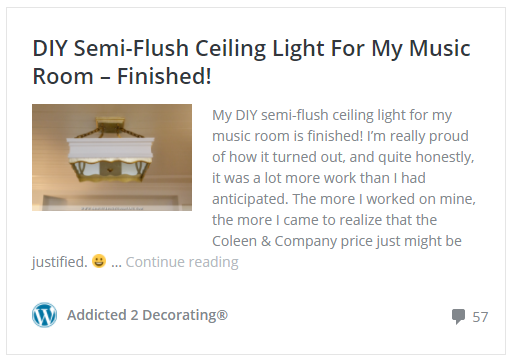
UPDATE:
The light is finished! Click here to see the rest of the DIY process and pictures of the light installed…

Addicted 2 Decorating is where I share my DIY and decorating journey as I remodel and decorate the 1948 fixer upper that my husband, Matt, and I bought in 2013. Matt has M.S. and is unable to do physical work, so I do the majority of the work on the house by myself. You can learn more about me here.

WOW!!
That looks amazing!
Really impressed! Can’t wait to see it in your music room😊
Woman, you are the bomb.
Also.. am I the only immature one who was snickering at nipple and hickey?
>.>
No Mehgan, I was as well. LOL
I like it better than the inspiration. How you know what to purchase and how to think these things through is amazing to me. You have an incredible mind.
Did I ever tell you that YOU ARE FREAKING AMAZING..!!! To be able to look at something, like it and then build it for much cheaper..!! I’m so impressed..!!! Great job Kristi..!!
I honestly never would have considered building my own ceiling light. It just seems like one of those things you buy, but this is wonderfully well thought out! Can’t wait to see the finished product.
What a (yet another) great choice! The gold accents and rectangular link chain will be super in that room and pick up the gold so nicely from the kitchen.
I love how it also picks up details from your (current planned) living room ceiling fixture, but stands on it’s own as well.
Funky, cool, and (yeah, I’ll use the “E” word) elegant all at the same time!
SUPER!
How on earth do you figure out how to make these things? You truly amaze me!
My gawd woman, you’re amazing! We had an electrician in last week to do some wiring upgrades to the house, and he spotted a small plug in pendant light I purchased less than a year ago to hang above my sink. (When we re-did our kitchen, I didn’t want to tamper with the electrical right then, so I bought this one as a temporary light until I could get somehow hard wired). Anyways it’s cloth wrapped wire, and is against code here, so I has to go he says. So now I’m scouting out a new fixture yet again! He’s going to be hard wiring one in for me. I’ve been looking all weekend and falling flat on fixtures I like – I feel your pain! I wish I had your creativity to make one myself because I have wine taste with a beer budget :P. Of course any I like are a small fortune!
Your current pendant can be rewired with up to date wiring from Home Depot. I rewired a few old lamps; it’s easier than you think.
Kristi, thank you for this post, I’m saving it into my favorites, because I need to rewire my mother’s old crystal chandelier that was damaged in a fire years ago. As in the plastic coverings for the on each light fixture melted tight around the wiring. Thank you for putting names to the items I will need to buy.
Wow, that’s looking amazing.
I was left with a one word response but then saw someone else beat me to it…so….double WOW!
You are amazing.
What an amazing job! Just amazing.
Looks great so far! Will you let us know the final price breakdown so we can see the final cost, and savings!! Thanks for the education on light fixture terms!
I like what I’m seeing so far. Can’t wait to see it complete and installed. Great work!
Hi, just wanted to tell everyone that great L E D lights can be found at Dollar General. They are wonderful, new and much improved quality of light emitted and the safe plastic bulb cover is a plus.
I bought a string of LED Christmas lights a few months ago, the colors were more like the bright hues of traditional lights now. Not like the “weird” hues from a couple of years ago when they made their debut on store store shelves.
Dollar General had much lower prices than the big box stores I noticed too. Got a 60 watt type
bulb for under 4 bucks for my closet, boy is it nice and bright white light. Flameless candles are a fun new way to use ambient lighting, and they look realistic. You can put them in bookcases or close to houseplants, in windows etc. All the beauty without the danger.
I’m afraid to buy anything from “dollar stores” because most, if not all, of those cheap things are made in China. Not only are they usually shoddily made, but they often incorporate toxic materials in their manufacture, even in things you wouldn’t think of as being toxic. Paying more is worth not taking the risk. Some time ago I read an article that listed about ten unexpectedly toxic things made in China. I wish I could find the article to share it here. If I recall correctly, Christmas lights and garlands, plastic table cloths with cloth backing, and children’s jewelry were among the items. I would never buy anything for children to use if it’s manufactured in China.
Not to mention the American jobs that have all been lost. However, it is just about impossible to find anything made in the USA and it gets harder every year. Although you can buy some Sylvania and GE light bulbs made here but they are incandescent.
You’re absolutely right. It takes searching to find American-made goods. I’m happy to have cookware that was made in Sugarland, TX! It’s nice to know it’s still being made there.
I think the incandescent bulbs we find are just those left in inventories since they’re now illegal. It seems that companies are allowed to sell out what they have left. I stockpiled them because I much prefer the warm light of incandescent. I wish we’d save by doing other things, such as using wind and solar power. A friend of mine needed to replace lights in her bathroom fixtures, and it was going to cost $250 for the new bulbs! Some people just can’t afford such prices.
Wow, you are such an inspiration Kristi, that you see something you like and can figure out how to make it from scratch. Would have never thought about making a light fixture, but this one is looking amazing! Can’t wait to see this finished and installed in your music room.
Ahhh-mazing-ing!!!
It looks like it is shaping up to be a very nice light. You like to build things. You take great pride in being able to show us how you do things and what to buy. While I agree, unless you are very wealthy, $1200 for a ceiling light is totally ridiculous. On the other hand, if I had everything to do that you have in front of you, I would not spend two days shopping for and building a light fixture. I know without a doubt that I could find one that I like and worked just fine for well under $200. That to me is worth my time. I think that is where you sell yourself short, you don’t “pay yourself” for your time. You have to give yourself value Kristi, your time is worth something. God forbid something happened to someone and you found yourself thinking if only I had gone to see her/him last weekend. That is the point I am trying to make. Your craftsmanship is beautiful but if you were to pay someone to do it for you, you would pay $40. an hour for a pro. Times that by two 8 hour days and you are looking at a $640 light. In my opinion, picking your projects is important. Don’t spend hours on something you can buy. I know you said you could not find anything, but I think you sometimes set the bar too high on certain things. Just trying to bring another perspective. Blessings
What you would do is irrelevant as our situations are completely different. You may not spend two days building a light, and may just find one online a buy it instead. That’s fine, but you also don’t write a DIY blog for a living. How many readers do you think would stick around for the long haul if all I blog about is drywall and installing trim? I NEED projects like this…not only for myself, but also to make a living.
Besides everyone needs things to do that they enjoy in their life. Who cares if that is knitting baby hats, embroidering, baking, or making your own light? Life is very boring without hobbies and interests. You are constantly learning all the time, which is great for the brain, and you’re also teaching all of us out here a skill we might never have thought of doing. I think its great that you can make a living doing what you love too. A house is a life project, even when a person thinks they are done it soon comes time to update things again, so what difference does it make if you don’t hurry up and finish the house? I’m glad you are just enjoying the whole process and not going at this like it all had to be done yesterday….and then what, right?
I couldn’t have said it better myself. Thank you for this blog, Kristi. No matter what you do, or how much time it takes you to do it, I am here for the long run.
So spending time writing long critical comments is a better way to spend time?
I don’t think Mary Anne’s comment was critical. She is simply commenting on the project from her own economic perspective.
I guess I did not think about it that way. I always think about your DIY projects as being big, like re doing a room, as you have done in the past. They are the things that I am so impressed with. I don’t expect you to drywall etc. I have always felt that is stuff you should job out. I enjoy seeing all the ways you create moldings etc. I guess a wooden light fixture was just not my cup of tea, or maybe I was having a bad day. Regardless, as you say, what I think is irrelevant. To those of you who think I wrote a long critical blog I would like you to point out the area’s in which I was being critical. Was it when I said that Kristi does not value her time? I don’t think that is critical. When I said I think she sells herself short? How about when I said her craftsmanship is beautiful? I find nothing critical in any of those things. You are all missing my point. Maybe Waco TX does not have the kind of store that we find in the north east. I am sure you can pottery barn catalogs, and all of the other ones that really nice things, for a lot less than $1200. That was my point. But as Kristi so nicely pointed out what I would do is irrelevant, even though I am one of those people who stay with her blog through the long haul.
Blessings
Sadly, you remind me of my mother. She doesn’t realize how people perceive her “comments”. She thinks of her input as being helpful, but most people think her comments are critical. When a person pays a compliment only to later say how they would do things differently, most people, myself included, consider that being critical. It’s one thing when Kristi is requesting opinions from us for various projects, but I have observed on more than this one occasion, your past comments have struck me as being critical. Sorry, I realize that is probably not your intention.
Seriously? You have to have your criticism pointed out to you?
Challenge accepted!
1) Kristi doesn’t know how to value her time, as she should’ve hired someone to come in and do this for her,
2) Kristi is actually much too picky, because if she would just look she could have found a perfectly acceptable light fixture,
3) This one is my favorite: Kristi is neglecting her loved ones, because if someone randomly died over the weekend, she would be wracked with guilt over making a light fixture (otherwise known as earning a living) instead of spending her weekend with them.
Blessings!
What you do IS irrelevant when it’s not your blog, or are you too self-absorbed not to notice that? Why would you hire someone to do drywall when you can do it and feel capable and good about yourself? You must be swimming in money for it to be reasonable to hire out everything but decorating. 😛 Again, you’re just coming off as extremely petty for criticizing Kristi for looking at expensive things and, god forbid, making them herself at a much cheaper price for both the love of doing it and without sacrificing looks.
Long before i saw this piece, I wanted a Collen Co light fixture more than I could possibly describe, but just couldn’t swing it with the other expenses decorating my new house and staging another for sale. I consider myself sophisticated shopper(my friends always turn to me when they can’t find a particular item) and I have looked everywhere in fabulous Atlanta lighting showrooms and online. I haven’t come close to finding something I like even half as much especially not for 200 bucks.
I am not a DIYer but rather a DIWPA (Do it With Professional Assistance) person which is time consuming but at least I get what I want and I don’t settle. I have visited this page countless times looking at this tutorial. I have sent the link to the craftsmen who are helping me too. Kristi’s advertisers should be thrilled. Many subscribers have said they like Kristi’s light better, in respect for the original designers I can’t go there. The Collen Co piece is so very beautiful it inspired Kristi to create her own and hers was so beautiful it inspired me to try as well. I think theirs is worth every penny and hers is worth every second. Those who can just “put it in the cart” and pay for it with a click should do it. Their lighting is stunning design. There is no accounting for taste so if it isn’t your “cup of tea” then fine but don’t compare it to a mass produced product at Pottery Barn. If Kristi were to make one for sale, she could “charge” herself more than 40 dollars an hour as well. Her light would sell on Etsy for 1K easily, but unless she just enjoyed making them for others as a hobby, manufacturing lighting could be a waste of her precious time. She inspires people for a living and moving on to the next project is probably time better spent, because that is her job. I just sent Kristi a photo of my light fixture in progress. I am grateful she helped me realize my decorating vision for my home because although I like Pottery Barn, it wasn’t going to do this time.
I’ve seen your comments on Kristi’s blog several times now, but I can’t hold my tongue any longer. You remind me exactly of my grandmother: nothing but backhanded compliments. You aren’t satisfied just by telling Kristi she did a good job on her project, or that she’s a very capable and creative woman, or even by just drawing inspiration from it silently. Instead, you have to go “oh, /I/ would have been able to find a good $200 light instead of spending all this time building something I could just buy… but my intentions are only good, I’m only thinking about your family, of course.” You are not. It’s none of your business.
Kristi likes to build, and it’s her own business if she builds things and uploads them onto her blog. My god woman, stop BUILDING THINGS YOU CAN BUY?! What a stupid thing to say! Why bother building bookcases, beds, chairs, tables, ottomans… why bother cooking? You can get foods that have already come prepared, after all. Surely you can see how stupid and petty you sound. Hell, do you have any hobbies? Might as well stop those, you’re just wasting money and spending time away from your family. What if a family member had a tragedy while you were gardening? You could have hired someone to garden for you! While scrapbooking? What a waste of money and space. You clearly have no concept of the joy of having made something with your own two hands.
Maybe I’ll be labelled a typical internet bitch, but I don’t care. Someone needs to point out that you aren’t half as clever as you think you are. Nobody here is stupid enough to buy your shallow excuses, and it’s insulting that you think we are.
Please STFU and GTFO.
I also am immature and having a Monday morning laugh at nipple and hickey👍🏻😊👍🏻😊👍🏻😊👍🏻😂
Not only are you AMAZING, you have the patience of a saint!!!
Great job, as usual. What is the final color(s)? Looks like they put your $2800 light on sale for the whopping new low price of $1875! Too funny! I don’t blame you for building your own.
It’s going to be white and gold.
The $1875 price is for their small 12″ x 12″ light. 🙂 The large one is $2800. It doesn’t give the dimensions of the medium and large, but I would guess that my 18″ square light is a large.
You go girl. I was thinking along the lines of using trim to make the light. I also love the store in Lorena. Used to live in McGregor and went there several times for shades for coal oil lamps that my mother had. Did not realize that they were still there. It is definitely worth the stop for those travelling thru.
I’m really glad you make me aware of the fact that you can actually build your own lamp! I really like this about your blog – that you show us what is possible (or that – nearly? – nothing is impossible 🙂 ). I have to agree with somebody above who said that people need a hobby – even if your hobby is something other people make for a living or if the result could be purchased with money. I think if it gives you the feeling of satisfaction of accomplishing something (let alone give you material for your job – the blog!) then it’s worth doing it and wrong to calculate the amount of money that you could have earned in that time on another job. This is YOUR job anyway – and how glad are you that you can do something so fulfilling (at least most of the time :))? I guess: very! I for one am very glad that this is your job and I get an idea of things such as how to build a lamp! Thank you – as always!
In awe; I would def click “add to shopping basket” and pay the $2,800. But reading the post and following the pics makes me almost believe I can do it as well! Of course I felt that way when you built the bed for your niece but have yet to attempt such an imposing project. Go, girl! Ahem, WOMAN!
Never say “uncle”, keep showing us that you can create when you can’t find exactly what you want! You are truly a craftswoman and I am in awe!
I think that your light is going to look better than the “Daphne” light at Colleen & Co. I think your trim is more understated and classier.
Kristi, can I ask you a technical question? How exactly do you use the wood glue and the hot glue? Do you apply the wood glue on the whole surface and then the hot glue on top of the wood glue? Or do you leave some spots not covered in wood glue and then apply the hot glue on that spots?
The lamp is amazing!!!
I basically just use a minimal amount of hot glue — just two dots of glue, with one one each end of a piece of trim, or if it’s a long piece then I might use three dots with one in the center. And the the rest of it has a bead of wood glue. I try to leave as much room for wood glue as possible, since that’s what I rely on to keep it together for the long haul, and it’s MUCH stronger than hot glue. But I put the wood glue on first, leaving blank spots for the hot glue where needed, and then add the hot glue right before adhering the trim. That way the hot glue isn’t cooling off while I’m trying to put wood glue on the trim piece.
Thank you so much for sharing this! We have been unable to find the fixtures we want too, and while we did consider the making of them… I just had no idea where to start!
It is a somewhat complex process (many steps and bits and pieces), but still quite doable. You give me courage.
I love it! Way to go Kristi!
How do you know how to do all of this? You boggle my mind. Amazing … absolutely amazing.
I’ve re-wired several chandeliers and lamps in my lifetime, so I knew generally how everything needed to go together to make the lights work. Everything else was just decorative. 🙂
All the “Why would you spend time making this?”….. My first thought was “Kristy need to be creative and fun again!” I know your brain can only take so much caulking and sanding before it needs to make something pretty! Lol. Is this the final project for the music room before decorating?
Yeah why would she spend time making this? Ohhh I don’t know, why do people crochet or knit blankets or make quilts when they could just buy a perfectly acceptable one in the store. Duh some people just amaze me with their lack of thinking skills. Heck I paint, why would I want to paint when I can find perfectly acceptable……hm hm…. even much prettier art online than I could ever paint myself. Its true, we can buy just about anything in this day and age but wheres the fun in that? She spent her time making this…….because she CAN!!
OMG! You are my spirit animal Kristi! I found you when I knew there had to be a different way to install a barn door and then I remembered the awful sliding closet doors but imagined it in this exact application (music room)! Thank god you already did it so I could see it! And seriously the lady being critical of how you spend your time?! What in the world? It brings you joy and satisfaction! I freaking love it! You inspired me to try the heart light from the same designer for my daughter’s room because we all know $1800 is waaay too much! And I do not have a license but have been helping friends lately but the “real” designers are so snooty and then I read how you got your start….I just want to sit down and have coffee with you! Truly! INSPIRING!