Essential DIY Tools – Miter Saw
Few things thrill me more than getting emails from readers saying, “Kristi, you’ve inspired me to tackle such-and-such project in my house!” And since I started my bathroom makeover, I’ve been getting an increased amount of these emails. (Seriously, ya’ll make my day!! 🙂 ) So just in case any of you are new to the world of DIY, I thought this might be a good time to share my “Essential DIY Tools” list with you.
I’ll share them one by one, in the order of importance (in my humble opinion, of course), so that I can give you some more detailed info on each one, rather than just giving you a “Top 20” list that might leave you newbies even more confused than you were before you read the list. 🙂 If you have specific questions about each tool, I might even consider making a video to demonstrate each one, so let me know if you think that would be helpful.
In thinking about my list, I asked myself, “If I could only have one power tool…just one…what would it be?” My answer?
A Miter Saw
 My miter saw is absolutely, positively my most-used tool. I honestly don’t think I could DIY (and certainly couldn’t have a DIY blog) without it.
I never buy the top-of-the-line tools. I leave those for the building contractors who use their tools all day every day and need the really powerful ones with all the bells and whistles. I stick with the lower to mid-range tools.
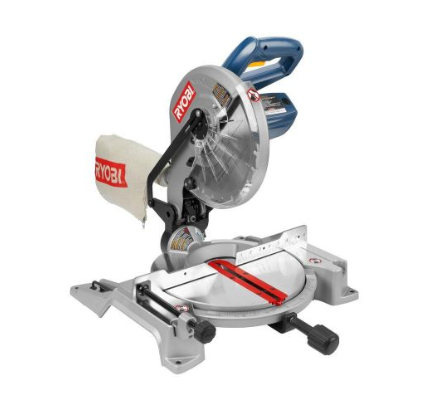
I personally have a 10″ Ryobi miter saw that cost me $119 at Home Depot (pictured to the right), but I’ll admit that if I lived in a bigger place with more room to spread out, and to have my tools set up permanently in a workshop, I would invest in something bigger — a 12″ sliding compound miter saw.
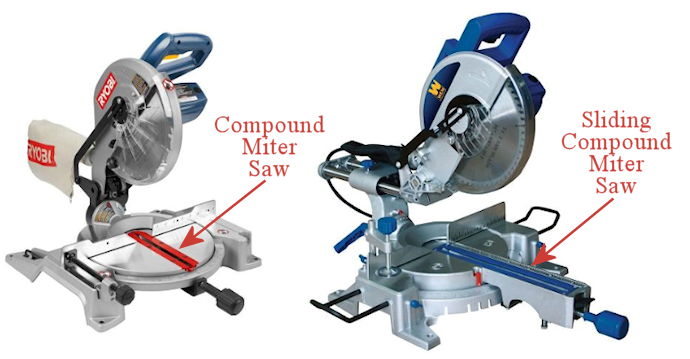
Miter Saws, Compound Miter Saws, and Sliding Compound Miter Saws
Wondering what the differences are between all of these? It’s simple:
A basic miter saw only does an up-and-down cut with the blade. You can swivel the base, so that you can change the angle of the cut. So if you were making a frame and needed to cut 45-degree angles, you would just swivel the base until it was set to 45-degrees, and then make your cut.
It’s actually been quite a while since I’ve seen a basic miter saw. It seems like today, even the most basic miter saws are compound miter saws. Even my little $119 Ryobi saw is a compound miter saw.
A compound miter saw not only does an up and down cut with the blade, but you can also tilt the blade so that it cuts at an angle. So in addition to swiveling the base to cut an angle, you can also tilt the blade to cut what are called “bevel cuts”. A compound miter saw is imperative for projects like installing crown moulding, where you have to set a miter angle plus a bevel angle.
A sliding compound miter saw is a compound miter saw (obviously) with a blade that slides back and forth so that it can cut larger pieces of lumber. With the previous two saws, the width of the wood that you can cut is limited by the size of the blade. For example, my 10″ miter saw struggles to make it all the way through a 1″ x 6″ piece of lumber. With a sliding compound miter saw, the width of the wood that you can cut is limited not by the size of the blade, but by the length of the sliding track.
The Most Essential Feature
Whether you choose a compound miter saw or a sliding compound miter saw will be fully dependent upon what kind (and what size) of projects you plan to tackle. But no matter what kind of miter saw you decide on, the most important feature, in my opinion, is…
A Laser Guide!!
My first miter saw didn’t have a laser guide, so often my miters on projects like frames wouldn’t join together perfectly. (Even being off as little as 1/16th of an inch can throw off your miters on a project like a frame. Seriously.)
When that saw finally broke, I bought a new one (the one I have now), and it came with a laser guide. I couldn’t believe how that one simple thing completely changed how I cut miters! I was cutting some of the most beautiful, perfectly fitting miters I had ever seen. All because of that little laser guide.
Now seeing that I have a very basic miter saw that cost me all of $119, I would assume that laser guides are now coming standard on most new miter saws. But still, look specifically for that feature if you’re ready to purchase. And keep this in mind if you’re considering purchasing a second-hand saw.
Now let’s get to the fun stuff, and see how I’ve used my miter saw.
Projects I’ve Done With My Miter Saw
My most recent project that I used my miter saw on is my mosaic tile frame that I made out of wood yardsticks.
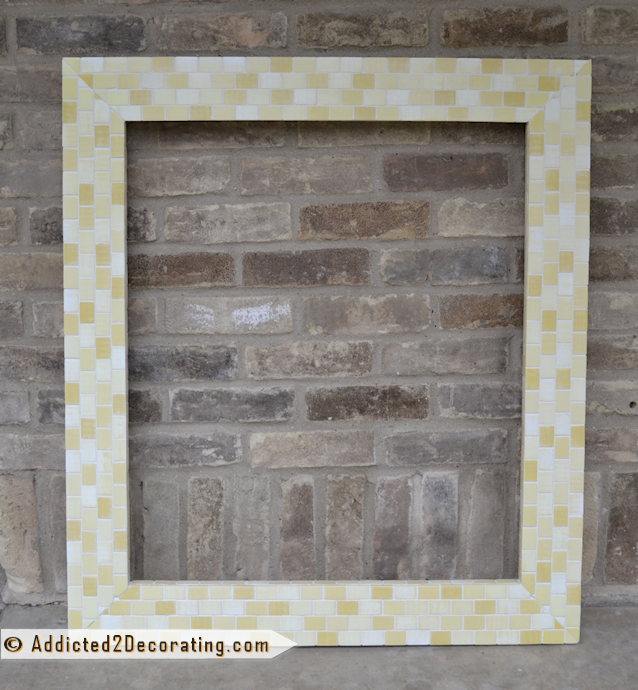
There’s simply no way I could have made that frame without a miter saw. I used the saw to cut the hundreds of “tiles”, and also to cut the miters on the corners of the frame.
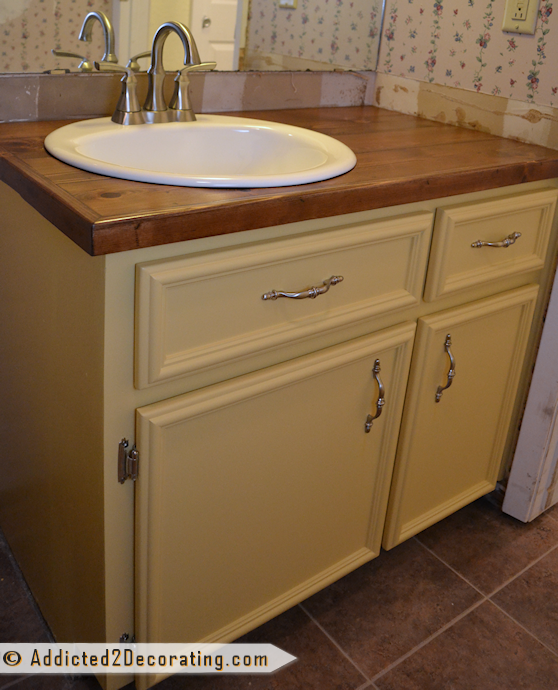
On my bathroom vanity, I used the saw to cut the cedar fence pickets for the countertop, and also to cut the trim that I used to make the new cabinet doors and drawer fronts.
In that bathroom, I also used my miter saw to cut all of the pieces for the faux wood plank wall. (Home Depot cut the wood into 4″ strips for me, but I had to cut each strip to the right length for my wall.)
Moving on to other rooms of my condo…
I used my saw to make my chevron table…
![]()
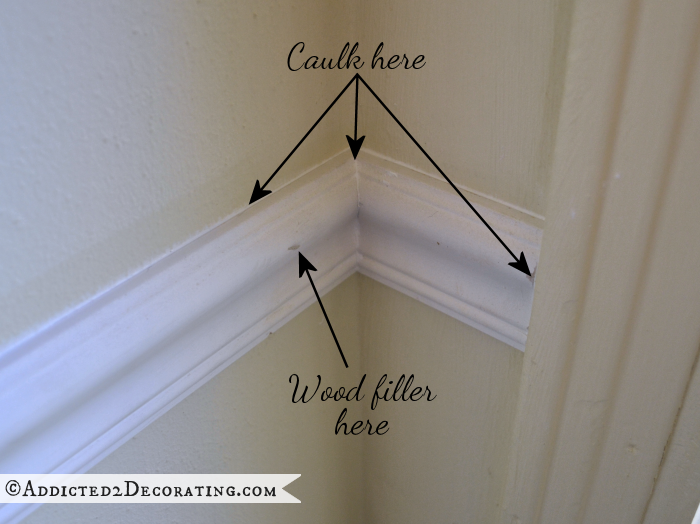
And to cut my battens, baseboards, and quarter round for my walls…
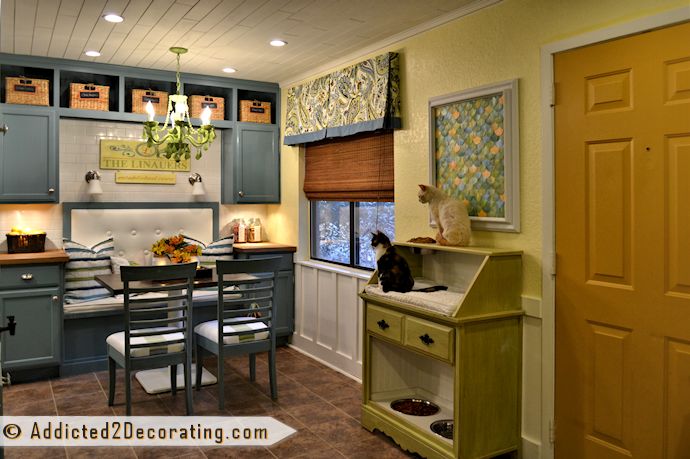
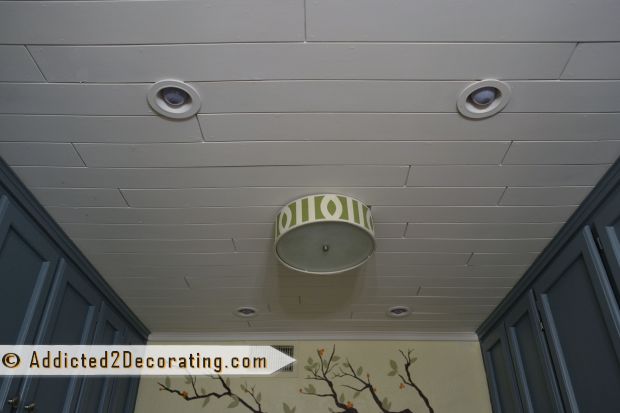
Similar to my bathroom walls, I also used it to cut the pieces for my wood slat ceiling in my kitchen and breakfast room…
And of course, I don’t just use it for home improvement types of projects. I use it all the time to create decorative items as well, like creating the frame for my pistachio shell succulent garden…

And the big, chunky frames for my fabric dye impressionist artwork…

And to cut the sides for my herringbone serving tray…

I could go on and on. Suffice it to say that my condo would look nothing like it does today if I didn’t have my miter saw.
I really don’t think I could go without it. It’s definitely my #1 pick for essential DIY tools.

Addicted 2 Decorating is where I share my DIY and decorating journey as I remodel and decorate the 1948 fixer upper that my husband, Matt, and I bought in 2013. Matt has M.S. and is unable to do physical work, so I do the majority of the work on the house by myself. You can learn more about me here.


I’m so excited for this series of posts (and I would LOVE to see videos)! Once upon a time I used to know how to use all this stuff, but then I moved out of my parent’s home and no longer had access to all my dad’s cool tools. I ended up marrying a military man and we’ve moved 10 times in 14 years, so I never had the time (or location) for the tools I’ve always wanted. We are getting ready for our 11th (and hopefully last) move to our (potential) retirement home. It has a 3-car garage that is just begging to be filled with tools! Woot! 😀
You inspired me to try installing a new vanity in my bathroom so thank you, however, I bought a miter saw last year that I am afraid to use. Maybe this post of yours will convince me to give it a try. I use a jig saw all the time and even the reciprocating saw but I’m scared of the miter saw. Sad huh?
I agree totally. While I am extremely lucky to have access to my husband’s woodshop I never had a miter saw. I recently had to purchase one when our contractor took a hike with out completing the job. It allows for really controlled cutting. I did my first trim work and, although not perfect, the results were great for a newbie.
I am new to your blog and you are truly an inspiration. I have that same mitre saw and do love it with the laser. I have used it on many projects and my only complaint is being able to only cut 6″ wide boards. I am currently converting a 4′ wide closet in my mudroom to an open locker type with hooks and a bench. I have my hooks on a 1 x 8 board and I cut it on the mitre but had to flip it to cut the rest of the board and try to line things up. No fun! I too would like a sliding blade and may end up selling this one for one like that. They are a fun tool and essential for these types of jobs. Your condo is totally amazing! And I love that you do it all alone like I do. It’s amazing what we women can accomplish if we want to! Where there’s a will, there’s a way! Keep the inspiration coming! Videos would be helpful. Happy building!
thank you for saw post!! I was planning to buy one, got stucked because of the big assortment- which one is right for me? here you make some arrangement. and please, video would be very helpful…
I’m lucky to be able to share my husband’s tools in the garage and I agree that a miter saw is a valuable tool.
I would like to add another thing to essential tools. I recently purchased a Black & Decker cordless screwdriver with Lithium battery at Home Depot to assist me with my closet project. For $20 this little screwdriver has the power of a drill. I have used it after drilling pilot holes with my good DeWalt cordless drill. This little screwdriver drove the screws in 2 x 4s like nothing. I’ve had others in the past, but none have had this kind of power. This is totally $20 well spent for anyone that is a DIYer or just wants to have a handy screwdriver for small projects. I just had to leave a comment because I’m so impressed with it’s power. Now just go buy one!
I’m looking forward to this new series, too. (And a video series where you demonstrate each tool would also be great!) I just bought a jigsaw last week (my first power tool) and am looking forward to using it.
A year ago I purchased the Ryobi Sliding Compound Miter Saw…with the laser. I just started using it and the laser really did ensure precise cuts. lol…Unfortunately, newbie that I am, I wasn’t holding something tight enough and a piece of wood kicked the laser loose. Aaaack! Now trying to see where it was actually set so I can put back! Any experience with this?
Awesome info. I have seen so many projects, and think “I could do that”, but don’t have any big power tools to speak of and have been thinking of a miter saw for a while, so thanks for sharing all the great info! I do have a question (which shows what a complete novice I am), the miter saw also makes straight cuts, and not just angled? Videos would be another amazing learning tool.
I can’t believe how beautiful everything is! O.K., I am really ashamed to admit I have a compound Mitre saw, that I have never used! I bought it about 6 months ago at a garage sale from a guy who was seriously down on his luck and selling all his tools, everything. It was kind of sad, but I guess we both got something out of the deal. I need to figure out how to use it, and then there will be no stopping! You really have inspired me in so many ways. BTW, love the new look around here!
videos videos videos! I’d love to see demonstrations of the tools. I’m such a visual learner and would appreciate the extra effort.
I got a compound miter saw for my birthday last year and immediately regretted not having a laser guide on it. arg!
Love your new series on tools. My husband and I are moving to our retirement home that needs many decorating fixes such as fire place surround, kitchen and bathroom remodel, and outdoor entertaining space. I am trying to pick up tools one at a time before the move. I knew I wanted a jig saw but now I know I want a miter saw. I have molding and frames to tackle. Videos would be very helpful. When I talk to my contractor brother-in-law he just gives me a blank look because he knows what it takes to remodel and is concerned for my skill level. May have to contract some of these things out, but want to be able to accomplish my handmade projects in the garage. I really love your blog. Keep up the awesome work that you are willing to share with the world. ; )
I wish you would have been around when I did my condo over. It turned out nice, but yours has such pop and zing to it. Not sure which room is my fav ,love em all and can’t wait for the bathroom to be done.
You really are an inspiration to us!
Hey Kristi,
Thanks for the edumacation on tools! Yes, you HAVE inspired me to get to work on my place, and it’s good to know what tools will help me.
You do such nice and creative work and your blog is just so dang pretty and well laid out.
Hi Kristi,
I am excited to see more of this series… I so wish I had this article before I bought my miter saw (which I forced my husband to get me for my birthday 2 months ago). Luckily, I got the same Ryobi saw 🙂
Now I need a sander, circular saw etc… I am soo looking forward to your views on all of those before I buy them 🙂
looking forwrad to the rest of the series
Best,
Anika
Kristi, Great information! Please do a video! Your blog is the first one I look for in my inbox everyday. Love this new series. I’ve always been slightly afraid of power saws of any kind but with your inspiration I just might be hitting Home Depot this weekend to check them out. Your bath renovation is fantastic.
Jean
I love this miter saw! Just found one at Goodwill for $20! I can’t wait to use it 🙂
P.S. ~ Love all of your projects and look forward to your posts every day!
Deanna
Great post! I agree it’s a critical tool for diy and renovation. Somehow, I managed with an old-school hand miter saw for years. Now I have the DeWalt 12″ slider and LOVE it. Rather than the laser, I bought the LED worklight. It projects an accurate shadowline on both sides of the blade.
I am completely in love with your blog!!! I’m new to the DIY stuffs and your posts are inspiring me.
Every time my baby goes to sleep, I run to my laptop to check on your posts.
Thank you very much for your amazing blog.
Once I’m done with some project, I will let you know!
Kristi- Thanks so much for this post! EXACTLY what I was searching for! I am so wanting to get into power tools but didn’t know where to start..your post really sums up all that I need! thanks!!!
Hi Kristy! I just discovered your site tonight and I don’t even remember what I was first looking at when I got here!! LOL I’ve been going through your bathroom re-do and I am so inspired by your ideas and your fun and inspirational posts. It does my heart good to see someone who is so honest about her trials and tribulations and lets us know that not everything has to be perfect!
I hope you are able to keep your wonderful posts coming for all of us who lack inspiration but still want to do our own projects!!
Sigh,
I’m so confused now. I was pretty sure I was going to buy this
http://www.harborfreight.com/10-inch-sliding-compound-miter-saw-98199.html saw from harbor freight. It was on “sale” for a bit more last month, but then a store employee told me “they’re always on sale”, so I waited, and low and behold it’s on sale for LESS this month! Yeah! Now bear in mind, that I have NEVER used most building power equipment in my life, and to be honest, I too am a bit nervous about using it, but you’ve inspired me! I plan to make a storage/bookcase similar to what you built. I’m also hoping to build a very cool coffee table, and sofa table that Ana White has plans for. I’m pretty sure I’ll be wanting to put crown molding on the top of my “bookcases” so it looks like I might need accuracy, and you said to get one with a laser. SO . . . . I could get the other 10″ saw which is in the same price range, but doesn’t have the “sliding” feature, and I KNOW I’ll want to cut boards that are 12″ wide, so that one probably wouldn’t work. THERE is a 12″ available that is sliding AND a laser, but it’s considerably more: http://www.harborfreight.com/12-double-bevel-sliding-compound-miter-saw-with-laser-guide-69684.html. What would you advise? Or maybe you would tell me to steer clear of this brand?
Well, three months later, and I’m finally seeing your comment. :-/ So sorry! It was stuck in my spam filter (probably because of the links). I have no idea what made me look in there today, but I just saw your comment.
Anyway, I’m sure you’ve made your decision by now. If not, I would definitely go with the second one. That sliding action that allows you to cut wider boards is so helpful, and the laser guide is definitely a must. I’ve never heard of that brand, but it seems to have decent reviews, so I would go for it!
All good tips, thanks. My biggest problem is setting the miter angle precisely. I made a threaded adjuster to “nudge” the angle slightly. But still have to sneak up on the angles.
Hi Kristi,
Excellent post, no doubt!! I will go through rest of the blog slowly because I have got something that I’ve been searching for a long time. Keep posting and share your views time to time.
Best wishes