How to Reupholster An Occasional Chair With Tufted Back
<< Return to the beginning of this tutorial
There are several different styles of seat cushions, so it’s very possible that your seat cushion is a little different from the one shown in this tutorial. However, the process of reupholstering your seat cushion should be very similar.
If you’ve never sewn a seat cushion before, here are the basic steps that I recommend:
- Take several pictures of your seat cushion, from various angles, so that you can have a visual reminder of how the finished product is supposed to look,
- Carefully take apart the existing cushion using a stitch ripper and save the zipper for reuse (if it’s still in good working condition),
- Use the pieces from the existing cushion cover as patterns for the new fabric, and
- Refer back to your photos if you need a reminder of how the pieces fit back together.
Now with those basic steps in mind (which can be used with any style of seat cushion), I’ll show you exactly how that works out with this particular seat cushion.
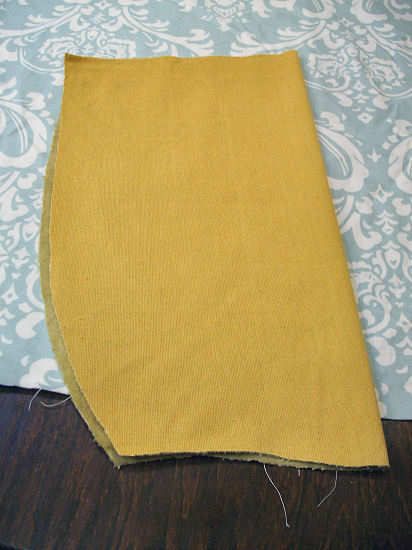
First, using a seam ripper, carefully take the existing cushion cover apart. Don’t throw anything away! These pieces will be used as pattern pieces for the new cushion cover.
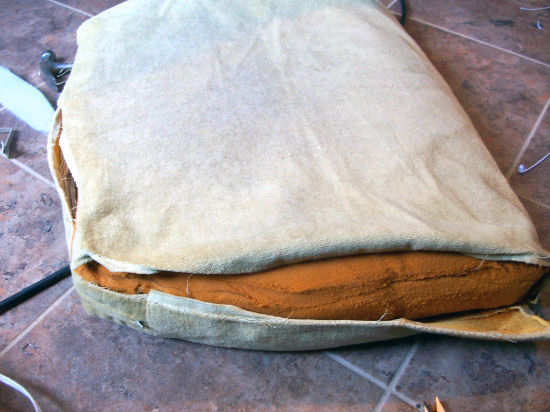
On each piece, you will see a fairly clear line where the cover was stitched together (about 1/4-inch to 1/2-inch in from the edge all the way around).
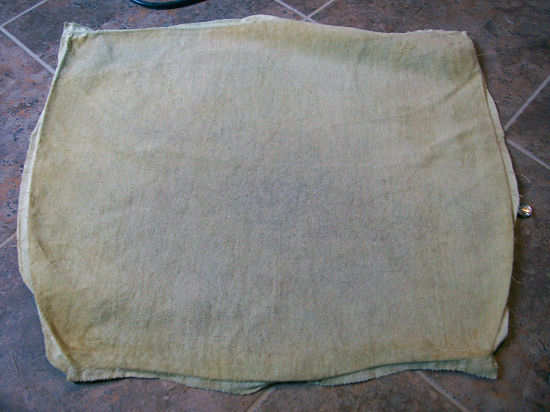
Use your scissors to cut along the lines where the cushion cover was stitched all the way around. Do this on the other pieces as well. (If you have duplicate pieces, you’ll only need one. For example, you don’t need to keep the top AND bottom cushion cover pieces of they’re the same shape. Only keep one and cut two new pieces from that one pattern.)
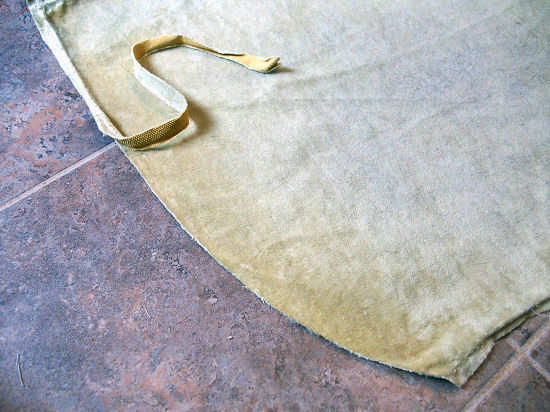
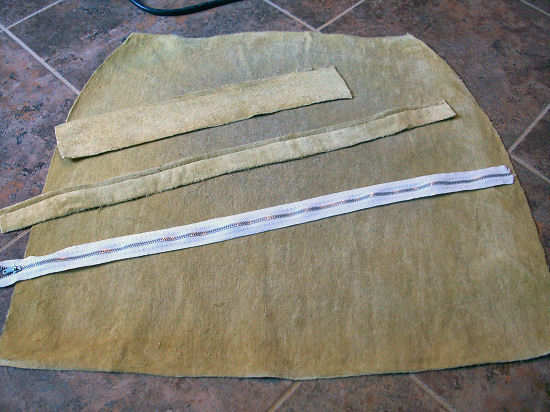
You should be left with the following pieces (or something similar): One main piece for the top and bottom of the seat cushion cover, one wider piece for the edge of the cushion, one narrower strip for the edge of the cushion where the zipper goes, and the zipper (reuse the zipper if it’s in good working condition).
Now take the large pattern piece and fold it in half…
Then cut the fabric along the fold.

Now fold the new fabric in half. If the fabric has a pattern on it, be sure it’s folded along the middle of the pattern.
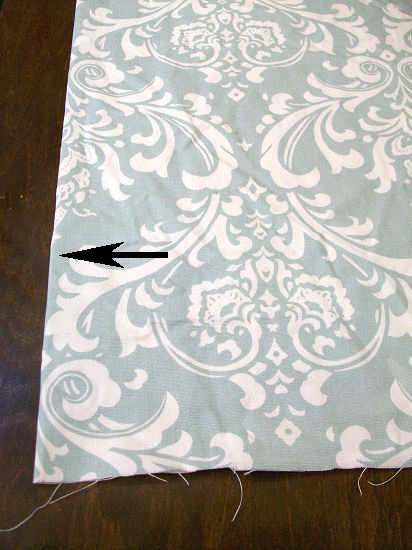
Now place the cut edge of the pattern along the folded edge of the fabric, pin, and cut out. You’ll need to repeat this since you need two pieces.

Be sure that you leave a seam allowance when you cut out the new pieces. I use a standard 5/8-inch seam allowance.
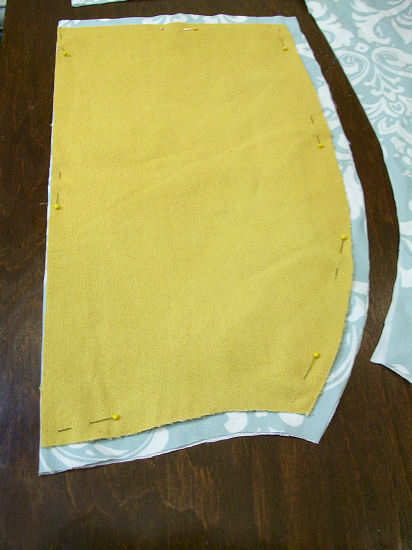
Now use your other pattern pieces to cut out the new pieces. Remember to add enough for seam allowances.
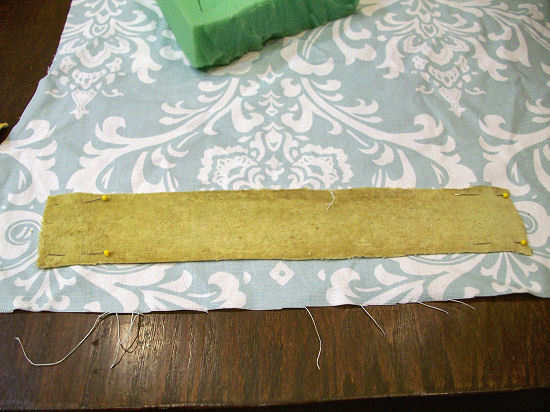
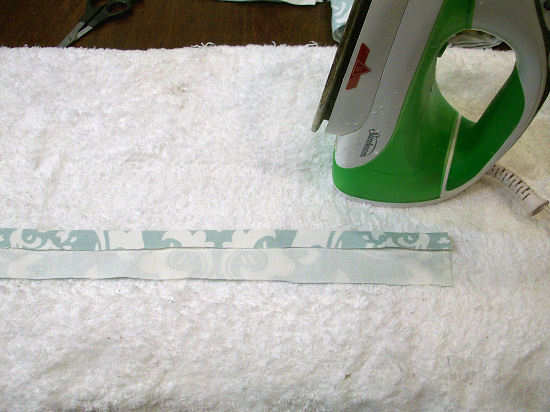
Now starting with the long thin strips, fold one edge down 5/8-inch and iron in the fold. Do this to both strips.
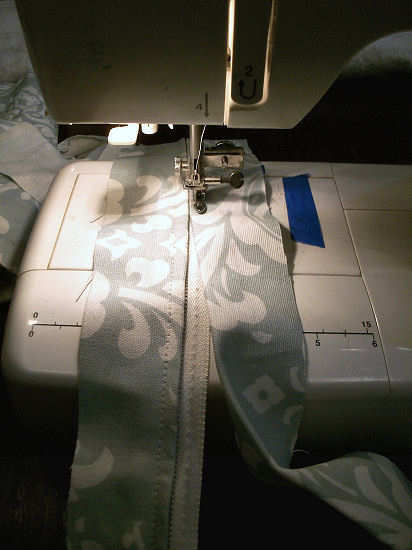
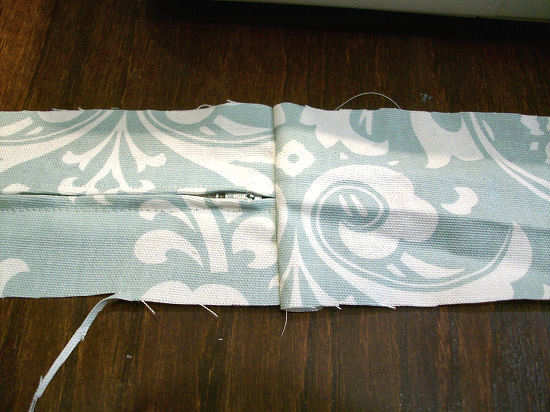
Then using your zipper foot on the sewing machine, sew the strips to the zipper with the folded edges towards the middle of the zipper.

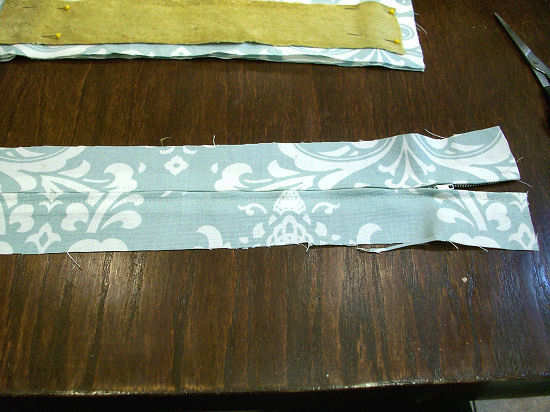
When the zipper section is finished, it should look something like this…
Now take the other two edge pieces and pin them to the ends of the zipper piece.
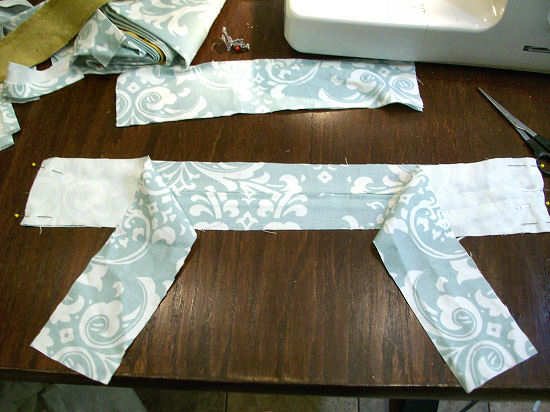
Sew those pieces in place and iron the seams flat.
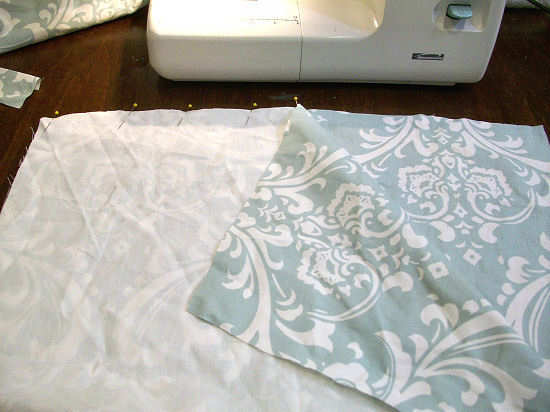
Now pin the top and bottom cushion cover pieces together along the front seam. Sew together and iron the seam open.
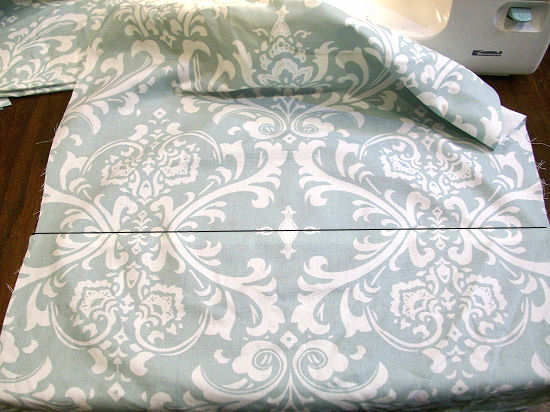
If your fabric has a pattern, the pattern should match up. (I placed a thin black line on the photo below to show clearly where the seam is.)
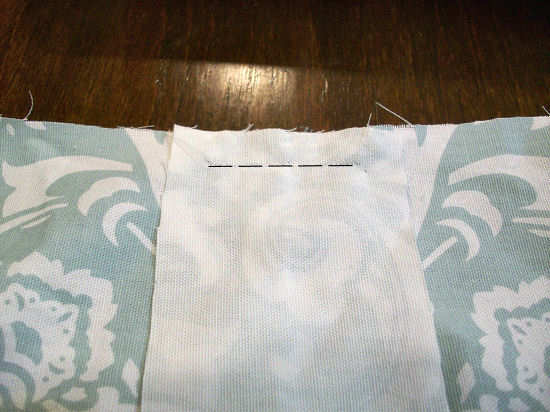
Next, take the strip of fabric that has the zipper in it, and line up the middle of one end of the strip with the seam on the main large pieces.
Stitch those together with a 5/8-inch seam. Start the stitch 5/8-inch from the edge of the strip, and end the stitch 5/8-inch from the other edge of the strip, as shown with the dashed black line below. Now repeat this on the other side, with the other end of the strip to the seam on the other side of the main pieces.
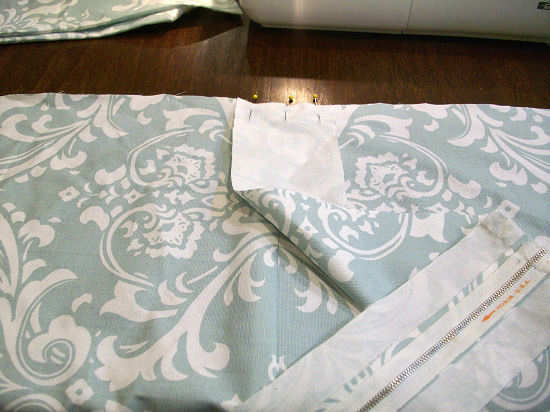
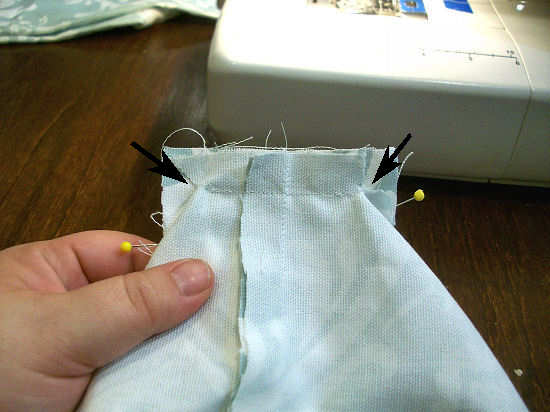
This part is a bit tricky, but now cut a slit in the fabric in the areas shown by the arrows below. Then you’ll be able to turn the fabric and continue pinning the main pieces to the long edges of the strip that has the zipper.
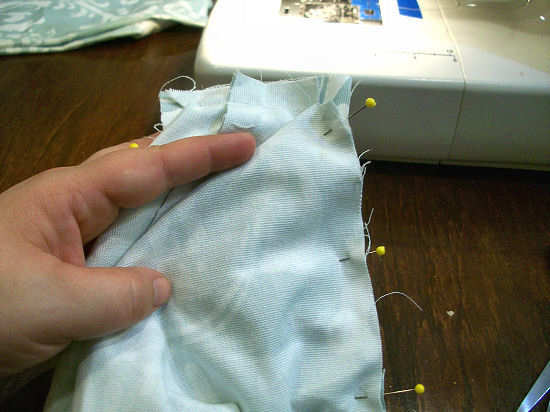
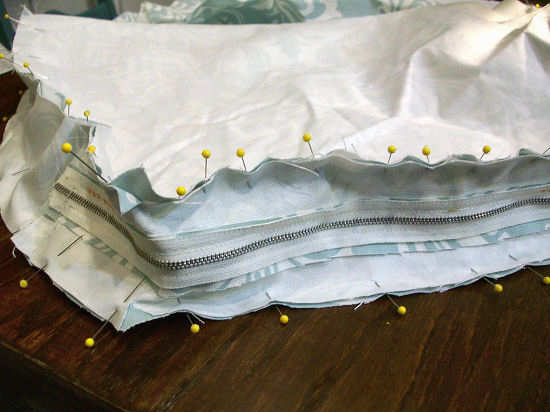
Continue pinning the main fabric pieces to the long edges of the strip all the way around. Be sure to pin the fabrics together on both long edges of the strip.
When it’s pinned all the way around, it will look like this…
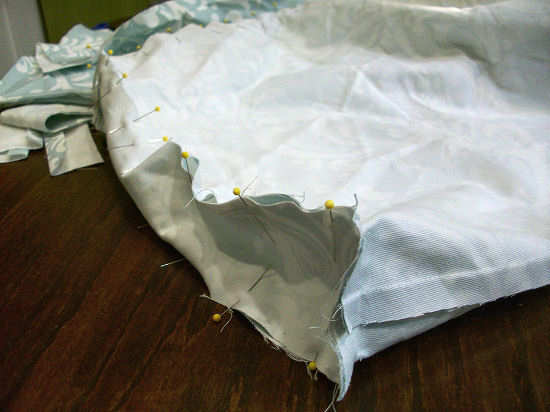
And the back, where the zipper is, will look like this…
Now all that’s left to do is sew along the pinned edges with a 5/8-inch seam, flip the cusion cover right-side-out, and insert the cushion. Then you have this…
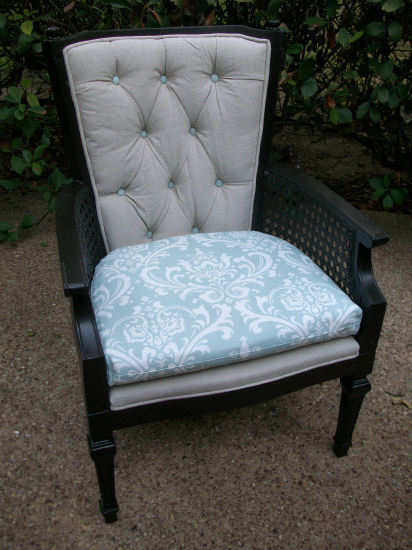
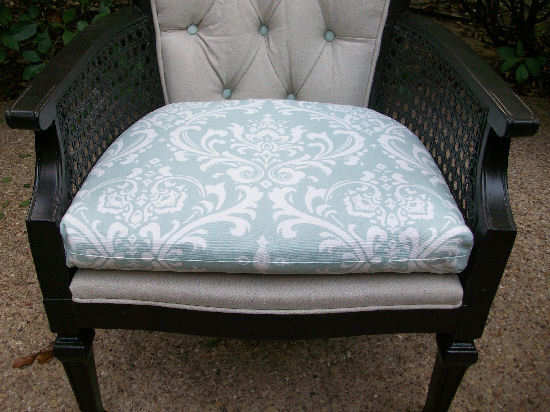
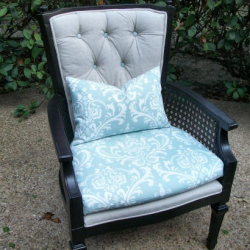
And that’s it! A completely reupholstered occasional chair!

Addicted 2 Decorating is where I share my DIY and decorating journey as I remodel and decorate the 1948 fixer upper that my husband, Matt, and I bought in 2013. Matt has M.S. and is unable to do physical work, so I do the majority of the work on the house by myself. You can learn more about me here.

I was thrilled to find this tutorial! I found 2 of the exact chair and was nervous about reupholstering them but now i think I can do it! Can i ask how much fabric you needed? I love your site, thank you!
Hi, Kristi, thats great, thank you very much for your job. I’m a begineer, but now i know, that it’s not so hard to reupholstery french chair.
Thanks so much for this wonderful information. Very useful and easy to follow with the illustrations. Keep up the good work
I love this tutorial. I pinned it a while back because I have a very similar chair that I had been meaning to reupholster. It looks like the pictures are missing from parts 3-5 though.. Any way to get those added back in?
HELP! This looks like a fabulous tutorial but the images for parts 3-5 are broken! I hope you can get them back up because yours is the best tutorial I’ve seen on occasional chairs yet!
What an excellent tutorial. I’m picking up a chair like this today and am way more confident about reupholstering it now! Thank you!