The Wall That Turned Me White As A Ghost (From Ugly And Rough To Skim-Coated Beauty)
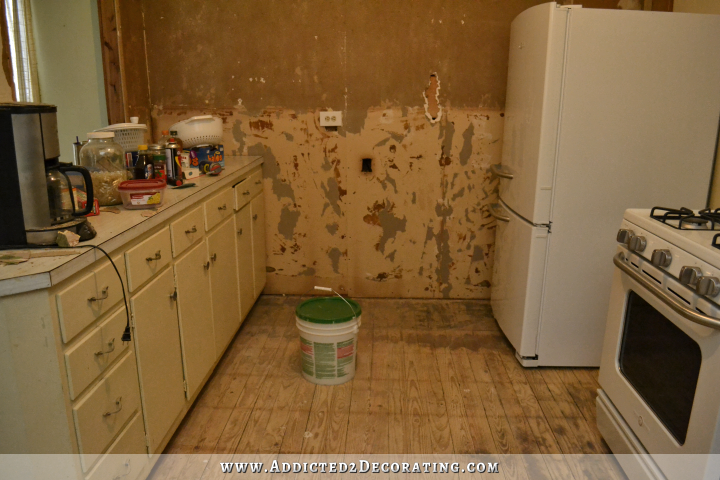
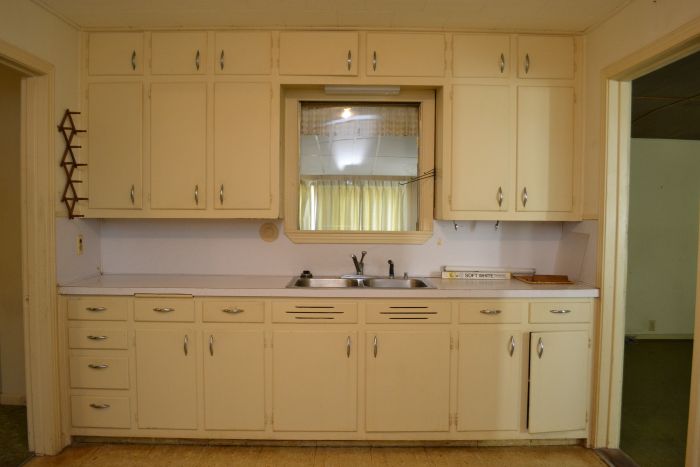
Remember how ugly and torn up the end wall in the kitchen was after my father-in-law and I removed the cabinets, and then I scraped all of the paint, wallpaper, and other stuff off? (Not the mention 10-inch-long exploratory hole that I gouged out of the drywall.)
Well, after an entire weekend of taping, repairing holes, skim coating, and sanding, that wall is now super smooth and ready for primer and paint.
I know that probably seems very boring to some of you, but after working on it the whole weekend, it’s one of the most beautiful things I’ve ever seen. 😀
Of course, it’ll be even more so once I get primer and paint on it. I’m hoping to do that today.
So for those of you who may have never done this before and want the details, let me show you how this wall went from a super rough, gouged, and torn up to patched, super smooth, and ready for paint.
I started the other day (I think it was Friday) with just a few smears of drywall mud on the wall, just to see if this whole skim-coating thing would work on this wall. I was using a 12-inch drywall mud pan, and a 10-inch mud knife.
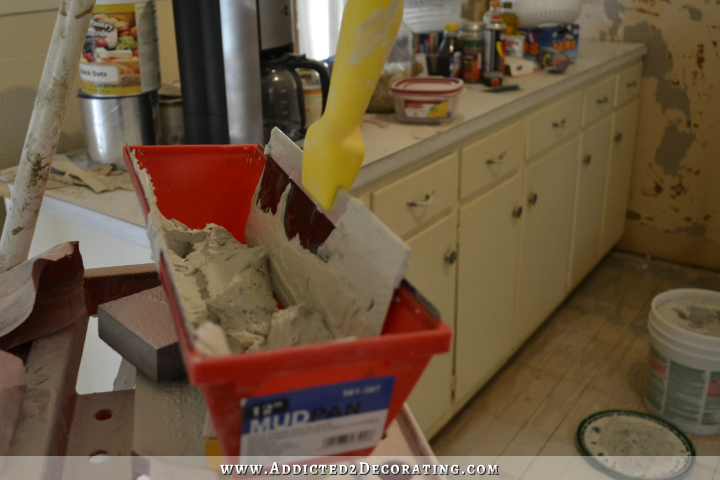
And I always use the pre-mixed drywall mud. You can see the container sitting on the floor in the pic above. A 5-gallon container like that costs under $15.
So I smeared some mud onto the wall in the middle just to test it out. It’s kind of like icing a cake, but the goal is to use as little drywall mud as is needed in order to smooth out all of the rough areas.
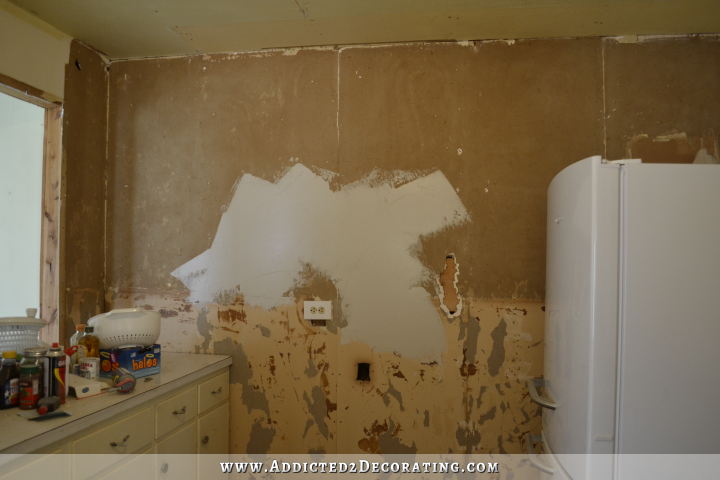
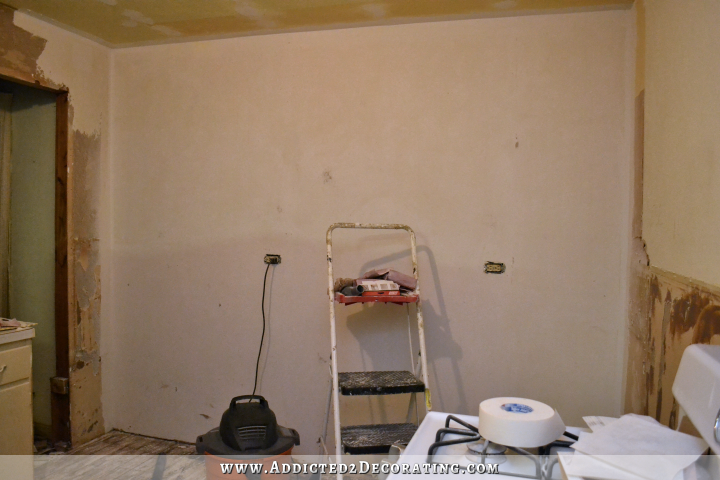
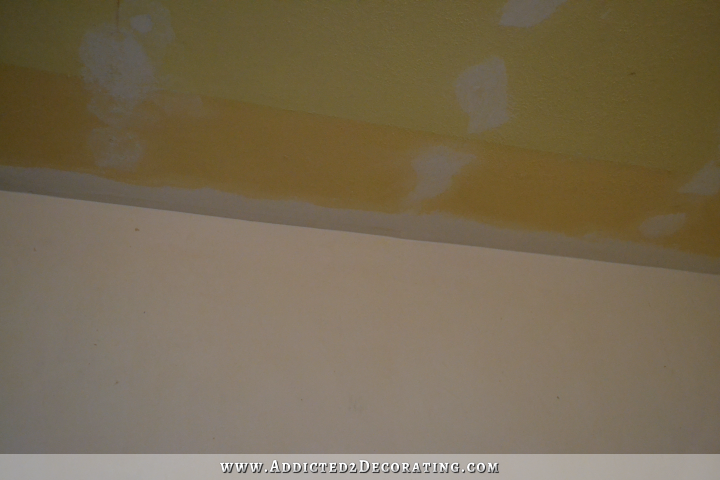
I was convinced that it would work, but as you can see, I kind of got ahead of myself. I still had the top edge of the wall (where the wall meets the ceiling) to patch with drywall tape, and I still had a couple of rather large holes to fix.
In order to do the top edge of the wall, I used this paper drywall joint tape. A big roll of it is super cheap.
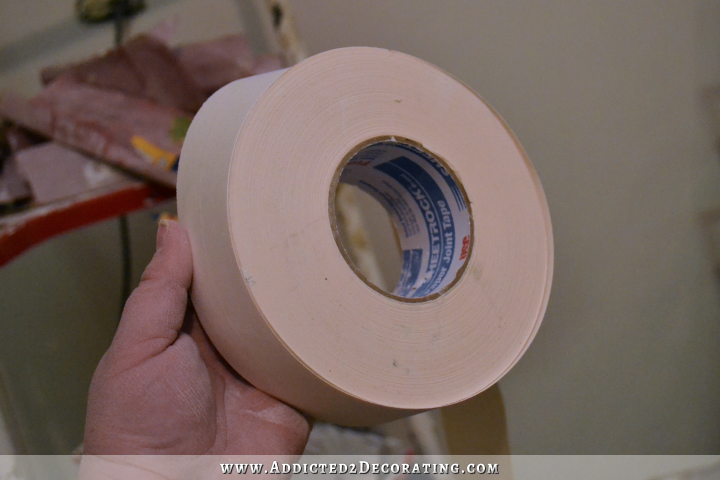
At the home improvement store, you’ll usually see all kinds of fancy joint tape, like self-adhesive mesh and such. I’ve tried those, and I’ve never been happy with the results. I always come back to this super cheap paper stuff.
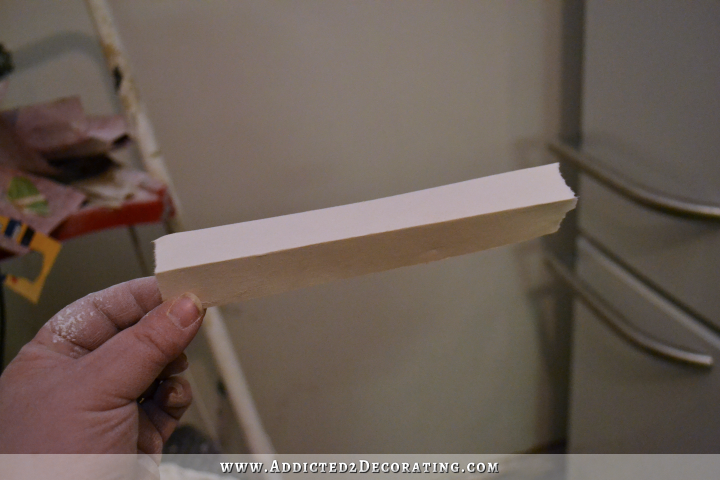
I love the fact that it’s pre-scored right down the middle so that folding it along the middle lengthwise is a cinch.
To put it on the wall, I use a little 3-inch scraper/putty knife (sorry…it’s covered in dried mud, but you get the idea)…
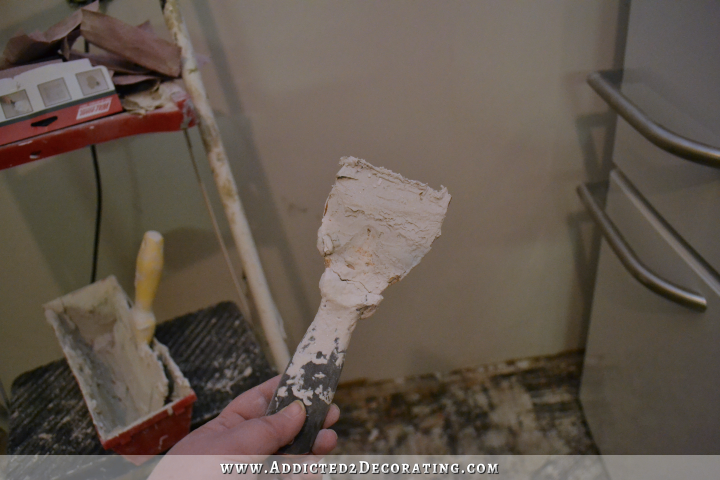
…and I smear some mud across the top of the wall, and along the edge of the ceiling — just enough to make the tape stick. Then I put the tape on, use the scraper like a squeegee to get the excess mud out, and then mud right over the top of it to hide the tape.
For holes in the wall, I like to use these wall patches.
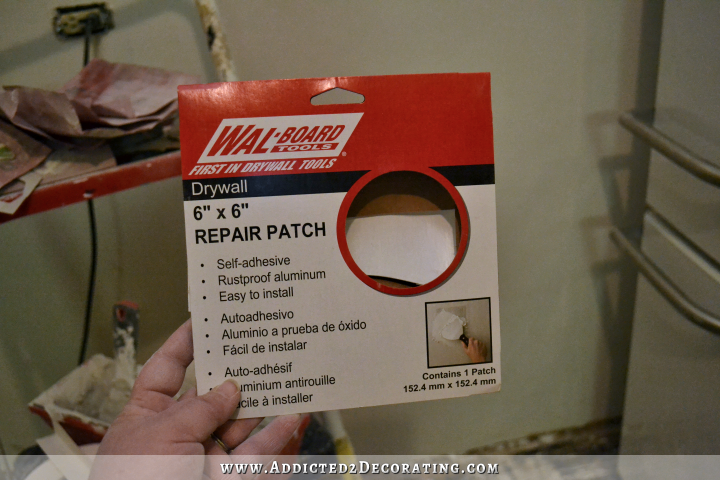
They come in three or four different sizes, and because they have a thin metal backing, they’re super strong.
I didn’t take pictures of the actual product or the process, but it’s just a self-adhesive square of thin metal with a mesh over the top. You just stick it to the wall, and mud right over it. It’s very simple and straightforward.
So with all of those repairs done, I was finally ready to skim coat the rest of the wall. It was very time-consuming and then took several hours to dry (I left it to dry overnight with two big box fans running in the kitchen). Then the next day I started sanding.
I’ll admit, I love sanding drywall mud. It sands so easily and smoothly. What I don’t love is the mess it makes. By the time I was done with the initial sanding, I was covered head to toe with white dust. I looked like a ghost. 😀
After the initial sanding, I used a tip that someone gave me on my Facebook page. They said to use a flashlight to be sure that you don’t have any cracks or divets in the drywall. Brilliant idea! So I used my flashlight and held it an an angle so that any uneven areas would cast a long shadow…
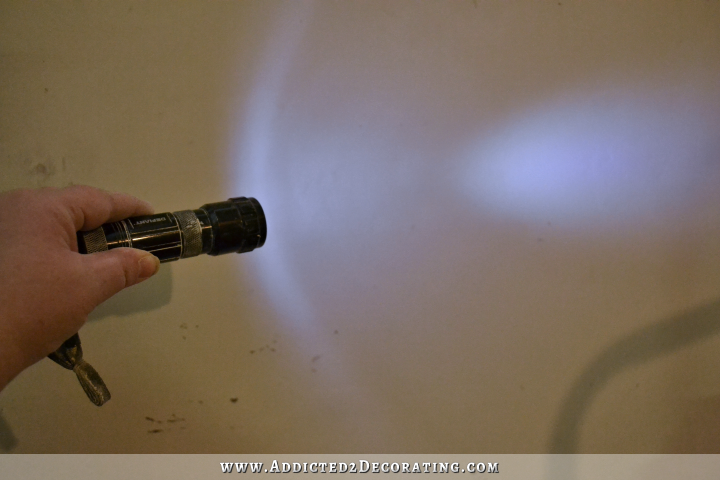
and then I used my small 3-inch scraper/putty knife to fill in those small areas. That didn’t take long at all to dry, and I was ready to give it a final sanding.
And the result is a beautifully smooth wall, ready for primer and paint…or texture, if you choose to texture your wall.
One lesson that I’ve learned personally about wall texture is that you never want to count on wall texture to cover or disguise any cracks, uneven areas, divets, or any other imperfections in your drywall. As I was told by the drywall guy who did the texture in our first house that we built in Oregon — texture isn’t a miracle worker! 😀
So even if you’re going to texture, you still want to start out with a wall that’s as smooth as possible.
I’ll eventually be removing the outlets in the wall (or I should say that my brother-in-law will eventually be doing that) and once they’re gone, patching those holes will be quite simple using those wall patches I showed you above. You’ll never know these outlets were there.
But this wall has come a long way, right?
In other news, I got a kitchen sink! I had originally planned on using an undermount stainless steel sink like I had in the condo. But the more I thought about it, the more I was convinced that what my little vintage house needs is an enameled cast iron sink that will bring the white of my appliances over to the sink side of the room, especially since I’ve decided to use a dishwasher that will be covered with a cabinet panel rather than the dishwasher that matches my appliances.
So before plunking down a few hundred dollars on a new one, I decided to see what ReStore had. And they had one that I really liked! Of course, when I got it home, it looked like this…

I didn’t realize it when I bought it, but this is a Kohler Hartland sink, and it retails on Faucets Direct for $322. And I got mine for $35! Score!
I set it in my front yard and gave it a good scrubbing with the hose and a sponge. It cleaned up pretty nicely.
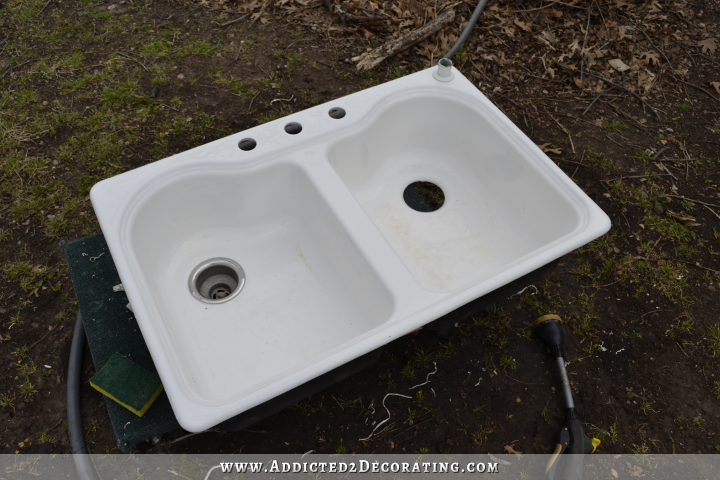
It still has some scratches and discolored areas in the bottom, but I haven’t tried any cleaners on it yet. I’ll try some Barkeeper’s Friend and see if that works, plus I’ve also ordered some Kohler Cast Iron Cleaner, which I’ve heard can work miracles on the scratches. So we’ll see! Either way, I don’t really care. If it’s not perfect, then perhaps it’ll just look original to my house. I’ll just call it “charm.” 🙂

Addicted 2 Decorating is where I share my DIY and decorating journey as I remodel and decorate the 1948 fixer upper that my husband, Matt, and I bought in 2013. Matt has M.S. and is unable to do physical work, so I do the majority of the work on the house by myself. You can learn more about me here.
I am going to hound you until you ditch that sink and go with the under mount stainless. Having been down this road already, everyday you will be faced with a sink that needs more attention than an aging face.
This is so true. :\ mine is a nightmare. So many scratches everyday. I clean it back to new everynight.
I also live in an apartment where no one has cared for it thougb. And I just finished chipping some god awful cover up paint they tried fixing it with. So maybe it just needs some new enamel.
This is not boring at all! It’s all part of the process and I love seeing how things come together. You are doing great. Very nice job on the sink as well! It will be perfect, and the price is awesome.
Love the sink – what a great find! I managed to find a model on clearance when I was last doing kitchen stuff. Loved the heft of the cast iron compared to the stainless steel one I replaced, but my deal still wasn’t nearly as good as yours!
On the drywall, I’m impressed as always. I find a certain zen in painting but the zen of drywall mudding and sanding, not so much! LOL
looks great! amazing what a little patience and drywall mud gets ya! i’ll admit, i’ll always been terrified of it, but seeing this gives me a little more confidence.
Your wall looks wonderful and I am glad you explained about the outlets, they were bothering me. I like your sink, I have had mine (kind of like) for 19 years, it has a few pings and such, but I still love it. I think stainless steel is much harder to keep looking nice.
Hey Kristi, with the sink, what about refinishing it like you did your tub? Do you think that would fill in the scratches and make it look shiny and new?
Woohoo! One wall done, just three more to go. Were you able to make any progress on the ceiling? I love the idea of the white cast iron sink to balance the white of the appliances on the other wall. I think the cast iron/porcelain will fit right in with your vintage style appliances.
Congratulations on a job well done, my dear. What color will you paint the wall?
Mudding an entire wall is a feat worthy of endless praise! ~;)
I’ve patched holes before, but have always been severely intimidated by this larger wall-encompassing task. I imagine the first time I attempt it I’m going to have an entire wall full of light & shadow valley highs and lows. It just seems like a task where great skill is needed to accomplish the kind of smooth needed to foundation-well a layer of paint. OK, I need to stop thinking about this now. lol 😛
I love the sink and I know you will too! I have one and I love how it just brings back childhood memories! Are you going to finish mud work on the rest of the kitchen before painting? You did a great job!
The wall looks perfect! Thank you for the steps you took – just need to know what sandpaper you use to sand draywall. Is it a sandsponge and what grit?
I think we should call you the Miracle Worker. Since finding your Facebook page and then your blog, I’m amazed at the things you are doing and have done already. Wish I had the confidence to do this.
Before you go through the trouble of a bunch of different cleaners, try out a regular ol’ pumice stone (yes, like the kind you use to scrub your feet) on those dings/scratches on your sink. I was terrified the first time I tried it…I thought I was going to scratch it all up…but I was shocked at how much of a miracle worker pumice is on porcelain sinks/toilets (gets the hard water ring out!!!!)
aWesome! I had that exact sink in stainless at our old house. I LOVED it! It fit a 13 x 9 baking dish beautifully, and larger skillets with handles… oh how I loved that sink. The one in the new house only has one side that is larger like that. I miss that other sink. Our Realtor that helped us with our old house said everyone commented positively on the sink. It was the largest, deepest sink that the cabinet could hold and still have a disposal (it had previously had a very shallow single opening sink). I love to cook and this served me well.
I’m addicted 2 your website!! I have always wanted to build things and repair stuff on my own. I wouldn’t even know where to begin. I wish you I could just come work with you for a weekend..haha! Love the detail tutorials 🙂 THANK YOU SO MUCH!
Great find on the sink, coming along nicely. Wish I had you energy. I’m anxious to see your color choice.
You do a beautiful job so quickly. Already quite a transformation in this kitchen.
What a difference a coat of compound makes! It looks great and you’ve already made progress. Your sink will look great in your completed kitchen and will definately look like its retro to the age of the house – nice job!
I have a sink just like that. They are so easy to clean, really! I use ceramic stove top cleaner. It’s effective on scratches and marks from pots and won’t damage the sink. For my coffee stains- I’m an addict- I spritz it with Clorox Clean Up and rinse out a few minutes later. I love my sink so much more than the stainless one in my old house. You will love it..and what a deal!!
OMG, why haven’t I thought about the Restore for my kitchen sink? I bought my bathroom pedestal there as well as my slop sink for the laundry. Brilliant! I’m stopping there this week for sure. Now drywall is another story, I hate it and kudos to you for doing the sanding yourself. I can’t wait to see the big reveal.
After having made some medium sized changes in my livingroom that called for drywall mud and sanding, and drywall mud and sanding, and drywall mud ….. well, you get the idea! I am so impressed with how your wall turned out and how quickly you were able to achieve it. There are other projects around my home that need the same kind of attention. I was putting them off indefinitely because of the endless experience in the livingroom. You have given me inspiration to try again! How would you like to come to Florida for a “vacation”?
Wow, are you lucky! Father-in-law doing this, brother-in-law doing that. If we all had that support we would get a lot more done.
No need to be so snarky. I think it is great she has help. Maybe we can all just take a minute and color you green.
Definitely nasty comment and not necessary.
Kristie has bought the house, planned and shed plenty of sweat and tears. I am doing the same with my house, just because someone skilled comes in at the end to do some essential doesn’t take away from what she has done. – And lets remember she is having someone do the electrical (as required by licencing) and someone help her remove overhead cupboards, that is not a single person job.
Love the sink, very charming! Nice drywalling too!
I have the exact same sink and I love it! It’s the sink we installed when we built our house in 1999. It is still white as ever all I do is spray it with Clorox like the other commenter above and it cleans it right up. If one of my pans make a mark, all I have to do is sprinkle a little comet and lightly rub then rinse and it comes right off. I’m enjoying seeing the progress on your kitchen.
I had some rough plaster walls in my house. I got this drywall vacuum system and I swear it changed my whole outlook on projects involving sanding drywall. It is amazing!! I would make sure, however, that you invest in a HEPA filter for your shop vac to keep it from blowing dust back into the air.
http://www.amazon.com/Hyde-09165-Dust-Free-Drywall-Vacuum/dp/B00097D2K4/ref=pd_sim_hi_4?ie=UTF8&refRID=0Z1XCMTGYC1TNR3QEG0A
Just use Kohler Cast iron Cleaner. I bought a nasty cast iron sink from the salvage yard it worked magic, looks amazing. And everyone thought I was crazy.
Really impressed with your progress and have dropped all other DIY blogs except you and Young House Love. Question though. If you are putting a wall of counters and upper cabinets on this wall, won’t you need some outlets to plug things into?
You hit the nail on the head with the “texture isn’t a miracle worker”! The home we bought last summer used to have wallpaper everywhere. Instead of removing all of it, someone gave up half way through the process and mixed heavy texture into the paint and painted over the half done job. Yeah, I can still SEE where the paper wasn’t removed or wasn’t completed removed, as well as gouges where they scraped too much off. So now, room by room, we have to fix the walls the right way. Sometimes I think it would be easier to remove the old drywall and replace it with new, but since that’s not cost effective, we’re just tackling it one room at a time!
Thank you for turning me on to ReStore as well, they just opened one down the street from my home and we scored a fabulous counter top for the bathroom vanity we’re building!
How about instead of removing that wall outlet, move it over. Can never have enough outlets! The wall looks like it’s ready for some makeup. And I, too, have a big white ceramic sink like yours, and I love it! All it takes is a Mr. Clean sponge thing and, bam!, it’s ready to go. More and more exciting!
When you make your bank of cabinets, how about incorporating a piece of furniture for the middle, like a china cabinet or something to break it up a bit. I love furniture in the kitchen. It makes it so custom. So glad you’re working on the kitchen!
Thanks for the tutorial on the drywall patching..your house is really coming along…thanks for sharing..I am fixing my house up also so a lot of good insight. 🙂 Love you blog!
Awesome job on the wall! That, to me, is a huge undertaking. Great score on the sink! I love white, cast iron sinks! I grew up with them and the lasted forever (never had to replace one) and always looked beautiful.
I’m sitting here with my chin on my chest. You are amazing! I don’t think there’s anything you can’t do! That wall was a HUGE project. I remain duly impressed by your skillz (<— yep, with a "z").
I came across this blog post because I too just found a Kohlker Heartland sink at our local ReStore. 🙂 Your kitchen reno looks exactly like ours. I am almost done with the walls now. Best suggestion we got for reducing the amount of dust was to attach the orbital sander to a shop vac with a HEPA filter.