Kitchen Hardwood Floors Are In! (Eight Installation Tips From A Novice)
What an amazingly productive weekend I had! Things are moving right along on the kitchen. I spent most of Saturday installing my new hardwood floors in the kitchen, and then Sunday morning, my sister Cathy and brother-in-law Bill came over and Bill taught me how to install all of the plugs and switches, and how to connect all of the wires in the breaker box. I went from being so scared of all of that stuff, to really feeling confident that I know what I’m doing. And after they left on Sunday afternoon, I finished up the installation of my hardwood floors.
On a side note, did you know that when you’re wiring up outlets and light switches, you don’t have to wrap the wires around the little screws on the sides of the outlets and switches?! I had no idea! That always seemed so tedious to me, and I was afraid I would mess up and not make a good connection with the wire. Turns out that I was making it much harder that it needed to be. Those switches and outlets have little holes in the back where you insert the wires. Just strip them about 1/2-inch, and stick them into the appropriate holes. So stinkin’ easy!! I can’t believe I never knew that!
Anyway, I didn’t get my cabinets installed like I had hoped, but that’s okay. I realize that I set unreasonable goals for myself, so I’m cutting myself some slack on this one. 🙂 So let’s take a look at what I did accomplish!
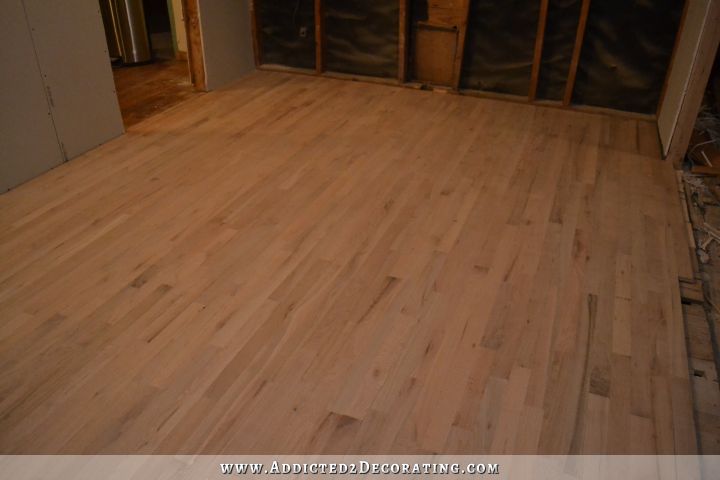
(Hopefully these will be the last photos I take in here with awful lighting. My recessed lights have power now, but I could only find one light bulb!!)
Here’s a time lapse of my progress. My goal was to take a photo after every 20 minutes of work, but I obviously forgot a few.

It took me about 10 hours of work over two days to install the whole floor, including repairs I did to the subfloor along the way. The process was really quite easy and very straightforward, so this is definitely a project that a novice can do.
But I did learn a few things along the way, so I want to pass those along to you.
1. You don’t need expensive tools.
When I found out that no tool rental places in my city rents out flooring nailers (and yes, I did check Home Depot — ours doesn’t rent out tools), I was frustrated at the thought of actually having to purchase one. I went to Amazon and found the cheapest one I could find. I ended up with this Hard Core Tools flooring nailer![]() * for $129.99.
* for $129.99.
This thing was perfect! I used it with my Porter Cable 6-gallon 150-PSI air compressor that I got at the end of last year, and set my compressor to 120 PSI. I can’t imagine any need for a more expensive nail gun for a DIYer. Save those expensive things for the contractors who use them every day.
2. Don’t be afraid to whack the nail gun pretty hard.
Here’s what a flooring nail gun looks like, and it comes with a rubber mallet that you use for striking the plunger thing on top of the nail gun.
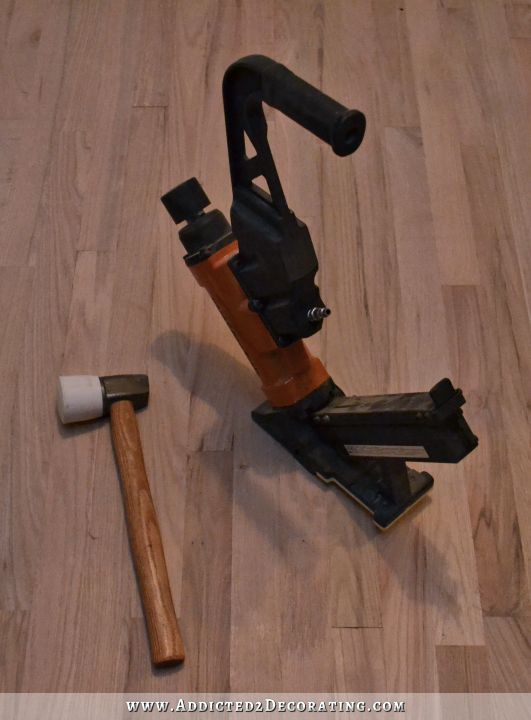
Before I started, I read the entire instruction manual for the nail gun (something I rarely do), and it said very specifically that you should not strike the plunger too hard or you could damage the nail gun. So the first few times I tried, I was getting misfired cleats that were sticking out about an inch.
I was incredibly frustrated, and had just about determined that I had a defective nail gun. But then I decided to turn my compressor up to 120 PSI (the max allowed for this nail gun), and then whack the heck out of the plunger, and it worked perfectly.
So the lesson here is that you don’t need to hit it with all of your strength, but you also don’t need to be gentle with it. You can (and will probably need to) hit it fairly hard.
3. Don’t be afraid to hit the wood with the metal side of the mallet.
The rubber side of the mallet is for striking the plunger on the nail gun, but the metal side is for striking the edge of the floor boards to get them into place and close up any gaps.
When I first read those instructions I thought, “Have they lost their minds?! I’m not going to hit the wood with a hammer! It’ll ruin it!”
Turns out, they know what they’re talking about. You’d be surprised how much force I used on some of those pieces to when hammering them into place, and yet I didn’t ruin a single “tongue” on any of the pieces. I was very surprised.
Of course, I was also installing oak, which is a hard wood. If you’re installing pine or another soft wood, you’ll want to test out how hard you can hit it.
4. Use the right fasteners.
Okay, obviously you need to use the right fasteners, but when I read the instructions and saw that I needed to use “L” shaped cleats, I had absolutely no idea what those were. The Amazon listing for the nail gun said that I could find them at Home Depot, so I went there and wandered around until I found them. (I’m one of those people who hates asking for help.) 🙂
Here’s what these “L” shaped cleats look like.
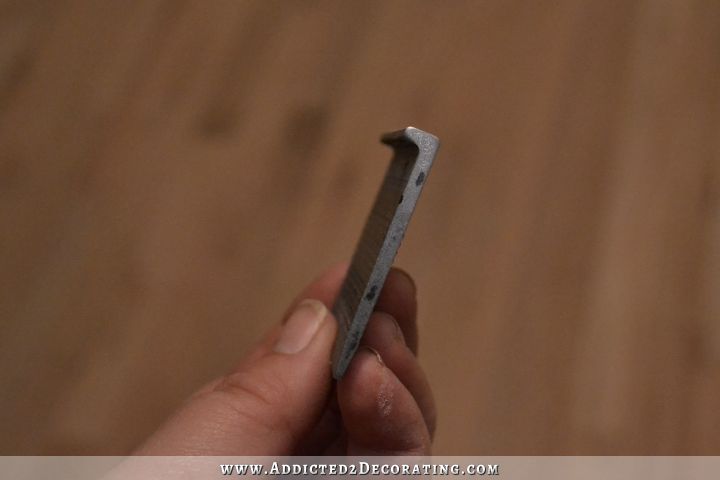
The nail gun that I used will take 16 gauge cleats like these, or it’ll take 15.5 gauge flooring staples. I couldn’t find any staples labeled “15.5 gauge” at Home Depot, so I had no choice but to use these cleats.
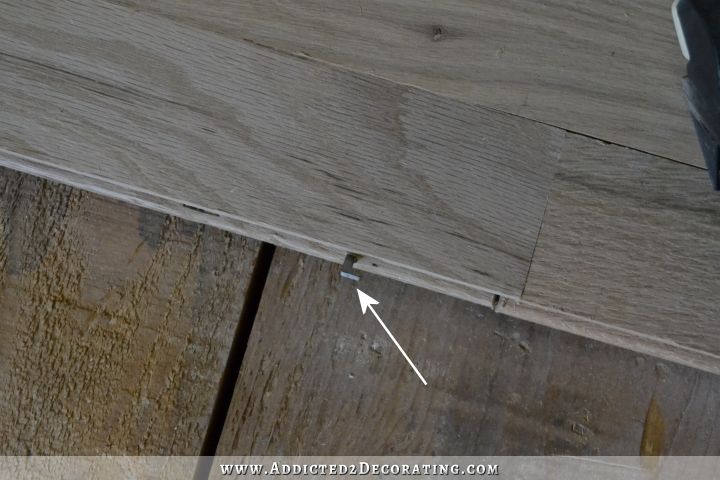
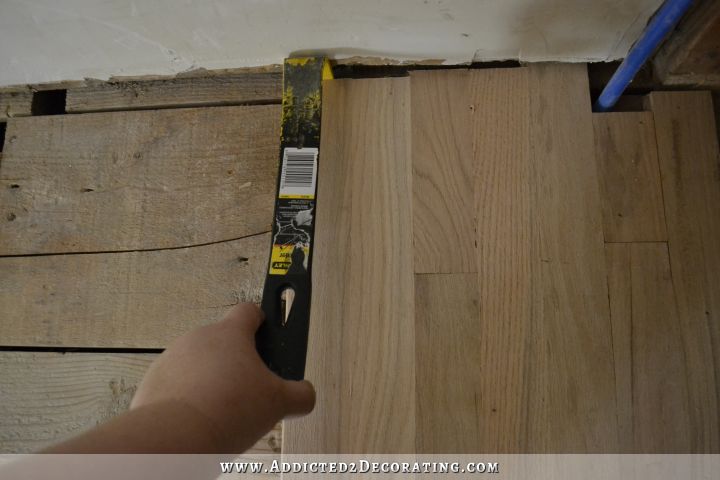
5. Cut off misfired cleats rather than pulling them out.
The first few times that I had a misfired cleat (always due to user error and not tool malfunction), I tried to pull them out. Well, those little things are so incredibly hard to pull out. It’s hard to see on the photo above, but the cleats have rough edges that really hold them into the wood. I tried prying them out with a hammer and the nail removal slot on a pry bar. I tried pulling them out with pliers. None of them would easily remove the misfired cleats.
I finally realized that my Dremel Multi Max oscillating tool![]() * with the carbide blade
* with the carbide blade![]() * would be my best friend for this particular situation.
* would be my best friend for this particular situation.
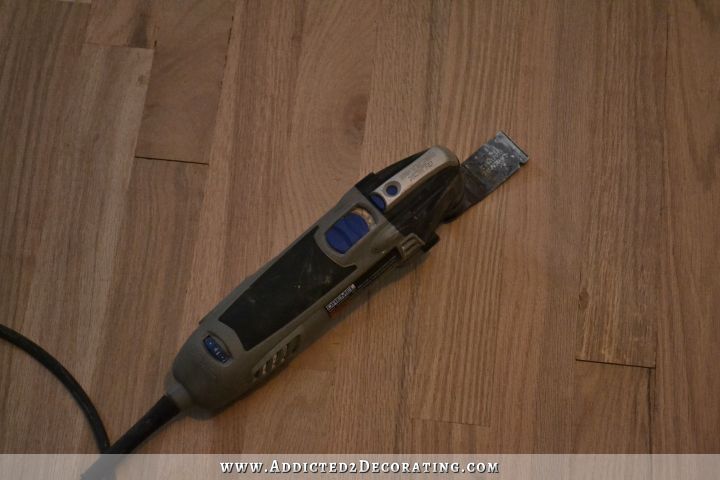
Rather than trying to pull, twist, and pry the cleat out, I simply used my Dremel and cut off the part that was sticking out.
It took about three seconds, and zero frustration to remove a misfired cleat.
During this whole kitchen remodel, this tool has come in handy time and time again. But even if I had purchased it for the flooring installation alone, it would have been totally worth it for the time and frustration it saved me.
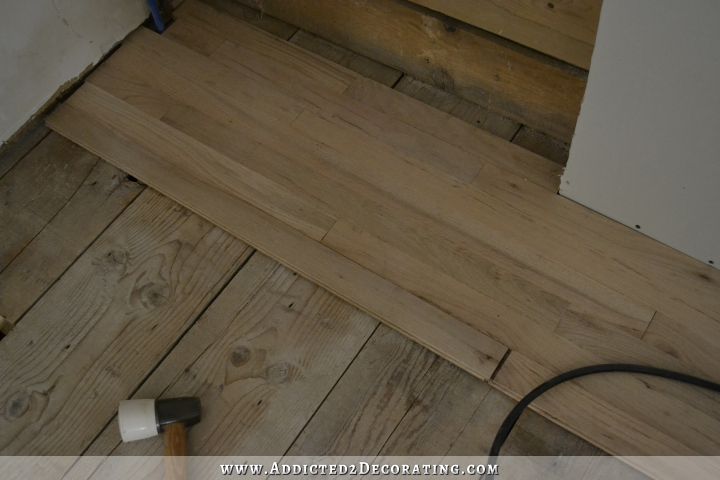
6. Straight, random match pattern is by far the most economical.
Okay, this is kind of common sense. If you do a straight, random match pattern with your flooring boards, you’ll use a lot less wood that you would if you were doing a chevron pattern, right? So that means that if you’re on a very strict budget, and looking for ways to cut costs at every turn, this is one of the ways that you can do just that.
I knew that. I think everyone knows that. But what I didn’t realize is that a straight, random match pattern isn’t just a low waste method of installing flooring. It’s a zero waste method of installing flooring. Literally, the only waste I had when I finished was the one piece of wood that I cut wrong because I wasn’t paying attention. Other than that one board, I had zero waste.
Here’s what these flooring boards look like. Many (most) of you probably know this, but I didn’t — the boards don’t only have tongues and grooves on the long edges of the boards, but they also have tongues and grooves on the short ends.

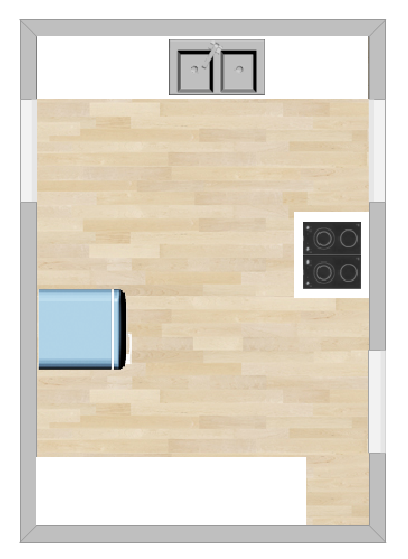
I installed my flooring starting on the left side and working towards the right side (with me standing on the new flooring as I went along, and facing the side of the room that still needed new flooring).
So once I got to the end of a row on the right side, I cut the last board to the length I needed, and then I used the leftover to begin the new row. That way the cut edges (the edges that had neither a tongue nor a groove) were against the walls.
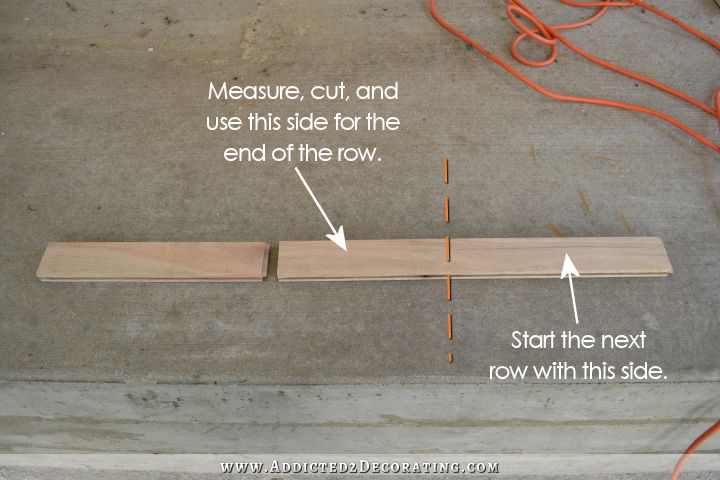
Zero waste. None. Nada.
Amazing.
That means that the 20% extra that you’re always told you need when you order flooring will literally be left over when you’re finished. I bought my 20% extra, and I still have almost two full bundles of flooring sitting in my breakfast room.
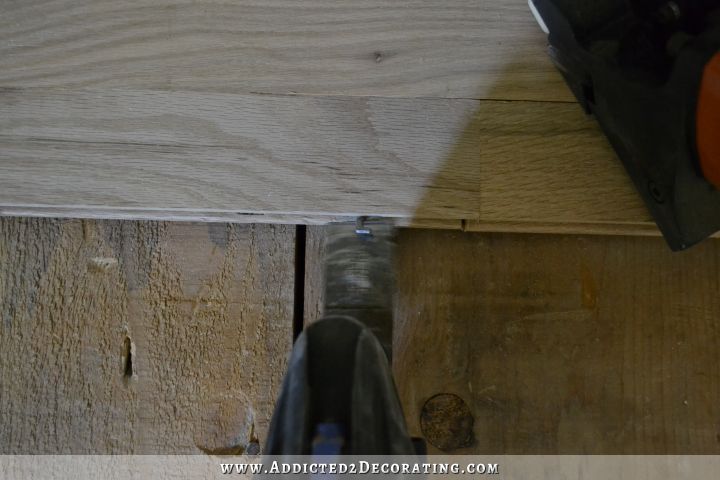
7. Use a pry bar to close gaps on the last piece of each row.
On all of the pieces of each row, you can use the metal end of the mallet to force the board into place and close up the gaps.
Except on the last piece of each row.
The first time I put my last piece into place and had a gap, I sat there staring at it, mallet in hand, thinking, “What the heck and I supposed to do?!”
All that’s needed is a pry bar. Just put it into the expansion gap that you left at the end of the board, and pry the piece over to close the gap.
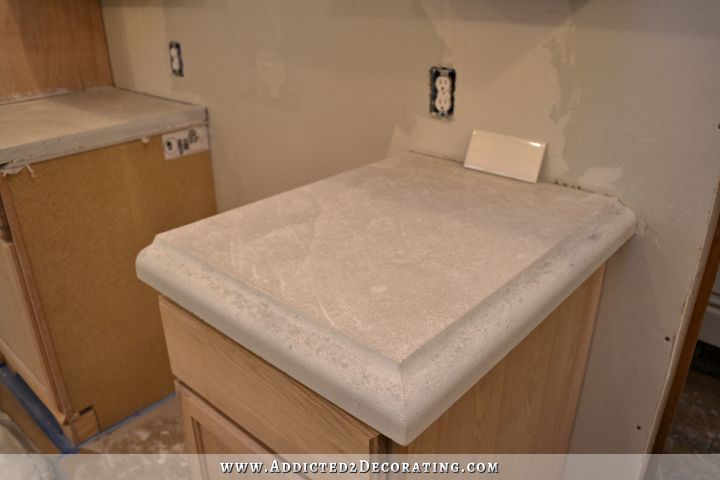
8. Beware of subfloor repairs.
If you live in an older house like I do, with subfloors made of lumber (mine are done with 1″ x 10″ lumber), be very cautious about doing subfloor repairs. Only do them if absolutely necessary.
That old lumber isn’t pretty to look at, but it’s incredibly strong and…well…amazing. (At least in my case.) But I did have three areas that needed repair, so I cut those sections out right on top of the floor joists (again, using my Dremel Multi Max) and replaced those sections with new lumber.

I HATE that I had to do that. New lumber just isn’t anything like that old lumber. The new stuff is softer, and no matter how long I stood there in Home Depot looking through the pieces, finding one that wasn’t warped was virtually impossible. Plus, the new 1″ x 10″ lumber is narrower than the old stuff, but it’s also a bit thicker than the old stuff (probably because the old stuff has had six decades to dry out).
Ugh. I seriously hate that I had to use new lumber.
It worked out fine in two places, but in one place I literally have a ridge underneath my flooring where the new lumber meets the old lumber. I didn’t think it would make that much of a difference, but it does. I could have taken care of it with a planer, but that’s another tool that I don’t have. So now I’ll live with a ridge in my floor because I had to use new lumber to make repairs. And unfortunately, it’s right in the walkway between the kitchen and breakfast room. Just…ugh.
And I think that’s it! Those are all of the things I learned along the way with this flooring installation project. It took a long time, but in no way was it a difficult project. But I will say that my butt and hamstring muscles haven’t been this sore in a very long time. It’s a great workout! 🙂
And finally, because I know at least a few will mention it, no I didn’t use a moisture barrier. I went and looked at the options at Home Depot, and decided against it in the end. The rest of my house just has hardwood flooring right on top of the subfloor and it’s survived that way just fine for 65 years. And I wanted this new flooring to blend seamlessly with the old flooring.
I will probably do some sort of moisture barrier/insulation under the house (read: I’ll hire it out, because I don’t get under the house) at some point in the future, but it’ll go under the subfloor rather than between the subfloor and flooring. But that’s a project for down the line. Because right now, I’m anxious to paint my new floor. 🙂
*Post contains affiliate links.

Addicted 2 Decorating is where I share my DIY and decorating journey as I remodel and decorate the 1948 fixer upper that my husband, Matt, and I bought in 2013. Matt has M.S. and is unable to do physical work, so I do the majority of the work on the house by myself. You can learn more about me here.


You never fail to amaze me! The floor looks fantastic. And you had better cut yourself some slack or else! LOL Not even Superman could have laid a floor and completed electrical wiring as well as put up cabinets! LOL Are you going to paint the floor before putting in the cabinets? Are you planning to paint the floor under the cabinets as well? If so how long will you have to wait for it to dry before you can move around on it and hang and place cabinets? So many questions!!!! Oh never mind, I will read the answers as you complete the kitchen. LOL ( I am such an Addicted 2 Decorating junky!)
I’m planning on painting the floor before I install cabinets. I considered both ways, but I think it would be easier to paint without having to work around stuff, plus I would still need to seal the floor that goes under the cabinets, so I’ll just do it all at once. and then install cabinets. Since it’s all water based stuff I’ll be using (paint and sealer) I think I’ll just need to wait a couple of days before moving the cabinets in..
We have just bought an old house that needs a LOT of TLC. The one thing everyone keeps telling me is that when I need to replace any wood in the house is that it is true. An old 2 by 4 is exactly 2 by 4, not like today’s wood you buy, and that I would have to go the next size larger and rip it down to size.
I am excited to see how your kitchen is coming along.
Jeannie @ http://www.YourInteriorDesignJeannie.com
Wow Kristi, your floor looks wonderful! Such a great explanation of the process too. I swear girl, you are a force of nature! 🙂
Holy cow – what a job and it looks great! I am debating doing my own floors in a house we own … this coming weekend (one room only for now). You’ve inspired (yet terrified) me! I’m going to think about it more today and then … we’ll see!
No, don’t be terrified! 🙂 It’s really so simple.
Seeing that new wood floor makes me cringe when I think about it being painted…but I understand your vision and I’m sure it will beautiful. Great job on getting it all done…can’t wait to see it when it’s finished.
I thought the same thing about painting that beautiful wood, so I’ve come up with an solution that I’m pretty excited about. You’ll have to wait and see, but I think you’ll be pleasantly surprised. 🙂
Me too, new wood – but I will wait for judgement lol – I actually thought about paint our pine wood in our front den — its the first time I have thought about painting wood – but I always love what you do ….
You are such an inspiration! The floor looks great, probably better than if you had let the “pros” do it, so don’t worry about the slight lump where you repaired the sub-floor. You will always notice things like that way more than anyone else.
Wow, what a week-end ~ I’m so impressed with how much you are able to get done. I put down laminate flooring in my kitchen last summer and it seemed to take forever to get done. Excited to see the floor painted!
Floor looks great! I am in awe of you!
Great job!! I’m a girl who loves power tools..
I know you are excited to get the flooring down. We put hardwood in our bedroom, and I could barely move for a few days afterwords- and that was with both of us working on it. Yikes, girl, give yourself a break!
It’s looking GREAT!! You are doing such a good job with all of that! When next you need a planer, email me….
Blessings,
J
I should have known you’d have a planer!! 😉
ummmmmm yes, and a few other toys as well :^)
Gorgeous! Can’t wait to see them painted!
Wow! What an accomplishment! Looks fabulous!
Living Room Idea:
I was cleaning out some old books and low and behold I came across a booklet from Ralph Lauren Paint. I looked through it and they have some techniques on faux painting. The Indigo Denim totally reminded me of GRASSCLOTH wallpaper, but I would minus the vertical stroke.
I KNOW you could do that application and make it look identical to grasscloth! Just an idea!! I can send you the booklet…or email you the page, if you like. Let me know.
After figuring how much it would cost to use the real stuff in my living room and entryway, I’ve definitely been contemplating doing a paint treatment to replicate the look. I’m sure it would take some practice to get the look just right, but it would be worth the savings.
I’d love to see the picture that you have! You can email me: [email protected]
Thanks, Cate!.
Wow it ooks good… I’m glad your still on facebook coz’ my subscription to your blog isn’t coming through to my emails, nor any other bloggers for some reason..
I think I need to make you a new Super Woman cape to replace the one you wore out this weekend! Way to go, Kristi! Beautiful floors!
You rock! I’m so impressed at the things you accomplish! It looks beautiful!
You’re a workhorse!
I love the kitchen floor! It is bright, beautiful and you deserve a gold star for doing an amazing job!
Kristi you mentioned about the header in the kitchen with counter top height and or bar height. Counter top height should work perfectly fine. Wouldn’t go bar height – not practical. We just did one for a customer, where we had to make a header as well. Also is had to be attached with a wall on both ends. The counter is going into the dining room area, I shared the link so that you can see a visual (didn’t know how else to send a picture) if you scroll through 2 more pics you can see the other side of the counter top. https://www.facebook.com/KitchensbyDRSRenovations/photos/a.184176501725831.59732.164162387060576/184553525021462/?type=3&theater
Frances, that’s a great idea to add the extra cabinets on the breakfast side of the island. Kristi, if you were to do that, not only would it give you a bigger countertop, but it could disguise the uneven floor on that side of the island. What do you think?
Beautiful!!!! Well done Kristi…Lovely indeed..
Kristi, I am so inspired by your talents & fearlessness! I am one who will tackle a lot of things my friends & coworkers won’t. All I can say is wow, just wow!
Great job! I always agree with everything you do….your wonder woman!
But I strongly disagree with your painting these new floors.
To me painted floors are an option you go with as a cheap fix to an ugly floor.
The painted floor will breakup your more open floor plan.
I really wish you’d reconsider and just finish the floors to look like the rest of the wood floors in the house.
Your house, your money, your choice but painting new floors…I’ll have to avert my eyes. I can’t watch !!
Incredible accomplishment. You are an amazing gal….my hat’s off to you! I sorta agree with the last comment on the painted floors…seems to me it might cheapen them. I think you might end up painting them and then sanding it off….if it were me I would go with just natural first and then if you decide later, paint. Make it easy on yourself for a change. It is your house, but I would think that the most natural would be best.
Anyway, hat’s off to you!
G.
Hi, instead of a ridge couldn’t you have used your Maxi to take out the required amount from the joists and set the new wood lower. I cannot believe all you are doing, may I add not as a female but as a person, houses in the UK just aren’t made the same as yours lol.
Keep up the good work and blog.
PS gets a bit confusing with the different terminology in names lol
You make it look so easy! It looks fantastic!! I need new flooring throughout my house (1885) but the expense was great and not in my immediate budget so I went with plank vinyl as a stop gap measure. It too has no waste when laid in exactly the same way that you mentioned. It’s not wood but it’s a close second in my opinion and will get me by for another 5 years or so anyway. I put mine down with vinyl glue which makes a world of difference in how well it stays down. After doing the vinyl I’m sure I’ll be able to do the hardwood by myself in a few years. I hope your back feels better very soon!
Kristi I’m curious about the rules for remodeling in your area. Do you have to get building permits for all of your projects and then have the permit showing in a window of your house? And with the electrical you just talked about do you have to have an inspector come and sign off it is correct? They always show that in the rehab shows on TV. I live in Indiana and any work to a house by oneself or a professional they have permits in the window which I think has a cost attached to it and extra leg work and time. Just curious what Texas requires? Thanks
What ridge? I don’t see a ridge! 😉
Wow. Just Wow. You get more done in a weekend than most people get done in a month!
Have you considered staining the kitchen floor two colors instead of painting? That would be very striking! But, I have to say I can see the point of the comments above that, since you’ve got the new floor down, it would look classic to go ahead and stain the kitchen floor the same as the rest of the house. Again, where do you want your focal point to be in the kitchen – the floors, or the cabinets?
Take a hot bath with a cup of epsom salts to help with the muscle stiffness. Works great!
Wow once again you are amazing. What a great job of your flooring. I’m looking forward to seeing how you paint this.yes makes sense to paint and seal before the cupboards go in.
It’s beautiful! What type of hardwood did you end up using? Is it from the Home Depot? Thank you so much for sharing this with everyone!
Can’t wait for the painting to go on. You’re sure to have some great fun with it. Is it too late to pull up the part of the floor with the “ridge?” If not, you could just use thinner lumber pieces to build up the hole to be even? I love how this kitchen is coming together. And whatever you decide with the counter, either way it should be just fine!
Love the new flooring! You’re so amazing.
Although it looks like a tedious work but your explanation made it really easier. Thanks for sharing such a wonderful idea. I will surely use it. Keep it up!