My Stained “I Can’t Believe It’s Cheap Pine” DIY Butcherblock Countertop (Plus, Vanity Paint Color Options)
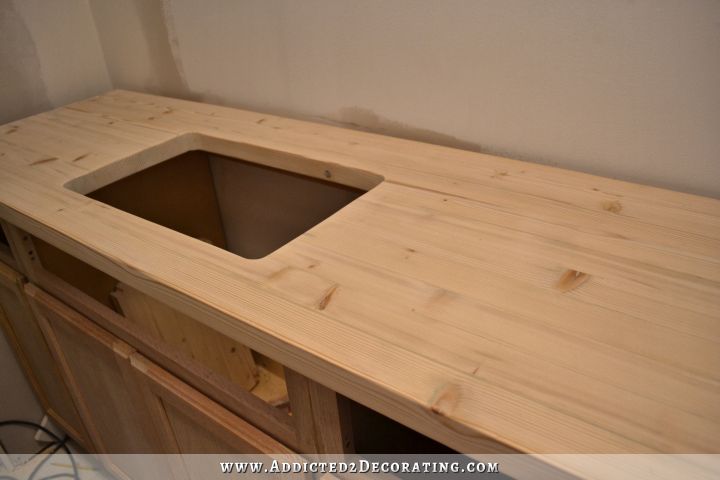
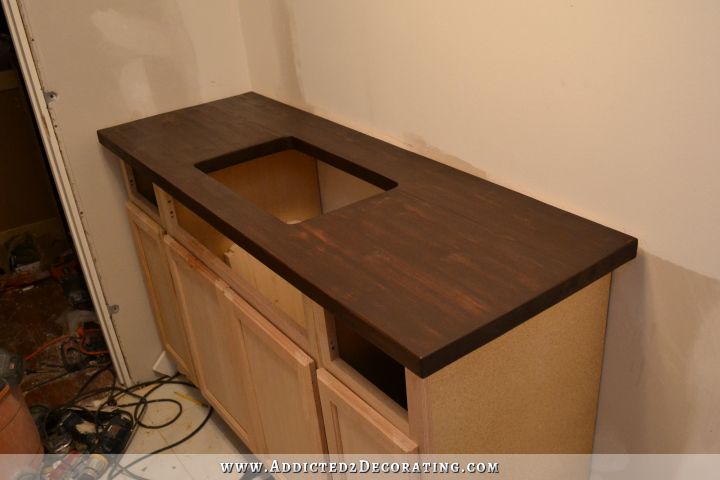
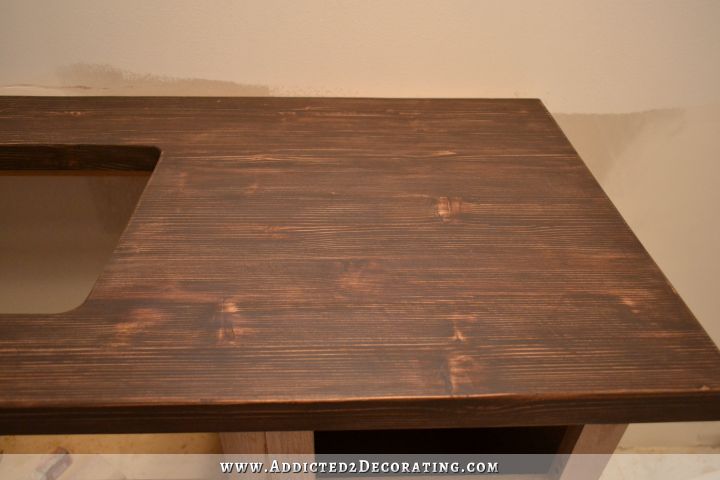
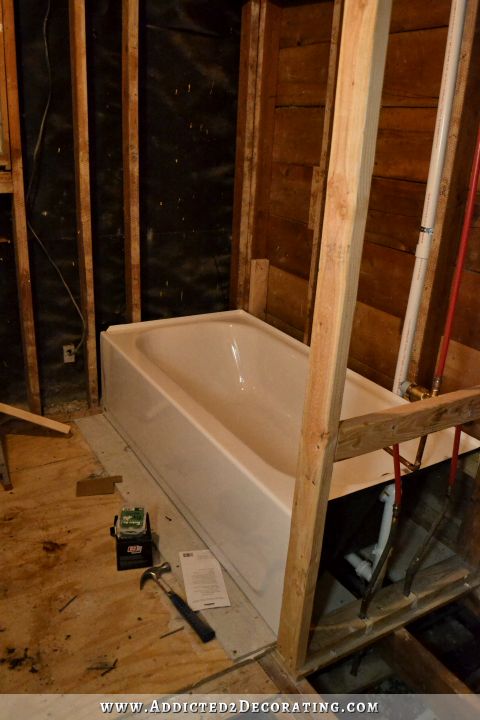
I recently showed you how I built the DIY butcher block countertop for the hallway bathroom vanity. In that post, I left off with the countertop looking like this…
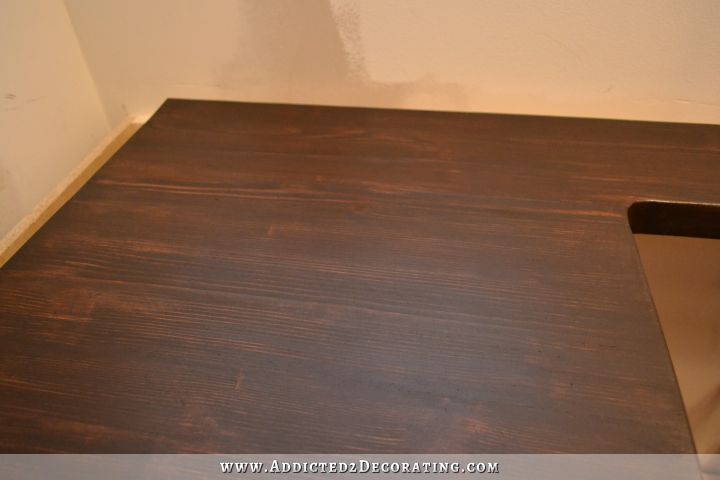
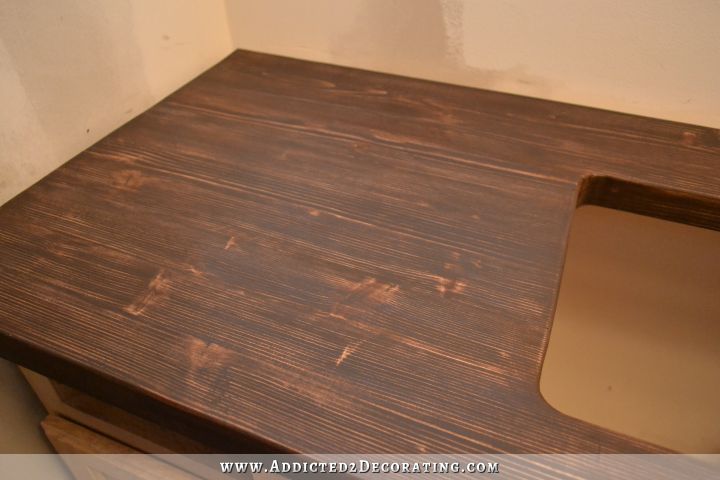
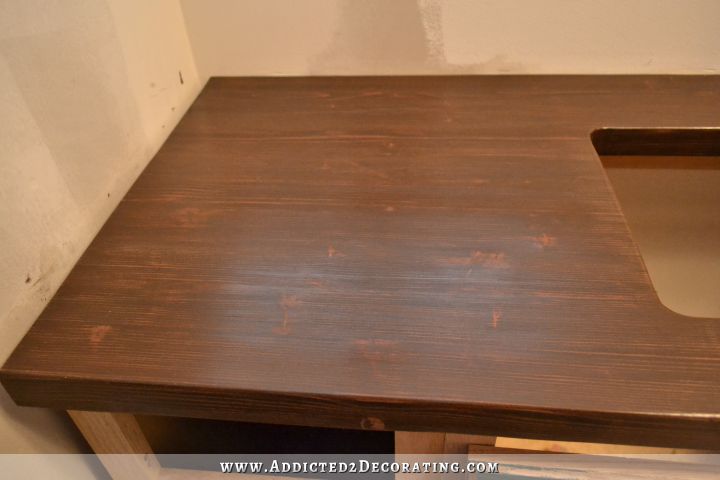
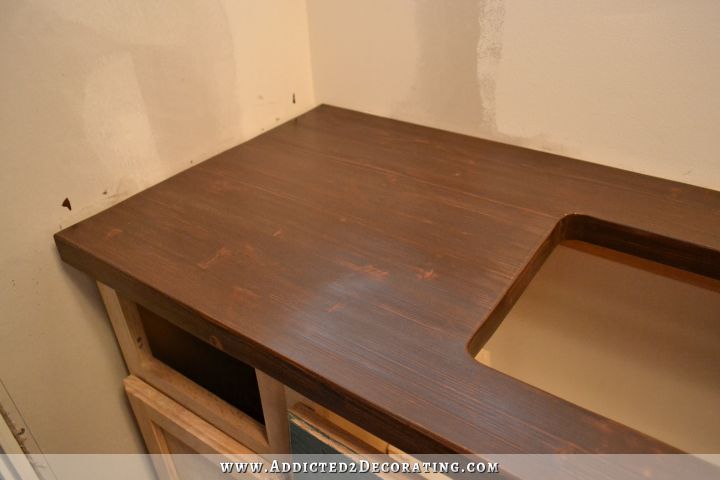
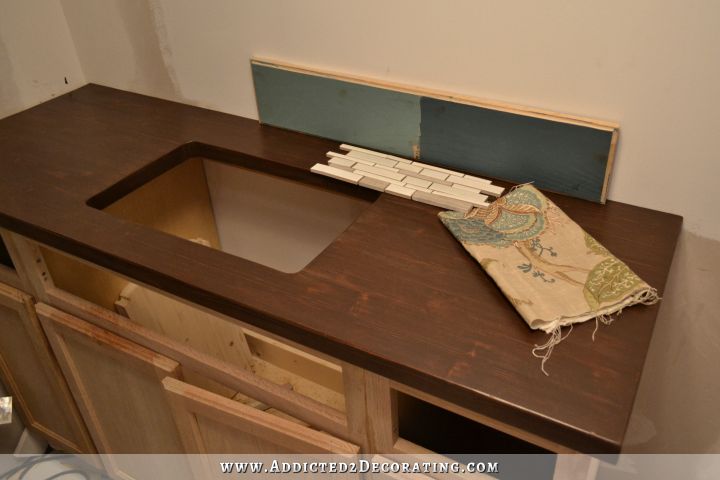
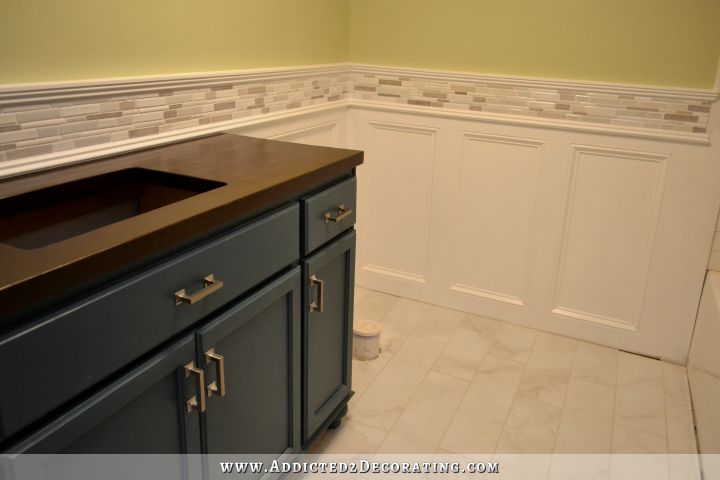
And now here’s what the countertop look like after being stained.
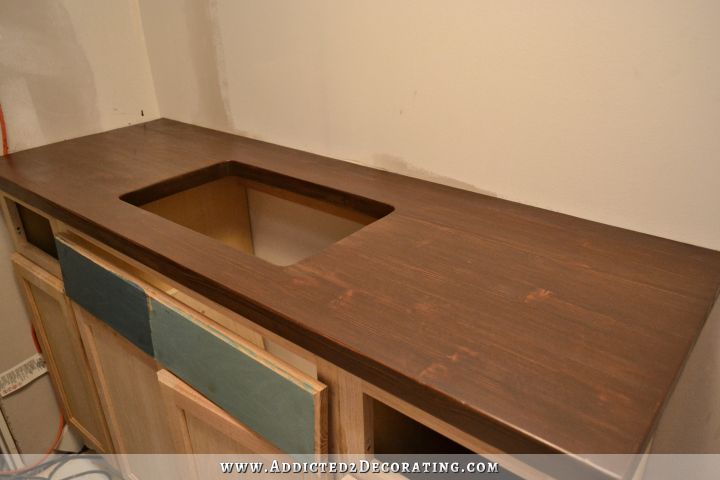
It’s not perfect, and I don’t think I’d ever fool anyone into thinking that it’s walnut or another expensive wood. But I also don’t think that “cheap pine” would be the first thing people think when they see it. I think it looks pretty darn good considering that it’s only $22 worth of pine studs!
It’s still not finished. Stain alone isn’t enough to protect a wood countertop in a bathroom or kitchen (or anywhere else, really), so it requires several coats of lacquer (or polyurethane, or another clear finish…but I’m pretty sure I’ll use lacquer). Then after that cures, I want to do a hand-rubbed finish.
The problem is that lacquer stinks to high heaven, and it’s a finish that really needs to be sprayed. So that means I need to work outside, and have a whole clear, sunny day with low humidity (or preferably two days in a row) so that I can apply several coats. Unfortunately, the weather here has not been cooperating at all lately (it’s been raining for the better part of three weeks now), and I have no idea when we’ll have our next clear, sunny, warm, low humidity day when I’ll be able to spray the lacquer finish. Until then, I’ll just have to be extremely careful with it.
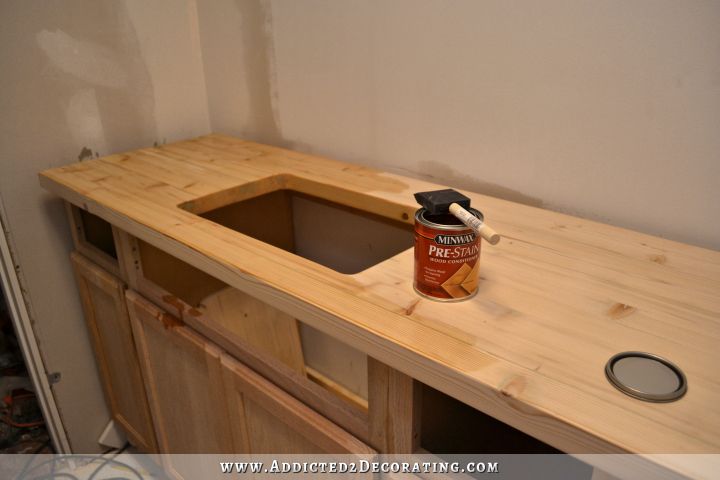
How I stained my DIY pine butcher block bathroom countertop:
To stain the countertop, I started with a coat of pre-stain conditioner. I applied it with a sponge brush, let it sit on the wood for about ten minutes, and then wiped off the excess.
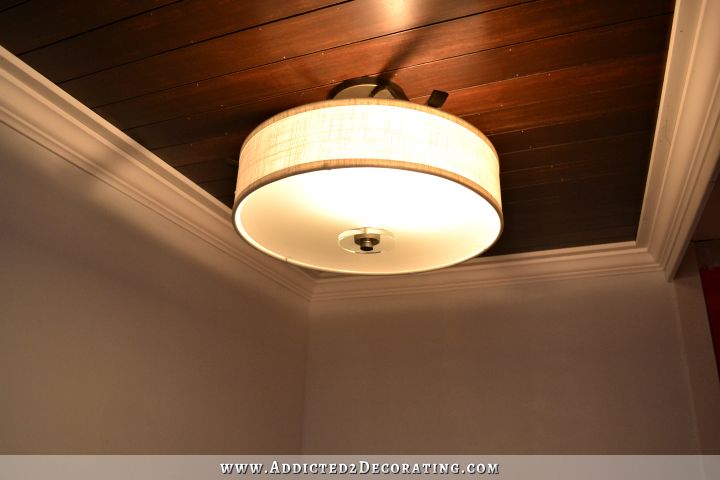
Then I used another sponge brush and applied a coat of Rust-Oleum wood stain in the color Carrington. (Rust-Oleum is the only brand of wood stain I’ll use now, but especially on pine. Minwax turns the grain in pine a hideous orangish yellow color. Rust-Oleum doesn’t do that.) Carrington is the same color I used for the first coat on the plywood planks for the ceiling. It’s a very dark color, especially when you use it like I did and just apply it with a sponge brush and leave it (i.e., don’t wipe any off with a rag), and it’s also very opaque when used like that, so it hides most of the wood grain.
I let that dry, and then sanded it very lightly by hand with 220-grit sandpaper to bring out some of the wood grain.


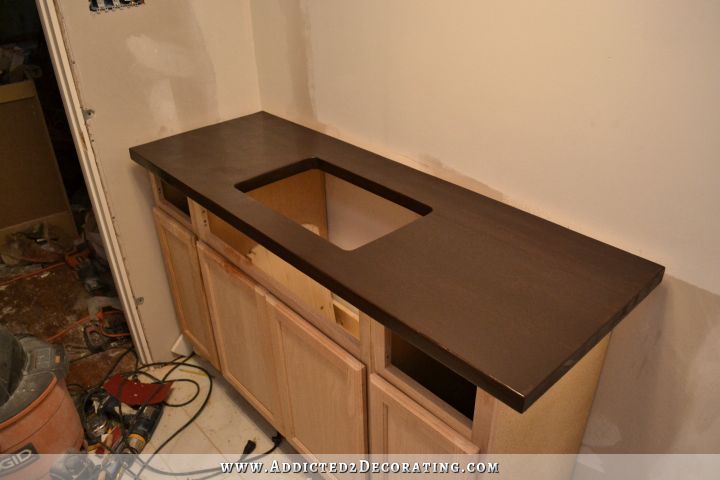
I actually really liked how that looked, and if I were going for a more rustic or farmhouse look, I probably would have left it like that. But the last thing I want in this bathroom is a rustic finish, so just like I did on the plywood planks for the ceiling, I added a coat of Dark Walnut on top of the Carrington.
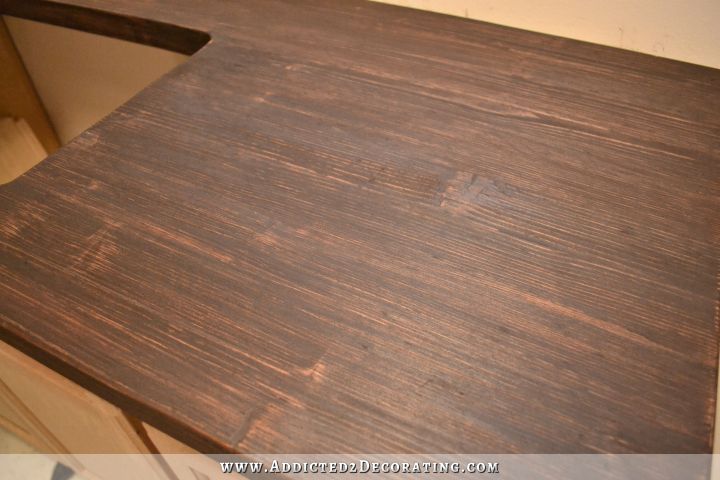
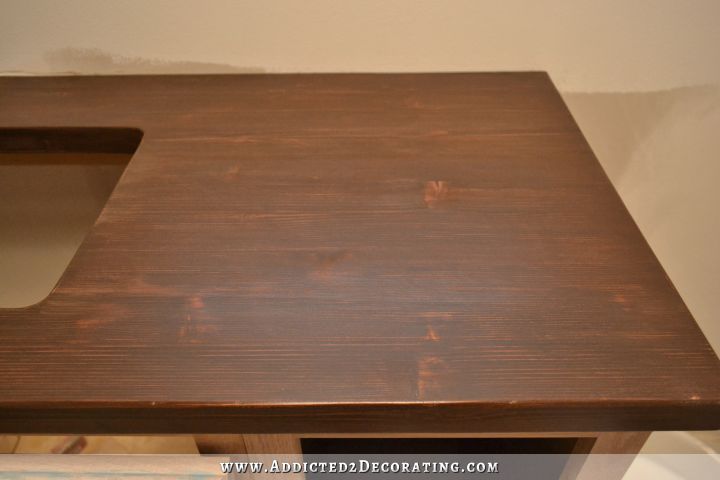
I was hoping that it would turn out more like the ceiling planks, but it didn’t. Not only did I mess up on a couple of areas by overbrushing (you can see the really light areas in the pic below), but the finish was just super dark. The ceiling planks had considerably more red in them.
But what I did really like was how more of the grain was showing through. I didn’t want the grain to be a hideous color (like that orangish yellow that the grain in pine turns when I stain it with Minwax stain), but I definitely wanted some of the grain to show.
After all, what’s the point of having wood countertops if the finish is so opaque that you can’t tell it’s wood, right? If no grain shows through, and it doesn’t even look like wood, then I could have just saved myself the trouble of building a wood countertop, and just used painted MDF.
(I was so tempted to make a countertop out of painted MDF, by the way! And I’d LOVE for one of you to try that out and send me pictures! Two layers of 3/4-inch MDF glued together, primed and sanded super smooth, painted a bright and fun color, and coated with a high gloss pourable bar top epoxy. I think that would look AMAZING in the right room! And with a bar top epoxy coating over layers of paint and primer, there’s no way that water damage would be an issue with the MDF. It would be a fun, bright, eye-catching countertop for a reasonably low price. Please, someone do that and send me pics!) 😀
Anyway, my countertop was still too dark for my taste (which surprised me), and didn’t have quite enough red in it (which also surprised me since I generally turn my nose up at wood finishes that have too much red in them). So after that was thoroughly dry, I used some 400-grit sandpaper and sanded it VERY lightly to expose more wood grain.
And then applied one more coat of stain. This time I used American Walnut, which definitely has more red in it than the Dark Walnut.
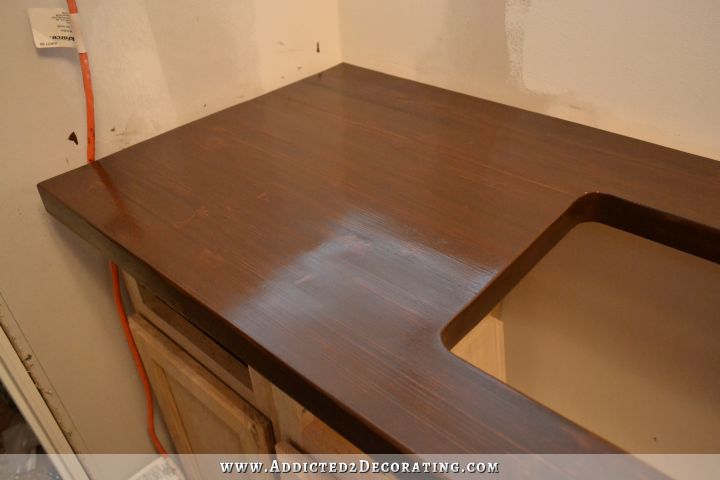
And then, when that was completely dry, I used 1000-grit sandpaper and sanded the entire surface very lightly by hand until I had exposed enough of the wood grain to suit my taste.
Obviously, there’s no right or wrong way to do this staining and sanding. It’s completely subjective and dependent upon your personal taste. You can sand as much or as little as you want, and expose as much or as little of the wood grain as you want. You can also layer as many different colors of stain as you want to create just the right look for you.
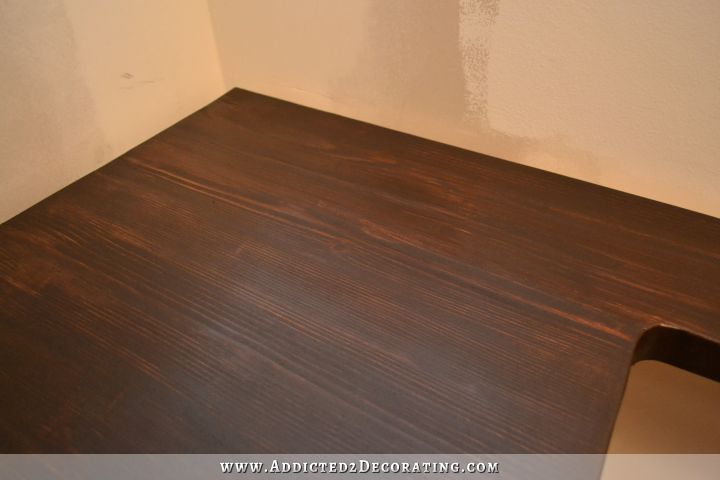
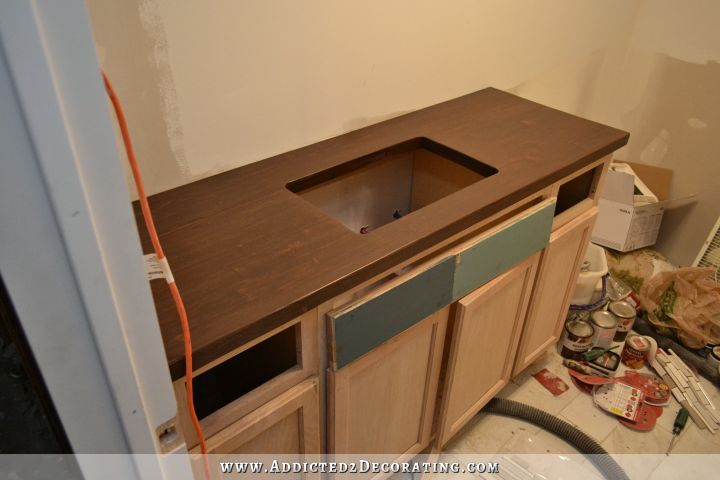
So that’s where I’ve left this countertop project for now. The sheen isn’t perfectly even all over the surface, but that will be taken care of as soon as I can lacquer it.
And I also think that the lacquer will bring out more of the depth of color, and will also bring out more of the wood grain.
But that’s not too bad for a pile of rough, cheap pine lumber, right? 🙂
And now that I have the countertop color settled, I’m trying to make a final decision on the vanity color. I’m trying to decide between this light teal, which is Hallowed Hush from Behr…
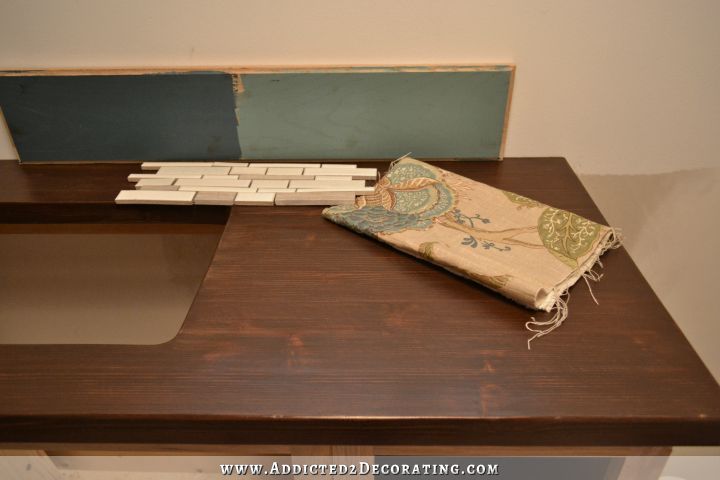
…and this darker teal, which is Mythic Forest by Behr.
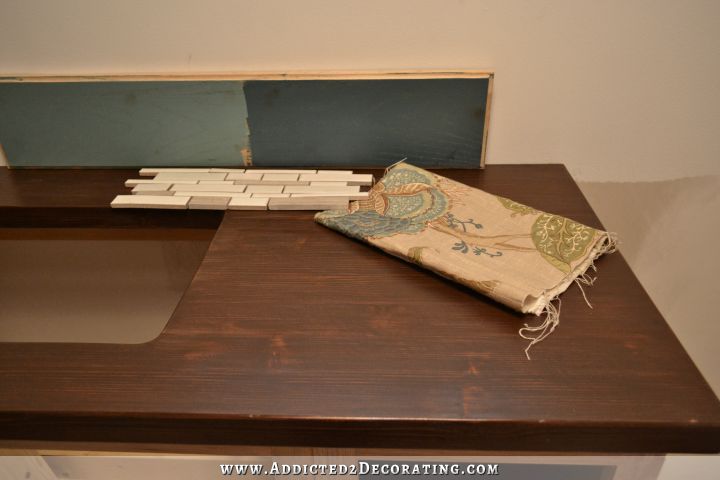
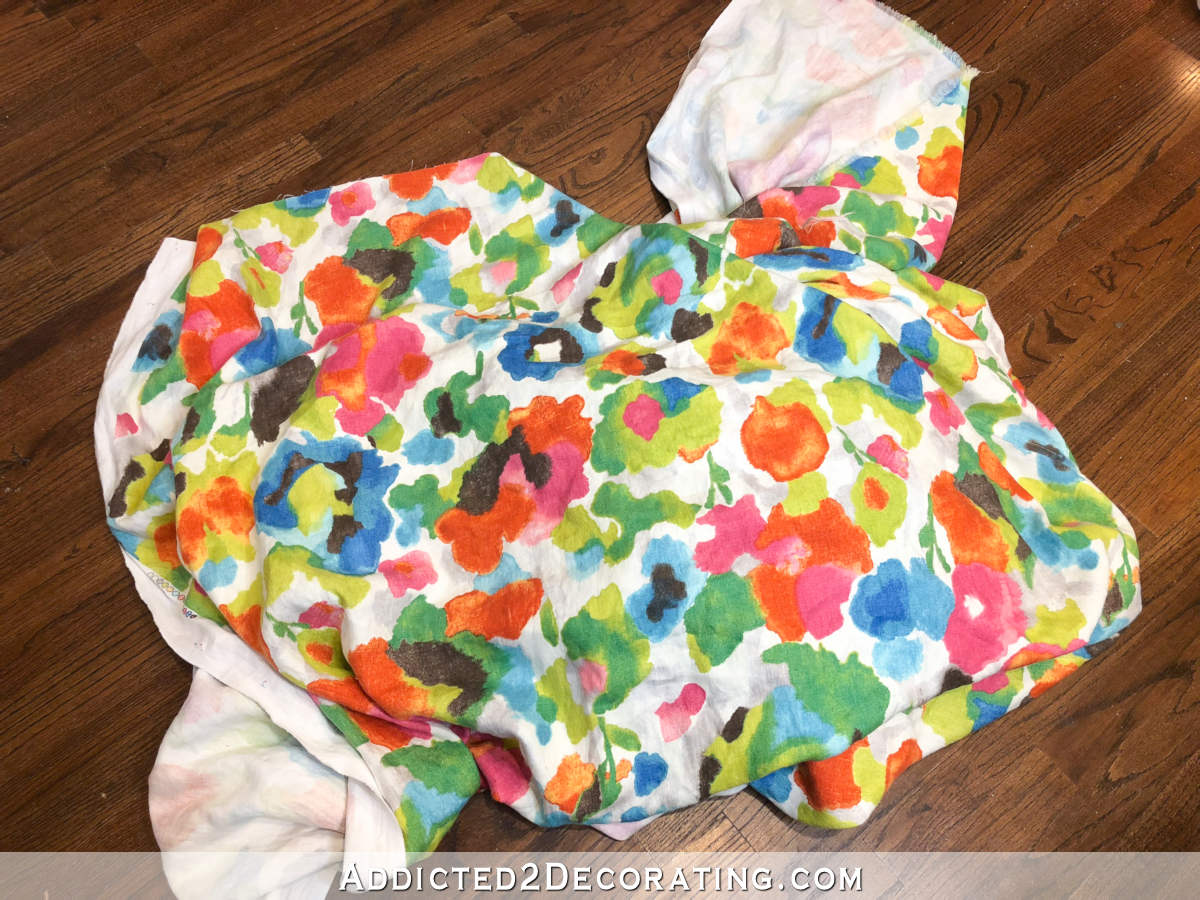
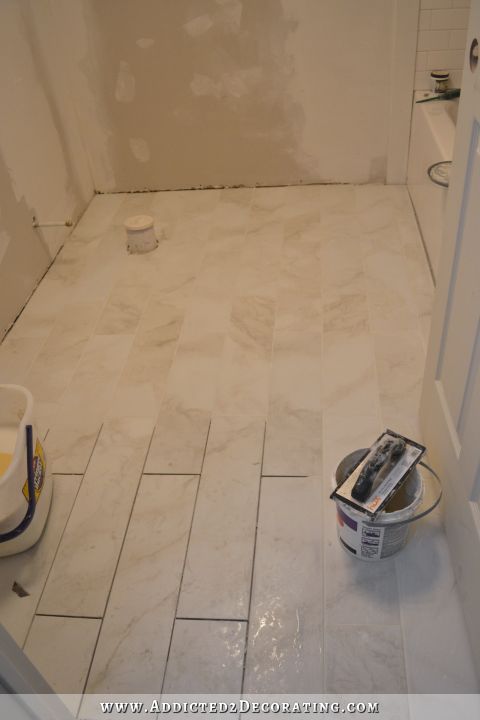
Both of them go well with the shower curtain fabric. And that tile is the mosaic that I’m using as an accent on the wainscoting, and it will also wrap around the wall along the vanity to act as a backsplash.
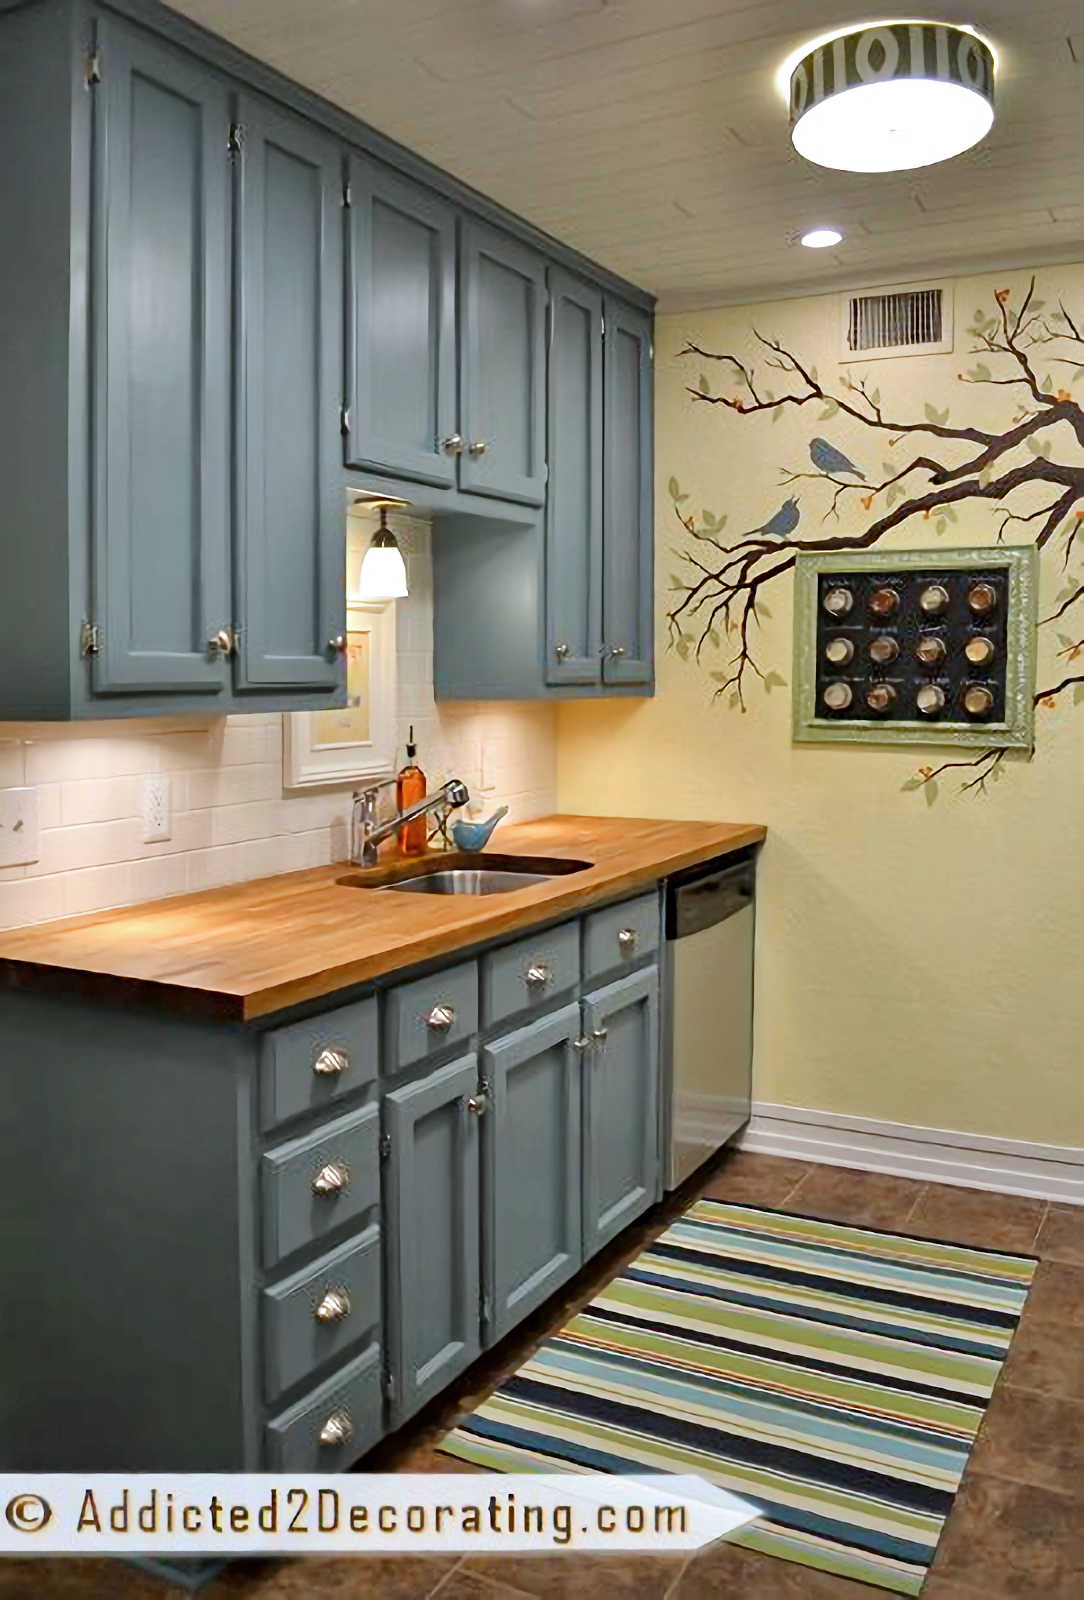
I love both colors, and I’ve used both of them before. The light teal, Hallowed Hush, is the color that I used on my kitchen cabinets at the condo. I also happened to have butcherblock countertops in that kitchen, so I know that I love that color used with a wood countertop.
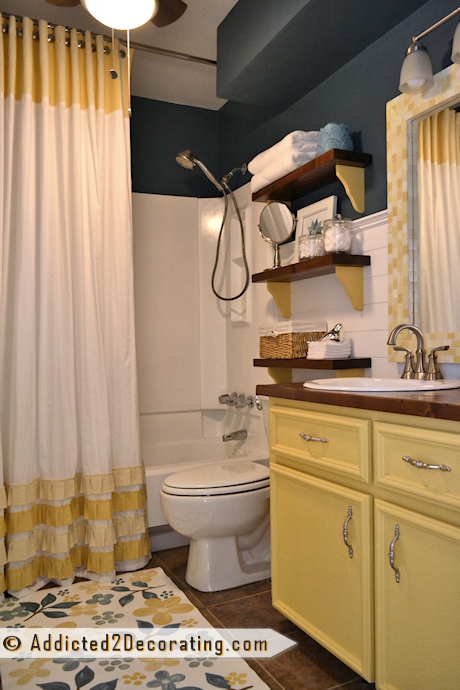
And the darker teal, Mythic Forest, is the color that I used on the walls in the hallway bathroom at the condo.
So I need to make a decision on that pretty soon. If pressed, I think I’m leaning towards the dark teal. I think. But if you know me at all, you know I could change my mind 20 times before I make a final decision. Or my vanity could end up a totally different color altogether. 🙂
No, I’m definitely leaning towards the dark teal. Right? It just feels more “me” right now, don’t you think?
UPDATE:
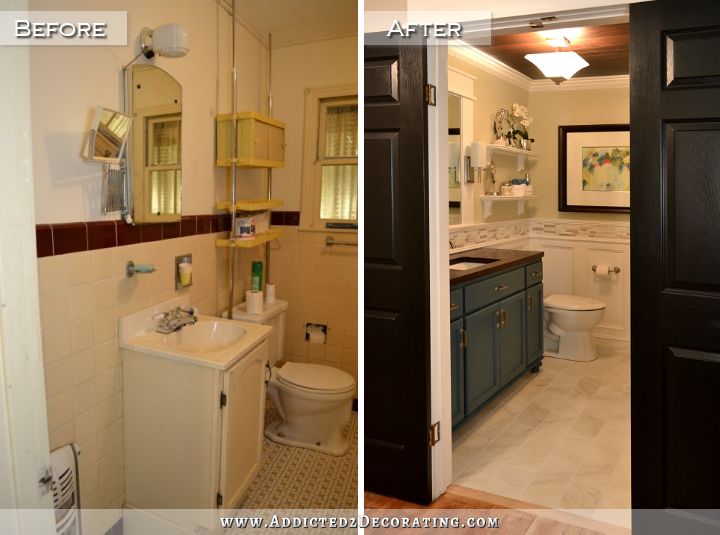
This bathroom remodel is finished! Click here to see the finished bathroom.
UPDATE #2:
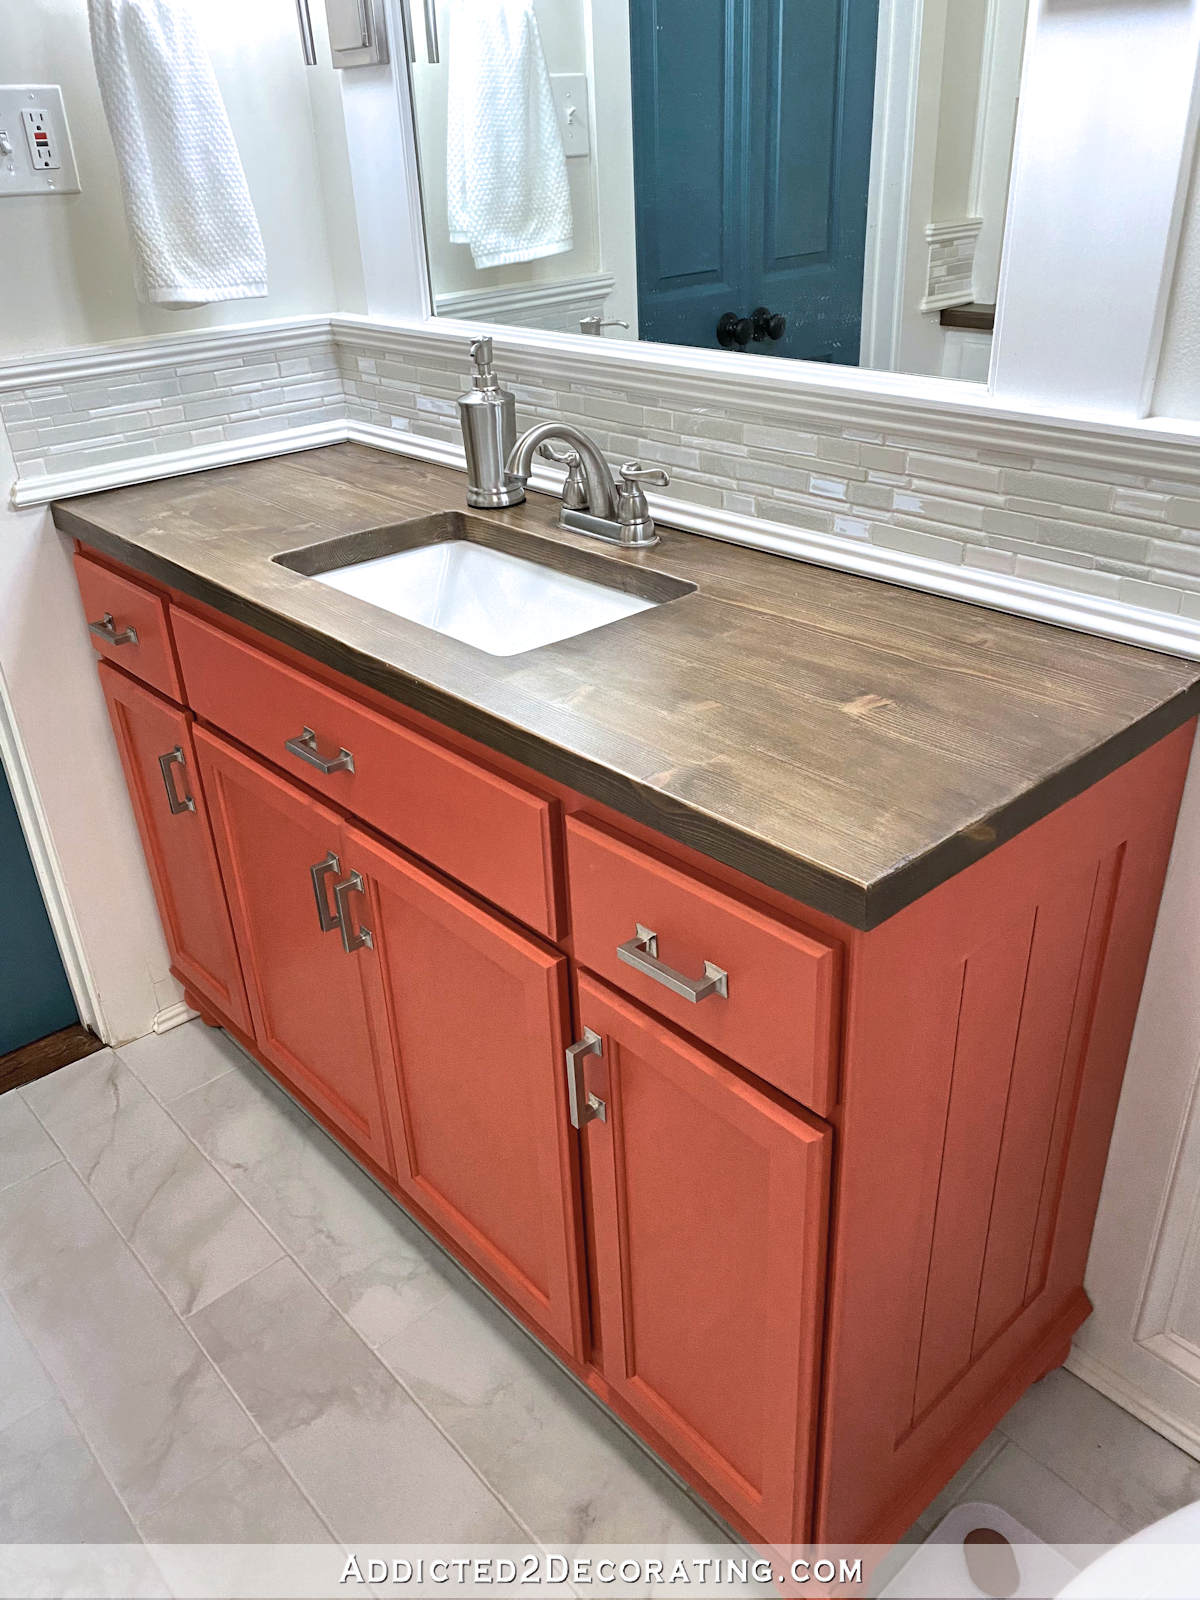
In January 2019, I gave this bathroom a more colorful makeover, and during that process, I also refinished this DIY butcher block countertop so that it wasn’t quite so dark, and so that the wood grain could be seen more.
You can click here to read the details of how I finished the pine countertop the second time. And you can click here to see the bathroom after its colorful makeover.

Addicted 2 Decorating is where I share my DIY and decorating journey as I remodel and decorate the 1948 fixer upper that my husband, Matt, and I bought in 2013. Matt has M.S. and is unable to do physical work, so I do the majority of the work on the house by myself. You can learn more about me here.
Loving your work! In the condo, your shower curtain is lovely with the ruffle trim. When showering did this lie inside or outside the bath?
The decorative curtain stayed outside, and I had an extra long shower curtain liner on the inside.
Aaah, makes sense. My OH and son would have a field day with all those pretty ruffles but I love it!
OH = Ornery husband? I have one of those too.
Looks great !! I do love the lighter teal paint ! Cant wait to see it finished !
Looking beautiful! I like the lighter color for the cabinet. I think it really brings out the color in the fabric. Your bath is going to be gorgeous!
It is looking beautiful! And I prefer the darker color. It has a rich elegance.
I love the work you’ve done! I would choose the lighter color if it were me. More of a pop of color and there’s already several dark elements going on. When looking at the condo kitchen, the color looks dark to me, and that was with a lighter stain on the counter tops and with white planked ceilings. Lighter would also allow for more contrast from the counter tops and let them stand out. I realize you’ll have light tile surrounding, though, so it’s really your preference! Can’t wait to see.
i like both the light and dark teal, mostly the latter. It contrasts nicely with the tile.
It’s going to be fab!
I know you didn’t ask for a vote, but if you had I think I would lean towards the lighter since it’s in a small room with no window so may end up looking darker than it did in your kitchen. Either way, it’s going to look great!
My first inclination was toward the darker color until you showed the cabinets in the kitchen at the condo. Love! Now I am wondering if the beauty in the wood countertop would be lost or compete with the rich darker color. Decisions, decisions. I love everything you do so I know it will be beautiful in the end.
What about the green in your fabric for the cabinet color? Isn’t it close to the color you painted the credenza?
It is, but I’m not sure how I feel about having even more green cabinets in my house. I think a kitchen full of them might be enough. 😉
Darker teal!!!!! look how it brings out the green in the shower curtain fabric!!!! love love love it!!!!
just….beautiful !!!!
Even though I love the lighter colour all by itself, in combination with the wood (fabulous by the way!) I like the darker colour much better. as the others tend more to the lighter colour, I’m pretty curious which you’ll decide upon in the end 🙂 I love the fabric and think it’ll be very beautiful when everything comes together!!
I like the lighter. The counter looks great :0)
I love the look of the darker teal with the tile and fabric that you will be using, so rich and pretty! 🙂
When I saw the 2 shades of teal next to your countertop I liked the lighter one the best! The value of the dark teal and the value of the countertop are too similar, the lighter teal provides a better contrast. Your bathroom is going to be beautiful when its all done!
I agree with Kaye. I think the lighter teal is best with the dark counter top.
So pretty! Doesn’t look like cheap pine at all. The lacquer will look amazing.
I LOVE that darker teal, but not for the vanity. I’d vote for the lighter color just to have some contrast with the wood countertop. I’m afraid the darker teal would be too much contrast with the floor, and would be the first thing your eyes would be drawn to (so you’d never see the amazing ceiling!).
Excited to see the final product. The tile you chose is so pretty, looks like warm marble.
How did you get the pine boards to fit so snugly together?And have a smooth surface across? I’ve tried and i always end up with little “ditches” where the boards bump together…
I shared that process here:
https://www.addicted2decorating.com/diy-butcherblock-style-countertop-undermount-sink-part-1.html
I like the darker teal against the dark counter top, but that’s just personal preference. Either one will look lovely with the other finishes and the fabric.
Lighter in that room, given how dark the same teal looks in the condo kitchen and that room has more light coming in.
Although I prefer the lighter one, you might want to make your final decision after the countertop is lacquerd so you’ll have the final look for comparison. The shower curtain wont be right up against the cabinet either. If going with the lighter, you could accessorize with the darker tone in your towels etc. I know you will make the right decision on your tastes and that’s the way it should be.
I think that’s a good suggestion to wait. But at this point, I prefer the dark teal.
I’d go with the dark teal on the cabinet and the lighter ( or an even lighter variation) on the walls.
Can’t believe you can get such a beautiful countertop with some old pine boards.
Only you could come up with that and your stunning ceiling on a tight budget.
So impressed, but then you did do that knock out kitchen so I shouldn’t be surprised.
Only wish you lived here in California; I’d hire you in a heartbeat to tweak my home.
Paula
Counter looks awesome !
The vanity color… I think it depends on what will be on the walls above the wainscoting and indeed what color the wainscoting will be (not sure if that will be a painted wood, if so, what color, with the feature strip tile capping it) or will it be white subway with the feature strip tile capping it.
Because you have a dark ceiling and no window, I wouldn’t even hazard a guess at the vanity color until all that is known.
I’m a blues and greens freak too, so either would probably work, unless painted portions of wall or waiscoting will also be strong or dark.
With a gun to my head, right now I’d choose the lighter of the two (or something lighter still) to contrast with the counter better.
Hi Kristi, my choice for the vanity is the lighter teal. I love the way it looks with the fabric. One thing I don’t remember you mentioning is the color of the wainscoting, or the sink. I also don’t remember if the toilet and tub are white. Guess I need a rerun on this. On your countertop I am seeing patches of lighter stain. Not necessarily looking like woodgrain on my monitor, but it could be me. Will those spots darken with the finish applications? Blessings
The wainscoting, sink, and toilet are all white. Those patches that you see on the countertop are knots in the wood. I actually sanded again and added another coat of stain today,and it seemed to minimize the knots. Of course, it also made the countertop much darker, so I guess I’ll have to either live with really dark countertops, or with the knots showing.
LOVE It! I like the darker color – brings out the green in the fabric 🙂
I am curious to know why you won’t be using Waterlox on the vanity counter top. I know you can get many sheens, or really no sheen.
Waterlox is amber in color, and I was hoping to use a finish that is clear.
I’ve always loved the color of paint you used on the condo kitchen cabinets, so I’d go with the lighter teal. I also think it would go great with your ceiling light fixture. Yet I know you know and see a room differently than most of us do. Wow I wish I could borrow your designing creativity for a couple of days so I could make my home look as great as yours. I’m so loving your bath already.
Either color will look good, but I think the darker teal will be classier.
Use darker teal on cabinet. It will be rich with the wood counter, then I would use the lighter teal for walls. The contrast of the lighter color against the back splash and surround tile will tie all in together with curtain fabric
wondering why you chose not to use the cedar like you did in the condo bath, I loved it?
Also, my house is full of white Mdf cabinets, and built-ins, circa 1992. my experience has been it is a terrible chose for wet areas.
I don’t really have a reason for not using cedar. 🙂 Just saw the pine first and thought it would work.
I was suggesting that someone use MDF encapsulated in 1/8-inch of very hard plastic, which is what a pourable bar top epoxy is. It’s a finish you’ll never get from paint, polyurethane, or any other sprayable or brushable finish. Anything coated in that much plastic would be fine in a bathroom.
So, I’m not sure you’re asking for votes! If you are, my vote would be the darker color. It looks richer and more elegant to me. If you wanted a lighter color, I’d say pick up the green from the fabric. But maybe my preferences are just based on the way my computer screen picks up the colors. I don’t think the darker color will be too dark, especially once you get the wainscoting up, which will add a little bit of light reflection with its semi-gloss finish.
I lean towards the dark side. LOL! I think the darker teal would provide more drama and be more in keeping with your kitchen and the direction you are going in the living room. Just my two cents! Good luck! I love how you give such detailed instructions in your blog. Someone could really follow exactly what you did and duplicate the results. This is my favorite blog by far! Thanks Kristi!
Lighter teal! I think the dark teal and dark countertop will become a heavy look that draws your eye away from the pretty fabric rather than creating a happy, smooth cohesiveness.
Isn’t there a clear varnish/sealant that is used on wooden boats to protect them from water damage? (I can’t think of the name) Wouldn’t that be a good choice for butcher block in the kitchen or bathroom area? I’m curious for possible future use myself.
Marine varnish. I don’t think I’ve ever used varnish, so I don’t know anything about it.
I like the lighter color.Hallowed Hush.
Ok I love your countertop BUT please research lacquer a little further. My cherry cabinets were spray lacquered and I can tell you they did not hold up to water. If you want to keep the warmth and clearness of lacquer use oil base poly,. It does not give the plastic effect that several coats of water based does. It will give you a bar finish shine if you like or the more satin finish. I refinish furniture all the time that is going to get heavy use and I fine the oil base poly does not need a coaster where lacquer will. I don’t know what you were going to put on top of the lacquer so maybe it will make it more waterproof. I have even lacquered first for quick dry and to set stain and polled over it with no problems. Both have about the same scratch resistance although for obvious reasons poly is harder to refinish. Just saying because after about 2 years my cabinets of fine solid wood starting looking awful. Could you use the same thing you used on your floors since it is so durable.
Spar varnish is also a good choice but very shiny although you can steel wool to satin. Please forgive some of the misspelling in previous post . Spell checker meant to say I have polyed over lacquer.
Cindy, I have the same problems with my kitchen cabinets.
i was hoping to avoid polyurethane because it’s amber/yellow in color. I thought about using lacquer because it’s clear, and it’s what most professionals and furniture manufacturers use. After reading article after article like this one, I finally decided on lacquer. Now I’m confused.
Kristi, thanks, I followed your link and read the information, it was really interesting. They make lacquer sound like the better option. Now I’m confused too. I finished about 15 six panel doors several years ago and polyurethaned them and the finish is really hard and durable.
i also read this link and researched othe post. Maybe the lacquer he is using is better than what was used on my cabinets 18 yrs ago or maybe kitchen oils and cleaners led to the breakdown of my finish . All I know is in my former home I had oak cabinets I had built in the seventies they applied the top coat by hand . He told me it was poly . That finish held up until I sold it 18 yrs later with no hardware just grooves to pull open. I don’t know what to do with my cabinets now. I was really ill the first 10 yrs we were here so was not able to tackle the finish problem before it became a larger problem.
I found this on the internet — waterborne lacquer!
http://www.valsparwood.com/valsparwood/EN/product/details/Zenith_Waterborne_Lacquer.html
I’ve read that a lot of automotive finishers are now using waterborne lacquers. I always shy away from the finishes that have a smell — this is supposed to be low VOC and low odor. 🙂
Kristi, can lacquer really protect from water? I think I have lacquer on my kitchen cabinets and I hate it. i wish it was polyurethane. The lacquer gets gummy where you touch it alot. After 10 years I have gummy soft spots near that door handles.
It’s what most furniture manufacturers use, so I thought it would. :-/ Now I’m not so sure.
Love both colors, prefer the darker for this application, yet I’m sure both would look beautiful.
But I do have to say, your countertop looks pretty amazing. In a good way.
Lighter for sure. Then your bathroom wont look too dark with dark wood ceiling, dark wood counter tops. Nice intermediate between the white tile and the dark wood!
Do you have enough left to mix the two together? I would love to see how that looks. The dark seems just a bit too dark and the light seems a little washed out; maybe a blend of the two?
I’ll try that!
Speaking of . . . have you sold the condo?
Nope. It’ll be my top priority when this bathroom is finished.
I like the lighter shade…This bathroom is going to look fabulous!…I love the make over that you did in the Condo bathroom also…You sure are a super woman Kristi!
Love the lighter teal for the cabinet in general, but what color will the upper walls be?
I’m still trying to decide on wall color. I had thought all this time I’d be using a neutral color, but the last two days, since I can now paint the walls at any time, I’m having second thoughts. Neutral just doesn’t set well with me.
Would whichever one you don’t use for the vanity work well on the upper walls?
$22 worth of awesomeness! I love that countertop and am sure when the clear finish is applied it’ll be even more beautiful. Add in your pretty tile and the fabric for your shower curtain and its going to be SPECTACULAR!
Loving the darker color!!! Every day I have lunch with you. I work from home and I enjoy reading about what you have done while I take my break. I am so impressed with how hard you work and with such few rest days!!!! I have learned so much from each post. Thank you!!!
This will be a beautiful bathroom no matter which color you go with, but I vote for the lighter color. The wood on the ceiling and counter are darker and since you won’t have natural light for awhile (if I remember correctly) – I think the lighter color would be best. No matter what you do – it will look lovely! Thanks for posting your adventures!
I am voting for the lighter teal. You are so talented!
Your kitchen and music room are such rich, regal colors. Will you carry those into the hall? My inclination would be to bring in brighter tones more on par with the other public spaces to keep it from looking too much like the original living room. Is there a medium shade of that teal that might be a bit happier in color?
I’m not sure yet exactly what I’ll be doing in the hallway. I do want to repurpose the diamond tufted top from my ottoman and use it in the hallway in a “mudroom” type of area. Other than that, I have no idea. I think I want to keep things kind of light and neutral in there in general.
Lighter! Lighter! Lighter! 😉 I absolutely love how the lighter color goes with the fabric and the back splash! I can only imagine how great it looks with the floor! 🙂 Wow! That room is going to be beautiful!
I like the lighter color Kristi, because it will give some pop to the room, but it is not too dark and will be a nice contrast to the countertop.
Great job, as per usual!!!
Excited to hear that the condo is next! That will be such a nice feeling to have that
burden off of your shoulders, and extra $ every for projects:)
Either one, but I predict you will go with the darker because you’ve already done the lighter.
I like the look of the lighter color. No clear consensus probably means either would look fantastic.
Darker for sure! I’m painting my bathroom vanity teal too. I opted for Behr’s Peacock Feather to match some striped towels. I was totally inspired by you and can’t wait to get started. Also, can’t wait to see how yours turn out!
Love your countertop–“who’d a thunk” a bunch of studs could end up looking that good! I love the stain color you ended up with! You are so amazing–I think you should have your own diy reality show! (May I send in that suggestion to HGTV? Maybe you wouldn’t want the pressure of tv cameras, however!) If you want another opinion–I would vote for the light teal –I think it is “singing in three part harmony” with the countertop and the fabric. The fabric has a soft, subtle elegance that seems to suit the lighter teal with the brown, imho. The lighter color gives more contrast with the darker wood and they play off of each other so well.
I really favor the light teal.
The lighter color is definitely magical with the shower curtain fabric. I vote for the lighter on the walls and the darker for the cabinet. The “marble” floor, white subway tile and tile trim will keep it all bright enough. Great stuff, Kristi!
Looking good! I’m glad you included the photos of the rooms in which you’d used those colors before. I’ve had difficulty in gauging the intensity of a color used in a larger space from looking at a little paint chip. I vote for the lighter color (if I hadn’t seen those photos, I’d have gone with the darker). Although I’m a great fan of dramatic color, so if you go for the deeper hue I know I’ll like it. 🙂
You are so talented! I love watching the progression of these incredible house transformations!
You’re doing a great job. I admire your hard work and your designs are fabulous. But, I do wish you would take a nap, now and then, you make me feel like such a slacker.
Do you ever give advice on what to do to someone’s room? I have large open room that had stained cabinets and trim. I would like to paint the trim white like the rest of my house . I just don’t know if I should do the ceiling trim too . I have a large beam I would like to leave stained but also do not know what to do with the stained doors. I am not ready to paint cabinets white yet but this room need something to perk it up. I already changed the room from a greenish teal to a neutral color that I don’t like. I am going to repaint the walls but just don’t know what to do with the trim.
Thanks so much confused
Thank you so much for the whole counter tutorial! I’ve been adding cabinets to my pantry around the fridge and I so wanted a wood counter to match the floors. It was a bit more work, but totally worth it to have a butcher block style counter for less than $20!
Looks Awesome!! how are you sealing around the edge of the sink where the wood is exposed to water?
I sealed the wood around the sink the same way I sealed the rest of it — lots of coats of polyurethane.
Awesome! Thanks! I think I am going to try it!
How is this wood counter top holding up? We’re building one similar to this, but I’m concerned about the pine being too soft for a master bathroom being used daily.
https://www.addicted2decorating.com/three-past-projects-revisited-how-have-they-held-up-over-time-concrete-kitchen-countertops-wood-bathroom-countertop-wood-bathtub-skirt.html