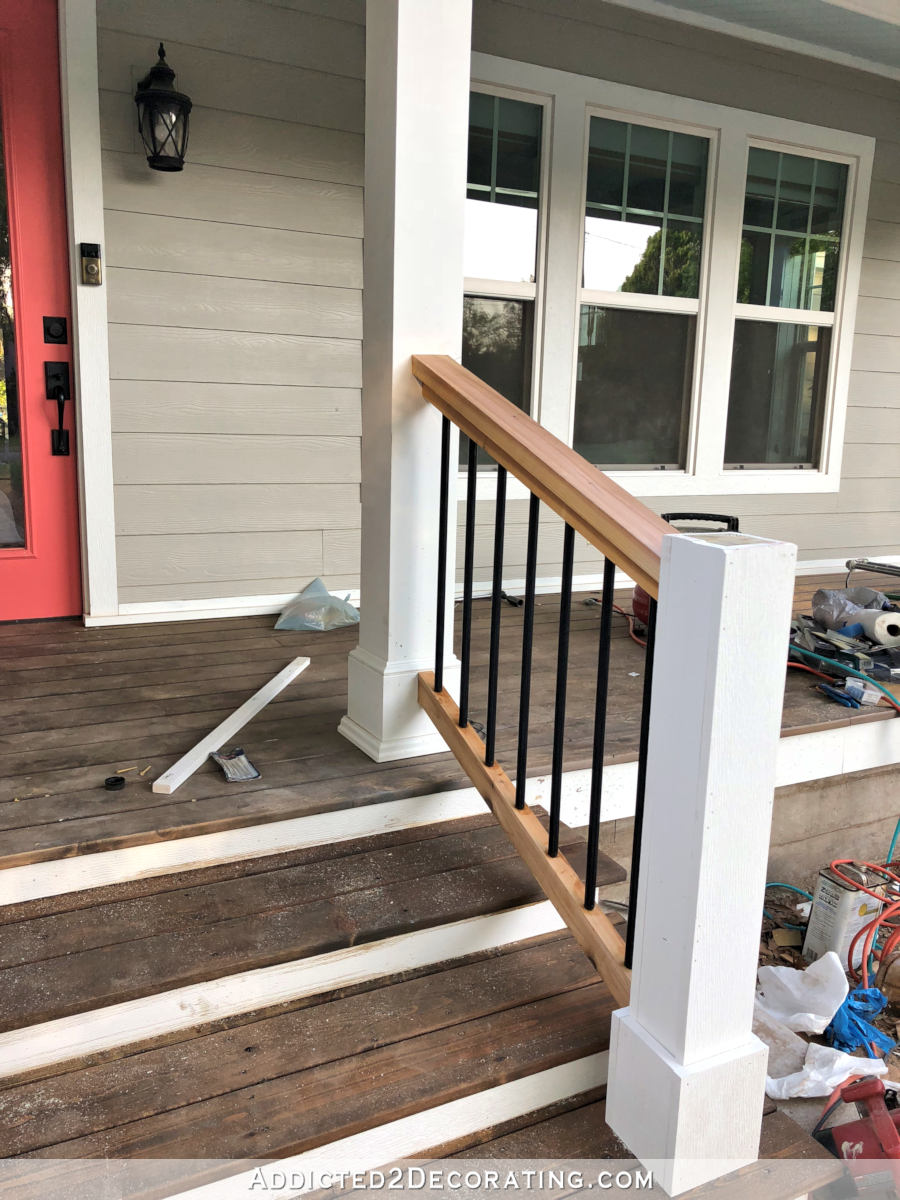
Tiled Bathroom Floor Progress (Plus A Few Tiling Tips)
I haven’t quite gotten all of the floor tile installed in the bathroom, but I’m making progress! Here’s what I’ve gotten done so far…
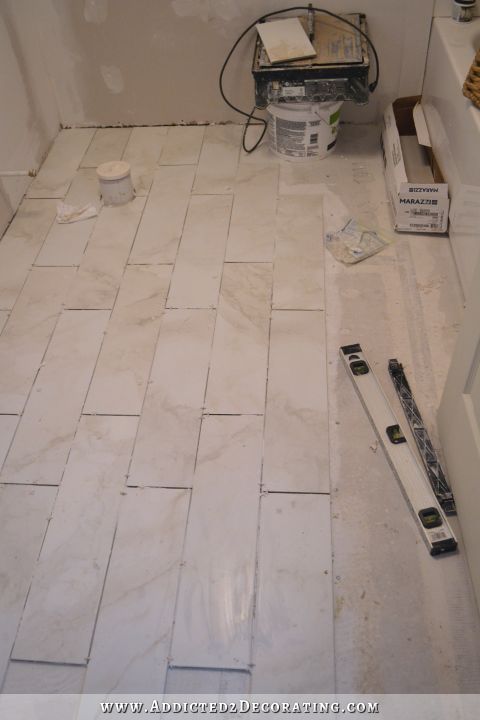
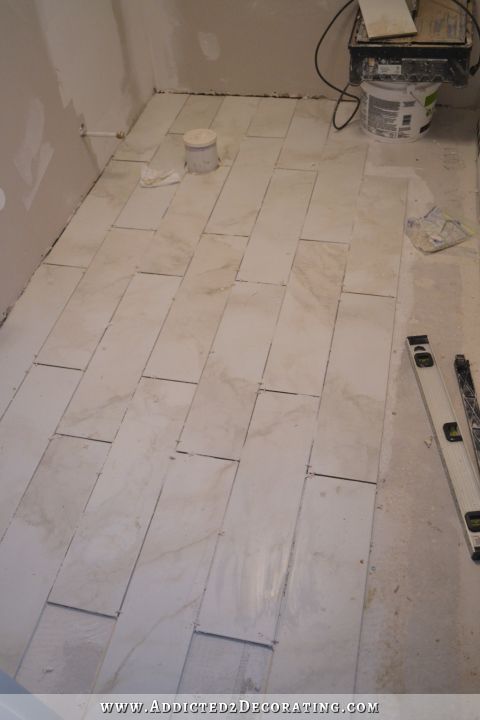
I’d say I’m a little over halfway done. I still have about 2.5 rows before I hit the bathtub, and then I have the linen closet area behind the door. This tile is the Marazzi VitaElegante Bianco 6″ x 24″ porcelain tile from Home Depot. I think it’s so pretty with its subtle marbled pattern, and it goes beautifully with the dark stained ceiling. Hopefully I’ll be able to get a photo that shows both of them together.
By the way, if you’re wondering the difference between porcelain and ceramic tile in the U.S., there’s basically no difference. I found this great article that explains, and if you’re in the market for tile, I highly recommend reading it and understanding how U.S. tile manufacturers use the term “porcelain” (rather ambiguously), and what information and ratings you should actually be looking at when purchasing a tile, such as tile grade, P.E.I. rating, C.O.F. rating, etc. Whether it’s called “ceramic”or “porcelain” is inconsequential.
Anyway, a couple of weeks ago, I had covered my plywood subfloor with concrete board. My brand of choice is Hardibacker, but there are other brands available.
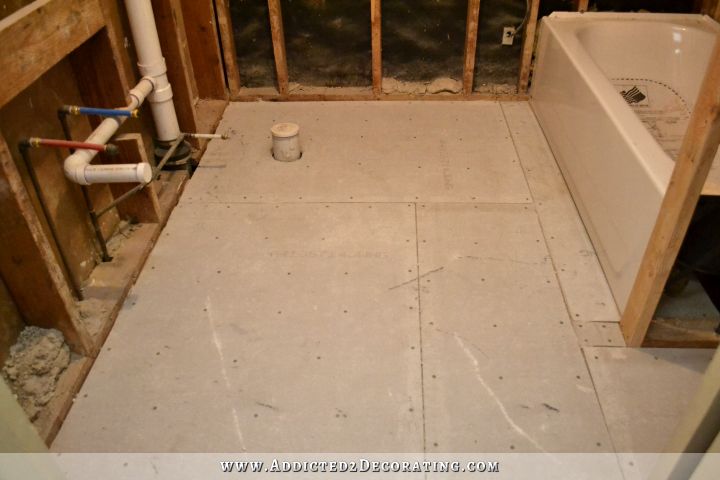
To install concrete board over a wood subfloor, you simply trowel on a layer of thinset mortar (the same stuff you use to install tile) directly onto the subfloor, and place the Hardibacker directly onto the thinset mortar. Then you screw the Hardibacker onto the subfloor using special alkali resistant screws. I just used the Hardi brand screws to be sure I was using the right kind.
And then before tiling, you have to tape the joints of the concrete board. To do this, you trowel thinset mortar into the joints, filling the joints with the thinset mortar, and then place alkali resistant mesh tape (there’s a kind specified for use with concrete board, located with the drywall tape at Home Depot) into the thinset mortar, and cover the tape with a very thin layer of thinset mortar. Thin is key here, because you don’t want to create any hills on your floor.

I gave that a day to dry before starting my tiling, but I learned on a contractor forum that that’s not needed. In fact, many professionals will tape the joints as they’re installing the tile. The benefit of doing that (besides saving time and getting the job done faster) is you can be very sure that you’re not leaving any mounds of thinset mortar on your seams, and if you do, you can just scrape away any excess as you’re installing the tile since it will still be wet. But because I’m far from a pro at this, and I didn’t want to mess up my taped joints while crawling around on the floor installing tile, I let mine dry before tiling. I just made really sure that I scraped the joints as smoothly and flat as possible.
After that was dry, I was ready to start installing the tile. It’s very important before installing tile to wipe down the Hardibacker with a wet sponge or rag to remove any dust and debris. If the concrete board it’s covered in dust, it will affect the adhesion of the thinset to the concrete board. It’s also a good idea to wipe down the back of each tile before installing, because if you happen to get a batch of dusty, filthy tile, that dust and debris can also affect the adhesion.
I really debated over which direction to install the tiles — front to back, or side to side? And since my ceiling slats go side to side, should the tiles match that? Or does it matter? After looking on Houzz at lots of pictures with wood slat ceilings and either wood or tiled floors, I realized that there doesn’t appear to be a rule about that. Some people install them going the same direction, while others install them going in opposite directions, and they both look just fine to me.
I finally decided to install the tile going front to back (from the door to the far wall). Actually, my mom decided that, and her reasoning sounded good to me, so I went with it — something about long tiles going side to side creating a kind of visual barrier, where the front to back configuration seems more welcoming. 😀 That sounded completely reasonable to me! And I noticed that that’s how my hardwood floors are installed from the front door — front to back rather than side to side. So front to back it was, and I decided to start on the vanity wall and work my way towards the tub. The recommended spacing for these tiles was 3/16″, but I like grout lines as small as possible, so I opted for 1/8″ spacers.

I also used a 1/4″ x 1/4″ x 1/4″ square-notched trowel for the thinset mortar. The size of trowel you need for tiling depends completely on the size of the tile you’re installing, and different brands of thinset may also have different requirements, so be sure to check the specifications on the container of thinset that you’re using to make sure you get the right size trowel for your tile. The size I used is generally used for tile up to 16″ x 16″, according to the table on the container of thinset I used, but since my tiles were 6″ x 24″ (and not square tiles) I made a judgment call and went with the mid-sized trowel.
Installing in that front to back direction made things a bit more challenging. If I had worked side to side, and started on the far wall, I could have just worked my way right out the door, and gotten the whole floor installed in a single day. But going front to back meant that I’d have to tile the floor over two days, or else I’d have to walk/sit on the newly-set tiles while finishing the last rows. And walking on newly set tiles is never a good idea. So I got as far as I could, and left it to dry overnight. I’ll finish up the rest today.
For the most part, tiling this floor has been incredibly easy since the only area that required anything other than a straight cut was tiling around the pipe for the toilet. When cutting circular or other oddly-shaped areas out of tiles, I don’t use any fancy tools. I just use my cheap tile saw, and it does the trick.
On those particular tiles, I needed to cut out circular areas like this…

I did that by making a series of straight cuts to my cut lines, and breaking off the slivers of tile left between the cuts.
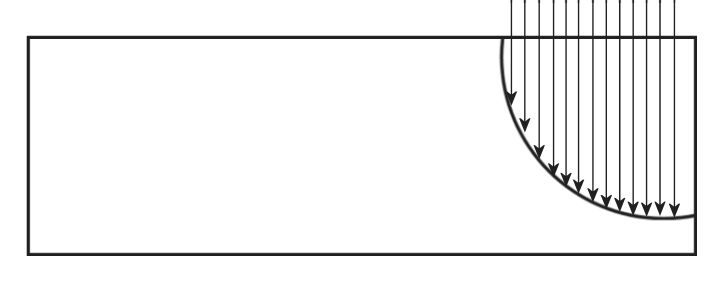
And the good thing is that cuts like that generally don’t have to look good, since they’ll be covered with something like a toilet, or a shower trim kit, or something like that. Everything else I cut was just a straight line, and my cheap tile saw handled that very well. I’ve definitely gotten my money’s worth out of that $99 tile saw!
So I’ll be able to finish this floor this weekend (tile today, grout tomorrow), and then I’ll be on to the vanity! That teal vanity is the part I’m really looking forward to.

Addicted 2 Decorating is where I share my DIY and decorating journey as I remodel and decorate the 1948 fixer upper that my husband, Matt, and I bought in 2013. Matt has M.S. and is unable to do physical work, so I do the majority of the work on the house by myself. You can learn more about me here.

Kristi–It’s looking wonderful! As a fellow Texan, with knowledge of our soil movement and how it affects our houses, did you consider using an underlayment membrane with that tile? I know you’re on pier-and-beam, but I would be concerned about the flexing of your subfloor. I have a slab foundation, and while I really like the look of these plank tiles, I am concerned about flexing and cracking. What are your thoughts on that? Thanks.
I did consider it, but decided not to use it. I am a bit concerned about cracked tiles, but I decided to let Future Kristi deal with that. 😀
LOL! I love it–I’m like that too, at least for some things ; ).
I’m just curious why you opted to start on the wall that will be less visible. It would have been my inclination to start in front of the tub, to avoid any possibility of unevenness there.
Can’t wait to see the teal vanity. I just know it’s going to be beautiful!
It just seemed easier. I could get more tile installed on Day 1 without blocking the doorway. I can see how it might be preferable to have whole tiles showing by the tub (although my tub skirt that I plan to build would have covered up some of those whole tiles anyway), but I don’t see how it will affect evenness.
I think what Peggy is saying is that sometimes walls arent 90 degree angles so you may be tiling at a slight angle, which you might not notice until you do the last row. My bathroom at home is like this…I can see the wall is not straight as the tiles are wider at one end of the row.
Oookay, gotcha! 😀 In my mind, I thought “unevenness” was referring to the surface of the tiles, and I couldn’t figure out why that would be an issue. 😀
There’s definitely nothing square about this room, so it will be an issue. But if I started at the vanity wall and made the tiles square with the wall, then the tiles would be straight in front of the vanity, but possibly not quite so straight with the tub. If I started at the tub and made them straight with the tub and worked my way to the vanity wall, then I ran a risk of them not being straight in front of the vanity. I just made a judgment call and determined that I’d rather have them straight in front of the vanity, and run the risk of them not being quite so straight in front of the tub. Since I’ll be building a tub skirt to add to the front of the tub, I can probably camouflage any unnevenness of tiles next to the tub when I install the tub skirt.
I thought the same thing of the possible unevenness, but didn’t consider the vanity like you brought up. Plus, you’ll have the full length gorgeous shower curtain/s to help camouflage if that’s necessary! Love the tile you chose.
I can paint walls and cabinets and install light fixtures but beyond that things get hired out. From past experience, I believe a professional would have made a chalk line at the center of the room (door way to far wall length wise) and worked off of that.
Shoot that looks confusing what I said. In other words, they would have worked from the center of the room out to the sides.
Yep, you’re right about the chalk line. If I were working in a much larger room, I would have done a chalk line and started from there. But it seemed kind of pointless in such a tiny room where I’m using so few tiles. I’ve noticed on home improvement shows when people are tiling small bathrooms, they often (usually?) start in a corner and work from there. But definitely in larger rooms (kitchens and living areas) a centered chalk line is important. 🙂
You’re right. That is the proper way to install tile so that it runs even. Most times walls are not straight so the tile runs crooked if you start from the wall out (or from whatever side). It is best to find the exact center of a room and start from there and work your way out so that all the tile runs evenly. When we bought our house 20 years ago, they had carpet in the bathrooms, if you can believe it. That was the first thing we got rid of. We didn’t have any money at the time to do anything much but we bought self stick vinyl tiles to use temporarily. We made the mistake of starting in a corner instead of finding the center of the room. It was horrible! We ended up having to cut little “shivers” off to get them all to fit correctly and look even. We learned our lesson with that. When we bought ceramic tile several years later to tile the majority of our house, we learned the proper way to lay it and it was so much easier and came out looking a lot better.
Yes, what Casey said is what I meant. But I see your point about being straight in front of the vanity. Since that’s right inside the door, that’s probably what your eye will be drawn to first. Mine would be anyway, if I were doing the tiling and didn’t get it straight!
Looking good!! Can’t wait to see the finished results! Happy Friday to you Kristi! Btw, this gives me inspiration for our master bathroom remodel….love it.
I have never tiled, but would love to learn how to do it. Your site is very inspiring! I am probably missing something here, but I’m curious if you couldn’t have laid the tiles side to side first, instead of end to end (resulting in the same look/end product), and have worked your way out the door all in one day. Still having a front to back design, but starting at the other end of the room and working left to right.
I certainly could have, but I wanted every other row to have whole tiles at the door, so I wanted to start at that wall and work my way to the far wall. For some reason, at the moment, having those whole tiles at the door seemed important to me. If I had to do it over again, I’d probably do it your way.
Looking good!
Without going back to your design plans what are the dimensions of your bathroom, including the height of your ceiling? What was your mindset to do your floors before painting walls and completing the ceiling of the bathtub area? There’s probably no right or wrong way to do it, but I was just curious. Really like the tile you chose, by the way.
My mindset was that I wanted to tile the floor next. 😀 There’s no reasoning to the order in which I do things.
Those are beautiful floor tiles and the same size I’m considering for my 1/2 bath. Great job, Kristi! You are a powerhouse!
I think your Mom’s logic is right and that’s the way I’ve always been told to look at it (whether it’s a “standard” or not, I’m not sure). I’ve always looked at it from the perspective of “entering the room from the main entrance.” I think it’s comfortable for peoples’ eyes to follow a visual queue that leads into or through the room rather than lines that cut across the space. Also, if you had a room that was long and skinny instead of square-ish, you generally wouldn’t want a bunch of short boards going across the short dimension. It’d make it seem kind of choppy (and make you do a lot more cutting work). Better to lay them the long way.
Kristi, your blog inspires me like no others! Your decorating tastes are slightly different from mine (I DO like neutrals 🙂 but I love the finished product of every project you tackle. And because you are so good at “walking us through” each project, including your thought process, I’ve found myself thinking, “If Kristi can do it, I can do it, too!”
Years ago I read ‘somewhere’ that flooring should all run in the same direction as the house’s entry doorways run when you enter the house. I thought about my mother’s early 1900’s house and realized that the wood flooring ran straight in from the doorways just as he article suggested so that’s the way I’ve always done it. Currently I’m installing plank vinyl throughout my home, one room at a time, and that’s the direction I laid this too. Fortunately both my front and back door are the same side of the house so there was no question as to which way was correct for this house. When you said that your wood floors ran the same direction I heard “Bingo” in my head, lol. I also think your mom’s reasoning makes perfect sense. The tile is so beautiful. This room is going to look just as rich as the rest of your home!
A funny and somewhat-related story about how to lay things out relative to the the entry way of a room… My Dad, an avid DIY’er, is a big fan of light switches. When he renovates, he tends to put in three-way switches anywhere they could possibly exist. Fan/light combos get two switches instead of one and a pull-chain. Task lighting gets switches….you get the picture. And he has a habit of putting them all in multi-gang boxes near the doorways or archways to the room like some sort of master command center.
Anyway, if you walk into any room in his house and try to flip the light on, there’s a pretty good guess you’re going to choose the wrong switch. You end-up flipping every one on and off until you hit the right one. We all pick on him that he has a counter-intuitive way to look at things but the simple fact is that it’s all about perspective. Do you walk-into a room from the front door or from the hallway that leads to the rest of the house? If you’re walking OUT of a room into another room or a hallway and that bank of switches controls both spaces, which room gets the first switch? Whether you’re walking in or out might make a difference as to whether you’re coming in from the bedroom (from sleeping overnight) or whether you’re coming in from outside. Everything is relative.
Anyway, my point, aside from humor, is that there’s no set rule to any of this, least of all the flooring. You might try to apply the “rule” and decide that it just looks visually awkward due to the shape of the room or the way you plan to place the furniture. You may have two rooms and a hallway that you plan to join together without thresholds and if you run the boards relative to the front door, maybe a hallway is going to end-up with boards going the short way. So you break the rule so that the hallway will look more natural. Or maybe you have two “entry” doors in the room on opposing walls. Which one do you choose?
Looking forward for the finished bathroom, it is going to look very good!
When Kristi explained why she has to tile the floor over 2 days, I remembered a funny story. We have a small toilet, about 4 x 4 feet, and used relatively big square tiles for the floor, so we needed 4 and a half rows of them. I decided we should start with a whole tile by the door and finish with a half tile at the back wall behind the toilet. Which meant tiling a couple of rows, let them dry, and finish the rest the next day. My partner John stepped up and said that we are not going to waste 2 days doing this tiny floor. I explained my reasoning but he wouldn’t listen and said he would tile himself. So I let him do this and found another job somewhere else in the house.
Then I heart a shout ‘Vaaaal !’. I run there and what do you think happened? John tiled 3 rows starting from the door, while he was in the room moving backwards to the wall. Then he spread the mortar for the 4th row and as there were nowhere to move, decided to take a giant step over the set tiles. He didn’t realize though that the mortar was slippery. So I found him with his hands on the door frame and his feet by the back wall, leaning over the tiles 🙂 We both couldn’t stop laughing :)))
There was no way to rescue him without ruining the job, so when I was able to speak again, told him to step on the tiles and pulled him out. We lifted all the tiles, cleaned them from the mortar and re-tiled according to the initial plan.
Great story.
Looking good Kristi! I was thinking about your post yesterday inspiring everyone to step out of their comfort zone with color. I noticed that you kept things neutral with all the major finishes in the room, ie: floors, tub surround, etc. and are using the vanity and shower (easily changed pieces) for your pops of color. I love this method, and utilize it myself, usually. (although I am still not as brave as you) However, when we build our home two years ago, I pretty much made everything neutral: walls, stained cabinets, floors, and countertops. Then I read your post on making drapes, and I made pinch pleat drapes for my main living area, and I used a brown trellis pattern fabric. I chose the color/design again as something neutral that I wouldn’t have to change often since I had to make 4 single and 4 double panels 108″ long. (a job that took some muscle to hang due to the weight!) What are your suggestions for adding color to my heavily neutral rooms. Should I add some painted pieces of furniture and/or colored accessories? If so, can I introduce some cooler colors? As I read you posts, I feel I’ve played it too safe. My sofa does have color in the pillows, and the coordinating chair fabric on the back. It is almost a Navajo print, and I have trouble finding a pattern in fabric that compliments/coordinates with it. Any suggestions would be appreciated.
BTW, everything looks great! Can’t wait to see the painted vanity, and how you transform it into a furniture piece. Love following your blog, and am a bit deflated when I don’t find a new post in my inbox. As hard as you have been working, I know you need a rest, so I will survive the occasional lapse in daily updates. Carry on, and we will catch up on Monday.
You’re doing an AWESOME job doll….love the tile!!!!!
Hang in there……we are all rooting for you!!!!,
Wow! Just “wow” because while I’ve been thinking about tiling you HAVE been tiling. I’m so humbled! And mildly ashamed. One of our three bathrooms needs to be… gutted. And I’ve been pushing it off for two years. I have got to follow your example and dive in and get ‘er done! Thank you.
I love how your bathroom is coming together. You should definitely go for bright crisp colors with your shower curtain. Have you decided what to do with your living room draperies? They are pretty, but to me they are more traditional than contemporary and don’t have that brightness your bathroom needs. Have you searched for new fabric? Maybe try one of these?
http://www.houzz.com/photos/22332496/Solar-Flair-Lime-Suzani-Medallion-Drapery-Fabric-By-The-Yard-contemporary-drapery-fabric
http://www.houzz.com/photos/22332669/Django-Turquoise-Linen-Ikat-Drapery-Fabric-By-The-Yard-contemporary-drapery-fabric
http://www.houzz.com/photos/10859975/Blue-and-Green-Giant-Ikat-Linen-Fabric-contemporary-upholstery-fabric
Kristi, it’s looking good. Is that your tile saw in the pictures? Is it like a tiny table saw with a tiny circular blade? I cant tell from the pics. Looking forward to seeing the end product.
I am more excited about this project than any other to date – maybe because I am itching to do our tired old, builder-grade 1980s bathrooms. i am still astonished at your bravery/talent/eagerness to strip that bad boy down to the wall studs and start over!
love that tile….can’t wait to see it all done! Do u think that tile goes with subway tile? I need a new floor, but I have a small amount subway tile on the wall….
I must say I am totally “Addicted” to your page. It is the first thing I
look for every morning and I am so disappointed when it is not there.
I can’t do most of what you are but you keep me thinking and encouraged
just to do small things even if it is just for me. thanks.
Hi. It’s really looking great. I am starting a bathroom renovation next week and I am planning to use the same tile on my shower walls. I was curious about what color grout you plan to use. Thanks!
I haven’t decided on grout color for the floor yet.
I am continually amazed at you and your amazing talents! I just love seeing all your work. I thought there used to be a contact button somewhere, but I’m not finding it now. I’m hoping to start the HCG diet in the next couple weeks and I’d love to know how it’s going for you by now. Any tips and tricks or whether you’ve noticed anything concerning. I am so freaked out of screwing up something–there’s so much negativity out there. If you’d rather reply privately, feel free! I put my email in the comment form.
Looking great!
Just wondering, the tile looks white and grey here, but online at home depot, it kinda has a tan hue. Besides driving there and checking it out myself, wondering if you could give a brief description? Just trying to avoid any tan tones whatsoever, and I like this tile at its price. Thanks!
Now you are getting into the exciting part! I like what I see! Thanx for that article on tile link. What a wealth of information!
Hi Kristi, I love the tile and funny enough I did pick the same tile for my project.
we are about to install the tile in the master bathroom, and I’m curious if you have notice any pink tones on the over all flooring so far?
I have seen the samples and photos and have that tone that is making me nervous,
Any advise? Thanks!!
I personally haven’t noticed any pink tones on the floor.
We are in the process of re-doing the master bathroom using the same tile you used (VitaElegante Bianco). I actually came across your site as I was searching for pictures of others that have used it. In one of your posts, you mentioned that you used Alabaster grout. What was the brand of the grout that you used? It looks like it turned out pretty well and not too noticeable. Thank you in advance!
It’s whatever brand Home Depot carries that comes in the pre-mixed 1-gallon containers.
Im also about to finish our bathroom tiling and was looking on YouTube for some inspiration. Got lost and found your website. Looks like you had the same ideas as I had at first.
Anyway, great to see that people are sharing their ideas and experience. Thanks for that.