Easy and Inexpensive DIY Modern Frames For Artwork
I took a break from cabinet building yesterday to finish my entryway artwork. Specifically, my artwork needed frames so that I could finally hang them on the wall.
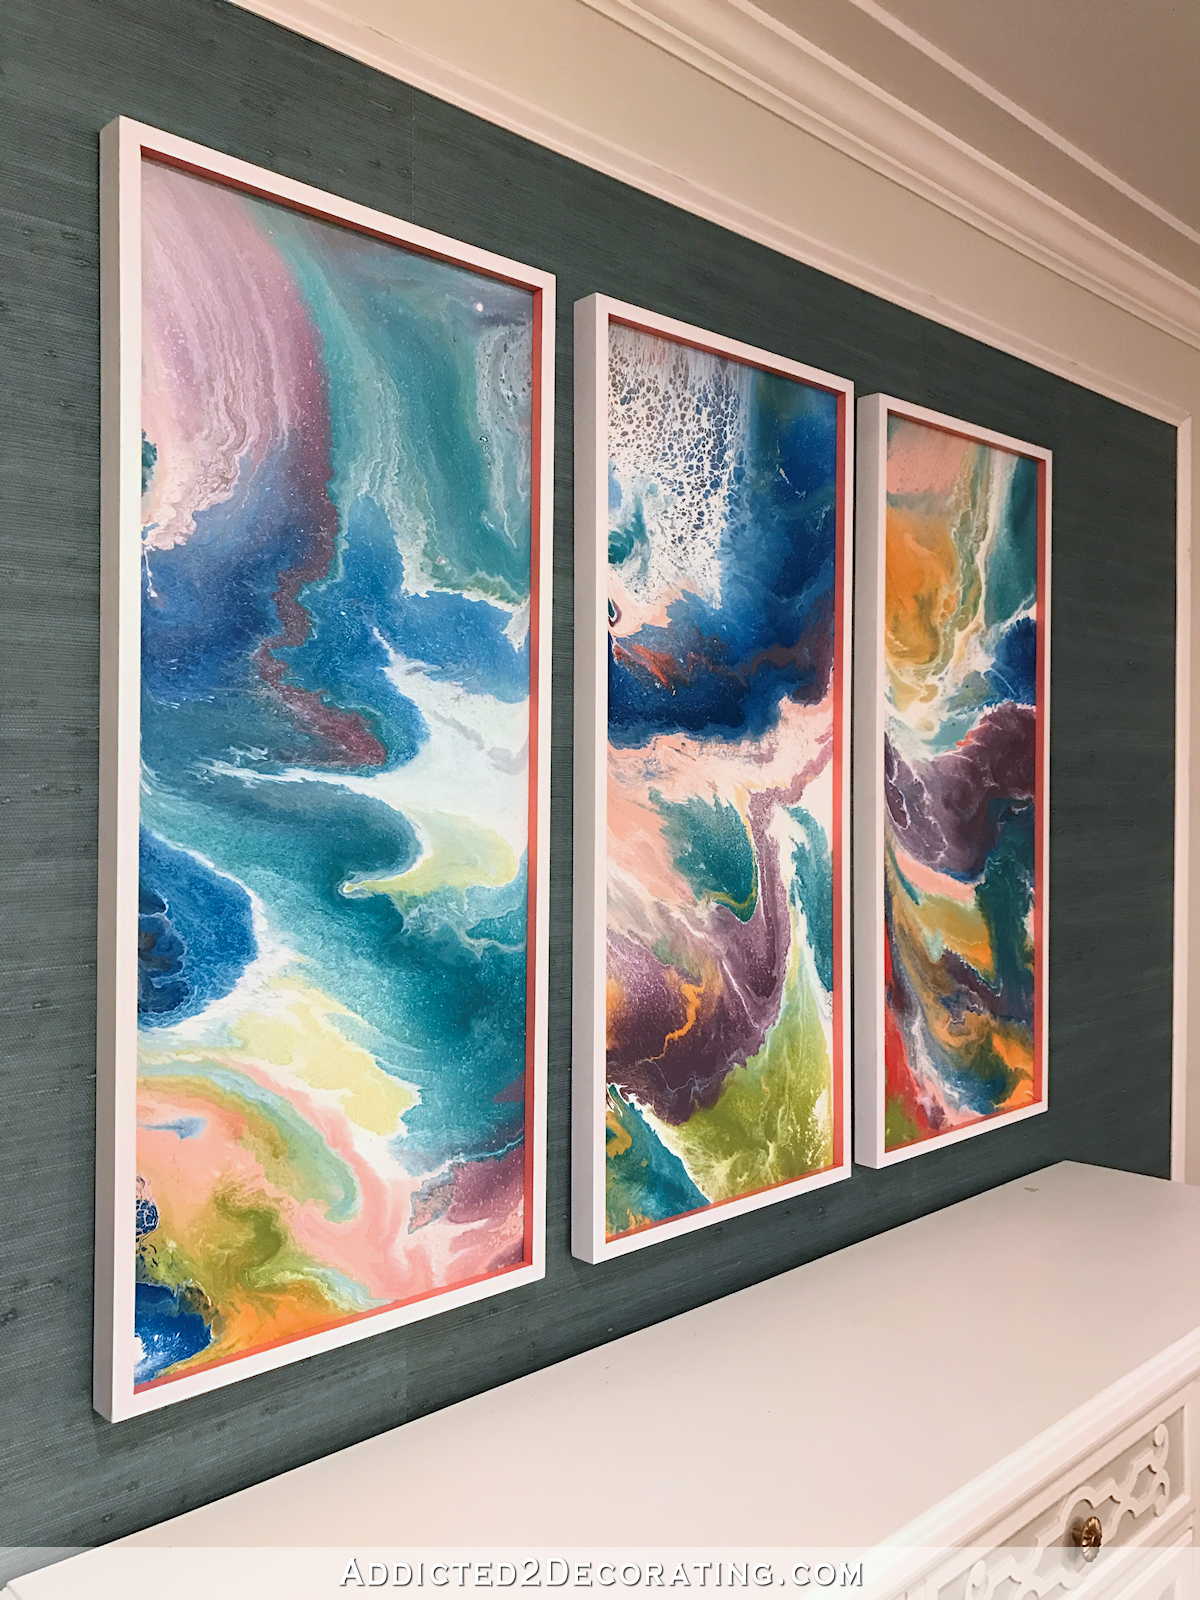
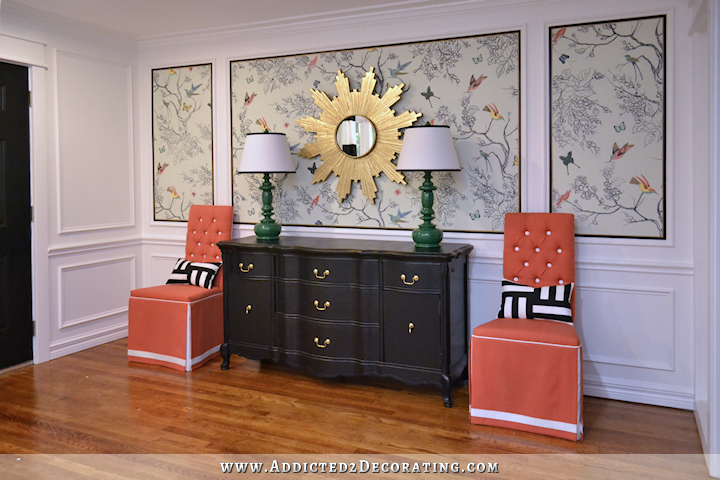
I wanted something bold and colorful in the entryway, so about three weeks ago, I did a triptych of fluid acrylic abstract paintings. You can read more about that project here.

But they’ve been sitting there just like that, unframed and unfinished, for three weeks because I had no idea how to frame them. They are a custom size (18″ x 42″), and three large custom size frames would be expensive. The cheapest I found for a simple, modern white frame in this size was around $80 each, so framing three of them would run about $240. That seemed excessive, especially considering that I might decide in a year that I want different artwork altogether, and then that money would be wasted.
So after looking at basic white frames online, I finally decided I could just make my own using my table saw to cut the rabbet. I used 1″ x 2″ pre-primed fingerjoint lumber from Home Depot. (FYI, 1″ x 2″ lumber is actually 3/4″ x 1.5″) And here’s how my frames turned out…

All three frames cost me just over $25 (5 boards at $3.82 each + a can of spray paint + tax). That’s not too shabby, right? 🙂
Making these just took two passes on the table saw for each piece. Now I know that a table saw isn’t a tool that all DIYers have. Heck, the entire time we lived in the condo (and I was remodeling it), I never owned a table saw. It wasn’t until we moved to the house that I got one, and I got a small Ryobi from Home Depot that cost $199. They have two models that are $129. The point is that you don’t have to spend a ton of money on one of those huge, nice table saws in order to get a useful table saw. I hope to get one of those one day, but for now, my little one works just fine. And now that I have a table saw, I wonder how in the world I DIYed for so many years without one!
Anyway… 🙂
For the first pass, I set my blade to make a cut 3/4″ deep, and I set the fence 3/8″ from the blade. Then I ran the piece of lumber through standing on its edge like this…
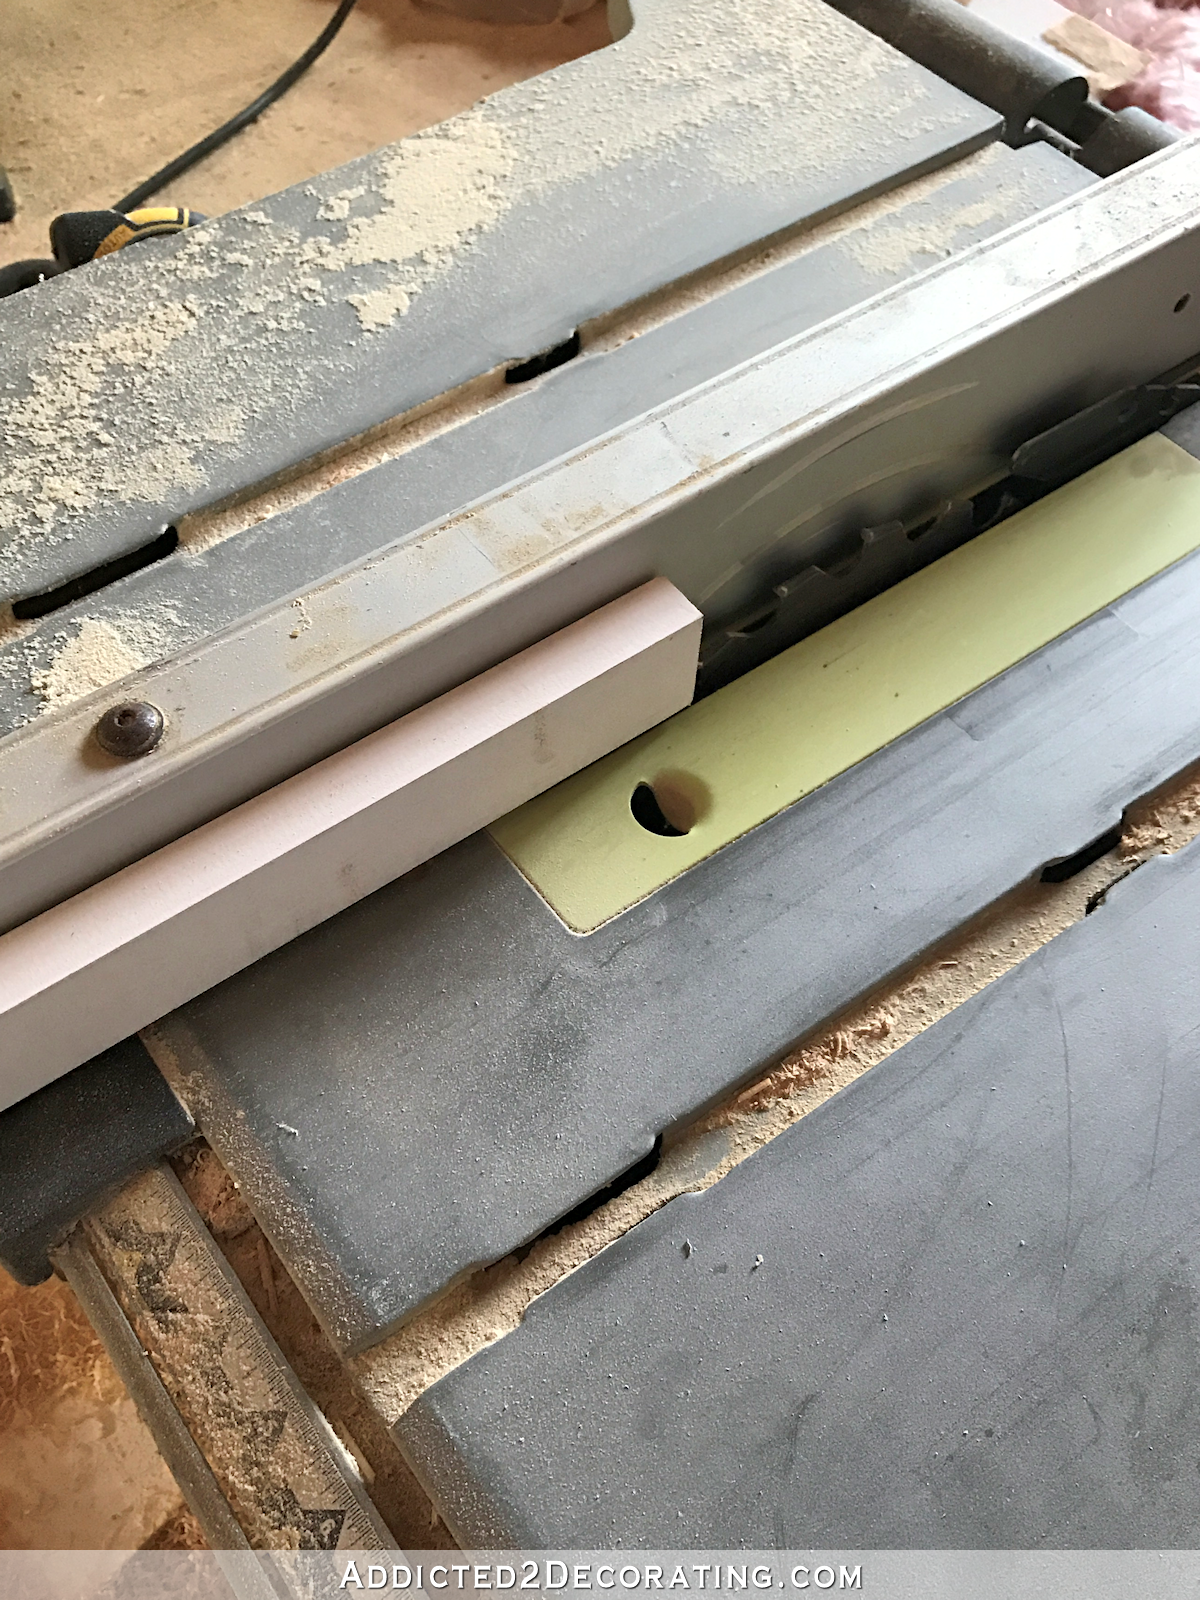
And then to make the next pass, I basically flipped those measurements, setting the blade to cut 3/8″ deep, and the fence 3/4″ from the blade. I ran the board through with the cut edge against the fence.
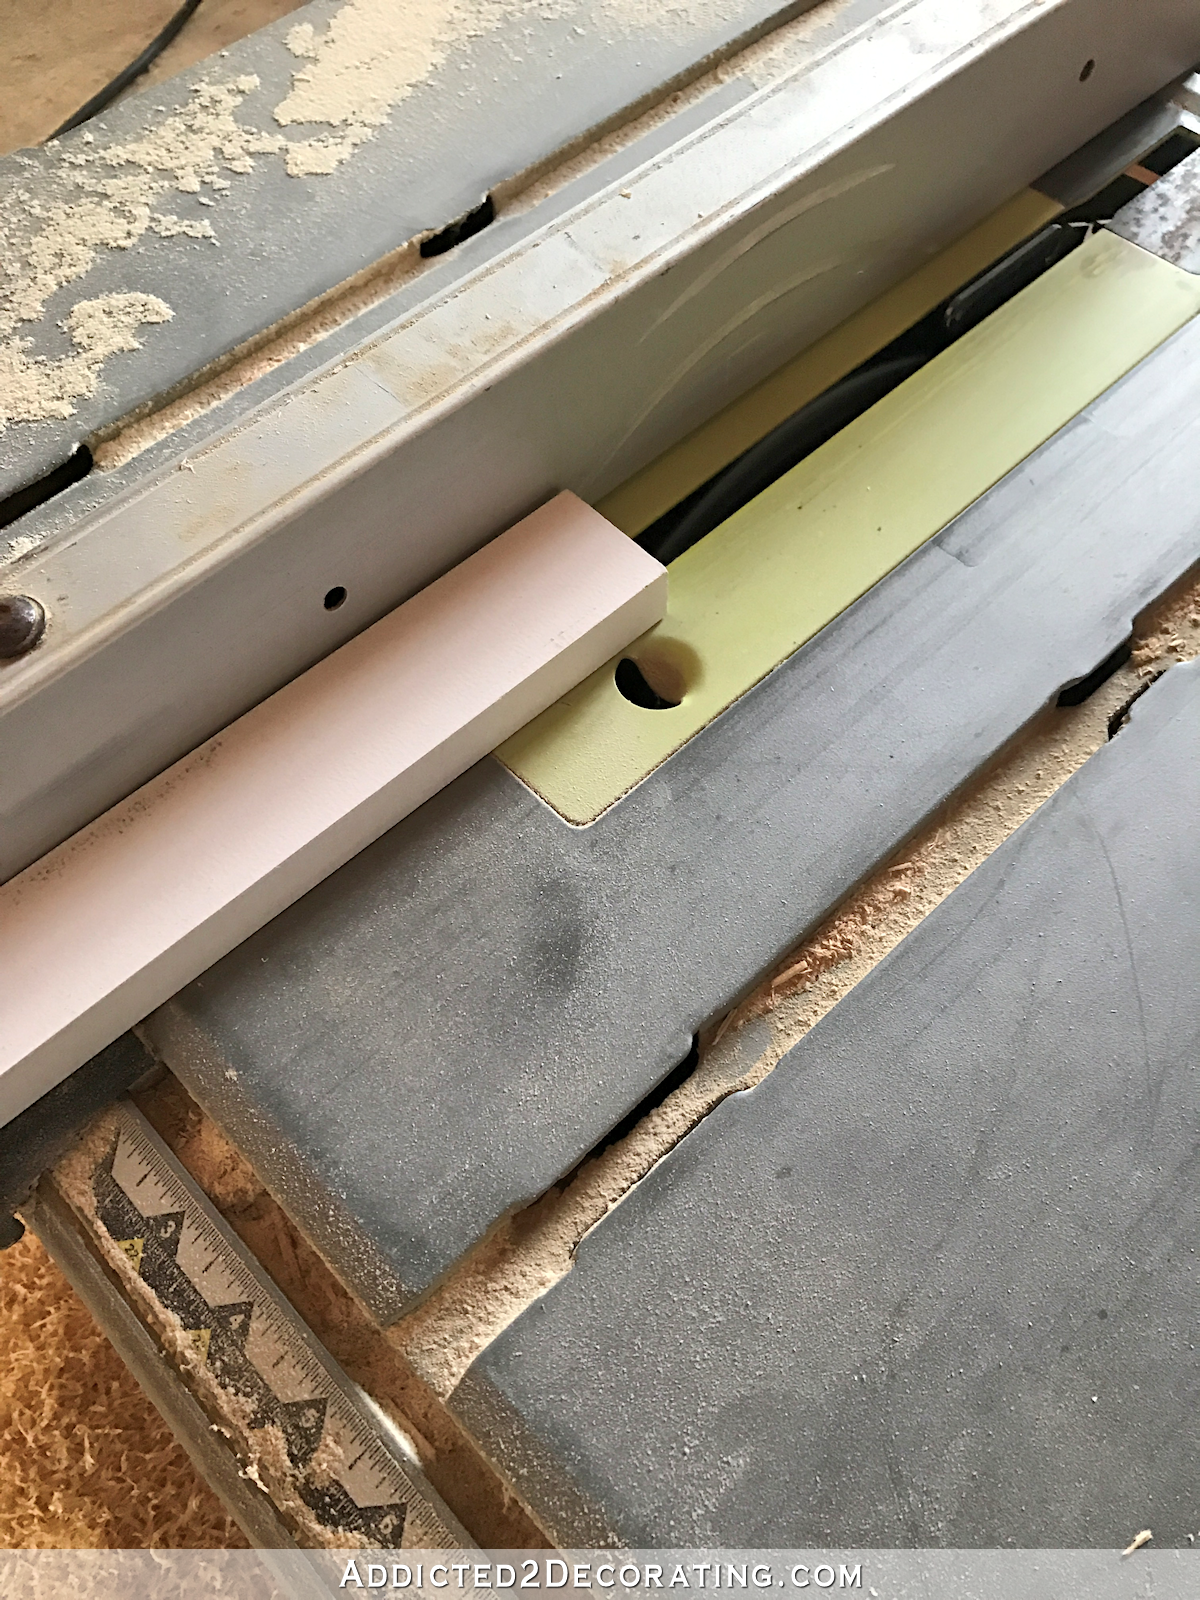
This gave me a nice rabbet on the back that the artwork could rest against.
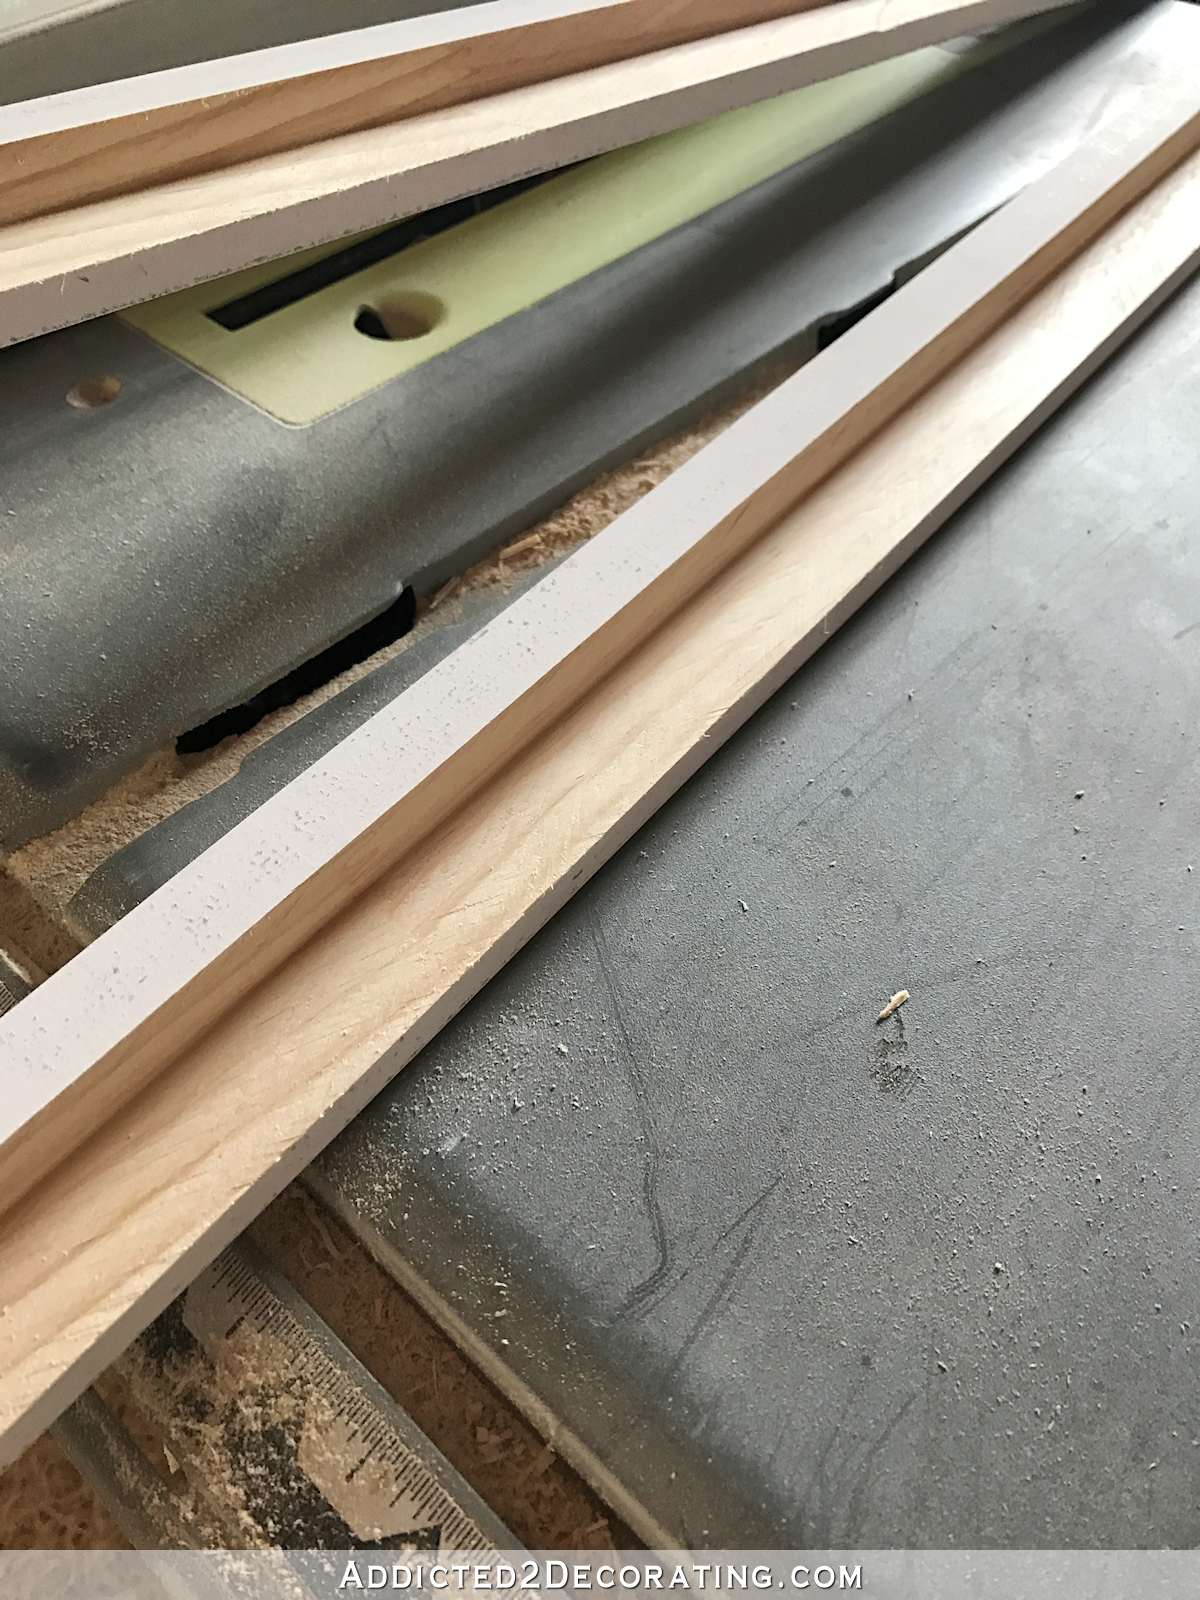
Then I used my miter saw to cut the pieces to fit my artwork, with the corners mitered at 45-degree angles. I assembled the frame using wood glue and 3/4″ 18-gauge nails.
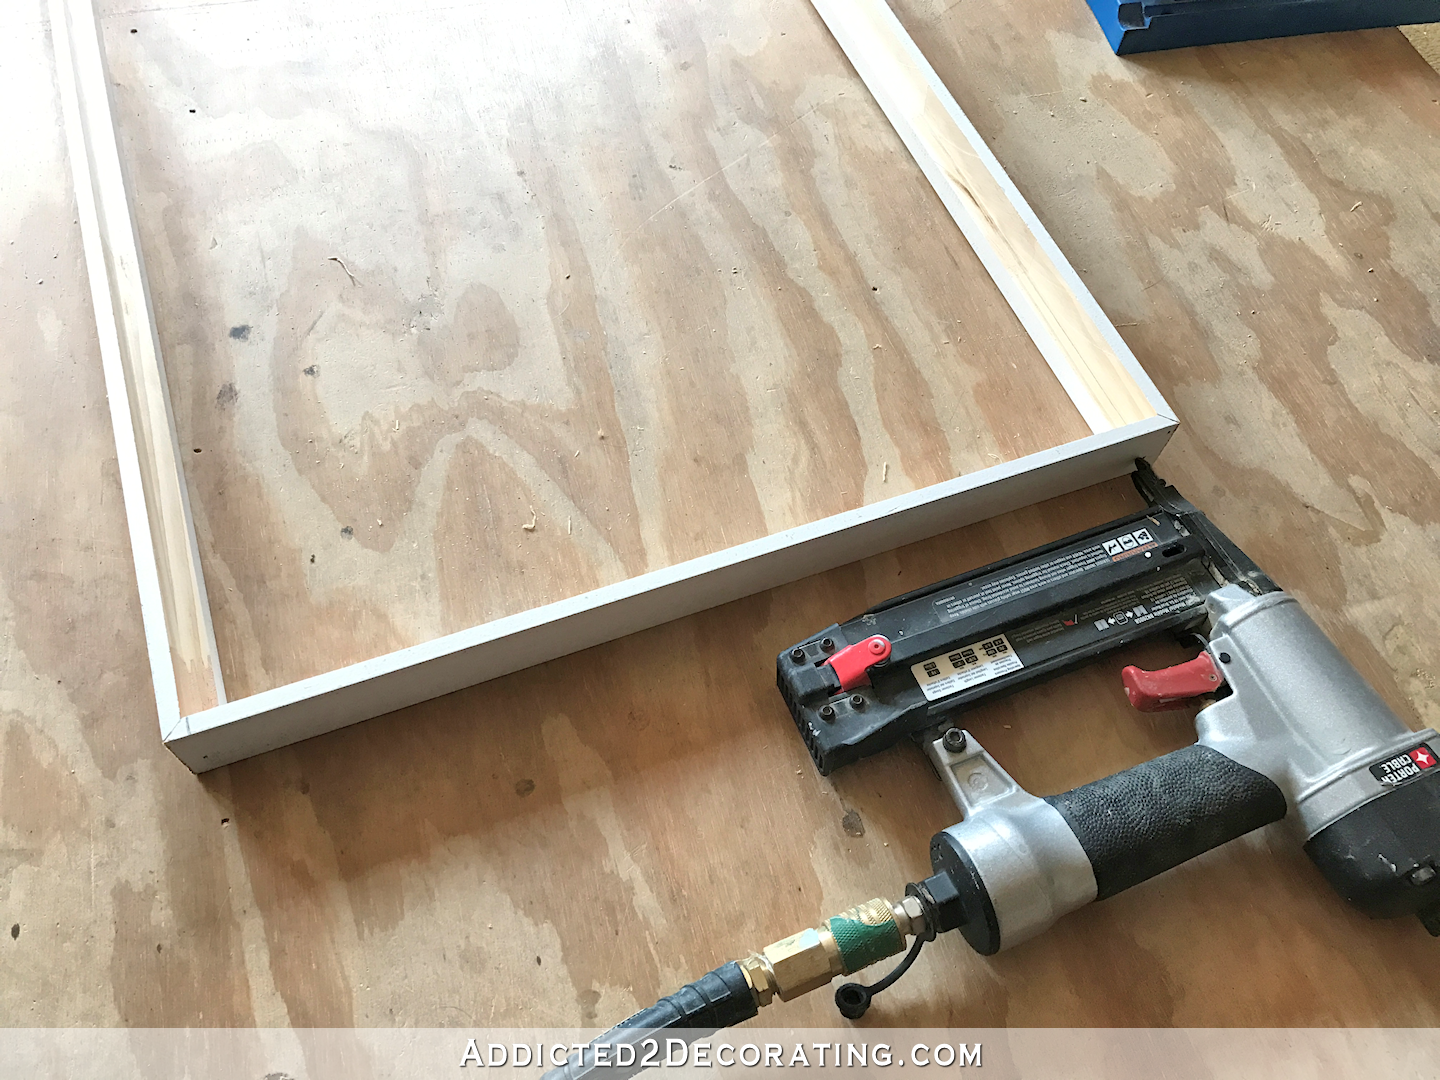
I waited a couple of hours for the glue to dry, and then used wood filler on the corner joints…
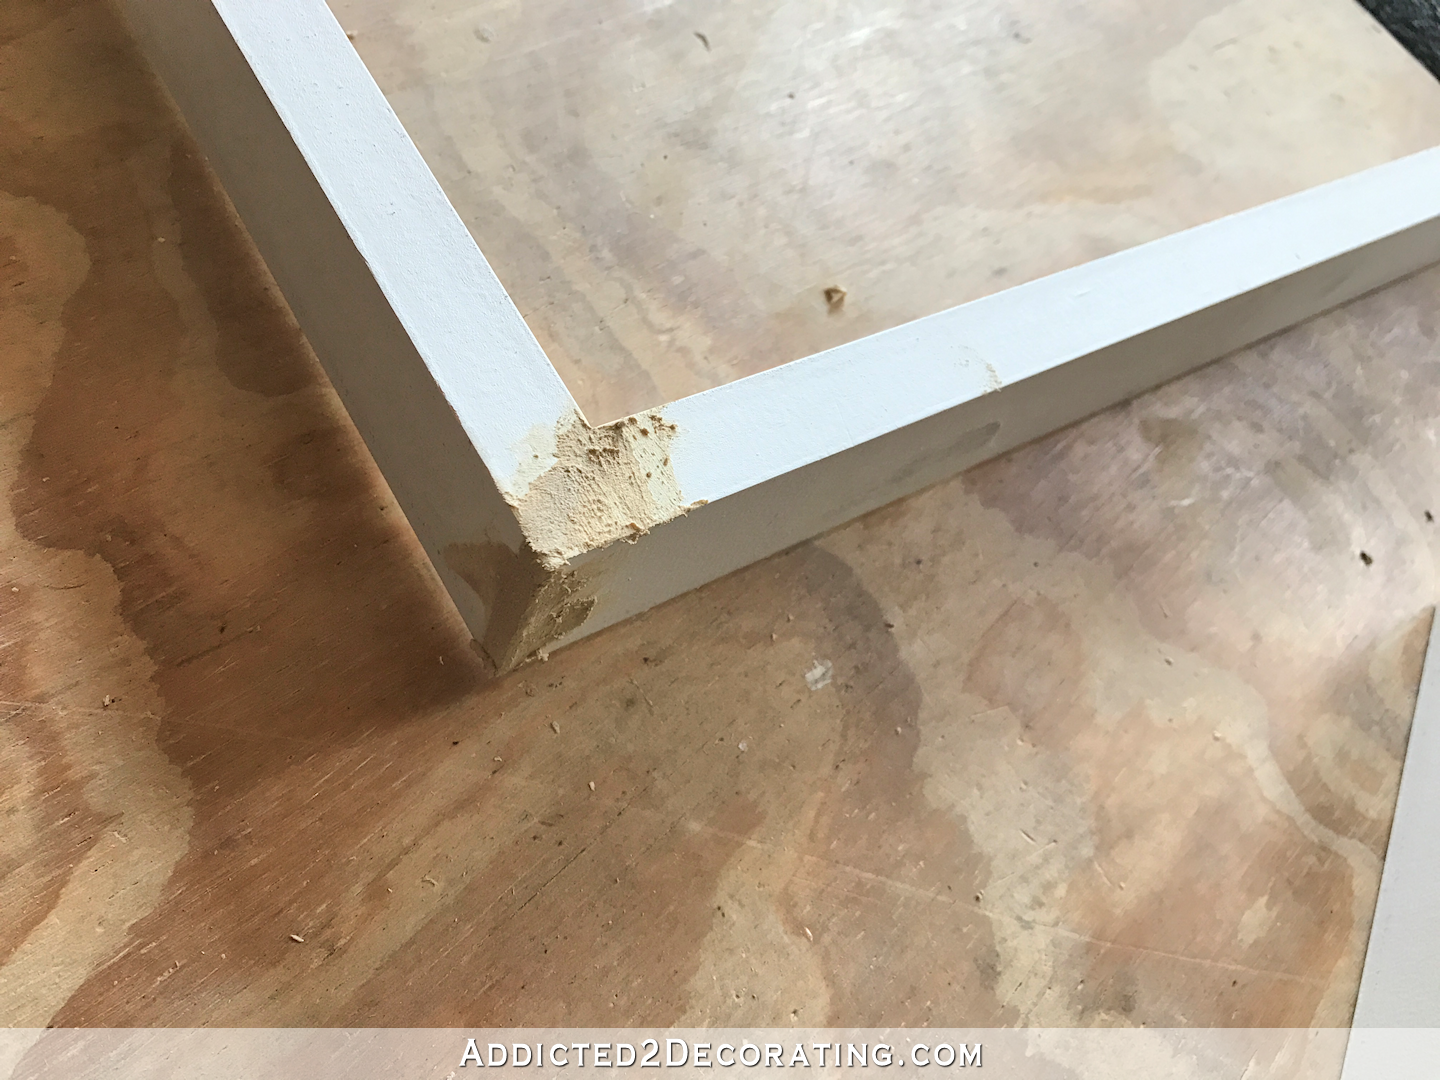
And then sanded them smooth by hand using 150-grit sandpaper.
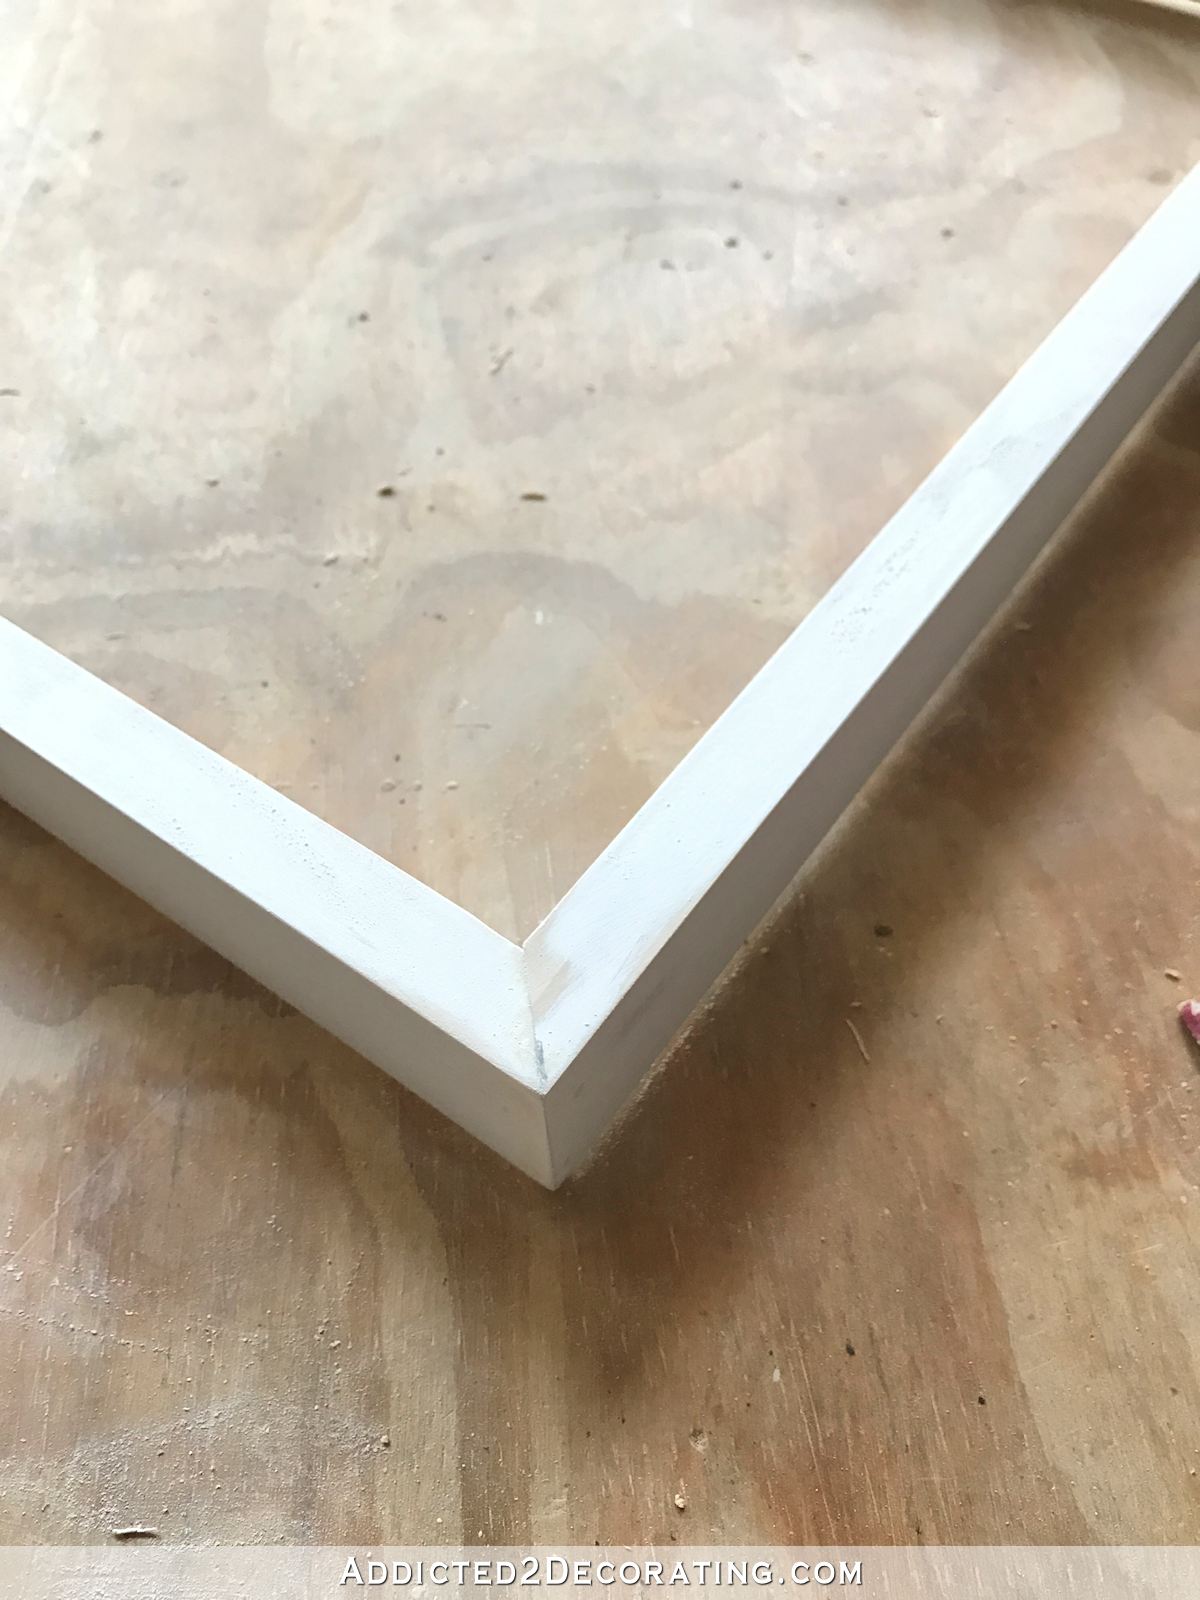
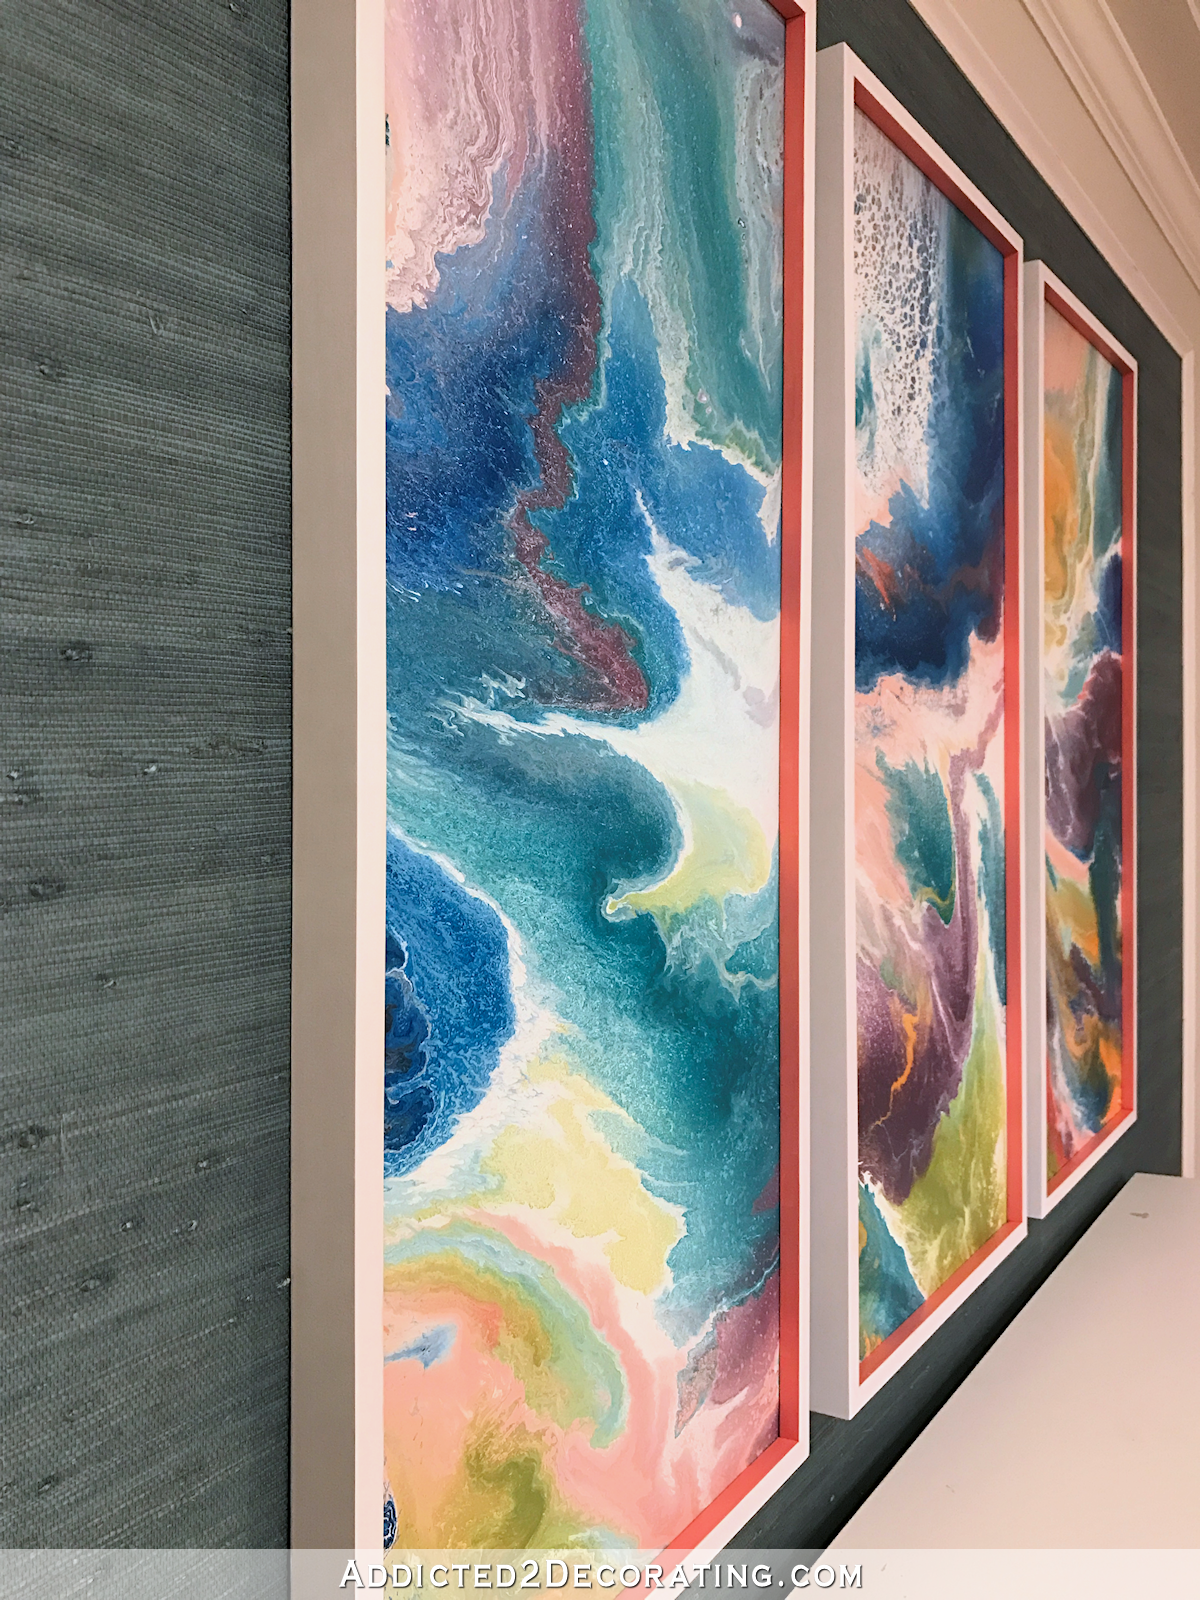
And then they were ready to paint. I used white Rust-Oleum spray paint to make things quick (took about 20 minutes to paint all three). I gave them about two hours to dry, and then went back and painted the inside edges of each frame using a pink sample paint that I had on hand called Pink Damask from Behr.
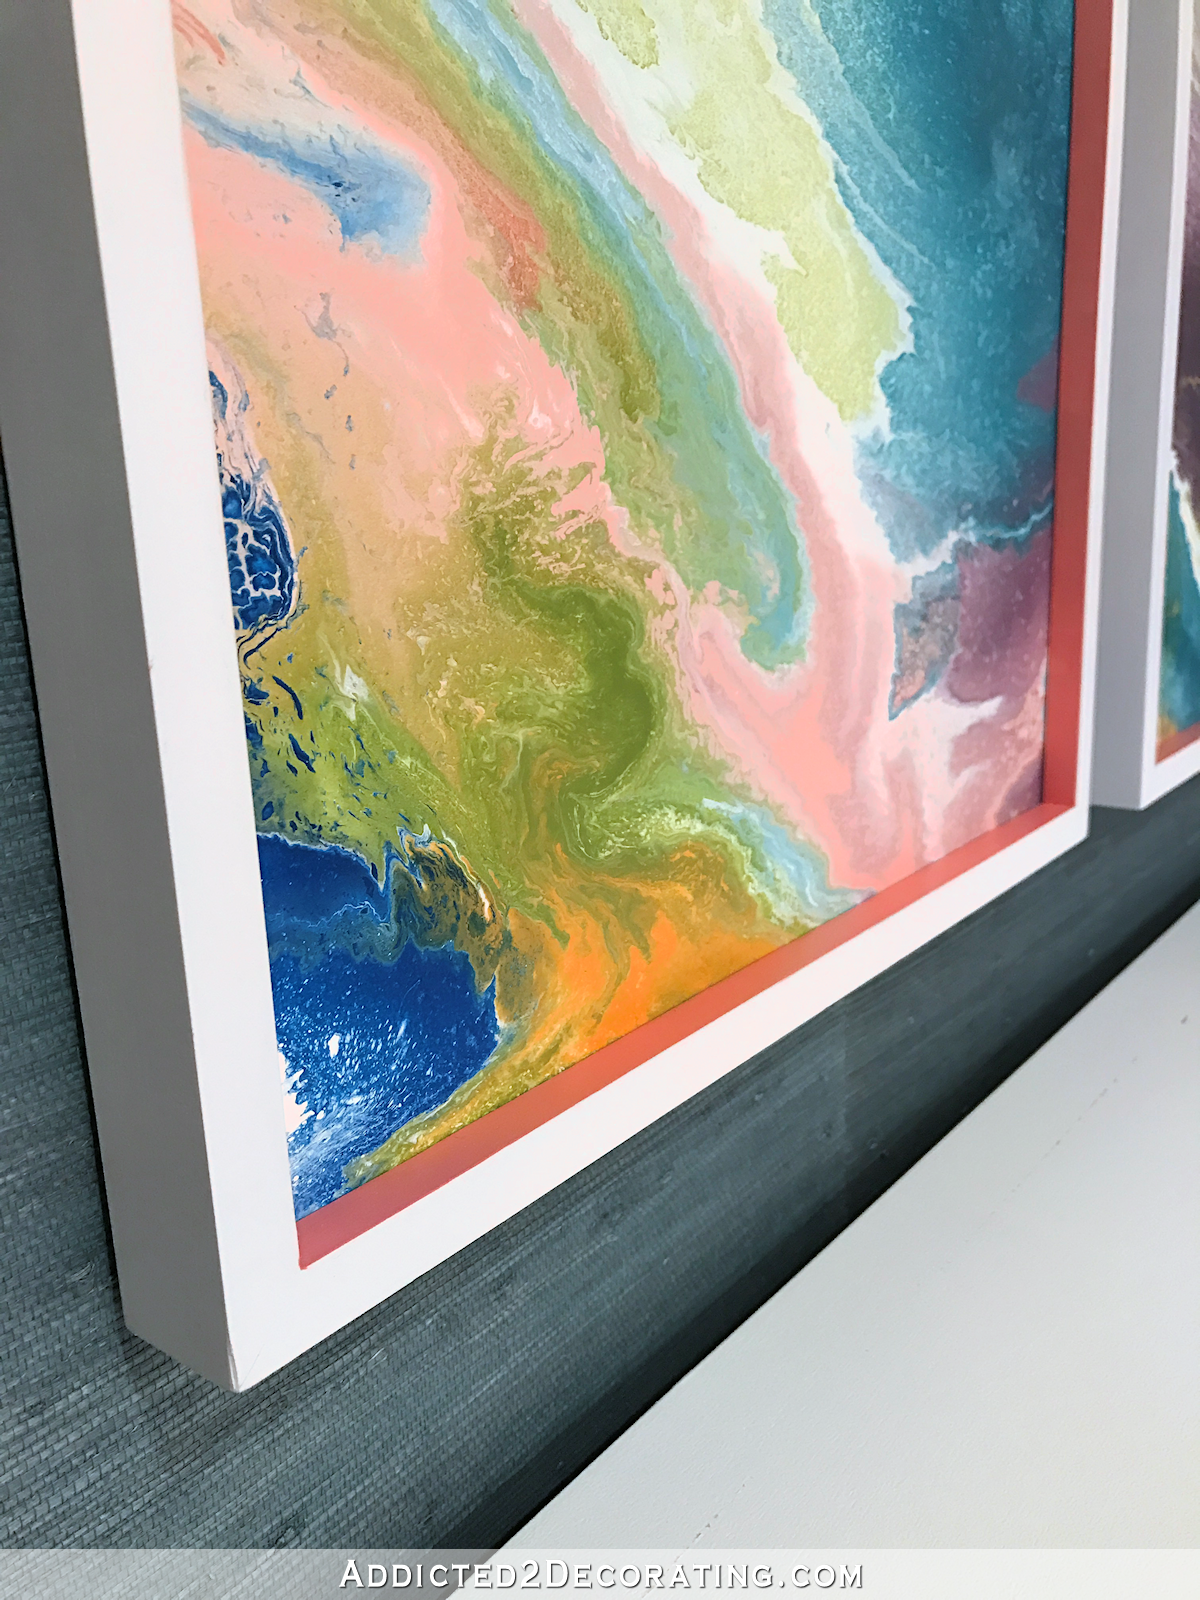
You can’t see the pink when you view the artwork straight on.
But if you see it from any angle at all (which is most of the time, since this is an entryway in a house, and not a museum), you can see those happy little ribbons of pink framing each painting.
I painted the pink with a small craft brush, and then after it was completely dry, I used an isopropyl alcohol wipe (I always keep these on hand and find them in the pharmacy section of my local grocery store), wrapped it tightly around my finger, and wiped it over the white face of the frame to remove any pink that accidentally crept over the edge. This gave me a really clean, crisp edge between the white and the pink. Isopropyl alcohol will only remove the latex paint, but won’t affect the spray paint as long as you work quickly and don’t scrub back and forth over the spray paint surface. If you just do quick passes, it’ll only remove the latex paint.
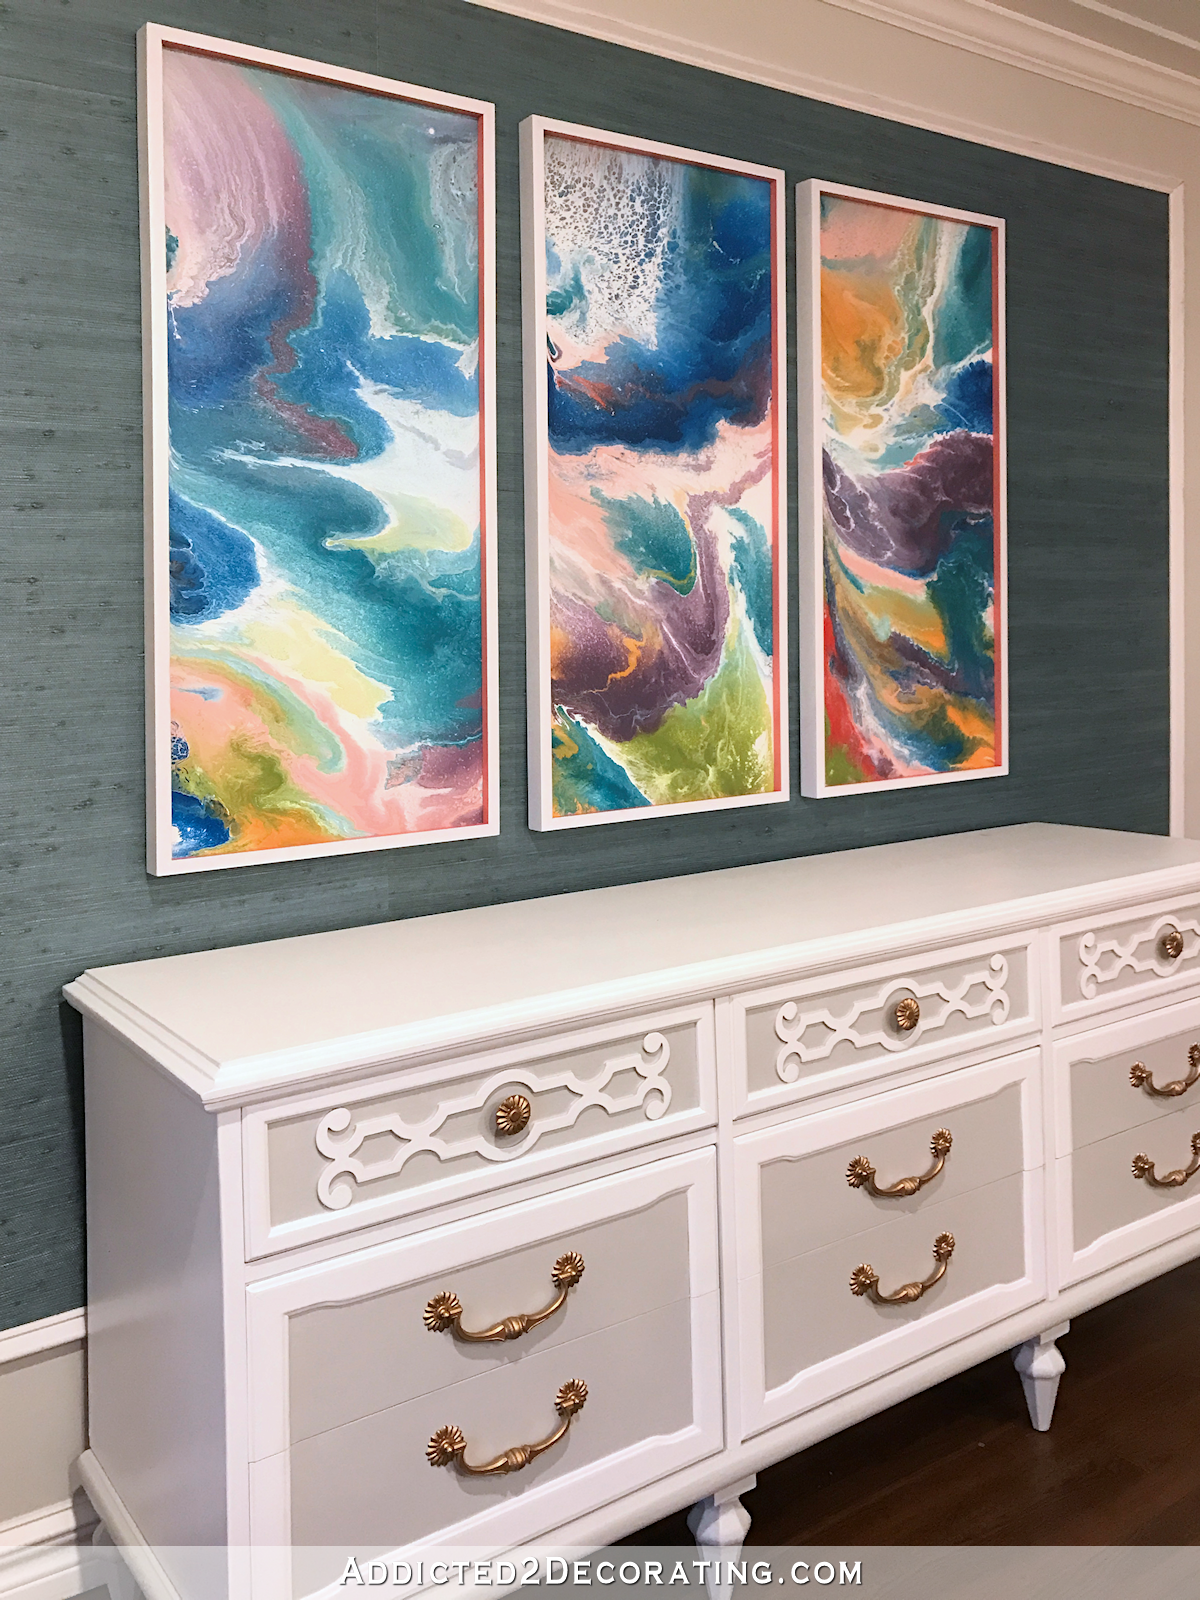
I think $25 for three big, custom size frames is a pretty good deal! And of course, the possibilities are endless. You can paint them any color you want, accent the front edge of the frame with a metallic wax like Rub ‘N Buff, gold or silver leaf the inside edge, or just whatever your heart desires.
I used the shortest 18-gauge brad nails I had on hand (I think they were 5/8″) to nail the artwork into the frame, but if you want to be able to remove your artwork, you can just use framer’s points to hold the artwork inside the frame.
And that’s one more item I can check off of my 2017 home projects to do list. I’ve now finished 31 of the 54 items on my list. But now it’s back to the hallway cabinets. I’ll be working on the doors and drawer front today, and I’ve decided to do a very simple design that doesn’t require any kind of special cabinet door-making tools. I’ll show y’all on Monday if my plan worked out.

Addicted 2 Decorating is where I share my DIY and decorating journey as I remodel and decorate the 1948 fixer upper that my husband, Matt, and I bought in 2013. Matt has M.S. and is unable to do physical work, so I do the majority of the work on the house by myself. You can learn more about me here.


They look awesome, another great job! Love the pop of color!
Great great great tips in this post!
Beauties! Love the pink peeking at you! I made my hubs get rid of his table saw when he took off the tip of his finger! Be careful with that thing! Don’t be like him! LOL.
I know what you mean! My husband cut the tip of his thumb off with his table saw. He admitted that he was in a hurry and not completely focused. Now he stays focused. The surgery and healing was no joke.
The artwork and frames look great! I have become such a worrier that I introduced my husband to the Sawstop table saw! If the blade comes in contact with skin it stops and drops in a millisecond! It won’t even draw blood. And to be honest that was the one power tool I was afraid to use, so it was for me too😉 A tad spendy but so is a trip to the emergency room!
It will draw blood. Mine went an eighth of an inch deep. I have my thumb and I am fine, but please note: I was definitely injured. I will never use a regular table saw again. Saw stop ONLY.
What a great idea! Love the pop of color.
I love this project! Simple, inexpensive, yet so effective!!
I didn’t read the comments, but I have been interested in your possible use of marbled paper on the wall. Seeing these made me think, “She DIY’s EVERYTHING, and did a beautiful job on the art over the credenza, so why not make paper for the walls with “her colors”?” Not that you need another thing to add to the list…but it seems to me that this would be a transferable skill. And you are color specific, so this might be a good option. Loving seeing what you do.
You’ve done it again Kristi…..another amazing job with Kristi finesse. The pop of pink color is so unexpected and it works! Your artwork looks awesome in your entryway and against the grasscloth! Well done and another item ticked off your check list. Woohoo!
I watched Youtube when you first showed that artwork. It is a neat technique. Could you have used a router to make the rabbet? I agree with people who responded to yesterday’s post. I would hire out some of the stuff that a crew can get done so fast and get closer to being able to work on the more creative stuff!!!
I have recently become obsessed with the colors of sunset, and now I just really, really want paintings like these done in sunset colors! It would be just beautiful. The only problem is that I have no artistic ability whatsoever. None. 🙁 I can only imagine how it would look if I tried it.
The whole entryway came out very nice. I love the pop of pink on your diy frames.
I love the pop of pink! You always add that little something extra that most would never think to do.
The entire wall looks really good. Way to go.
Thank you, Kristi. You just saved me a ton of money.
This is just stunning – artwork, frames, credenza, wallpaper – everything! You are amazing.
If & when you decide to. Get rid of the art I want to buy them. They are incredibly beautiful. Even the plots are perfect for my house. Luv Luv Luv!!!!
Those are simple but perfect to frame your fluid artwork. Love them.
Genius! Gorgeous to boot🎨🎨
I love this wall! It truly makes a statement and draws you in. It won’t get ignored when someone enters your home. If they don’t smile and feel good when they walk in, there’s no hope for them. : ) Frames are fantastic and the touch of pink is perfect. It makes me happy to look at the picture of this wall.
LOVE!If you change your mind in a year, I’ll buy them from you.
Great job! Must feel wonderful to check off another thing from your list for this year!
1) that pop of pink makes me so happy!
2) love how you mix more modern frames with more traditional millwork!
The best part of reading about your projects is not only finding your ideas new and refreshing, but more importantly that you actually are driven to complete them!! — even if I DONT GET MINE DONE, there’s always a good feeling that at least YOURS are getting accomplished😂 – Great job!
Celeste
They look wonderful! 🙂
They look great! And thanks for the tip about the alcohol wipes…I would never have thought to use those! 🙂
What a good idea to use a color inside the frame! I need to remember that!
I so agree on the table saw- for the past 10 years I’ve been using the ancient wood-burning Craftsman table saw that my husband had when we got married. This year I finally bought the Kobalt folding table saw from Lowe’s. What a difference! I don’t have a workshop, or even a garage, but I set up in the carport (we’re in MS), and when I’m done I fold it up and cover it with a tarp held on with bungee cords. Kinda redneck, but it works! I can’t imagine now why I struggled so long with that monster of a table saw!
Peggy – my husbands’ saw was a Craftsman too. And he was rushing, as he always does. Hit a knot in the wood and took off the tip on his finger. He’s getting too old now and doesn’t do many projects like he used to thank goodness! A finger, his front teeth ( fell off a ladder while building a deck and face hit the band board! ) and many other less serious accidents. Right now he has a gash on his bald head and a big bruise on his knee from hitting a rock with a sledgehammer. Part of the rock came back at him. I keep telling him to just stay inside and cruise the internet, but you know men! LOL!
These are fantastic. When they start to bore you, flip them. I bet it’ll be like a brand new painting. Thanks for the tip on the alcohol wipes! I have tons of those around my house- I use them for my glasses every morning and for the face of my phone. I never would’ve thought to use them while crafting!
The frames turned out great! I love the pop of pink. It really sets it up nicely. Thanks for sharing. Happy week. Toodles, Kathryn @TheDedicatedHouse
Thank you for the tip about alcohol and latex paint. I went right in and removed 3 drops of green paint from my beige carpeting that had been there for several months. Worked like a charm!
Wow, Kristi! I have been a fan for years, but somehow lost track of you, and only re-found (new word) you due to a search for ‘DIY large-scale artwork’. I have been plumbing the depths of your creative mind, and loving it all. Aside from the artwork search, I am also working on a new TV stand/storage unit for our family room, that has drawers & doors, & I just spotted your post on cabinet doors. Yay! Thanks again!