Natural Stone Flower Bed Borders (Clarity For Our Front Yard Landscaping)
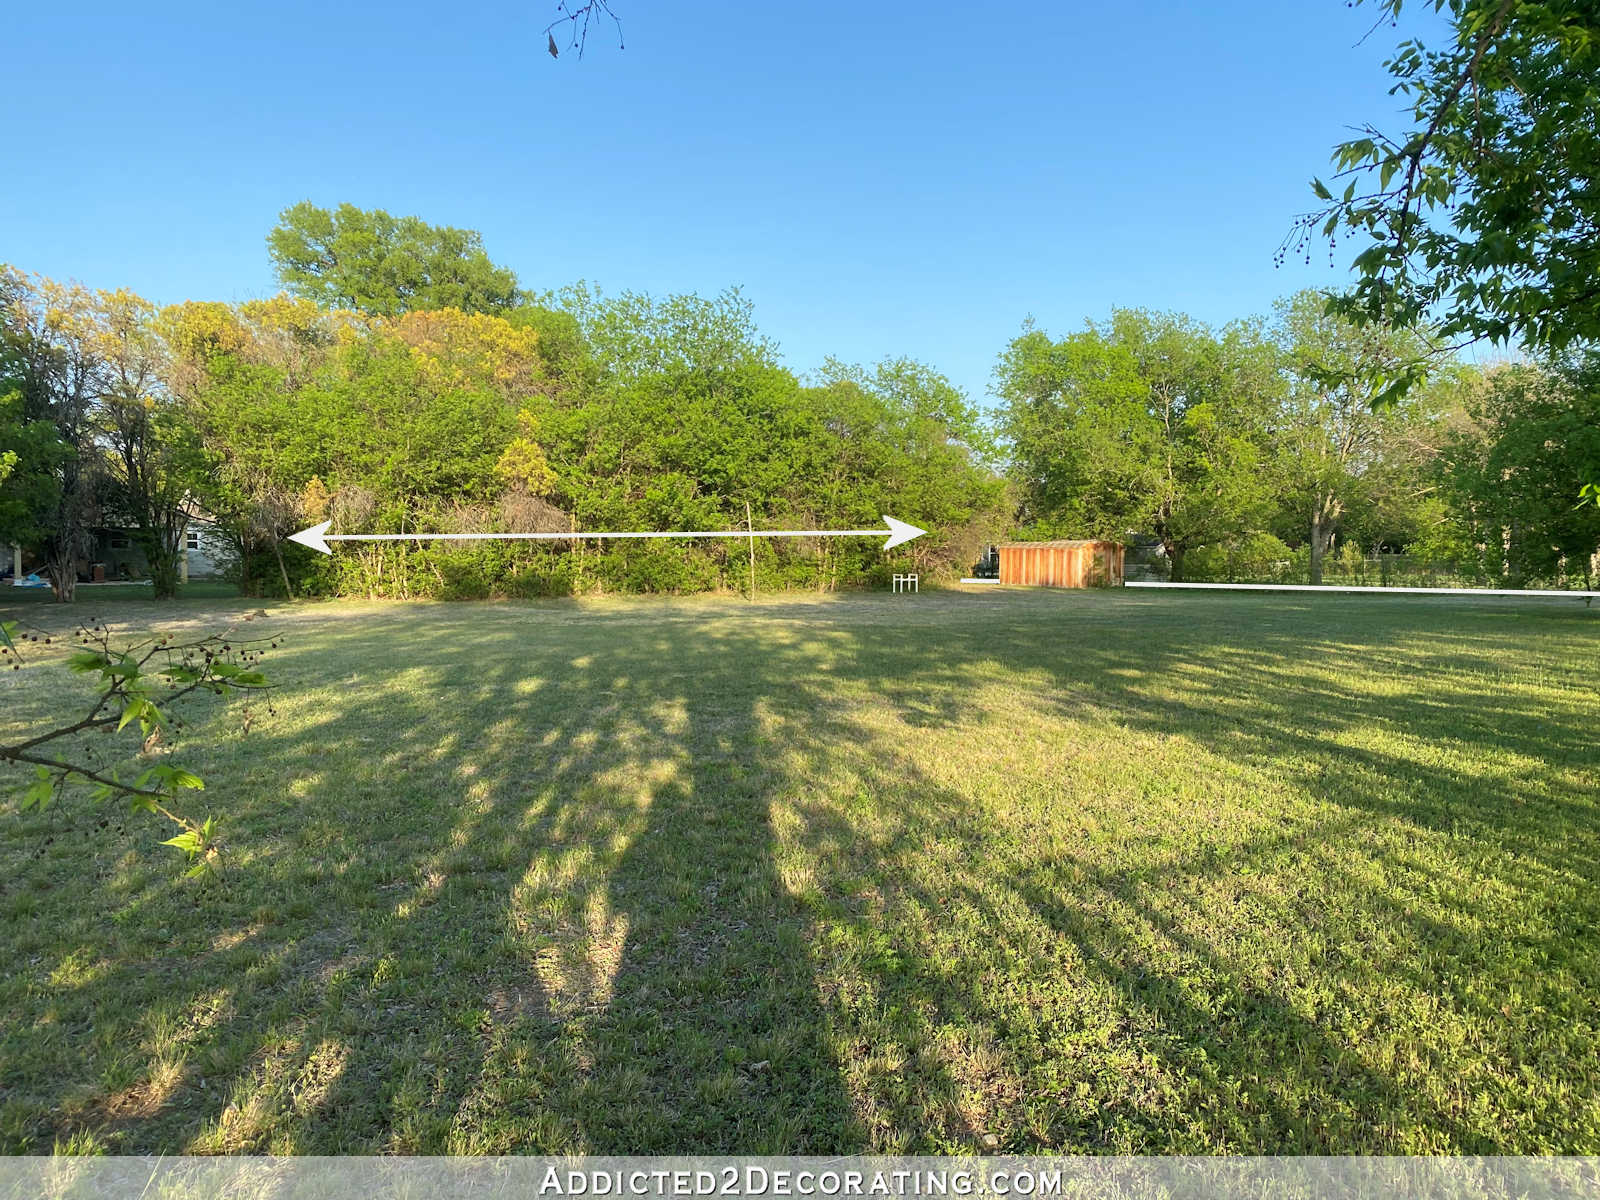
As soon as we get past this season of rainy weather here in Central Texas, I’m hoping to make some time to finally get some landscaping done in our yard this year. I don’t know how much I’ll actually have time for, but if nothing else, I’d love to get the flower beds along the front of the house and front porch sectioned off, and get some things planted in those beds. But deciding how to section off those beds has been a frustrating challenge for me…until I saw the perfect natural stone flower bed borders on Instagram. It was just the inspiration I needed!
As I scroll Instagram, I’m always on the lookout for amazing landscaping and outdoor ideas that I may want to incorporate into our plans. For my birthday last year, Matt bought me a landscape plan for our one-acre lot.
If you missed that landscape plan, you can see it below. But if you want a more detailed look, you can see everything about it here.
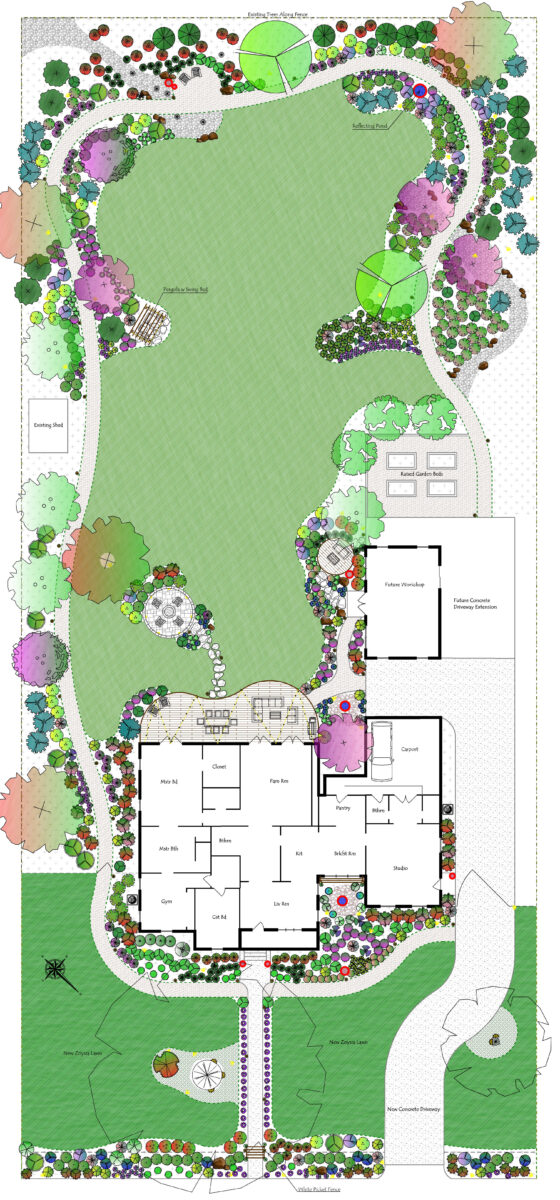
So while a lot of the guesswork has been removed for me, there are still a lot of decisions to be made, like what border to use on flower beds.
I haven’t had the opportunity to do much landscaping in my life. In fact, the only time I’ve ever really done any was at our first house in Oregon. I built a low retaining wall around the front porch area, and then planted some flowers. Unfortunately, I lost all of my pictures a couple of months ago, so I can’t show you a picture of that retaining wall or house. But the short retaining wall looked something like this…
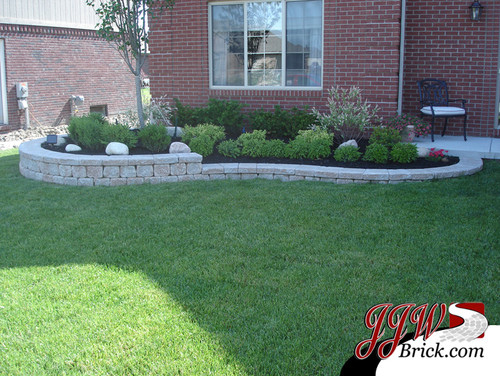
I don’t really want that retaining wall look again. I don’t dislike that look, but it’s a little too perfect for me. And even as I write that, I know it sounds strange. I generally like things perfect, symmetrical, tailored, and clean looking. But for outdoor gardens and landscaping, I find myself gravitating towards things that aren’t quite so perfect. I’m starting to like a more natural look.
So I’ve been waiting for the perfect inspiration. And last weekend, as I was scrolling Instagram, I found it! I came across an account called The Psychiatrist’s Garden. It’s the account of a woman who is not only a psychiatrist (as the name suggests), but she’s also an absolute magician when it comes to her gardens. I scrolled and scrolled through her account for a good 45 minutes.
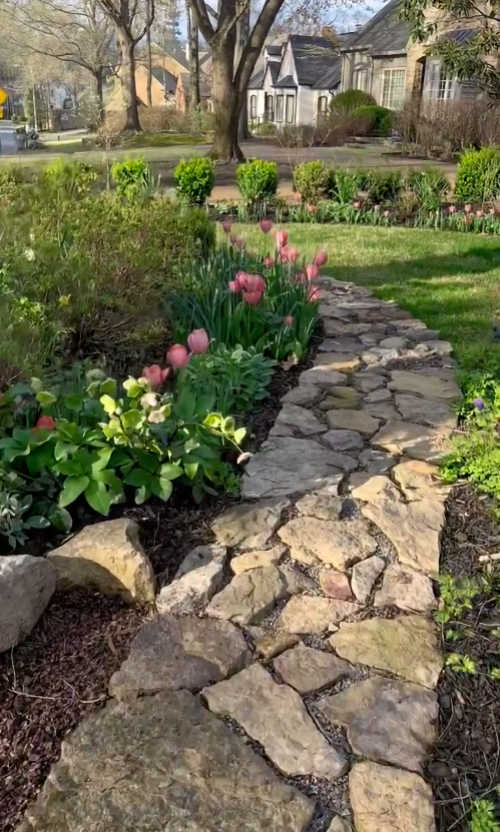
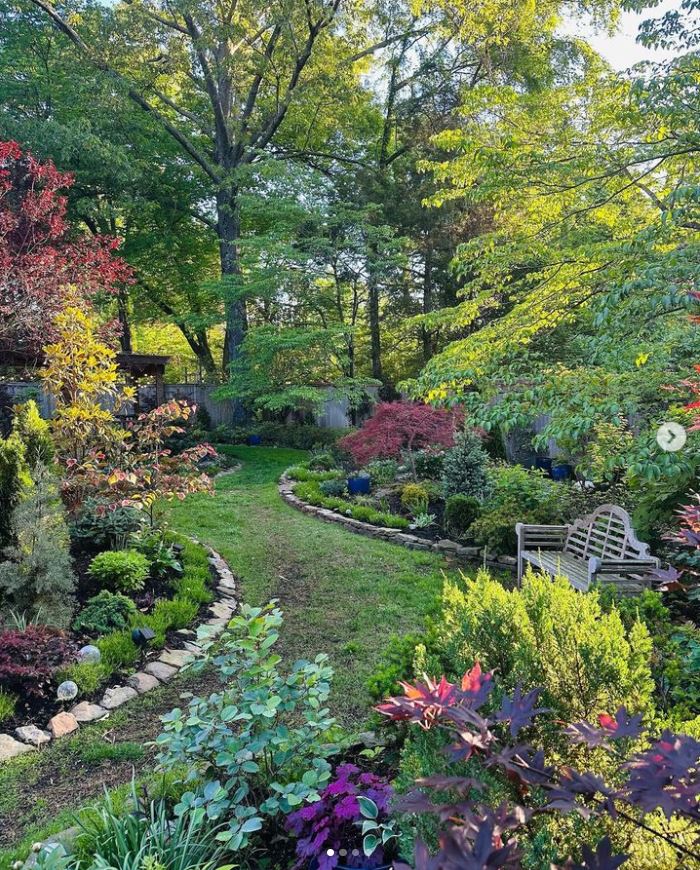
But it was the very first reel that I saw from her that had me hooked. And just like that, I knew exactly how I wanted to edge the flower beds in my front yard…and anywhere else I have flower beds. She has these amazing natural stone flower bed borders in her front yard…
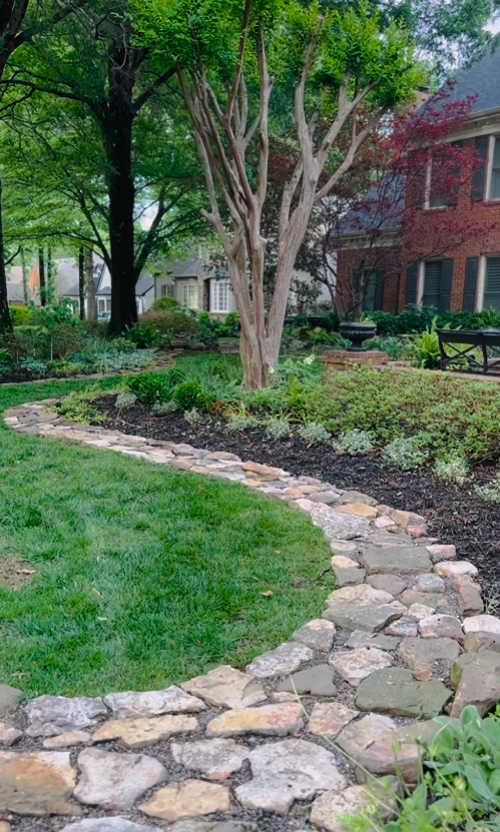
I think that this look appeals to me so much because it’s the perfect combination of perfect and tailored (just look at how perfectly those edges against the grass fit together), and a natural look. It’s the best of both worlds!
I scrolled and scrolled, and read lots of comments, to find out exactly what she used to create these stone flower bed borders. Some of the stone came from her property, but then she mixed those with ones that she bought. She calls them field stones, so I plan to contact some local stone places to see if I can find these. I mean, isn’t it just perfect? Or, imperfectly perfect?
And then in her back yard, she has these simple stone borders. I love these, too.
But the stone flower bed borders in the front of the house are exactly what I want. If you’re looking for landscaping ideas, I highly suggest that you follow The Psychiatrist’s Garden on Instagram. Her gardens are so gorgeous, and there are so many little details to see. There’s an endless supply of inspiration there! And I am so incredibly glad that I finally have some clarity regarding our front flower beds! I’ve been keeping my eyes open for the perfect idea for months now as I’ve scrolled Instagram and as I’ve driven around town. Her reel just happened to come up as I was scrolling through reels, it stopped me in my tracks. I’m so glad I saw it! It’s just the inspiration I needed.

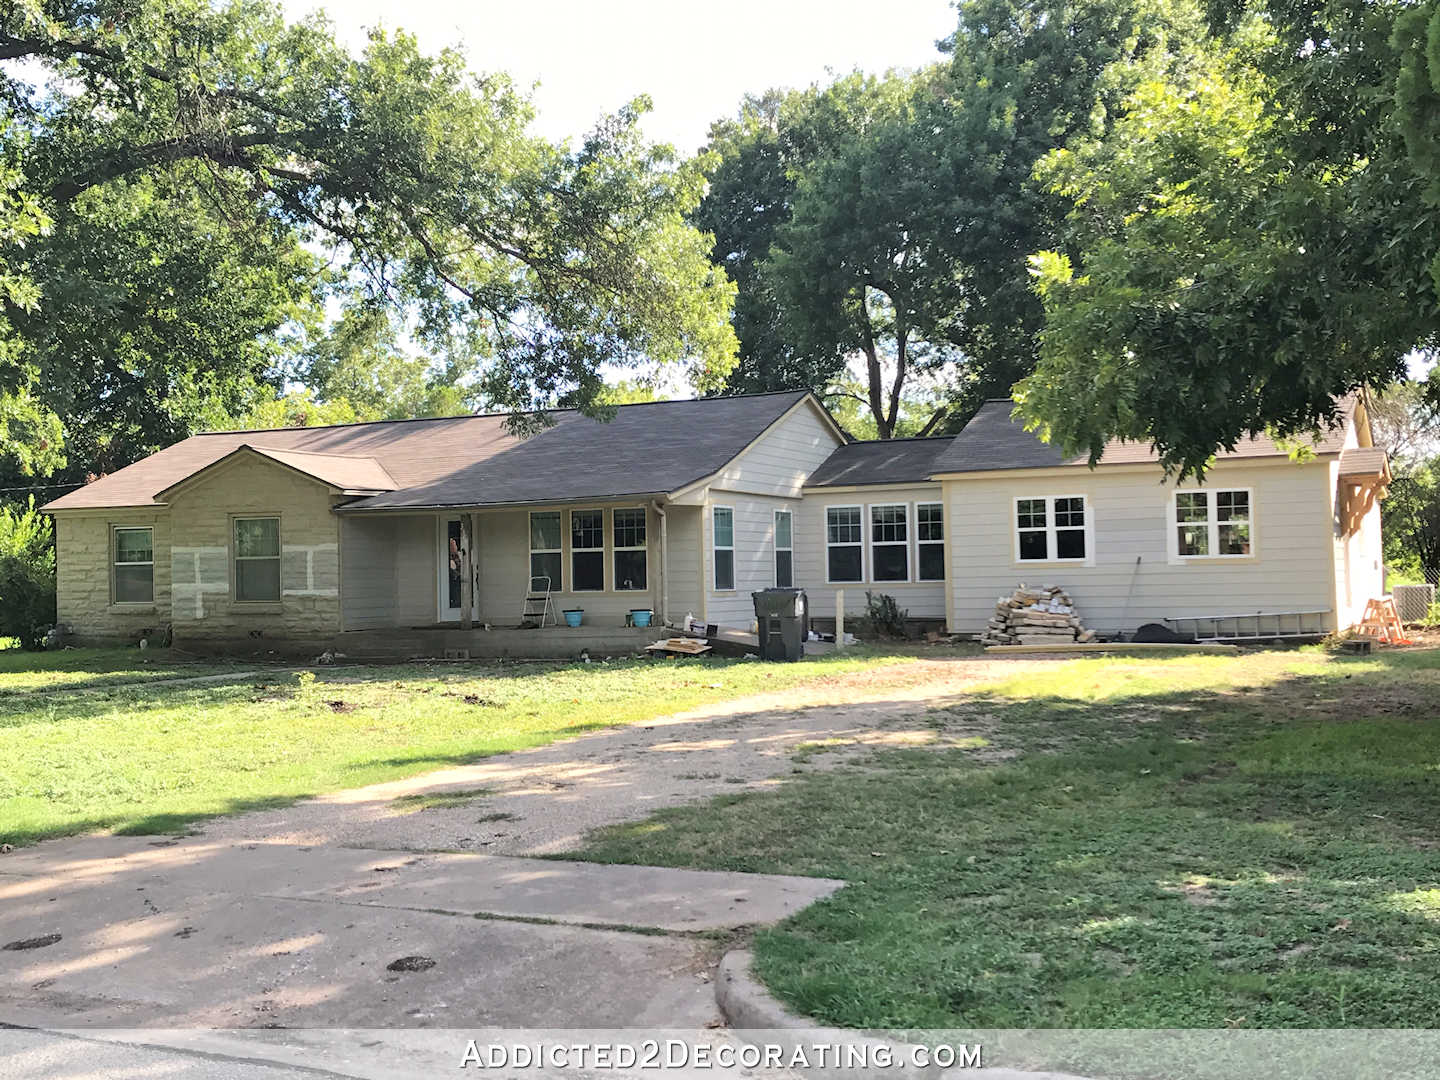
Addicted 2 Decorating is where I share my DIY and decorating journey as I remodel and decorate the 1948 fixer upper that my husband, Matt, and I bought in 2013. Matt has M.S. and is unable to do physical work, so I do the majority of the work on the house by myself. You can learn more about me here.

i saw this and immediately thought of you and almost tried to point you to it! her borders are something i have admired and also i think they would be relatively easy for a non landscape gardener to accomplish. i can’t wait to see which way you go in you landscaping!!
I just followed her, per your suggestion. Haven’t had time to really look much yet. For ease of mowing purposes I use the flat 6×9 pavers which work well for me. You want something flat along the edge of the grass so you don’t have to use a weed trimmer to keep things looking good.
Be sure to use GOOD heavy duty weed barrier underneath ( not the kind from HD) or you will have a lot of weeding in your future. 😕
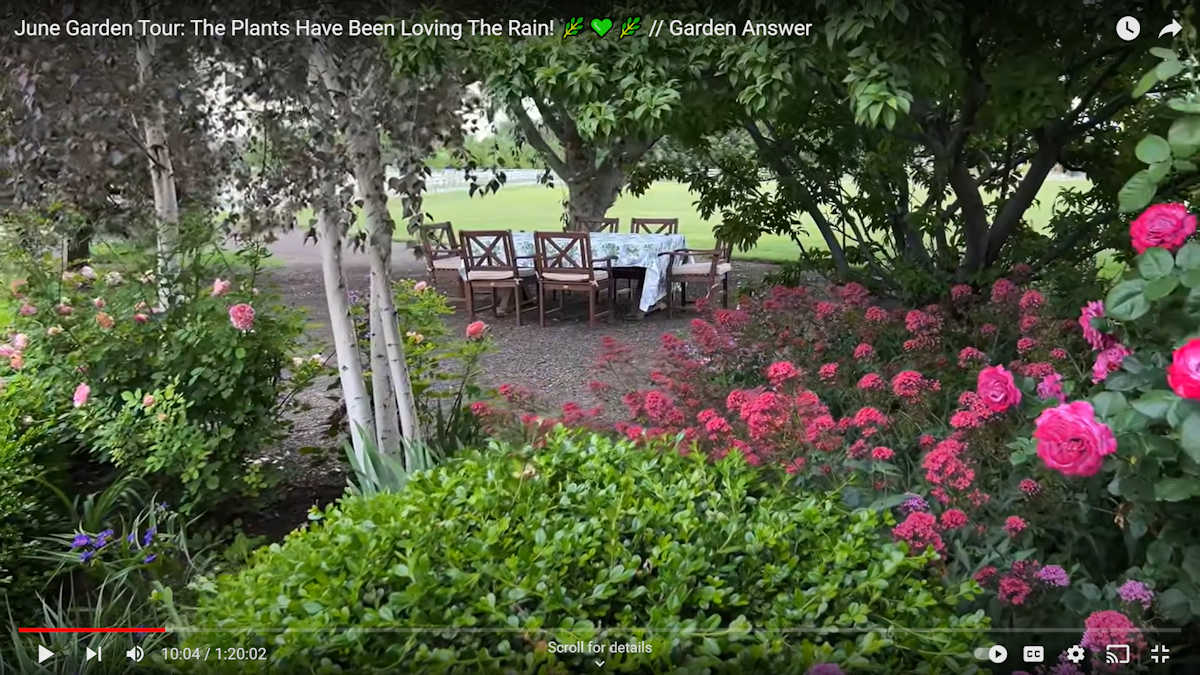
I agree the landscape fabric will be a life saver, Dewit brand is by far the heaviest and longest lasting I have used. I believe Laura from Garden Answer recommends it. This is gonna be so exciting to see everything come to fruition!!
I’m an amateur landscape designer and plant addict. I’ve been gardening my whole life since I was a child and I love it. The plan Kristi has is so beautiful and inspiring! I can barely wait to see it brought into being in her yard.
Landscape fabric under hardscape is fine and useful. Landscape fabric in planting beds is a nightmare. I have made that mistake of using landscape fabric in planting beds. You have to cut into it to get the plants in and the barrier is broken. Plus, landscape fabric breaks down over time and getting all those scraps out is no easy feat.
I would suggest instead either removing the grass from the area entirely or use the no-dig cardboard method which does truly work. I have used the no-dig cardboard method when creating beds at the house we bought in 2021. All we had was grass (weed lawn) when we moved in. Since then I have created very large beds on our 3 acre property by covering the area with cardboard, covering the cardboard with 2 inches of compost, covering the compost with no less than 3 inches of hardwood (not dyed) mulch. Then planting after a couple weeks. Also, once plants are in the ground I use Preen pre-emergent granules to prevent weed seeds from sprouting. This works incredibly well to keep the amount of weeding to the bare minimum.
Your old stone walls were very well done but I understand the desire for something different.
As a very experienced and long time Gardener here is my take on the new idea of stone edging.
#1 it is quite wide which means it will also be quite expensive. You have no idea! Especially for you large area.
#2. The pebble between the stones is a nightmare waiting to happen. That makes it difficult to clean up dirt. And the pebbles will disappear. When blowing lawn clippings the pebbles might blow too. I love my polymeric sand
#3 noticed some her beds are raised. Good idea but that means when those Texas thunderstorms come the dirt/mulch may be washing onto your stone unless you have the edges covered with ground covers. Which she doesn’t.
#4 Her short stacked stone is much better. The individual rocks as edging is impractical. Weeds and grass grow between them. Although I do love the way she has mixed her styles. That’s also evolution
Do Not rush this project. Make sure that when you do the major investments like stone, you’re not changing your mind later. Like you earlier posted, getting tree placement
correct. Gardening is all about change. Gardens evolve. But that’s mostly plants and
bed sizes.
That is some sage wisdom right there!
How about extruded concrete edging? I had that at my previous house and loved it. I had a guy that came once a month and edged it for me.
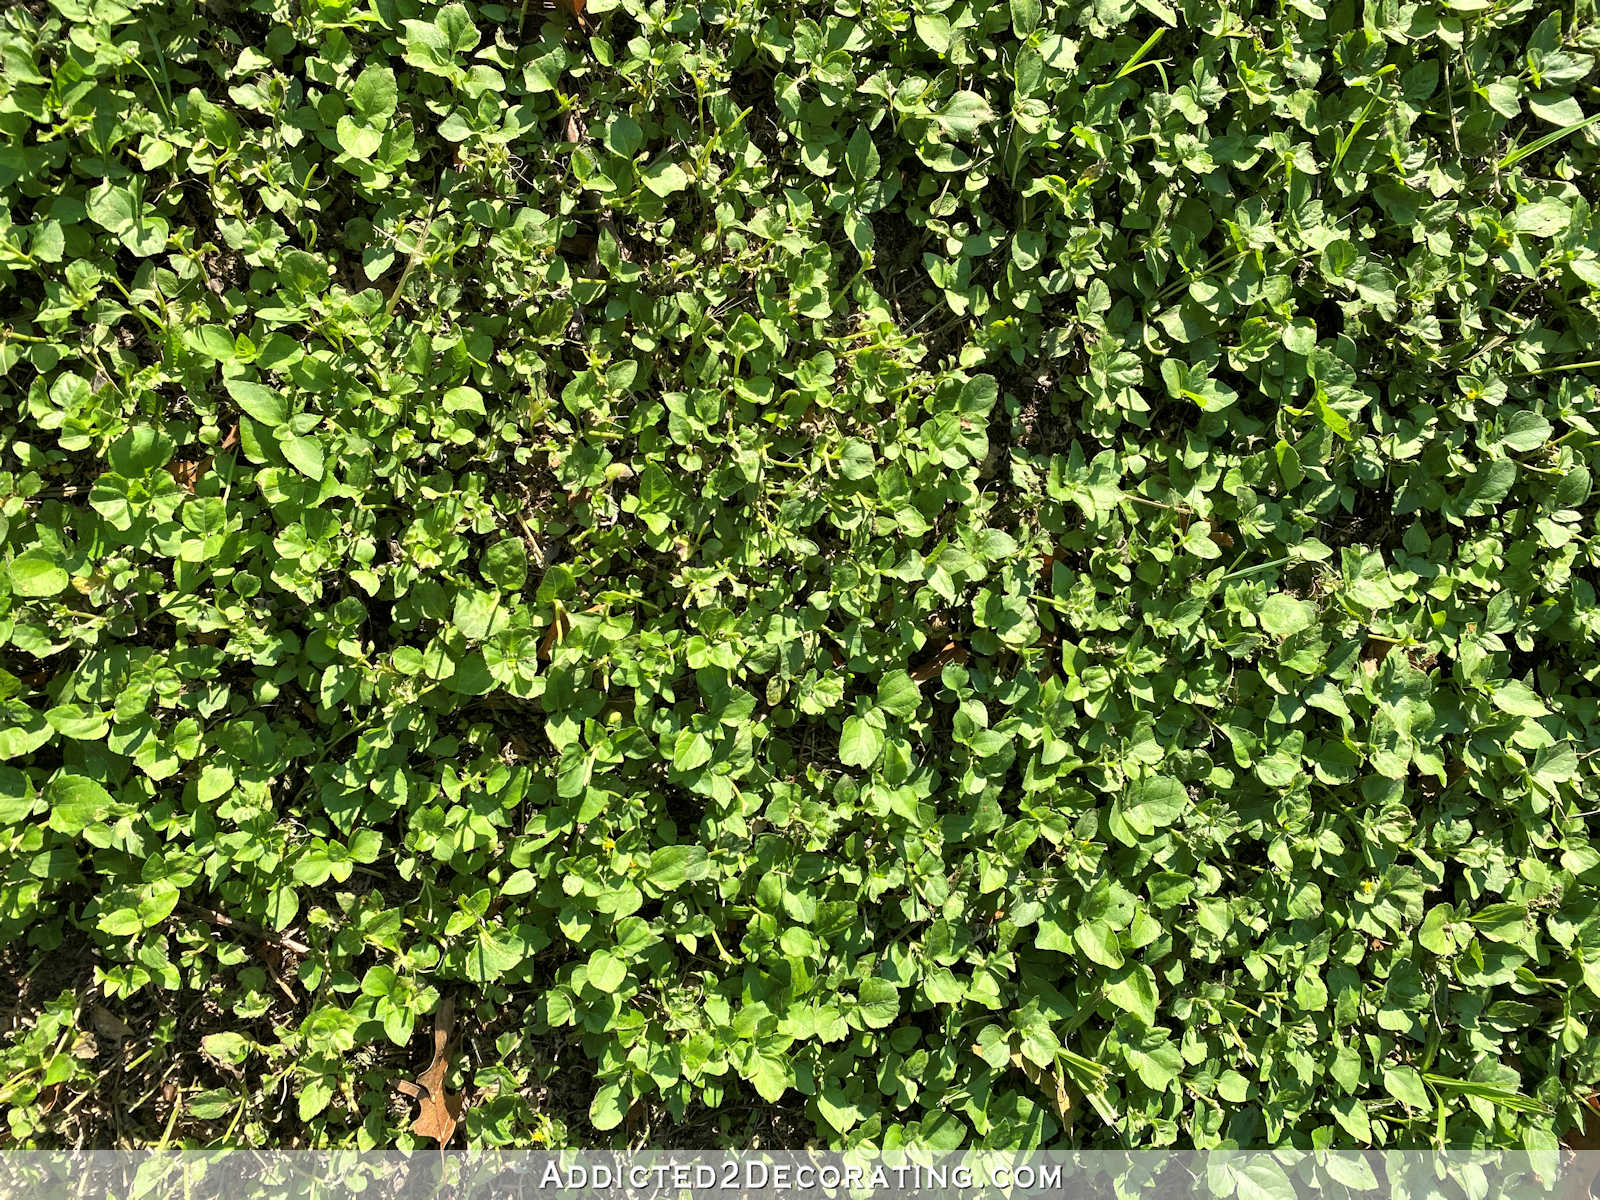
Yes, I have made every one of those mistakes. I DON’T enjoy gardening, and all you mentioned above took up so much time. I also have enormous oak tree in my small front yard and the grass that was once there 11 years ago is now clover and weeds. After 3 years of grudging effort and massive failure, not to mention large outlays of money, I gave up and just let it all go. I live in a senior complex and they mow, so at least that’s done. I have dirt, weeds and clover.
If you use wide stone borders will you have to weed spray to keep them clean? Now that I’m older I’m always having to think if what I put in will take a lot of upkeep after. Your plants probably would have enjoyed getting rooted just before and during the rainy season but unfortunately time lines arent always perfect. Will you be installing a drip system to keep things watered?
I do plan to have a drip irrigation system in place for the flower beds. I wish I could have gotten things planted before the rainy season! I just couldn’t get things in order in time to make that happen.
Kristi, then maybe wait till next year for planting and this year just work on the edging, walkways, hardscape. Then next year plan ahead which plants you want. You’ll also have time to start from seed, then harden off before planting. This is cheapest. Check prices at your garden centers. Even the dirt (and you must buy the right kind, of course) is expensive. Your landscape plan is gorgeous but will cost thousands and take years if you work by yourself on a tight budget. I’ve done it so many times. FYI one tip might be to hire a horticulture student ( or whatever degree your college has in landscape area) to help and they’ll get experience and credit at school. Good luck!
I strongly dislike a single row of rounded rocks along the edge of a landscape bed but I LOVE the flat fieldstone border. I’ve never seen one done like that before. I wonder if weeds growing up between the stones would be a problem. I hate pulling weeds! The landscape plan Matt gifted you is gorgeous!
What fun…dreaming of your landscaped yard! Love where you are getting your inspiration. She’s in Memphis, so maybe you are both in the same horticultural zone. That would help. You don’t want plants failing since they don’t come free. Be aware, though, that there is no way a working mother is maintaining those grounds solo. My advice: Plan a hefty budget for landscape maintenance, if only for mow-blow-go guys to come every other week. At least! I know whatever you create will be gorgeous.
I bordered all my garden beds in large-ish natural stones (plentiful here). Advice:
1) Dig a shallow trench on the yard-facing side of the stones so a lawn mower can get close to the stones and keep the edges neat.
2) Know this is heavy work. You’ll enjoy matching up the stones by size, color, shape and fit and watching them start to define your beds. But you’ll tire of crouching over and hauling and placing hundreds of stones that are cinder-block weight.
2) Commit to the look long-term. If you ever decide to change it, you’ll have to figure out how to get rid of a ton (literally) of stones.
Well, getting rid of the stones will be easy, if she ever wants to. Just put them up for free on Craigslist. I have had people take bricks, stones, and even dirt that I had dug out to make a path. It was not great quality dirt, but people came and shoveled it up for the “free fill dirt.” Just an idea, if you need it!
The landscape plan is beautiful! From my personal experience the only thing I have to add is that beautiful gardens are tons of work. I can’t emphasize that enough. You have no idea how much time it will take to maintain it. I would have a professional implement the plan and do it in stages maybe over three years. You will be surprised at how quickly the landscaping will grow. At first you will pray for growth and later you will pray that it just stops.
At any rate I am sure you will choose pretty hard scaling and plants. Just don’t plant too much and don’t plant things that will overtake your garden. Good luck with your new adventure!
These beds look fantastic! Easy to mow around and not too perfect!
I have those borders one stone wide (light grey granite squares, which are not too big so Ican handle them one at a time) in my garden and find them very beautiful! But the grass (and weeds) grow between them, so be prepared to either have them overgrow the stones a bit or having to weed them. I’m interested in whether you find a solution for that and implement it before laying the stones. Even though – I’m not sure I’m motivated to take out my stones again as it is indeed some work to do that. We have a patio area completely made of the flat granite squares (laid in circles, it is very beautiful) and this area feels like a nursery garden: for some strange reason young plants love to grow in the spaces between the stones and it is some feat to get them out there with their roots intact (which I love trying in order to populate my flower beds with them). I agree that gardening takes time and can be taxing, but it also is a source for tremendous joy. As one perfectionist to the next, I have to warn you though, that plants do what they want and it needs some laid-back attitude to let them grow and skip some of the detailed garden plans 🙂 I’m looking forward to following your outdoor journey, too – and perhaps on these topics I can actually contribute some info every now and then.
Did you ever finish the front porch you were working on? Love the way she did the stones, in the front and back.
No, I still need to do a second coat of stain on the porch, do some painting, and finish the faux stone skirting. I’ll probably have to wait until next month when all of this rain stops to finish it.
I LOVE this wide fieldstone edging. It looks fantastic! From a practical standpoint, if any string-trimming is done between the rock and the grass, there will inevitably be some cut grass that ends up on the rocks. That grass is much easier to sweep or brush off the rock than to pick out of mulch inside the bed (which is what would have to be done if it were a narrow edging).
Thanks for sharing!
It’s beautiful. I did something similar at an old home I used to have. The one thing I regretted was that in wind or super wet weather my mulched areas would seep through the stone borders (because they’re irregular and don’t make a perfect edge) so I ended up with brown mulch in my grassy areas. It was so annoying and hard to clean up. But other than that I loved my natural rock borders.
I have used cardboard before very successfully. I wish I had thought about it two years ago. We had a large tree toppled by the wind. Thankfully it fell away from the house. After the tree was removed and the stump ground down we had a “hill” of newly tilled red clay and chips, no weeds, grass or wild violets. I just started putting day lilies, irises, spider wort and Hosta in my new bed with ajuga holding up the slope. All transplants from somewhere else in my yard except the ajuga. The plants love it! But so does crab grass, weeds and so many wild violets; they are so invasive. I spend way too much time trying to at least keep them down. Last fall I got rid of about a 6×6 foot area of liriope; it was the kind that spreads. I let it sit this spring to ensure all the liriope was gone and was going to plant the new “bed”. It is now wall to wall wild violets. I’ve been dreading digging them out. I’m older with a bad back and extended digging and weeding really do a number on me. This is going to not only save my back but kill those stinkin violets and hopefully I will have a small bed that will not require too much weeding. Long story to say thank you for this comment 🙂
Will those stone pathways be what you’re going to do all around the house and property, as the landscaping plan illustrates? Will Matt’s wheelchair be able to negotiate them? Also, will your lawnmower be able to cut the grass real close to those pathways, or will you need a weedeater for that? I agree with you that they have a perfect balance of rustic and clean-lined, but grass is going to grow inbetween them and may be a maintenance nightmare. Just a few thoughts from our own experience.
I don’t plan to use them as walking paths. They’ll just be used as edging for flower beds.
Our experience with rock is that you need to think about using the local stone if possible, as it is less expensive. I like the idea of a wide path in front of the beds, but keep in mind it will need to be done just like a walkway is done, digging down several inches, adding drainage material, packing it down, adding stones, making them level, and adding some sort of small gravel/polymetric material to lock the stone in place. It all will need an edging to contain things and make it easy to maintain. It will be expensive to do it , but will be very nice if you can carry it out!
A nice stacked stone wall (about a foot high) might appeal to you. It’s rustic & neat at the same time.
Love it, but you may not want that rough of a stone. You may need to go with more like the really flat flag stones so Matt can navigate the walks easily. Maybe edged with the rougher stone? Either way will be really cool!
If you use a moss or other type ground cover that never grows tall in between the stones, you’d be ahead on the need to weed. But if you use Strong pickling vinegar in the heat of the day it will kill out what ever you get it on, and not you or your critters. Can’t wait to see the results!
I had Oklahoma native field stones laid flat as my flowerbed border at my old house. They were wide, between 8 – 12 inches, which I think helped to keep the Bermuda grass from reaching over into the bed. I mulched the garden side & never really had an issue with grass or weeds from that bed. So it’s possible to do. I didn’t build up the beds either so there was no issue with mulch overflowing into the yard.
The back patio was made from the same stone. I put pea gravel between them. Now & then I’d use Round-Up or whatever to kill any weeds that happened to show up, & sprayed along the outer edge to kill anything touching the stone.
Both the patio & flowerbeds were pretty easy to manage.
I’ll only use landscaping fabric if it’s somewhere I know I’ll never plant anything else. Like, I have a place where I have 2 boxwoods & know I’m not going to put anything else there, just let them do their thing. I wouldn’t put it in a bed that I knew I’d change up the flowers in, like adding bulbs, changing biennials, or annuals. Cutting through the fabric is a hassle & eventually you could have holes all over, defeating the purpose of the fabric. Mulch is my friend…and a never ending expense.
I absolutely love the wider fieldstone border, that she has in her front beds. I do utilize fieldstone for my garden edging, along with having made walkways and patios. Just recently, treated myself to having 4 large limestone boulders delivered and placed in my big front island bed. But, I can’t even imagine the expense of purchasing enough stone, in order to construct that front bed edging. Locally for me, (Albany,NY area) a pallet of fieldstone runs anywhere from $600-$1000 per pallet, plus delivery. And, for us, if you want it to remain on the pallet and set down(in order for stones not to break) it’s an additional cost. Otherwise they just dump it on the ground, where many break into small pieces. So, keep that in mind when shopping around.
Always plant with low maintenance in mind.
Don’t choose plants that have to be constantly pruned, read height n width measurements.
Don’t choose plants susceptible to diseases, such as scale.
Don’t choose plants needing regular watering n fertilizer.
Don’t choose plants that will propagate, send up shooters.
I think you will regularly have grass growing between stones in border you chose. All weed blocker will wear out.