D.I.Y. Project, Accent Furniture: How To Make A Cheap Solid Wood Table Top
DIY Project, Accent Furniture:
If you are in need of a replacement table top and you’ve searched for sources, then you know that ready-made, solid wood table tops are not cheap. But you can make one yourself at a fraction of the price using inexpensive lumber from the hardware store.
Project Cost:
Approximately $25.
![]()
]]>
Materials & Supplies:
*The following instructions are for a 42″ round table top. If you would like a different size and/or shape, please make the required adjustments.
1. Two pieces of 2″ x 12″ lumber, eight feet long (have these cut in half–into 4-foot long pieces–at the home improvement store),
2. Two pieces of 1″ x 2″ furring strips, approximately 30 inches long,
3. Wood glue,
4. 12 #8 wood screws, 1¾” long,
5. Drill with screwdriver bits and drill bits,
6. Electric sander,
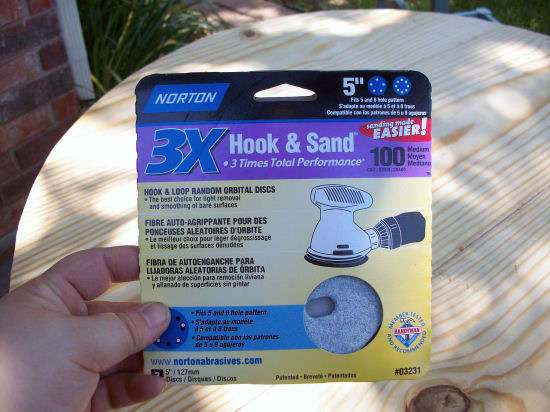
7. 100-grit sandpaper discs,
8. 150-grit sandpaper discs,
9. wood filler,
10. stain and/or paint in your choice of color(s),
11. 24″ (or longer”) clamps.
![]()
Instructions:
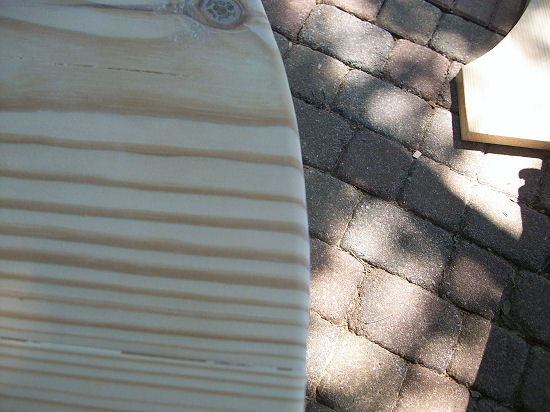
I had my 2″ x 10″ x 8-foot pieces of lumber cut in half at the home improvement store so that they were ready to use.
I started by joining the boards together two at a time with the long edges together. I used a generous amount of wood glue and my 24″ clamps and left them to dry completely before removing the clamps.

I only have two clamps, so I had to wait until the glue dried on these two before repeating the process with the other two boards.
My boards had stamps on them, but I wasn’t concerned about that. These are easily sanded off.

Next I measured the inside area of the table base to see how long the furring strips needed to be (this will make sense in second). I wanted two furring strips, each offset from the center of the table about six inches, and with about three inches of room at either end. I decided to cut my strips to 26″.

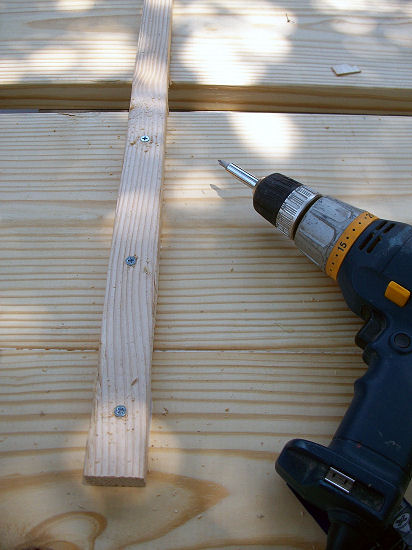
I marked the middle of one of the 26″ furring strips, and placed it on the edge of one of the two-piece lumber sections. Then I pre-drilled three holes for screws.
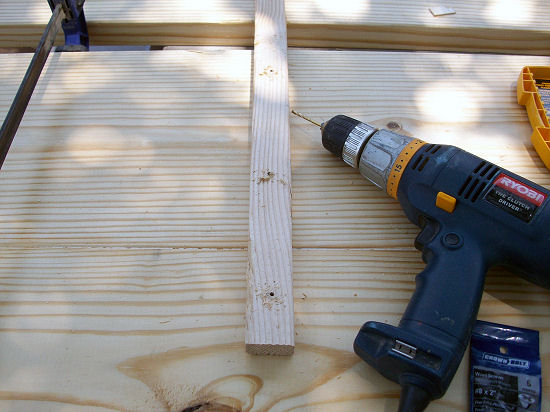
Then I secured the furring strip with wood glue and screws.
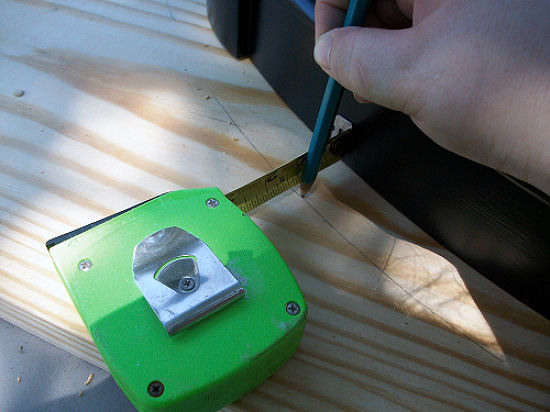
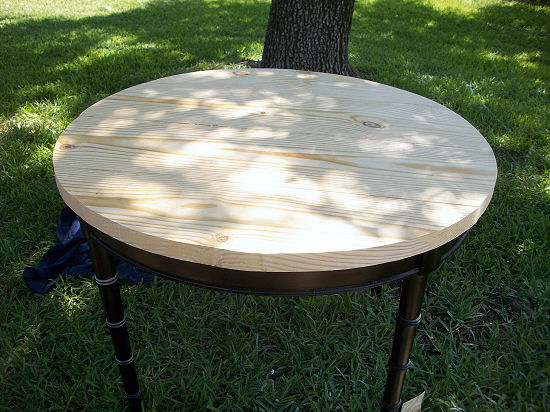
With the furring strips glued and screwed into place, I flipped the table base over and placed it on the table top.

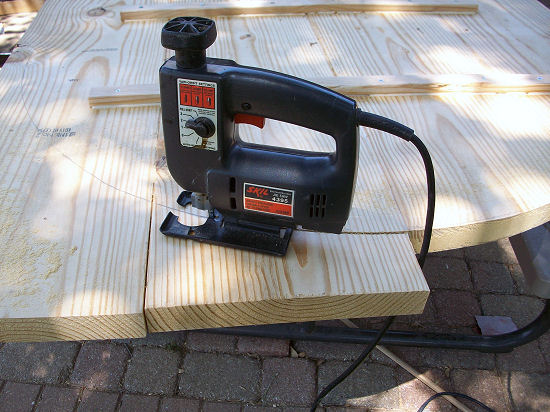
Using my tape measure and a pencil, I marked where the table top needed to be cut, allowing for a 1¾” overhang all the way around the table top.
Before cutting the table top, I made sure that I had a brand new “smooth cut” blade in my jigsaw.

And then I carefully and slowly cut along the pencil marks.
At this point, I went ahead and screwed the table top to the base from underneath.
**Important! Be sure to pre-drill the holes for your screws before attaching the base to the table top!! If you read the blog, then you know my table top ended up splitting, starting at a knot on the edge. I’m pretty sure the cause of this was the fact that I attached the base to the top with screws without pre-drilling the holes, and I screwed right into a weak spot at the knot. Learn from my very frustrating mistake, and don’t try to take short cuts!!
At this point, the table top was still pretty rough, so I started with 100-grit sandpaper on my electric sander.
I went over the top several times with the sander, being sure that the top was smooth and even, especially where the boards met.
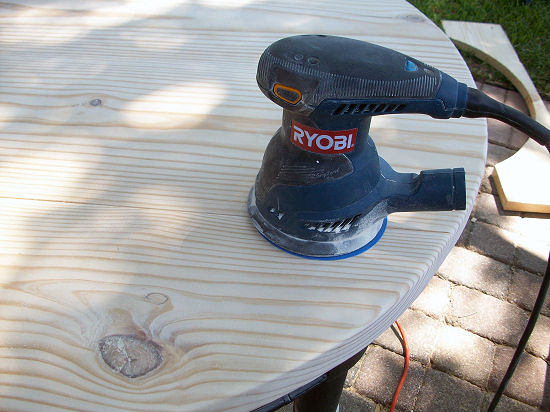
I finished up the sanding with 150-grit sandpaper, which I also used to round the edges a bit.
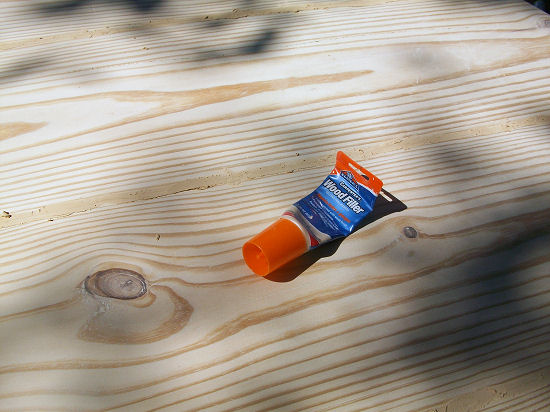
This next step is completely optional, but I wanted a completely smooth table top, so I used wood filler to fill in any gaps between the boards, and then sanded them perfectly smooth.
After everything was sanded and wiped down, it was ready to finish.
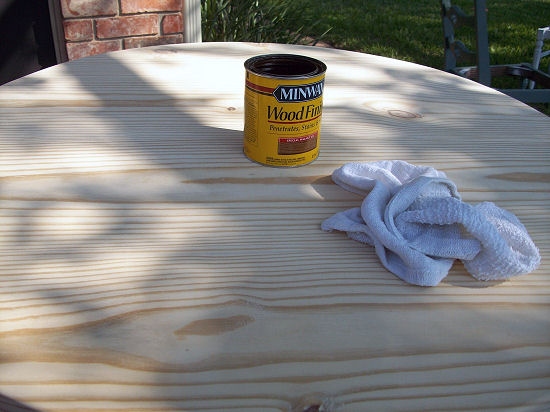
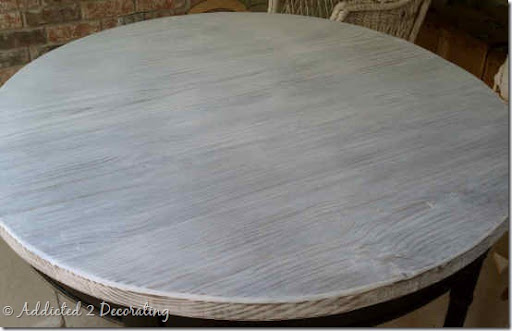
I originally stained my table top, which I ended up hating. Since I used cheap #2 pine boards, the grain was very heavy…way too busy for my taste.
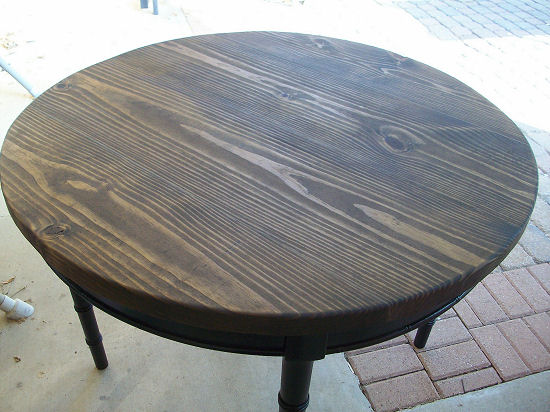
So I ended up going over the stained table top with a whitewash (white paint mixed with water, about a 1:1 ratio), and then several layers of dry brushing with white paint. I was much happier with this. The grain still showed through, but it was very subtle.
No sadly, as I mentioned above, my table top ended up splitting, starting at a knot on the edge and going clear across the top (pre-drill those holes!!!), so I had to come up with another solution. I didn’t want to go to the trouble of making another table top like this one, so I did a much easier and quicker solution…stain-grade plywood with decorative moulding attached to the edges.
click here to see the room completely decorated, with my final table top solution.
![]()
Helpful Hints:
Be sure to purchase the straightest boards possible. Warped boards will ruin a project.
If you’re going to stain your table top, just be sure that the grain in the wood isn’t very heavy. You’ll have to spend a little more money, but it will be worth it.
Pre-drill, pre-drill, and pre-drill!!! I made a rookie mistake by not pre-drilling my holes when I attached the table top to the base, and I ended up paying dearly (not so much with my wallet, but with my time) when my table top cracked. Don’t make this frustrating mistake!!
![]()
Variations:
Hmmm…I can’t really think of any, but if you have an ingenious idea or variation, please share it in the comments below!!
![]()
Have you tried this d.i.y. project?
I’d love to see your results! Send your pictures to Kristi at addicted2decorating[at]live.com
![]()
Did you like this project? If so, share it!
***SOCIALIZEIT***
![]()
Feel Free To Leave A Comment!
Im am so glad you posted this! I bought a cheap dining room table from good will to use for my desk, it has a leaf in the middle to make it longer. I wanted to glue the leaf to the other two sides and thin fill in the holes with wood filler and I was advised by mom friend that it wouldnt work, but now I have proof cant wait to try it out!!! thanks 🙂
Kristi, thank you soooo much for posting this in such great detail. Loved it! I especially like the fact it’s from a woman’s point of view — I could really relate. I’ve subscribed and looking forward to more ingenious ideas from you.
Kristi – as always, a great post with clear directions and great pictures! Very helpful advice on this project and it’s a smart use of lumber too.
Hi! I am looking to do this project with a pedestal base we scored on craig’s list. I am just wondering how you clamped the four boards once the 2 sets of boards were glued?
Thanks
Brittany
@ La Vita DiBella
If you can beg or borrow a pocket hole jig you dont have to predrill holes. I haven’t done a table top other than a workbench(Plywood!) but I have done cabinets and beds. The Kreg jig makes joining easy. A lighter stain colour would cut down on the grain marks, or a heavier application like an espresso stain. I will throw you a pic when I finish my table and show you what I mean.
Question do you think it would work with an old table top . My hubby just busted my track on my table that puts the 2 pieces together (( just the track.)) and I was looking more for a French country look .
Any way I have a different base I want to put it on that metal and more French looking with grapes underneath and I figured I could buy new chairs because the ones I have that are hard and uncomfortable.
so am I understanding this right your supporting this with furring strip? underneath? Cause I think this could work for mine too. just couldn’t move it in and out but could remove the whole top when not in use.
Then I could get away with just painting the table and buying new chairs.
Thanks in advance for helping me cause my hubbies in the dog house right now for this one and he’s looking at half to paying BIG BUCKS for a set. LOL Diane
Another fairly inexpensive option for making a table top is using a stain grade 3/4″ plywood. cut the 4 x 8 sheet in half (2- pcs, 4 x 4). Spread wood glue one and place and clamp the other on top. Once the glue has dried, it can be cut with a jig saw to the round shape, or if you have access to a router, make a “circle cutter” by mounting the router on a thin piece of wood, (1/4 x 6 x 60″) and putting pivot hole at a distance of 1/2 the diameter of the desired table. (from the side of the router bit to the pivot hole. Put a small hole in the underside of the table top as close to the center as possible. (not all the way through) and use something like a nail as a pivot. Use a straight bit and cut a perfect circle. The stain grade plywood usually has a pretty good stain surface and the construction of the plywood makes it pretty stable. After cutting the edge may have some minor voids, which can be filled with wood putty and sanded nice and smooth. The results can be a nice stained or painted surface.
I picked up a old small table from the junk yard for a very small fee . The top was beyond repair . I made a round top ,using your instructions and screwed it to the old top ,sanded and stained the legs to match the top .I over laped the old top by two inches . Wow looks so good and cost next to nothing,
For now, you can register your domain name for one year and go with a
small hosting package. Some companies will try and make you
pay a year in advance, offering you a discount, but this
is no deal for you. Taking your brilliant idea and turning it
into a powerful website doesn’t have to be a complicated process,
if you choose the right web host.
Here is my weblog :: hostgator coupon code 30 [Elsie]
I need help!!!! I too made the mistake of not pre-drilling one (don’t ask) corner of my table top. After I THOUGHT I was finally finished I noticed the top and base did not screw in tight together. HELP, What do I do?!
Fill the hole with wood filler, let it dry completely, and then start again predrilling this time.
Hey Kristi, I stumbled across your diy post on your table top. When you say you should have pre-drilled beforehand, where would you have pre-drilled the holes? How do you attach the table top to the base? I’m assuming you don’t drill down from the top because screws would be visible.
Also, I tried to access the link to view your table in it’s final setting but the link didn’t work. Not sure if link is still valid.
1. If you screw or glue the top to a fixed base, it will warp or crack because the wood expands and contracts in the cross direction. The wider the top, the more it will expand. You have to use cleats to attach it, which will allow the top to move slightly in relation to the skirt.
2. Using a pre-stain or a gel stain will reduce the blotchiness associated with staining soft woods like spruce and pine (construction lumber).
+1 to what Braden says.
You can keep it inside of the house and then MAY be it will not crack/warp.