Organization Mapping For My Studio (This Process Makes Organizing So Much Easier!)
Yesterday, I showed y’all how I organized my three drawers in my studio that hold my jewelry-making supplies using removable trays that I can use to easily transport my supplies to and from my desk. I had been envisioning that organization for a while, so it was relatively quick and easy to implement.
If you missed that project, you can see it here: Studio Organization — Custom Storage For My Jewelry-Making Supplies
But when I got through with that, organizing the rest of my studio seemed like a very daunting task. All I could focus on were the piles of seemingly unrelated items covering the surfaces of my work tables and long countertop. So I used a process that a commenter told me about several weeks ago that she called organizational mapping, if I remember correctly. Even if I got that name wrong, organizational mapping is a pretty good description of what I did yesterday.
Rather than trying to go through everything in my studio, one item at a time, and figure out in the moment where to each thing, instead I decided to sit down at my computer, find pictures showing the three different sections of cabinets in my studio, and then use my photo editing program to label the different drawers and cabinet sections. I did this process while sitting at my desk in the studio so that I could see everything that is currently sitting on my worktables and long countertop (i.e., all of the items that need to be stored).
As I looked over the items needing to be stored, categories of items started to emerge. And as those categories came to mind, I began to map them on my photos, placing them in an area and in an arrangement that seemed logical to me.
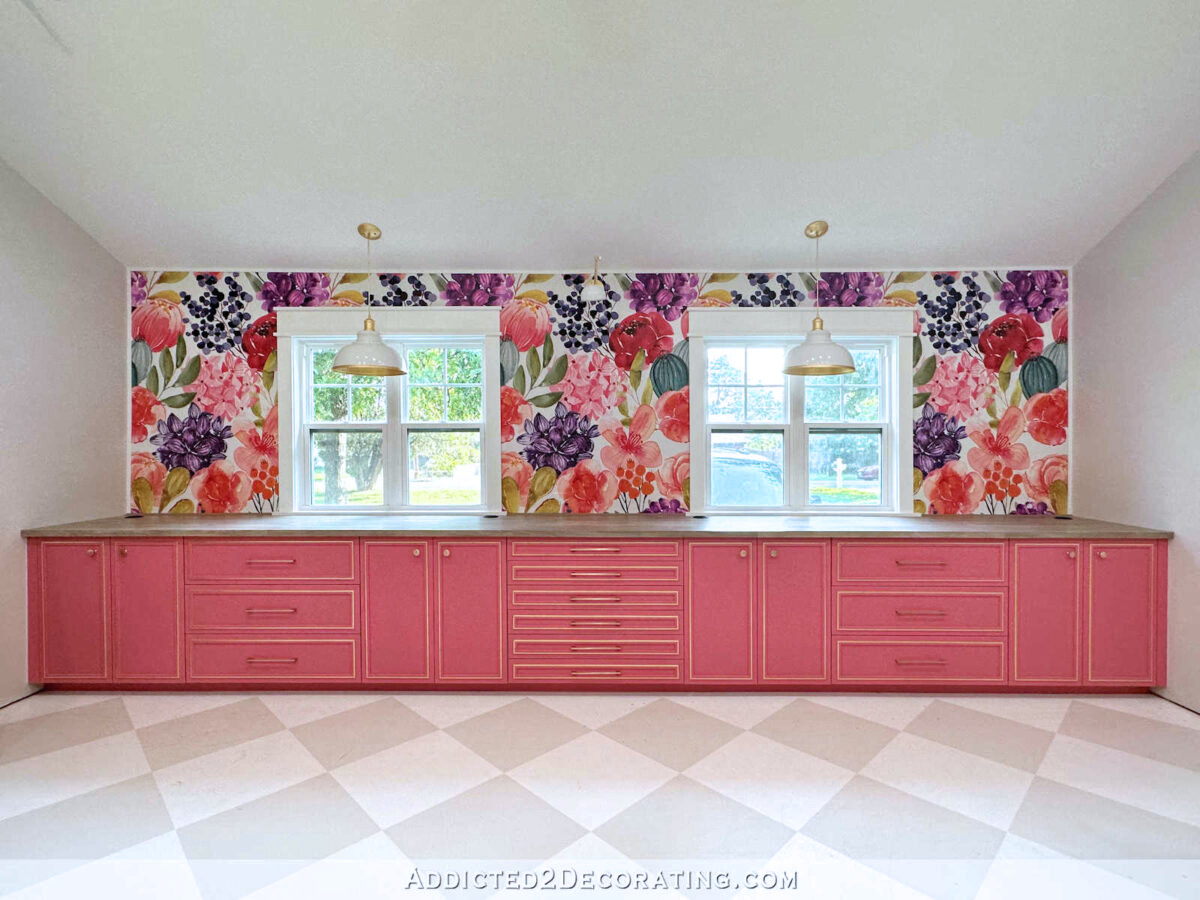
Here’s an example. I found this older photo showing the entire mural wall of cabinets…
And then I used my photo editor to section off all of the drawers and cabinet sections…
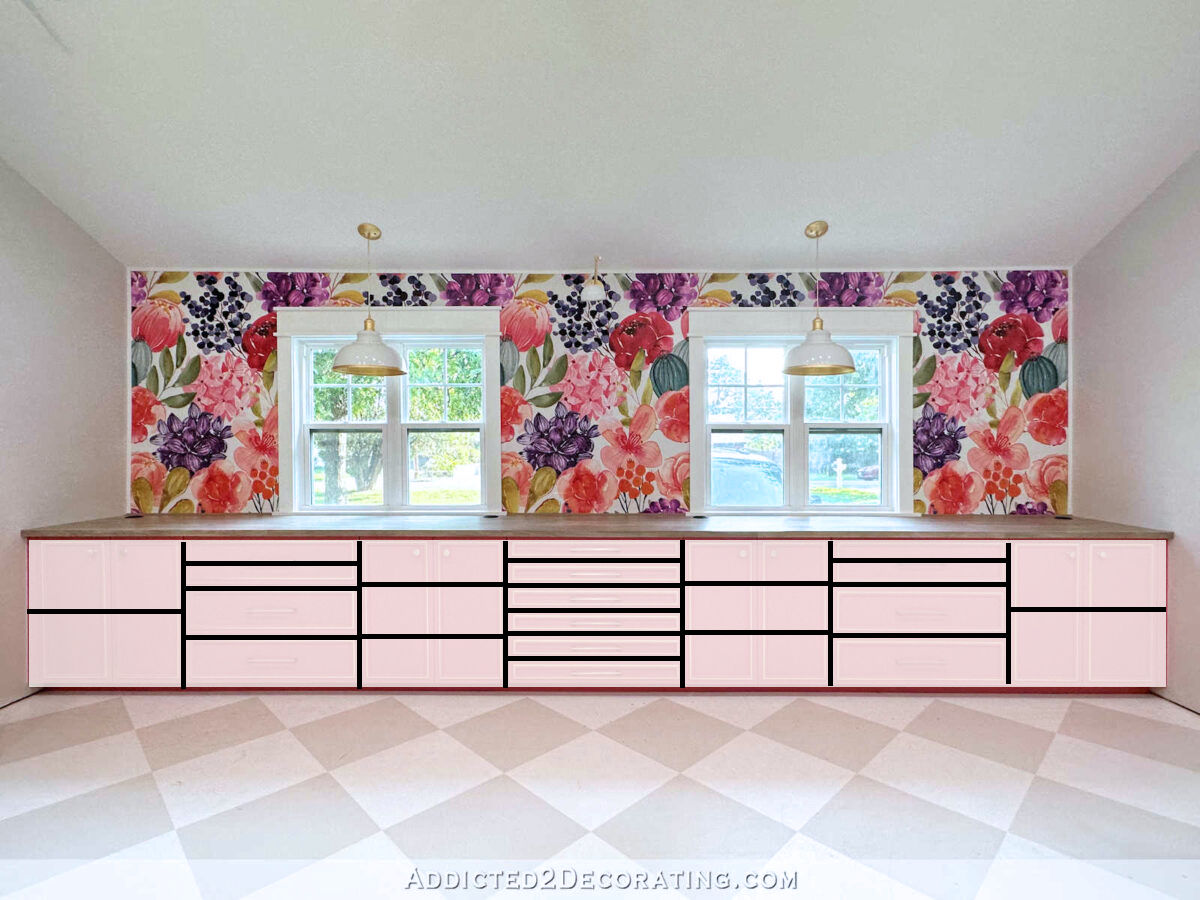
And then I began to think through what category of items I wanted to put into each section. And because I could see everything that needed to be stored sitting right in front of me, this process went fairly quickly.
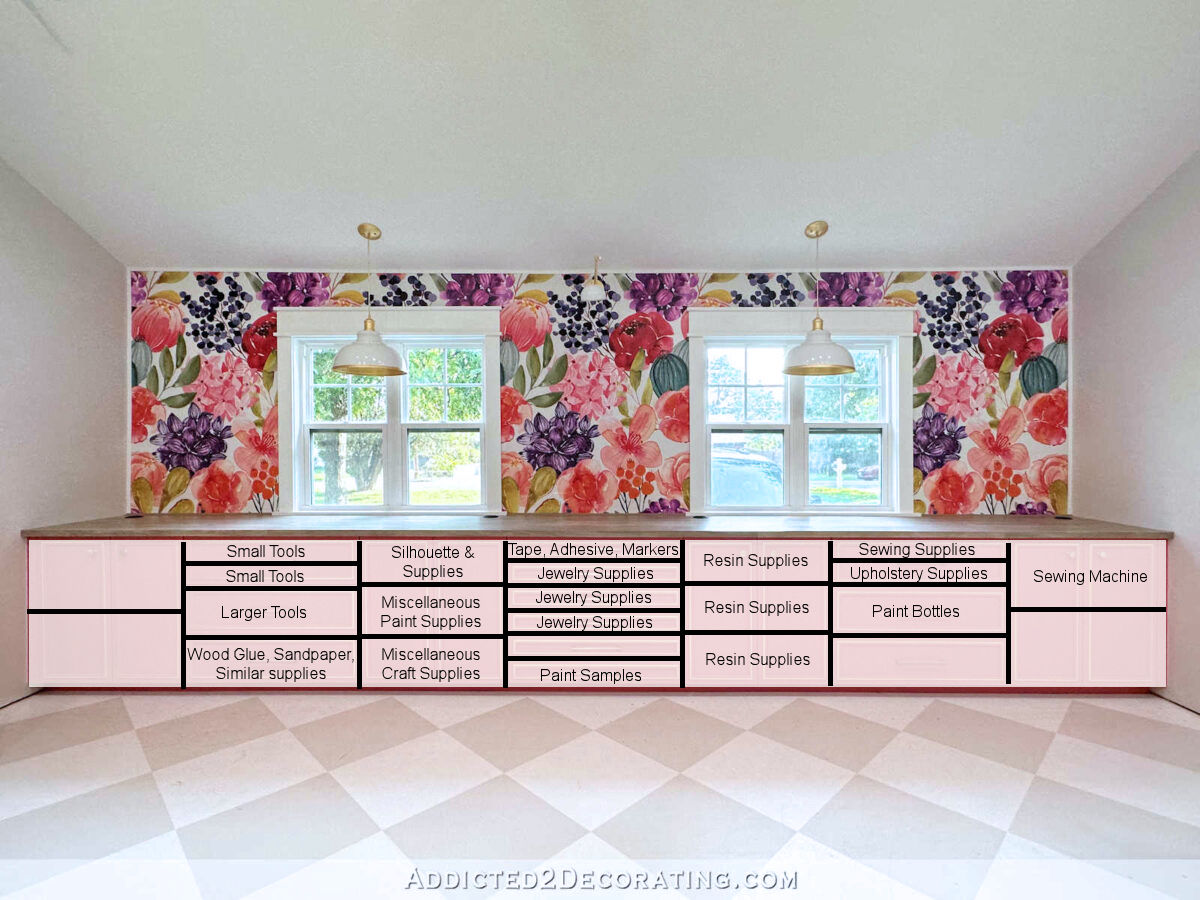
And I was pretty excited to see that I have empty storage that I can grow into! What if I want to learn to crochet? I have plenty of room now!
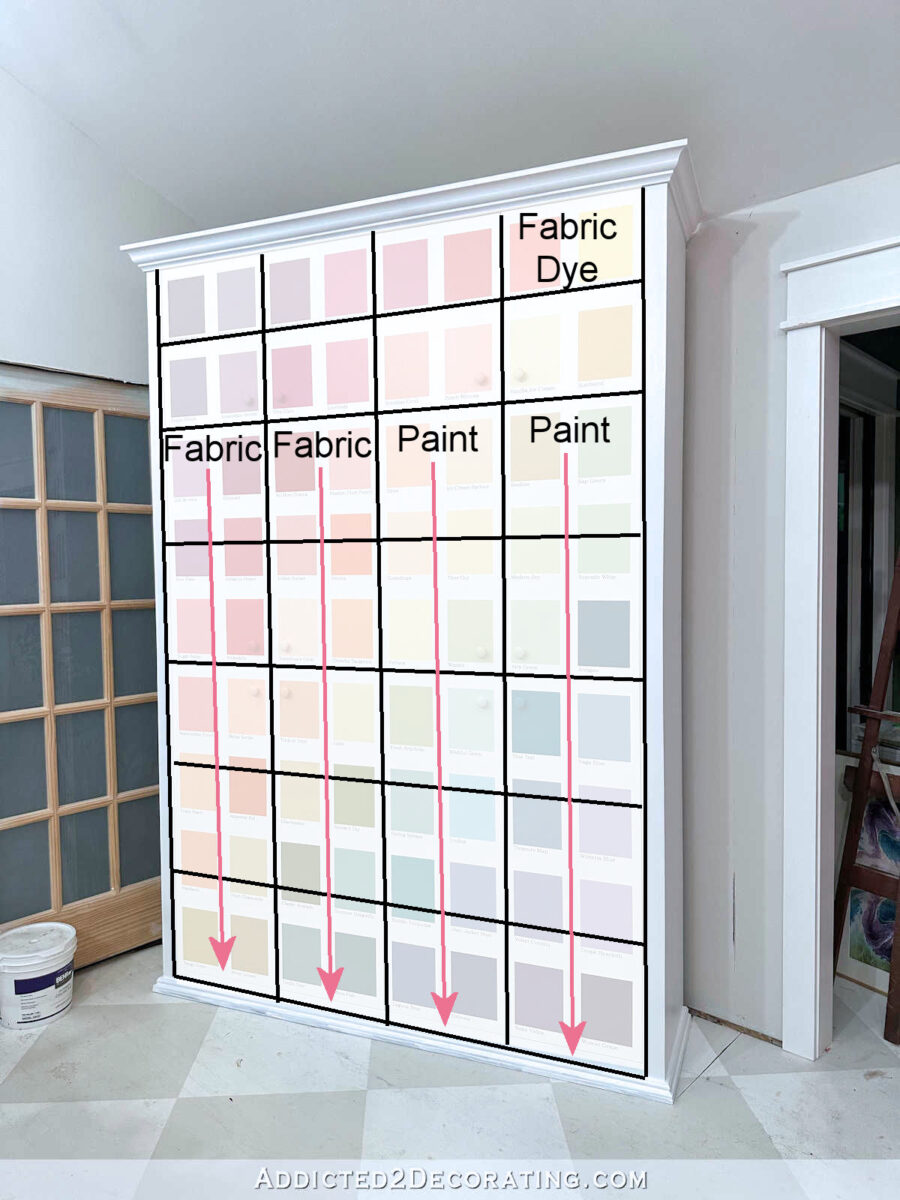
I did the same thing with the other two sections of cabinets. I found this picture of the paint swatch cabinet…
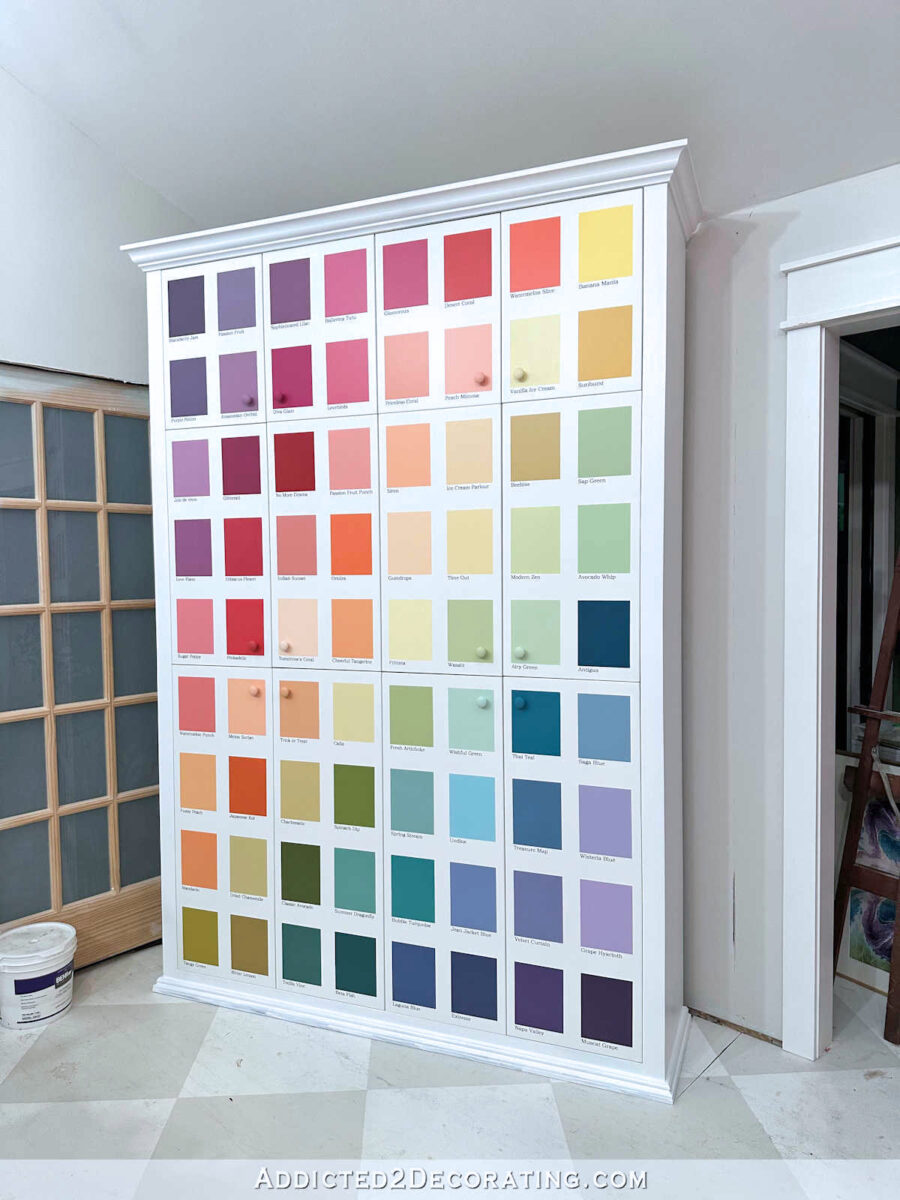
I have to admit that this one was very easy, and I probably didn’t need to map this one out at all. 😀 I’ve known all along this was going to hold my gallons and quarts of paint and my fabric. But I do have empty storage area in this cabinet also.
And finally, I did the office area. This one was also pretty easy because, well, it’s office stuff.

I’m actually going to be using the left and middle sections for office stuff, while reserving the entire right section of cabinets for more art/craft/maker supplies. I don’t know what will go there yet, but as I said, I like the idea of having plenty of room for growth as new interest come up.

Taking the time to do this mapping has made this organization process seem a whole lot less overwhelming. And another benefit of doing it this way is that I can now plan out what I’ll need to purchase for each section — drawer dividers, baskets, small containers, paper trays, etc. This has actually made me kind of excited about the process of getting organized!
I can’t remember who recommended this to me (and I can’t remember on which post the suggestion was made) but I’m so thankful for this suggestion! Tips like this make the whole organization process so much easier for those like me who long to get organized but have a harder time than those who thrive on making sure that there’s a place for everything and everything stays in its place. But like I’ve said a thousand times, once an organizational system is in place, I’m pretty good at keeping things organized. So this mapping system will help me reach that goal of getting my organization in place with a whole lot less stress.
Note: You don’t have to use a computer and photo editing software to do this! If you’re more of a paper and pen kind of person, just take pictures of your cabinets, print them out large on computer paper, and then use a pen or marker to label the shelf sections and drawers. This can be a very easy, low-tech process. I just decided to do this on my computer using my photo editing software because (1) I’m used to using that software and can do it pretty quickly, and (2) my printer isn’t usable right now. 😀

Addicted 2 Decorating is where I share my DIY and decorating journey as I remodel and decorate the 1948 fixer upper that my husband, Matt, and I bought in 2013. Matt has M.S. and is unable to do physical work, so I do the majority of the work on the house by myself. You can learn more about me here.
Looks great, and I’m so happy for you that you still will have more room as life goes on.
I KNOW you will get interested in other things…we all do! But meanwhile, you will have so much that will be easy to find, and easy to put away. Do you think you will label places? I don’t like the look particularly, but I also can’t remember where each thing is, so I had to do it. Oh, well…at least it helps me find stuff, but your cabinets are much prettier than mine…😍
I have a label maker and I love to use it. 😀 I won’t be putting labels on the outside of cabinets, but I’ll be putting labels on the edges of shelves, top edges of drawers, etc.
You could print out the photos of the cabinets with the overlay of what is in them, then laminate them. When you get more items in your areas that are empty, you can label them then on the photo itself. It might be helpful to take a photo of the supply closet too so you can print that out as well. Just an idea.
Very nice plan! Did you remember the stuff that might still be in the sun room? I know at one time there were lots of tools. Maybe take a look in there before you start loading up in case you forgot something and need to move your storage around a bit.
Good reminder! It was dark when I did my mapping, and the sunroom doesn’t have a light. So I’ll need to go in there during the day today and make sure I have all the categories I want on my map. I think I got everything, but I could very well be overlooking some categories.
It’s amazing how much storage space you have! I love the organization.
Kristi: This is an awesome post! I am in the process of decluttering and organizing an office space that I have inherited. Lots of stuff and spaces where items need to be reallocated. This is a great idea that will definitely be used by me. Thanks to you and your reader for sharing!
The organizational mapping was a great idea. I wouldn’t know how-to use it because I am not computer savvy. I can see it’s a very useful tool.
You don’t have to use a computer to do it. You could open up all of your cabinets, take a picture, print out the picture, and then mark on the picture with a pen. I did mine on the computer because my printer isn’t hooked up right now. 😀
I think you could also do a simple sketch on paper, it wouldn’t have to be perfect or even exactly to scale. This is such a good idea, I get pretty overwhelmed by organization projects, I see a bunch of empty shelves/cabinets and my brain kind of freezes up. Mapping it out like this would definitely help.
As a person who crochets, if you decide to learn, that is not nearly enough extra space for all the yarn you’ll want when you fall in love with crocheting!! 🤣🤣🤣
All kidding aside – I love this mapping idea! I didn’t really know it had a name, but I did this exact thing for our kitchen when I moved into our house 12 years ago.
Personally I’m distractible.. so I’d focus on the studio cleaned up to focus on finishing. Put the fabric and paint away in the intended spot. Then you have empty areas to put those contents to lighten up the cabinet to get it back in its place. Re-visit the map and refining (with learned lessons) after you finish the studio, so you have something to work on while the contractor does their thing. That is, if you are demoing the sunroom before the workshop is ready. Then include it’s contents now.
This was my suggestion! I’m so happy that the idea was useful to you, and I’m even more excited to see how much space you have to grow in that beautiful studio of yours! I know you’re going to build so much incredible storage into the drawers and cabinets and I can’t wait to follow along. This post made my day!
Oh yay!! Well, thank you so much for the suggestion. It’s such a good tip!
Thank you so much for this, Julie! I used your suggestion to plan out my entire kitchen that I am designing for our future beach house. I took each view of the cabinets, did a snip of it, put it into a word document, then labeled all of the drawers and cabinets with the intended contents.
I was able to ensure that everything needed fits and I have some empty space as well; for future additions.
I appreciate you sharing your idea that benefited Kristi, me and, I’m sure, others : ) It was very timely for me when you shared it a while ago. Thanks again!
YHWH Bless You : )
I didn’t like the idea of “mapping” at first because I thought I could have half the stuff put up during the time I made the map. But after read through your blog and seeing your pictures, I began to think it was a good idea. You can always look at your map to see which draw holds your whatever’s. You use that software so you probably had this done in a flash where I would spend days just drawing it out by hand or trying to do it on the computer. I have an entire bedroom of shelves filled with fabric. Some folded and some on the bolts. Plus, I have a 72″ cutting table with shelves underneath that holds totes of small scraps, 2.5″ strips, 1″ strips, etc. Then in another room I have an entire wall of thread cases full of threads to keep my threads dust free. In that room are my sewing machines, Gary’s sewing machine, and my serger desks and chairs. Also, a large cabinet of drawers holding stabilizer is in there. Also, my television and two design walls. There are shelves under the TV that are also full of totes of more “stuff”. Then in another room is the 12′ quilting machine, quilting thread, my desk, printer, etc. That is where I have my Bible study books. There is also a full kitchen with the counter tops covered with quilted quilts and quilts waiting to be quilted plus the big dog kennel and the big board ironing board.
I have decided in doing this, I have too much stuff. I guess it is organized, just not labeled. This addition to the house was for the previous owner’s mother-in-law. So when we saw it online for sale, it was perfect for me. Most people don’t have three rooms for crafts and sewing and quilting. I am blessed.
I’m looking forward to seeing your tables all cleaned off and your chair finished!!
Thank you so much for this idea. I am a crafter and have been organizing my craft room since the day I stated over 10 years ago…and this method is so simple how did I not come across it even in my own mind to do this? So thank you. I am getting too old to do all the labor of physically orgaizing by trial and error and this is so simple. So eternal thanks to solving my problems. Now I can sit and organize on my PC and then call in all my daughters to physically do this moving for me…yahhhhh
Wondering if you could switch cabinets 1 and 2 with 7 and 6. That way all your paints would be a little closer together.
This is a technique that works great for kitchen planning, too! I did it while sitting in my current kitchen, and every time I assigned the contents of an existing drawer or cupboard to the ones on my plan, I stuck a scrap of painter’s tape on that drawer so I knew I had handled it. It makes it more obvious what type of kitchen storage you need, maybe more drawers than you thought for example.
Thanks Kristi for this post! I am just starting to move into my new house and this system will make my life much simpler!
Ingenious!
Hi Kristi, so happy you found a plan that worked great for you. Now that you know where stuff is going, now is the time to sort all the stuff. Make a space for each category and move all your things into their category. That way you’ll know what you need to make or purchase for each category. Also include a category for trash, belongs elsewhere, and one for a new category.
In the future when a space is too full, sort through it and remove any or items in the wrong category. Then if there is still not enough space find a new larger space. I find myself doing this last step when I need a project that is small and gives a lot of satisfaction in return.
Hope you have fun.
A couple of years ago, I organized my fridge with clear containers. My resistant-to-change husband complained that he couldn’t find anything. I made him a map and he’s helped me keep it spiffy ever since. I should have thought of organizational mapping when I had teenagers!
This is brilliant! Thank you, Julie, for the idea, and Kristi for the beautiful execution!
Thanks for sharing! My “craft” room has been a mess for years because of money constraints and just being too overwhelmed to make a lot of progress in there. I’m definitely going to try this.