Banquette Seating Finally Underway!
For two years now, I’ve had a vision in my head of how I wanted my eating area to look–additional cabinets, banquette seating with storage, beautiful diamond-tufted upholstered back, big overstated chandelier.
I love it when a plan comes together!
Of course, it’s far from finished. There still no diamond-tufted upholstered back, no big overstated chandelier…but I do, FINALLY, have my banquette seat!
First, a refresher of where this room started.

I took that “before” picture minutes after we closed on our condo and got our keys. The electricity hadn’t even been turned on yet, so it’s a little dark, but as you can see, it was terribly bland…and very outdated.
And now…

You’ve come a long way, baby!
So as you can tell, my weekend project was building the banquette seat. Although I still have to do the trim work, prime, and paint (as well as finish out the toekicks on the cabinets on either side), I’m very pleased with how it’s looking so far. And the best thing is, I put a continuous hinge along the back edge of the top…

So now I have even MORE storage!!

There’s still a great deal of finish work to do. I’d like to paint the entire inside of the storage area white so it’ll look fresh and clean. And then, of course, the outside of the banquette seat will be painted the same color as the cabinets, so it’ll all look like one continuous custom built-in unit.
So can you envision the finished space yet?

Picture the banquette seat painted the same color as the cabinets, an upholstered cushion on top, a diamond-tufted arched seat back, and a beautiful apple green glass chandelier.
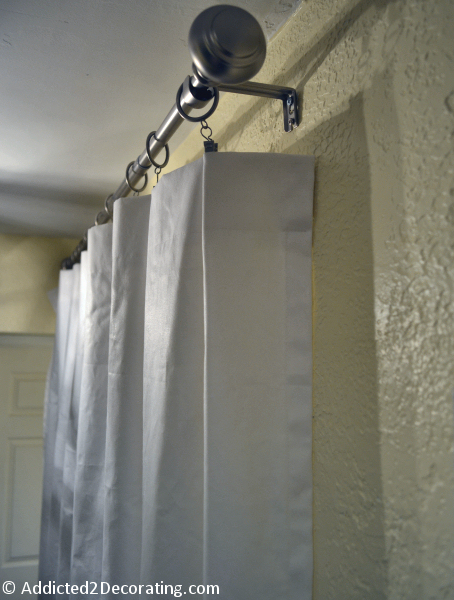
Did you also catch a glimpse of my new roman shade? In the top “before” picture, you’ll notice that the window had one-inch metal blinds (which my cats had destroyed). I’ve had those blinds on the window until this past weekend. Now I have this:

(Please note that that’s still the old taupe wall color. I bought my new soft yellow paint, but I’ve been a bit busy :). Hopefully I’ll be able to paint soon.)
Now because I’m working on a very tight budget, I wasn’t able to get the shades I had originally planned to purchase, which would have cost $277 for this one window alone. So instead, I purchased a roman shade from Home Depot for around $40. The problem? It was 60 inches wide, and my window is 55 inches wide. If I could have used an outside mount, it wouldn’t have been a problem. But because the cabinet is so close to the window, I had to have an inside mount.
Not a problem! I got out my trusty utility scissors and went to work, cutting off the extra width on either side.

Then I used my miter saw to cut the wood rail…

That took care of the width, but there was one other problem…the length was about four inches too short.

(Please be so kind as to disregard my unfinished window sill. 🙂 I hate doing all that tedious finish work!!)
So in order to solve the length problem, I removed the “valance” from the top of the shade, and I will use that to lengthen the shade on the bottom. Sure, it’s a bit tedious, but if I can save over $230, I’d say it’s worth it!
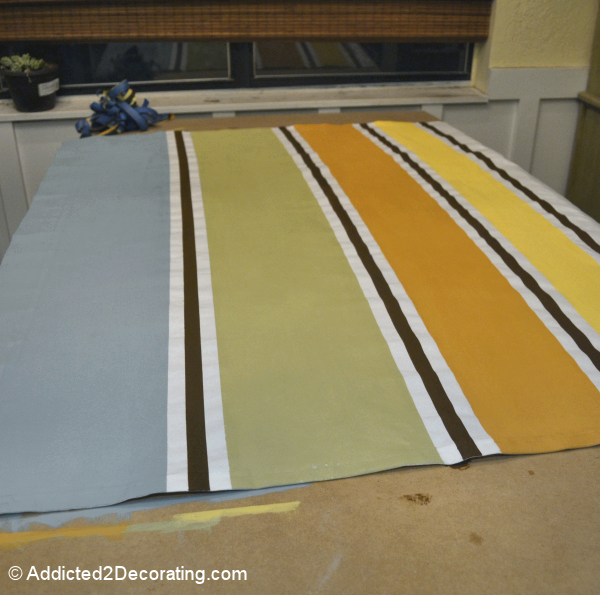
And remember, I won’t be needing that little valance on the shade anyway, because I’ll eventually have a beautiful fabric valance out of this fantastic fabric.

So there it is…my progress so far. I’ll be so glad to have this area finished! The “still to do” list is very slowly getting shorter and shorter, and I’m so glad to finally have that finish line within sight!
Hope you have a very blessed Monday!
**I’m linking this post to the Weekend Wrap Up Party at Tatertots & Jello, Metamorphosis Monday at Between Naps On The Porch, DIY Day at A Soft Place To Land, Transformation Thursday at The Shabby Chic Cottage, and Feature Yourself Friday at Fingerprints On The Fridge.

Addicted 2 Decorating is where I share my DIY and decorating journey as I remodel and decorate the 1948 fixer upper that my husband, Matt, and I bought in 2013. Matt has M.S. and is unable to do physical work, so I do the majority of the work on the house by myself. You can learn more about me here.


One word. A-freakin-mazing.
You're phenomenal. *smiles* I love watching you work! You have such a lovely, cheerful spirit. I also love the constant reminder you are to us all- practicality doesn't mean cheap or cheesy! You've done an outstanding job… you remind me of my Mother and my Mother-in-law, both of which I admire greatly.
Keep up the amazing work, and thank you for keeping me inspired! ^_^
That fabric is amazing! Everything looks great!
I'm am continually amazed at the ideas you come up with. It doesn't even look like the same place. Beautiful! The additional cabinets and seat are such clever ways to add more storage. Is there anything you won't tackle? 🙂 You are a master DIYer!
Thanks so much for your sweet compliments! This little condo is definitely a labor of love for me. And Hannah, you're absolutely right–practical does NOT have to be cheap (looking) or cheesy.
Jenny, to answer your question, there's probably not much of anything I wouldn't at least try when it comes to DIY stuff. 🙂 You have to be willing to try!
I love, love, LOVE the quote by Thomas Edison, when a reporter asked him how it felt to fail (at inventing the light bulb) 10,000 times, he replied, "I didn't fail 10,000 times. I just found 10,000 ways that didn't work." (I've seen different versions of this quote, but that's pretty much the idea of it.) 🙂
I love what you are doing- It looks great. And yes, I see your vision.
You're my hero – I don't even know how to manage it all!!
Wow the color of the cabinets are so beautiful and that valance is to die for! It's coming together so beautifully!!
It's great work!I am also addicted of decorating my home.You know you feel very beautiful and awesome when you live in a beautifully decorated places.
Colorado Springs Carpet
We are actually considering having a bench seat put in a nook we have in our dining room! Your's looks so cute!!
Truly inspiring! I love all of what you've done!
Bon
gorgfabgoodies.blogspot.com
Ooo. I love your choices! I'm excited to see the finished product!
you're not going to believe this but that is the fabric on our dining room chairs. we had them recovered with that and a clear plastic on top (we have little ones).
nice taste 😉
Oh my word! It looks fabulous! I love the white tile with the cabinets. Stunning!
That looks wonderful! The cab color looks great with the fabric you selected.
I hope you'll swing by AtticMag and tour my home.
Allison
I think I just fell in love with you.
Are you serious! I love it. I love the paint color you are using for the cabinets. And that fabric too. I can't wait to see more!!!
Thanks for linking this up. I love it!
XOXO
Jen
I know I'm a bit late on this, but there is an easier way to cut bamboo/wood blinds. Roll each end of blind up very tight. Secure them with blue painters tape around the areas you'll be cutting at least three times making sure to hold the rolled blind as tight as possible. Measuring from the center of blind half the distance of the total width needed in each direction and mark with a Sharpie where you need to cut. Now carefully place blinds on your miter/chop saw and cut each end with one smooth down pull of the blade. Remove painters tape.
That's all there is too it.
Hi Becky~
You're absolutely right. That's actually how I did the one for the living room. It did splinter a little, but that's okay, because the edges will be covered with drapery panels. I would say for blinds that are made of thicker wood slats, that's definitely the way to do it. For the ones that are more grass-like, scissors work a little better. Mine are somewhere right in the middle–not sturdy wood slats, and not grasslike.
it looks totally awesome! i'm jealous! 🙂
following you now, cant wait to see the finished product!
michelle…xoxo
Thanks, Michelle! I actually have some more recent pics posted on newer blog posts. It's still a work in progress, though. Hopefully soon it will be done! Thanks for following. 🙂
Ohmygosh, this is like the answer to my prayers. I had asked you earlier about where you got your roman shade but then I was so disappointed when I went to the store and they told me they couldn't be cut down. But they can! This will save me so much $. I only need to take about 4 inches off the 90 inch. shades to fit my windows. Do you have any other tips/suggestions before I get started? Thank you!
Well, if you're going to cut them with utility scissors like I did, just be prepared for your hand to hurt. 🙂 It takes patience, but the result is worth it.
On my living room one, I actually rolled them up tight, secured with blue painters tape, and then used my circular saw to cut through all of it–the shade plus the rail. It worked, but it splintered the edges a bit. Since I'm hanging drapery panels on that window, I'm less concerned about the splintering. However, I think it could be easily remedied with a bit of stain.
Anyway, the miter saw through all of it was obviously the quicker way, and if you don't mind doing some touchups with stain on the splintered edges, it'll definitely be easier on your hand. Just be sure your blade is sharp (relatively new), and be sure the shade is wound and secured very tight before you start cutting through it.
I love the color combination and I love neutral colors mixed with a loud color. I love blue mixed with beige, black and white. Very clever…
Also I like the storage banquette seating very useful for small spaces.
This is great for limited spaces, but what I like most about this plan is how you have created extra storage. I'm not crazy about the white tiles though, but it looks fine overall.
This is great for limited spaces, but what I like most about this plan is how you have created extra storage. I'm not crazy about the white tiles though, but it looks fine overall.
It's great work!I am also addicted of decorating my home.You know you feel very beautiful and awesome when you live in a beautifully decorated places.
Colorado Springs Carpet
roller blinds
I really like the combination of roller
blinds which you shown in your blog. I also want to decorate my walls and
window with blinds and I will definitely using this kind of roller blinds in my
windows and doors.
I am looking for a place, perhaps online, that has great customer
service, a great reputation, and quality products. We want something with
"room darkens” for the children's rooms like roller blinds.
===================
roller blinds