Before & (Not-Quite-So) After:: Craigslist Dresser For J & A Family Room
I had hoped to have the Craigslist dresser finished today so I could have a beautiful and dramatic “before and after” to show you. But not only did I not get finished, but I kind of hit a road block. So, let me show you what I DID get done…
As I shared last week, I found this dresser on Craigslist for $55. This thing is heavy, solid wood.


If I were using this in a bedroom as a dresser, I would have just sanded and painted the entire thing. But because I’m going to be using it in a family room, I wanted it to look less bedroomy.
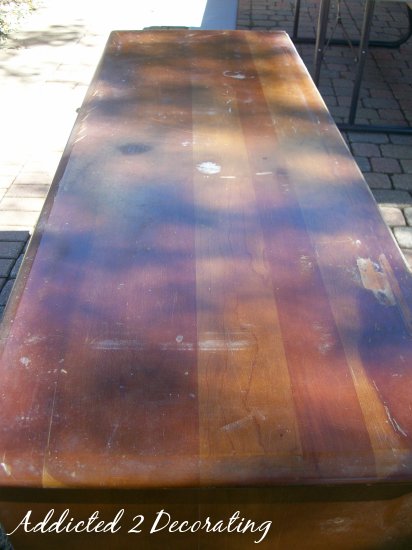
The top was scratched and the original finish was an orangish-brown, so I was anxious to sand it down. So, with my trusty new sander (that I had to purchase because I burned out the motor in my last one), I got to work.
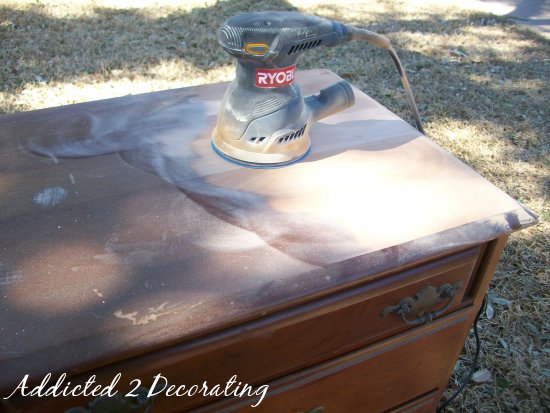
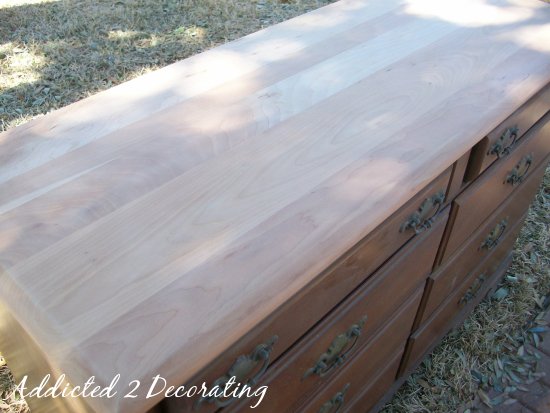
Soooo much better! Is there anything more beautiful than freshly sanded raw wood just waiting to be stained?!
Next came the task of deciding how I wanted this piece to be configured. I thought about keeping the top two drawers, then I thought about keeping the middle drawers, but I finally settled on this configuration. I’ll keep the bottom two drawers, and the rest will come out to make room for open shelves.
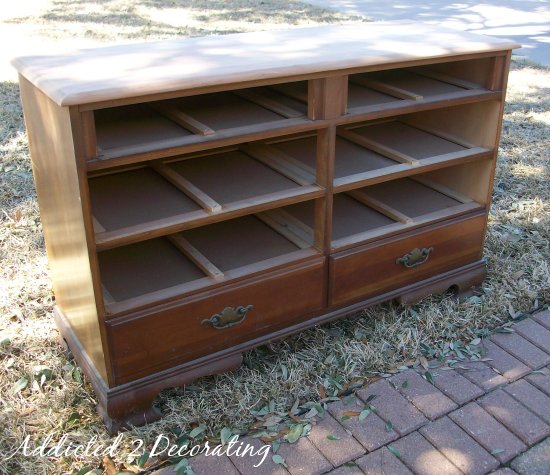
So after settling on that, I took a hammer and started whacking away at all of the extra support pieces that I wouldn’t need, and this is how it ended up.
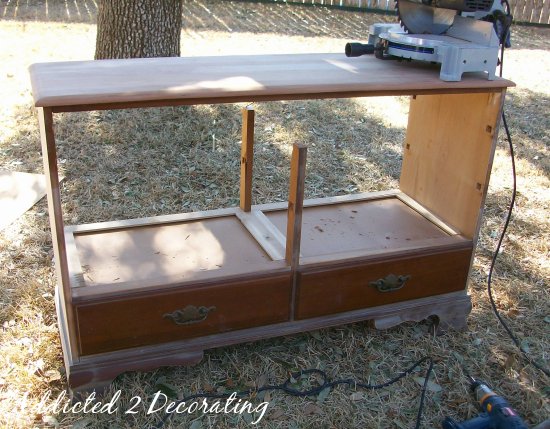
You can see the road block I hit. Those two vertical pieces in the middle separated the three left drawers from the three right drawers. It needs to stay between the bottom two drawers, but the rest needs to be cut away. But…I didn’t have a tool that could do that. I think I’ll have to use a hand saw, as I can’t really think of anything else that will cut it close enough.
So, with that roadblock in my way, I refocused my attention to the beautiful wood top that was just screaming for stain. I used “dark walnut”…
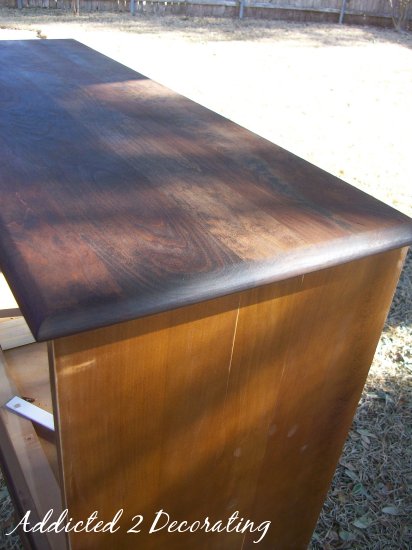
What a difference! That pretty new stain really accentuates how orange the old finish was.
The last thing I did was sand, degloss, and put a coat of primer the bottom part.
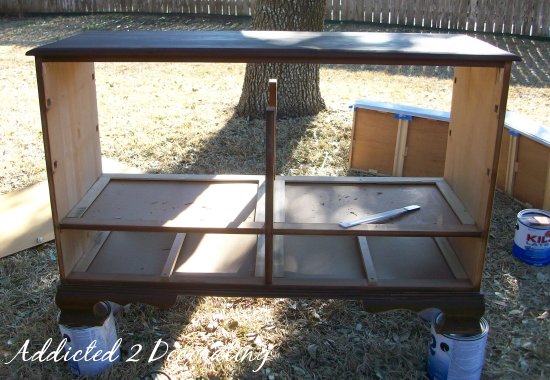
And that’s as far as I’ve gotton on this project.
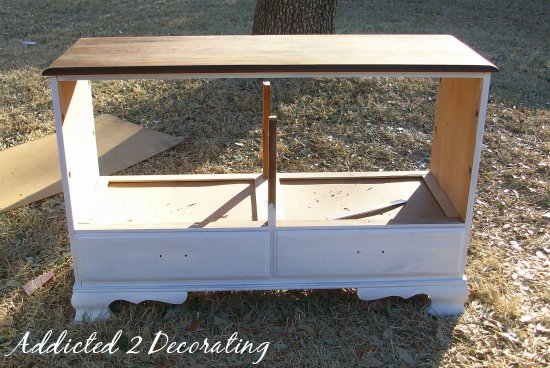
It already looks like a completely different piece of furniture. I just need to cut off the vertical pieces, add shelves, and add a new backing to complete the structure of the piece.
Then comes the difficult task of deciding how to paint it. I’ve already purchased two different paint colors to use–Martha Stewart Arrowroot, and Behr Intellectual…


So I’ll be using some combination of these colors, but I’m just not sure what that combo will be yet. I have to keep in mind that it’ll be sitting against a wall painted in this color…
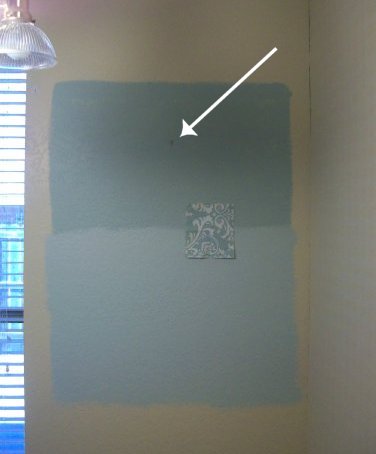
Interestingly, the paint color for the dresser is a couple of shades darker than the wall color, although it certainly doesn’t look like that in the pictures. I hope it shows up on the finished piece!!
So that’s the progress, and the (somewhat unclear) plan. If you have any brilliant ideas of how I can incorporate those two paint colors on the base and shelf area, please share!!
Don’t forget! Your comment enters you into this month’s drawing for a $100 gift card to the home products store of the winner’s choosing. More info here.

Addicted 2 Decorating is where I share my DIY and decorating journey as I remodel and decorate the 1948 fixer upper that my husband, Matt, and I bought in 2013. Matt has M.S. and is unable to do physical work, so I do the majority of the work on the house by myself. You can learn more about me here.

I can't wait to see it all done…I love craigslist
I love how you repurpose things! Love it. So, let me ask you this….if you're putting in shelves, is it for books or baskets or something? Is a flat screen going on top? I'm excited to see what this will be used for! Thanks for sharing.
Hollie
I love how you repurpose things! Love it. So, let me ask you this….if you're putting in shelves, is it for books or baskets or something? Is a flat screen going on top? I'm excited to see what this will be used for! Thanks for sharing.
Hollie
A reciprocating saw will take those supports out in seconds. It's a great tool to own for cutting weird angles and small spaces. Great project, and I love your imaginative plan for it. Can't wait to see it finished!
Sally, I actually have a reciprocating saw around here somewhere. It was given to me, and I've never once used it!! It needs a new blade, and I keep forgetting to purchase one. Perhaps now is the time! Thanks for that reminder!!
I'm always so amazed that you can look at something like this old dresser and see such possibilities… and then do the things that need to be done to make it become something so beautiful! I'm looking forward to seeing how it turns out! ~Cathy
Hello Kristi,
had to swing by here again before I get started on some work in my garden today.
Well, it looks like your favorite tool, the good old sander, did another good job.
I'm curious what the final will look like.
Using a reciprocal saw, as Sally recommended, is easy. Even I have used it several times and if I could, you will for sure not have any problems with it either.
I still can't believe what a good deal you made with this old dresser.
Paula Jo
Top looks like different kinds of wood. Did the stain even that out? I have a piece like this and wanted wood stain on top but was afraid it would end up looking like a zebra due to the different wood "colors".
If I wanted to use two different colors of paint on a piece like that, I think I'd probably do some sort of design on the drawer fronts – maybe small-scale harlequin diamonds. (I sure wish someone would give ME a reciprocating saw!)
To cut that piece, a 'flush cut pull saw.'
I used it when we did flooring, and it was very easy to use.
I'm sorry that you hit a road block, but it sounds like you have your answer. I can't wait to see your finished piece!
I love your paint colors… what about the inside one color and the outside and the shelves the other?
I think I would use the gray as the overall base and shelf color and paint the inside back and drawers the Arrowroot. Just my two cents… Are you keeping the hardware or changing it?
I love how you are completely changing the look of this piece by taking out those drawers. I don't think I would have thought of that! So many awesome ideas!
I have a dresser almost exactly like this down to the hardware! It was my son in law’s dresser as a kid and I took it and sanded it down, and painted it black. It looks great…even used the same hardware and painted them a brushed nickel color then distressed with black. I actually love mine as a guest bedroom dresser. Can’t wait to see yours when you finish!