Studio Side Steps Progress (DIY Steps With Retaining Wall Blocks And Pavers)
Well, it seems as though my idea to DIY the steps to the side door of the studio went over like a lead balloon. I read all of the comments, and I have to admit, I was very surprised at all of the people who said, “This isn’t a DIY project. You need to hire this out. Leave it to the professionals.”
I read the comments. I considered the comments. I did a whole lot more research on my idea and the products I wanted to use. And I decided to forge ahead. I really love my idea, and even if it doesn’t work out in the end, I will have at least tried something new and learned a lot from it. And after Day 1 of working on this project, I’m even more determined and excited about these DIY steps. I didn’t get all of the first step finished, but I love the progress so far.
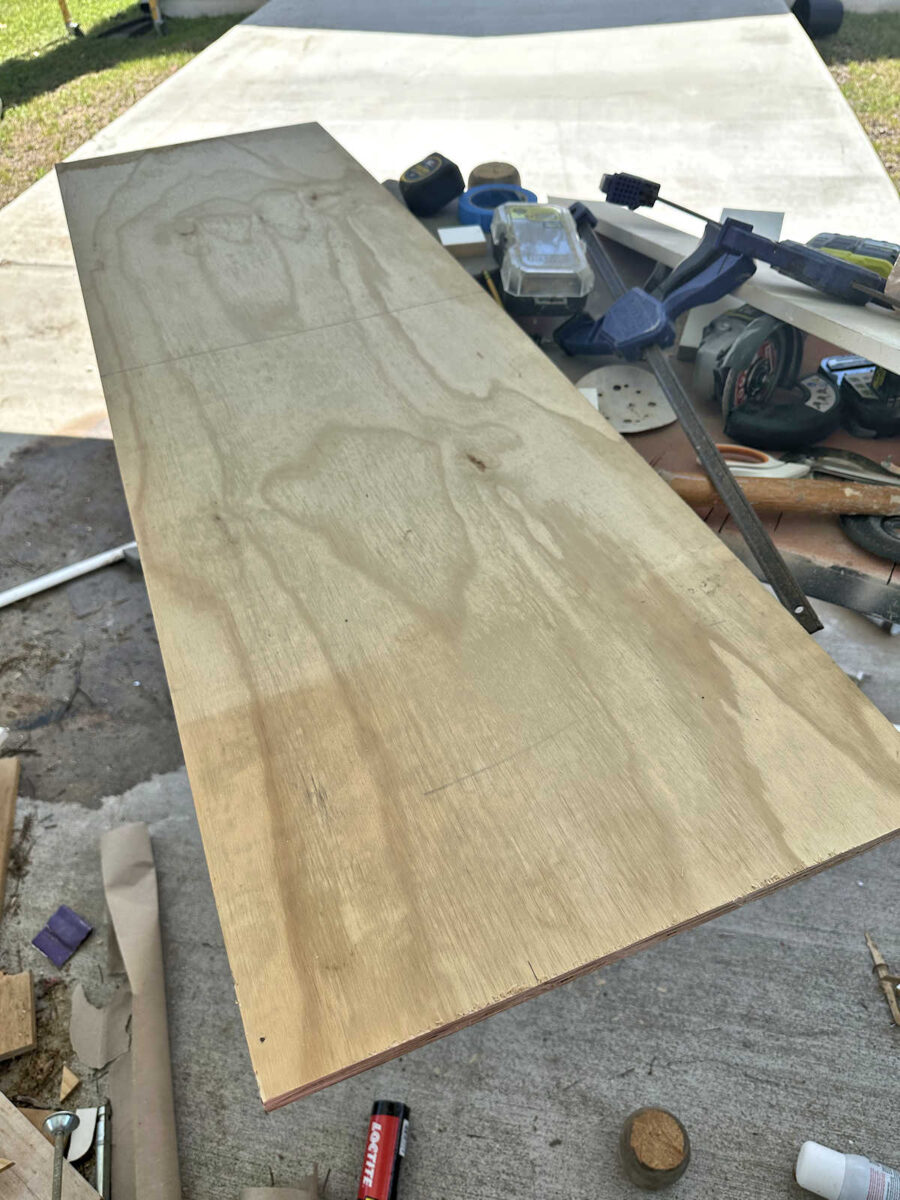
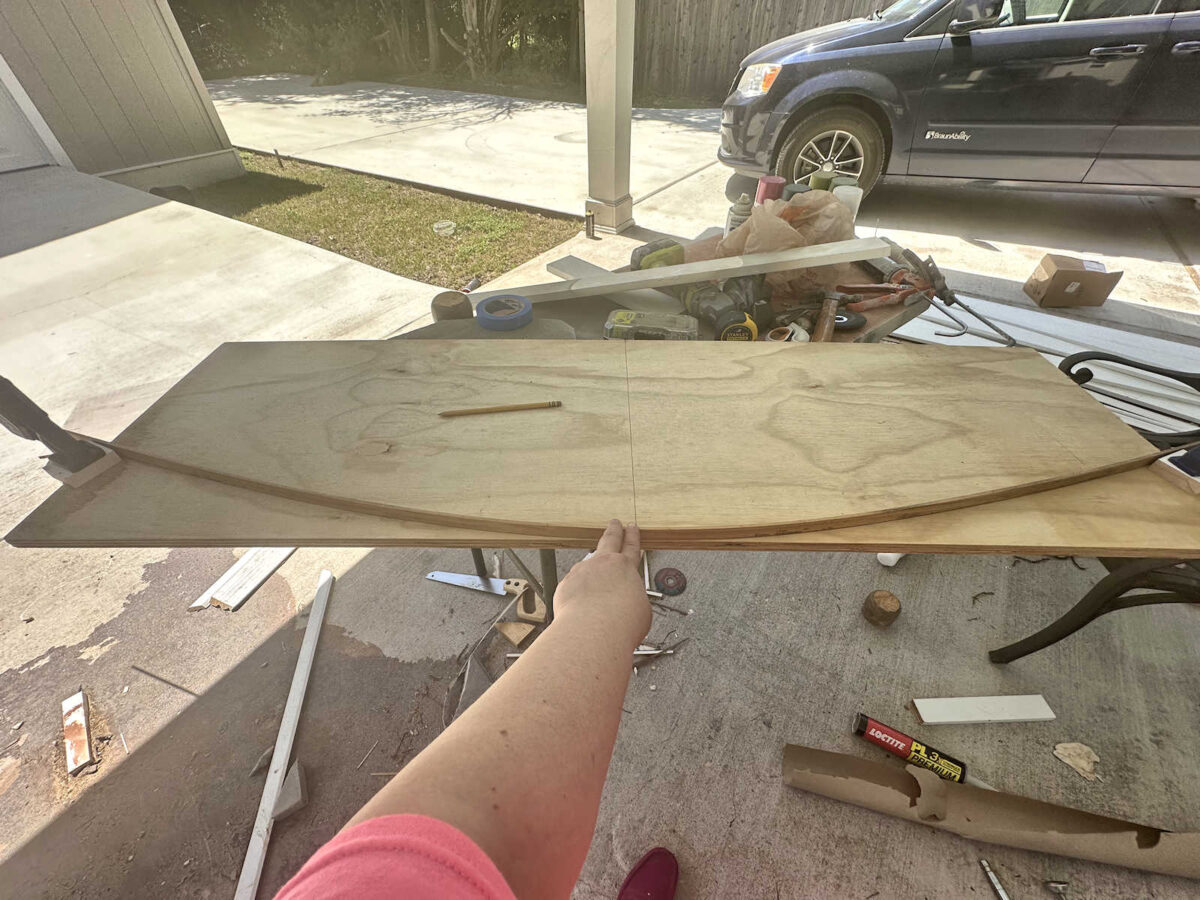
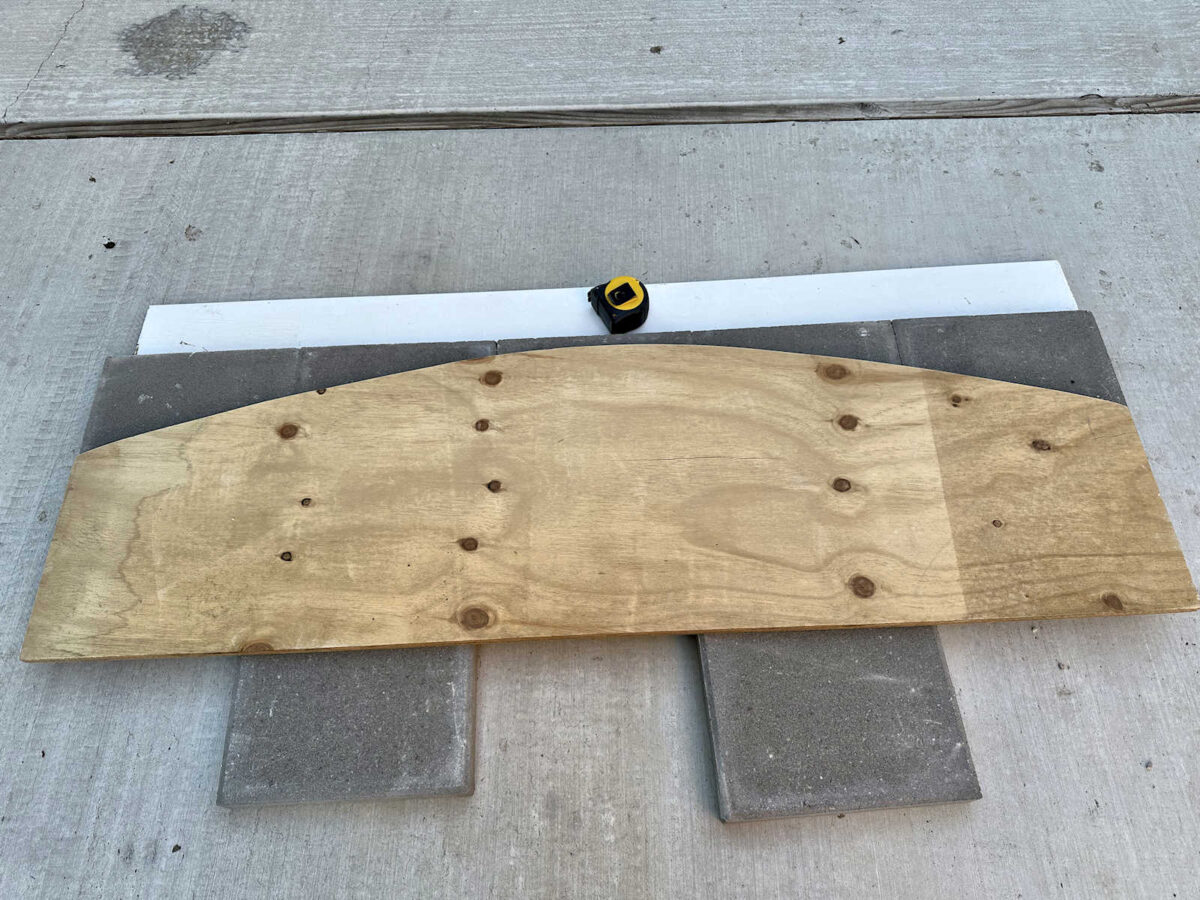
Here’s how I did it. First, I needed a pattern for the front curve of the steps. I want the overall width of the steps to be 60 inches, but I want the steps to over hand the risers by one inch on the sides and front. So I cut a scrap piece of plywood to 58 inches wide to use as the pattern.
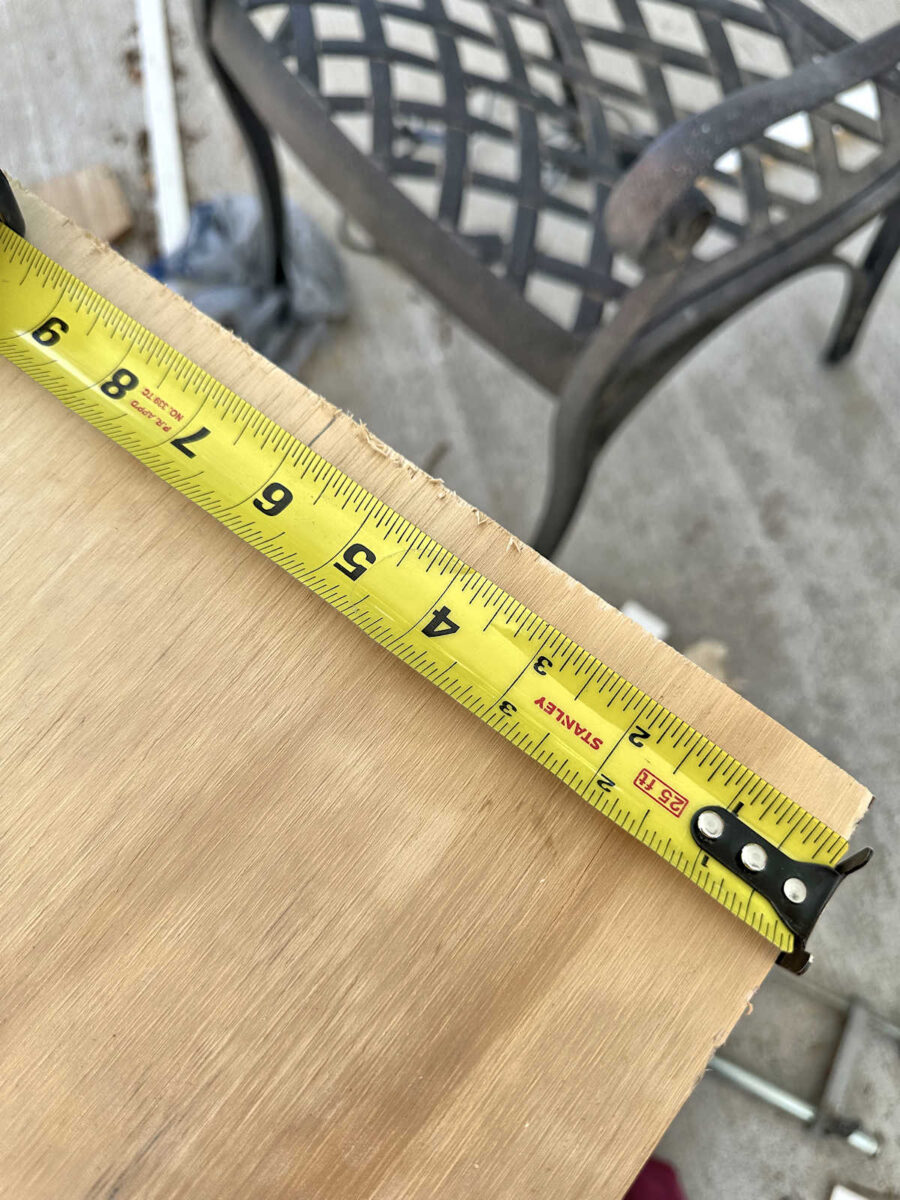
Then I measured and marked six inches on each end of the plywood.
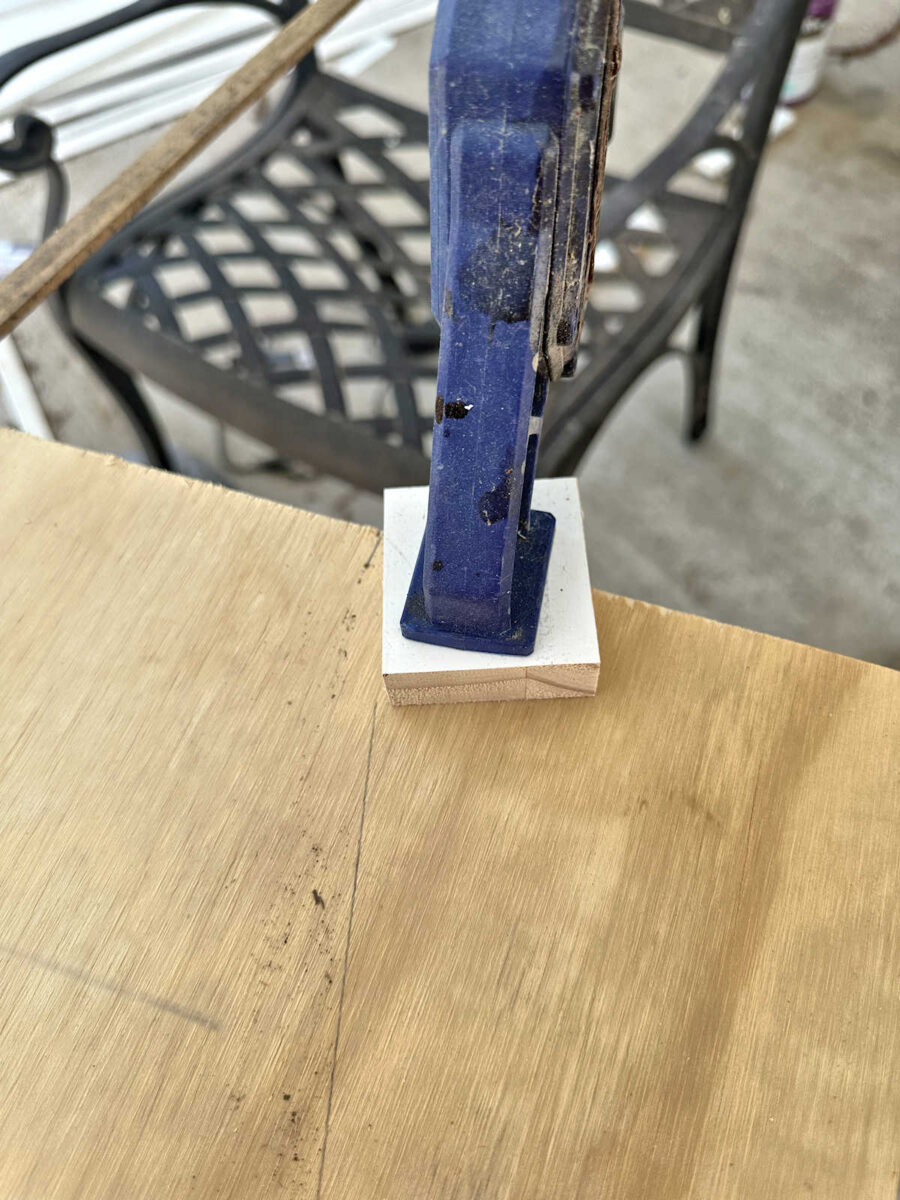
And then I clamped a piece of wood at that six inch mark on each side. I placed the wood piece to the side that would be cut off, not on the side that would remain as my pattern.
And then I used a thin, bendy scrap that I had cut off of something for a previous project (I found it in my discard pile) and placed it behind the clamped wood pieces and pulled it towards the front edge of the plywood piece right in the center (which I had measured and marked) to form a curve. And then I traced that curve onto the plywood.
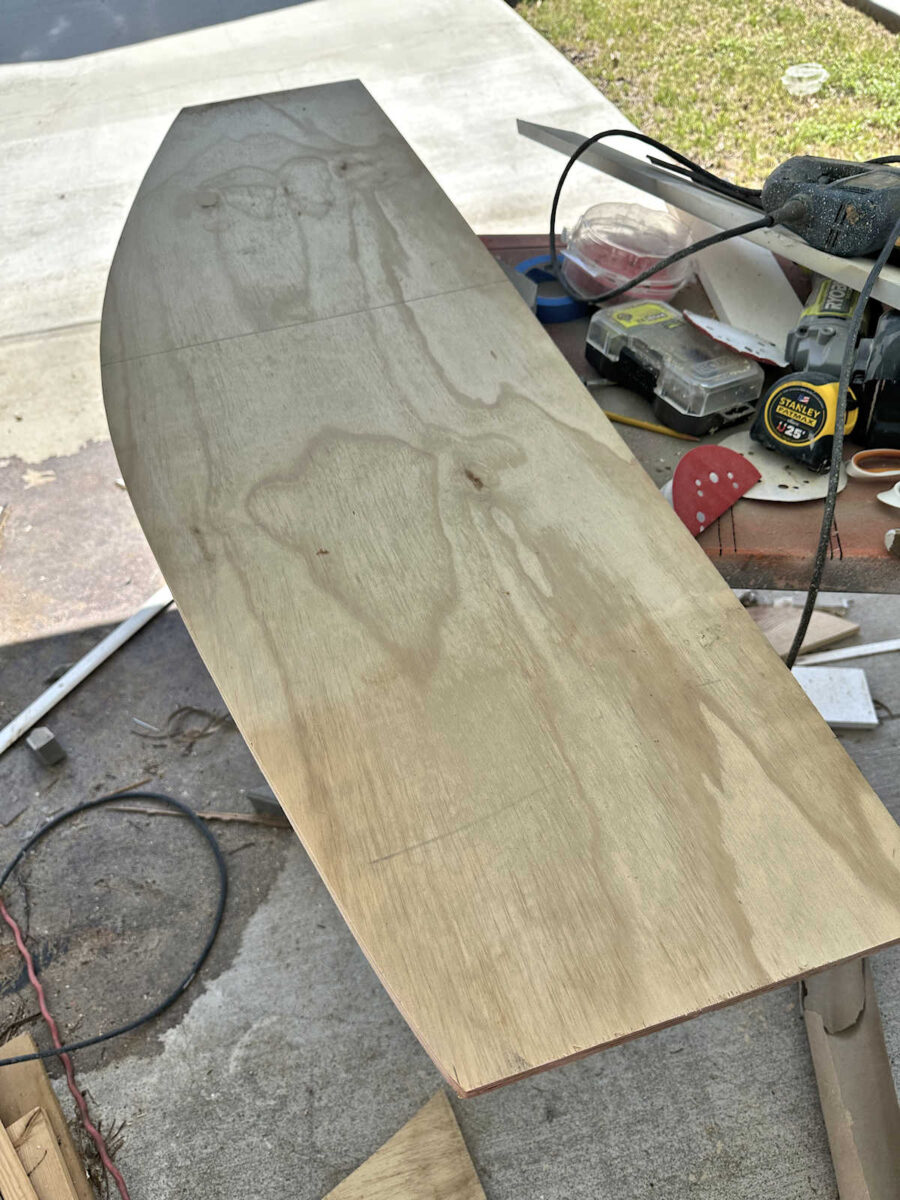
And then I used my jigsaw to cut out the curve and cleaned up the cut with my rotary sander.
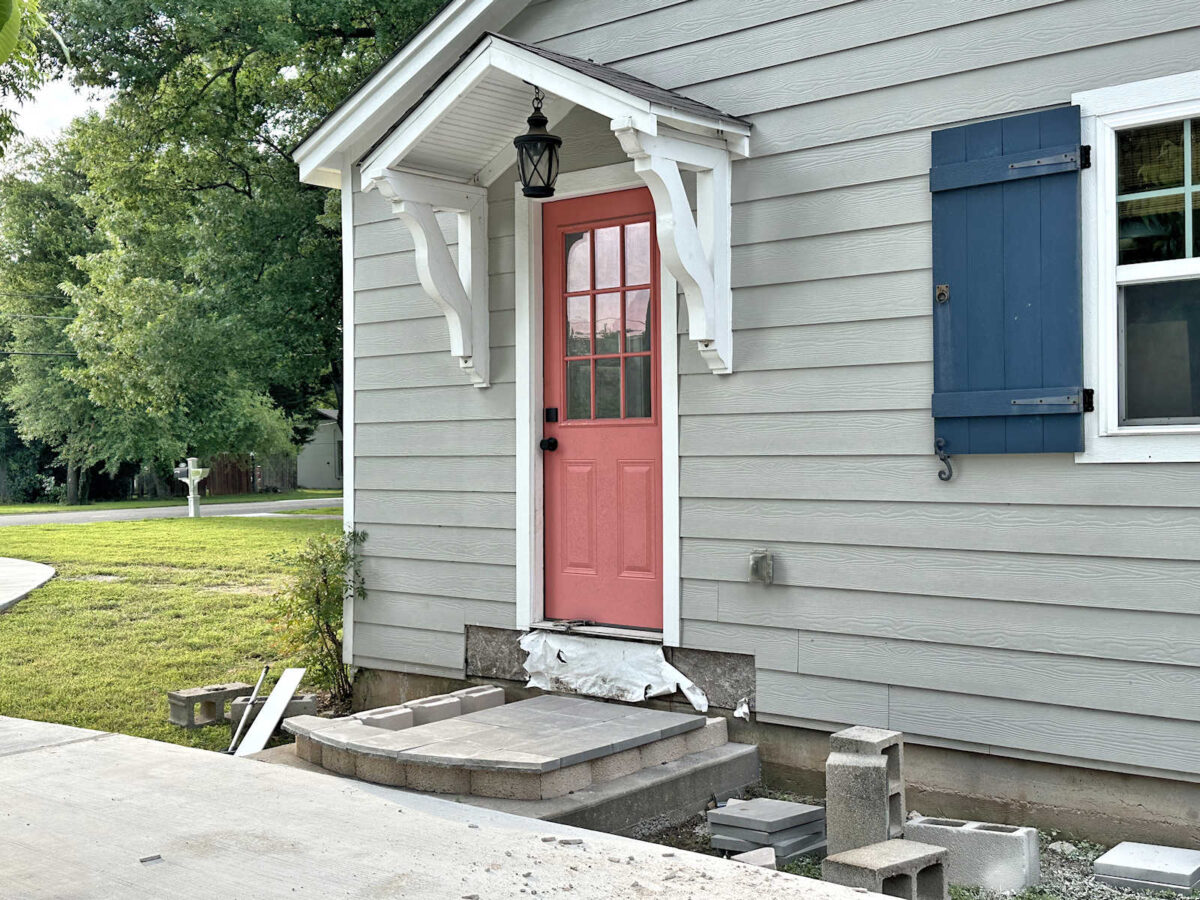
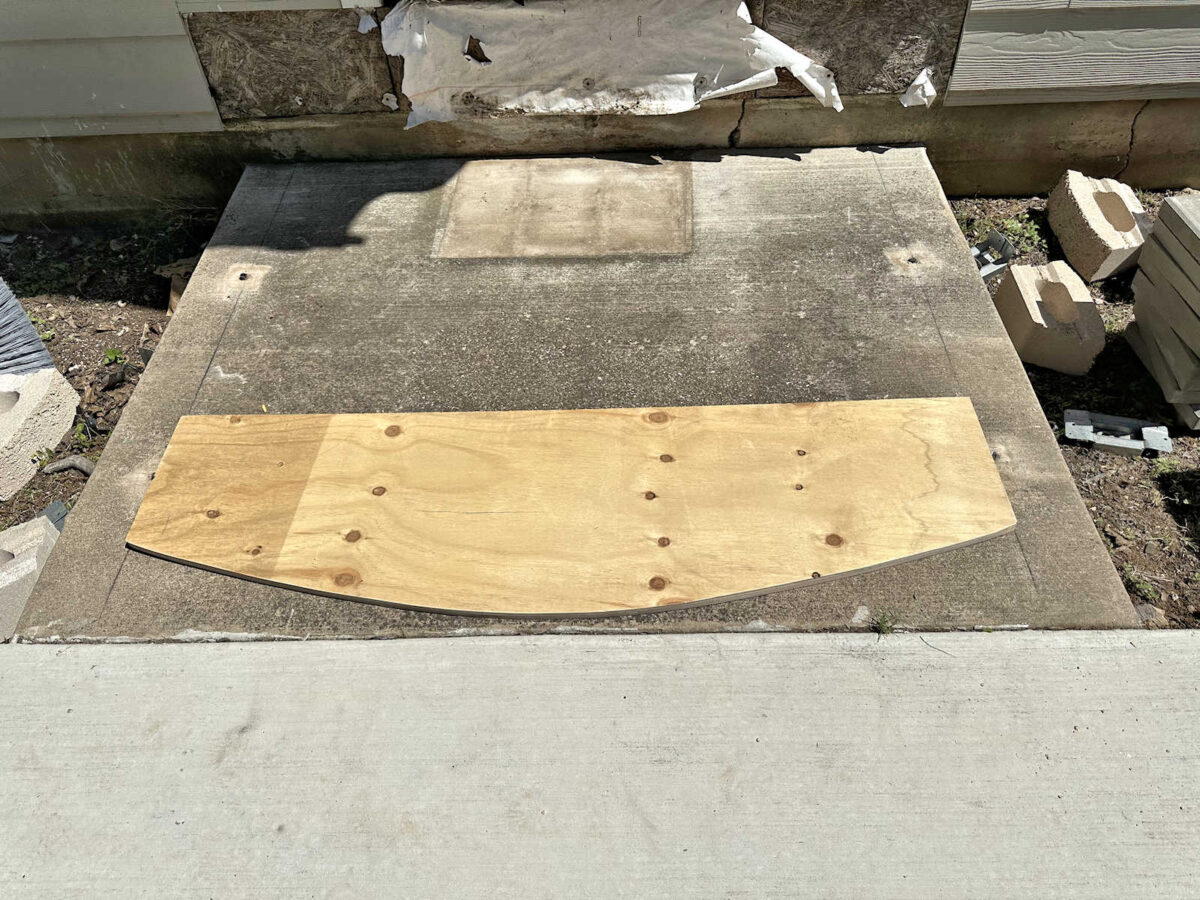
After marking and measuring the 58-inch width centered on the concrete pad and drawing the straight lines for the sides, I then placed my curved pattern at the front, set back an inch from where the concrete pad meets the driveway and lined up with the straight lines on the sides. And then I traced the curve onto the concrete.
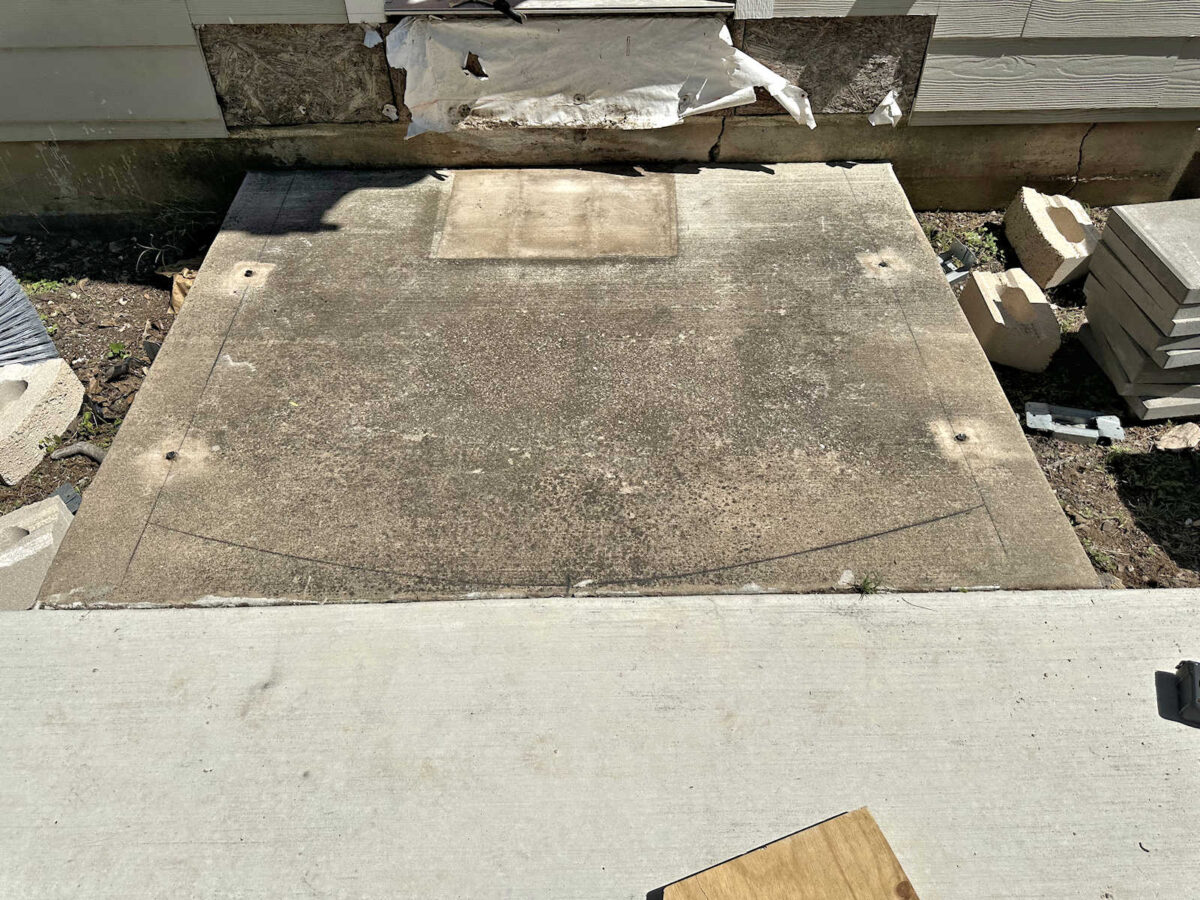
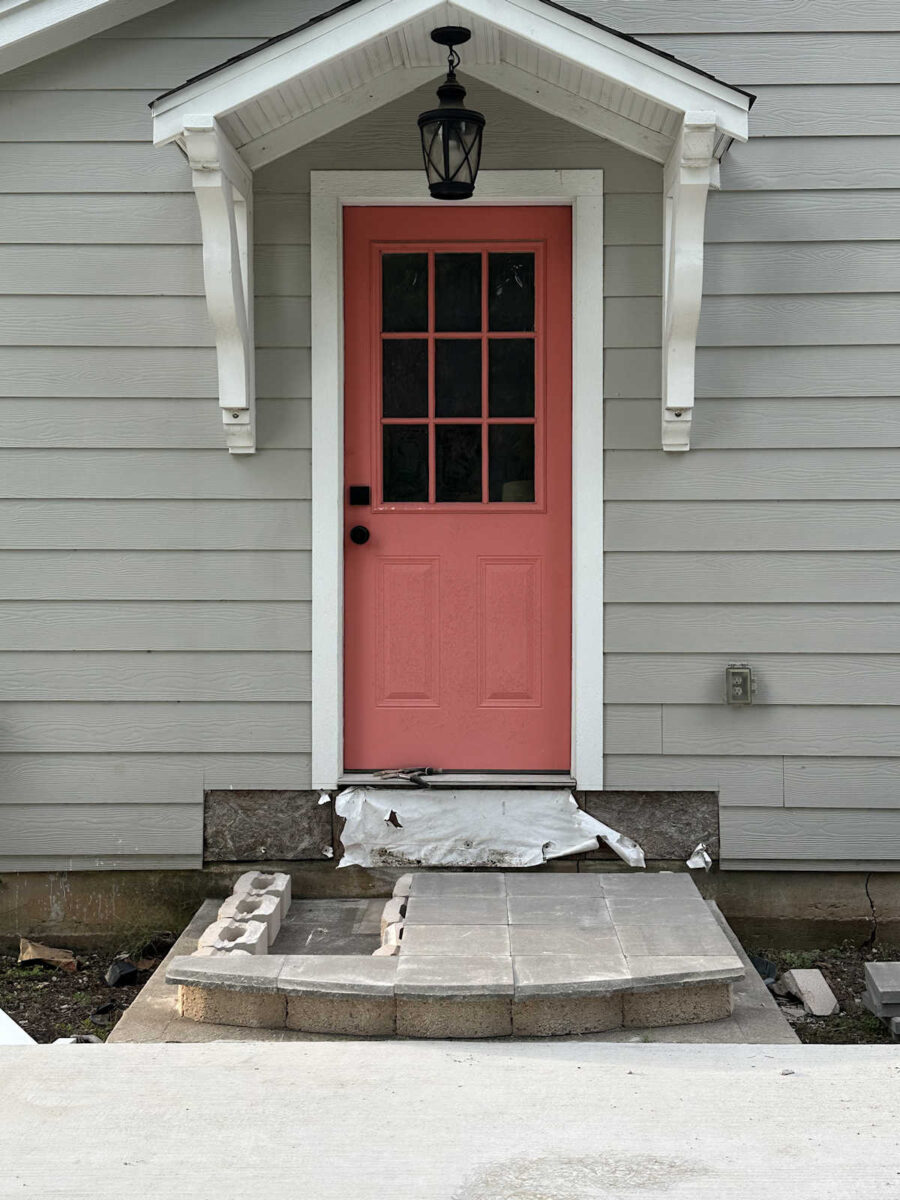
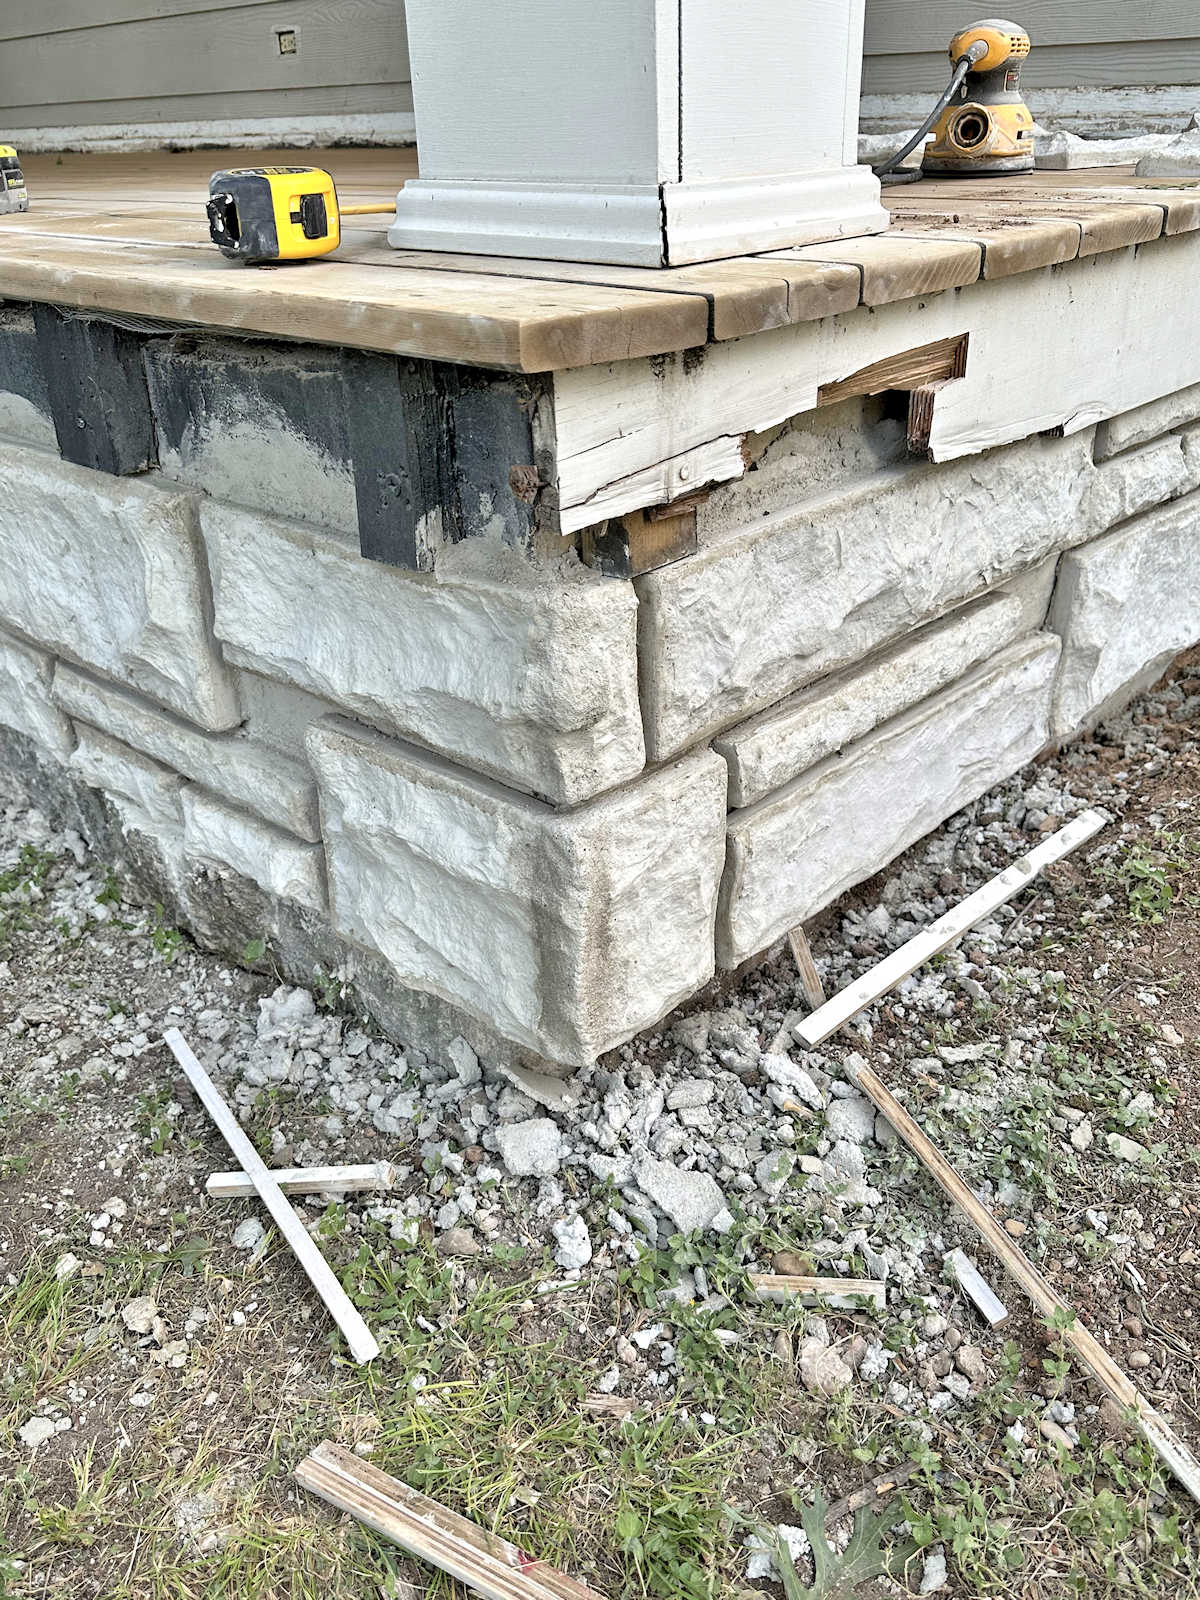
Side note: I still need to waterproof that area where the siding is cut away. I have a plan for that, which I’ll have to do before I move on to the second step. But I knew the first step wouldn’t cover up any of that area, so I decided to do the step first since I was way more excited about working on the steps than I was about waterproofing that OSB. But don’t worry. It’ll get done.
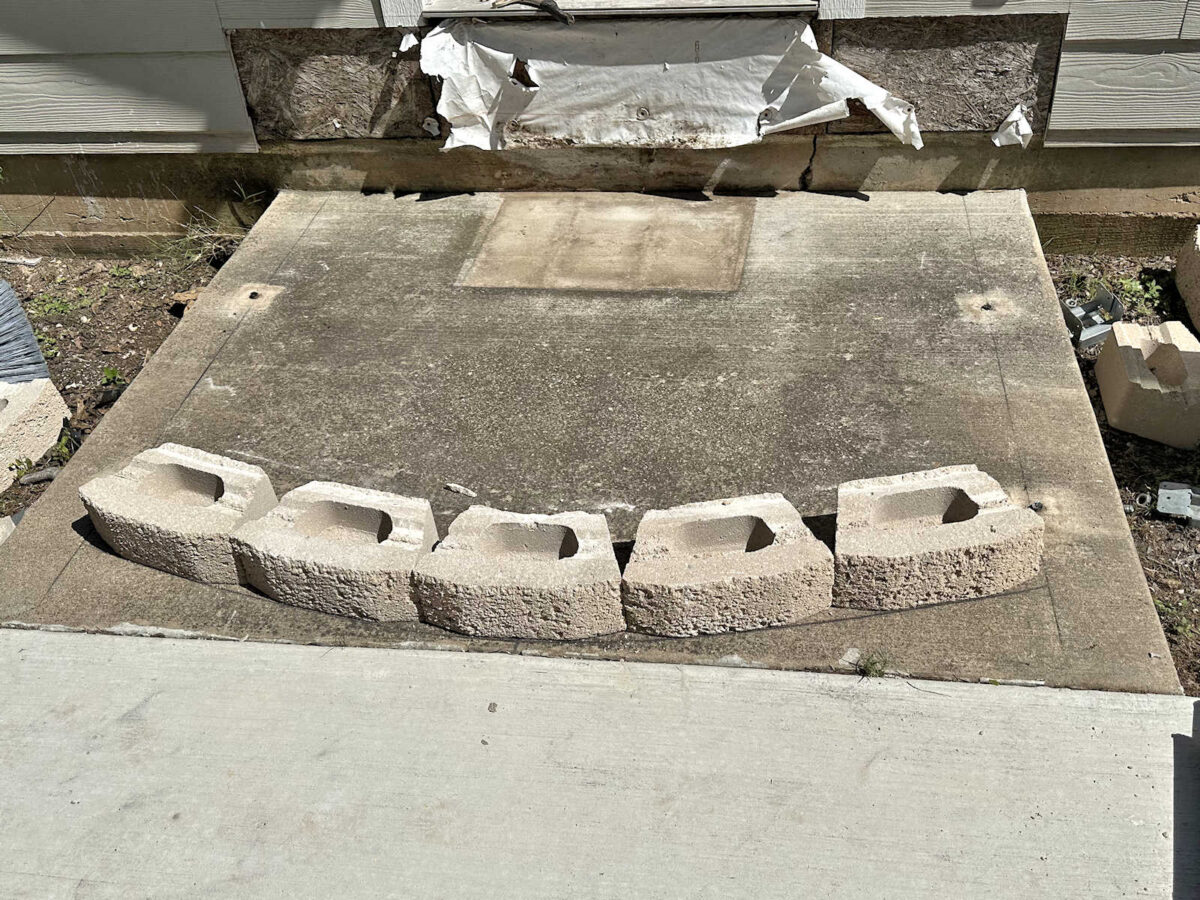
And here’s the final shape traced onto the concrete pad.
I started laying out the retaining wall blocks along the front curve first. Once I had them arranged just right, I glued them into place using an exterior polyurethane adhesive.
The reason I decided to use polyurethane adhesive instead of mortar is because I did quite a bit of research and reading on this, and I came across a few websites where people can ask “pros” for input, and several of those pros made a very convincing argument that the adhesive is a better option than mortar because polyurethane adhesive isn’t rigid when it’s dry and cured. It can expand and contract and remain a bit pliable through the seasons, where mortar dries very hard and rigid and doesn’t have any give to it, so it can start to crack through the seasons.
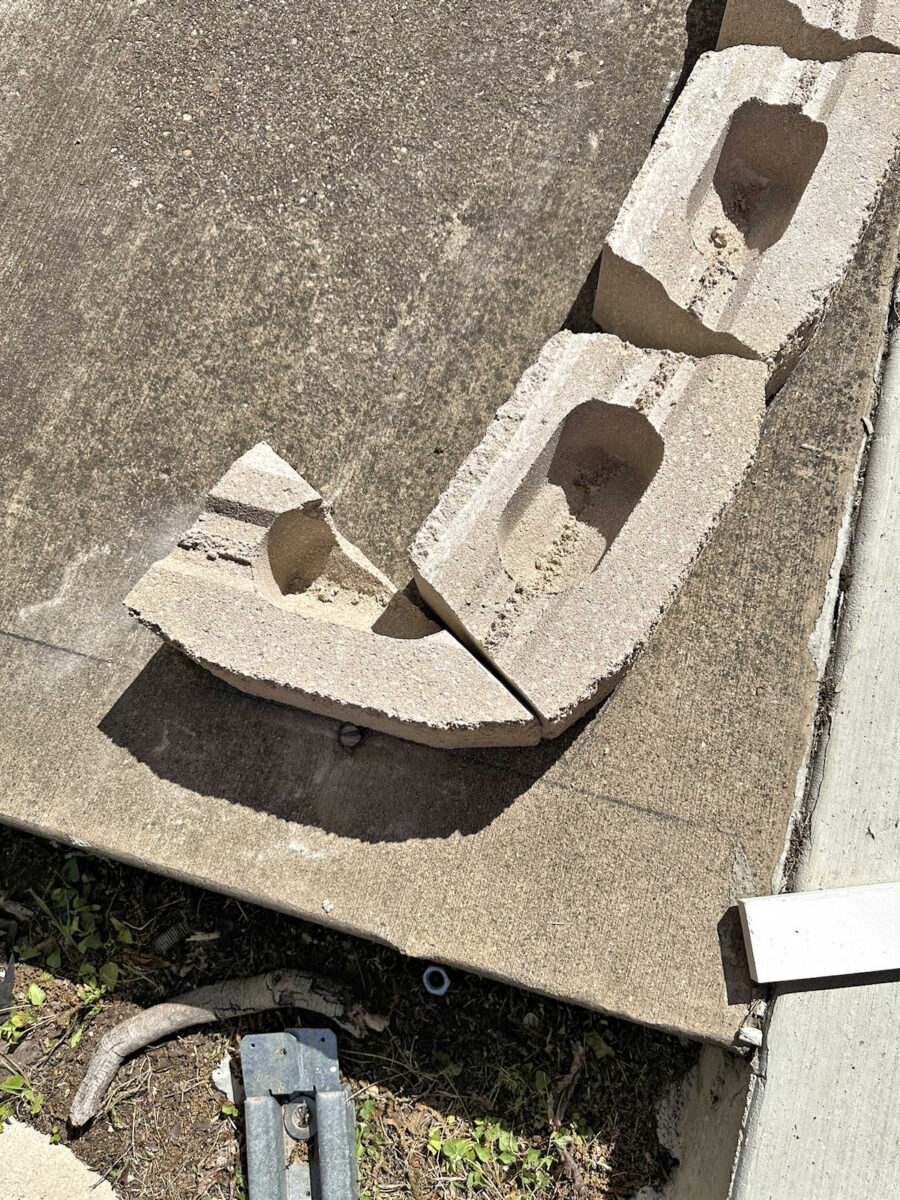
Once I had the front curve in place, I needed to cut two blocks to start the side runs on either side. I used my handheld grinder with a masonry disc on it for this. After drawing my cut line on the top and bottom of the block, I used my grinder to score the cut line all the way across. This is another trick I learned from a pro. He said never try to cut at the full depth all way across on the first pass. Always make a score line first, and then go back with several passes until you reach the full depth of the cut.
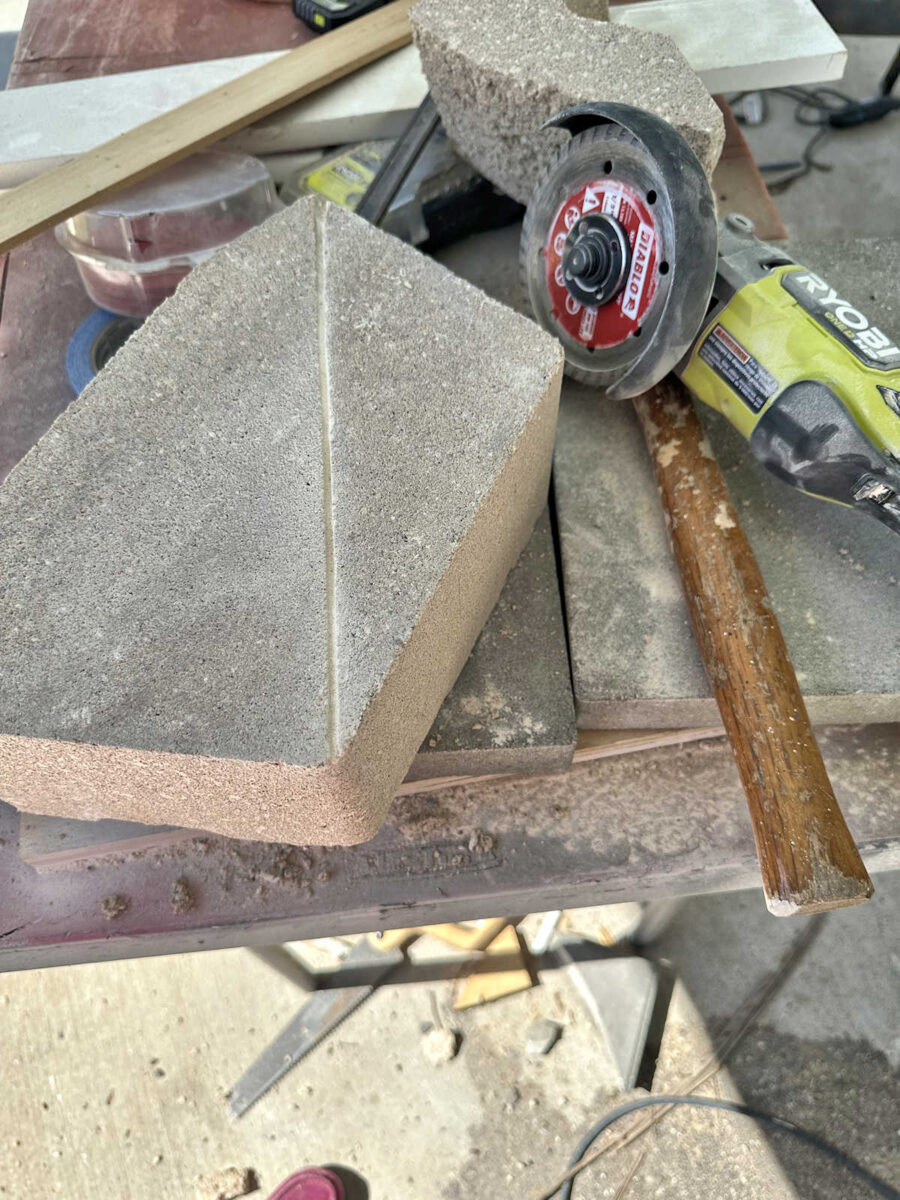
I cut the block on top as deep as my grinder would go, and then I flipped the block over and cut on the bottom as deep as I could. It still didn’t get all the way through, but with a couple of firm taps with a hammer, the excess came off rather easily. And then I used my grinder to clean up the cut before putting it into place.
And then I continued on with the sides. I dry fit everything first, and once I had them where I wanted them, I went back and glued them down with the polyurethane adhesive. And then I repeated that process on the other side.
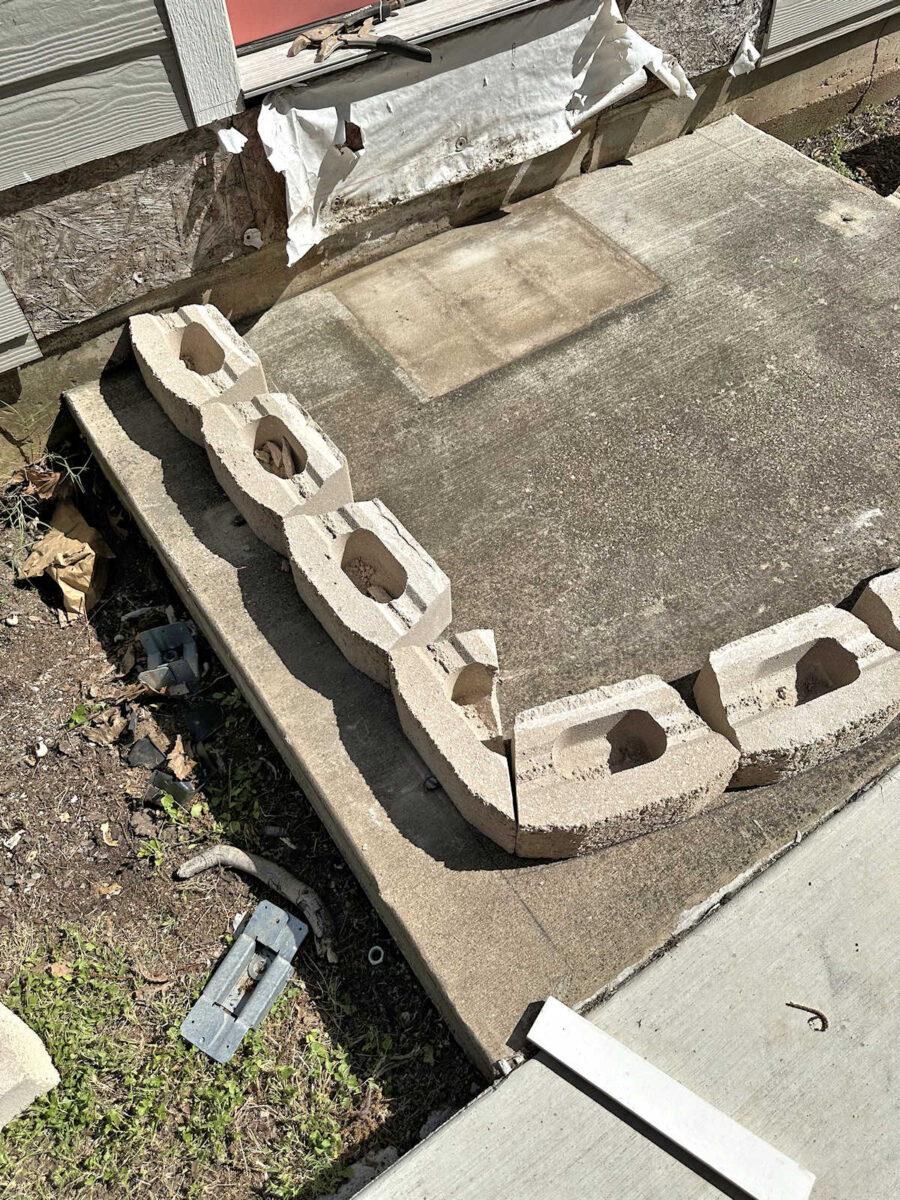
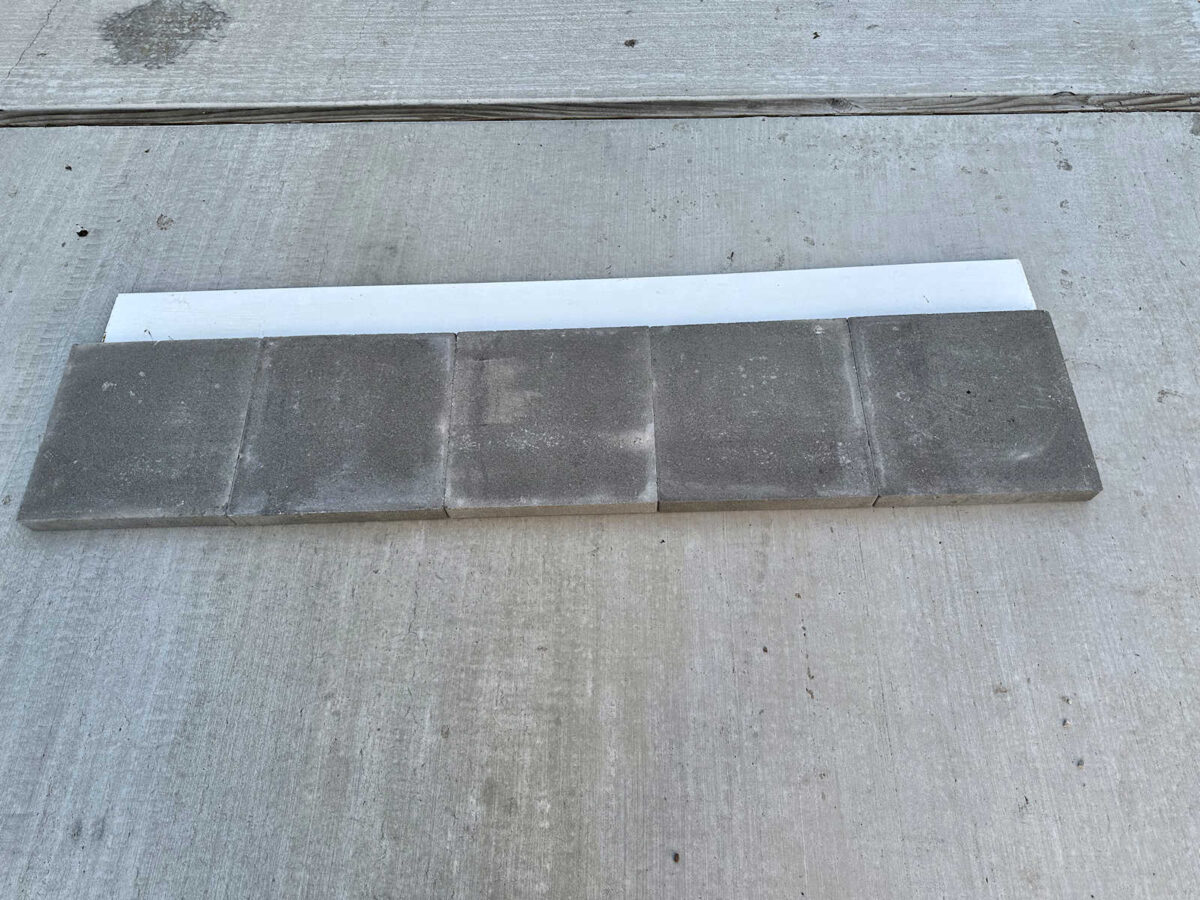
With the outer shape of the first riser in place, I worked on the pavers for the first step while the polyurethane adhesive set. I lined up five concrete pavers, and then used a straight edge (a 1″ x 4″ piece of lumber) to make sure they were perfectly lined up.
And then I used my curve pattern to trace the curve across the pavers.
One thing I should have done is use my grinder to score the curved shape into all five pavers while they were still together so that the cut would be consistent from paver to paver. But I forgot to do that, so I took each paver to my work area individually and scored and cut them.
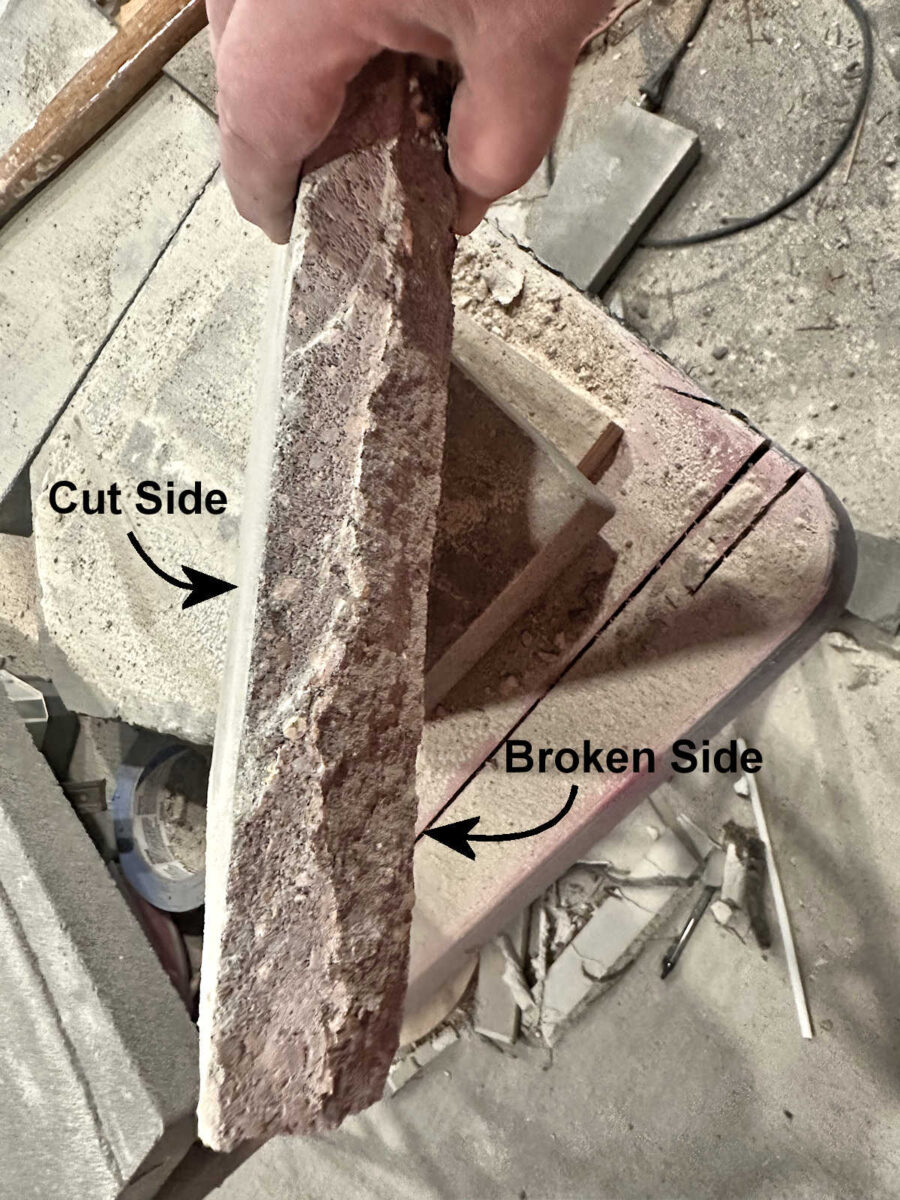
This is where I decided to do a little bit of experimenting. Since these pavers are inexpensive, I decided I could lose a few for this experiment. I wanted to see which method would work out better, and I had a couple of options. First, I could cut one side to the full depth that my grinder would go, and then use a hammer to knock off the excess. The second method I could use is to trace the pattern on both sides of the pavers and then use my grinder to cut one side, flip it over, and cut the other side. The second method would give me a cut all the way through, but the first method (if it worked) would be so much easier.
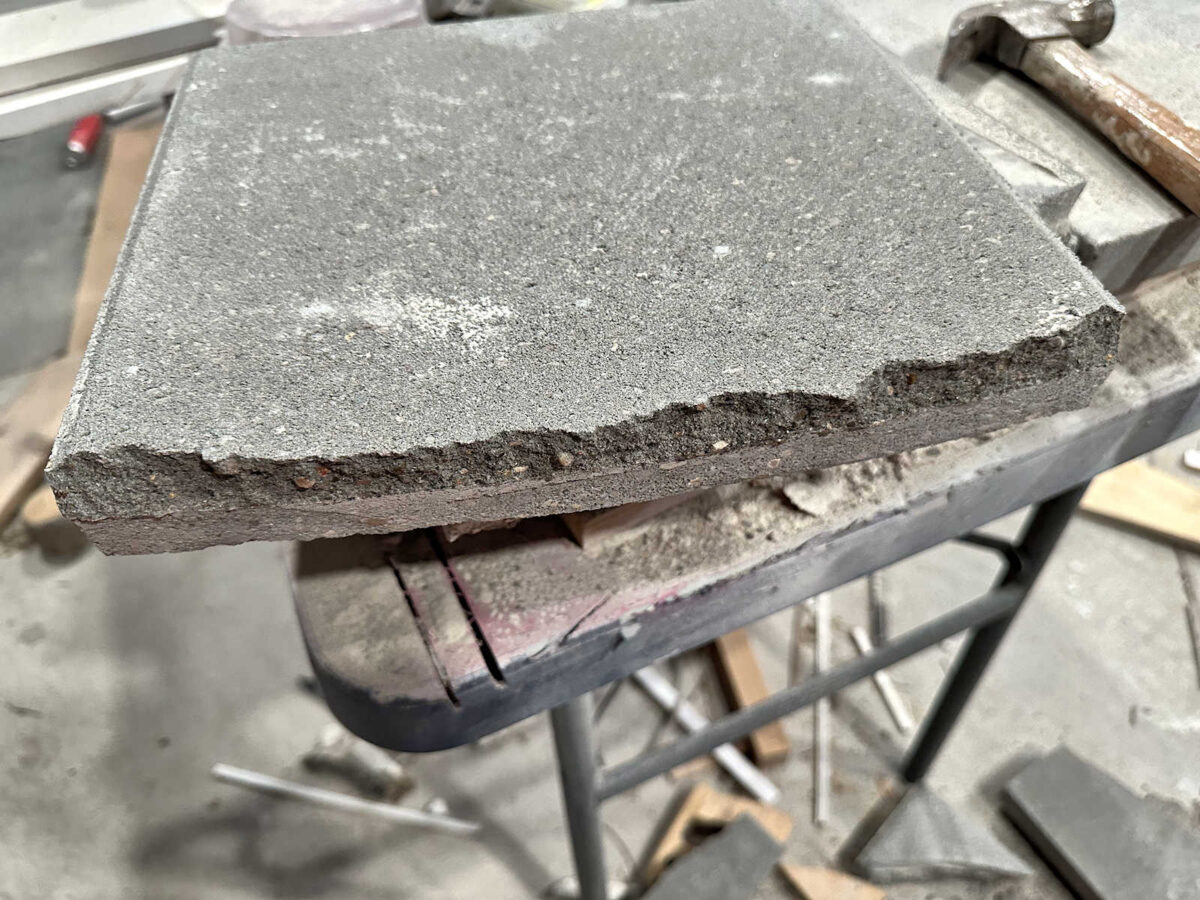
I only had time to try out the first method yesterday, so I cut as deep as I could with my grinder, and then used a hammer to knock off the excess.
That didn’t work because the uncut part that came off was quite a bit further into the paver than the cut part. If it had left excess, I could use a concrete grinding/polishing disc to grind away the excess. But since it took off too much, there was no way to get the edge smooth.
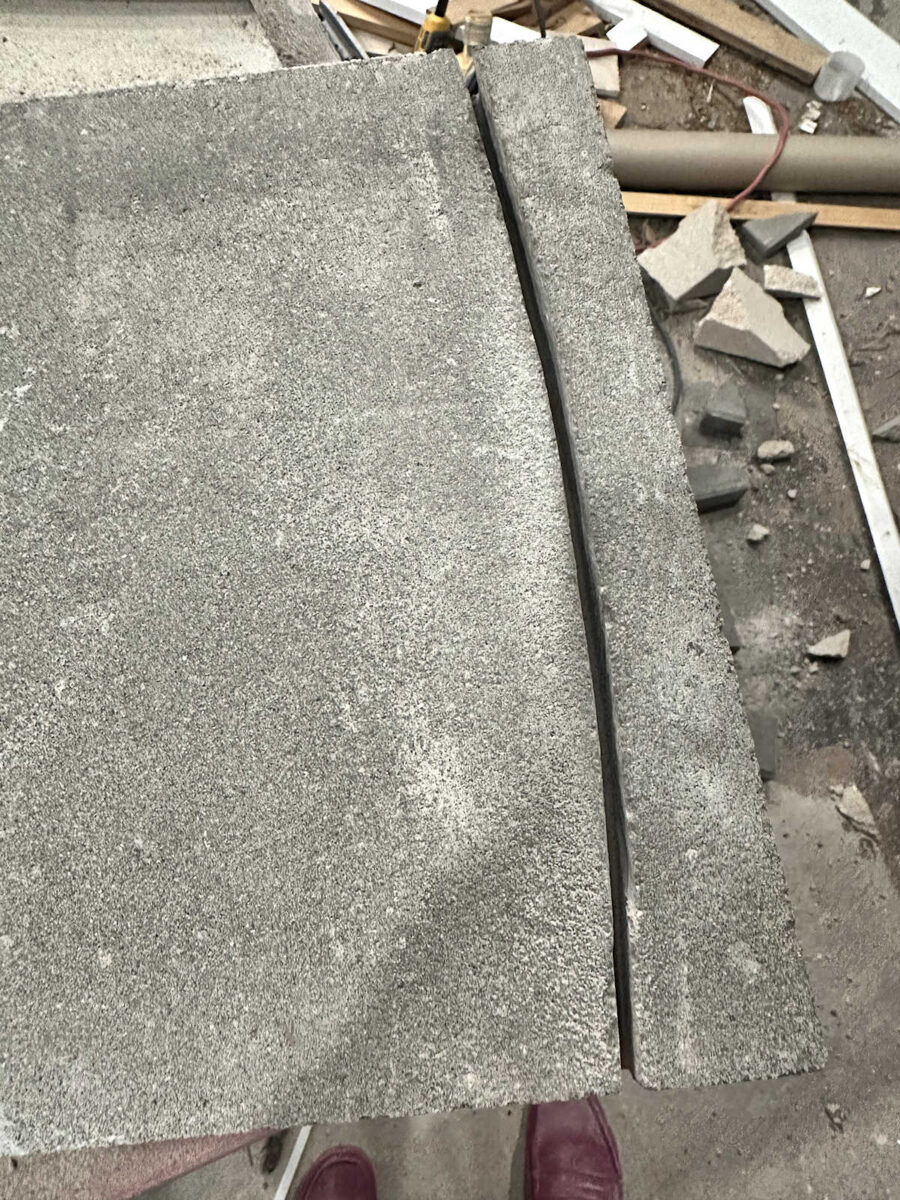
So I tested one more. This time, I cut as deep as I could with my grinder, and then instead of using the hammer on the cut side, I flipped it over and used the hammer on the uncut side to break away the excess. This actually worked! I can’t explain the physics of it, but it just made sense in my mind that hitting the uncut side would leave excess instead of breaking away too much. And it worked on all five pavers. What’s left can be easily cleaned up with a concrete grinding/polishing disc on my grinder.
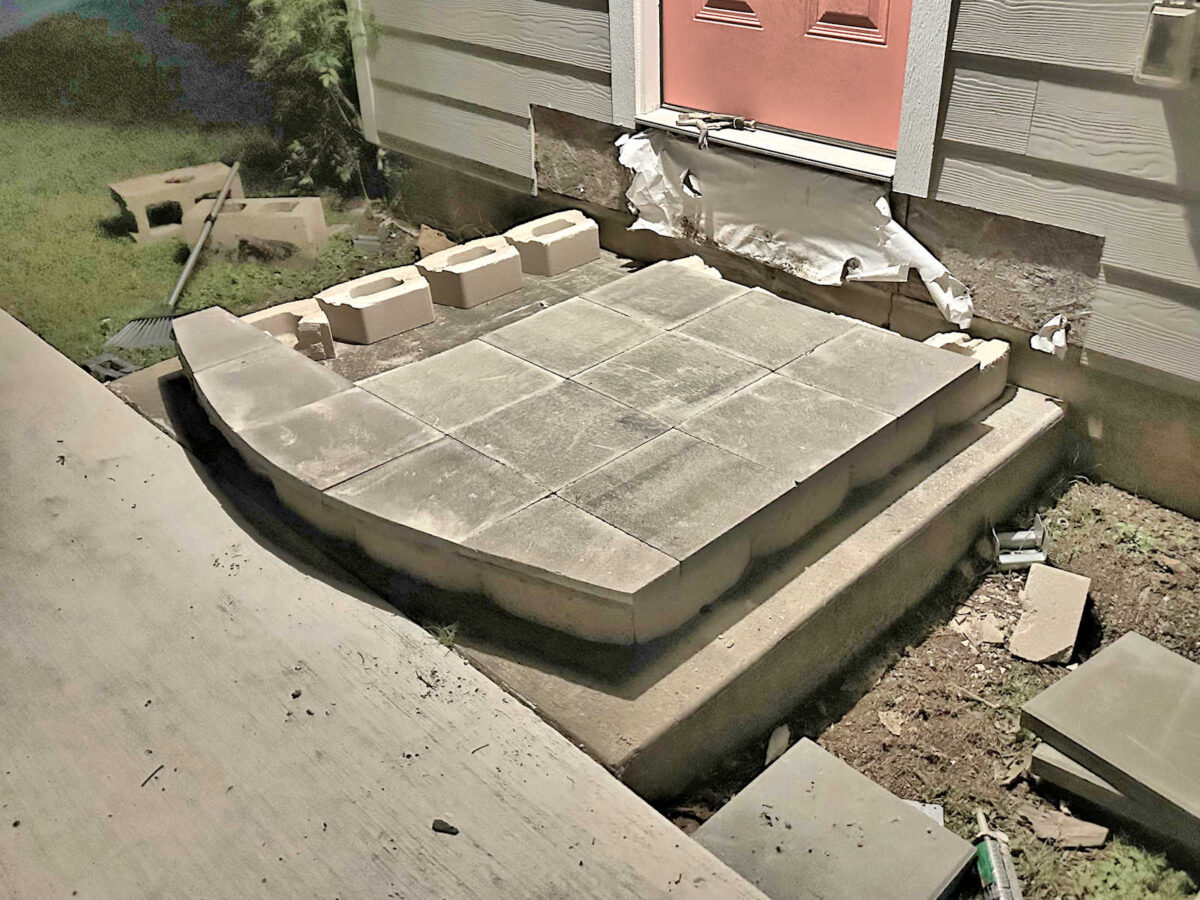
I didn’t get to test my idea because by that point, it was too dark to see clearly enough to test out my idea. But I did put them into place to see the overall shape and design.

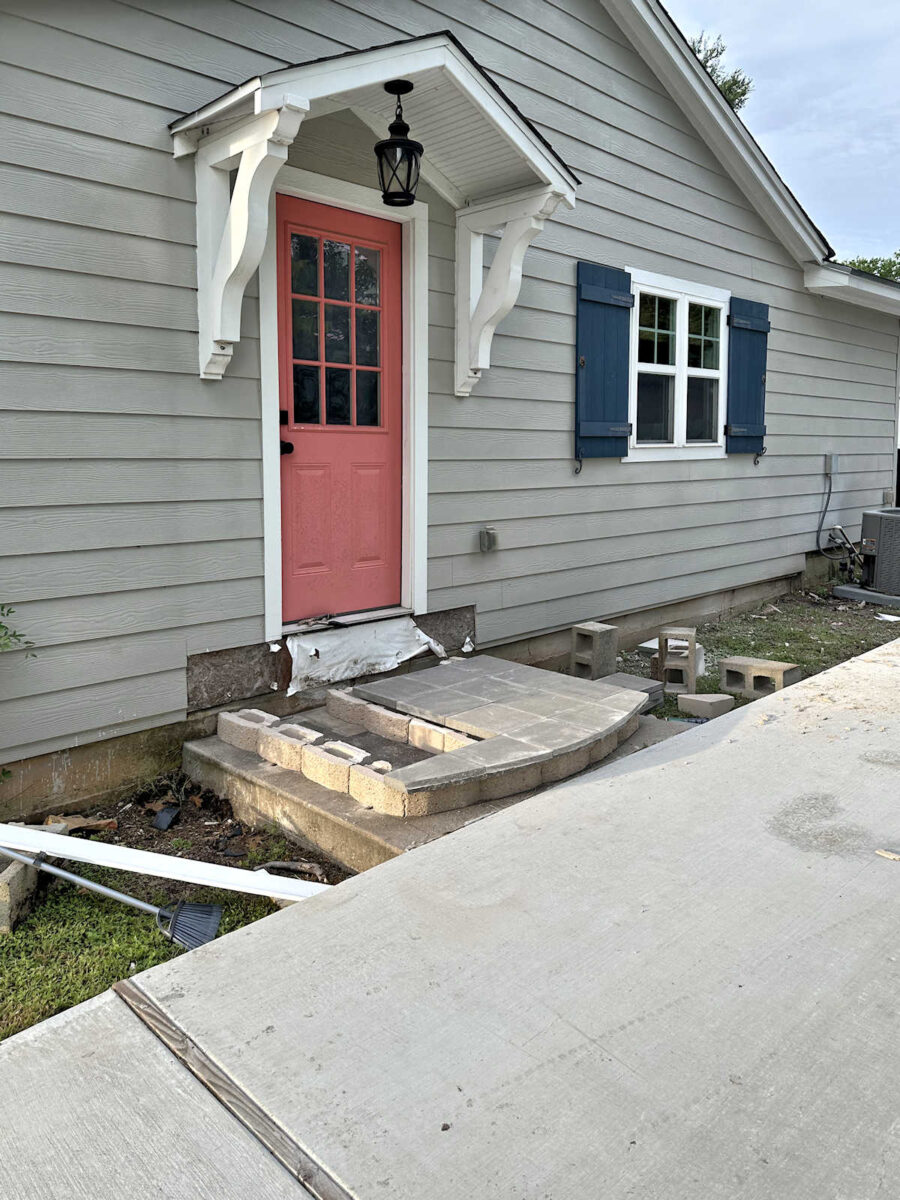
And because I was curious, I went ahead and put more of the pavers in place. None of the pavers are adhered in place yet. I want to wait until I have those front pavers worked out before any of them get adhered into place. I still want to try out option 2 for cutting those front pavers (i.e, cutting from both sides) to see which one I like better. But either method is going to require a concrete grinding/polishing disc once the pavers are cut.
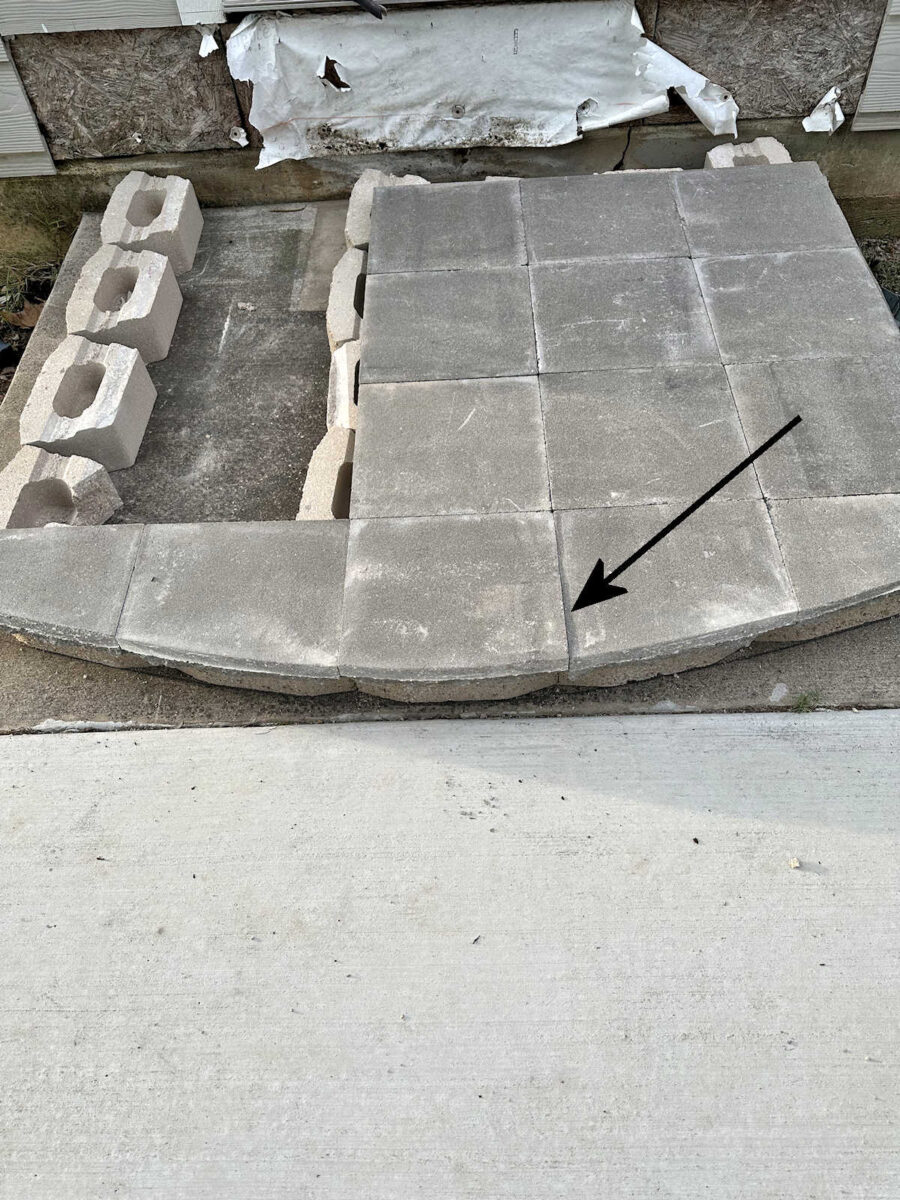
I was surprised at how flat all of the pavers were, with one exception. This front paver has a little bit of a lip on it, but I’ll just remove the paver, find the high spot on the retaining wall block, grind it away, and place the paver back in place.
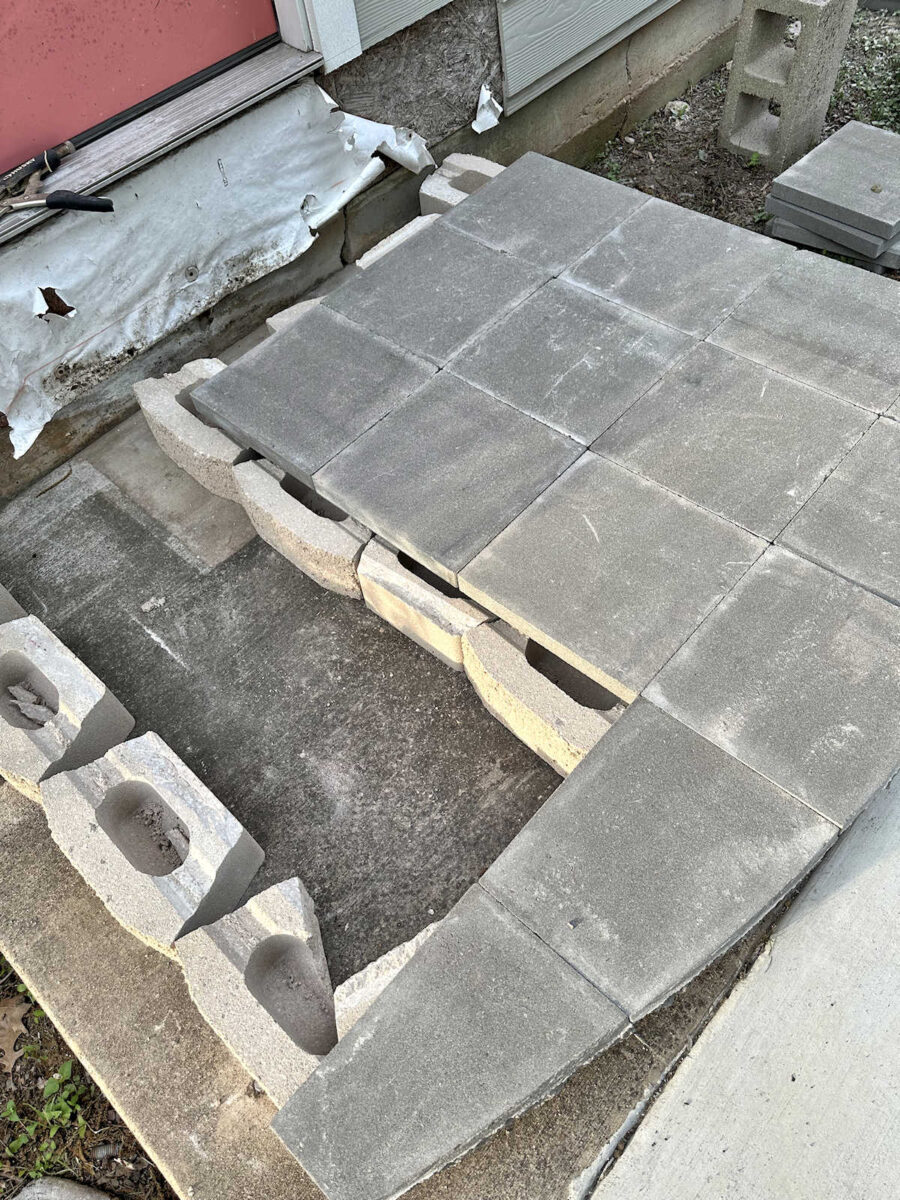
I also want to cut these blocks that are being used as the inside support in half before I adhere them into place. In their full size, I find it hard to put them exactly where I need them. With them cut in half, I’ll have a lot more flexibility in placing them in the exact right spot. But again, I ran out of daylight before I could get that done yesterday.
But I have to tell you, I’m very excited about how this is looking. And I can envision the other two steps, and I think it’ll look great. You’re welcome to disagree with me, of course. 🙂 But we can agree to disagree on this one. I think it’s going to look really nice.
If all of my measurements work out (and there’s no reason they shouldn’t), the steps will be 12 inches deep, 5.5 inches high, the top landing will be 30 inches deep, and the whole thing will be 60 inches wide. That’s how I planned it since the day this concrete pad was poured.
We’ll see how much I can get accomplished this weekend. I haven’t even checked the weather, so hopefully my progress I won’t be delayed by rain.
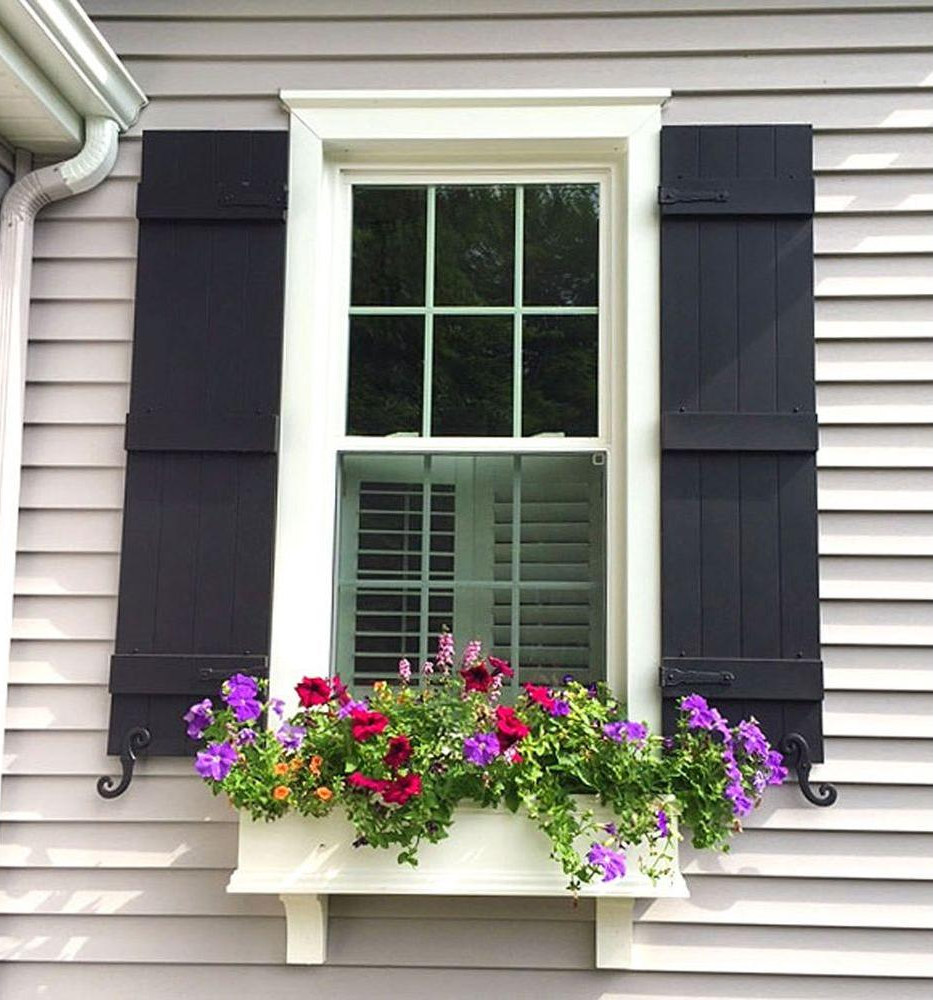
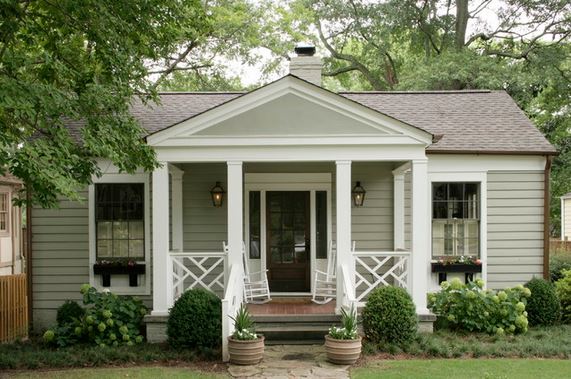
I really want to get these finished this weekend (or do my best towards that goal) because I have an idea for the front porch. As I mentioned in a previous post, the goal is to coordinate the three areas with steps, and the way I intend to tie in the front porch with these steps is by using a stone look on the porch skirting to match the risers on these steps. And I think I have an idea of how to do that now, so I really want to finish these steps so that I can test out my idea. I’ll work as fast as I can, and we’ll see what kind of progress I’ve made on Monday.
NOTE: This is a multi-post project. You can find all of the posts about this project, from start to finish, here: DIY Exterior Concrete Steps Archives
You can find the next post in this series here: Studio Side Steps Progress (A Change In Design)
More About Our House Exterior & Yard

see all exterior &
yard diy projects

read all exterior &
yard blog posts

Addicted 2 Decorating is where I share my DIY and decorating journey as I remodel and decorate the 1948 fixer upper that my husband, Matt, and I bought in 2013. Matt has M.S. and is unable to do physical work, so I do the majority of the work on the house by myself. You can learn more about me here.


So glad to see you go ahead with this project! It makes perfect sense to me, I really didn’t understand so many people disagreeing with you. I’m anxious to see this work, as I have a similar project I want to do this summer on a storage shed on our property.
I think it looks wonderful and seems a great solution to your problem. I can’t wait to see the finished project, I know it will look fantastic!
I agree. I was kind of taken aback by all the people saying to hire it out. I love how it’s coming together.
Whereas I’m not a huge fan of the pavers, I think it looks good ! I wonder if you can seal the pavers and then paint or treat them to make them look like one solid step? Adding masonry to your list of super powers 🙂
Was also thinking that you could have used the debris from the brick planters and fireplace you demolished out back as filler so there was no space under the pavers.
This looks awesome! Such a great idea. The only thing that cmento mind is filling the voids to make it more solid. Like with sand (around the blocks under the pavers) or possibly concrete/cement. You could use a dry pour technique if you are not opposed, but it would delay your progress for it to cure, lol.
Love the design and the process. Will there be a problem with rain draining through the cracks and pooling under the pavers? Is there a way to caulk or seal so fungal growth is limited underneath?
The stairs are going to look great! The only thing I would suggest is to infill the layers with gravel. It will add extra stability, and reduce the chance of mice under the stairs.
Looks like a few of us are thinking the same about infill of the steps to feel more solid and prevent any critters from making a home.
It looks very nice! My only question is “What about Matt’s ramp?”
Matt doesn’t need a ramp at this door. My studio has a very nice, very long concrete ramp out the back doors that goes to the carport.
Glad to see the grinder is working out. I was worried you’d not find something that’d make all the shapes you wanted. I knew it was possible, but just getting the details okay so it doesn’t settle funky can be interesting. I figured cutting the back edge of the retaining wall blocks was going to take enough time and finesse you’d inflame your wrist like you did on the music room walls. Go slow and careful you’ll do fine.
I came across this super detailed video it talks about tieing it in and flashing about 2/3rds through it. Not sure if the codes are correct for you, but you got a head on your shoulders to figure out good enough. https://youtu.be/mulV1Ru4DQY?si=lqDdhq_pp8O-Z_ta
Loooooookeeeeng GOOD!
Is there a reason you can’t replace the siding in the area where it is cut out?
I disagree with everyone who said you needed to hire a professional – these are wonderful and will look so good when completed!! Great job so far! You have such a great mind and imagination for these types of projects that I would never even think about!
Thank you for your “go for it attitude”! You’ve encouraged me to make steps for an area in my back yard. Wonderful instructions and thank for the advice about using the polyurethane adhesive. That is what I’ll be using for my steps!
Code requirements, particularly for the front of your house, may specify railings! Before you start a concrete project at your front porch and bedroom door, be sure to plan around the need for railings to meet code–what they’ll be made of, how you’ll install and anchor them, etc. Most municipalities have height and spacing requirements for railings and you can’t afford to fall afoul of these regulations. You don’t want to have to tear any of this stuff out. Again.
None of our steps require railings.
That is a LOT of work for you, but I know you like to DYI. It looks to me like you are headed in the right direction.
Have a good week.