Around The House
By Jay Preston, Brand Manager at ToolHQ.com.au, leading online supplier of power tools in AU.
For those of us who work in an office, at a desk, or on projects that start in one calendar year and end in another, working around the house can be immensely satisfying.
Many Saturdays I have started with a pre-assembled piece of furniture or a picture, flooring, painting or other DIY project, and finished it in the same day. Like cooking, a DIY project that starts out as a chore can end in a burst of achievement that doesn’t require committee meetings, approvals from distant offices, or Power Point demonstrations. It’s amazing what can be done with your own two hands, and sometimes a little elbow grease.
 Tools that make the job easier can prevent a time consuming trip to the hardware store, smashed thumbs, and the uttering of expletives. For most around the house jobs, a garage full of power tools isn’t required–a few choice tools will do the job. If you can, keep them all in one place, in a tool box, or a drawer or shelves organized enough so that you can lay hands on the right tool almost immediately.
Even for pre-assembled furniture, and other stuff that comes in a box, there can be difficulties, such as instructions in another language–unless you know Chinese–or screws or parts that are missing, or instructions that you can read but still don’t make any sense (because they were translated from a language you don’t understand). One factor all will have in common is measuring the distance between this part and that, or if you’re hanging a picture, the distance from one nail to the next. That’s why before you start doing anything, it’s a good idea to ask, “What is this supposed to look like when it’s finished?” This can be figured out from a picture of the finished project or by holding the picture up to the wall where it’s supposed to go.
So a yardstick, or better yet, a measuring tape is the first piece of equipment I’m using so I know where I’m going to place those nails (with the help of a pencil dot) before I pick up a hammer, drill or screwdriver. If I’m hanging a picture, for example, I’m going to want to know where the studs are in the wall so I know if the wall can bear the weight of whatever I’m hanging. The idea is to suss out the project before before anything else–you’ve probably heard the expression “measure twice, cut once”–which should be standard operating procedure.
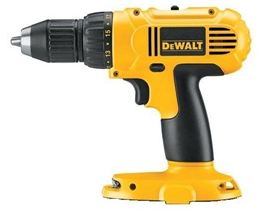
Once you’ve got all that straight, the project becomes infinitely easier, especially if you have a handy power drill or screwdriver. Sometimes screws stick or you wind up with a balky Phillips screw, so make sure your drill or screwdriver can handle different size bits and screws. These should be organized so you can lay hands on them without a search expedition. If you can go cordless, so much the better. Cords can get wrapped around other things lying around, which slows down the project. Today’s cordless tools don’t take much time to charge and have enough juice stored to get you through most projects.
In short, size up the project, take measurements before you begin, and invest in powerful, portable tools, and you’ll be on the way to a successful DIY project.


