Just Call Me Dr. Frankenstein (Here’s How I Finished The Home Gym Closet Floor)
I’ve already shared about how I carpeted the main floor of the home gym using FLOR carpet tiles (you can see that here), so I hadn’t actually planned on sharing the process of finishing the floor in the closet area of this room. But once I got started on the actual project yesterday, I decided that I needed to share it.
I wanted to share this process for one reason — to show that even perfectionists like myself sometimes have to adopt a “just get it done” attitude.
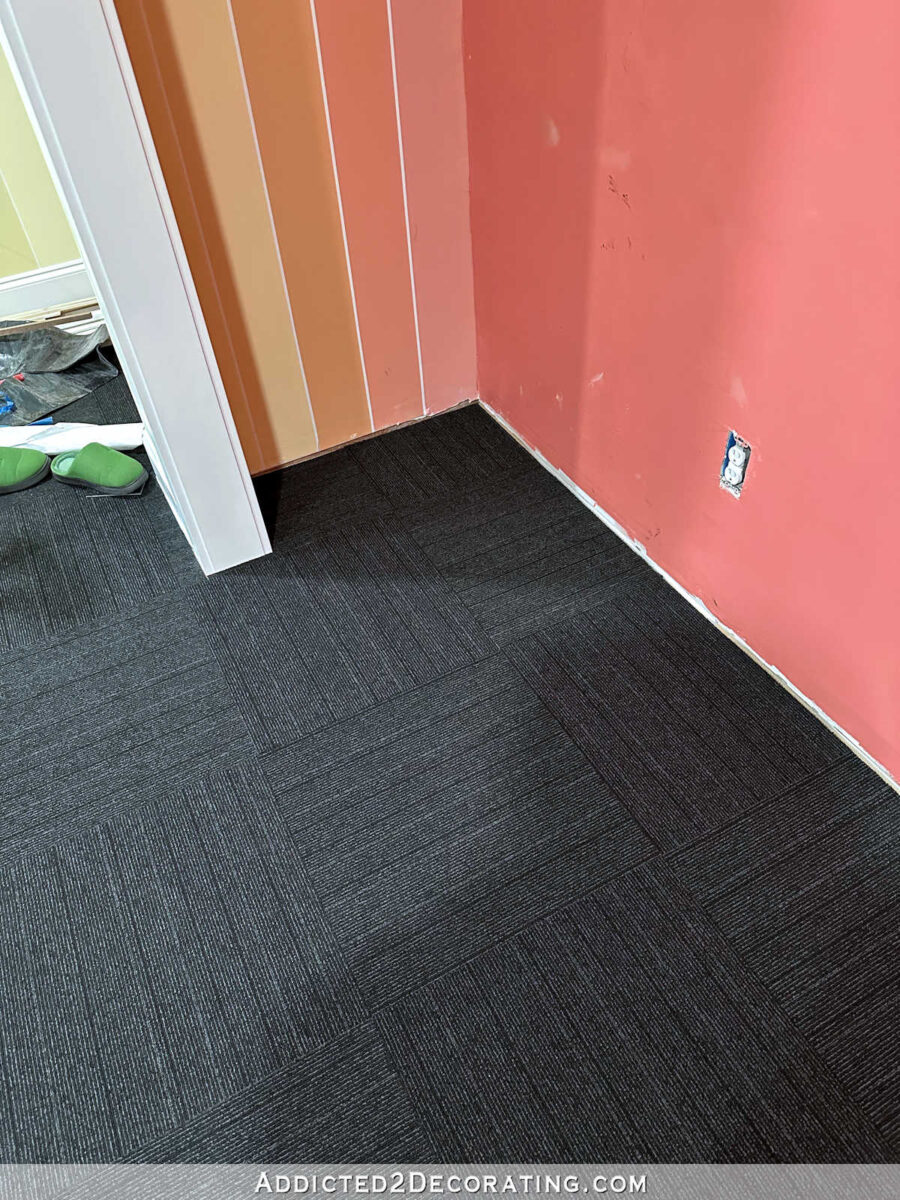
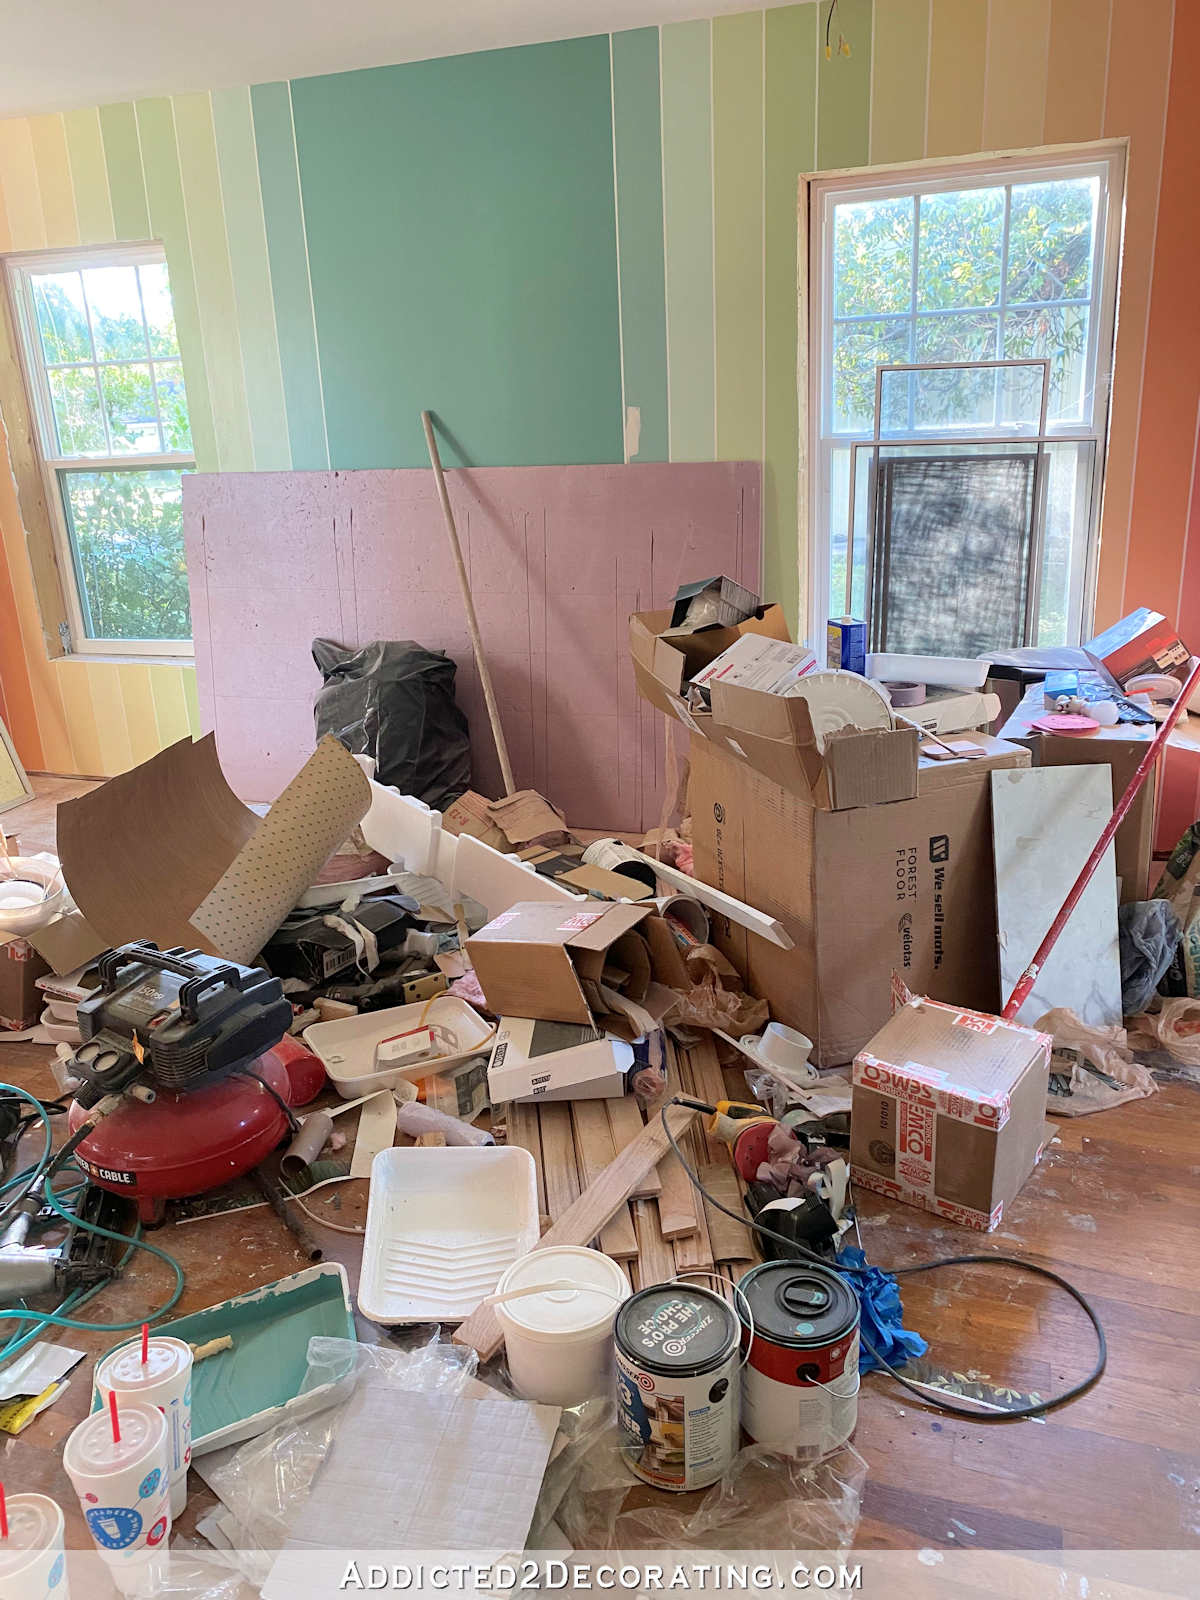
Here’s what the closet area looked like before I finished it yesterday (except that the main part of the room had the new carpet squares, not the old foam tiles)…

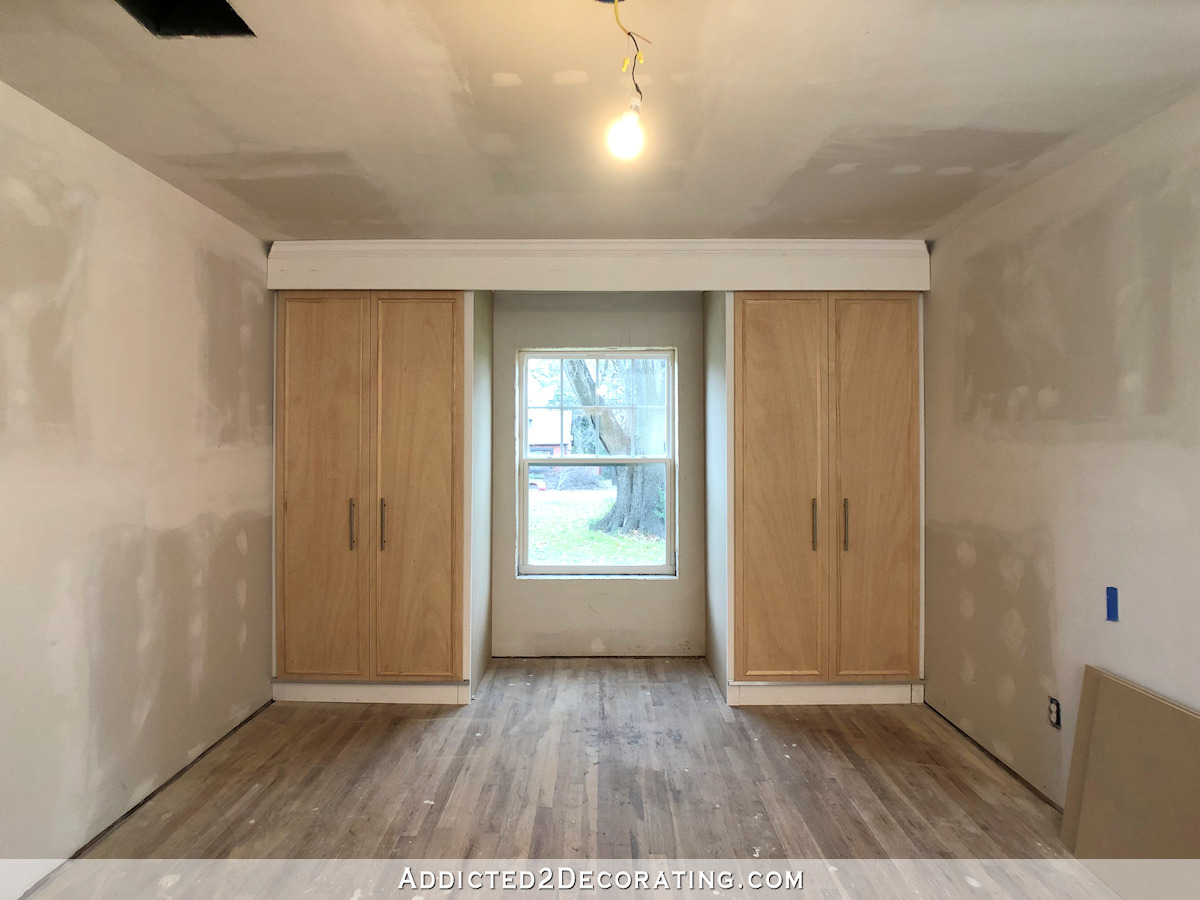
So I had to move everything out before I could even get started. And once everything was out, here’s what the actual floor in there looked like…
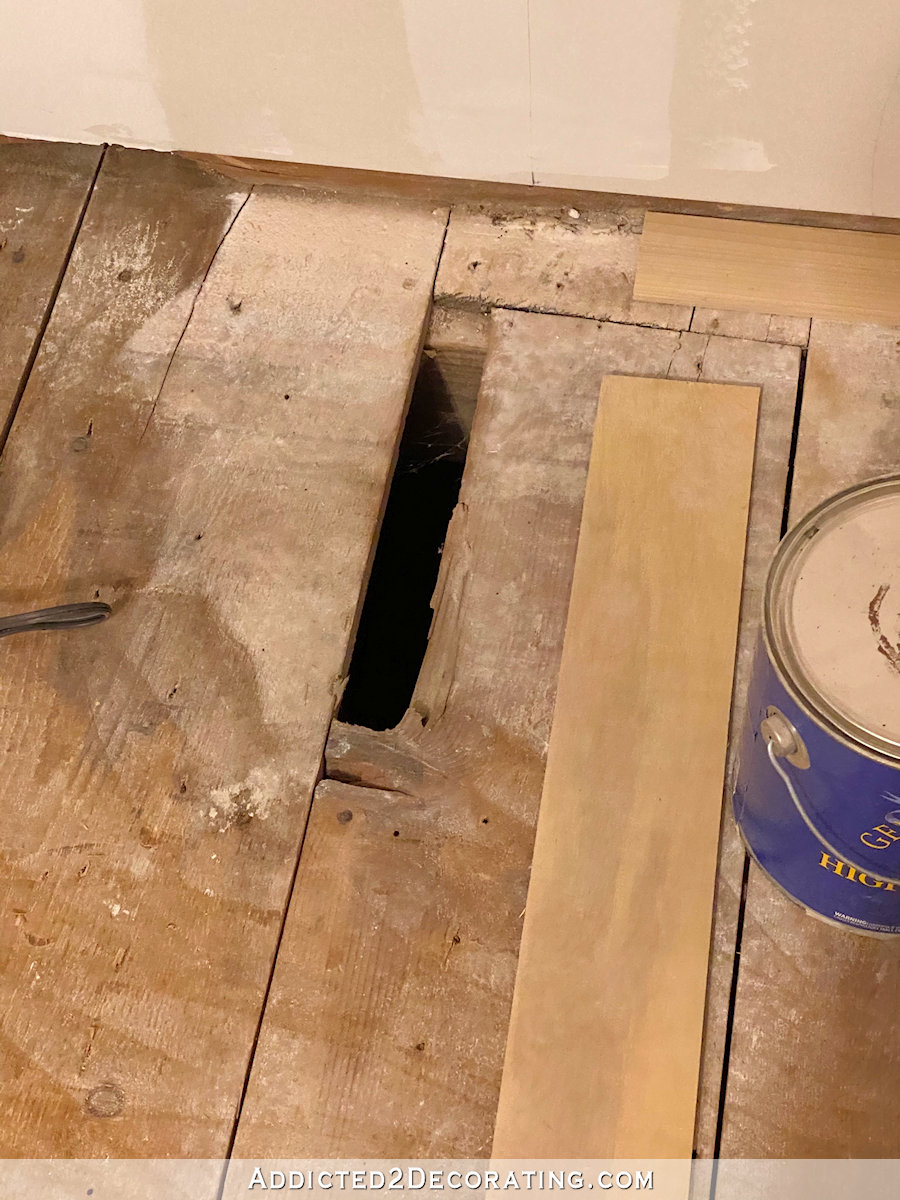
That’s subfloor. This house is over 70 years old, and the original subfloor is 1″ x 8″ and 1″ x 10″ boards, and as you can see it had some issues.
The whole floor in this entire room has issues, and that’s why I didn’t opt to sand and refinish the hardwood flooring. At some point in the very distant future, I’d like to have all of the flooring and subfloor in this room removed and replaced. But for now, I just needed a solid base on which to put the carpet squares.
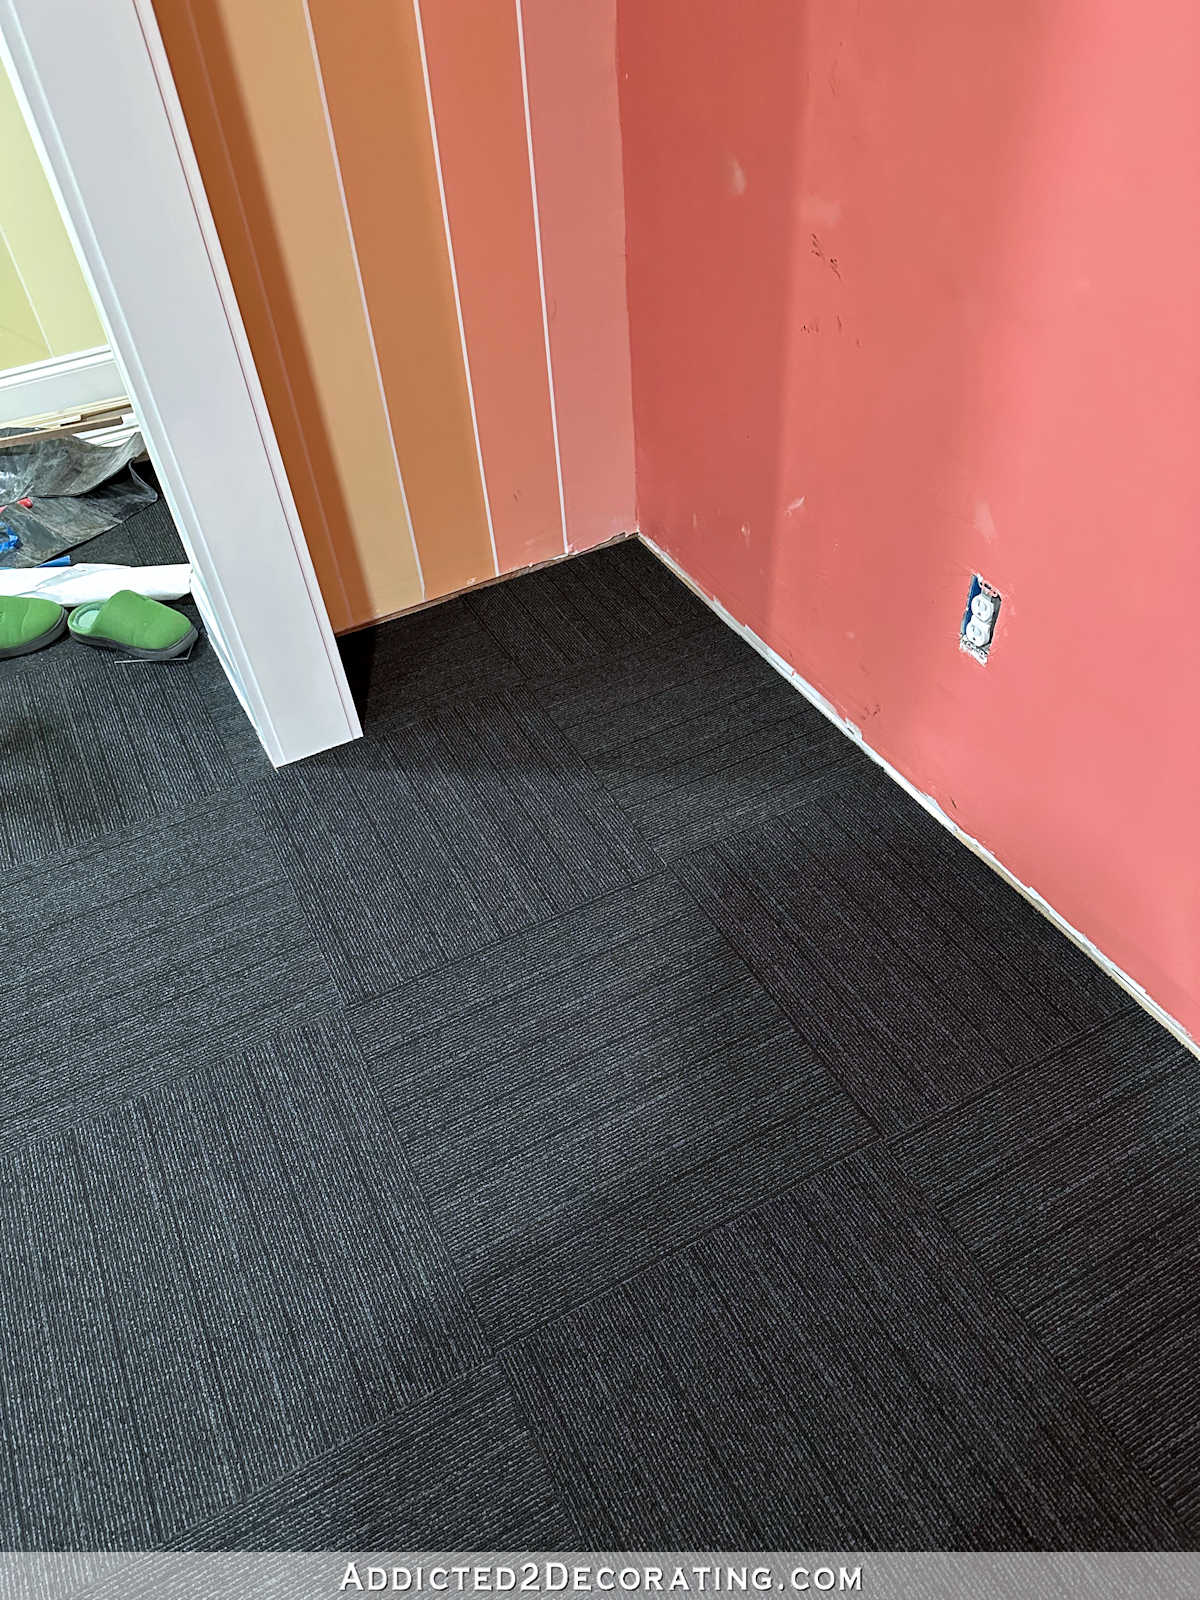
So after working all afternoon and evening, this is what the floor in the closet looked like when I was finished…
It still needs baseboards and quarter round, but doesn’t that look so nice!! I was so excited to finally have this done. I’ve been looking at that subfloor since 2019, so I’m thrilled to finally have this finished.
But again, the point of this post is to show you that sometimes, even I, a perfectionist, have to adopt a “just get the thing done” attitude, and even though the process may look horrible, I arrive at an end result that I can live with.
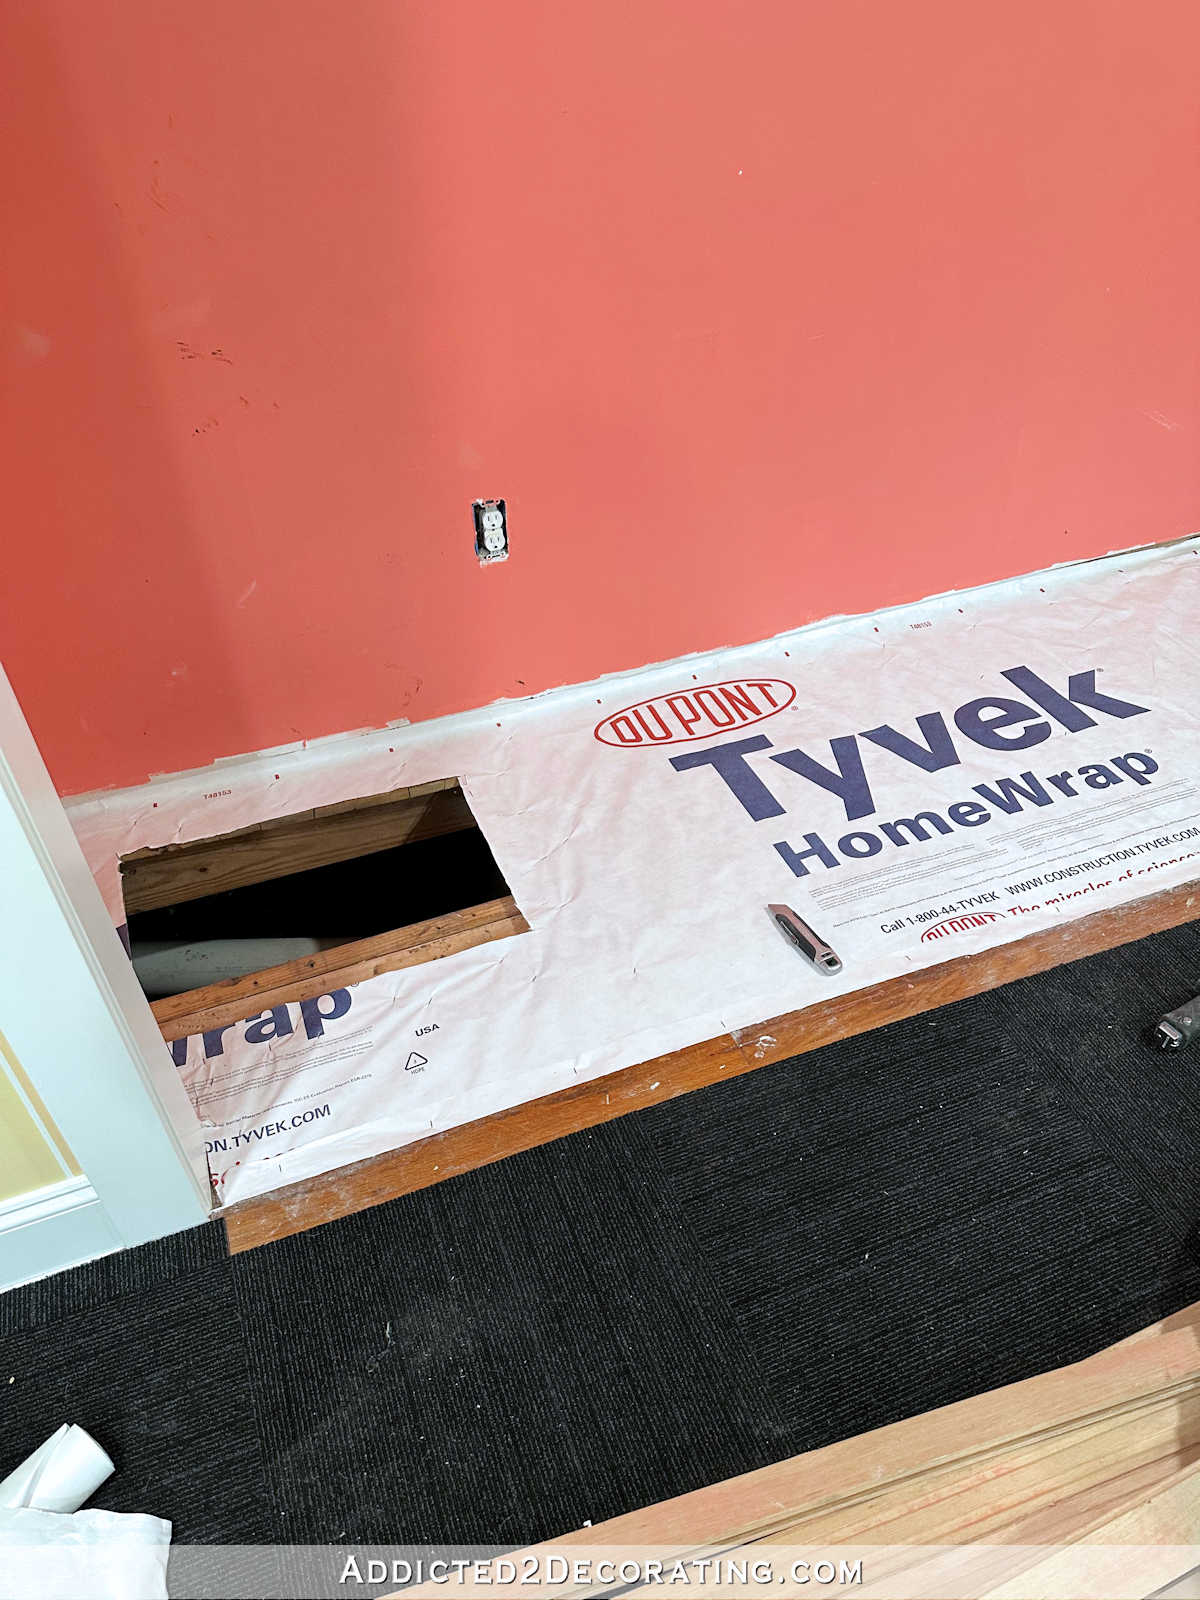
My main goal was to get this done without spending any more money. That meant that I needed to use only what I had on hand. First, I needed some sort of vapor barrier, so I had some Tyvek house wrap on hand. I stapled that into place directly onto the subfloor.
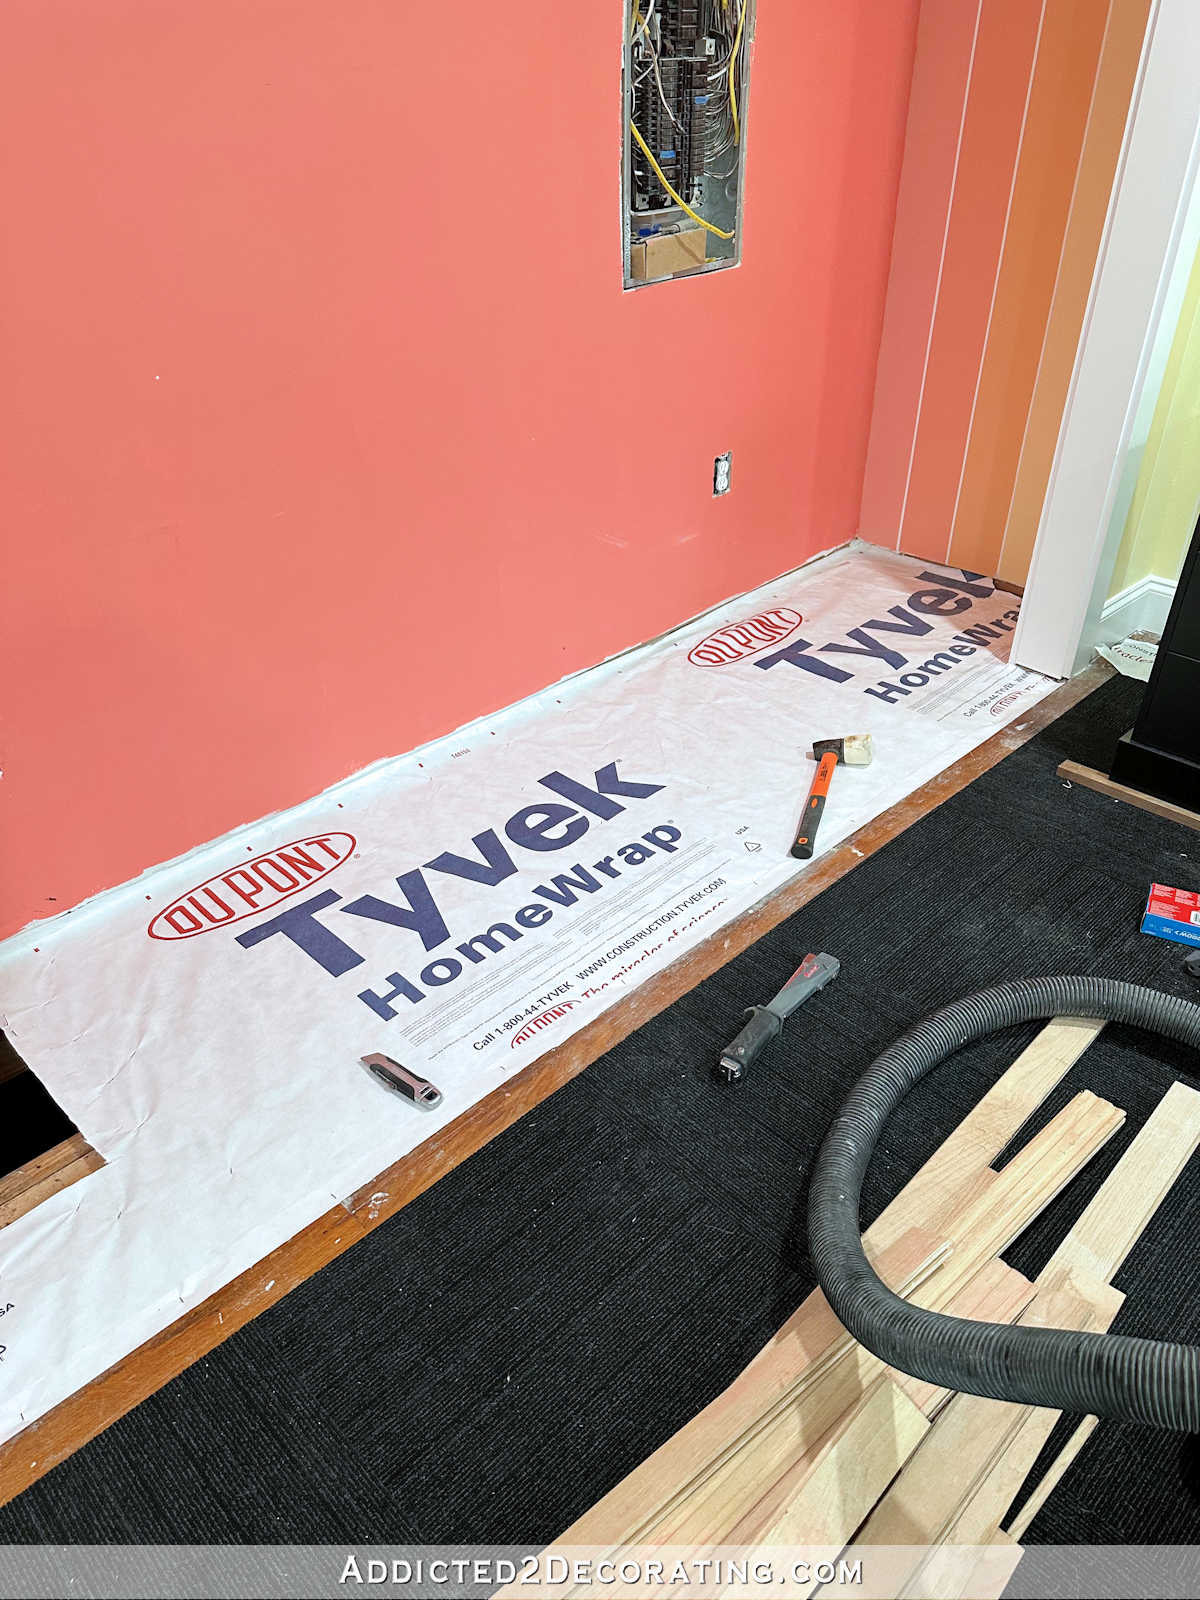
I had to cut a hole for the scuttle hole access into the crawl space on the left side of the closet.

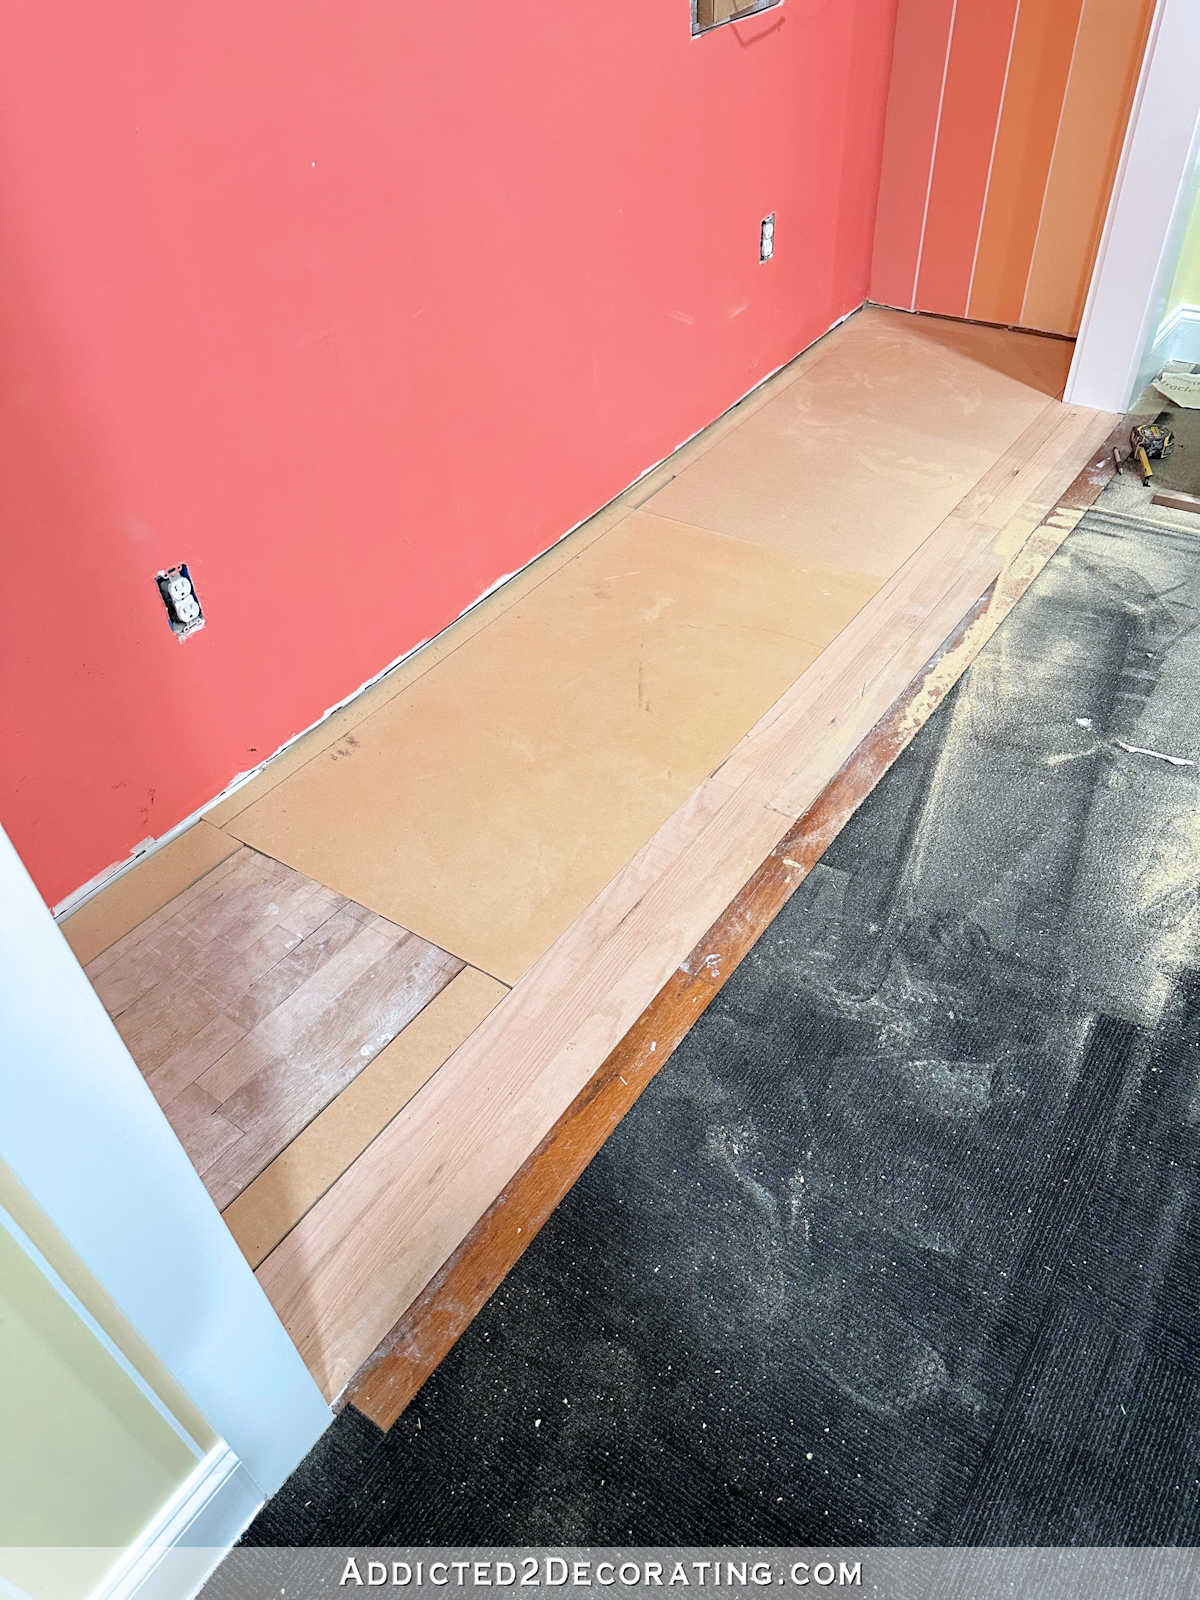
And then I used what I had on hand to build that floor up 3/4 inch so that it was level with the hardwood flooring in the rest of the room. I started with the few leftover pieces of hardwood flooring, and installed those until they were even with the closet side of the jambs on the cased opening.

And then I used pieces of 3/4-inch MDF that I had on hand. Yep…MDF. 🙂 Again, it’s what I had on hand, and I didn’t want to spend any money on “flooring” that was just going to be covered up.
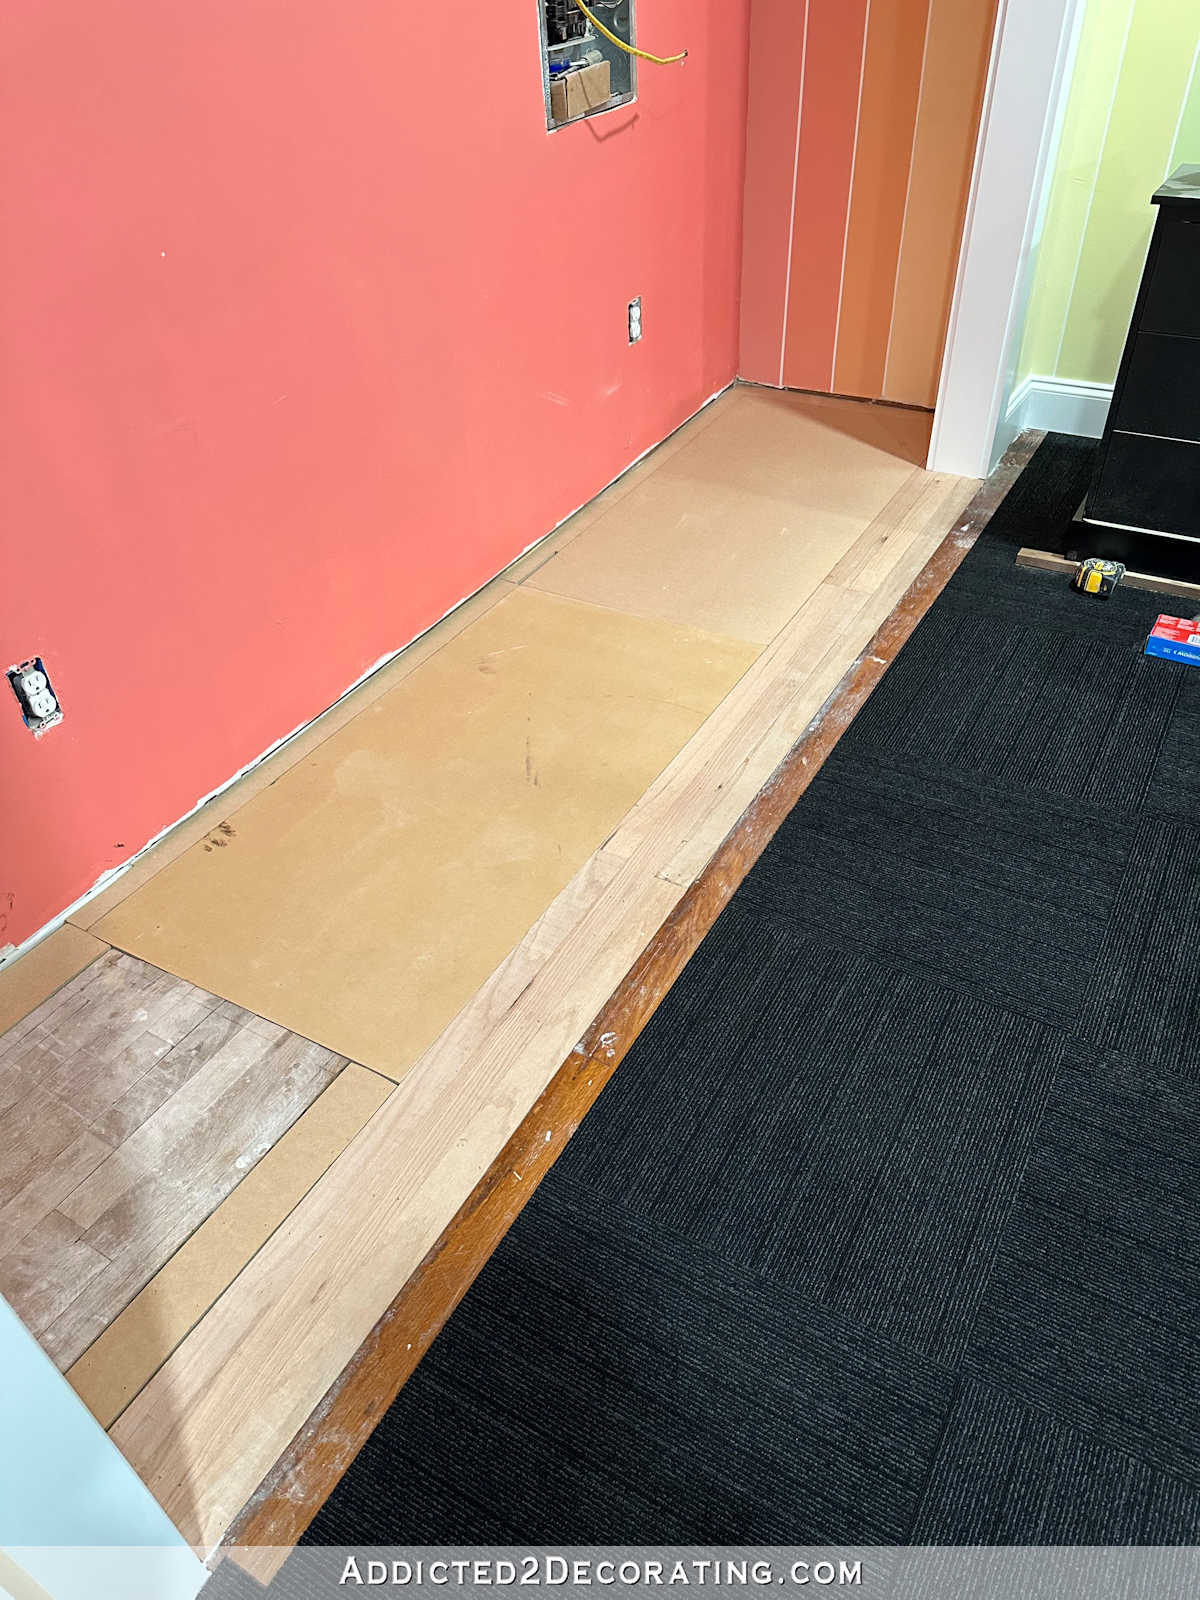
It required a lot of cutting, and piecing together, and filling in edge gaps, but I finally got the whole thing covered. I didn’t feel the need to cut a new scuttle hole cover, so I kept the original one with the original floor boards attached to it, and just filled in the areas around it.
And yes, I used my jigsaw right there in the room, right on my new carpet. 🙂 After living with these FLOR tiles for a few days, and seeing how durable they are, and how easy they are to vacuum, I felt pretty confident that they would be just fine.
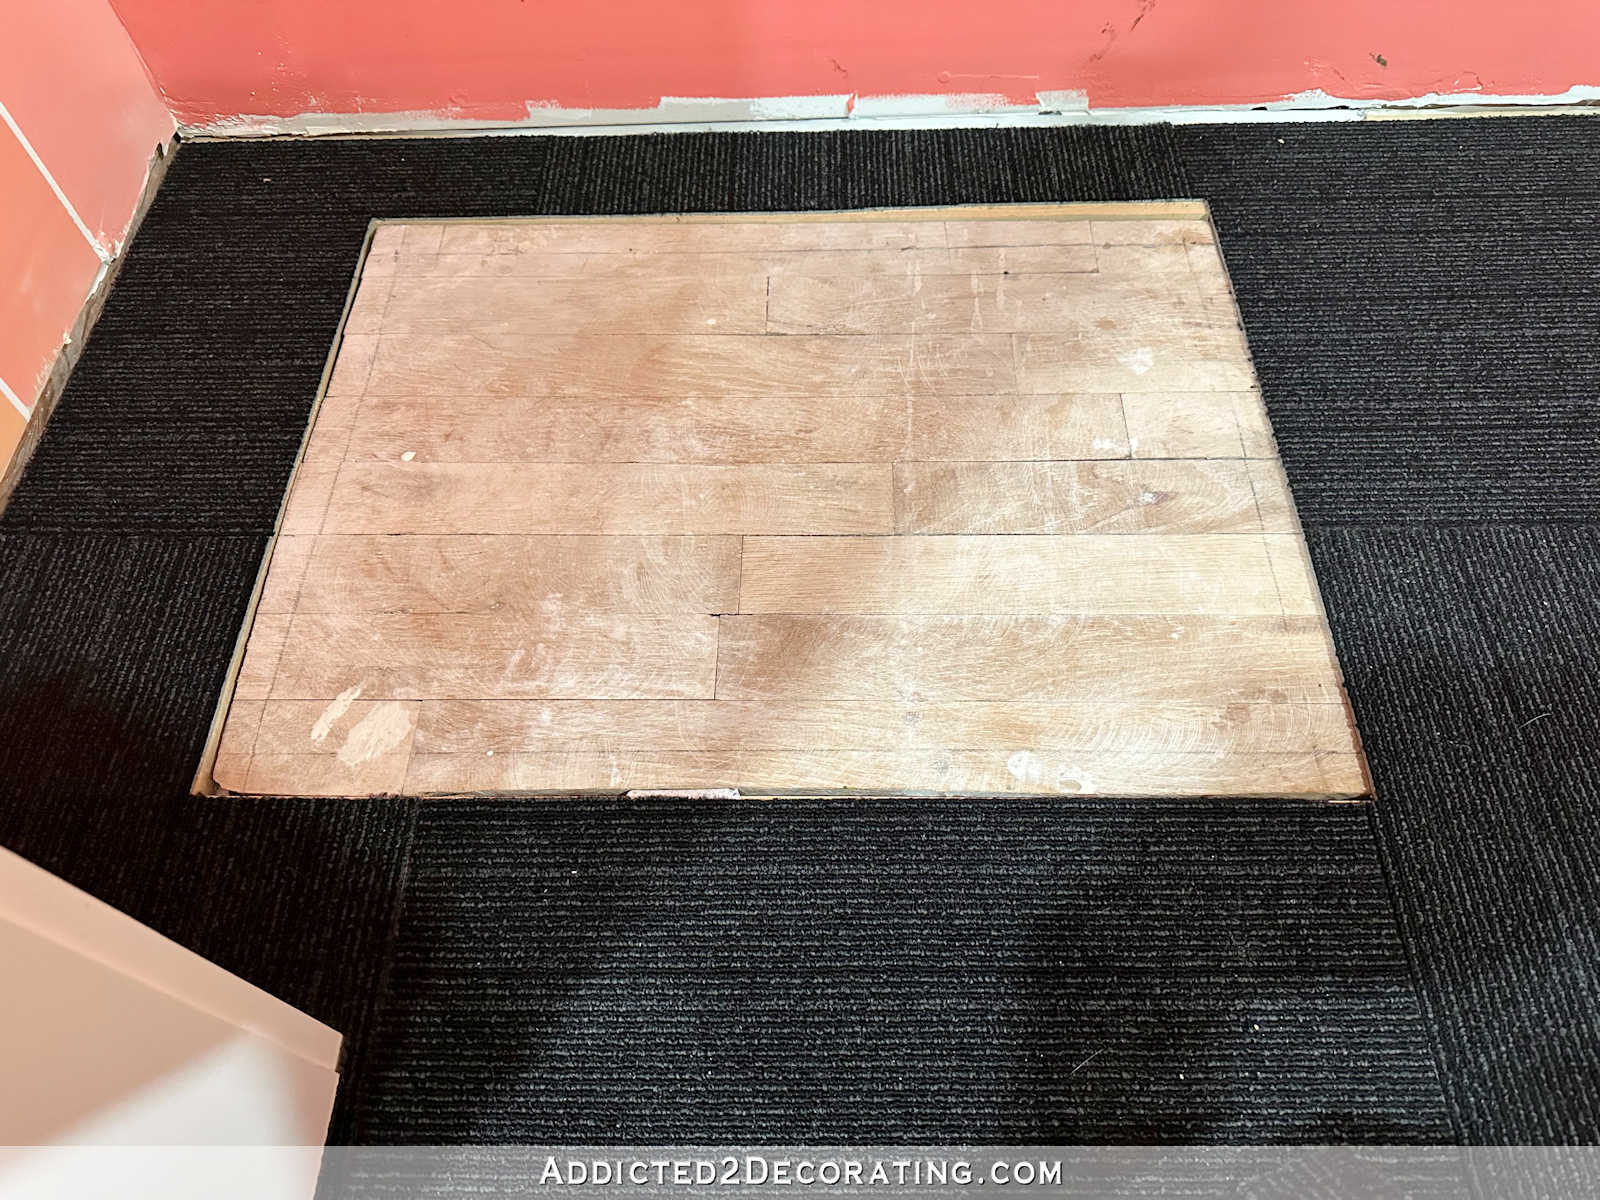
Here’s a closer look at the scuttle hole cover with the original floor boards, and the MDF around it. All of the leftover floor boards and the MDF are nailed down to the subfloor, so there’s no way they can shift around.

And just to put your mind at ease, here’s what everything looked like after I vacuumed up the dust, and just before I started putting the carpet tiles down.
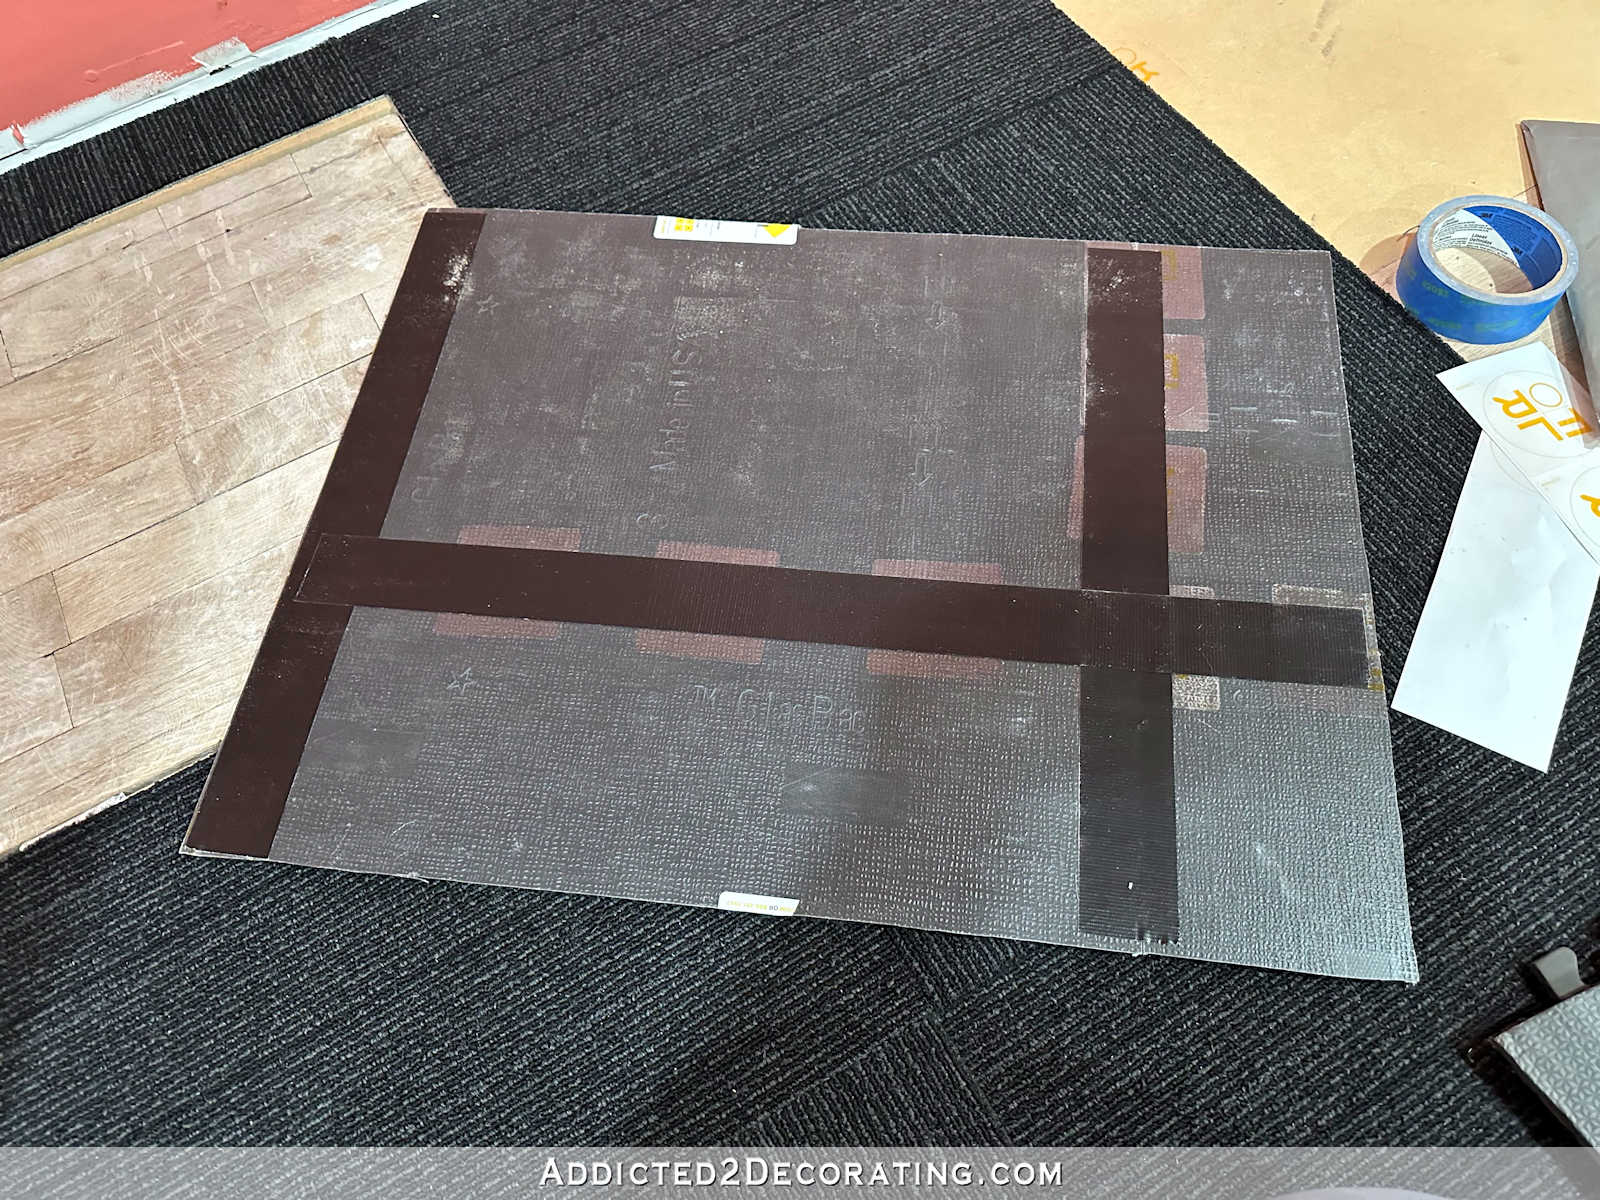
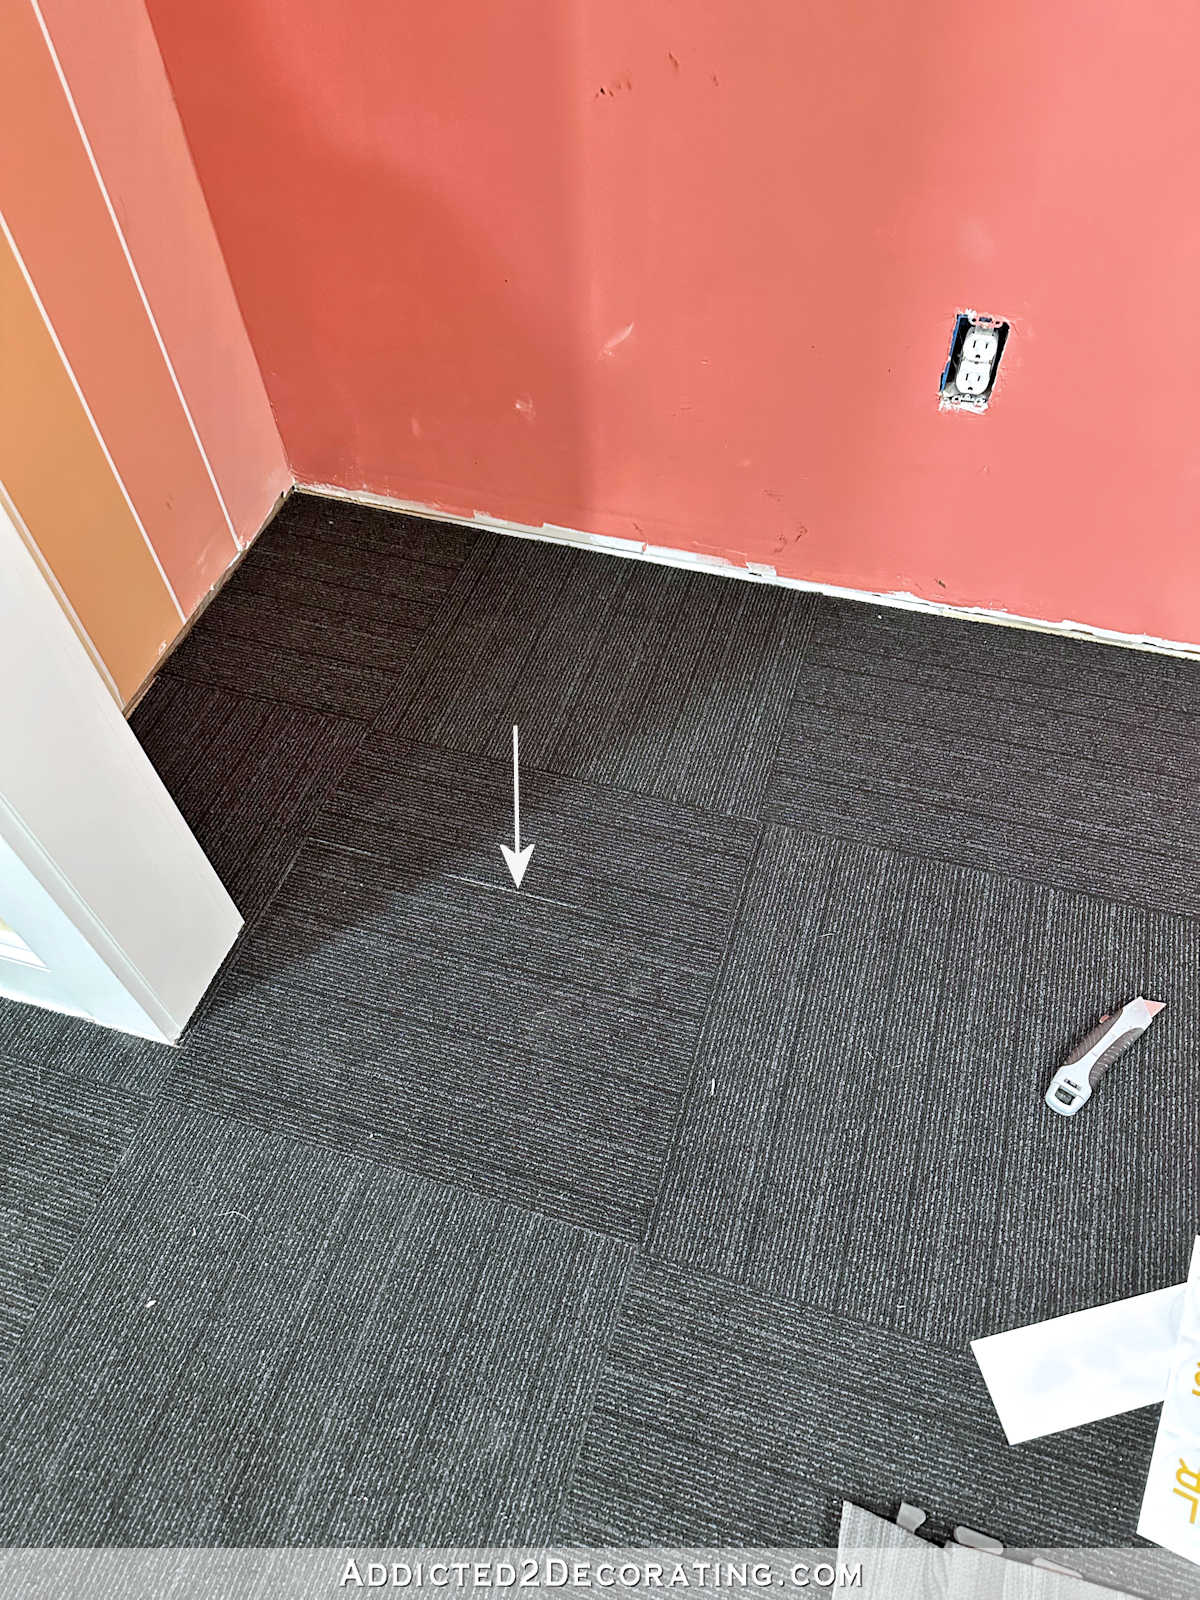
The hardest part of putting the carpet tiles in the closet was cutting the piece out for the scuttle hole. By this time, I had had plenty of experience cutting the carpet tiles to go around the perimeter of the walls, but this piece needed to be cut perfectly because it was going to be used. I couldn’t have any snags on the edges, or jagged cuts.
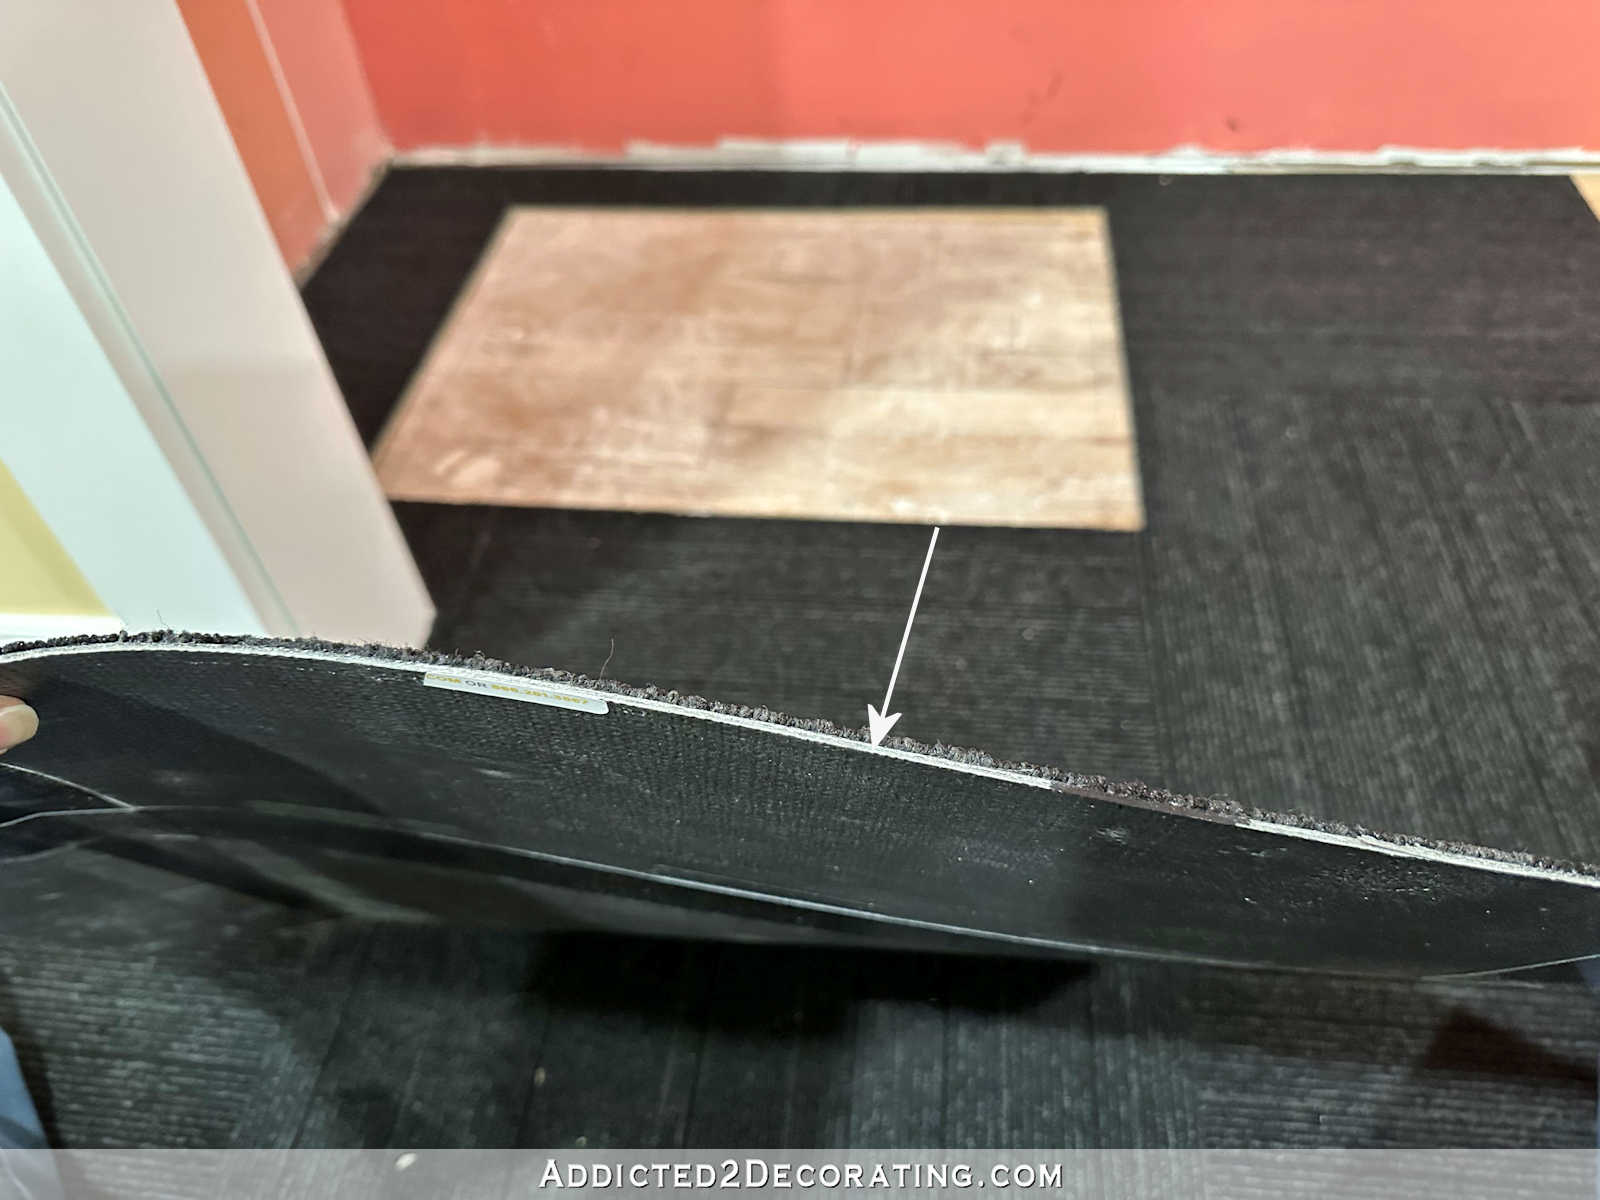
I did manage to get it cut out with fairly clean edges, and of course, the part that covered the scuttle hole was six separate pieces. So I used duct tape to tape those together securely on the back.
I will eventually glue this carpet piece onto the wood, but that will actually require a purchase of contact cement or something similar, so that didn’t get done yesterday.
But for now, the carpet piece lies almost perfectly in place. Initially, I could see the cut edge of the carpet sticking up just slightly. That’s the kind of thing that this perfectionist finds unacceptable.
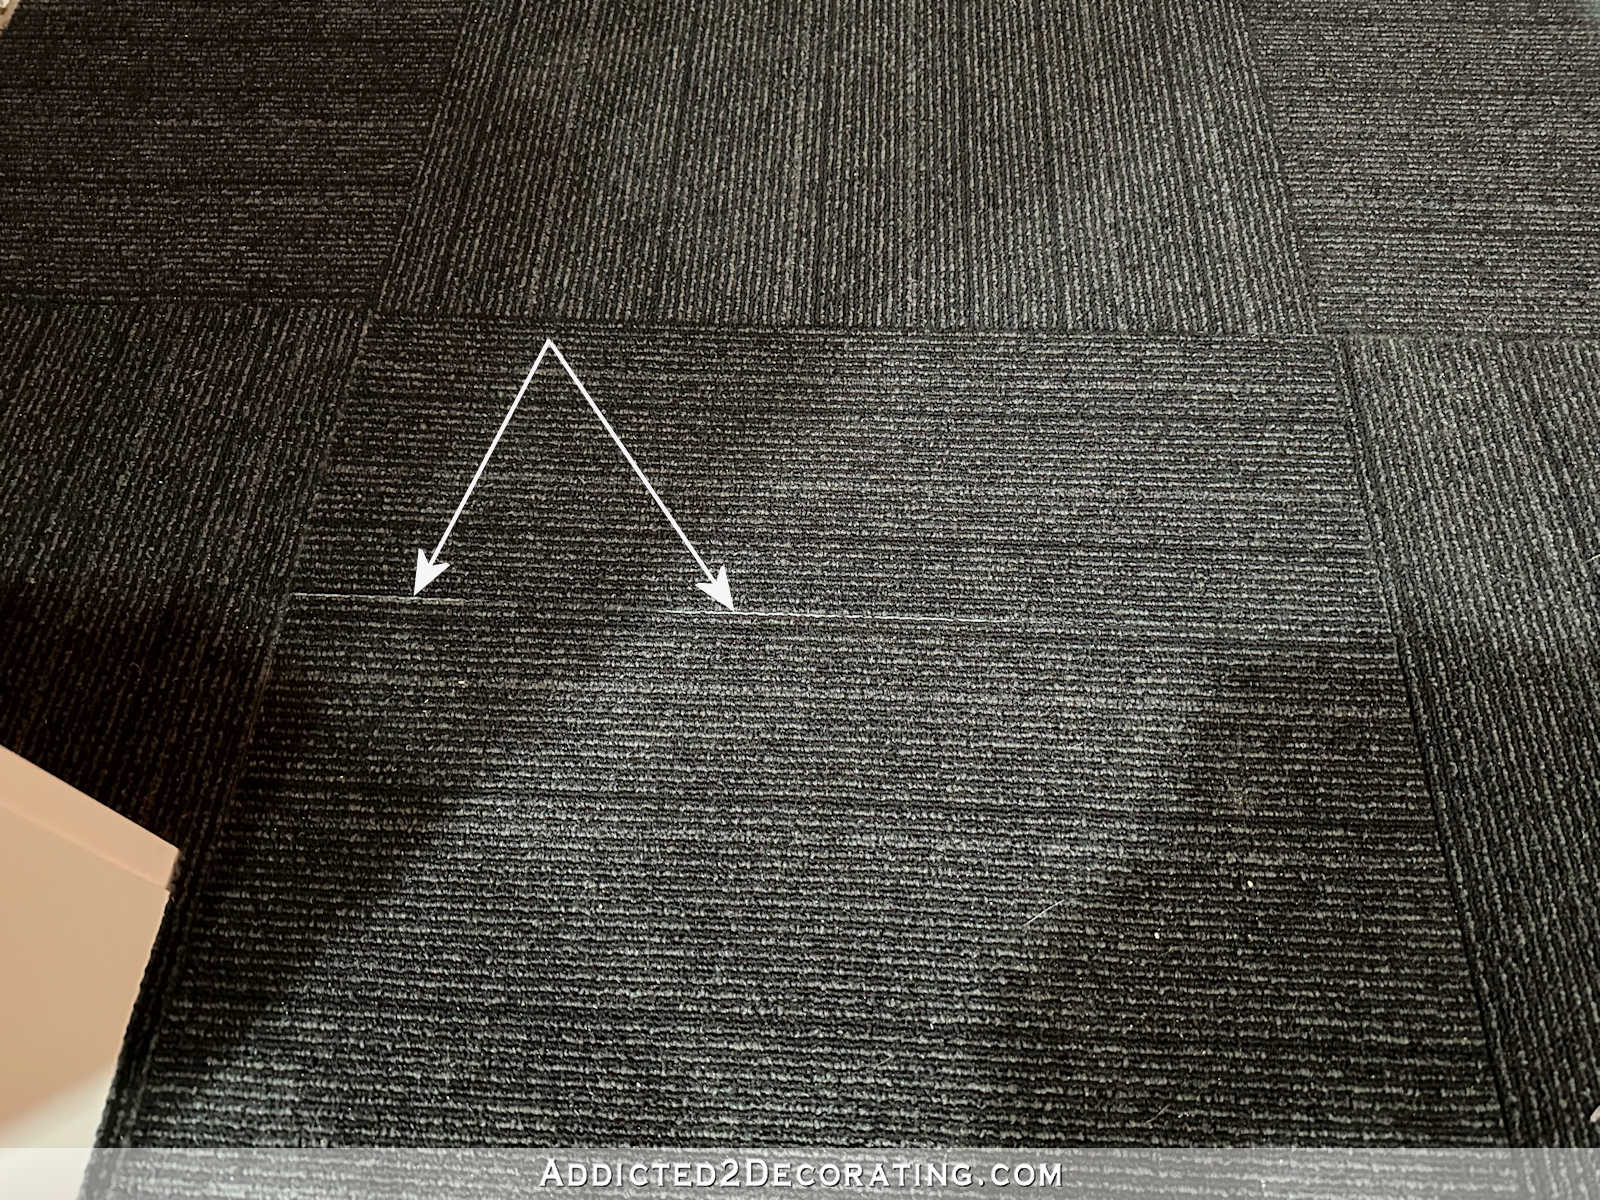
And in person, its obvious that it wasn’t just a stripe in the carpet because the stripes go all the way across. The white of the cut edge had starts and stops across the edge of the tile.
So I solved that problem with a black Sharpie marker. I used it to make the cut edge of the carpet piece black so that it would blend in with the carpet much better.
And that worked perfectly! I honestly don’t think that anyone would be able to tell that there’s a scuttle hole to the crawl space right there.
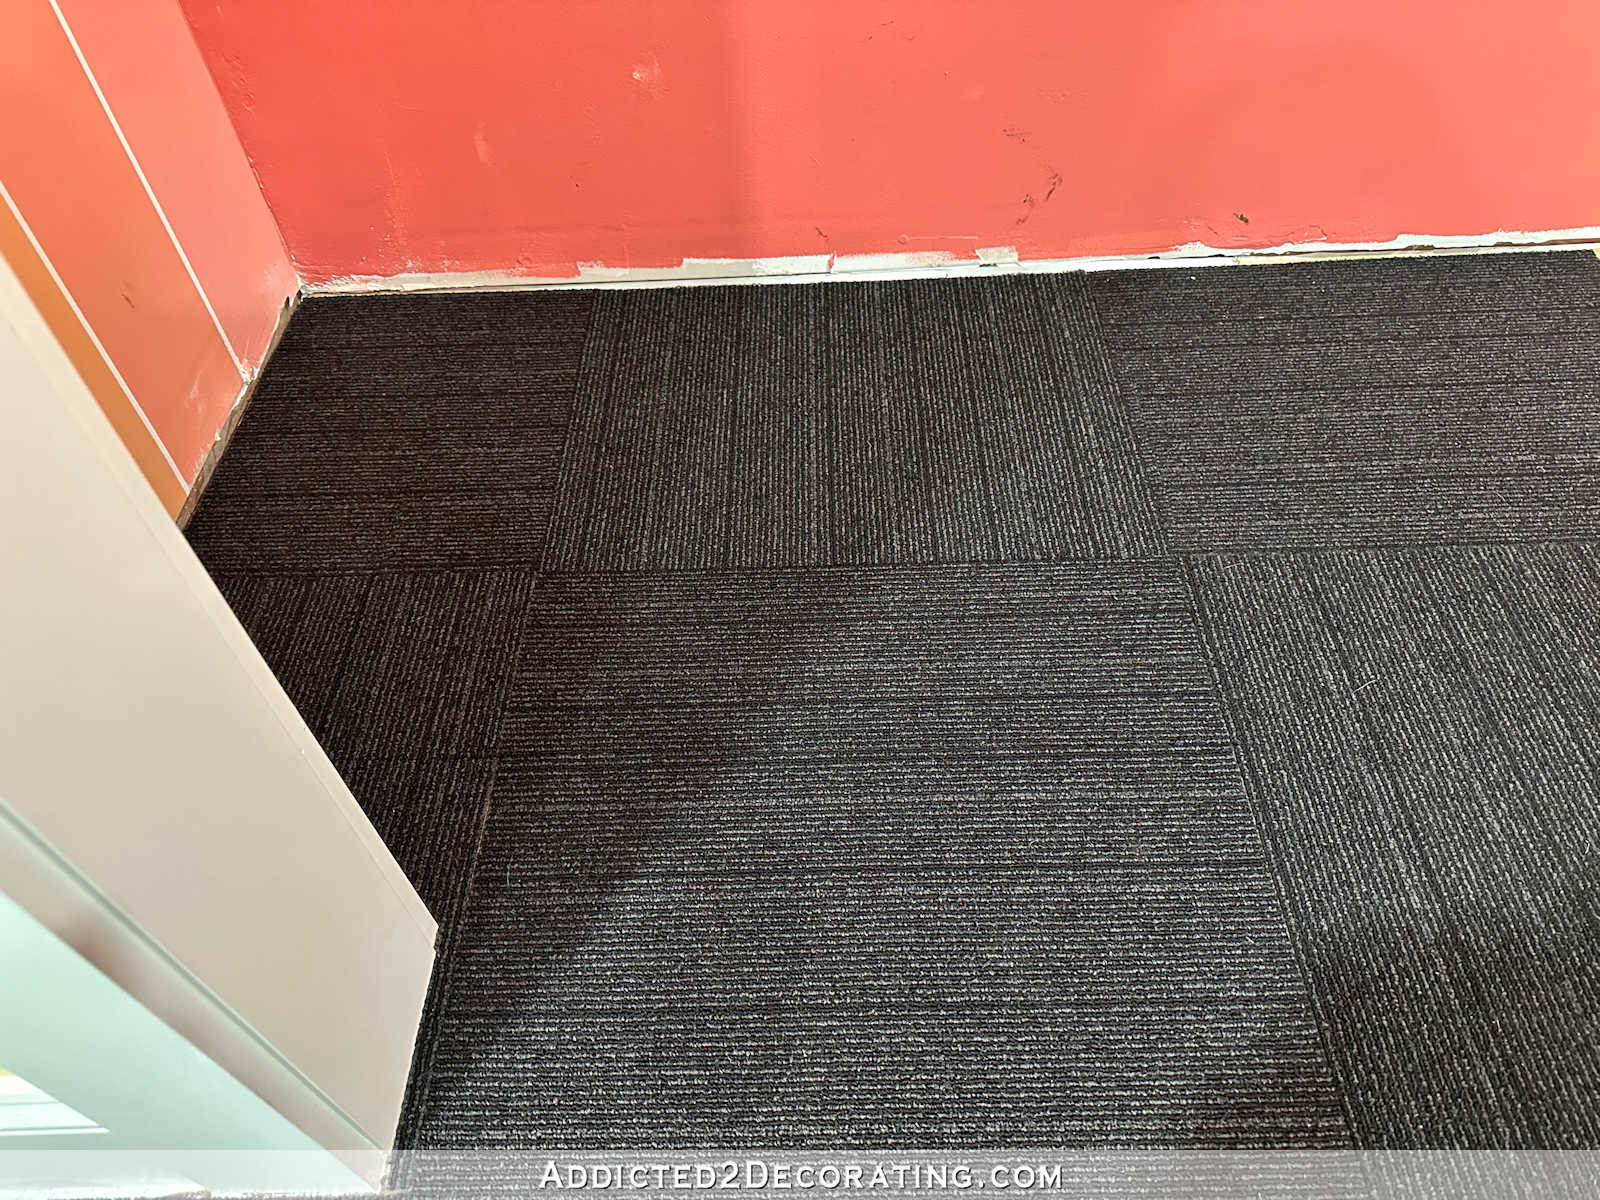
So that daunting project — one I’ve been dreading for far too long now — is finally finished. And even though it doesn’t look pretty at all underneath (it truly is a Frankenstein’s monster of a floor under there), the end result looks pretty darn good, if I do say so myself. 😀

Next up, I need to install the rest of the trim (baseboards in the closet area, and quarter round in the whole room), and then do some paint touchups on the closet walls, and then I can start adding the dresser, TV, shelves, mirrors, and whatever else I decide to put into this closet.

Addicted 2 Decorating is where I share my DIY and decorating journey as I remodel and decorate the 1948 fixer upper that my husband, Matt, and I bought in 2013. Matt has M.S. and is unable to do physical work, so I do the majority of the work on the house by myself. You can learn more about me here.


Looks pretty darn good to me!!!
Great job, Kristi! This whole room is looking fantastic!
That is seriously so perfect. I’m not sure why you didn’t opt for doing the closet floor just like the rest of the floor to begin with. Had you used something different on the closet floor, it would have remained a closet. This way it’s obviously part of the original design of the home gym. I like it. As usual, great job.
Incredible! Looks so good! You are on the home stretch for this room!
As I read about the white stripe on the carpet tile, I thought, “I’d just use a Sharpie pen.” Now I feel like a genius!
Me, too! 😆
And…me too!
I did too!
Same here! Sharpies are great for that kind of thing!
Good for you! Glad you were able to make the closet floor work, not spend any more money and finish getting those carpet squares down. Well done!
Looks pretty darn good to me!
You’re one smart girl !
It’s coming together beautifully!
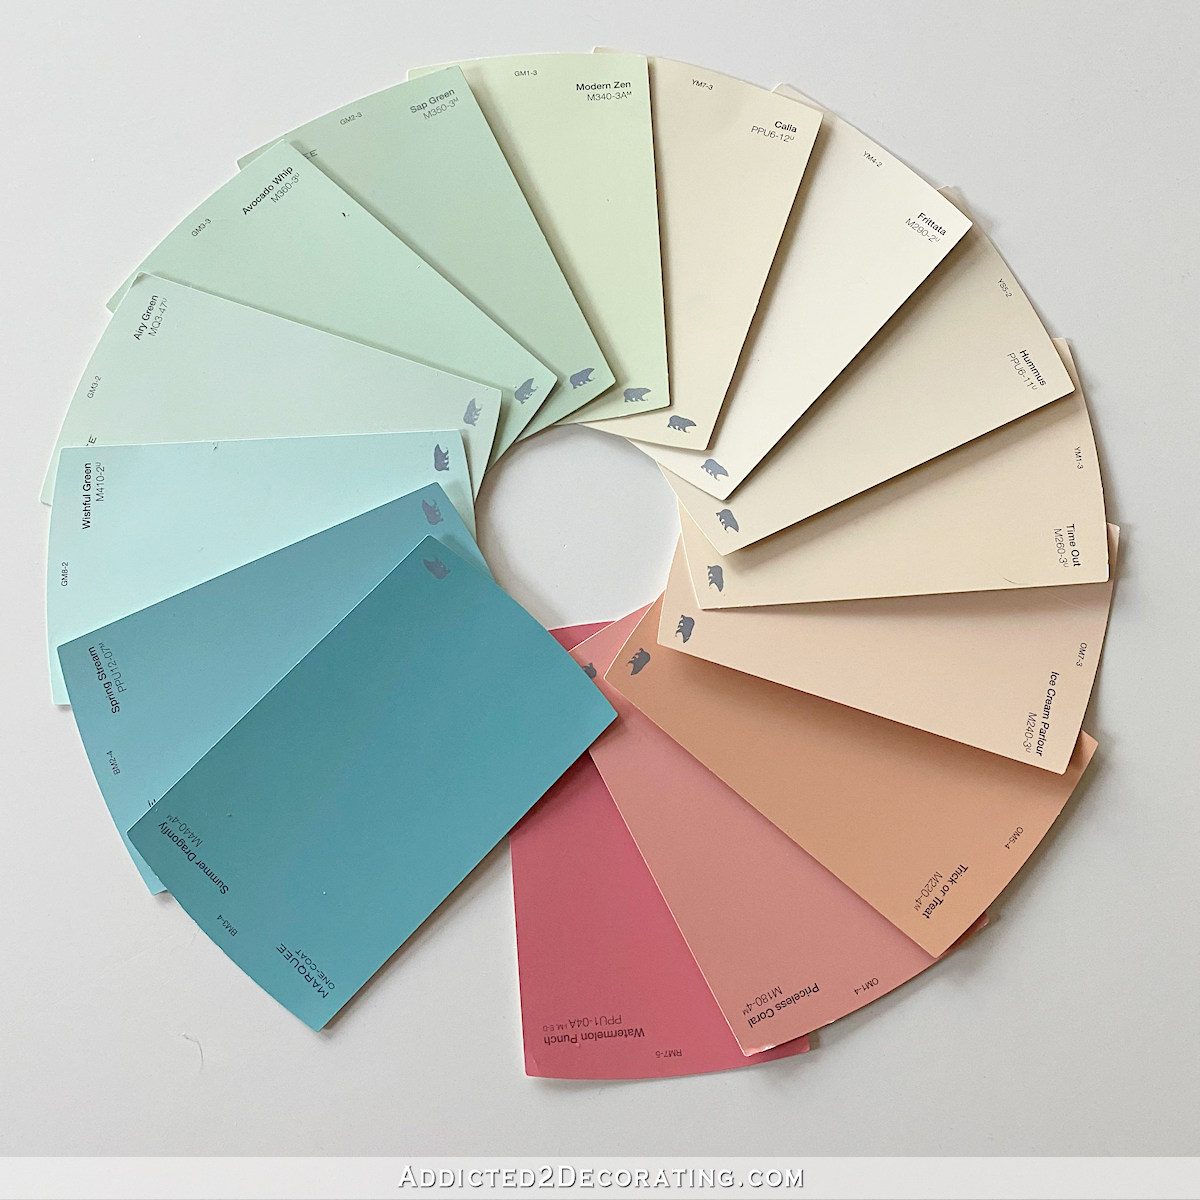
Do you have a list of all the paint colors you used in this room?
Looks amazing! You are so close to a finished room!
Love this carpet!!
Well done, Kristi! That closet looks as professional as it could be. I doubt a professional flooring contractor would/could have done any better. Using the Sharpie marker to color the edge of that one carpet tile was a great solution. The home gym floor looks fabulous! Good job!
“So I solved that problem with a black Sharpie marker. I used it to make the cut edge of the carpet piece black so that it would blend in with the carpet much better.”
Kristi, you’re a girl after my own heart! I keep a complete set of all the different colors Sharpie makes just for times like these! Looks fantastic!
Yes for Sharpies! I have them in very color I can find. They can be used to fix so many little things. I would not know what I would do without them! The closet looks great! You did it! Do a happy dance and move on! 💕😊👍
At least that scuttle hole will be covered with shelves.
😂 When I saw the little white line, first thing I thought is a black sharpie! So glad you solved this way too. Sometimes those things come in handy in the weirdest way! Looking wonderful!
That carpet is SO nice! I bet it will last and last!
Covering the subfloor with Tyvec and patching in with what you have to make a solid base for the floor tiles looks just right to me. Great idea to use Sharpie on that white edge. Similar situation here — we had a professional wall paper installer do a repair for us. The wall paper had a black background. She used black pastel marker on every edge before it was installed on the wall. Can’t see the seams! The gym is looking SO good!
What’s that I see ahead?? Oh, yes; the finish line!!
You are so ingenious at solving problems. That room is just gorgeous!!
You can`t tell or see any joints at all it looks just like a fitted carpet all the way through, and it looks fantastic,,
It looks perfect! So well done and thought out. The Flor carpet tiles are fabulous in your gym, and color looks great with the walls!
Wow, those FLOR tiles really cleaned up nice with the vacuum! The closet area looks great!
Wow! I love a good make-do-with-what-I-have project. You can’t get any more practical. Well done!
Kristi,
You always do a great job! Been following you for many years and you still amaze me!!
Nancy
I am so glad you almost finished the closet. That had been bugging me for some reason. You almost have that room finished, then on to the studio. I’d love to have a studio but mine would be for quilting and sewing. I love, love the studio wallpaper. I hope it can still be seen once the cabinets are all in place. The closet looks grand.
I never have been to a home that was “perfect”, we always seem to want to do more or only see the smallest things that we feel is wrong. I am amazed at what you let us see, because none of us would have ever known what you did to make it perfect! I have watched you make your condo perfect and now your forever home for you and Matt. It has helped me to move forward with my own projects, nothing as grand as yours, but an accomplishment, nonetheless.