The Finished Dresser & Chest of Drawers (and Dealing With Chrome & Brass Bathroom Fixtures)
Well, maybe I shouldn’t call them finished. They’re finished for the most part. They would have been finished if I had remembered to pick up a foam brush for the polyurethane that I need to use on the stained tops. Oh well. For the purposes of this “before and after”, I’m going to declare them finished.
So yesterday you got to see the “before” and “in progress” pics of the dresser and chest of drawers.
Now, here’s the “before” and “after”!
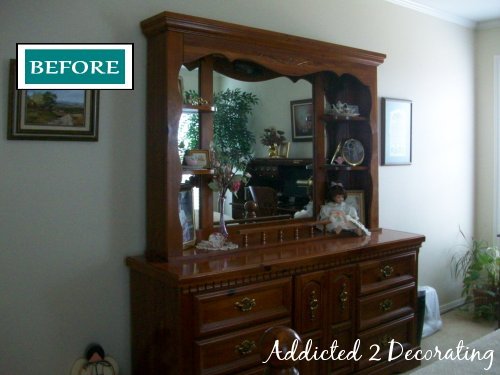
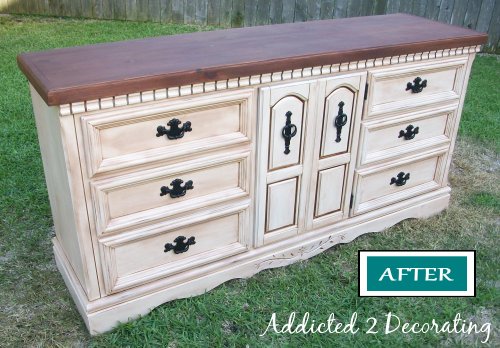
Isn’t it amazing what a little sanding, painting, and staining can do?!
And then here’s the “before” and “after” of the chest of drawers…
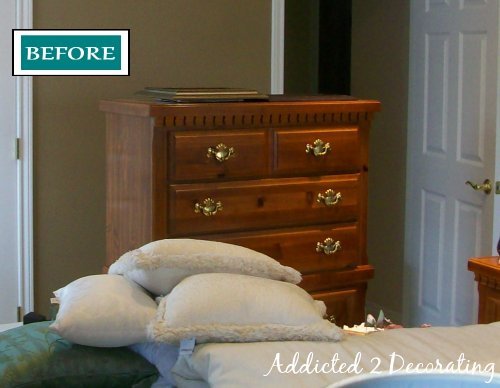

What a difference! I had intended to get a better before pic of the chest of drawers before I started, but I got a little too anxious to get busy and completely forgot! This one was taken when I painted the room, which is why things are stacked in front of it.
Isn’t it amazing what a little distressing and antiquing will do? I really like a fresh, clean coat of heirloom white paint, but with the headboard, bedding, and carpeting all the same color, it would have been overkill to have the dresser and the chest of drawers a solid off-white also. So, I opted to distress and antique the finish.
Here is the dresser before the distressing/antiquing process…
And here it is, all distressed and antiqued…
I’m quite pleased with how they turned out. So much so that I took about a thousand pics of them! Lucky you. 😀 Ready?
Okay, I’ll spare you the other 996 pictures. That’s probably enough…for now. 🙂
If you’d like instructions on this project, you can click here: How To Paint, Distress and Antique a Piece Of Furniture.
Now on to something completely different…
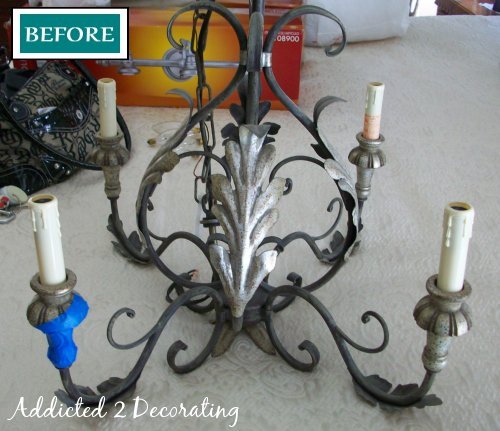
The metal finishes in Gwen’s bathroom posed a bit of a challenge for me. As I’ve shown you before, the shower door frame is a very shiny brass, and the two sink faucets, tub faucet, and shower fixtures are all a shiny chrome and brass combo.


Now because we’re trying to do this makeover on a budget, new fixtures were out of the question. Have you priced those things lately?! Goodness…we would have spent more replacing the two sink faucets, the tub faucet, and the shower fixtures that we’ve spent on the rest of the bathroom! And that doesn’t even include the cost of installation!!
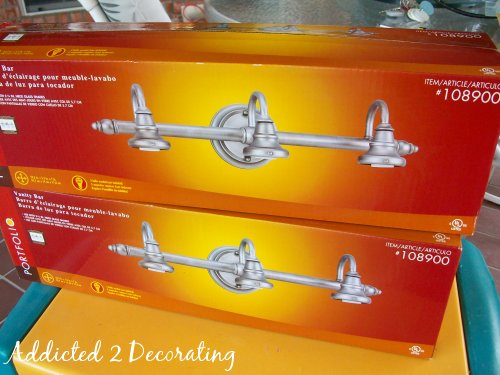
So I had to find a way to make them work. And because we were adding a new tub chandelier and two above-mirror vanity lights, I needed to find something that would blend with the chrome/brass bath fixtures, and also blend with the aged finishes being used in the bedroom. Quite a challenge, I’d say!!
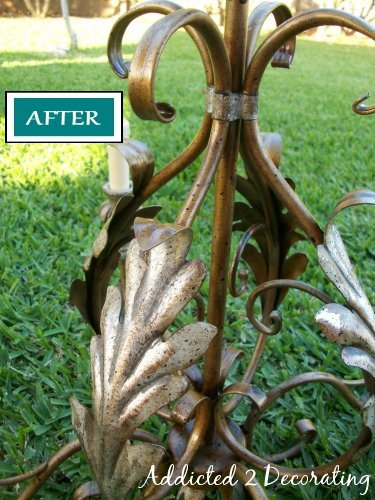
My solution? Use antiqued silver and gold on the new lighting.
I found this chandelier at Home Depot, and because I saw it hanging…way up…with the light glaring in my eyes, I mistakenly thought that this chandelier had silver AND gold on it.
When I got it to Gwen’s house, I noticed that it was, in fact, silver and black. I have no idea how I saw gold on that thing. I guess I just really, really wanted it to be there, so I saw what I wanted to see.
So, determined to get some gold onto that chandelier, I taped off all of the silver parts, and got out my trusty gold spray paint.
So pretty! Much better, don’t you think?
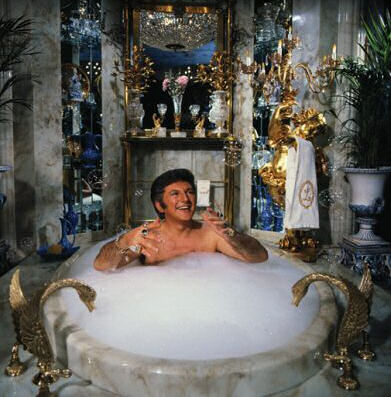
Ha! Just joking! I know, I know…at that point, it looked like something I picked up from Liberace’s yard sale. In fact, there it is…in the corner!
😀
Okay, that’s not exactly what I had in mind. But…after a little antiquing, it was beautiful…just what I had imagined.
Here’s another “before” and “after” of the chandelier…
So today, I need work on these…
With my trusty blue painters tape, I’ll tape off a few sections, paint them gold, and then antique the whole thing. Wash, rinse, repeat…
I’m linking up to
- “I made it without my hubby” at Shanty 2 Chic
- Frugal Friday at The Shabby Nest
- Before and After Party at Thrifty Decor Chick
- DIY Day at A Soft Place to Land
- Hookin’ Up at House of Hepworths
- Saturday Nite Special (Themed Link Up) at Funky Junk Interiors
.

Addicted 2 Decorating is where I share my DIY and decorating journey as I remodel and decorate the 1948 fixer upper that my husband, Matt, and I bought in 2013. Matt has M.S. and is unable to do physical work, so I do the majority of the work on the house by myself. You can learn more about me here.
Kristi~
Would you mind sharing what you did when you distressed and antiqued the dresser? I painted some very large furniture in my house white and I want to give it that distressed look but I'm not sure how exactly. I don't want to mess up and have to paint it all white all over again. Also, once the furniture is distressed, do you apply a clear protective top coat or are you done at the distressing stage?
Love the dressers, they look amazing.
I have the exact same sink fixture in my master bath. I love your solution.
I'm working on getting the DIY written up for the painting/distressing/antiquing. Stay tuned! 😀
Love you blog! You've been nominated for the Sunshine Award! Check out my blog to see!
Great after pics and the chandelier looks great!
Love the chest of drawers, chandelier looks greatto
Okay, now I'm beginning to think that is what needs to be done to the dresser and chest of drawers in the front bedroom upstairs. When can you work me in??? 🙂 The chandelier is beautiful!
Oh my! LOVE the dresser transformation! Esp. the stained top…thanks for sharing!
Wow, what a difference on the dressers. Great Job!
I love the dressers!!! I really love that you left the tops darker…it's not something I would ever think to do but I'm definitely making a mental note of that one!
You did a very fabulous job on the dressers! I adore what you did! They became so pretty.
Gosh, don't you love spray paint!! I've been accused of paining anything that didn't move. I've changed the finish on many a brass object with great results. Have a fun weekend, and I can't wait to see what you do next!
Love the dresser. It turned out great! Happy Mother's Day. Love & blessings from NC!
I'd also love some information on just how you distressed the dresser! It's an amazing transformation.
Thanks for stopping by to look at my teal coffee table. The stain looks great on your piece. I wonder if I would have let it dry for several days instead of an our or two…if it wouldn't have dripped. Also, I have never thought to spray seal…I wasn't taught that way, and I have a big can of sealer. Next time!
The fixture looks great! I will be eagerly awaiting your post on "how to" distress/antique!
Chelsea
Love the chandelier but how do you antique it after you spray? Thanks for inspiration!
I've written more detail on how to create the antique gold finish here:
http://blog.addicted2decorating.com/2010/05/bathroom-lighting-transformed-and.html
WOW, i looooove what you did with the dressers!!
Amazing transformation! I agree, paint is the single best decorating tool there is. Great projects!
Come by for a 1 year blog-iversary giveway. It's very easy to enter. Would love to see you there.
Lisa
That fixture is fabulous!!!! Can you find me one just like it?! Janell
Oh my goodness, I have almost exactly the same bedroom suit as you! My husband and I bought it when we got married 29 years ago. I've been dying to paint it but my hubby prefers wood left in a more natural state. I'm going to show him the pictures of your set and see if that helps convince him. I just found your pics on "Better After," and had to come over and take a look your whole redo. Thanks for the urge I needed to proceed with my plans.
Sherry @ A Happy Valentine
Oh my gosh. What a beautiful job on the chandelier. Can you share directions with us? I have a fixture to transform! Thanks so much for all your inspirational postings!
Lisa
Hi Lisa~
I posted a tutorial here:
http://blog.addicted2decorating.com/2010/05/bathroom-lighting-transformed-and.html
Hope it works on your fixture!
Great idea on the bathroom fixtures! As I am cursed with old brass in my house it might come in handy sometime…
Great idea on the bathroom fixtures! As I am cursed with old brass in my house it might come in handy sometime…
What a cool chandelier! chandeliers I never get tired of the spray-painted before and afters. It's amazing what a little color can do.