
Bathroom-To-Storage Room Demolition Progress
I think I told y’all that last week was a strange one, complete with not one, but two funerals, along with a few other things that came up each day and derailed my normal schedule. So by the end of the week, I had gotten shockingly little accomplished on this room. It was fine, though. Sometimes other things in life are more important than projects. Over the last couple of years, I’ve tried to rebalance my life and live more by the mantra of “people over projects“. But last week was an unusually people-focused week with almost no project-focused time.
It’s looking like this week is back to my normal schedule, so yesterday, I had quite a bit of time to focus on this room and get some demolition done. And my main goal was to get started on removing the tile around the bathtub and remove the short wall that previously separated the bathtub area from the cabinet/shelf area on this wall.
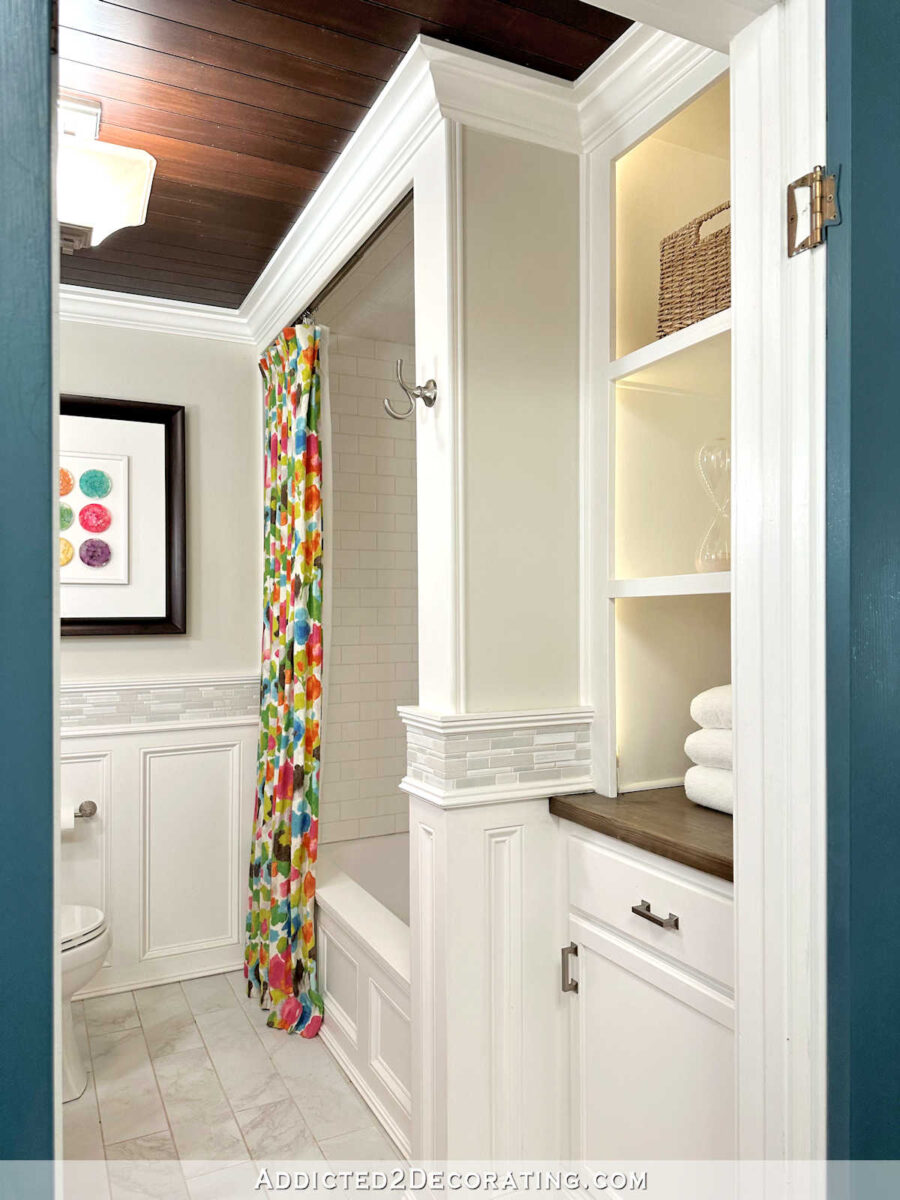
I had previously removed the cabinet and shelves in the corner, but that wall was still taking up a lot of visual space.
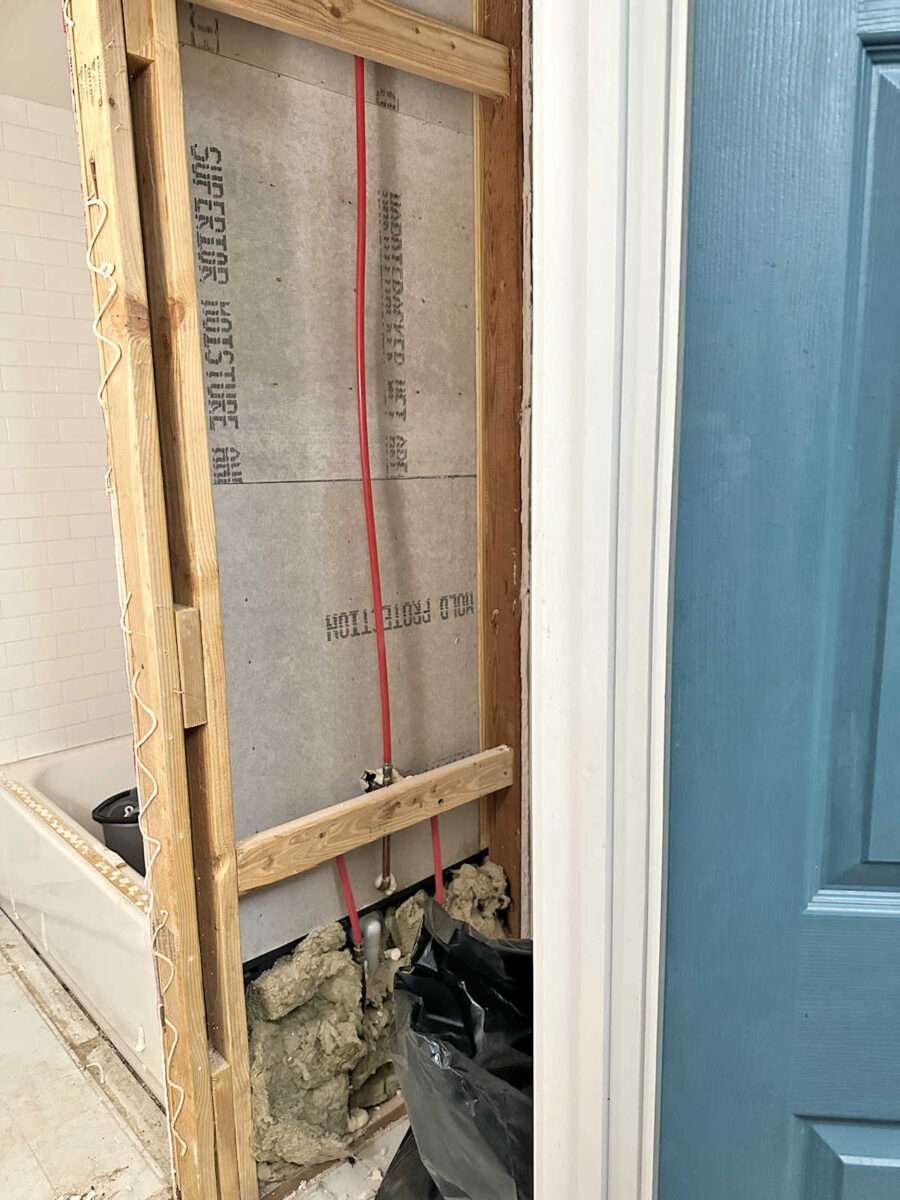
So I was anxious to see just how much removing that wall would open up the space visually. I had to remove a lot of trim and some of the plywood from the ceiling to get it done. And then it took a lot of patience to get all of the tile off of that wall so that I could remove the concrete board from the wall framing, but I got it done. And just take a look at how much it opened up this space!
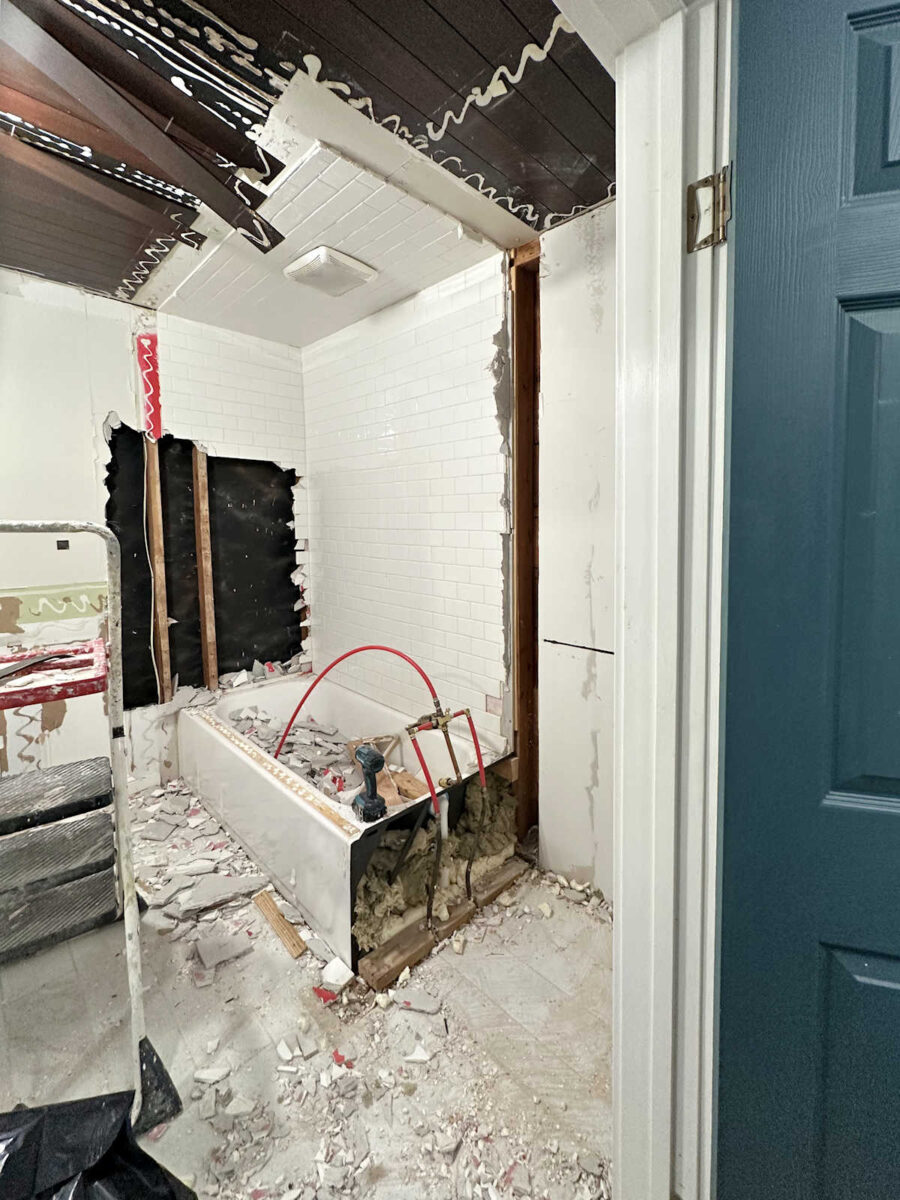
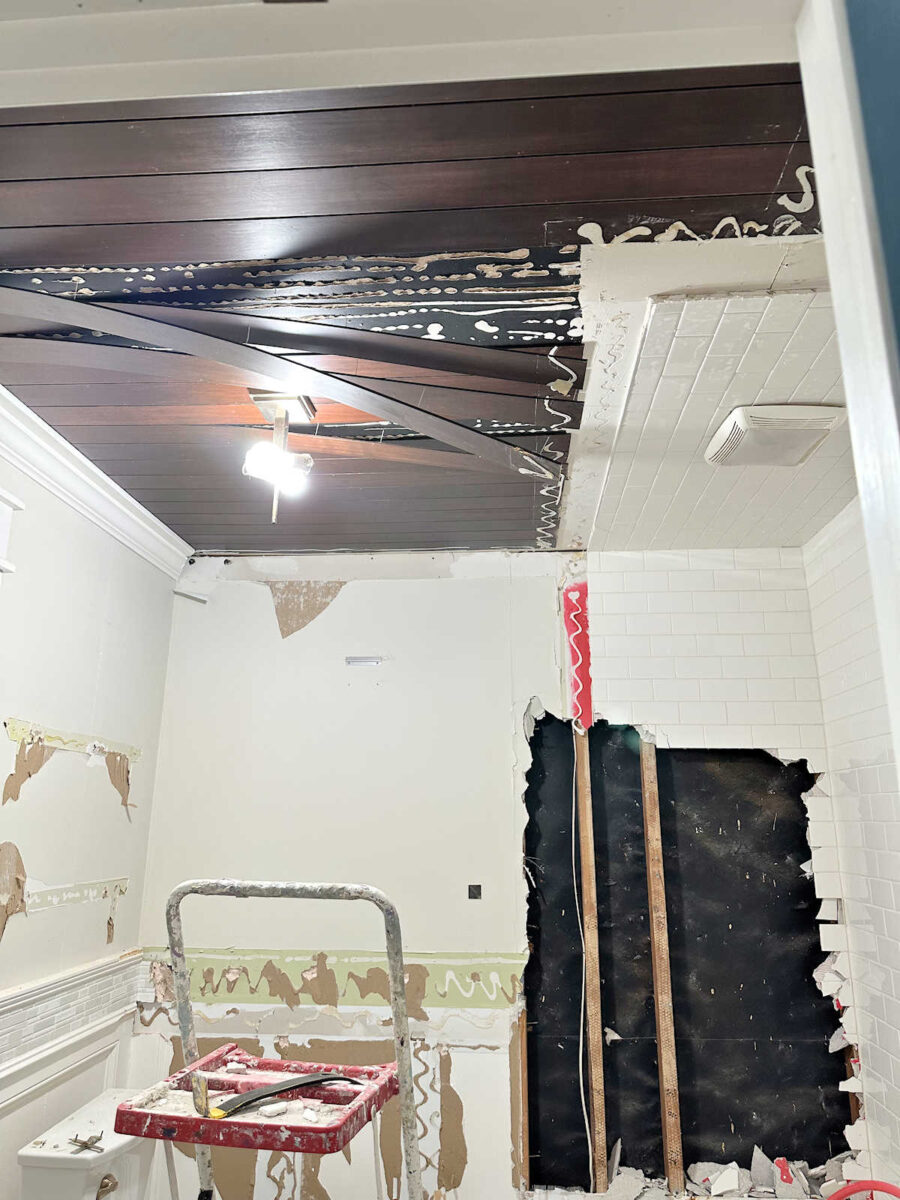
I was really hoping that I could get the bathtub out as well, but I didn’t quite get that far. The bathtub has a lip around the top that fits underneath the tile, so I still have a little bit of tile that has to come off before I can get the tub out. Once I get that bottom row of tiles off of the main wall, I’m pretty sure it’s just a few screws and two drains holding that tub in place. This room is going to look so much bigger once that tub is out of here.
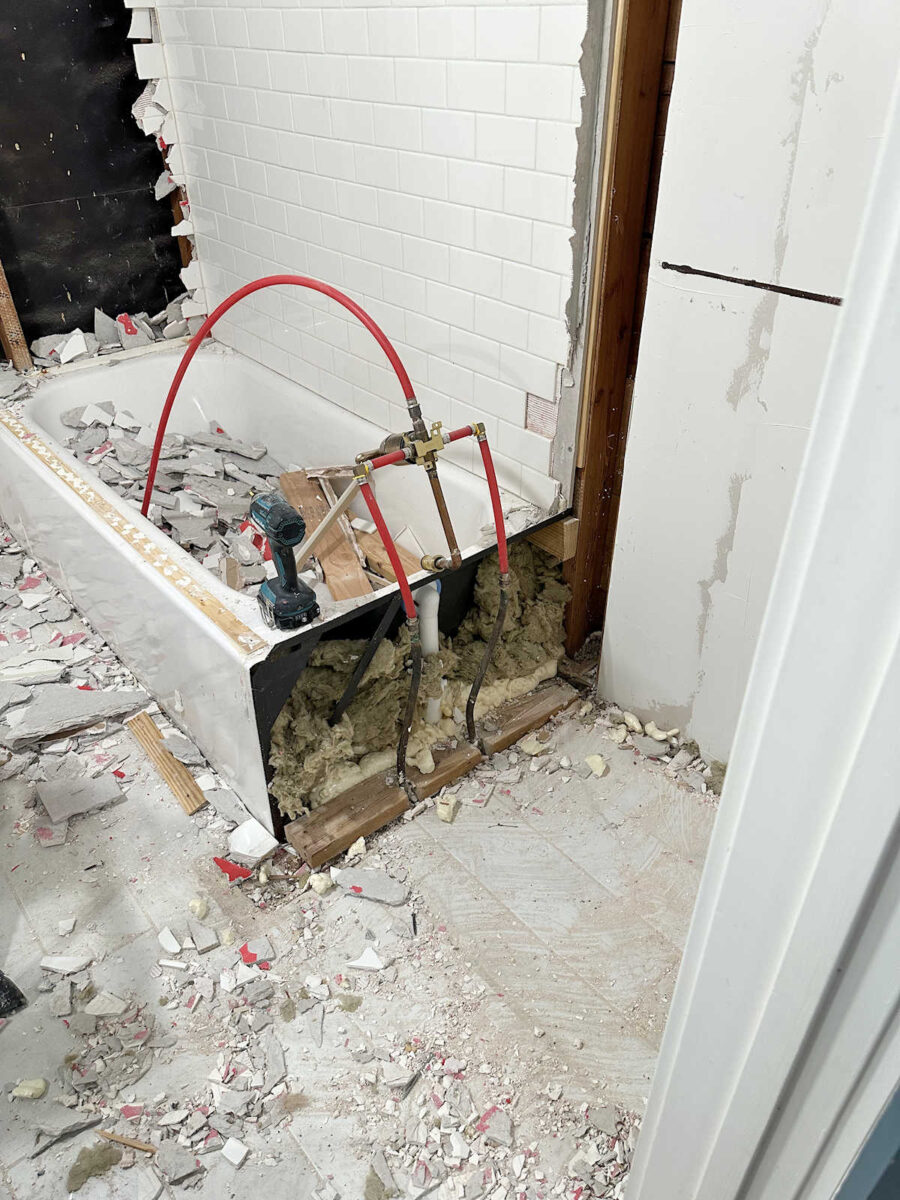
As I was working yesterday, I was weighing my options for the drywall. I can either take all of this drywall down and install all new, or I can try to salvage this drywall, fill in where there won’t be any drywall (i.e., the area around the tub that have concrete board instead of drywall), and do a whole lot of mudding and sanding.
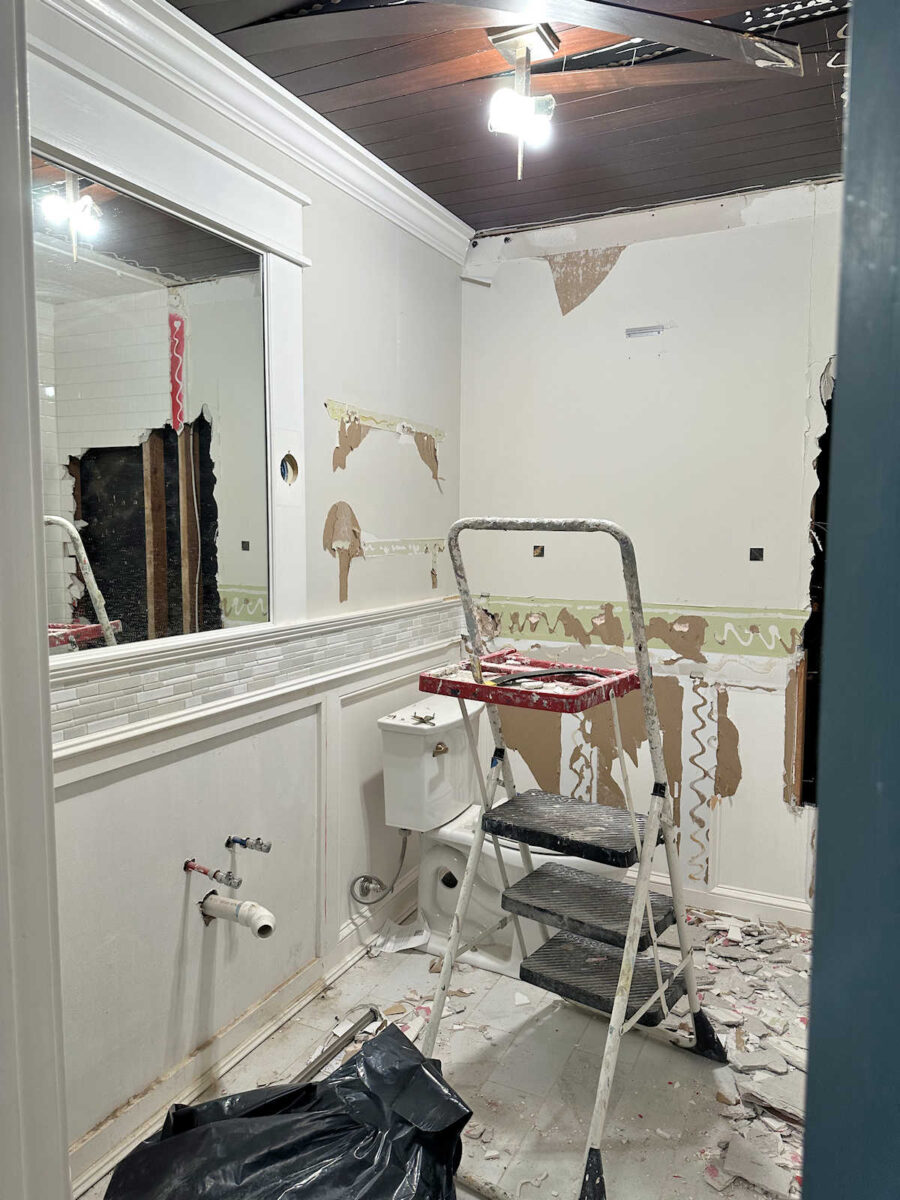
I hate doing drywall in any form, whether it’s installing new drywall or patching old drywall, so both of those options sound equally terrible to me. 😀 This whole process would be so much easier had I not used construction adhesive on everything! But as I’ve mentioned before, I used to use construction adhesive on every single piece of trim I installed. Back then, not a single piece of trim was ever attached to my walls without construction adhesive. I’ve learned my lesson since then, and I haven’t used construction adhesive to install trim in several years. But I’m still paying the price for my decisions before I swore off construction adhesive.
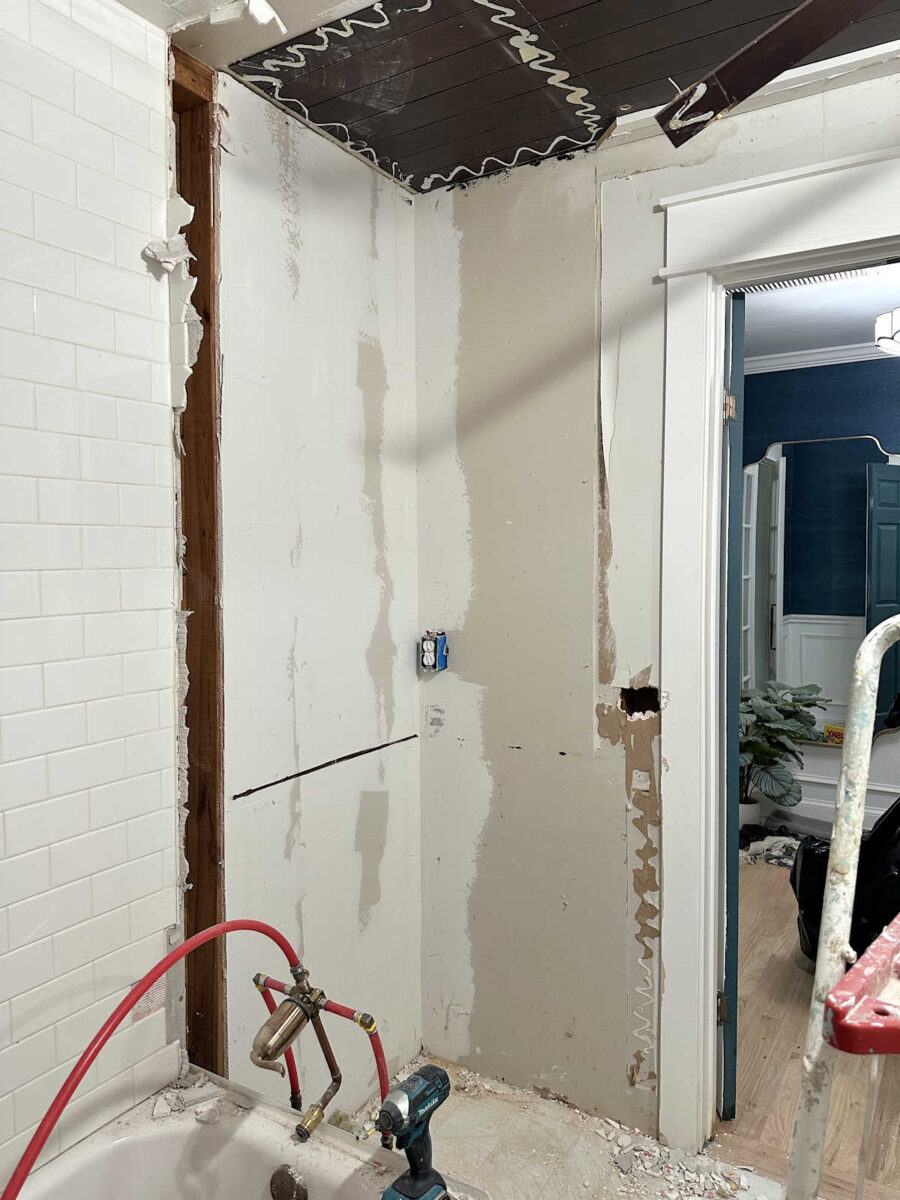
And as you can see below, it’s not just the walls. I used construction adhesive to attach every single strip of plywood to the ceiling as well. Talk about overkill. So either way, I have a drywall problem on my hands. And once I start chipping off that tile above the tub area, it’s going to get even worse. I’m pretty sure that ceiling tile is attached to drywall and not concrete board because, if I remember correctly (which is questionable because it was a very long time ago), I hadn’t originally intended to tile the ceiling in the tub area. I think that was something I decided to do after the walls were tiled.
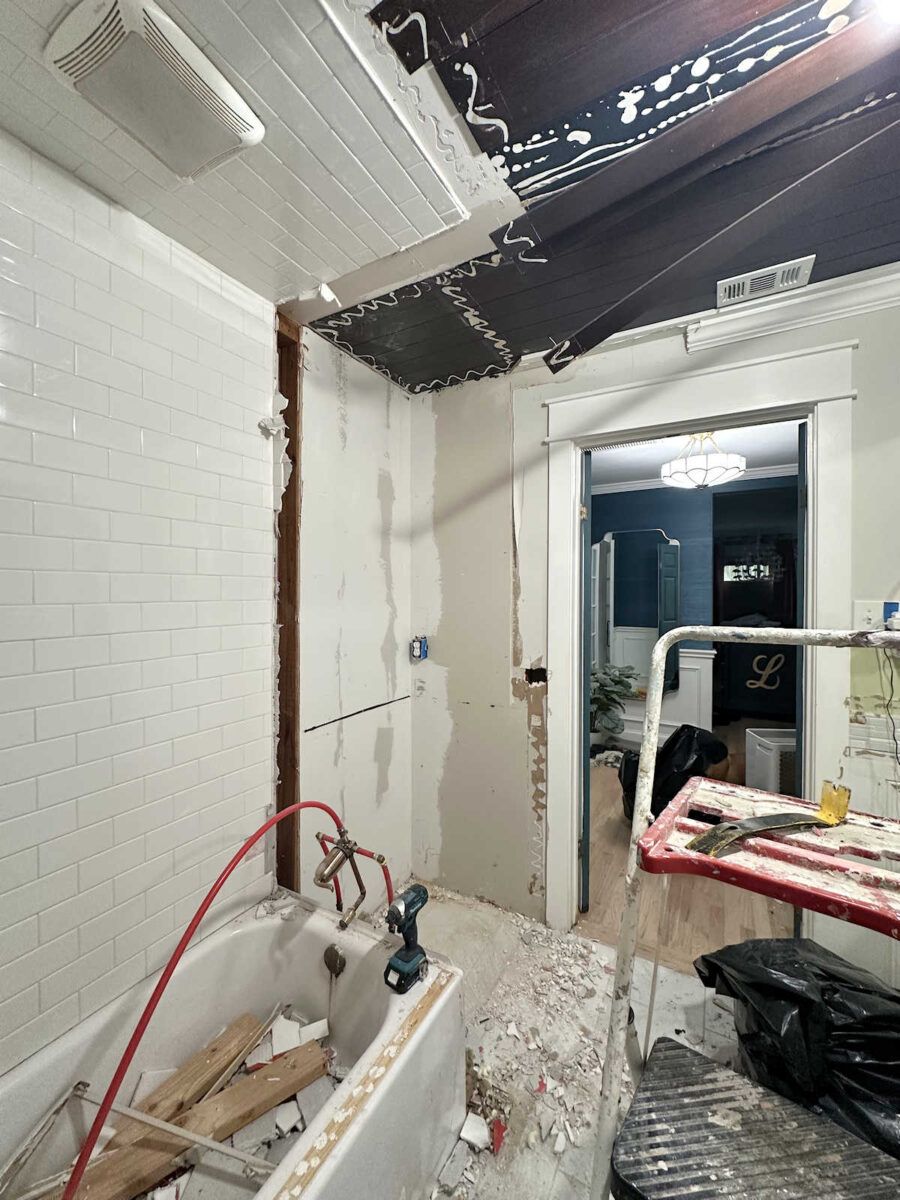
But anyway, it’s coming along. I realized that in yesterday’s post, I didn’t even address storage on this wall. I only discussed the storage on the opposite wall where the vanity used to be.
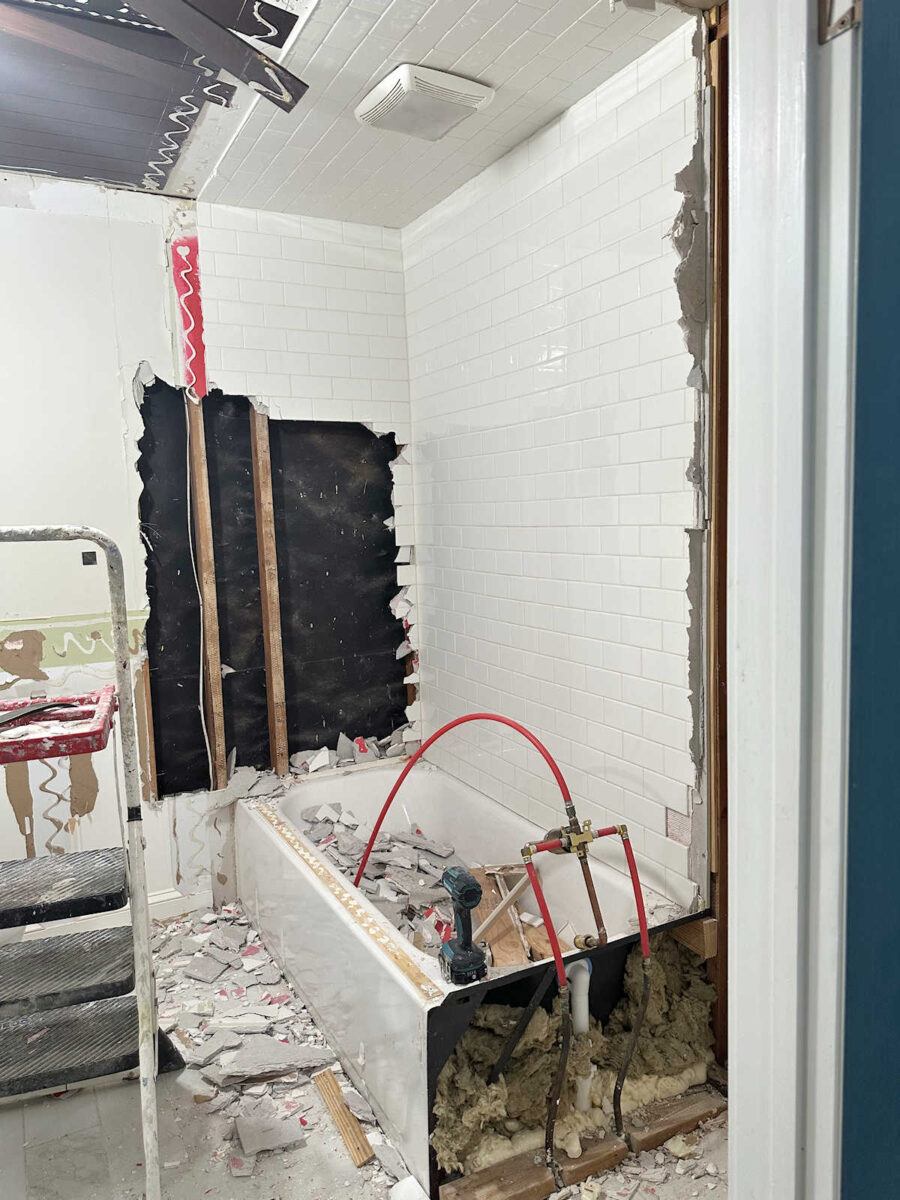
The floor space on this wall needs to be left open for Matt’s equipment and the sink that I bought for the corner just inside the door, but I had planned on building storage to on the top portion of the wall.
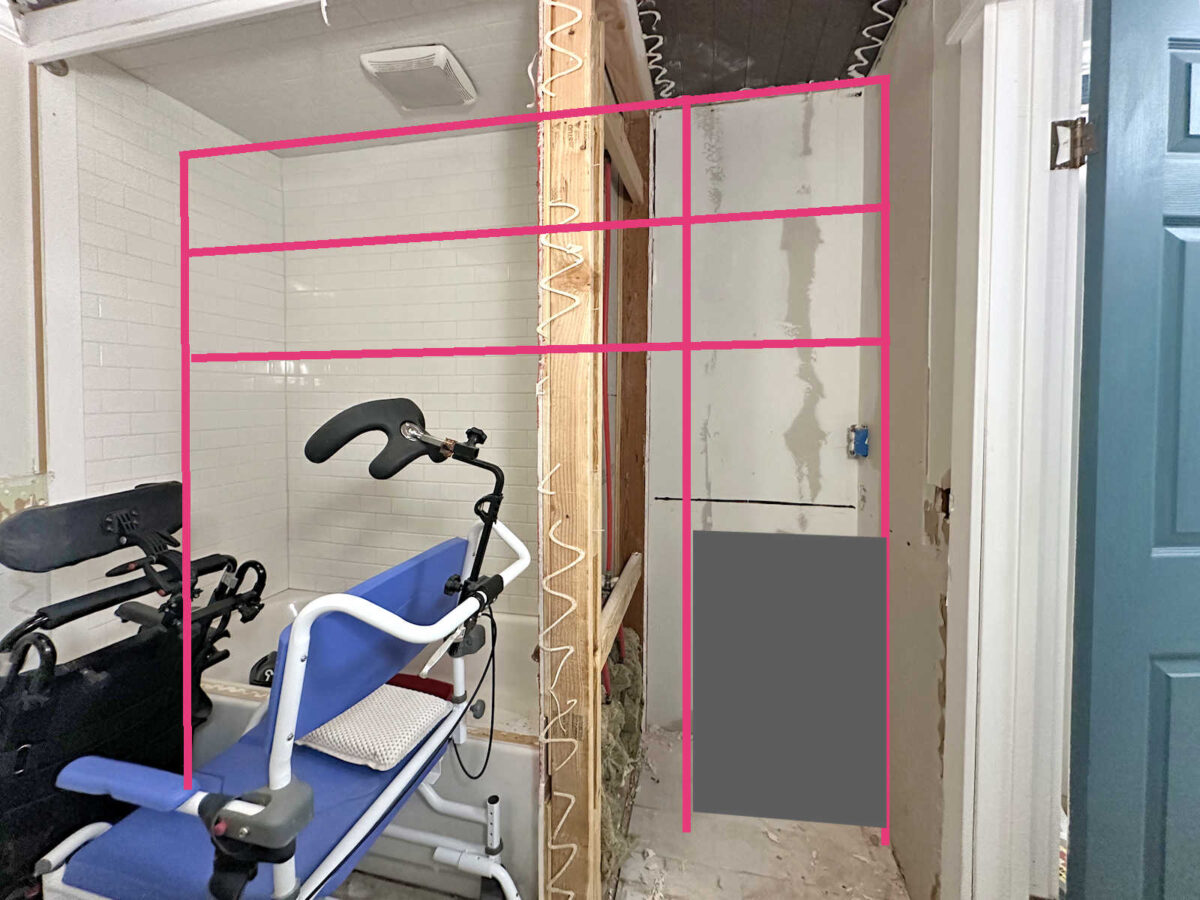
I’ve actually decided not to put any storage on the bathtub wall right now. I’ll have plenty of storage on the vanity wall for now, and I’ll see how that goes. I may find that the IKEA Pax wardrobes provide all of the storage area that I need in here, so I can keep the bathtub wall open. That’s the plan for now. If I find that I need more storage down the road, I can always come back and add upper cabinets to the bathtub wall. Or I may find that I want specialty storage for that area that doesn’t require cabinets but requires something like hooks on the wall instead. I’m not sure at this point, but I can add and customize as needed. It doesn’t have to be done all at once right now.
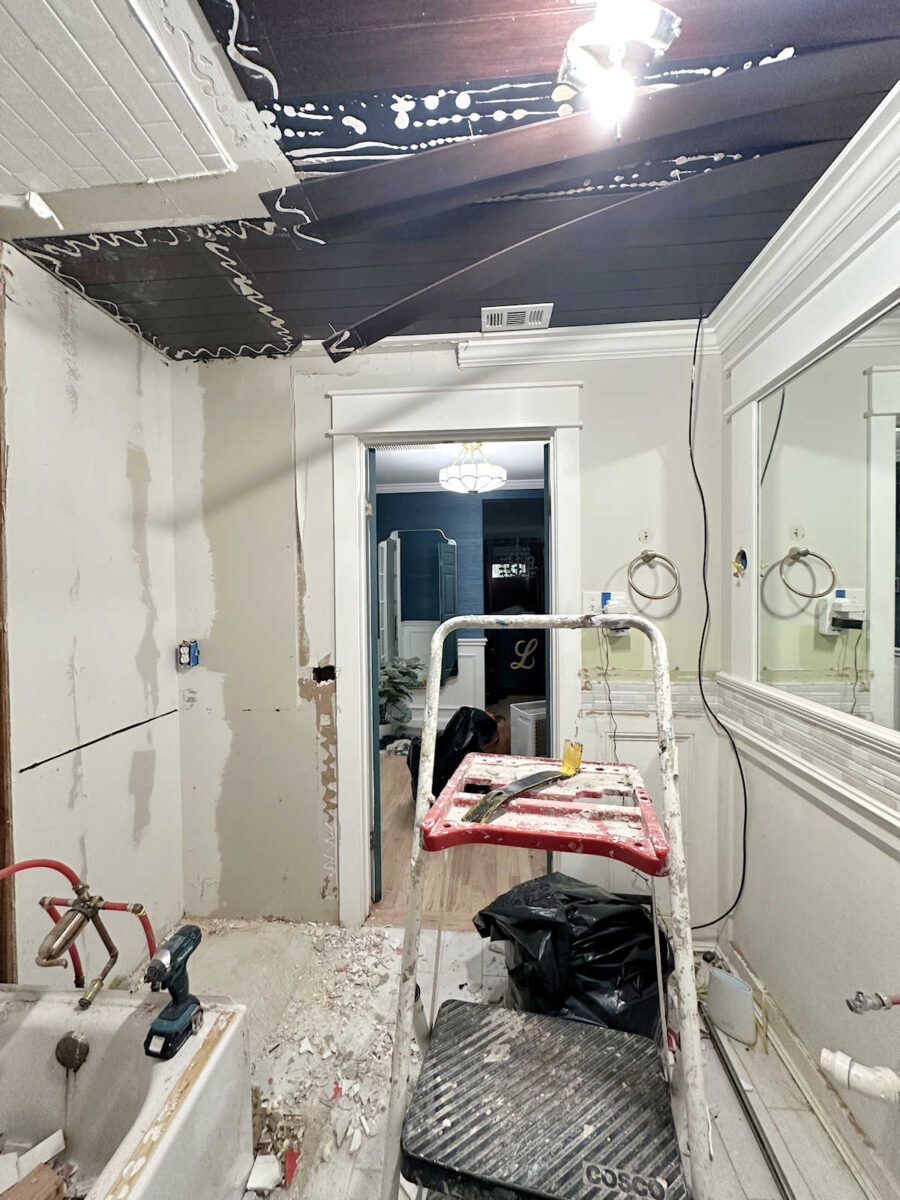
So today, I’ll continue on with the demolition and see just how far I can get.
I’ve also decided to remove the tile floor and put down hardwood floors. I happen to have three boxes of hardwood flooring left over from when we had new flooring installed in the bedroom suite, so I won’t even have to spend more money on new flooring. And that way, it’ll be consistent with the rest of the bedroom suite. So the demolition will also include removing the tile and the concrete board from the floor. I’m really hoping I can get that off without damaging the plywood subfloor underneath!
There are two reasons I decided to go that direction. First, it just seemed easier than trying to find a tile to fill in under the tub area where there is no tile. Second, this room is where the scuttle hole will be to access the crawl space under the house. Cutting a scuttle hole seems so much easier to do (and to have it look nice) in a hardwood floor than it does in a tile floor. And if I can get the tile and concrete board off without damaging the plywood subfloor, the subfloor pieces can be removed so that the plumber can have easy access whole rerouting the plumbing for my sink, and then the plywood can be reattached before I install the new flooring. All around, going with wood instead of tile seemed like a better idea to me.

Addicted 2 Decorating is where I share my DIY and decorating journey as I remodel and decorate the 1948 fixer upper that my husband, Matt, and I bought in 2013. Matt has M.S. and is unable to do physical work, so I do the majority of the work on the house by myself. You can learn more about me here.

Kristi, I know you’re trying to be thrifty…but given how much you hate drywall work and it looks to me like the entire ceiling will have to be replaced…maybe consider hiring it out? It might be worth the time and dread to spend the money.
I was thinking the same thing as well as having them fix up the remainder of the drywall that needs repair. They’ll have it done in a couple of days.
WOW…the room looks much bigger already. You must be so pleased with the direction this is going…you needed this for a long time. If the drywall is an issue, maybe you could ask your brother to just give you a hand with that part? It’s too much for one person, and I know your brother is good at all this too. At least it is a small area. Best wishes.
Instead of replacing/repairing the walls and ceiling drywall, should you think about inexpensive luan or paneling? Looking for durability in a storage area. All that moving equipment around.
Good idea. You could even maybe do finished bead board, that would look nice! And it would surely be easier than drywall (and painting!)
That storage area looks huge! I like the direction you are going with it. Although I did love that bathroom … Sigh … But I know you need the storage and a guest bathroom in your master suite is definitely weird. If you have the funds, hire out the drywall. It would take you days of doing something you hate and professionals will have it done in a day or two.
Have you considered paneling for the walls?
Amazing to watch you work.
Thinking the same. It could even be trimmed out and painted if she wanted. Plus it might hold up better to frequent bumps with Matt’s equipment.
I have! I don’t think I’ll do full wall paneling because I still want to use wallpaper in here, but I think I’ll use some sort of paneling as wainscoting. I don’t want wallpaper ceiling to floor because Matt’s wheelchairs will probably tear it, so a paneling as wainscoting with wallpaper above seems like a good compromise, and will require less drywall repair.
I’m glad you’re doing wallpaper! Came to suggest you do something that will be a joy for your eyes while you’re moving the equipment for the man you love. 💗
After fixing old non-primed wallpaper walls. I’ve learned replacing drywall or a big patch is preferred than repairing. The labor/mental load especially if the paper is over 10% damaged. It’s a toss up on cost, but time can be money. Especially if the drywall is damaged like yours. The amount of mud and time between layers, then sealing. Its a lot of small decisions, not a lot of pretty. To replace you then typically cut, hang, then mud the seams and screws.
For the ceiling, maybe rent a drywall lift, rig the scaffolding, or hire your contractor as a sign of good will/business to hang it. In the interim you get a great chance to dispose of the demo debris for livability, add blocking/framing for a ceiling, adjust plumbing, wiring, or more for easier fixes if you’ve removed the shiplap in this room. Part of why you want to do the hardwood floor.
My 1500 sq. ft. house had heavy knockdown texture on the walls and popcorn on the ceiling…I (with hubby’s help) scraped every single bit of it off by hand (the ceiling was easy, but the walls were HARD) and re-mudded the walls AND ceiling, then painted everything. Personally, I think it’s easier to install new drywall (I’ve done my own bits of remodelling, too) than it is to fix old, lumpy drywall. If it were me, in a room that small, I’d replace the drywall rather than try to salvage it.
Honestly, so glad to see you just doing storage on the vanity wall for now and holding off on the sink wall, until you see what you actually need. This is really thinking ahead and will allow you the time to try it out.
I was also glad to see that you have a ventilation fan in the ceiling already installed.
You will absolutely need that when you have a sink and are dumping water every day from you dehumidifier.
When we build our guest cottage, our contractor installed a bathroom fan that has a built-in sensor to turn it on when there is a certain level of humidity, and turn itself off when those levels are back to normal. It also fits quite flat against the ceiling, and you can hardly see it. It’s very quiet, works really well, and is one fewer thing to have to think about and remember to turn off.
Hire out the drywall! Life is short! Enjoy the fun stuff! IMO!
I’ll tell you what we’ve done to avoid drywall in our house on a few not-seen-by-visitors walls. We live in a old hunting cabin that we’re slowly updating.
We both hate drywall. So in our utility room, we installed Hardi-panels, the ones that are 4’x8′ and look like vertical shiplap. You measure for and precut any holes (like for a wall plug, etc.) and then stick it up and screw it to the wall with 2.5 inch screws into studs. We average about eight screws per panel. A little bit of caulk, coats of primer / paint and you’re looking good!
You may need help getting them up as they are heavy, but me and hubby can manage them ourselves.
I was wondering about using beadboard panels on the walls instead of drywall. Reading that you want to use some wallpaper on the upper part of the walls, maybe the beadboard would be good on the lower parts and easier than drywall.
I know you say you are a messy diyer But it would make your life so much easier if you piled all your decor items from the hallway together and threw an old sheet on them.
I splurge in a few areas….and drywall is one of them. The pro’s do it in no time and it looks great. Tear off the drywall instead of all those individual tiles. The cement board should pull off too I think. Good luck–the vision is on the way!
I will never understand how you do all the destruction of everything, I found that to be the hardest part of any project, and one I am willing to pay for. I am amazed at what you accomplish. I just don’t understand how you get all of broken pieces picked up and then dispose them without a lot of help. Please tell me you are not taking out the tub by yourself…you go girl!!! I am in awe!
I think I can get it out by myself. It only weighs 66 pounds. I’ve lifted much heavier bags of concrete. But the tub is bulky, so it will require my furniture dolly to get it out of the house.
I just keep thinking about the first time you demolished this room! The transformation comparison photos will be awesome!
If you are interested in repairing the walls yourself, I used a product called GoBoard. It is intended for tiling, but it can be used in place of drywall, too. Nice thing about it is how lightweight, yet sturdy, it is. It’s more expensive than drywall, and comes in 3’X5′ sheets. Scores and snaps just like drywall. Since this isn’t a wet application (like a shower), there’s no need to use the specialty screws, just use plain ol’ coarse black drywall screws. One caveat – it is made with fiberglass, so use gloves. Anything you attach to it should be done over a stud, but most things should be anyway. I can’t speak for wallpapering over it, but you can look at it over at Lowes (if you have one nearby). Chances are even if you choose GoBoard over gypsum, it will still be cheaper than bringing in the boys.
And it tapes and muds just like drywall. If you decide to wallpaper over it, consider rolling on sizing before papering. I think it’s smooth enough.
I would just use finished plywood for the walls. Way more durable than drywall for a storage area and you can attach things to it without have to find studs or use anchors. You can wallpaper over it…