Bedroom & Foyer Progress (Plus, Trying To Map Out My Wainscoting Plan)
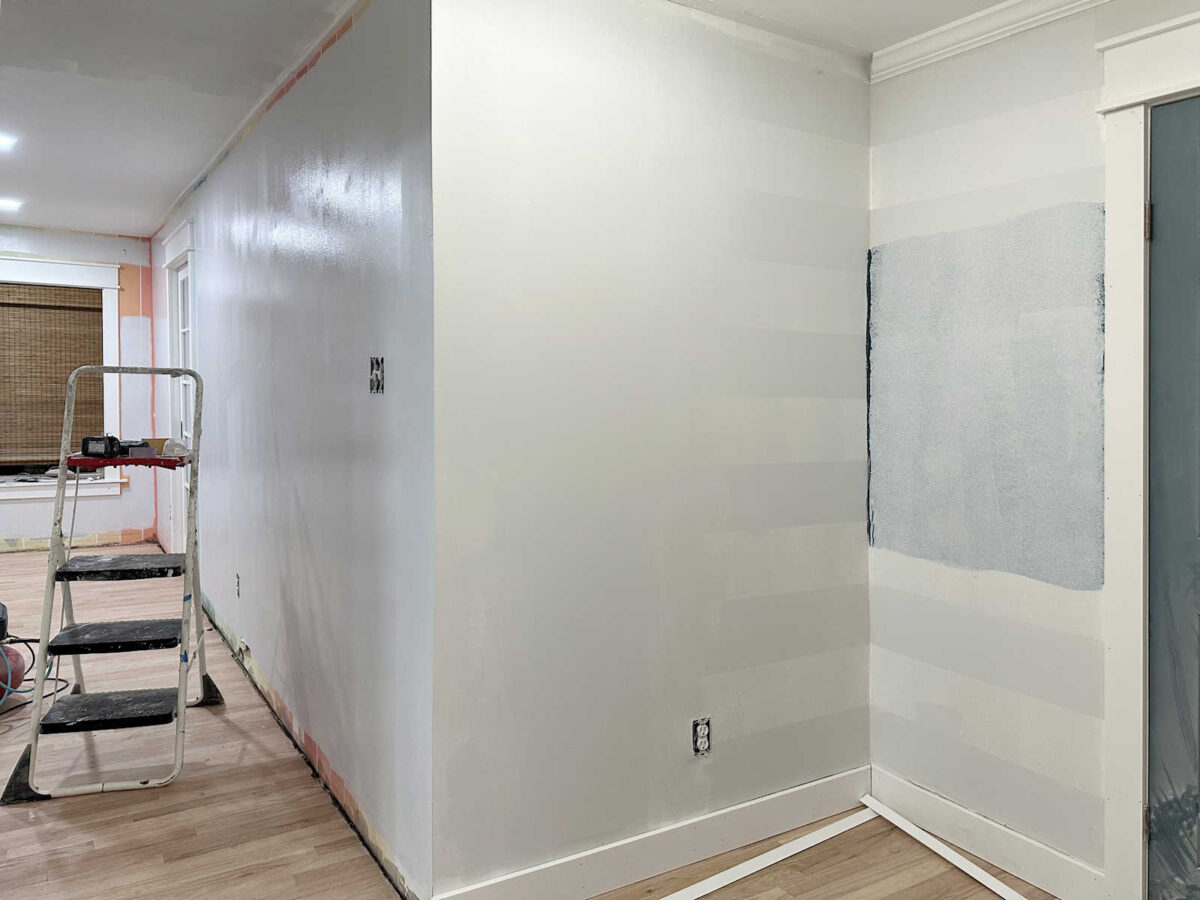
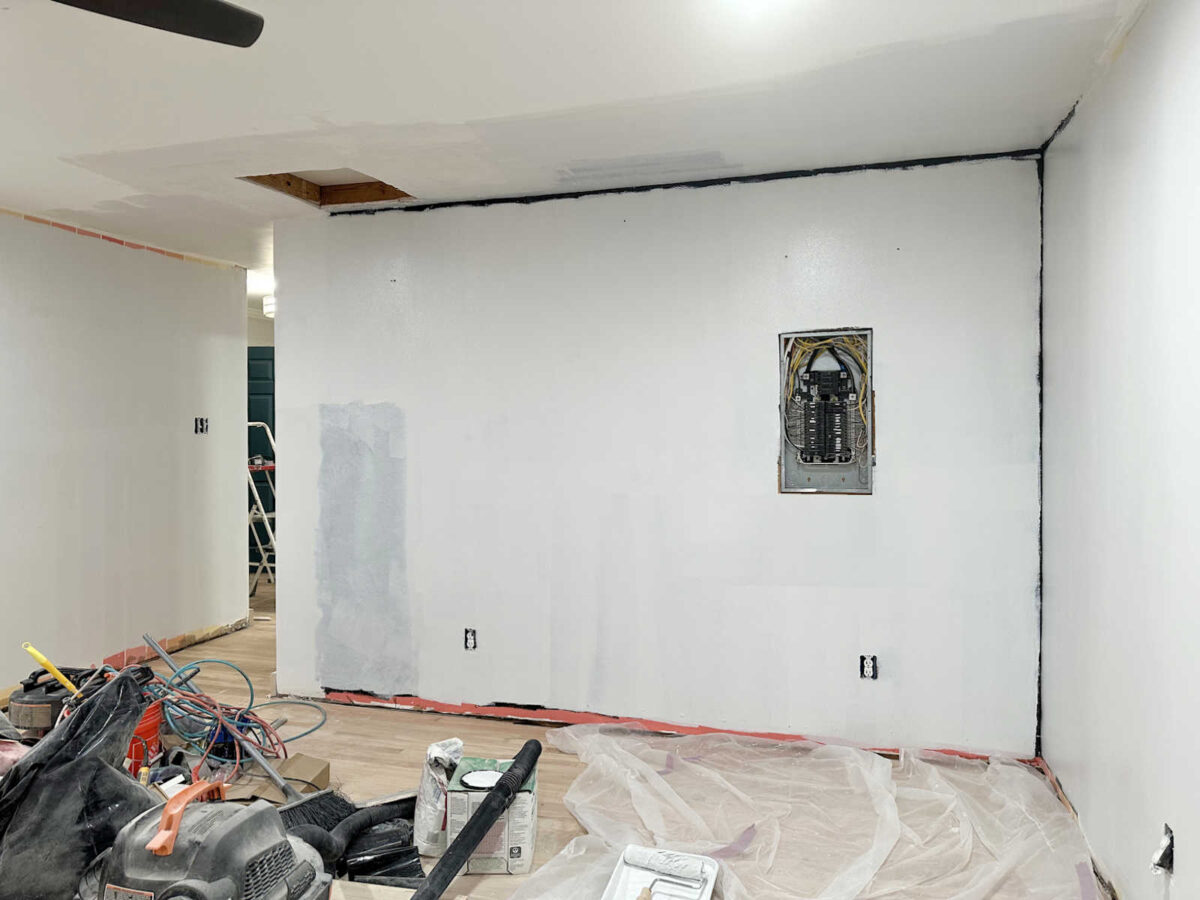
I’ve been working a bit slower these last couple of days because of my injured hand (which you can read about here), but I have managed to make some decent progress in the bedroom and foyer. I got all of the walls primed with at least one coat of primer, and I got a second coat on most of them before I ran out of primer last night.
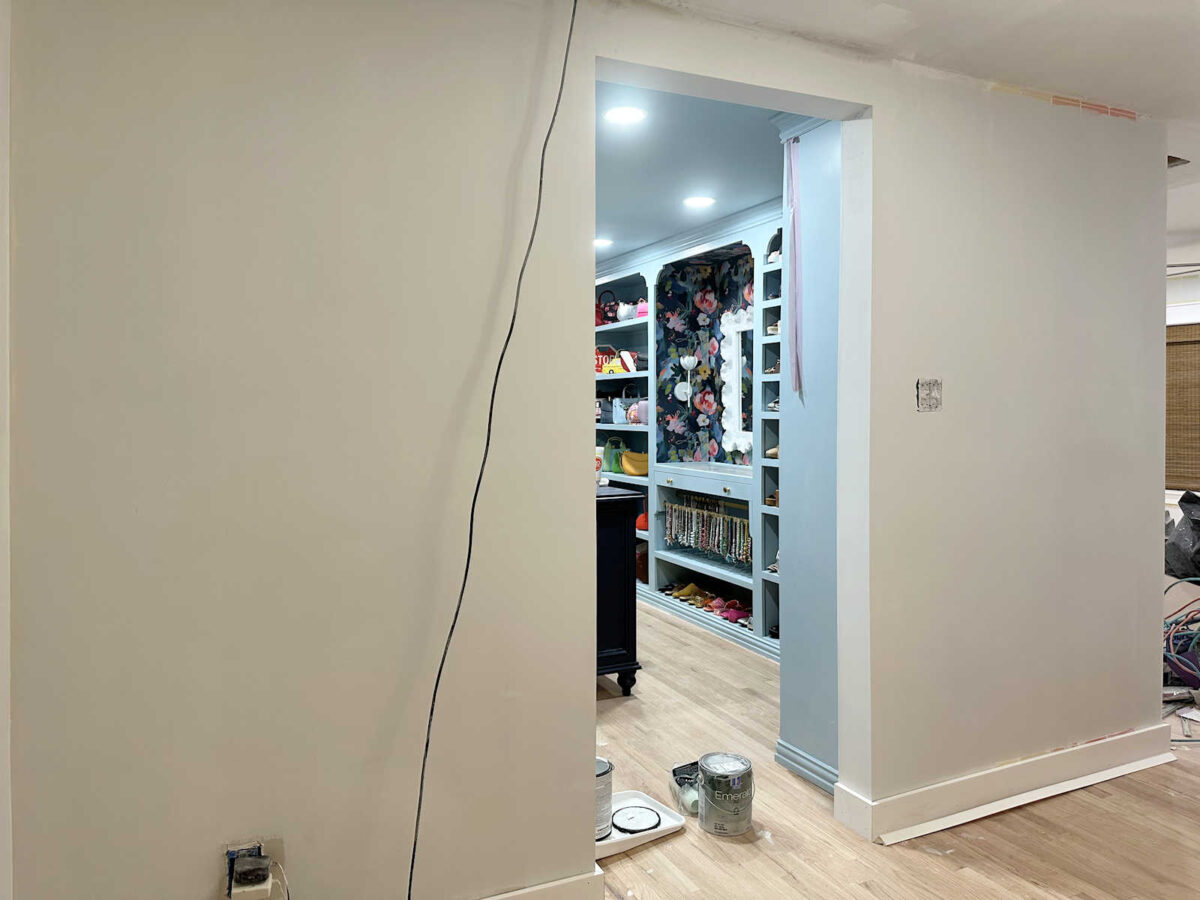
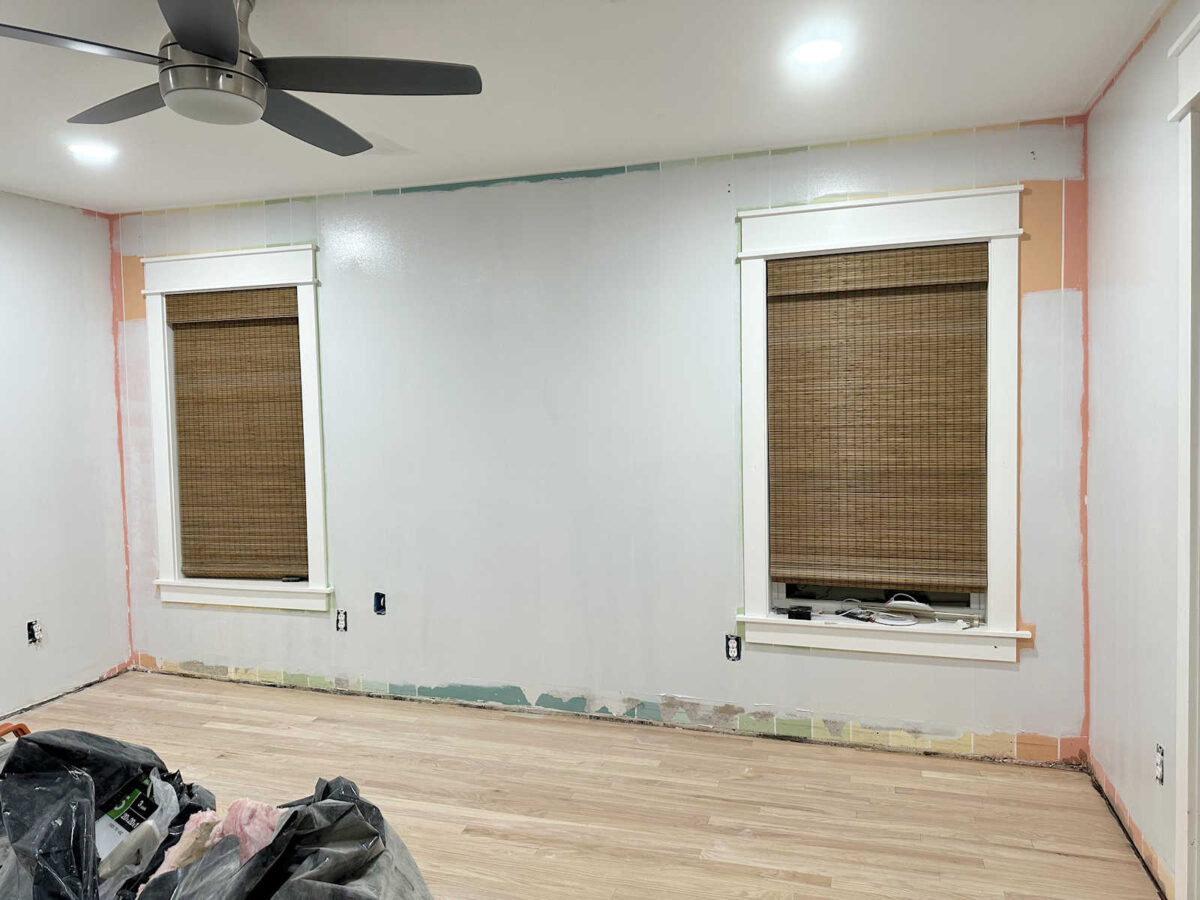
I was amazed at what a difference a couple of coats of primer made. Just seeing the walls around my finished walk-in closet go from this mess…
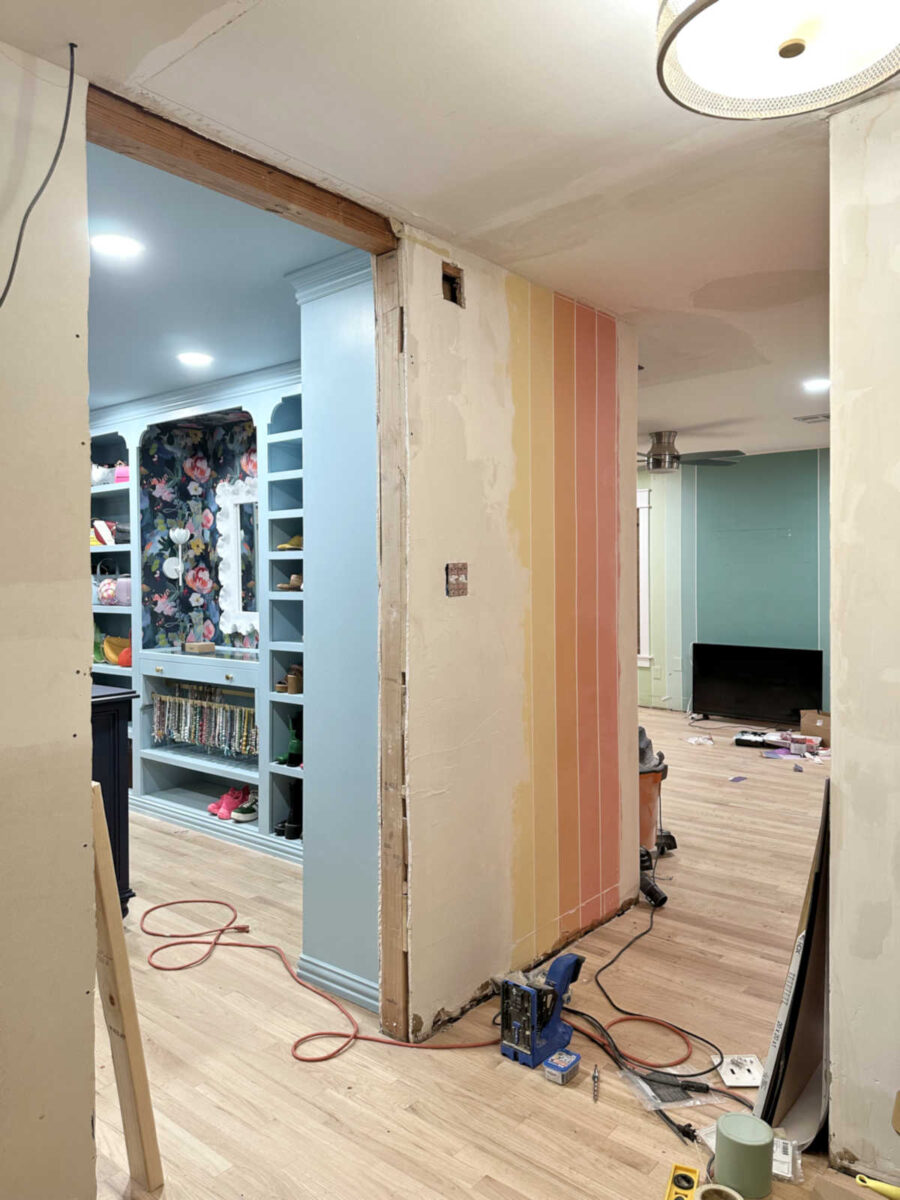
…to this clean slate, ready for trim and wallpaper was so exciting to me. This feels like I’ve crossed the first big hurdle.
And once I saw those stripes disappear, and I saw the walls all white, I started to get really excited about my plans for these walls.
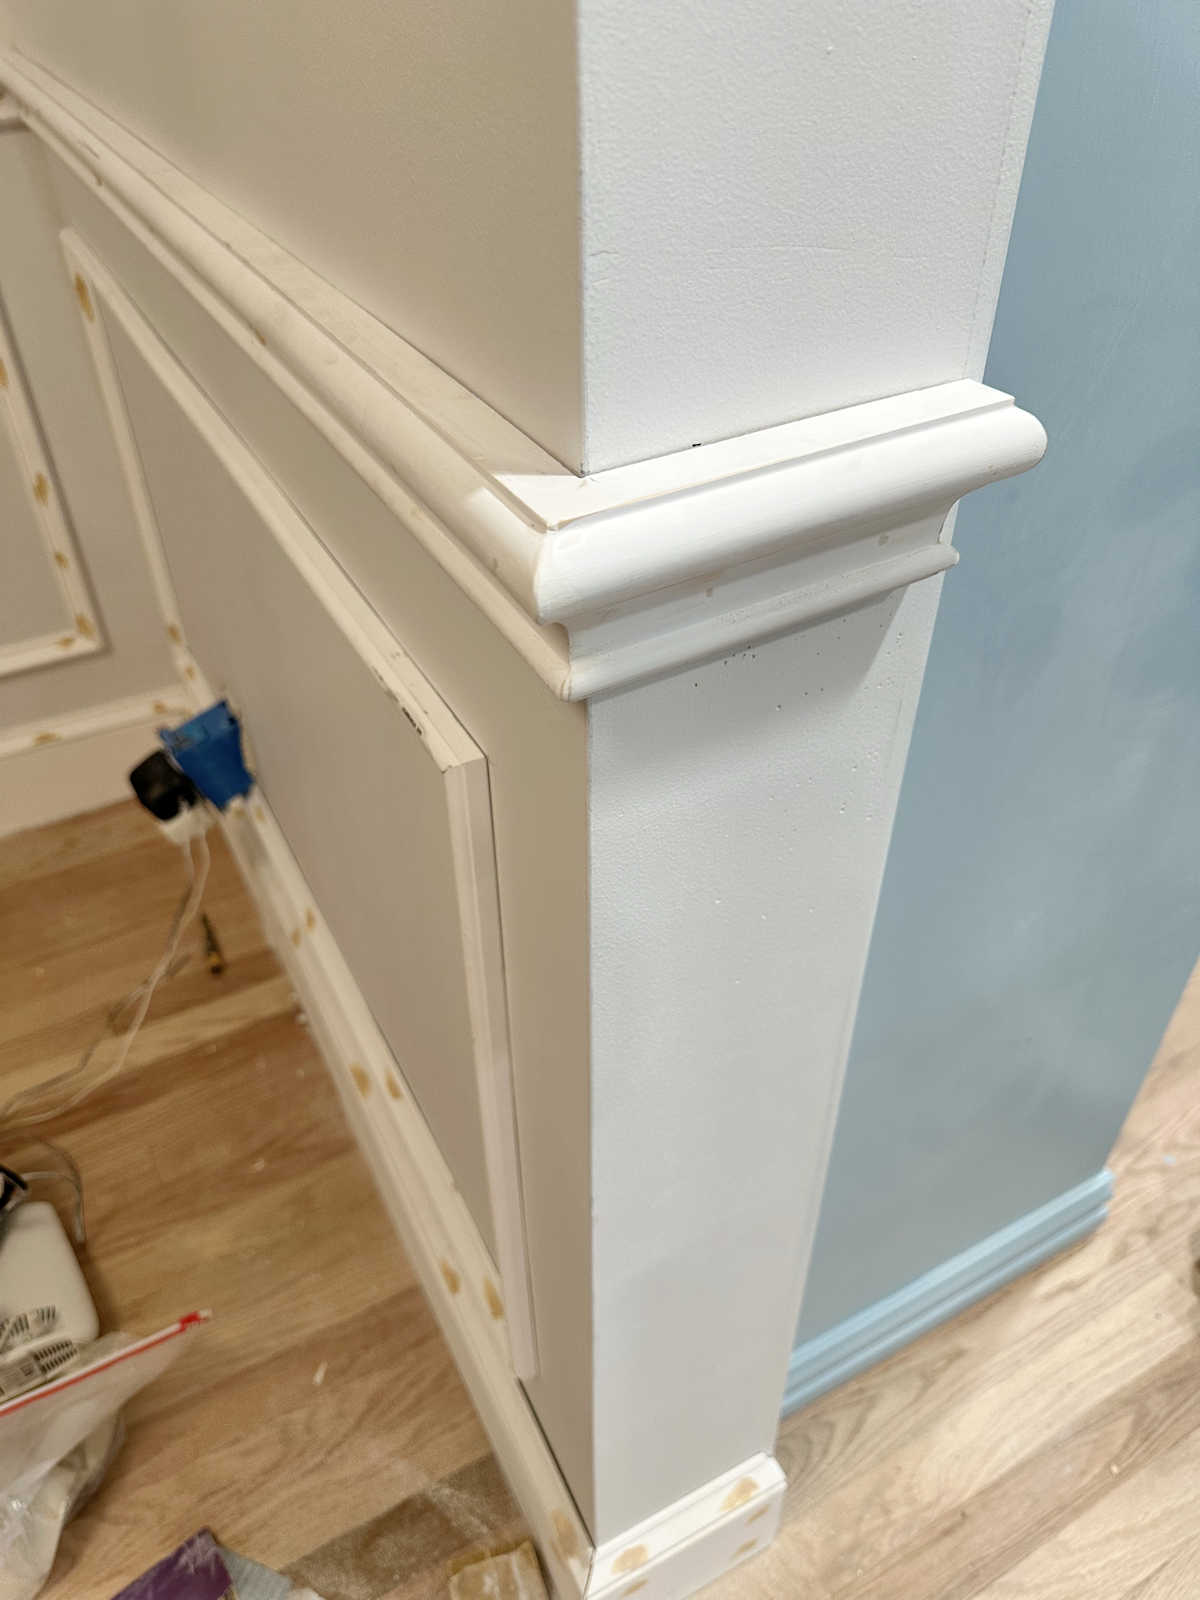
I took some time to plan out my wainscoting project. I decided a while back to go with simple picture frame molding rather than the more laborious judges paneling, but I still needed to map out how may rectangles I want on these walls. The last thing I want is to wind up with the walls looking busy with a lot of little rectangles, but I was also running into the problem of having so many walls that are various widths.
My instinct is to make all of the rectangles as close in size as possible. But the other day, as Matt and I were watching a TV show, I paused the show because the wainscoting in a house grabbed my attention. Rather than having rectangles that were all close to an equal size. They just had one big rectangle on most of the walls. On the really long walls, they were separated into two or maybe three rectangles. But it was clear that whoever installed that wainscoting had no intention of even trying to make the rectangles on any of the walls look the same width. They simply followed the width of the walls, and it looked fantastic!
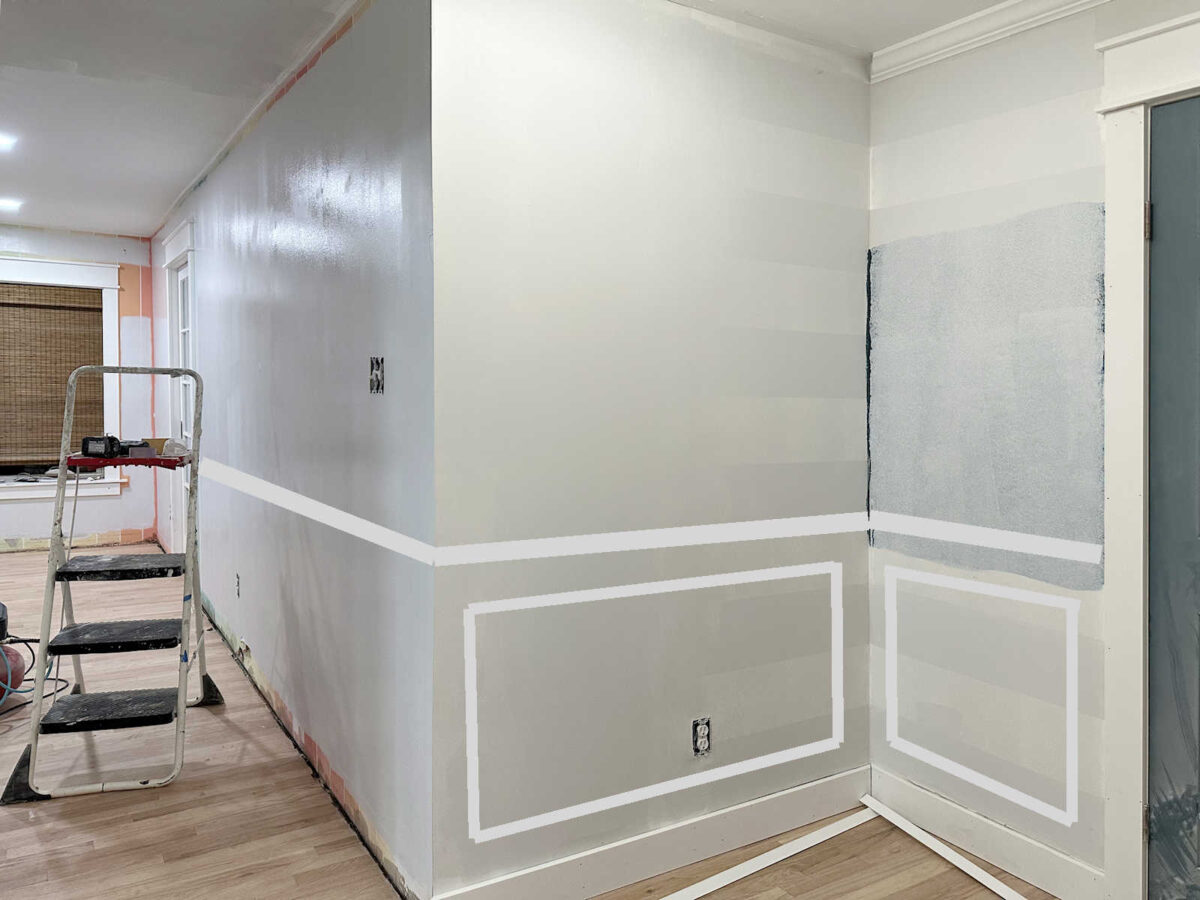
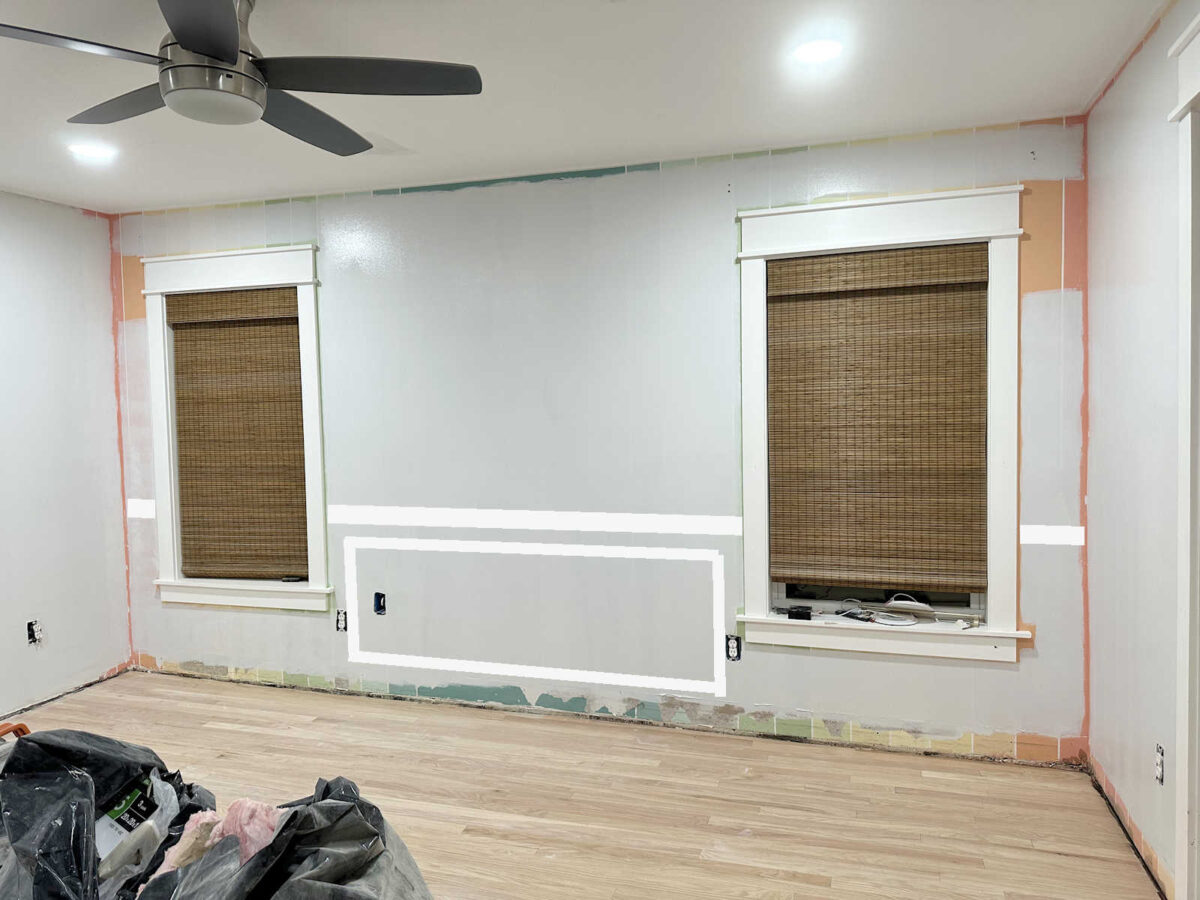
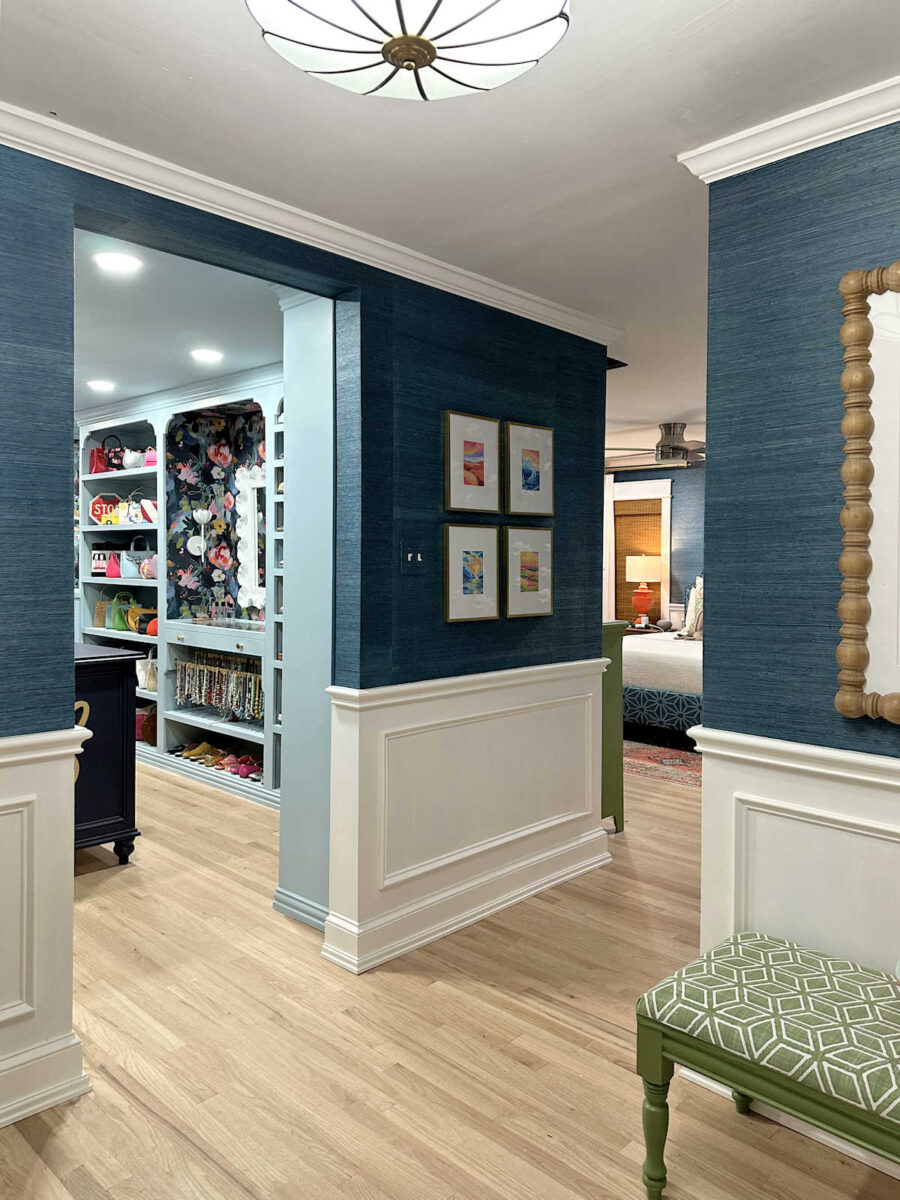
So that’s what I’ve decided to do on most of the walls, regardless of the size. On the walls flanking the walk-in closet, I’ll do one rectangle on each side.
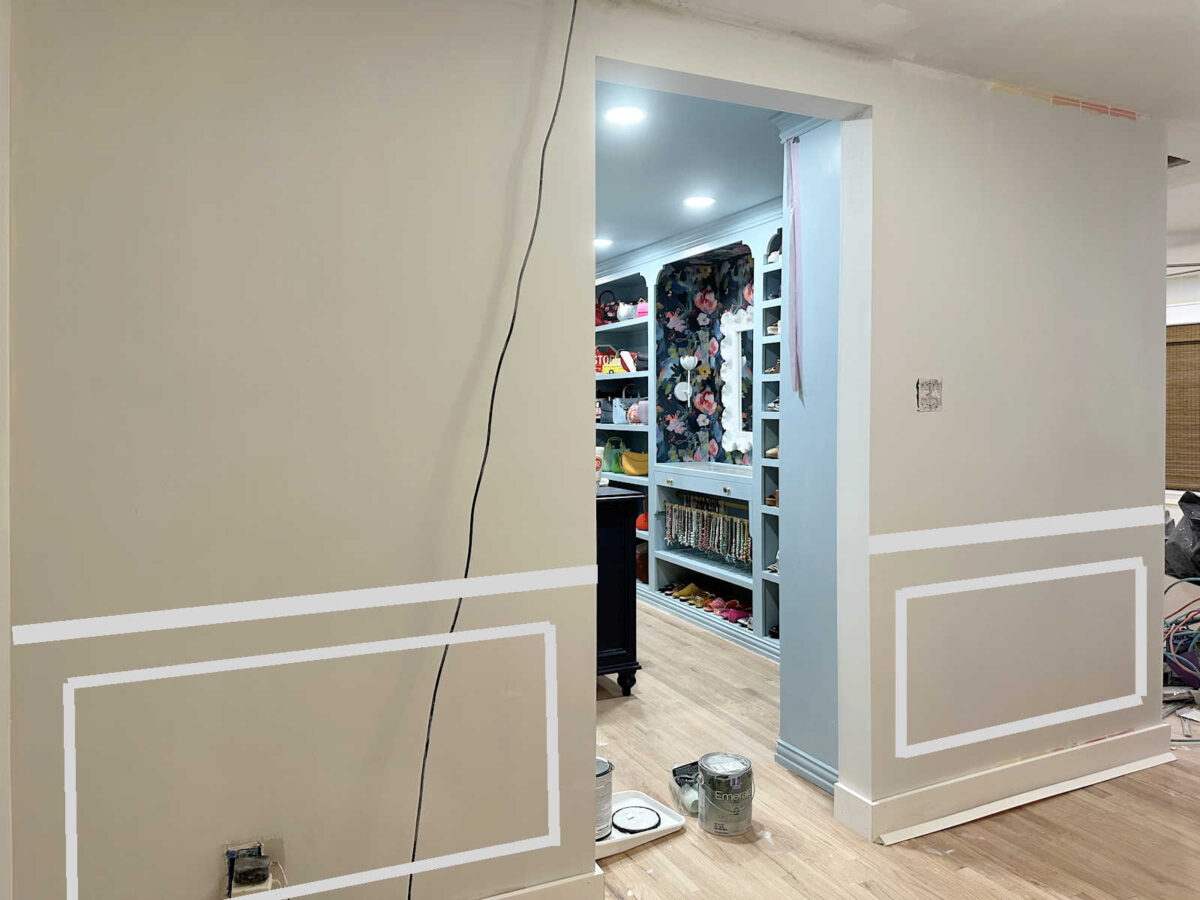
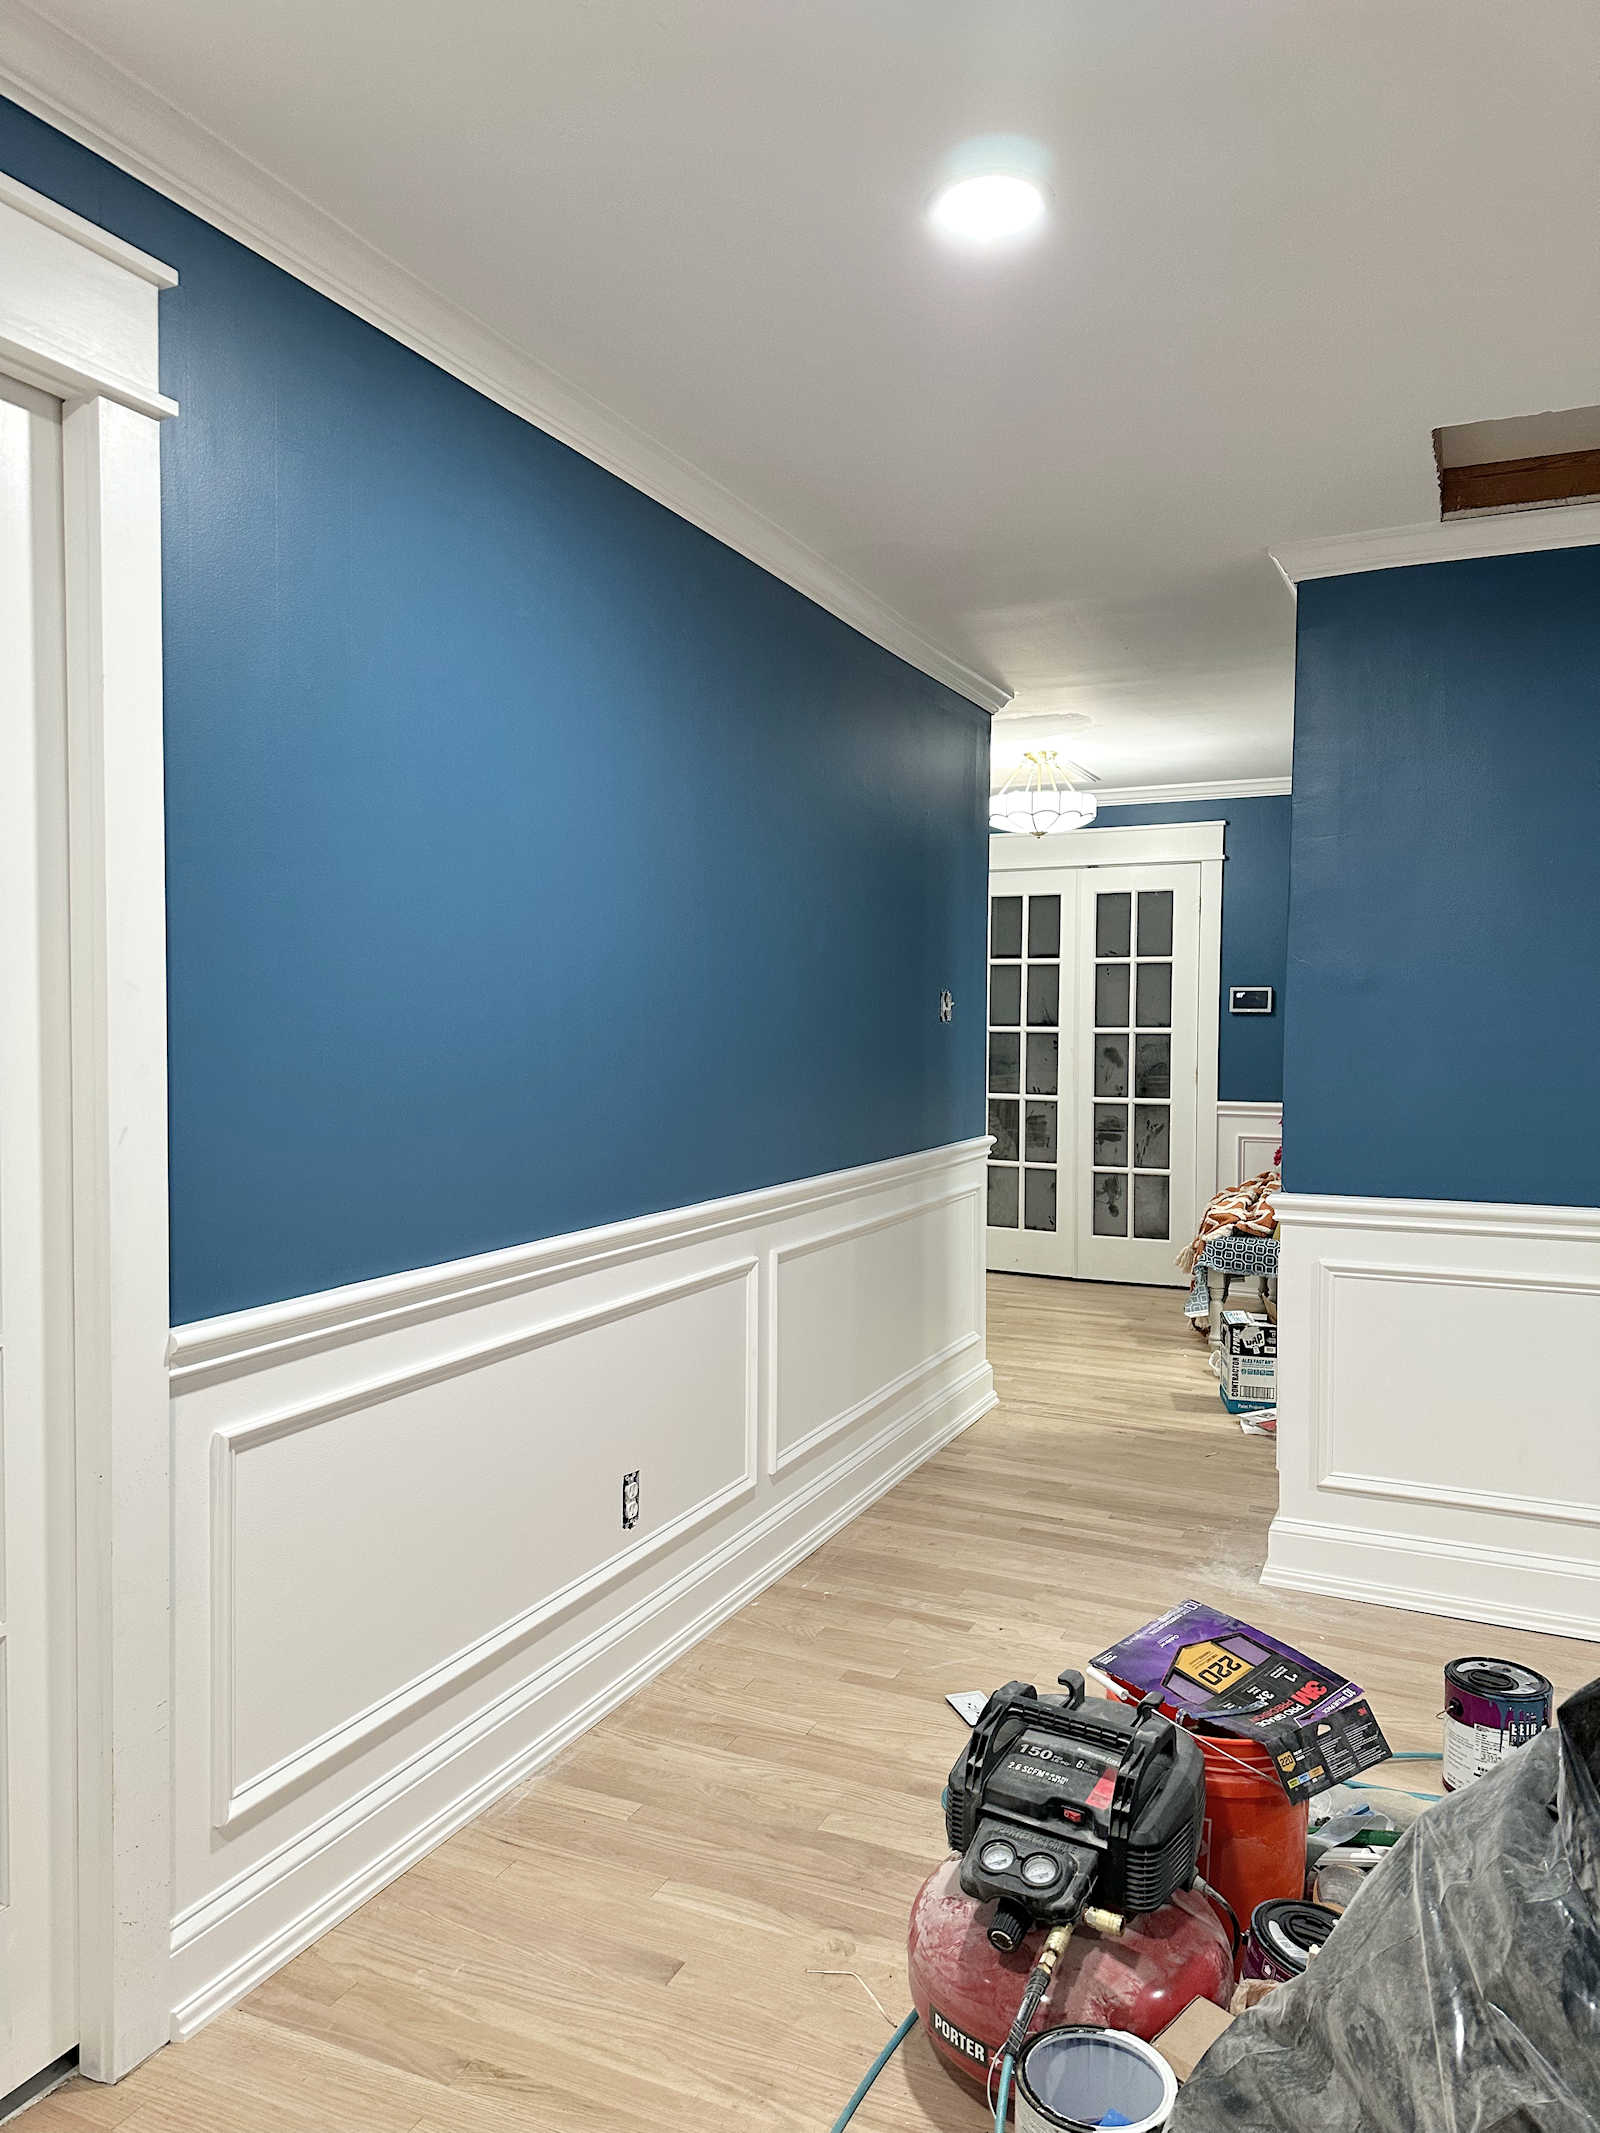
Same goes for the rest of the walls in the foyer. (You can see where I ran out of primer and didn’t get a second coat on.) So these walls…
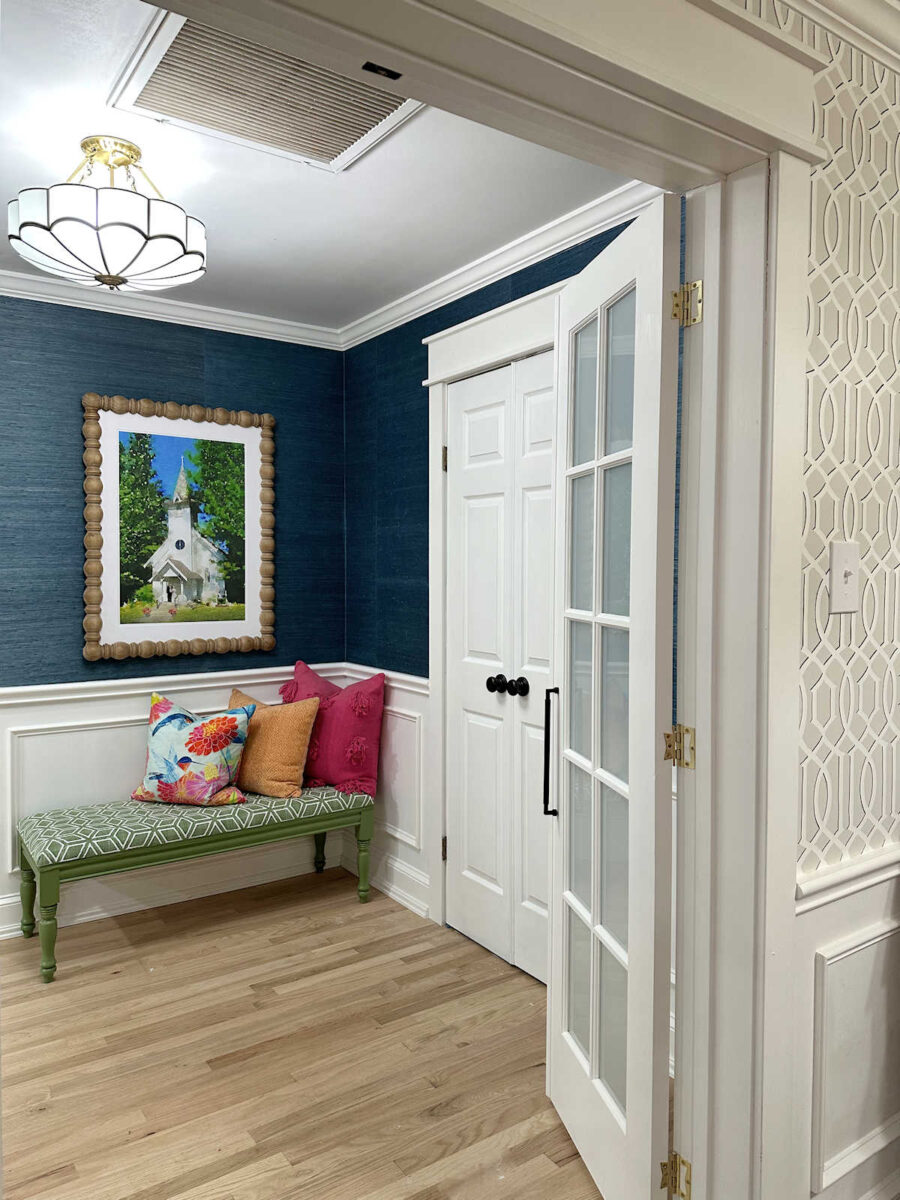
…will look like this, with one rectangle of picture frame molding per wall.
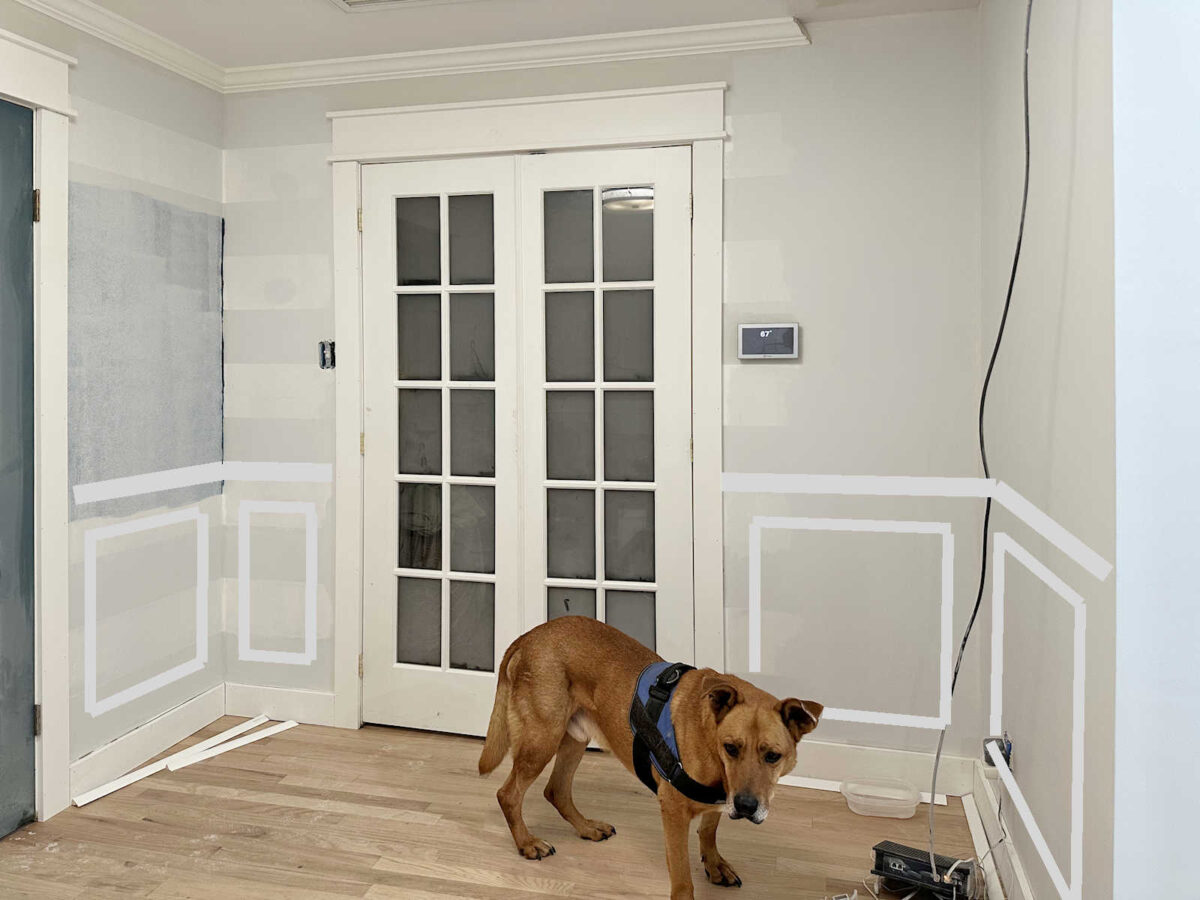
This is the area that I was the most concerned about because that door is definitely not centered on that wall. There’s nothing I can do about that, though, so I have to live with it.
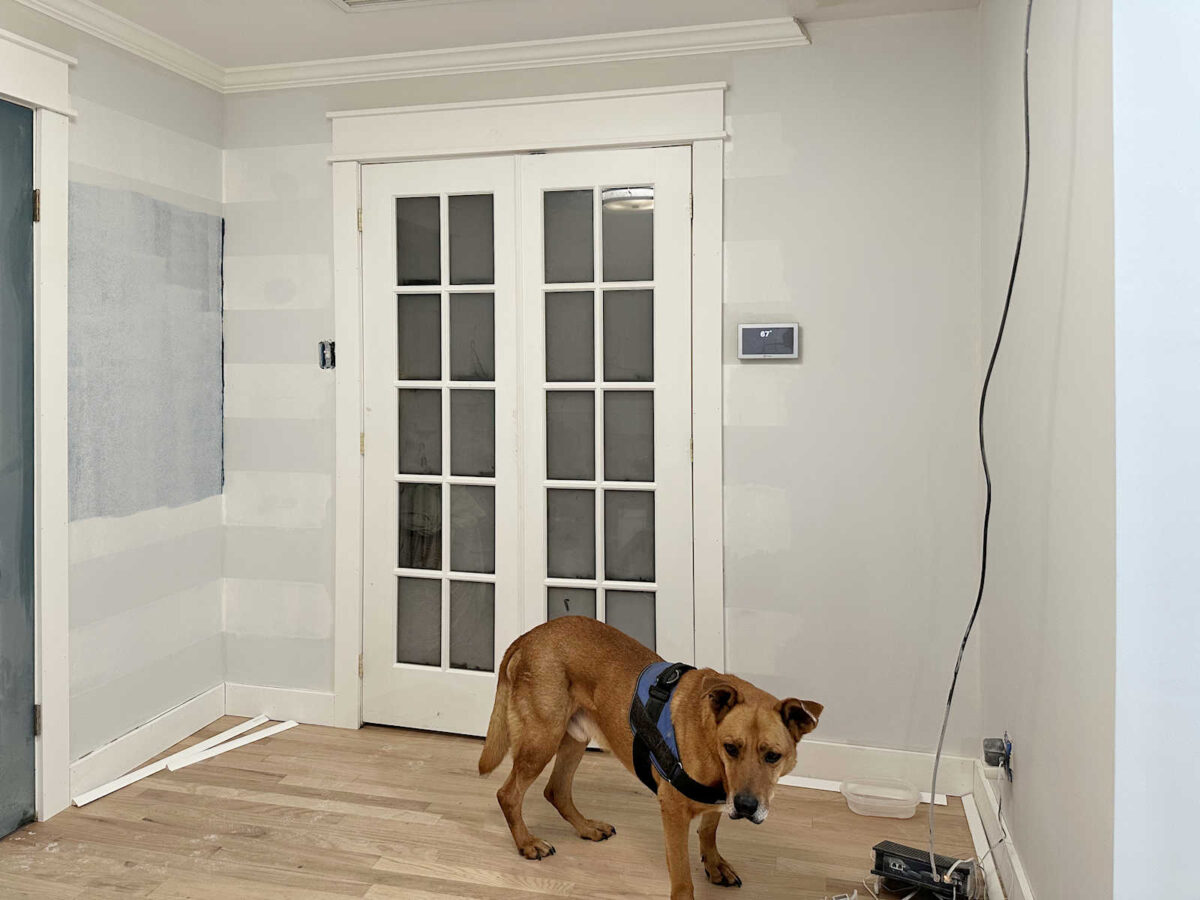
So I’ll just continue the on with the one rectangle per wall plan, even though that leaves me with one really narrow rectangle to the left of the bedroom doors. I think it’ll look great once it’s all finished.
The bedroom walls are a little bit more challenging because I have some pretty wide areas in here. I wasn’t sure whether to keep those to the one rectangle per wall rule or divide those up. (I still need to do some priming with a brush. I only did the parts I could prime with a roller yesterday.)
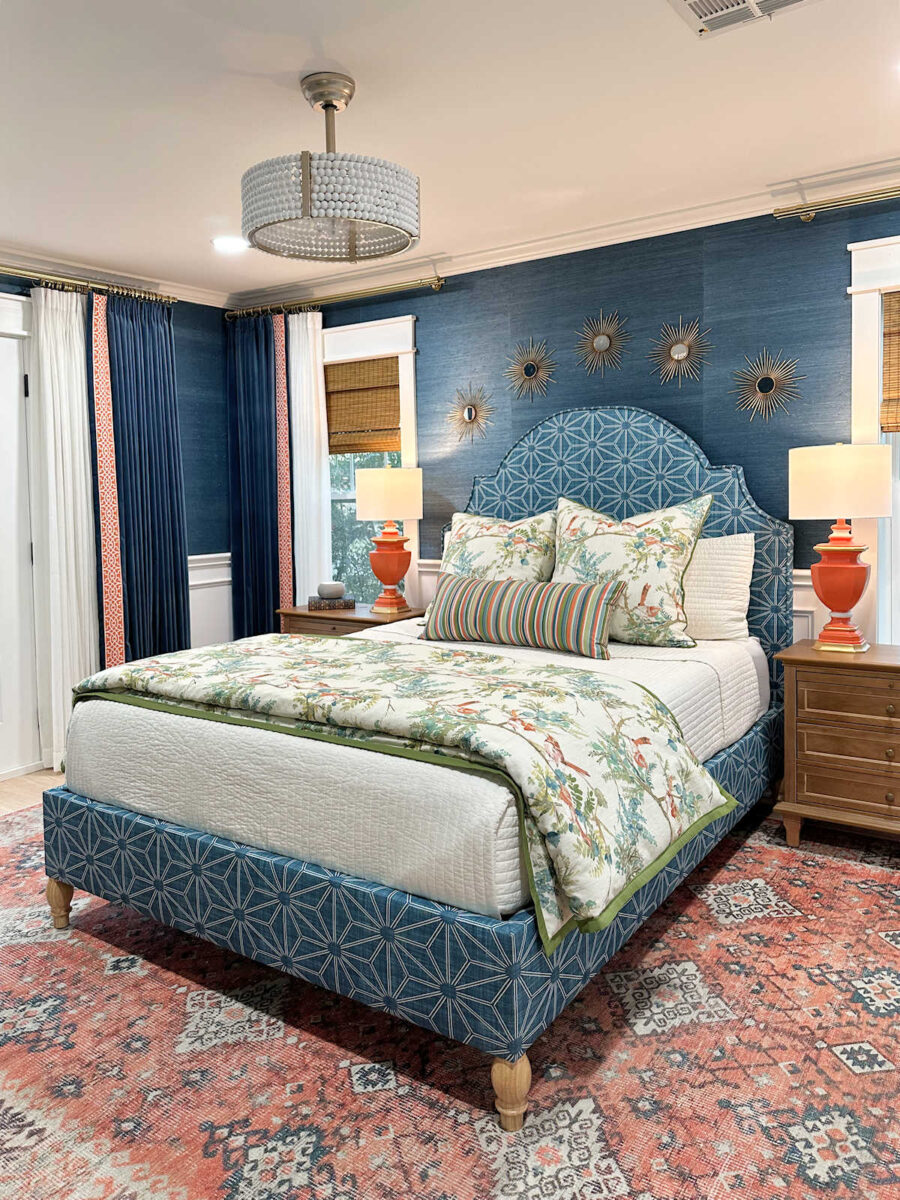
Since most of this will be behind the bed, I decided to go with one rectangle on this wall as well.
And on this wall, I have yet another off-center door to work around.

But again, because I don’t want things getting too busy, so I’m going to keep these to one rectangle as well.

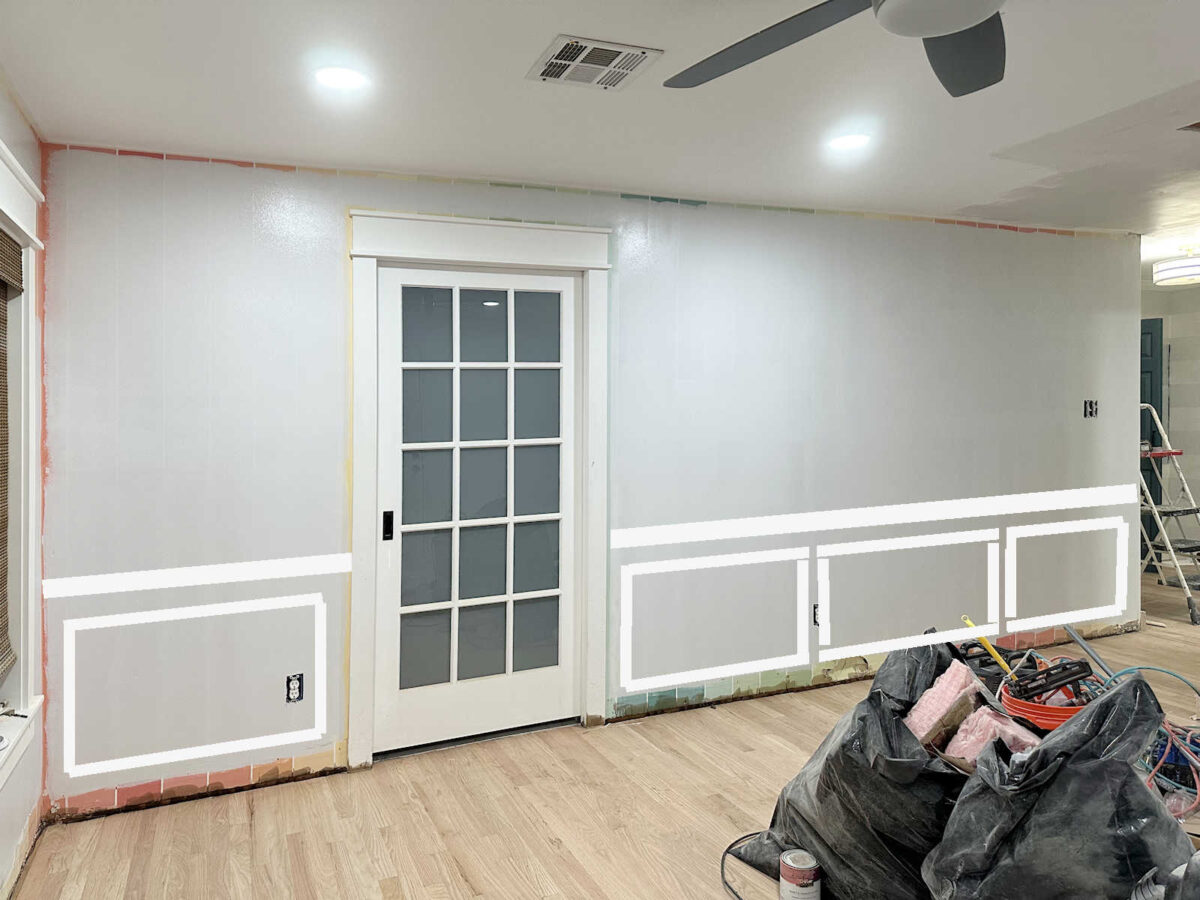
But the other two walls are where I got conflicted. I think that long span of wall to the right of the bathroom door is way too long for one rectangle.
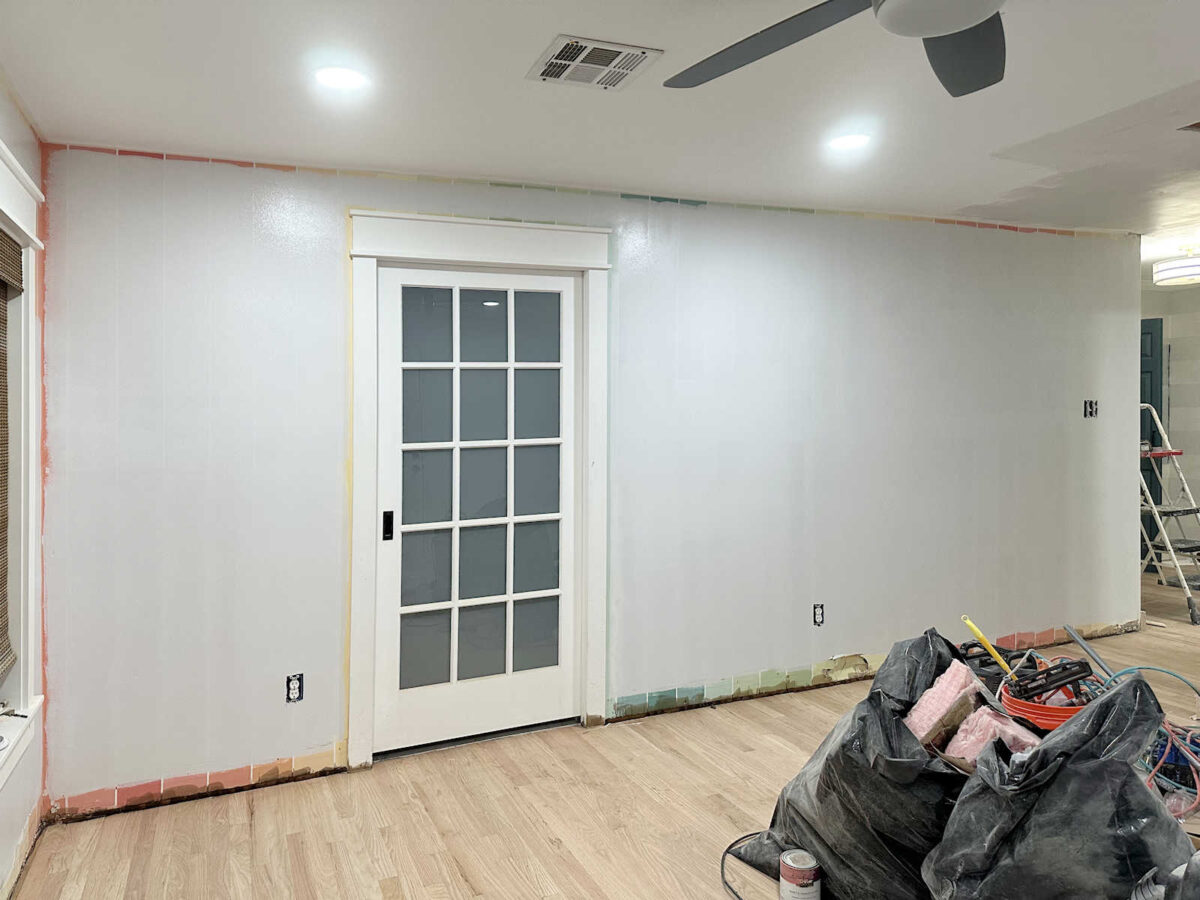
In order to make the rectangles on that wall look somewhat similar, I think I might have to break that long wall up into three rectangles. That’s also the wall that will be the most visible since I don’t have any plans to put furniture against that wall. All of the other walls in the bedroom will have furniture and/or draperies in front of them.
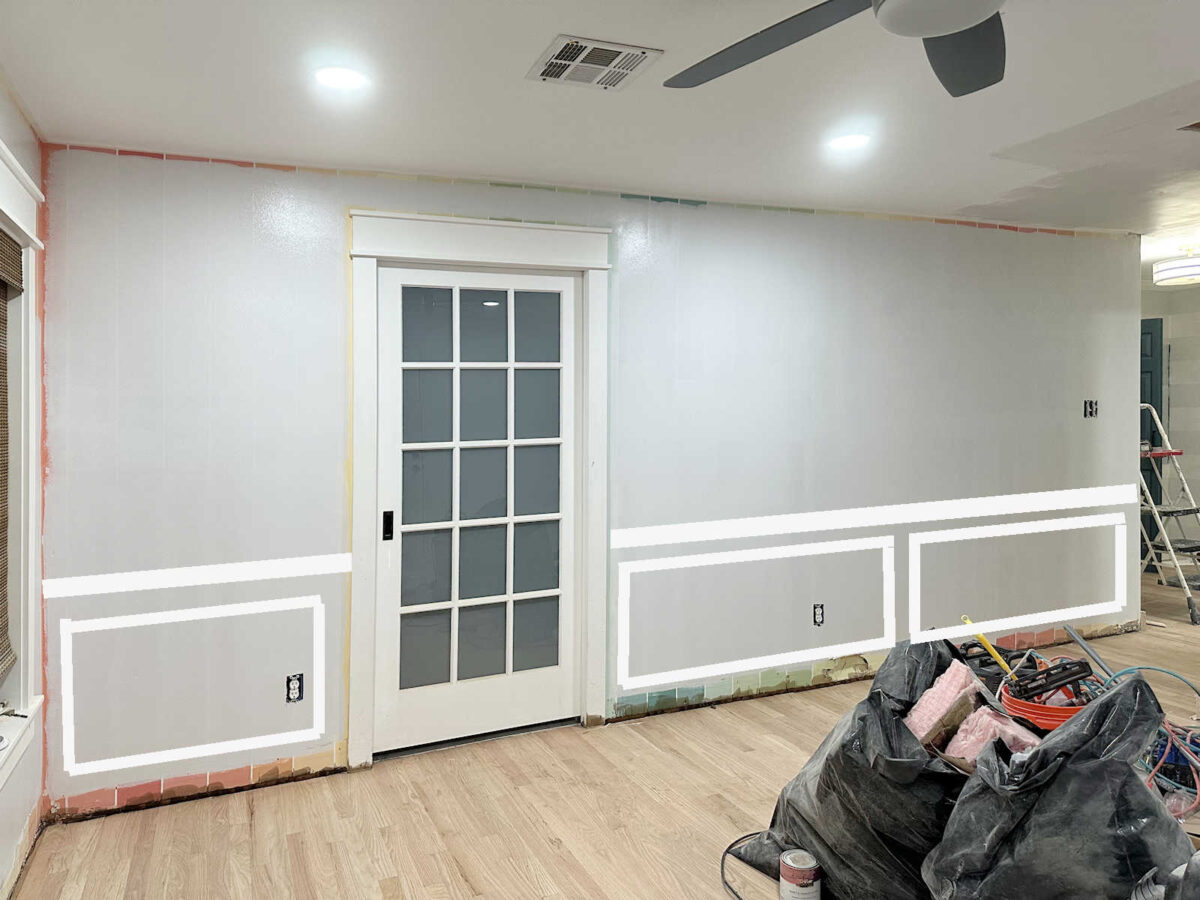
UPDATE: Someone suggested I try two rectangles to the right of the door, and I think I like this better.
And finally, there’s this last wall. This is the one I’m still not sure about. (And that’s where I ran out of primer.)
I tried it two ways. Here’s what it woud look like with three rectangles…

And here’s what it would look like with two rectangles…

The two rectangles would make them more the size of the one on the wall to the right, and the three rectangles would make them more the size of the ones on the wall to the left (unless I go with two rectangles on the wall on the left). I’m not going to get hung up on this decision, though, because this wall will have furniture against it. But I do want it to look nice and look like I put some thought into it. My initial instinct is to go with two. That way, I don’t take a chance on it looking too busy, and I also don’t take a chance on having those outlets in the way of where the trim needs to go.
So things are moving forward, and there is progress. It’s slow progress because of my injured hand, but at least it’s progress! And I’m so glad to finally have those stripes gone! With clean, white walls, I can really envision my wainscoting and wallpaper plan for these areas, and I’m getting really excited to see these walls finished.
More About Our Bedroom Suite Foyer
see all Bedroom Suite
Foyer diy projects
read all Bedroom Suite
Foyer blog posts
More About Our Master Bedroom
see all master
bedroom diy projects

read all master
bedroom blog posts

Addicted 2 Decorating is where I share my DIY and decorating journey as I remodel and decorate the 1948 fixer upper that my husband, Matt, and I bought in 2013. Matt has M.S. and is unable to do physical work, so I do the majority of the work on the house by myself. You can learn more about me here.
This IS exciting! I love it. I often get inspiration from sets on TV shows or movies. Im excited to see this completed. It’s looking good!
I really like the look of the size matching the width of the walls, rather than a uniform size throughout! The two one the wall with the electrical panel seems the way to go, especially since there will be furniture along that wall. I hope your hand gets better soon!
I agree with the two on that wall, especially since it’s adjacent to the wall with the door to the outside.
That primer makes so much difference! So fresh and bright, begging for you to have a go at it.
Take care of your hand, don’t overdo it!
I think two panels on this wall looks better and less crowded or busy.
I love your plan for the room and it is going to be absolutely beautiful!
I love your simplified plan. As far as the small space by the door, you could either just skip it, or I’ve also seen where the rectangle to the left is just continued around the corner.
This was my thought too. I think the two rectangles in small areas may make it look “choppy”. I like the idea of just making that corner one rectangle that extends from one short wall around the corner to the other short wall. I really like the idea of fewer rectangles on all of the walls. It’s going to look great!
Absolutely agree. My first thought was just to take the molding from the skinny wall to the left of the door and continue onto the next small wall space. Glad others agree.
For error reduction and less math oops: Tack on the door trim & install electrical plates – you can putty a hole later and uninstall plates easily. Then everything is in place nothing to remember to adjust, before you do the spacing. I recommend taping out the rectangles on tricky and visible walls vs photo editing to verify if it looks funny scale-wise from real life angles. Especially to see if there’s a nummy look foyer from bed and bedroom from foyer.
You’ve done paneling this more than I. I prefer two side by side on long sections why… easier math, just divide the distance in half vs 3rds. If three, choose an easy width for the middle for your symmetry wants. Then divide the leftover in half. Do take time to verify offset distance you use for spacing the vertical pieces parallel to the wall/trim. Try with nominal lumber widths -> easy spacer.
Such a dilemma! I think the rectangles that are smaller look better. I would do three on the wall with the circuit box and possibly two to the left of the door to the outside. I wouldn’t be opposed to the longer rectangle behind the headboard where it would mostly be hidden. I love picture frame mouldings!
Dear Kristi,
Even with your injury, you are getting there! I’d like to see what two rectangles look like on the bathroom wall going towards the foyer. Three there seems a bit much to my eye, with the larger ones you have in the bedroom portion. Also, where will your dresser sit on the wall with the breaker box?
I think this area will come together fairly quickly and soon you’ll be enjoying your amazing master suite.
Enjoy your day!
YHWH Bless You : )
It looks amazing. Very visually appealing. About your wrist. I have broken my left wrist once and my right wrist twice in the last 15 years. I had to teach myself not to brace with my hand. Just recently my new dog pulled my over and I managed to fall on my side. It take a split second decision, but you can make sure not to do it again.
Perfect solution, but I would do 2 panels on the bathroom AND last wall—3 is just too busy to my eye.
Hi Kristi! I definitely prefer 2 on the wall right of the bathroom door, and also 2 on the breaker box wall. It is less busy, the size of the boxes is more in line with the rest of the room, and it also prevents issues with the plugs. It’s going to look so good!
You should add rectangles under the windows on the wall behind your bed. It looks weird to just have the one in the middle. I’ve always done low, long rectangles underneath windows, the same width as the trim around the windows. Then space the middle one off that.
Two rectangles on the other wall is my vote!
I vote 2 rectangles. I think it would look more busy with 3 rectangles.
Wow – what a difference a little paint makes!
Thank You…Thank You…Thank You!!! I have been struggling with the exact same problem and while I was hoping to do the judge’s panneling, I finally got my head wrapped around the picture frame molding. Then came the hard part, the math to make it work, YOU ARE A GENIUS!!! I can’t thank you enough. I figured I was going to be breaking some laws of the universe, but instead I am making peace with the universe and all will be right with my world. When we moved all those times with the military, I would sometimes stencil a wall or put in a border, and no house is plumb and true, so I would fudge the stencil so long as it was level with itself you didn’t notice the wonky wall it was on. Same principle, whatever size the space is, the wainscotting will be perfect and no one will notice it and it will not be to busy to draw the eye away from the beauty of the craftsmenship. I’ll say it again, you are a genius!
Cuddles to Cooper!
Cheers to you and Matt!
Here is a website primarily for those of us who are math-impaired.
https://www.mathsisfun.com/greatest-common-factor-tool.html
Also, consider where the furniture is going to be and how much of the molding design will be seen. Maybe use paper, cut to size of furniture, against the wall see how different sizes of rectangles will be seen when the room is loaded in. If you’re not planning to move furniture around, like the bed, you wouldn’t need decorative trim behind the headboard except where grasscloth and paint meet maybe just to finish that edge.
One other thought:
It might look “busy” in the mockup because the trim is a different white than the primed walls. But when the entire thing is the same shade of white, the trim will blend in more. So keep that in mind when evaluating whether it looks too busy. Generally, I think the places you were deciding between 2 or 3 would look better with 3 when you think about it all white. But 2 would also be fine.
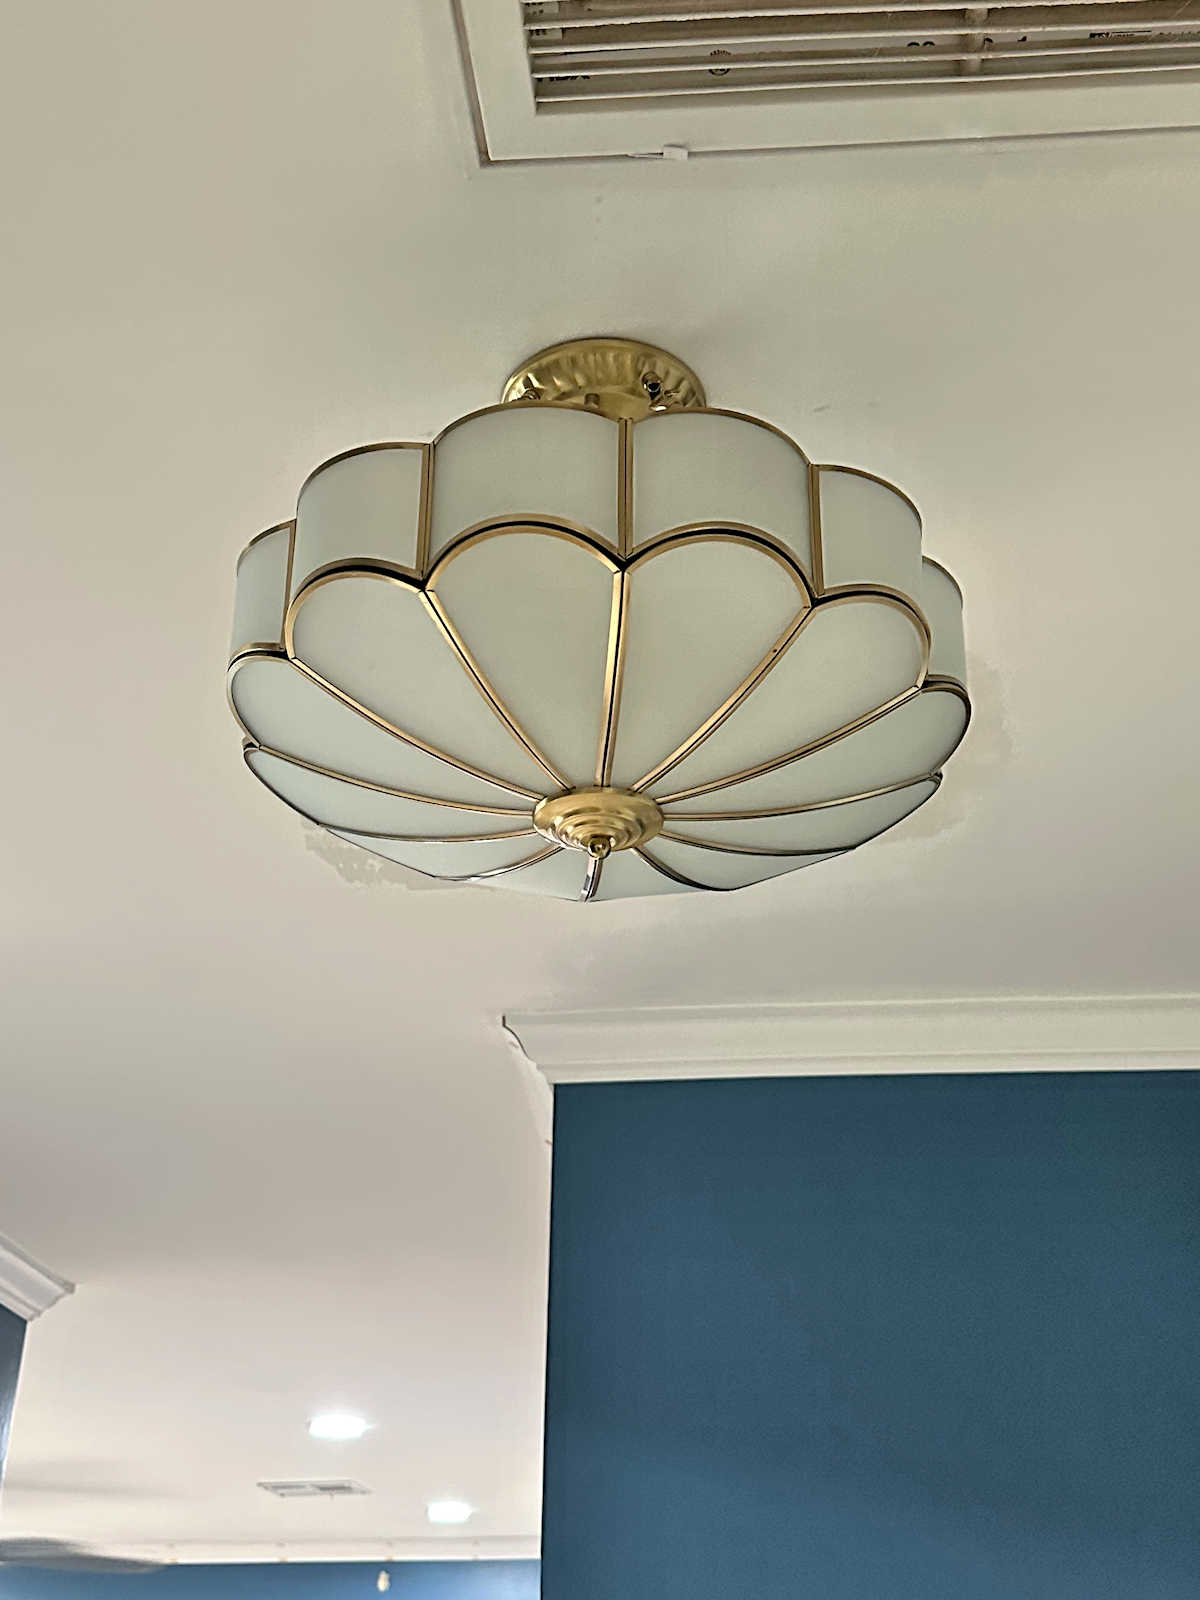
Different length frames, genius! Also, on the light in the foyer, if you really wanted a chandelier, you could leave the wiring where it is and add a longer wire to the chandelier and add a decorative hook in the center of the ceiling and hang it there. We did this in our 1920’s house and it looked great! Well done on the room progress with a bung hand!
I love the less busy, simpler wainscotting. I’m into the less is more design process lately. Sometimes I feel my house closing in on me, and I realize that as I bring a new thing in, I don’t take an old thing out, and one day it hits me as too much! Time to edit, before winter, when I really am closed in sometimes! I sure hop your hand isn’t broken!
I love the big rectangles!