Building My Closet Cabinets – Part 1
I have finally started building my closet cabinets! I only got two units built yesterday because I ran into a few problems along the way. They weren’t roadblocks, just speed bumps.
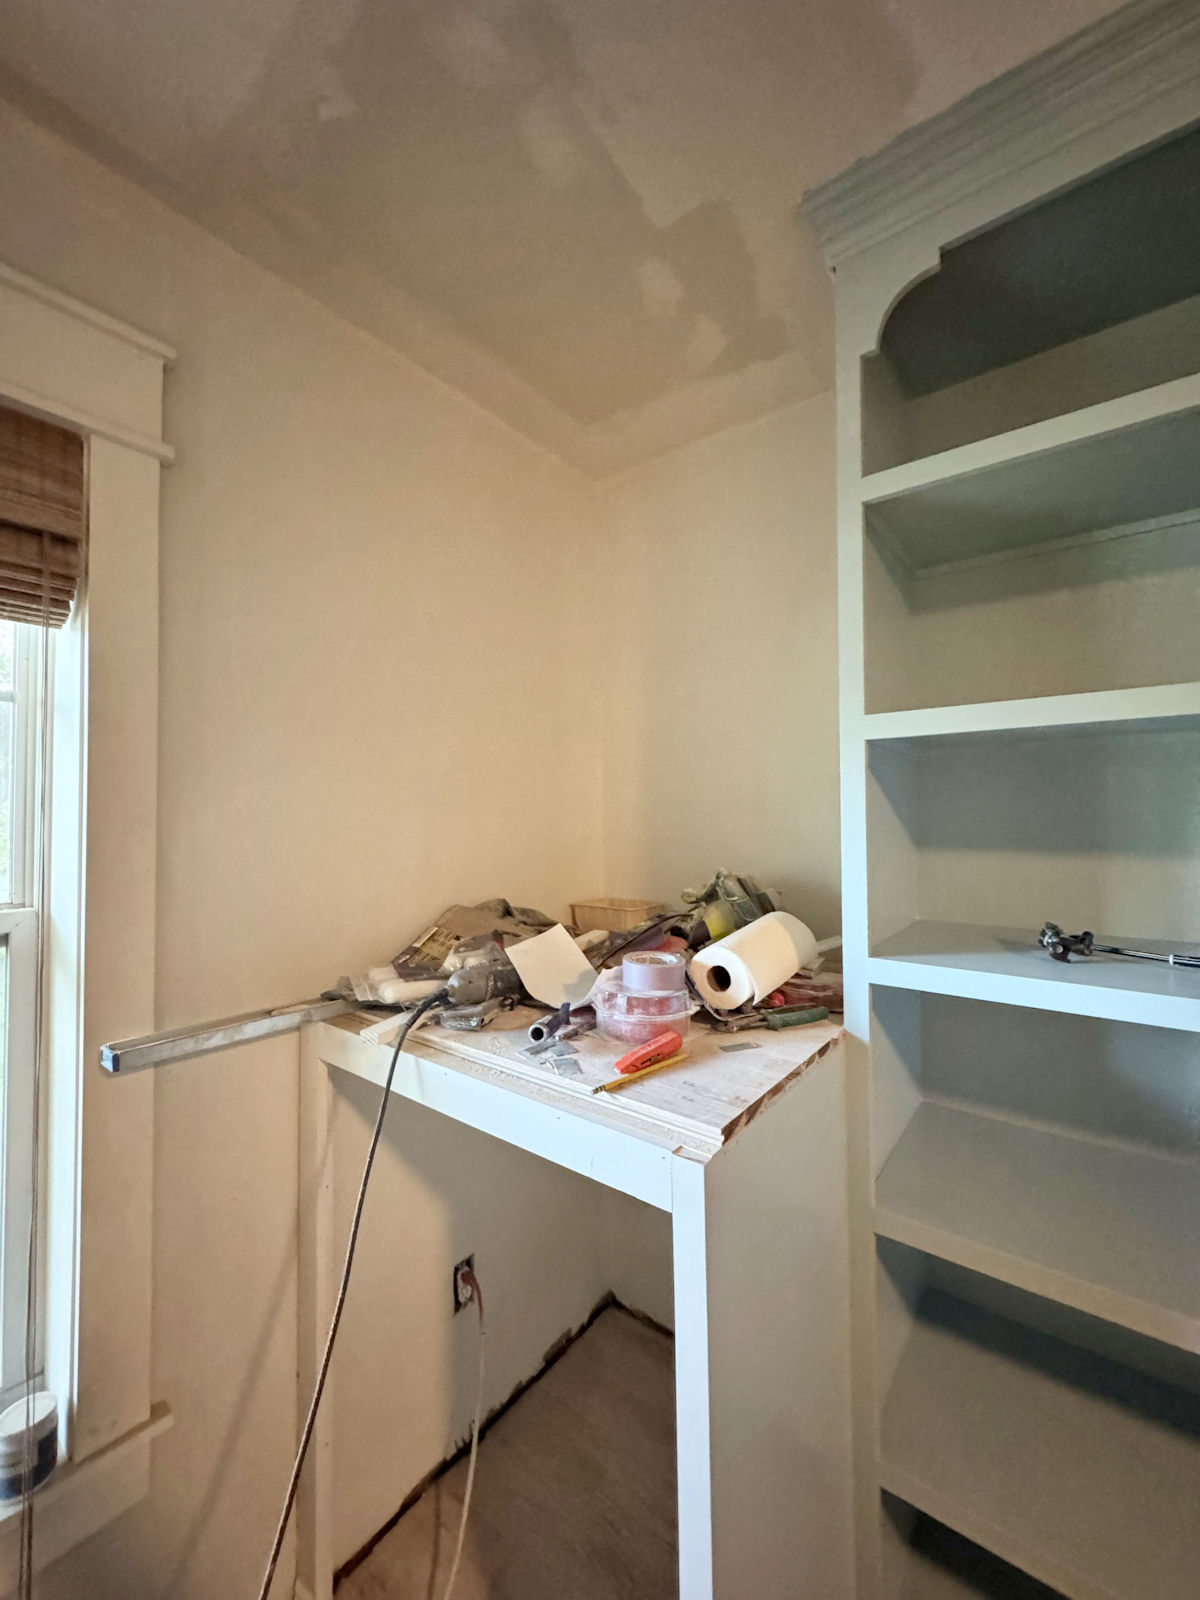
This is only one part of what will be a very long series of posts on my biggest built yet — my walk-in closet and laundry combination. If you missed the previous post, you can see it here: Closet Progress – Prepping All The Pieces For My Biggest Build Yet
First, I realized that I had made a miscalculation when cutting all of the backer boards for each unit. (Ugh, I’m going to blame that on pushing through with my work when I wasn’t feeling well over the weekend.) And then my 16-guage nail gun stopped working, so I had to make a trip to Home Depot and buy another nail gun. Also, some warped plywood and unlevel floors gave me challenges that I had to work through.
But at least I made some progress! And now that I have my system worked out, I’m hoping that the rest will go faster. So let me show you how I built my closet cabinet units.
First, I used my 16-guage nail gun with 1.5-inch nails and nailed the pieces together to form the sides, top, and bottom of the unit. To start, I had to find something to lean the first long side against so that I could get them nailed together.
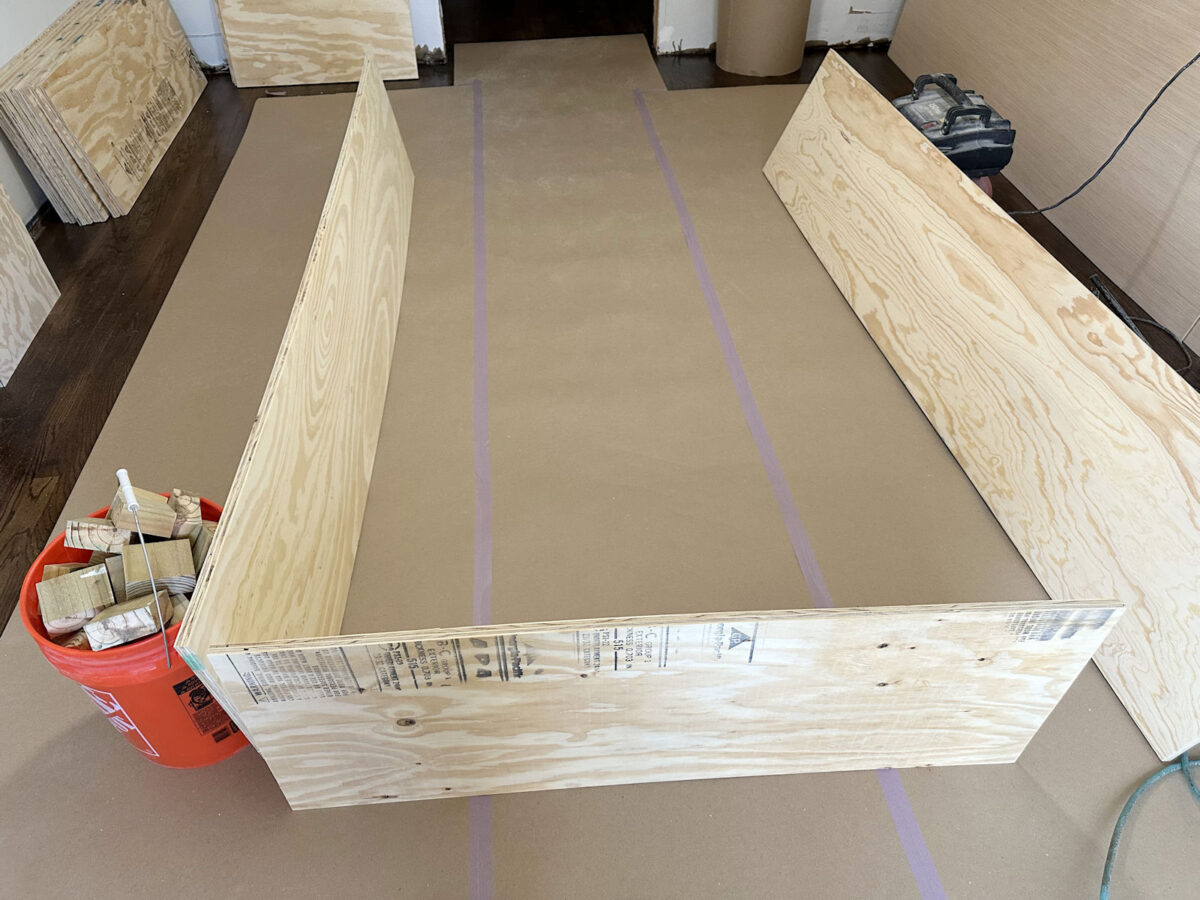
Once I had the first two pieces nailed together, the other two were easier. I put them together so that the shorter top and bottom pieces of the unit were nailed into the edges of the longer side pieces.

And it was at this point that I realized my mistake with the backer boards. I had intended to just place the 1/4-inch plywood on the back of the frame and nail it into place. But I realized very quickly that I had cut the backer board to the length of the long side pieces, and it needed to be the length of the side pieces PLUS 1.5 inches to cover the edges of the top and bottom pieces. Ugh. I didn’t want to buy all new 1/4-inch plywood at $28 a sheet for eight units, so I had to modify my plan on the fly.
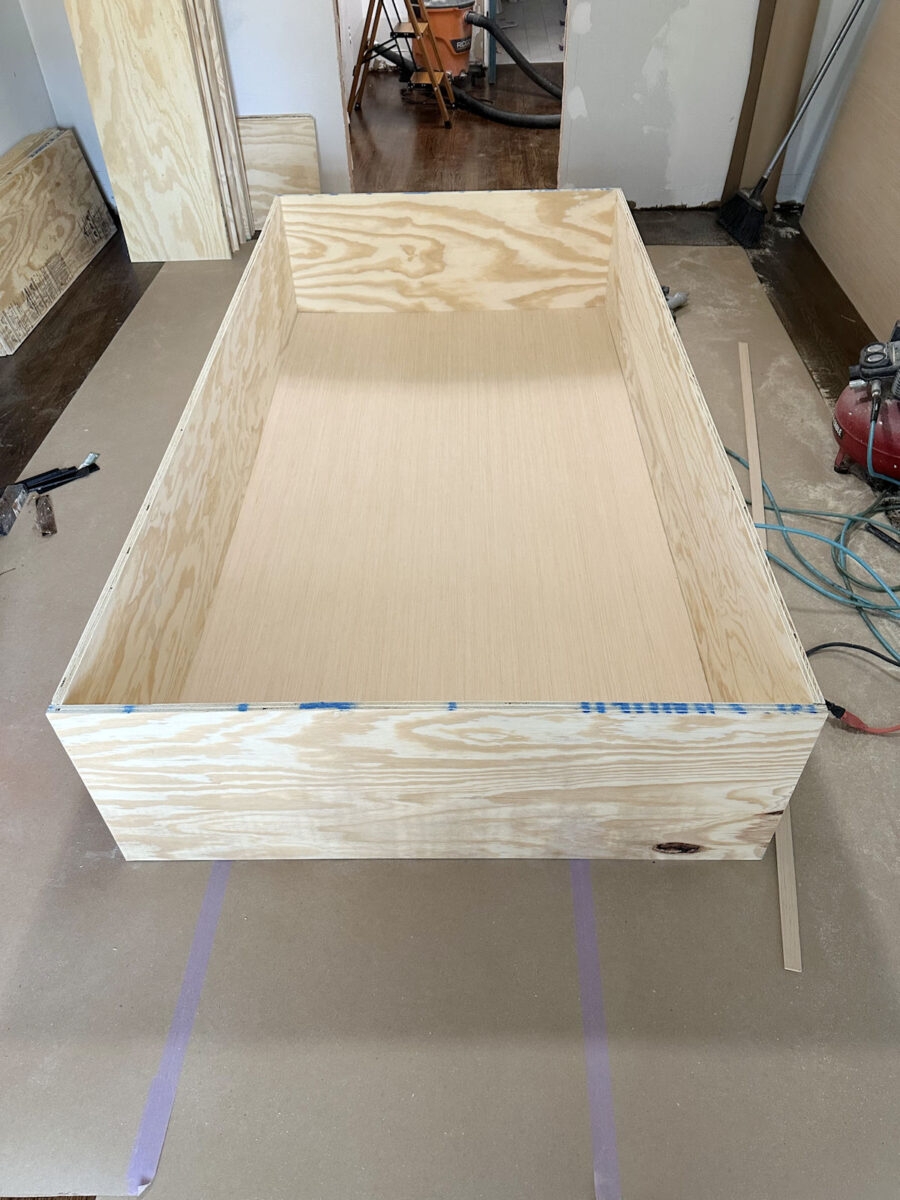
Since I couldn’t add plywood to the length, my solution had to involve cutting plywood off of the width so that the backer board would fit nested completely inside the outer frame. But then I needed something to nail the backer board to. So I used my table saw and ripped down some extra 1″ lumber that I had on hand to 3/4-inch wide, and I nailed those strips around the bottom (which is actually the back side of the unit) into the frame pieces using 1.25-inch 16-gauge nails.

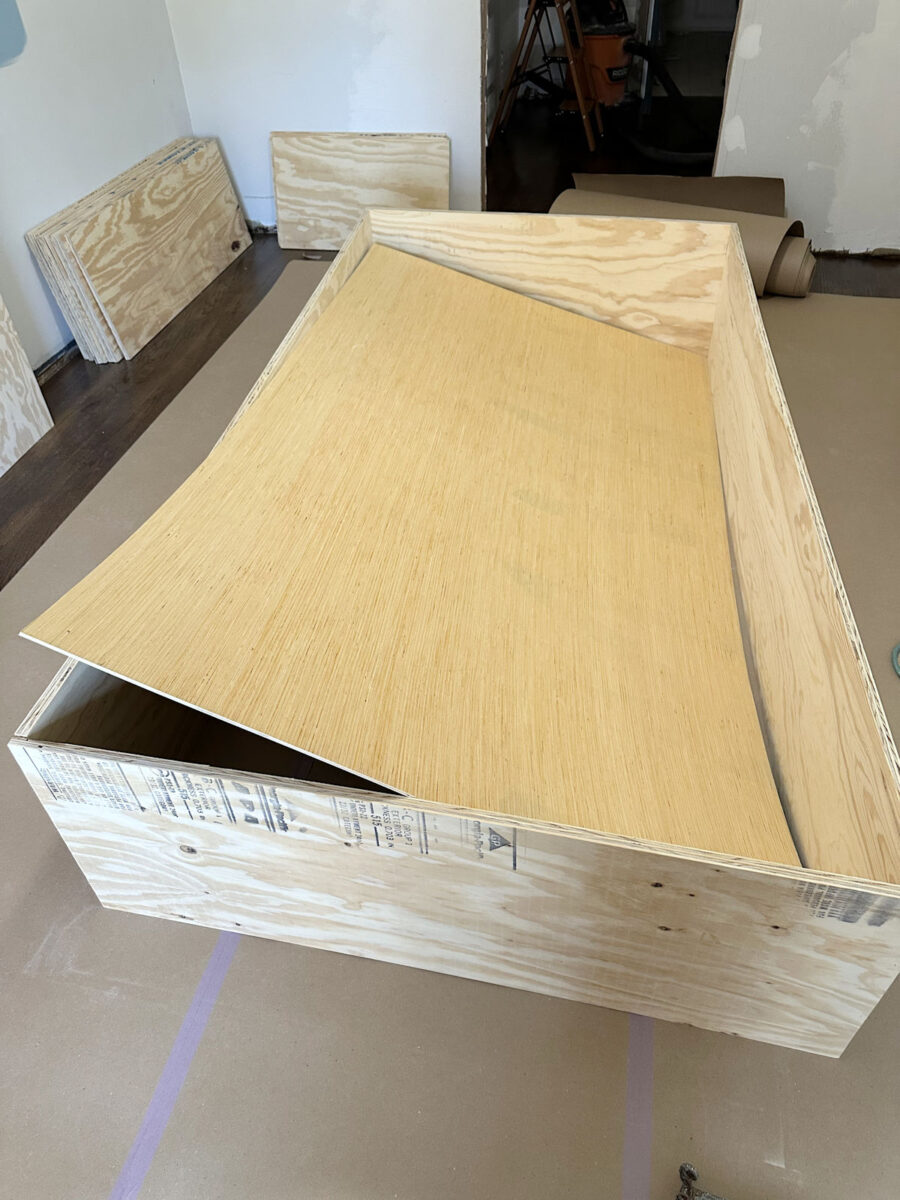
And then I used my circular saw with a guide to cut off the excess 1.5-inch strip from the width of the backer board, and I placed the backer board on top of the strips I had just attached.
The long sides of the plywood frame were a little bit bowed, so before nailing the backer board to the strips, I cut a spacer from some scrap lumber to the width of the unit and placed it in the middle to push the bowed pieces apart to the correct width. And then I nailed the 1/4-inch plywood backer board into place using 3/4-inch 18-guage nails.
After the backer board was in place and I had checked the corners to be sure they were square and nailed the backer board to the strips, I then went back and secured the side pieces (which had only been attached to each other with a few 16-gauge nails to this point) to each other using Spax #8 1.5-inch cabinet screws.
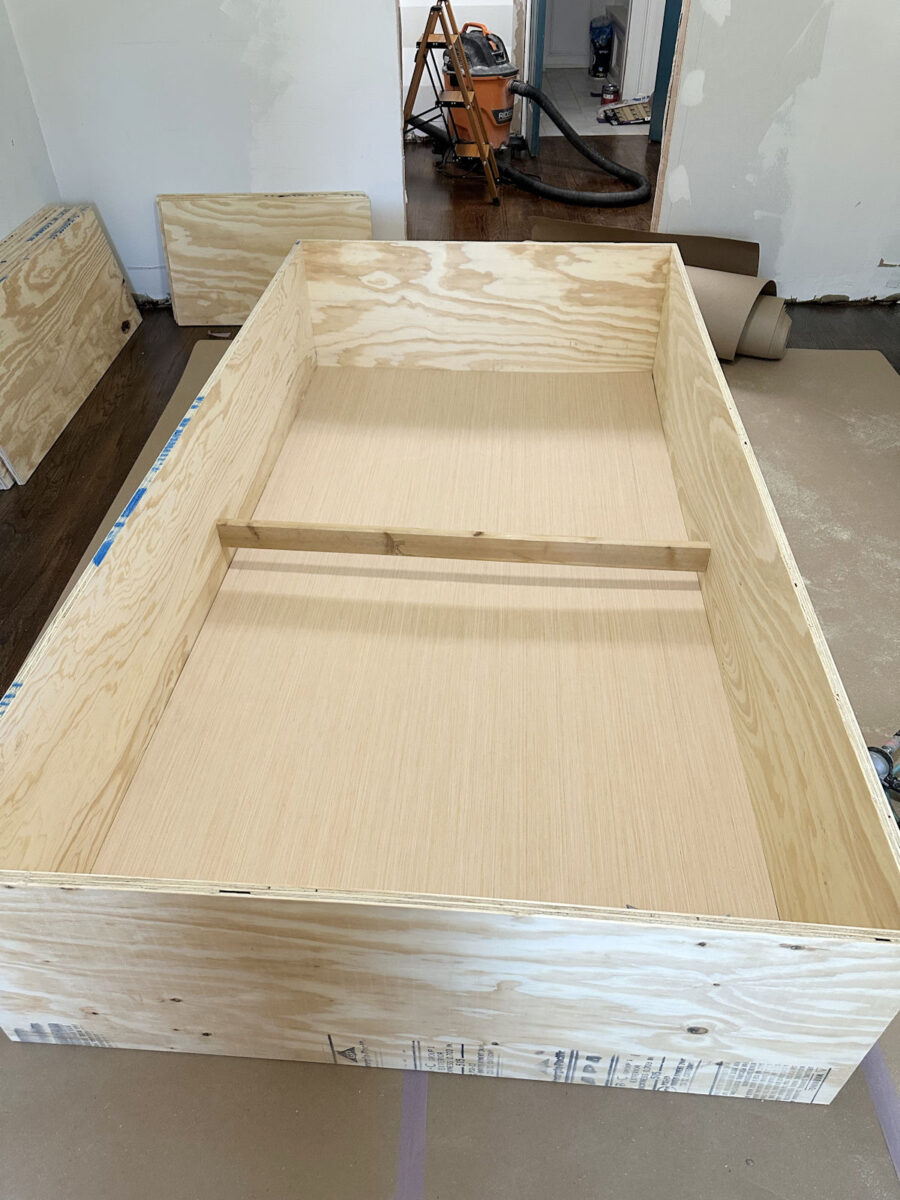
Next, I sat the unit upright and nailed a spacer board into place in the middle of the back to give a little more stability to the 1/4-inch plywood backer board. I nailed this into place using 2.5-inch 16-gauge nails through the sides of the unit and into the ends of that board. And then from the other side, I tacked the backer board to that strip of wood using 3/4-inch 18-gauge nails.

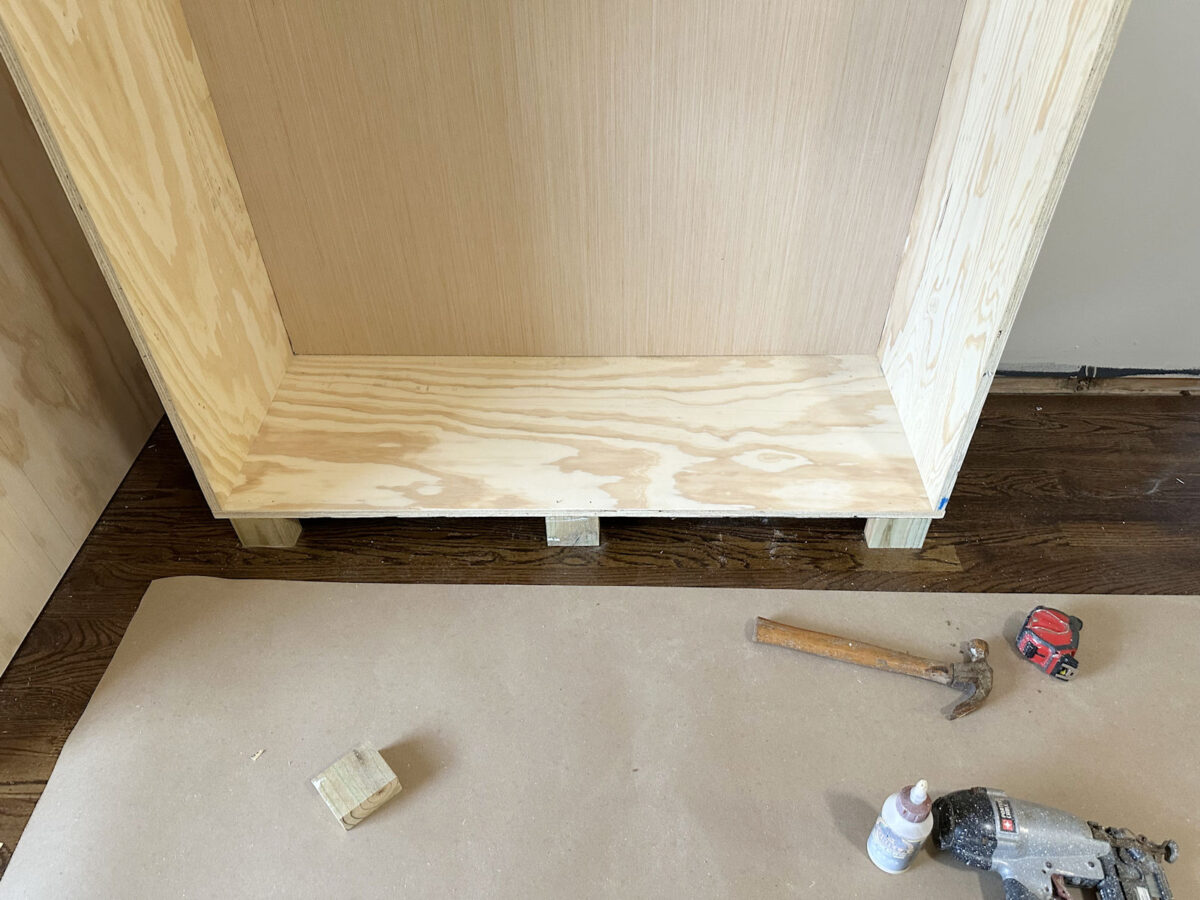
I very carefully slid the unit into place against the wall, trying not to rip the paper or scratch the floor. As it turns out, it really wasn’t as heavy as I expected it to be. And that was a good thing, because the next step was to tip the unit over and attach the feet. This is the only part of the whole thing that I attached using wood glue, and I used five feet per unit.
The feet are just 2×4’s that I cut to 2.75″ long using my miter saw. So I placed wood glue on the top of two feet, tipped the unit up and held it into place with one hand so that it was a few inches off the floor, and used my other hand to slide the feet into place, one on front and one on back. And then I went to the other side, put glue on two feet, lifted that side up a few inches with one hand, and slid the feet into place with my other hand. And finally, I placed a fifth one in the front center of the cabinet. I made sure the front feet were lined up perfectly with the front edge of the cabinet because these feet are what I’ll nail the bottom trim to when I start trimming out these units. Once all five feet were under the unit, I used my hammer to tap them into place exactly where I wanted them, and then I nailed them into place using 2.5-inch 16-gauge nails through the bottom piece of the unit and into the edges of the 2×4 feet.
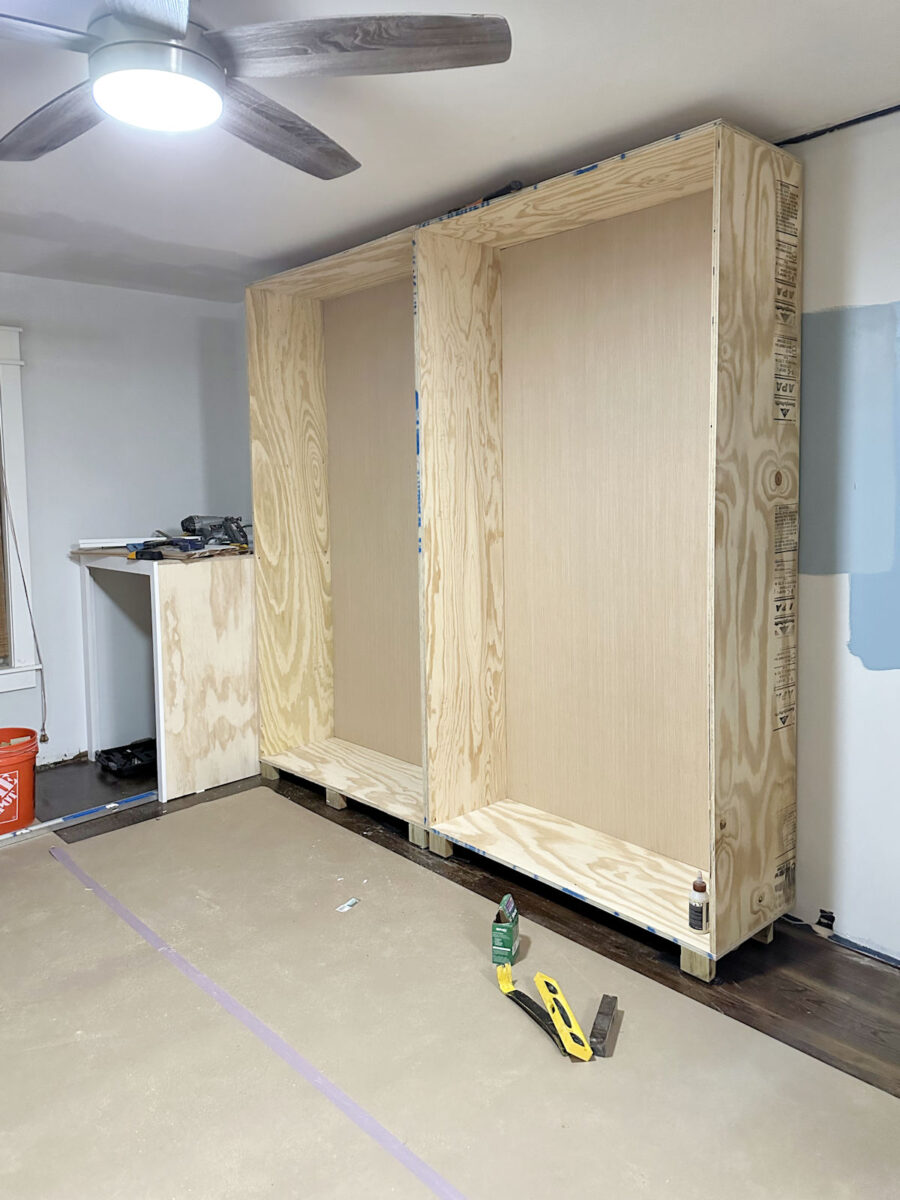
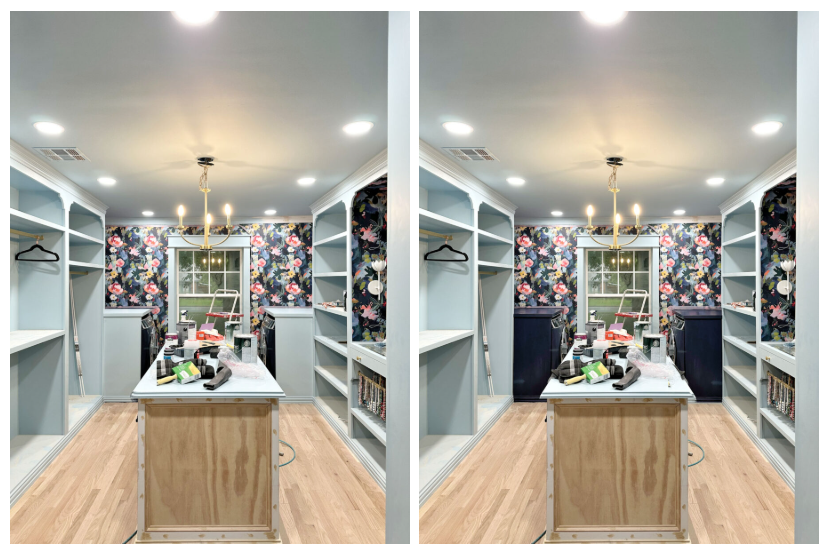
So here’s what the basic build looked like when it was finished.
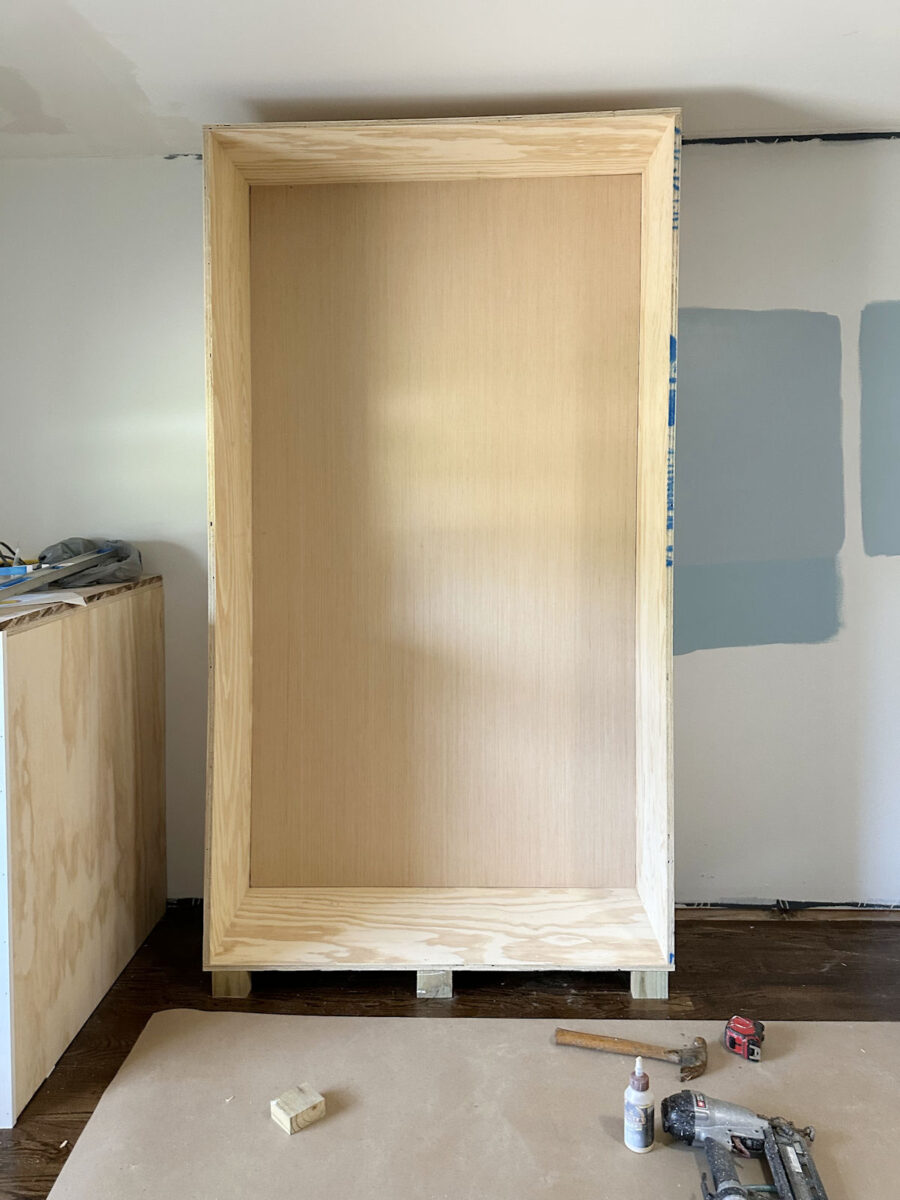
You can see that the long sides are still a little bit bowed, but I wasn’t worried about it. Once everything was in place and all the units were attached, I knew that would be taken care of. So I scooted the unit up against the washer cabinet and screwed those to cabinets together using Spax #8 1.5-inch cabinet screws. I made sure that I got the big unit as plumb as possible before screwing it to the washer cabinet. And since the washer cabinet was square, plumb, and level, screwing those two pieces together took the bow out of the left side piece of the tall unit.

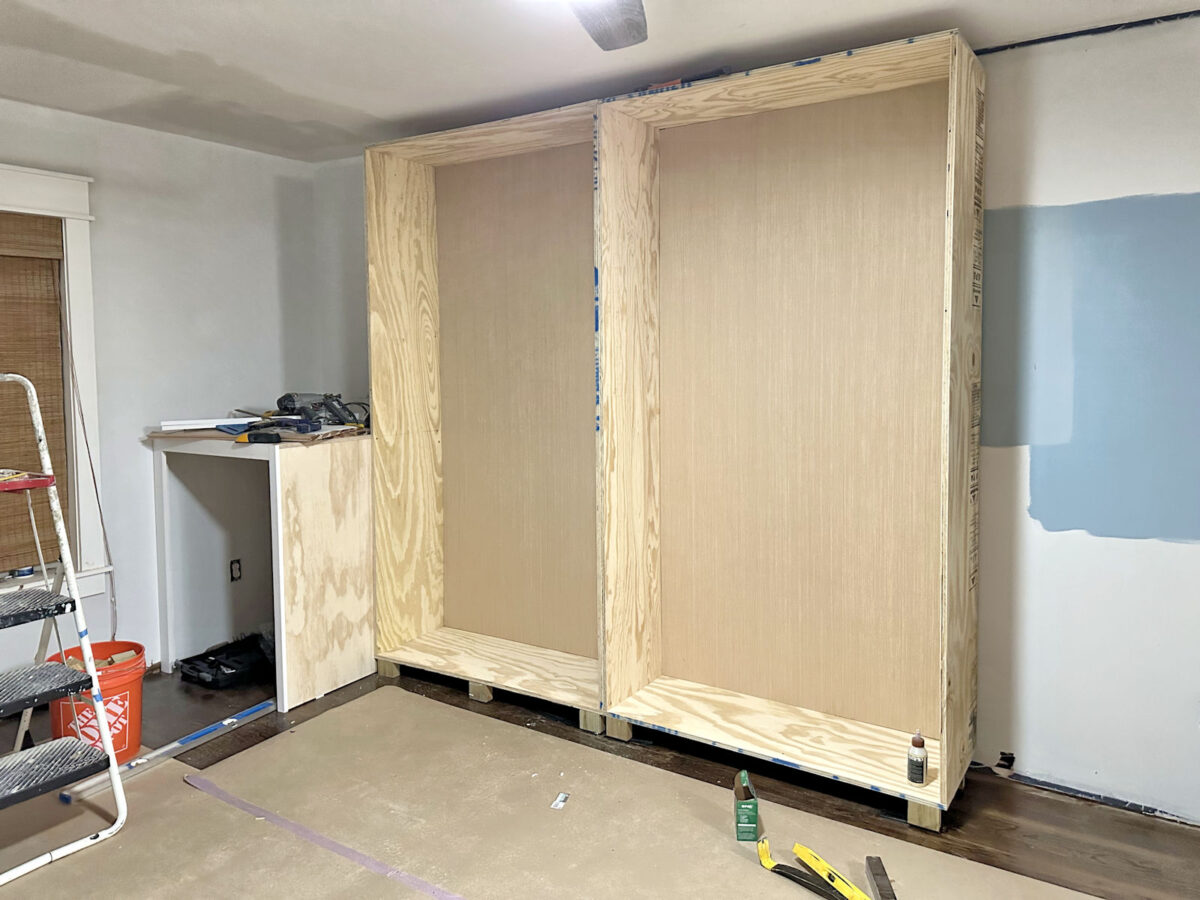
I built the second unit the exact same way, and then when I pushed it next to the first unit, the two weren’t quite meeting up like they should. So this took some work to get these two units to fit together like they should. First, I had to shim the feet on the second unit. And then it took quite a bit of pushing and pulling and wrestling with these units to get them to line up.
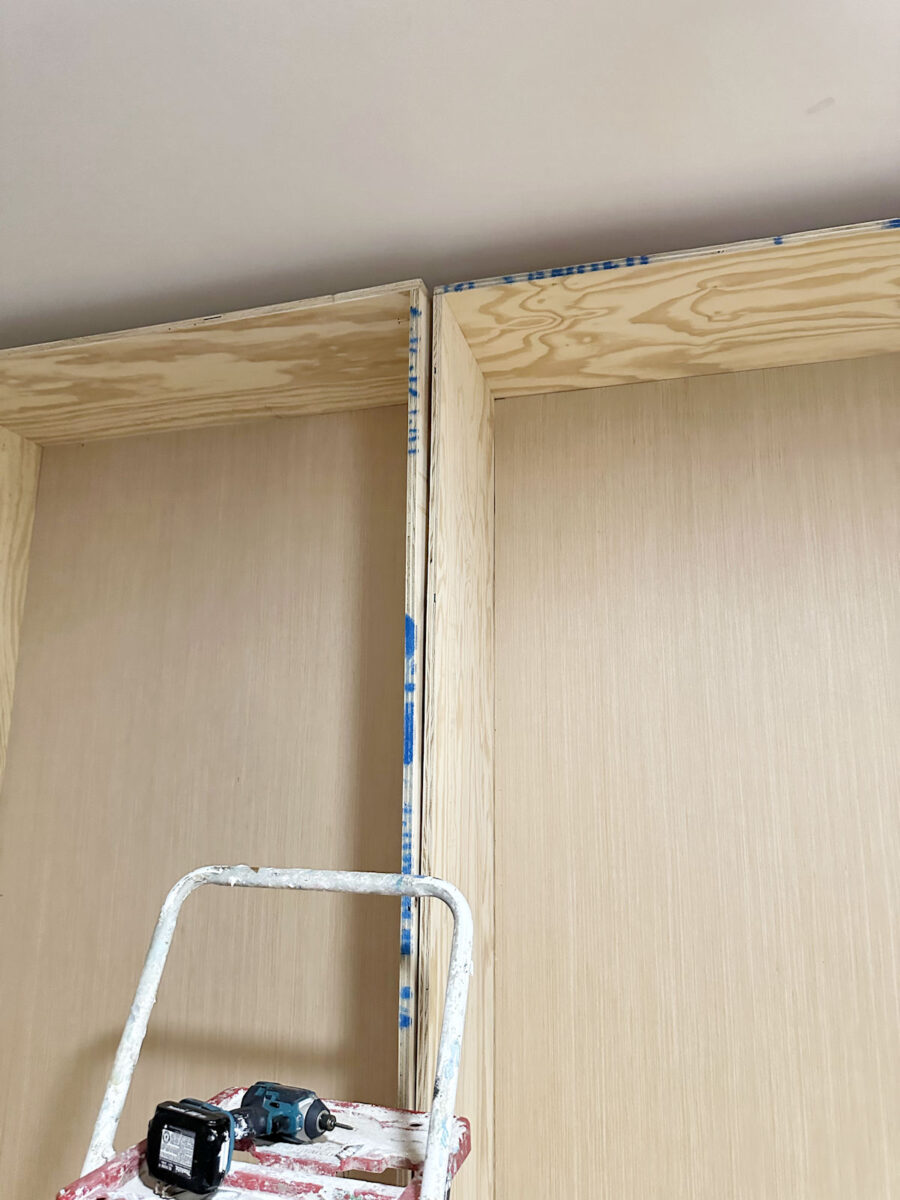
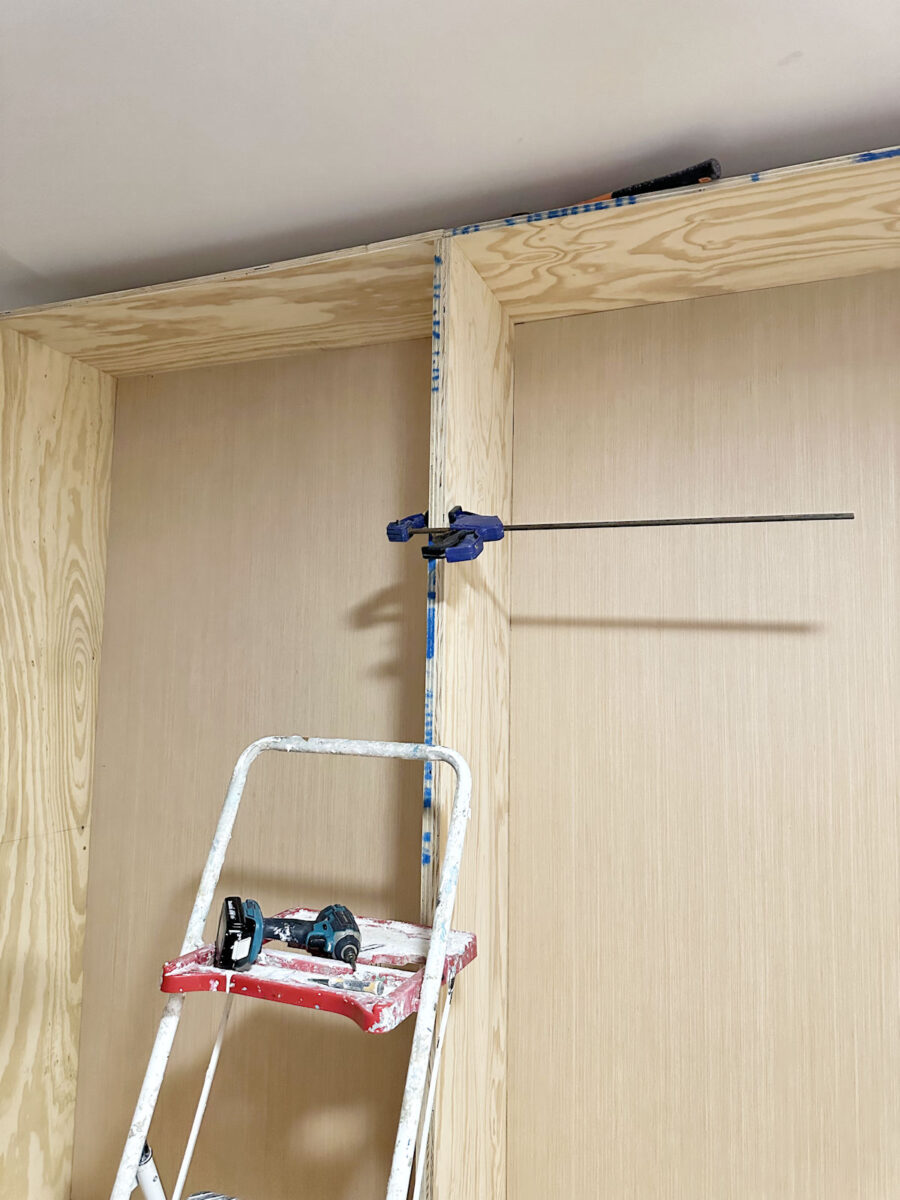
I actually started at the bottom because it was easier to get the bottom corners to line up. Once I got the bottom corners lined up and flush on the front with each other, I screwed the cabinets together at the bottom using the Spax cabinet screw. With the bottom corners secured to each other, I was able to get the top corners lined up and clamped so that I could add more screws to secure them to each other.
So that’s as far as I got yesterday. I have two more units to build for this side of the room, and I’m hoping I can at least get those done today. I do have to leave the house for a couple of hours this afternoon, so it won’t be an uninterrupted work day. That means my progress might be a bit slower today, but I’m going to do my very best to get the other two units for this side of the room finished before I go to bed tonight.
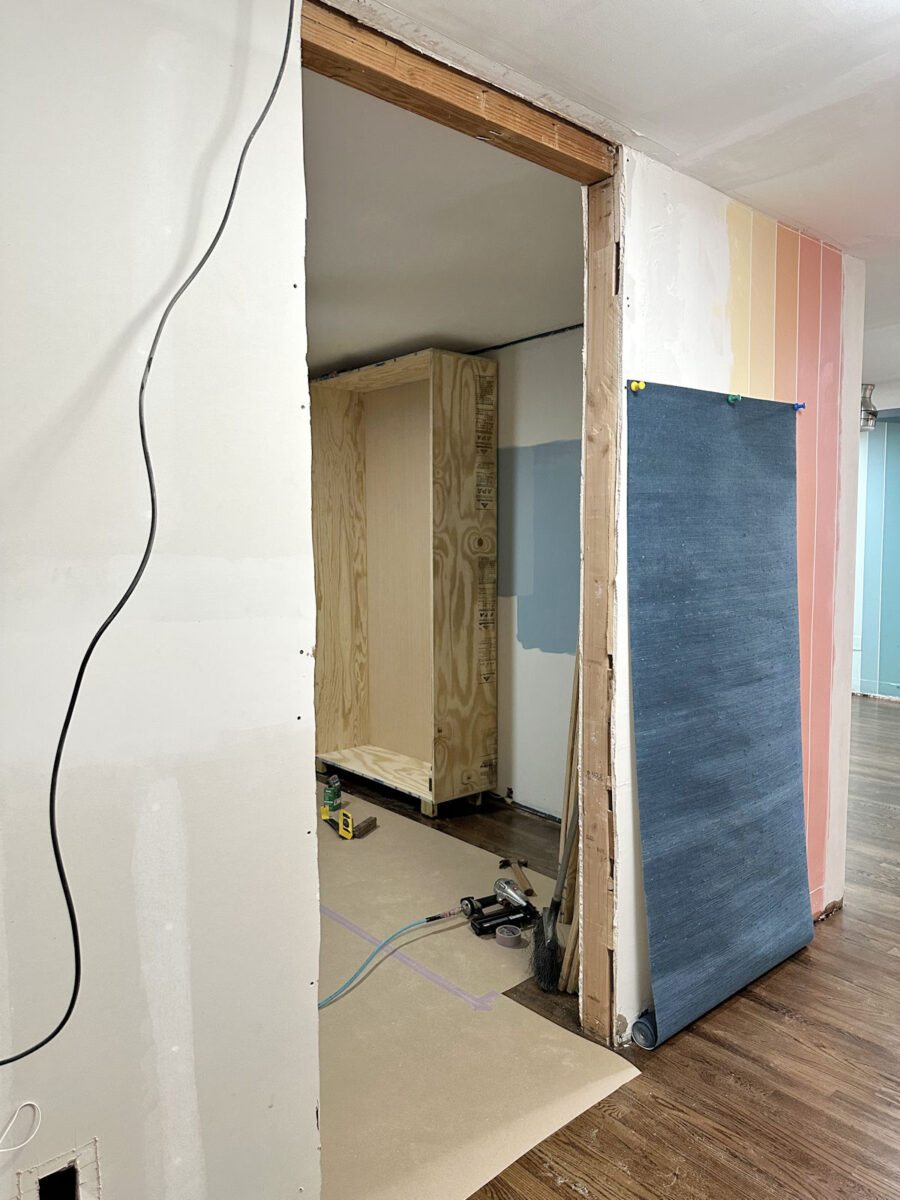
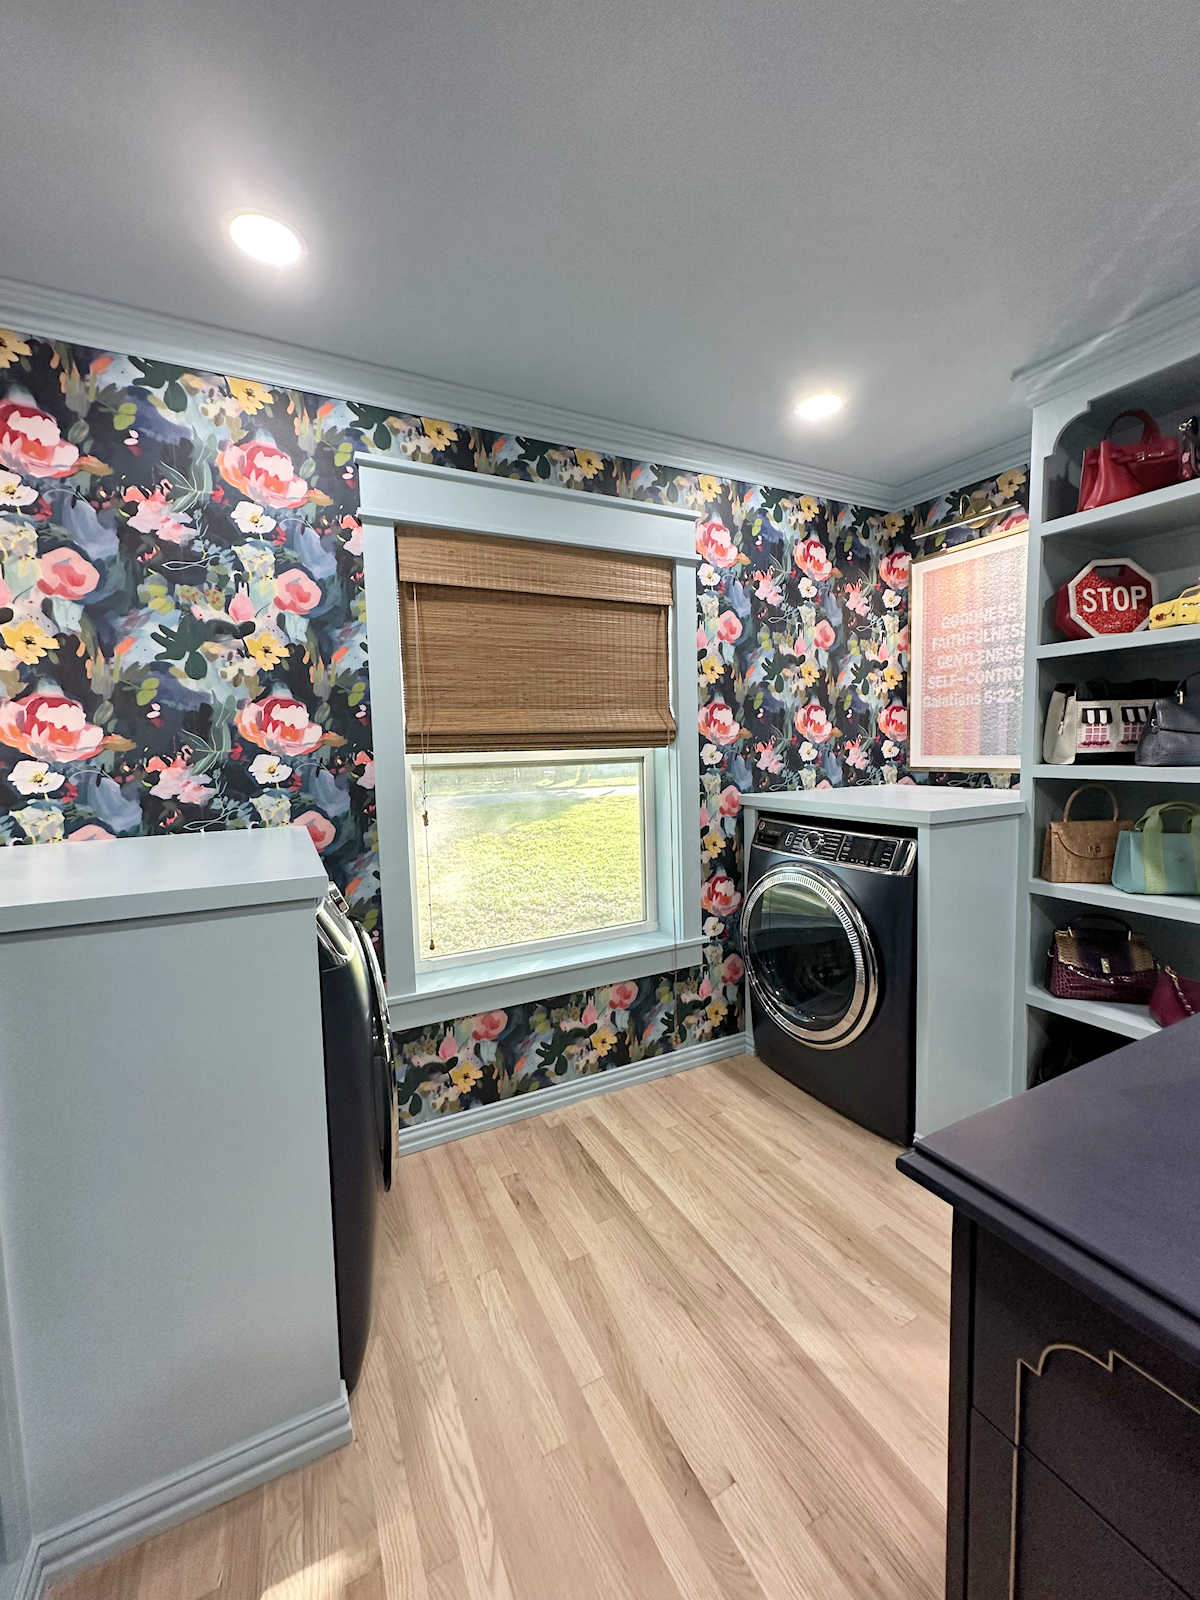
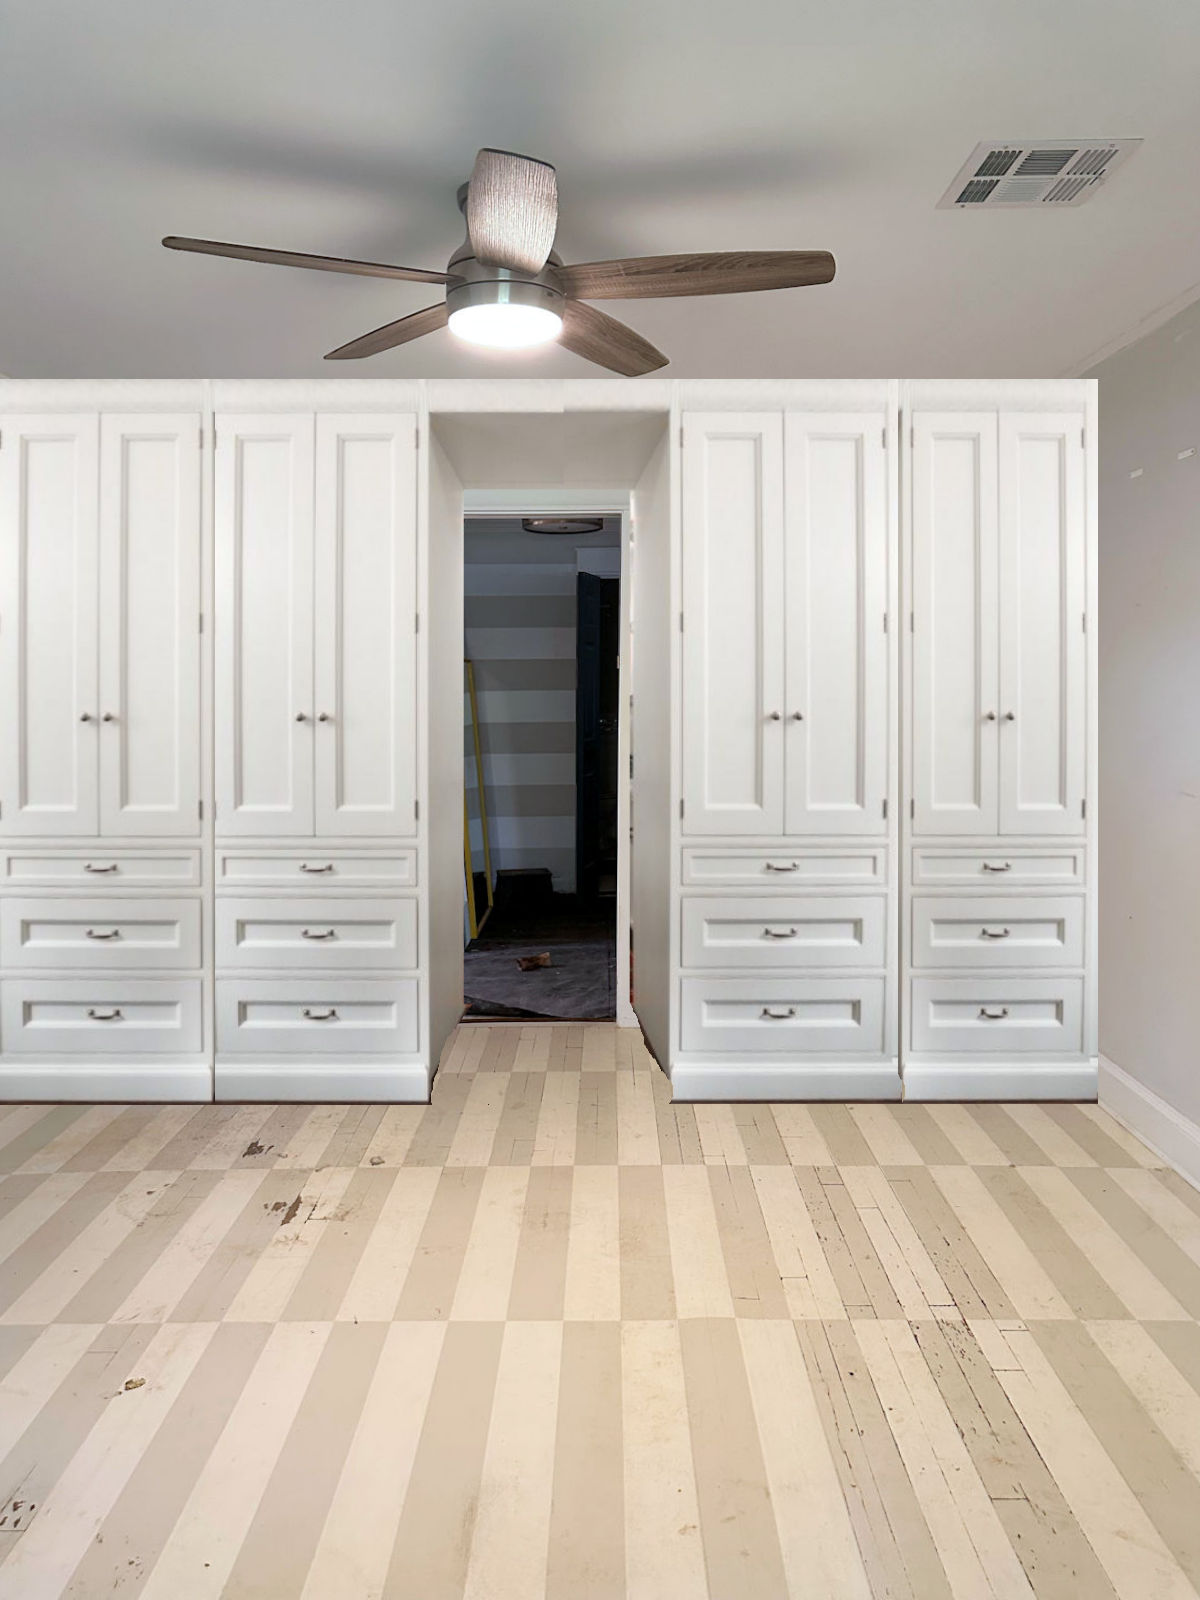
And here’s a glimpse of what you see when standing in the doorway to our bedroom suite. I love it when a plan comes together. My whole goal was to have the wallpapered unit visible from the bedroom suite doorway, and there it is. I wanted it placed so that it wouldn’t be obscured by the side of the cabinet on the doorway wall and so that the pretty wallpaper would be seen from the bedroom suite doorway. We’ll have to wait and see how it looks once that doorway wall unit is in place, but I think I may have accomplished my goal.
So that’s the progress. More to come tomorrow. We’re finally to the fun stuff, y’all! Of course, the magic happens when I start attaching all of the trim and molding, but I’m just so happy to finally be to the building stage!
The A2D Daily:
You can find the next post in this series (building my walk-in closet and laundry room combination) here: Wiring My Walk-In Closet Cabinet For Lighting
More About My Walk-In Closet/Laundry Room

see all walk-in closet/laundry
room diy projects
read all walk-in closet/laundry
room blog posts

Addicted 2 Decorating is where I share my DIY and decorating journey as I remodel and decorate the 1948 fixer upper that my husband, Matt, and I bought in 2013. Matt has M.S. and is unable to do physical work, so I do the majority of the work on the house by myself. You can learn more about me here.

Congrats on a fantastic building beginning! As someone who is going to build some long upper cabinets to go on top of built-in office drawers, do you consider the miscalculation a happy accident with additional framing for strength? Or if you had it to do over again, would you still cut the backer board with the additional 1.5 inches? I’m asking because I’ll build basically a smaller version of the same thing.
This is fun to follow!
I think it was a happy accident because I actually like the result of this method better. If the side pieces aren’t cut precisely the same depth (which always happens with me no matter how hard I try to be precise), that would have shown had I just tacked the backer board to the backs of the frame pieces. But by putting the strips inside, I could get them lined up just right where they met, and the backer board covers over them and makes everything look smooth and flat. I’ll still have to caulk where the backer board meets the side frame pieces, but I’m fine with that since the cabinets will all be painted anyway. But if you’re not going to be painting the inside of your cabinets, that’s something you’ll want to think about. I do have some small gaps between the backer boards and the side pieces, so if I weren’t going to be caulking and painting, I probably would have searched out a different building method, or just used stretcher boards along the top and bottom of the back with the wall showing instead of using full backer boards.
Beautiful and very exciting! I think I might have come unglued when I discovered the backer boards were short. And it would have taken me a long while to figure out how to make it work. You quickly figured it all out. You’re amazing!
Your comment, So that’s as far as I got yesterday” just blew me away. I needed to take a nap after reading All the work you did. Great accomplishment. Your brain in on overdrive.
Great save on the back piece! I’m following with interest because I’m planning on a built-in closet reno myself.
Could you take a minute and tell us all about your tools?
Of course! I’ll try to include all of my tools that I’m using in tomorrow’s post.
WOW!!! And I can’t tell you how many times the “Homer” bucket has come to the rescue since I have not yet grown a third arm, or hand. It looks awesome and you are a genius for being able to do this on your own. I too love it when a plan comes together, I am also fond of sawdust first thing in the morning too.
Cheers to you and Matt!
I have a Ryobi cordless nailer that occasionally quits working. It sounds like it’s nailing, but the nails don’t come out. Of course, YouTube has videos to explain how to fix it. You might want to check that out.
Carry on! Looking good!
YES! This is getting exciting…I have to do the same thing soon, and I’m making sure my husband sees what you are doing…I want to do what will work in my new master bedroom closet for us. Love how you solve the inevitable issues…nothing is ever square/level/plumb/etc. without work! Each day you can accomplish something…even if it is just a little, or even if it is just planning/researching.
Hi Kristi,
Will the window sill be in the way when you go to install the washer and dryer?
No. I used a 1×3 as a spacer at the wall.
Your building skills are amazing—backer boards giving more strength to your cabinets.
You are amazing!!
It never fails that the “head plan” runs into a glitch at first, but you managed to work it out with just a bit of a slowdown. I bet it would have taken a man double the time it took you to figure out how to fix it! LOL! Now, I have a question: will you be adding more support at the points where your closet rods will go? I would think you will, to support the weight of hanging clothes.
I’m still looking at closet rods. I haven’t decided on those yet, so I’m not sure what kind of support they’ll need. I’ve narrowed it down, and the one I really like doesn’t seem to need any extra support other than the two brackets–one on each end. It’s an oval shape made of thicker metal, and the reviews are really good, even for the longer lengths. So as long as the end brackets are screwed into two layers of plywood on both ends, I think they’ll be fine.
What a great problem solver you are, Kristi! I probably would’ve cried.
You said the other day that this closet is the biggest project you have ever done. I was thinking your studio seemed like a whole more work.
The whole room was a bigger project than the closet, but as far as building goes, the closet will be bigger. I didn’t build anything from scratch in the studio. That’s what I meant. The closet is my biggest build, but not necessarily my biggest overall project.
Looking good.
Kristi…..you continually amaze me with your skills, along with problem solving when you run into hiccups!!! I think you mentioned both a 16 gaige and 18 gaige nailer. How do you know when to use which??
It’s really subjective, but I use the 18-gauge on smaller projects (like making frames) and items that I don’t want big holes in. I also use it on thinner materials, like 1/4-inch plywood, and more detailed molding that might be harder to wood fill and sand smooth because of the design of the molding. I use the 16-guage on larger items that need more hold. The 18-guage nails can pull out much easier than the 16-guage nails.
You are absolutely amazing. I’ve built 2 kitchens, and I’m watching you with awe. How on EARTH do you do so much alone?!? You are pure muscle and brains!
Haha! I’ve been working alone for so long that I’ve just gotten used to it. I have to get kind of creative sometimes since I only have two hands, and I’m only five feet tall, but I can generally get it done!