The Closet Cabinets Are Painted! (Plus, Why I Didn’t Spray The Cabinets, And Why I’m Not Using A Clear Topcoat)
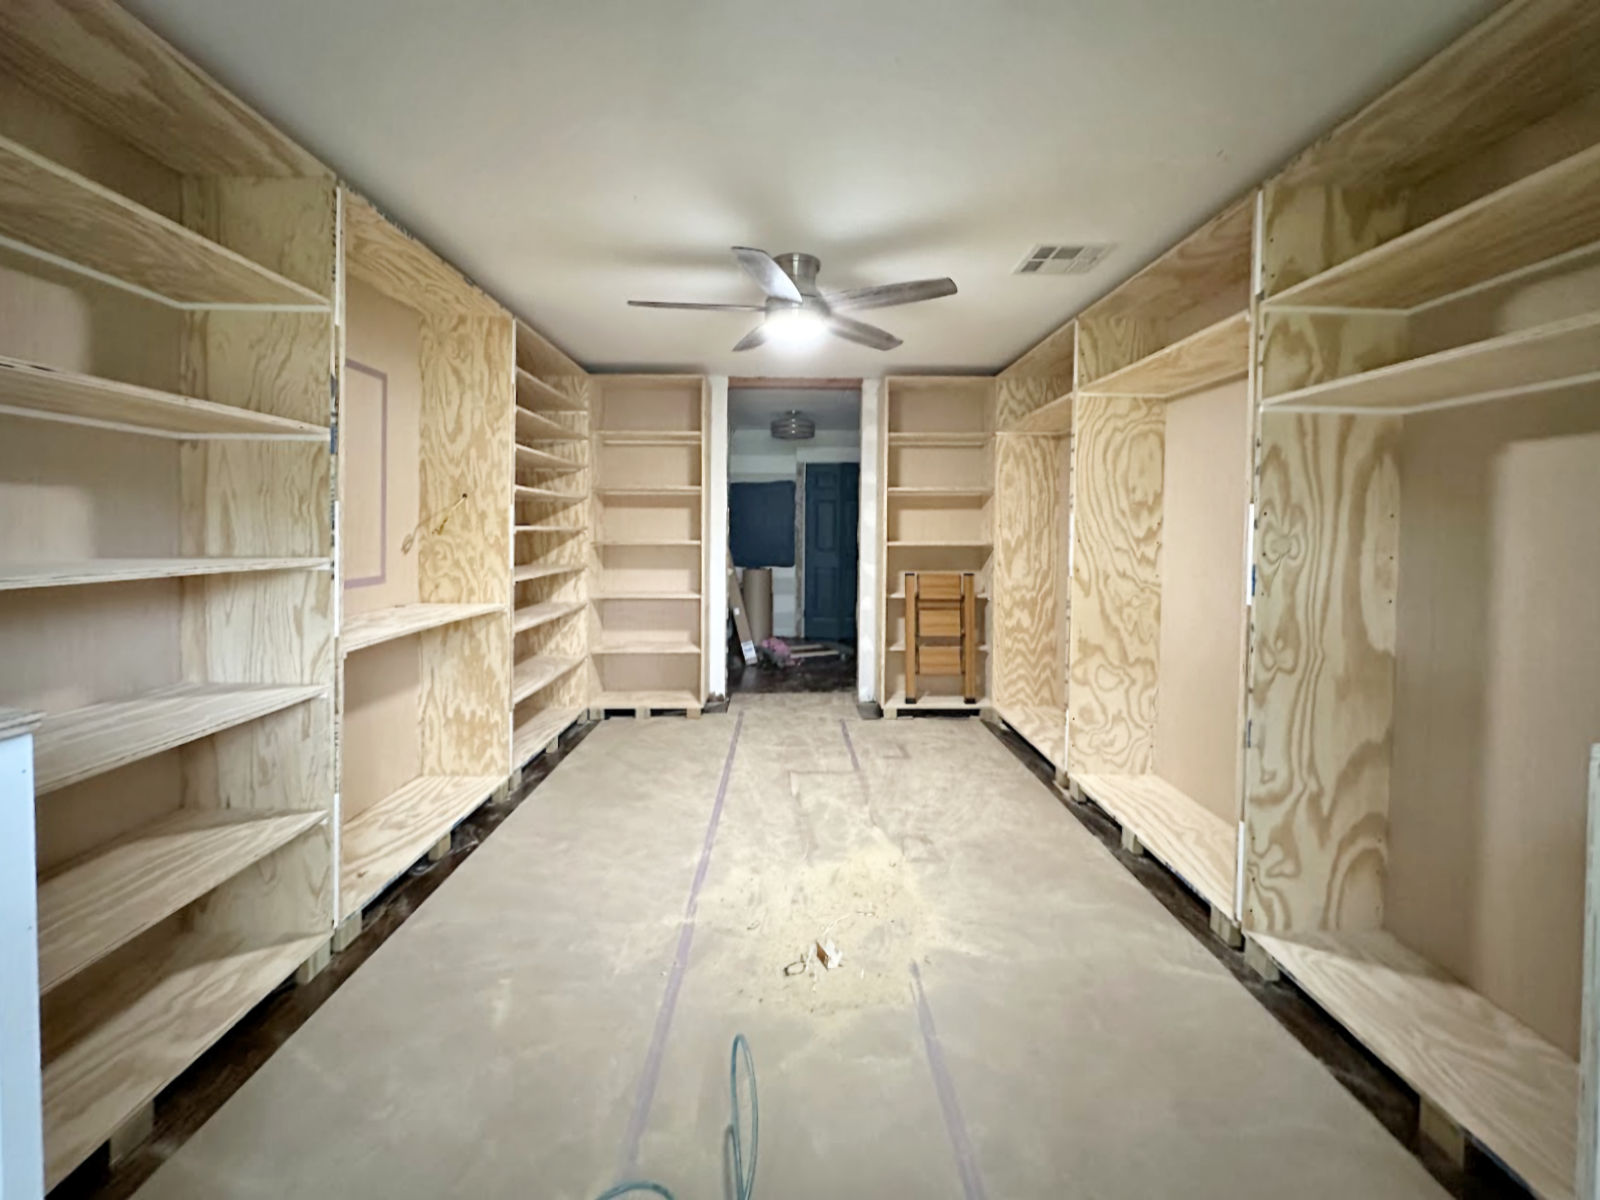
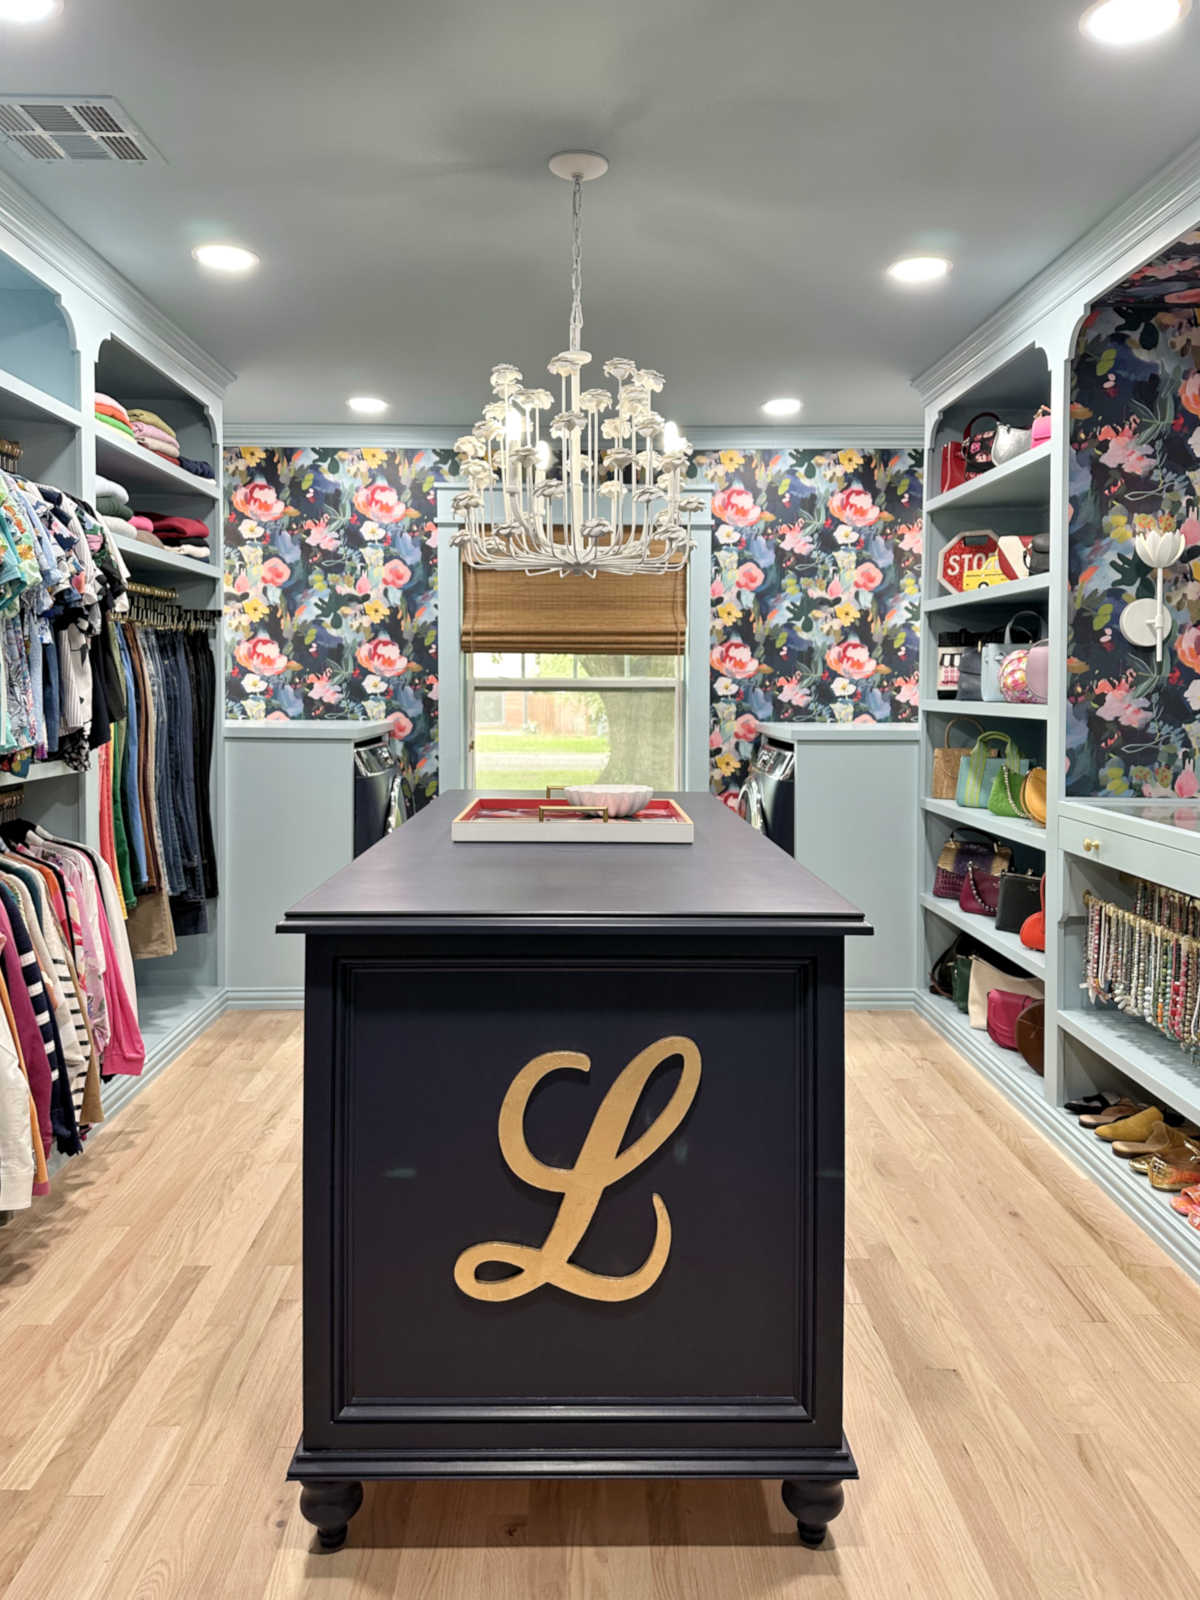
Last night, I cleared one of the major hurdles in this walk-in closet project. The cabinets are painted! This was a huge job with all of those shelves, but it’s finally done, and I can move on to the next step in this closet project.
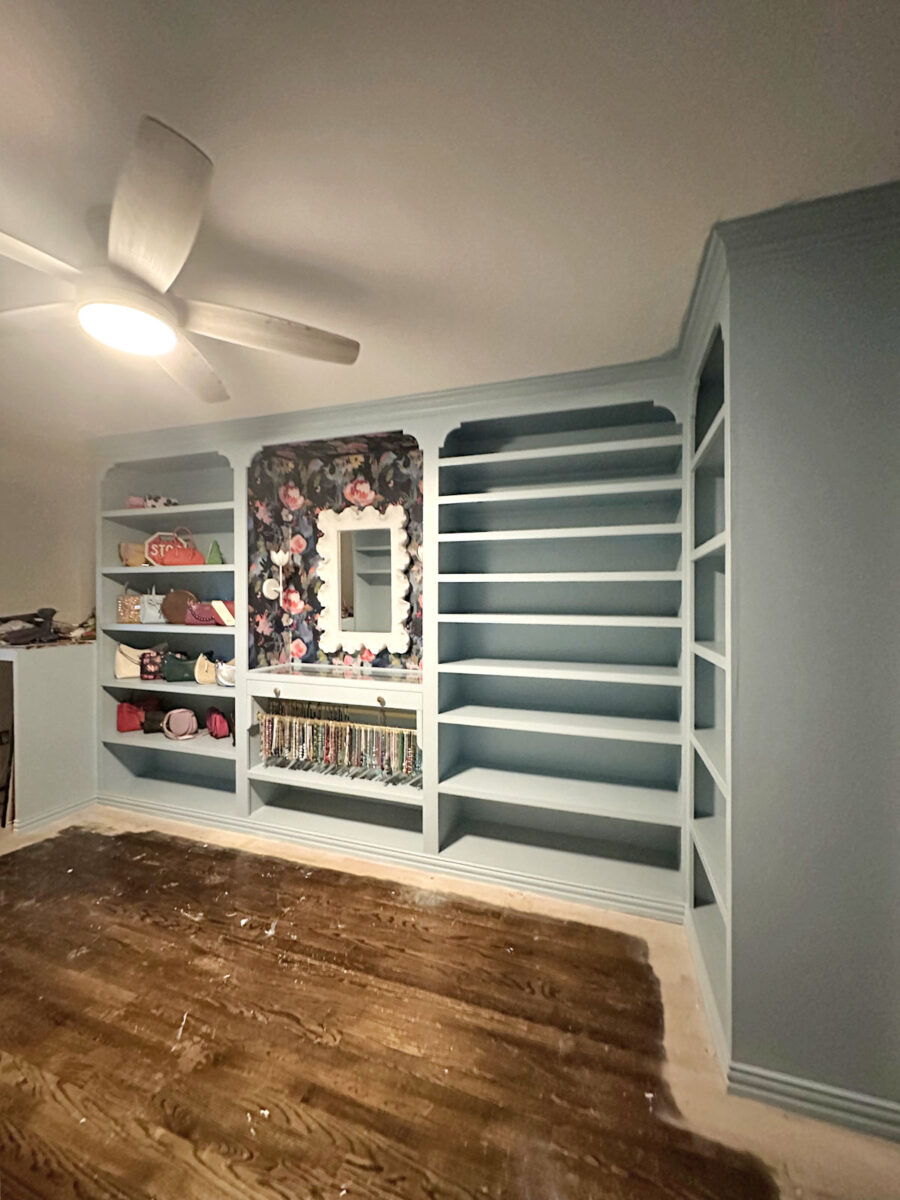
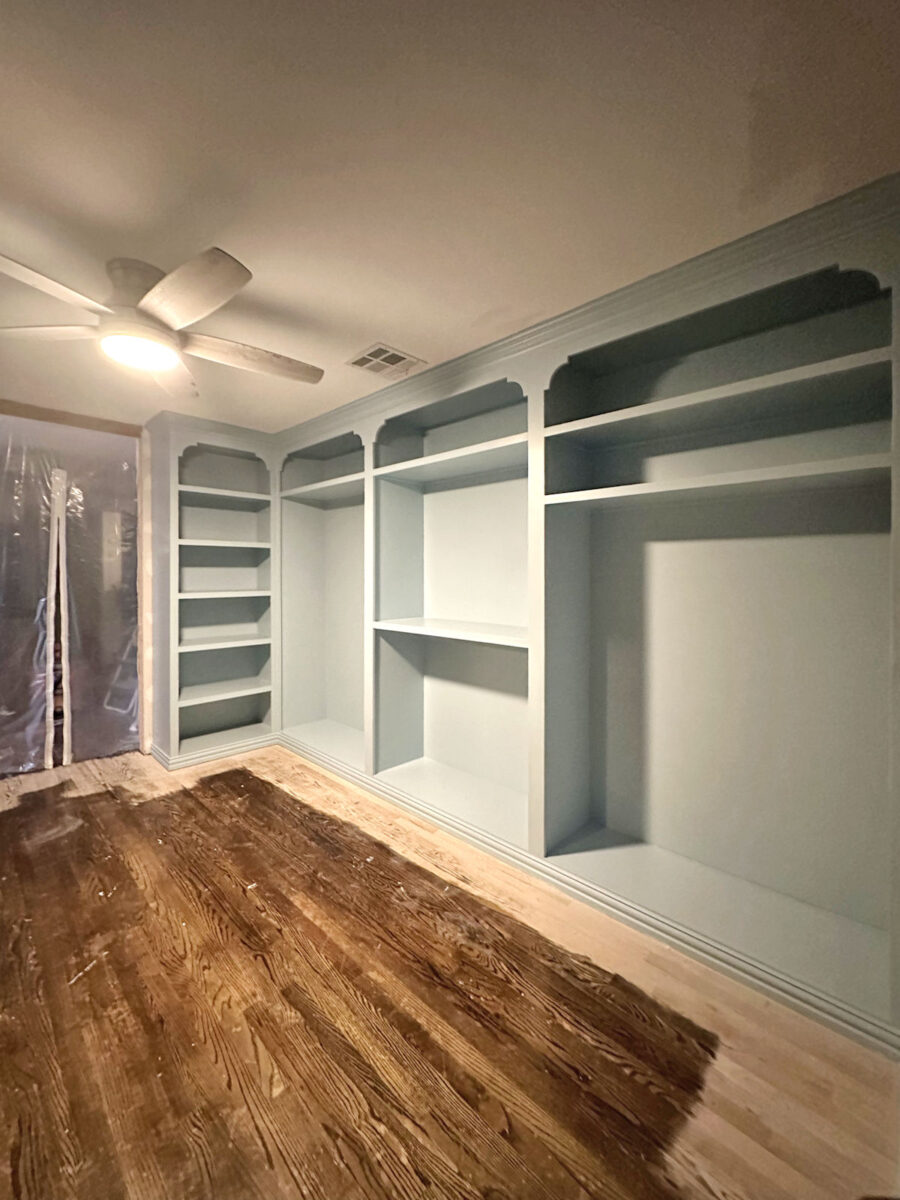
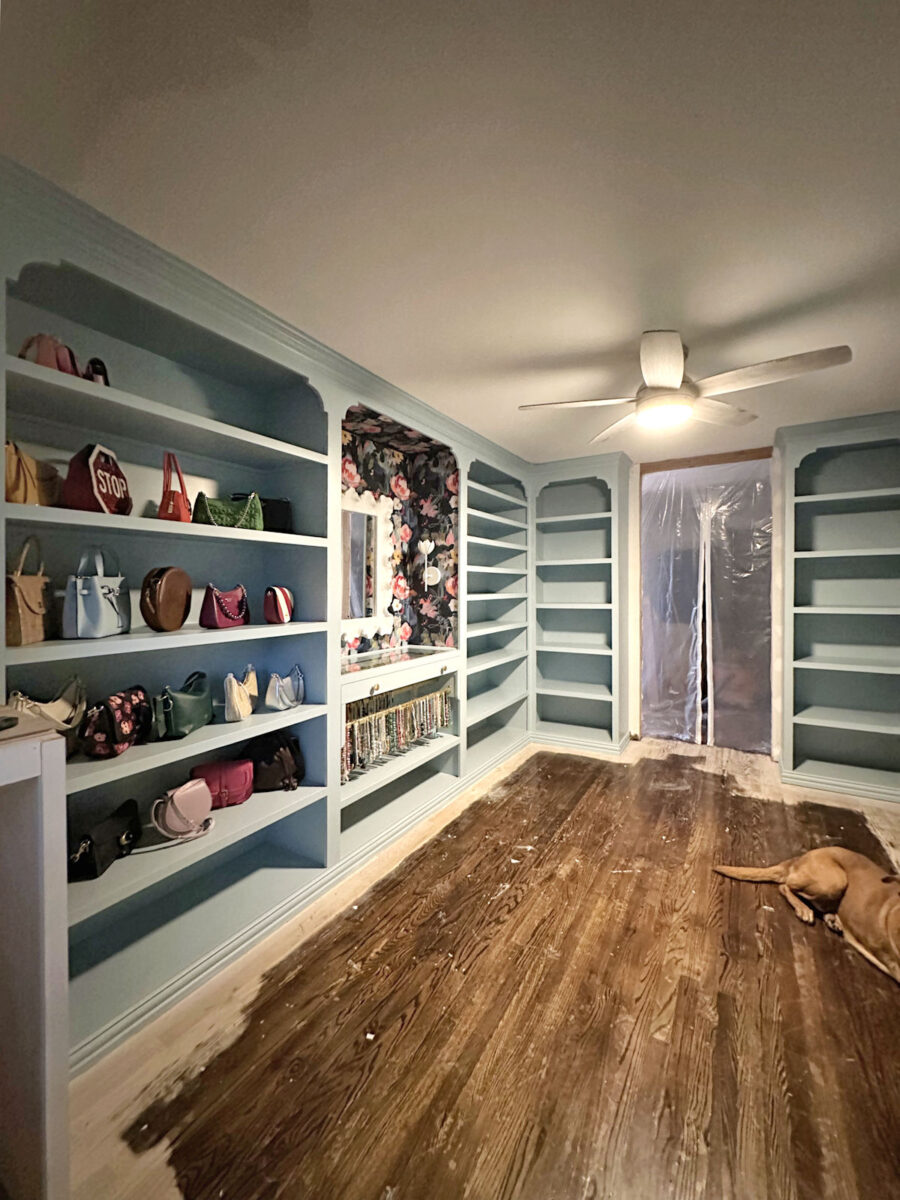
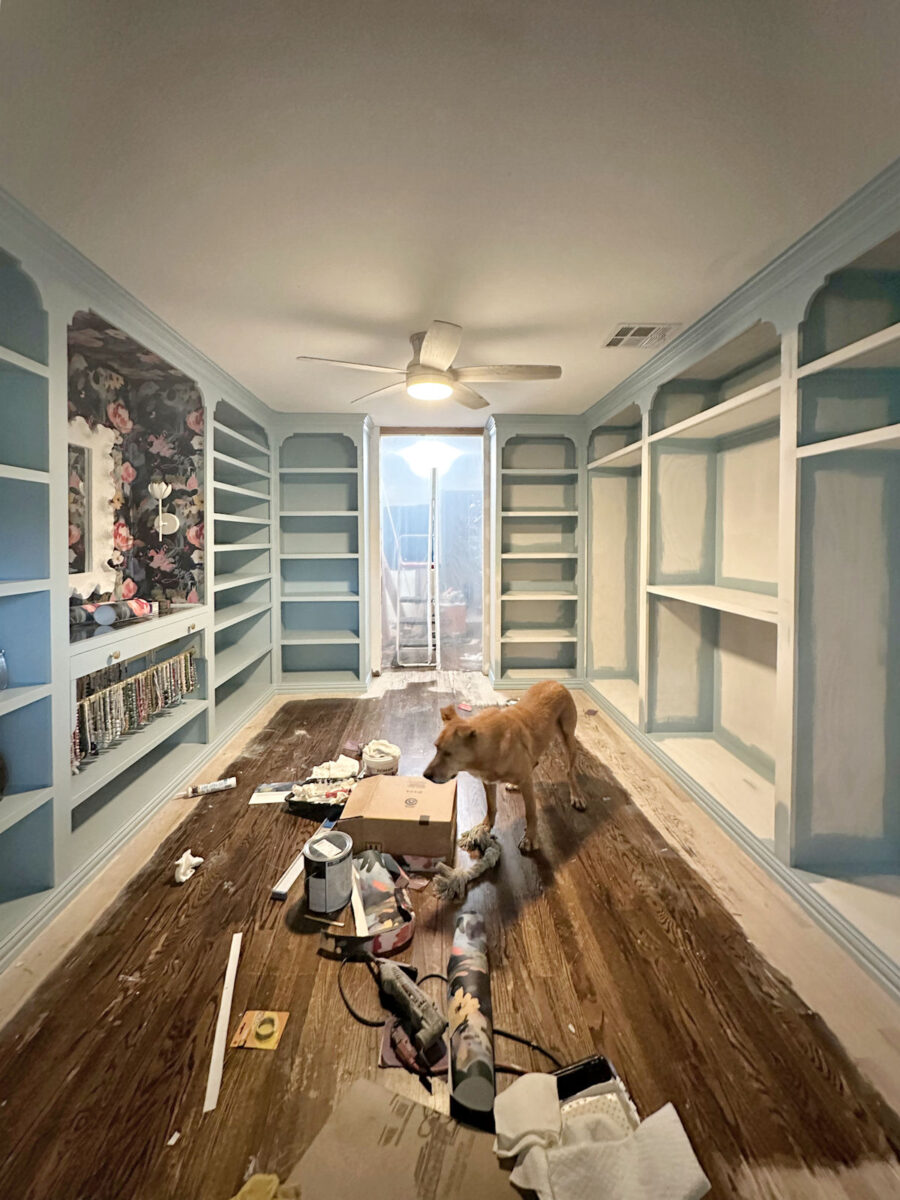
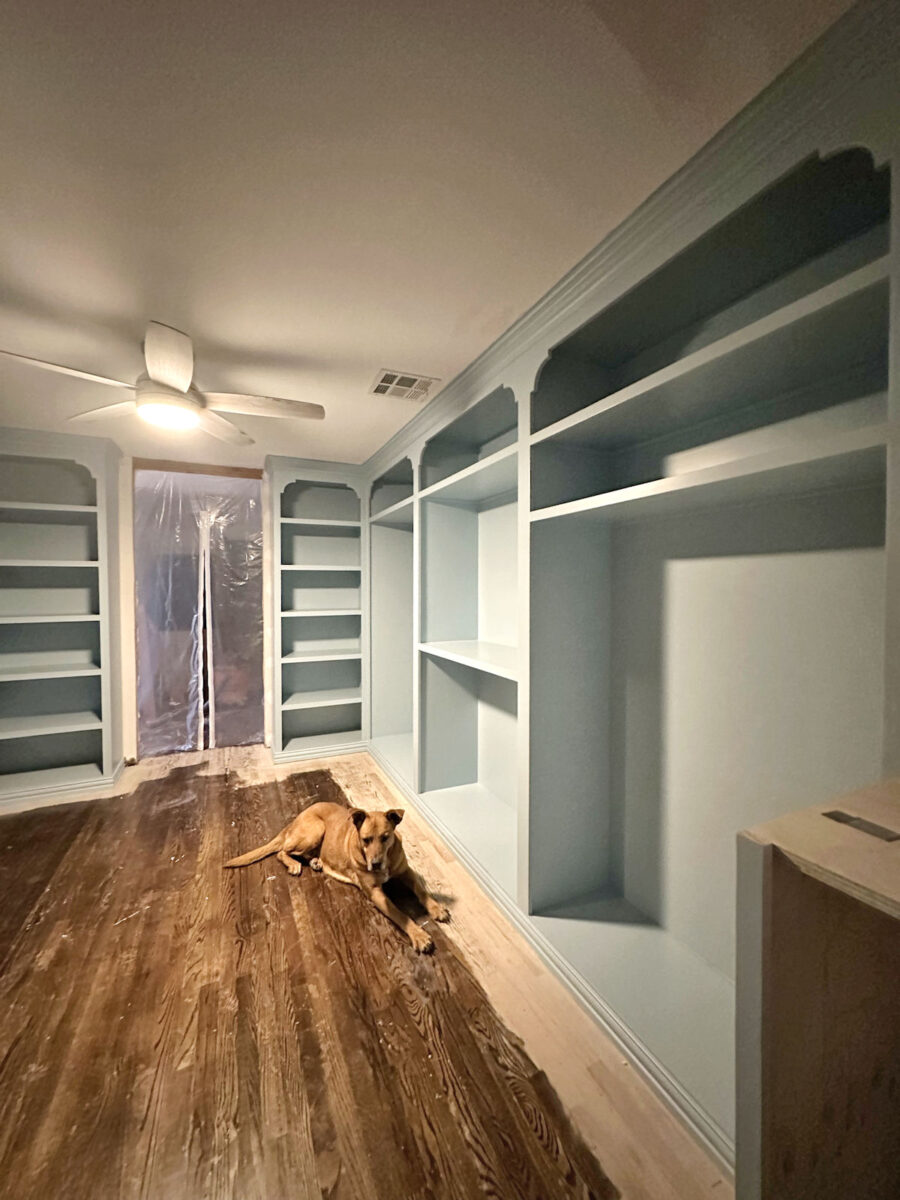
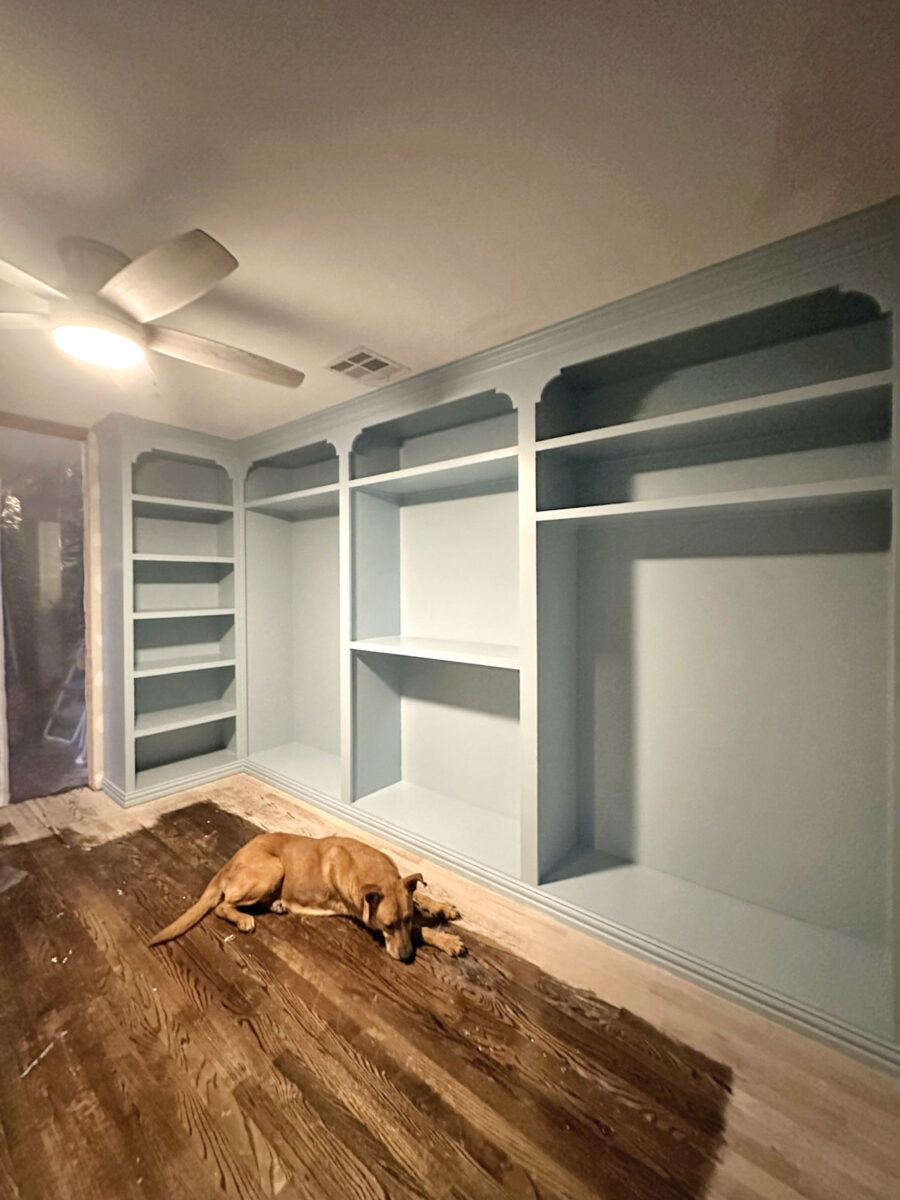
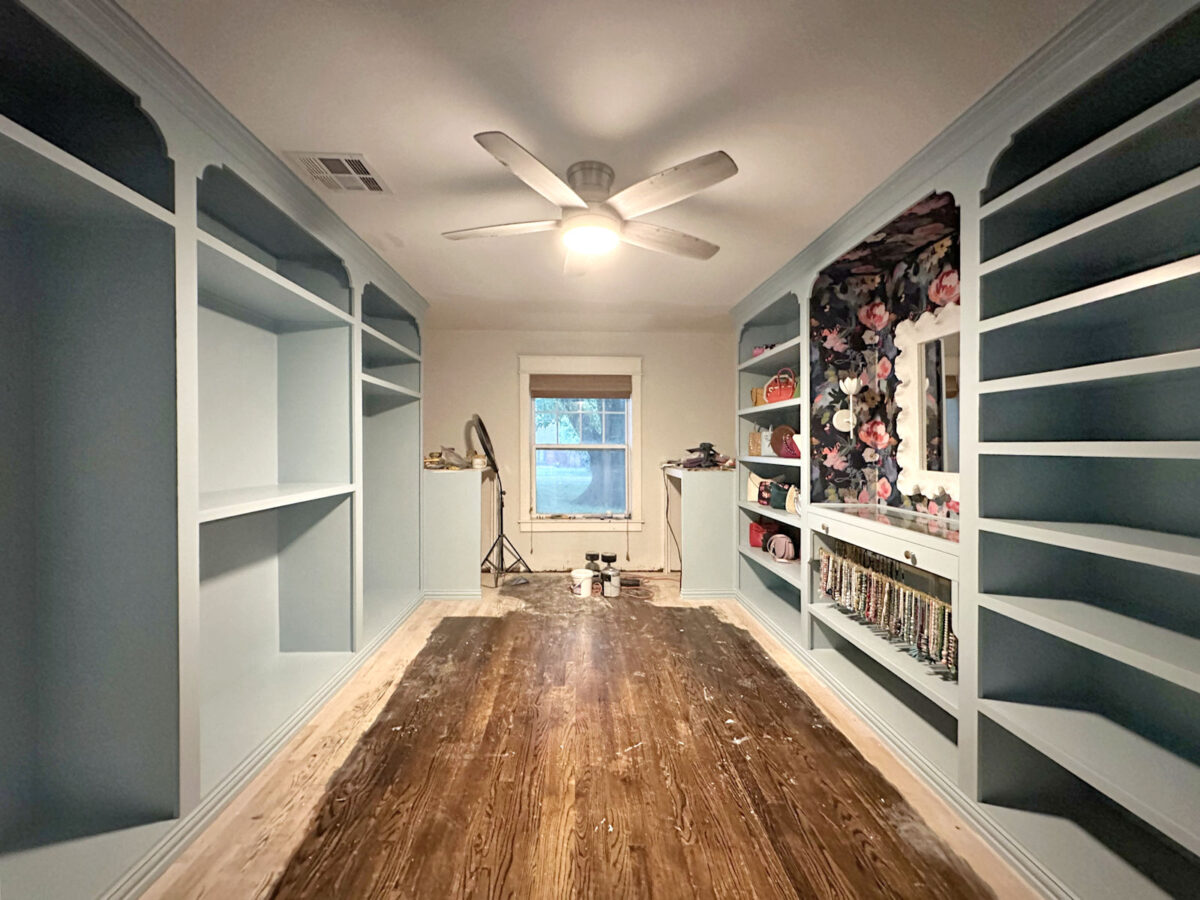
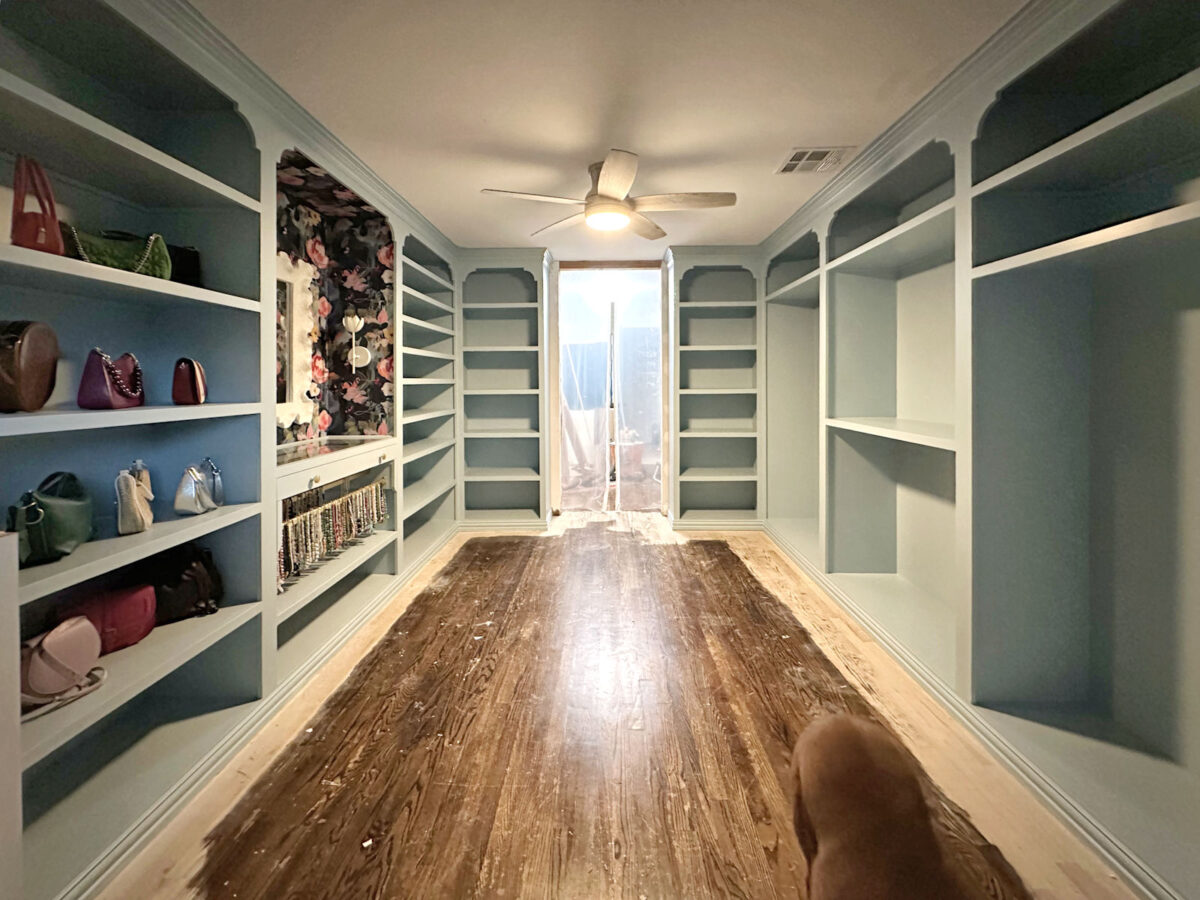
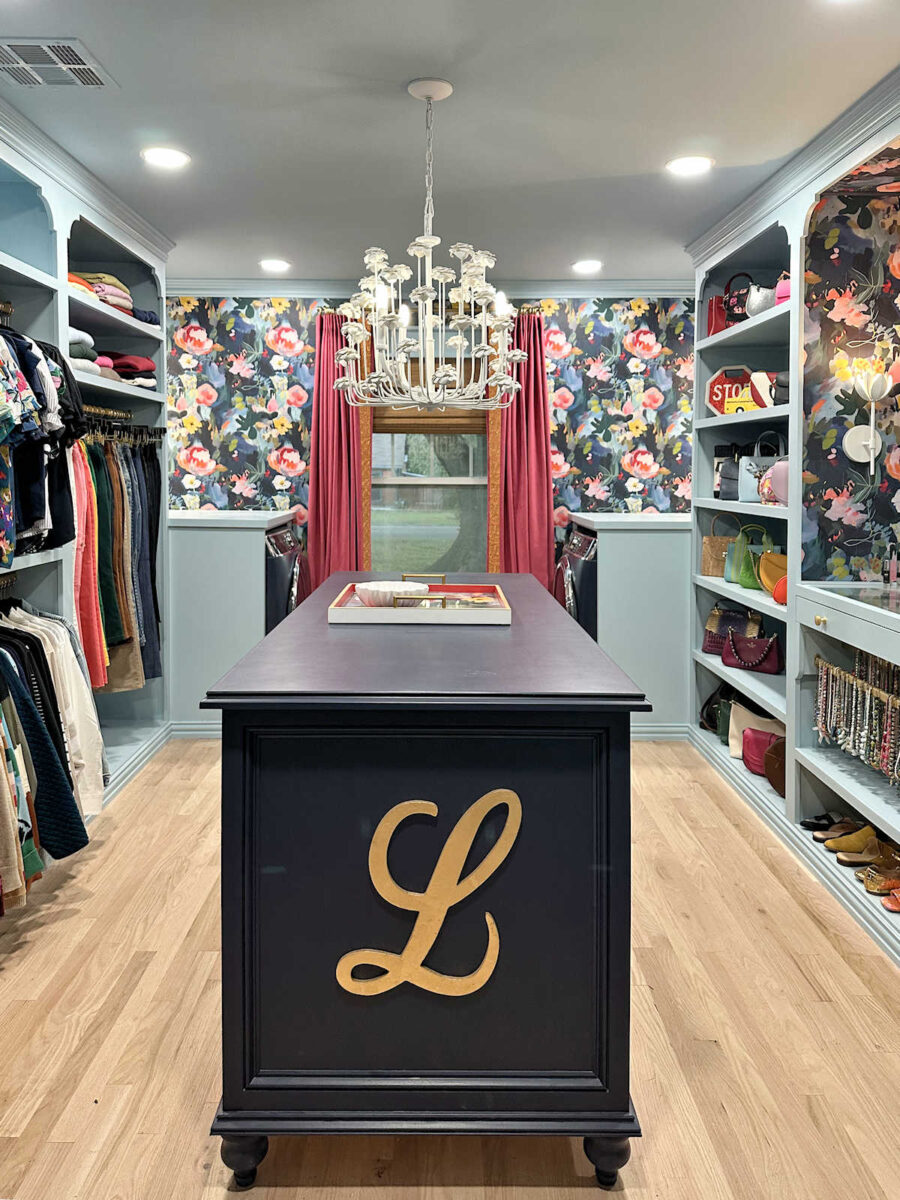
Here’s how they turned out…
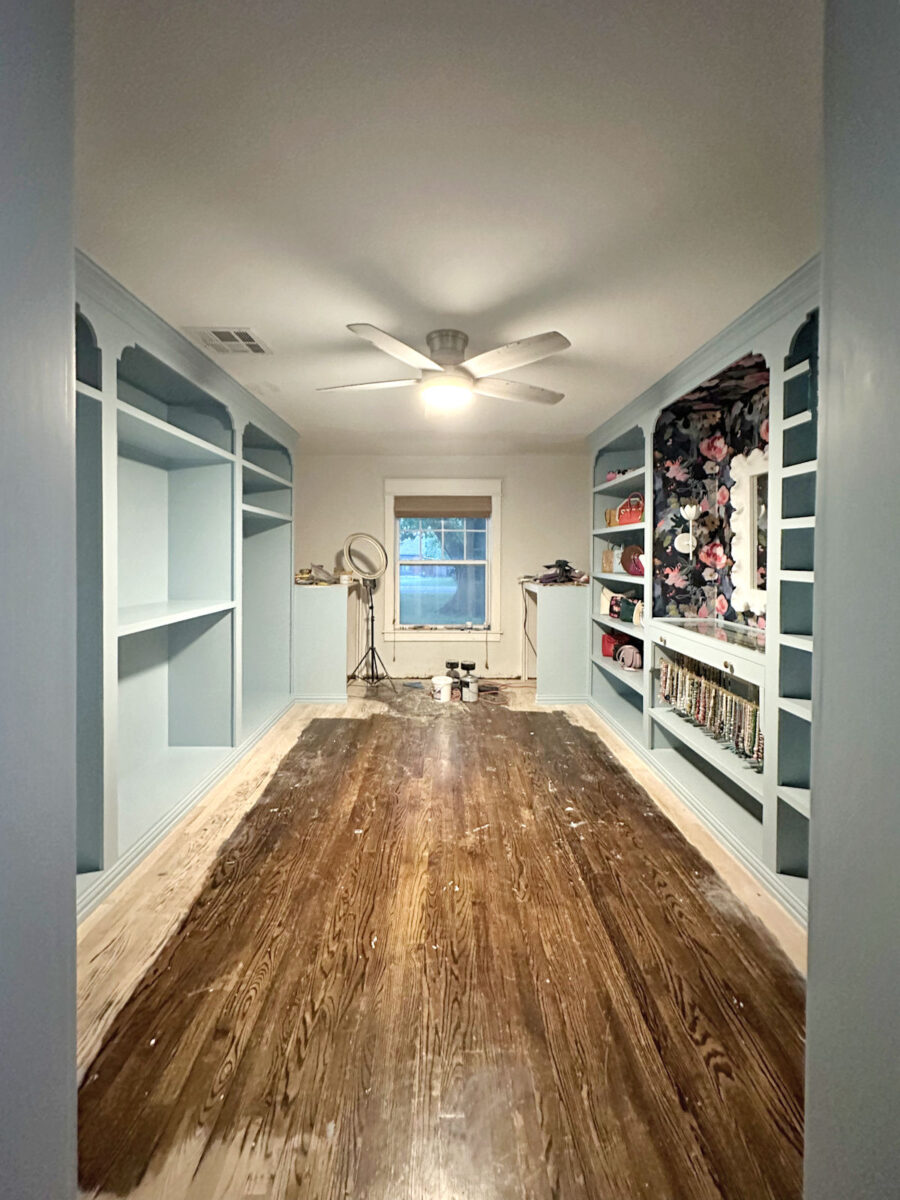
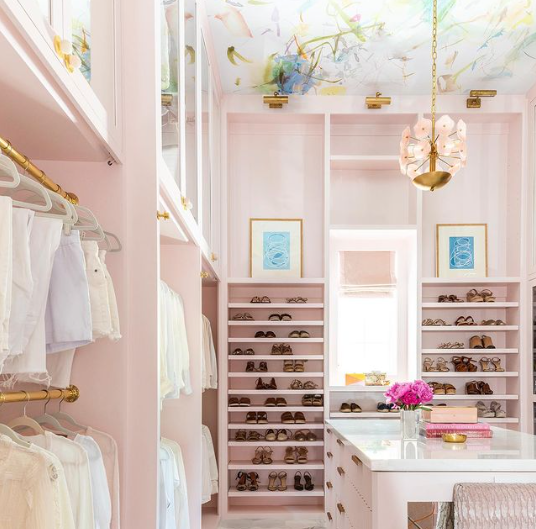
I took all of these pictures with the wide angle setting on my phone, which makes the room look larger (longer) than it really is. I mean, the room isn’t tiny. It’s 11’4″ wide and 15’10” long, but the wide angle does distort it a bit. Using a wide angle is the only way I can get all of the cabinets in the photo, though.
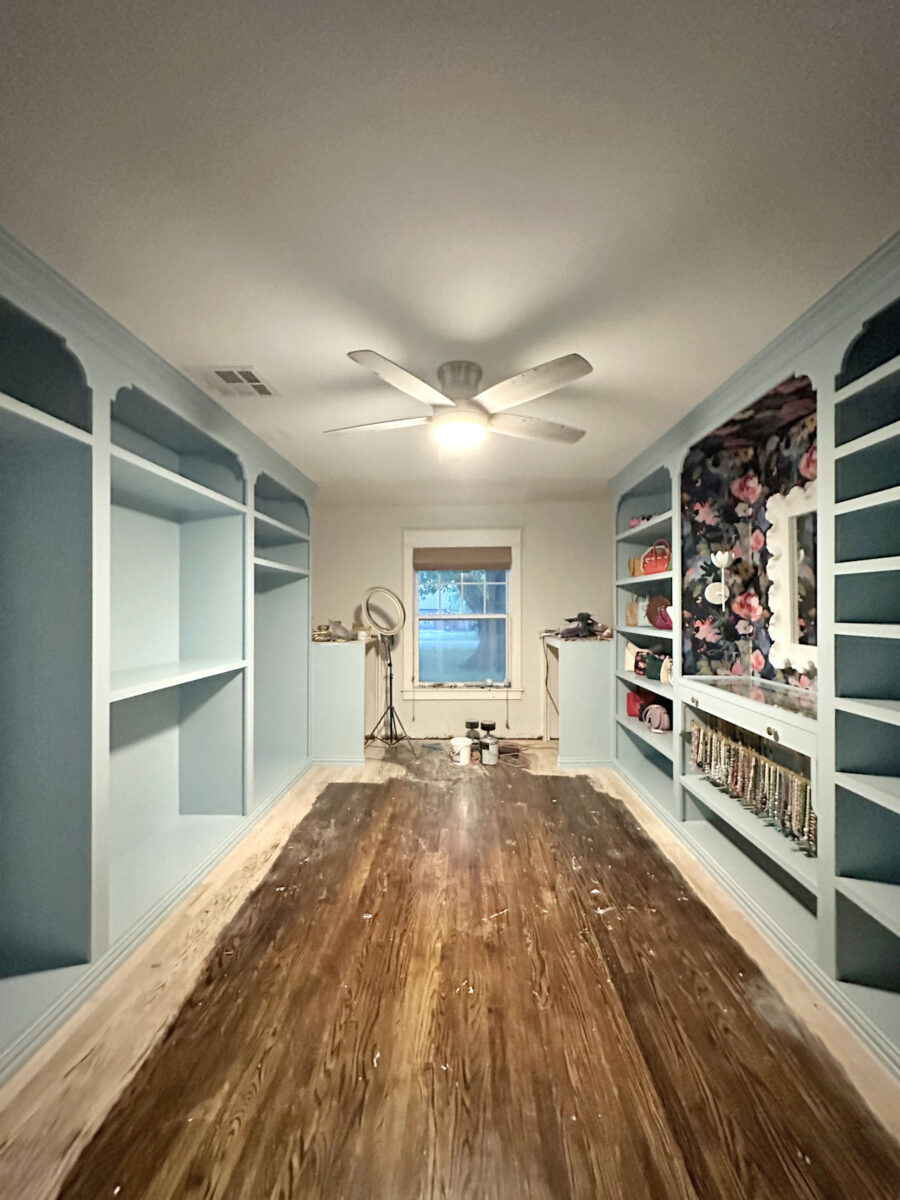
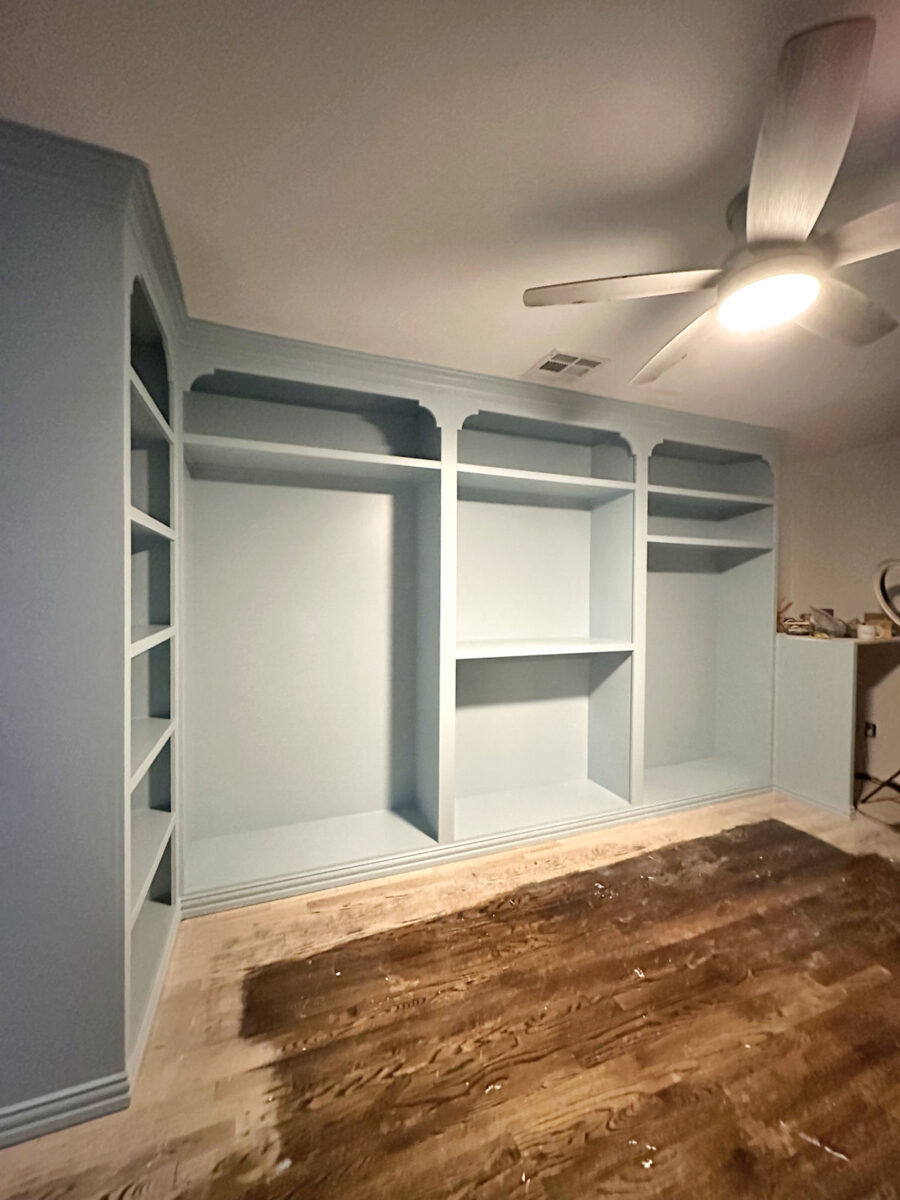
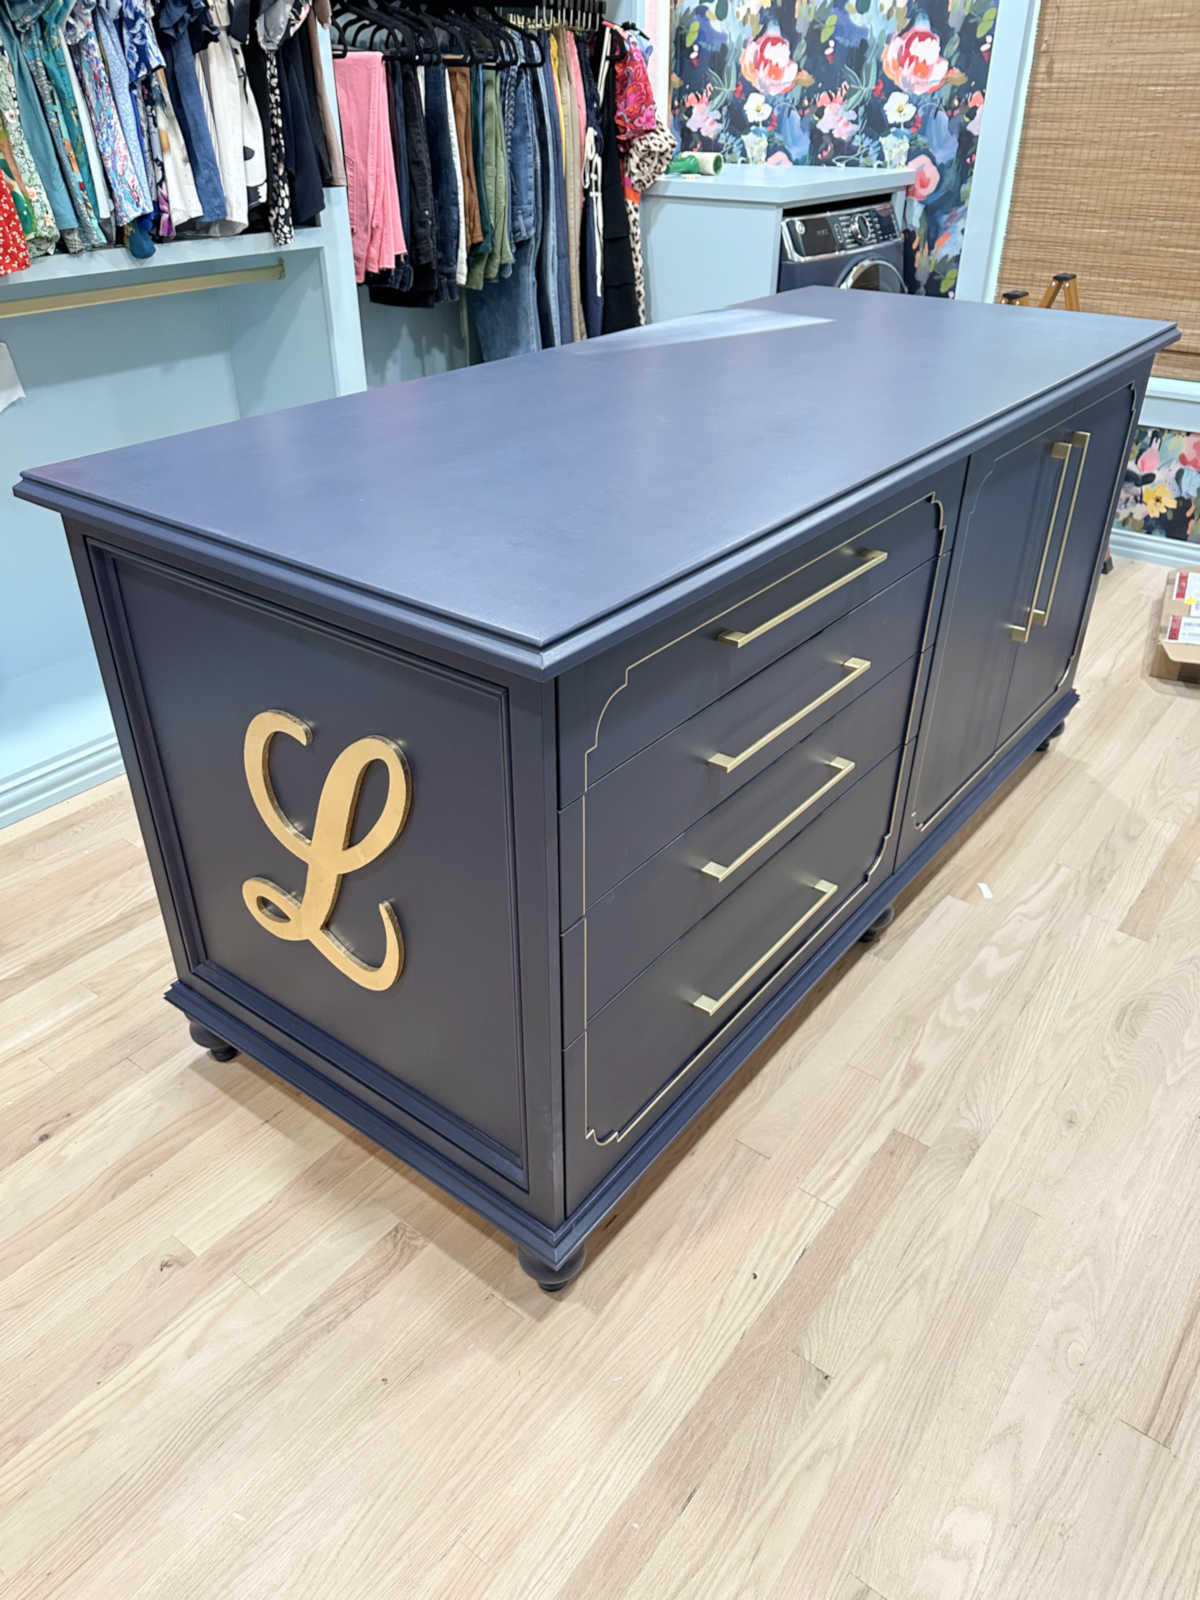
The color is Sherwin Williams Billowy Breeze, which is a very light blue with a hint of green in it. I think the touch of green added to the blue keeps it from looking like a blue that belongs in a baby’s room. I used their Emerald Urethane Trim Enamel in a satin finish.
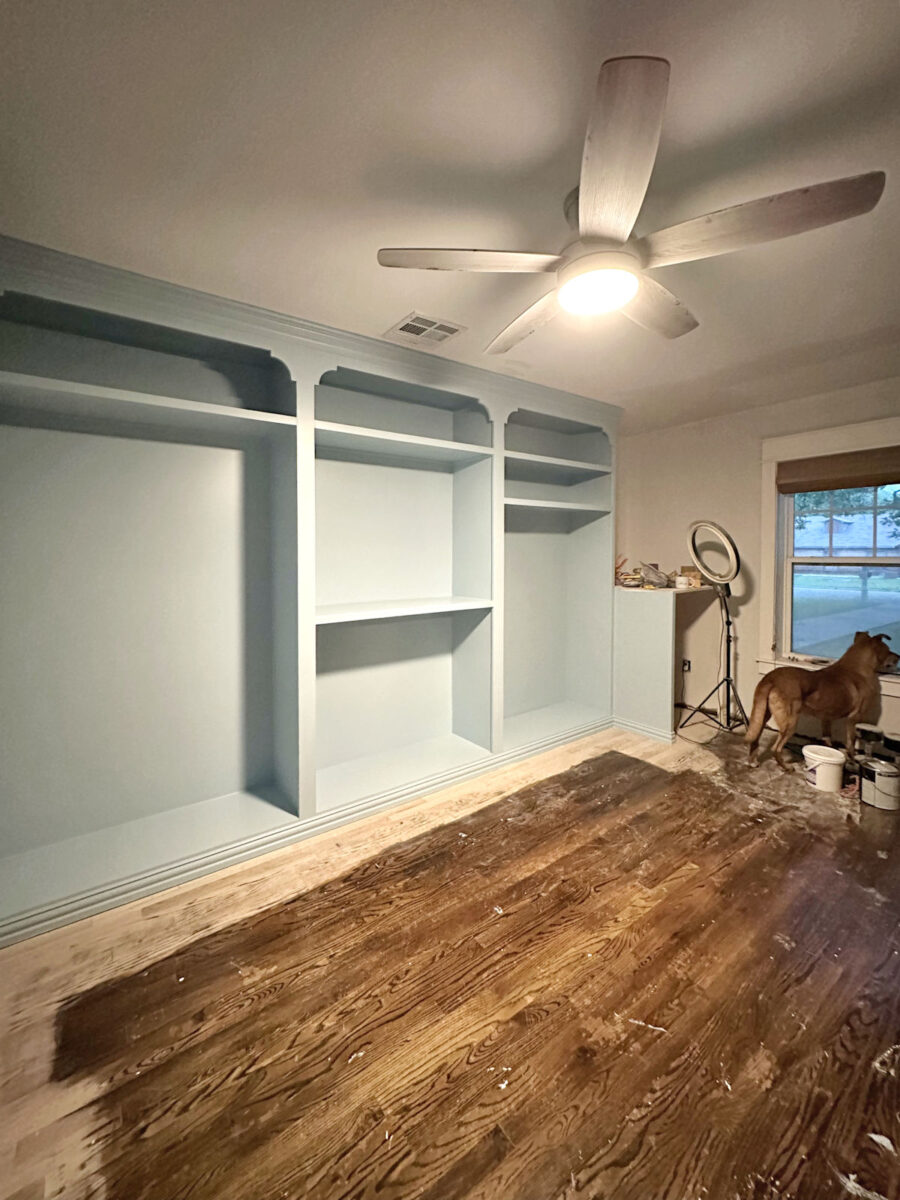
This room still has terrible lighting (just the one light on the ceiling fan for now), so I’m certain it will look much better when I finally get the new lighting installed in the room. I’ll be replacing the ceiling fan with a chandelier, and then adding at least five recessed lights, plus accent lighting with four sconces in the room.
I had planned on doing the floors next, starting tomorrow morning, but I think I’ve changed my plan. Instead, I’ll spend tomorrow working on the lighting. Since I have to cut holes in the ceiling drywall, that’s going to be a very messy and dusty project, so I’d like to get it done before I start on the floors. That way, I can also get the ceiling painted before I do the floors, which I think makes way more sense.
Plus, it would really be nice to see this closet in good lighting, and to have much better lighting to work by as I continue with the other projects that need to be done.
Anyway, I’m so excited to have this huge project checked off of my list for this room. Obviously, these perimeter cabinets were the biggest part of this closet, so having them done feels like I’ve turned a corner. While I do still have a very long list of things that need to be done in here (which I shared in yesterday’s post), it feels like the rest will be an easy jog to the finish line by comparison.
How I Painted My Closet Cabinets
To paint these cabinets, I used a brush to cut in around all of the corners and to paint the trim. You can see that in this photo that I shared yesterday.
I did two coats of paint, so once I had the first coat done, the paint was dry enough to start on the second coat. I did all of the cutting in and trim with both coats of paint before painting the rest.
And then I painted all of the large, flat surfaces with a 6-inch roller labeled for smooth surfaces.
Why I didn’t spray my cabinets
The main reason I didn’t spray them was because I finished the cabinets in a very piecemeal way. And I did it that way because that’s just how I work. I don’t always do things in the order in which they make the most sense, or in the order which is most efficient. I work in an order that will keep me interested, motivated, and moving forward.
So by the time I had primed, caulked, and sanded the cabinets on the right side of the room, I was ready to move on to paint. I didn’t want to wait until I had finished the priming, caulking, and sanding on the left side of the room. And then by the time I got two coats of paint on the first two sections of cabinets on the right side of the room, I was anxious to get the wallpaper and sconces up. There’s no way I could have done that out of order if I were spraying my cabinets. But that’s the order in which I needed and wanted to do them for my own peace of mind. I didn’t want to be stuck in the priming, caulking, and sanding stage for several more days without seeing some of the pretty stuff finally being done. I needed that mental break from the mundane tasks, and seeing the pretty wallpaper and sconces motivated me even more to get the other side of the room finished.

It’s definitely not the most efficient way to do it, but since I do all of the work myself, I have to do what I have to do to keep myself motivated.
Will I be clear coating the cabinets?
If you’ve been around here long at all, you know I love to use a clear topcoat on cabinets and furniture that have been painted with latex paint. But this time, I won’t be doing that. This is my first time using Sherwin Williams Emerald paint in a satin finish, and it is perfect all on its own. The paint us durable, and the finish is gorgeous. No clear topcoat is needed at all.
In the past, I’ve used clear topcoats for two reasons: (1) to add durability to lower quality paints, and (2) to knock down the sheen on paint that is too shiny for my taste.
The first reason is why I always used a clear topcoat if I painted cabinets or furniture with Behr paint. Behr paint always seems to retain a slight tackiness to the finish, like it never completely dries. So if I paint bookcases or a credenza top with Behr, and then place items on the shelves or credenza top, they stick. To prevent that, I always used a clear topcoat which took care of the problem and added durability to the finish.
The second reason is why I used a clear topcoat even when I used an expensive and high-quality paint (Benjamin Moore Advance) on my kitchen cabinets. The lowest sheen available in the Advance paint was still way too shiny for my taste, so I ended up topcoating it with General Finishes High Performance Topcoat in a flat finish. It frustrated me to spend that much on a high-quality paint only to have to clearcoat it, but that sheen was just too much for me.
But the Emerald paint is durable, and the satin finish is gorgeous. So for the first time in a very long time, I won’t be using a clear topcoat. I’m sold on Emerald Urethane paint in a satin finish. I’ll be using this paint for all of my cabinet and furniture projects in the future.
More About My Walk-In Closet/Laundry Room

see all walk-in closet/laundry
room diy projects
read all walk-in closet/laundry
room blog posts

Addicted 2 Decorating is where I share my DIY and decorating journey as I remodel and decorate the 1948 fixer upper that my husband, Matt, and I bought in 2013. Matt has M.S. and is unable to do physical work, so I do the majority of the work on the house by myself. You can learn more about me here.

How did the paint lay down? Is the finish smooth almost like you sprayed it or is there orange peel?
The finish is gorgeous. It’s hard for me to compare it to a sprayed finish because I’ve used two different sprayers on cabinets in the past, and I’ve gotten two very different results. I wrote about it here: https://www.addicted2decorating.com/the-best-paint-sprayer-for-kitchen-cabinets-plus-tips-on-getting-a-beautiful-finish.html
The finish I got with the Emerald paint applied with a brush and roller isn’t quite as smooth as the finish I got with the Critter siphon sprayer, but it’s NOTHING like the mess of a finish (which was a very orange peel finish) I got with the Flexio sprayer. With the Emerald + roller, there might be a very slight orange peel, but it’s VERY slight. You’d really have to be intentionally looking for it to even notice it.
Did you add any extender (e.g., flo-trol) to this paint?
Nope. I just used it as-is right out of the can.
“I don’t always do things in the order in which they make the most sense, or in the order which is most efficient. I work in an order that will keep me interested, motivated, and moving forward.” There is room in our world for our own way, that works best for us. Keep on keeping on! The results are beautiful and exciting…it must be so hard to wait on clothes and shoes. Have a great day, Kristi and Matt
Kristi, all the work you’ve done is impressive and will be even more amazing when it’s completed. BTW, if anyone has a painting project planned, but was turned off by the high price of paint from Sherwin Williams, they do have a 30% off sale starting May 2nd.
Loving the color so much, and I’m not usually a blue fan. The closest I ever get to blue is more of a sea glass blue-green, but this is making me want to redo our Master with this color. I have a question if you wouldn’t mind answering – is there a reason you went with permanent placement of the shelving over using an adjustable system, so you could change the spacing if needed? Or is it just a personal preference/visual appeal?
It was just a personal preference. I did a whole lot of measuring before determining the spacing for the handbag and shoe shelves, so I knew I wouldn’t be adjusting those. The shelves with the hanging bars really couldn’t be adjustable since the bars are in the way. And I wanted the shelves flanking the doorway to be uniform because I like the way it looks. I’ll use baskets in those to make it look neat and tidy, so making those adjustable, and having the shelves at different heights, would have driven me crazy with my unreasonable need for symmetry. 😀
It’s fabulous, Kristi! From top to bottom. And you’re not even finished yet. Your dream closet is becoming a reality at long last. And you created it with your own 2 hands & dazzling artistic vision. What a beautiful space.
It is coming along beautifully. Keep marching to your own tune my dear, it will all work out in the end. Simply gorgeous. It’s good to see your furry helpmate there helping no doubt to get some paint on himself.
Cheers to you and Matt!
Loving the painted cabinets and have to agree, your color choice is on point! This closet is going to look amazing!
When I need to stay motivated doing the more mundane chores (like painting intricate areas or planting large swaths of garden), I strive to work efficiently and just push myself to get at the boring jobs. Using specialty tools like power sprayers or planting augurs help me just get on with it. You might check out the DIY Wife’s YouTube channel to help you get motivated. She does a ton of prep like taping and masking, but uses a power sprayer to get through big jobs quickly.
With so many little jobs on your to-do list (and mine, too!), checking off a few items quickly is my key to staying invested and not jumping from project to project. Can’t wait to see more!
You have moved along a fast pace in this room! I know it may feel like it is taking a long time. It will be done by the end of May at the rate you are going! Loving all your choices!
Design, execution, color, style, beeeee you teee fullll!
Congratulations on getting the cabinets painted. What a turning point. And it looks fantastic. Everything else from this point on will be shorter, smaller projects, and easier to get through. so moving back-and-forth between the closet and the bedroom should keep you both motivated and moving forward. What a great job you’ve done.
Sounds reasonable to me. We each have a working style, which we can choose to follow if we aren’t answering to anyone else. I work that same way. You have done wonders already. The choice of that blue color was genius. It looks lovely with not only the other parts of the room, but also your personal items you have already displayed.
Well done Kristi finishing up the painting on the closets. Loving the color. It’s all looking so beautiful already!!