Chevron Wood Table Top, Part 1
I decided recently that I need a new table top for the table in my breakfast area. The one I have is the table top that I made out of MDF, plywood, and iron-on edge banding back in March 2010. When it was new, it looked pretty nice. (Old, tiny picture…sorry.)

But this is one hard-working table. We eat here, I blog here, and I work on projects here. So after almost 2.5 years, the table top now has some issues, like this corner that got banged up pretty badly…
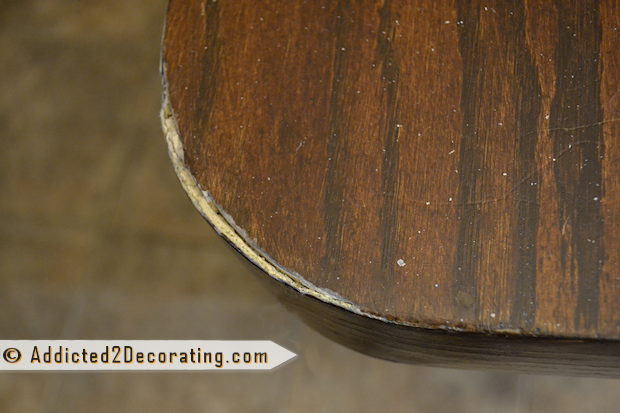
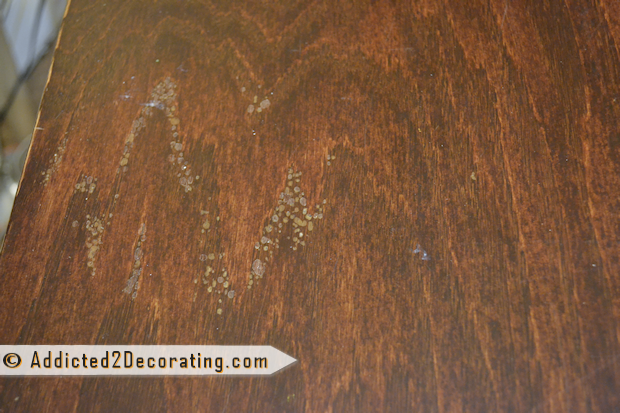
And this area where the polyurethane bubbled up because…well…I think I used a hot steam iron while working on a project, and didn’t protect the table very well. Oops.
Also, that table top was the very reason that the floor tiles were getting so damaged underneath the table. Yes, the damage was because of the constant sliding action back and forth when I get up from, and sit down at the banquette. But if the table had a lighter top, it wouldn’t be so bad. That particular top, however, is two layers of MDF with a thin layer of plywood on top. And if you’ve ever worked with MDF, you know it is MUCH heavier than real wood because it’s so dense. That top alone had to weight at least 70 pounds. At least!
So I definitely needed something new. I wanted to keep the base (which I bought at a thrift store for $15) and just make a new top.
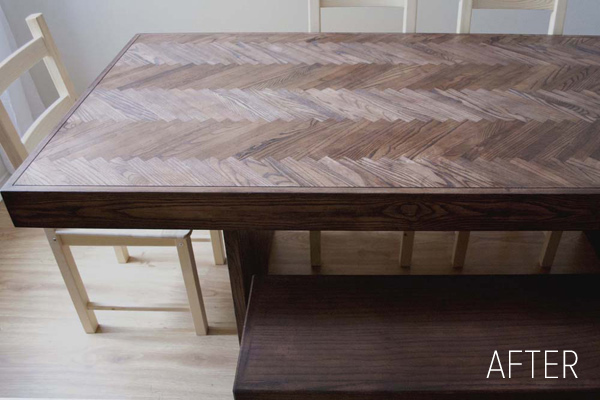
When deciding on a design, I remembered this herringbone wood table top that I came across the other day on Design*Sponge.
I love herringbone, much more than chevron, in fact. But there’s something about herringbone in a stained wood design that looks almost too serious (perhaps too classy 😀 ) for my colorful little condo. So while inspired by that table, I decided to make a table top in a chevron pattern instead. (Sorry in advance to those of you who are over the whole chevron thing. I still love it!)
I didn’t get the project finished, but I’ll show you what I did so far, and then have the finished table to show you tomorrow.
I started by cutting out a piece of MDF to the size I wanted my table top with my circular saw. Then I marked the center and drew a line down the center so that I would know where to start my chevron pattern. I used scrap MDF from my stash that I had previously used as a “drop cloth”, but since the paint wasn’t going to show, I wasn’t too worried about it.

Next I set up my miter saw at a 45-degree angle, and then I put a clamp on the end to use as my “stop” for the wood. That way I didn’t have to waste time measuring each and every piece, and I could be sure that every single piece was exactly the same length.
To create a chevron pattern, the angle on each end goes the same way, so no need to change the settings on the saw for each end. It’s really very simple! Just slide and cut. Slide and cut. Slide and cut.

As I cut the pieces, I placed them on top of my MDF piece so that I would know how many more I needed. I found that it was important to keep the pieces from one piece of wood together on the same zigzag line for a more cohesive look. I didn’t bother cutting the edge pieces perfectly at this point, so they all hung over the edge an inch or two (or three or four).
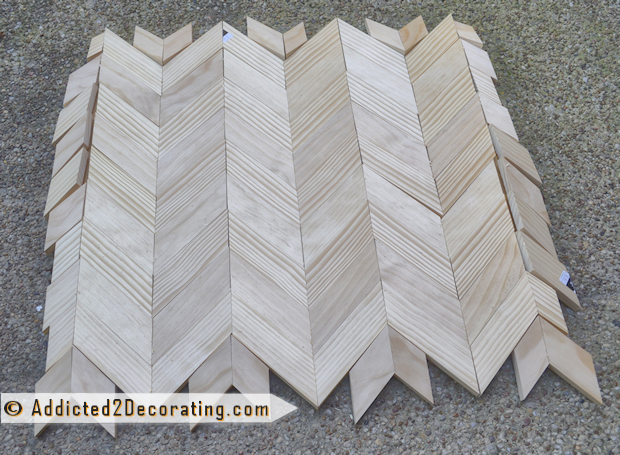
After cutting and gently sanding all of my pieces, it was time for the fun to start! I used wood glue and my brad nailer to attach the pieces, and on the very first row, I also used my framing square to be sure that the pieces were attached at a 90-degree angle. It’s very important to get the first row as perfect as possible so that the following rows will go on as tight as possible. But I only used the framing square on the first row.

After they were all attached, I used my circular saw to straighten up the edges, and this is what I had…

See those dark pieces? Well, I initially thought it would be brilliant to stain each individual piece before attaching it. Then I realized that that idea wasn’t so brilliant after all, because after everything was attached, I was going to fill in all the cracks with wood filler and then sand then heck out of the top with my electric sander. Soooo…that made pre-staining pretty useless.
And when I say I filled in the cracks with wood filler, I mean FILLED.THEM.IN. 😀
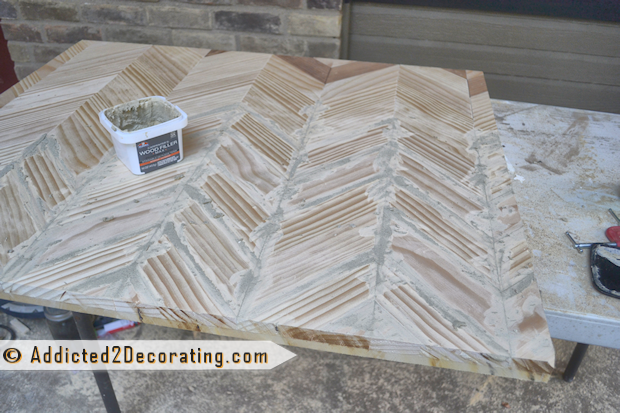
I’m probably one of the messiest wood filler-ers ever. When I know that I’m going to be using my electric sander on something, I simply don’t waste time trying to get everything all nice and neat. Nope, I slather that stuff on, smoosh it around everywhere, and get it done as quickly as I possibly can.
I was losing daylight in a hurry, but I snapped this picture a little closer up so that you can see just how messy I am with the wood filler. 🙂
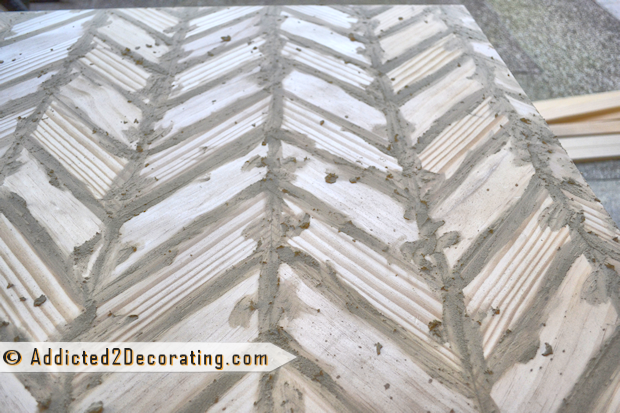
That’s a job only an electric sander could power through. When I know I’m going to have to sand something by hand, I do take the time to do a much nicer, cleaner job.
So that’s where the project stands for now. I do have an idea up my sleeve, because I never envisioned that this table would simply be a stained wood table top. I want something fun, colorful, and a bit playful. So let’s hope that the idea in my head actually translates well into reality. If not, I could have a big mess on my hands! We’ll all find out tomorrow. 🙂
Update: It’s finished! You can see the finished chevron table here.





I am so excited to see how this turns out! Looks great so far! Keep on DIYing!
Ooooh, I love this!! Such a fun and beautiful makeover. I was just thinking about building an island with a chevron top, and I cannot wait to see how yours looks finished. It may send me over the edge to do it!
wow, that is going to be amazing, Kristi! Can’t wait to see the finished product 🙂
This looks so fun and easy to do! Can’t wait to see it finished.
This looks like it will be soooo great!! I am tempted to do this for my own dining room table which I am currently shopping for and/or thinking about making or hacking.
Wow! This is gorgeous and sooooo involved! Fabulous!
I’m with you, the herringbone and chevron still makes me loose my breath alittle! 😉 I CAN’T WAIT to the see results!!
Kristi – If you could see me right now, you would see that I am bowing down to you and your genius creativity. You are so super talented girl – it amazes me! I can’t wait to see how it turns out!
*applause* that’s one wild lookin’ table – instead of it just being the old ‘norm’, you’ve got it acting as an accent piece all on it’s own – bravo! Can’t wait to see the finished result…
I can’t wait to see how this project comes together. You are definitely the power tool queen!!!!
love it! can’t wait to see the finished fun 😉
you’re amazing.
Cx
A girl who can use power tools, I’m super impressed! I have to get over my fear. That is going to be one gorgeous table top and made to last, beautiful!
I can’t wait to see this finished! That is a pretty tabletop so far and when finished, I bet it’ll be spectacular. Wow!
Wow! That’s completely amazing. You’re a total rock star, and I can’t WAIT to see how it turns out!!!
Amazing Post. Thanks for sharing.
Great Job! I’m dying to build my own chevron console table. Can you tell me what size boards you used for the top? Looks like 2×4 pine boards… curious as to how many you ended up using?