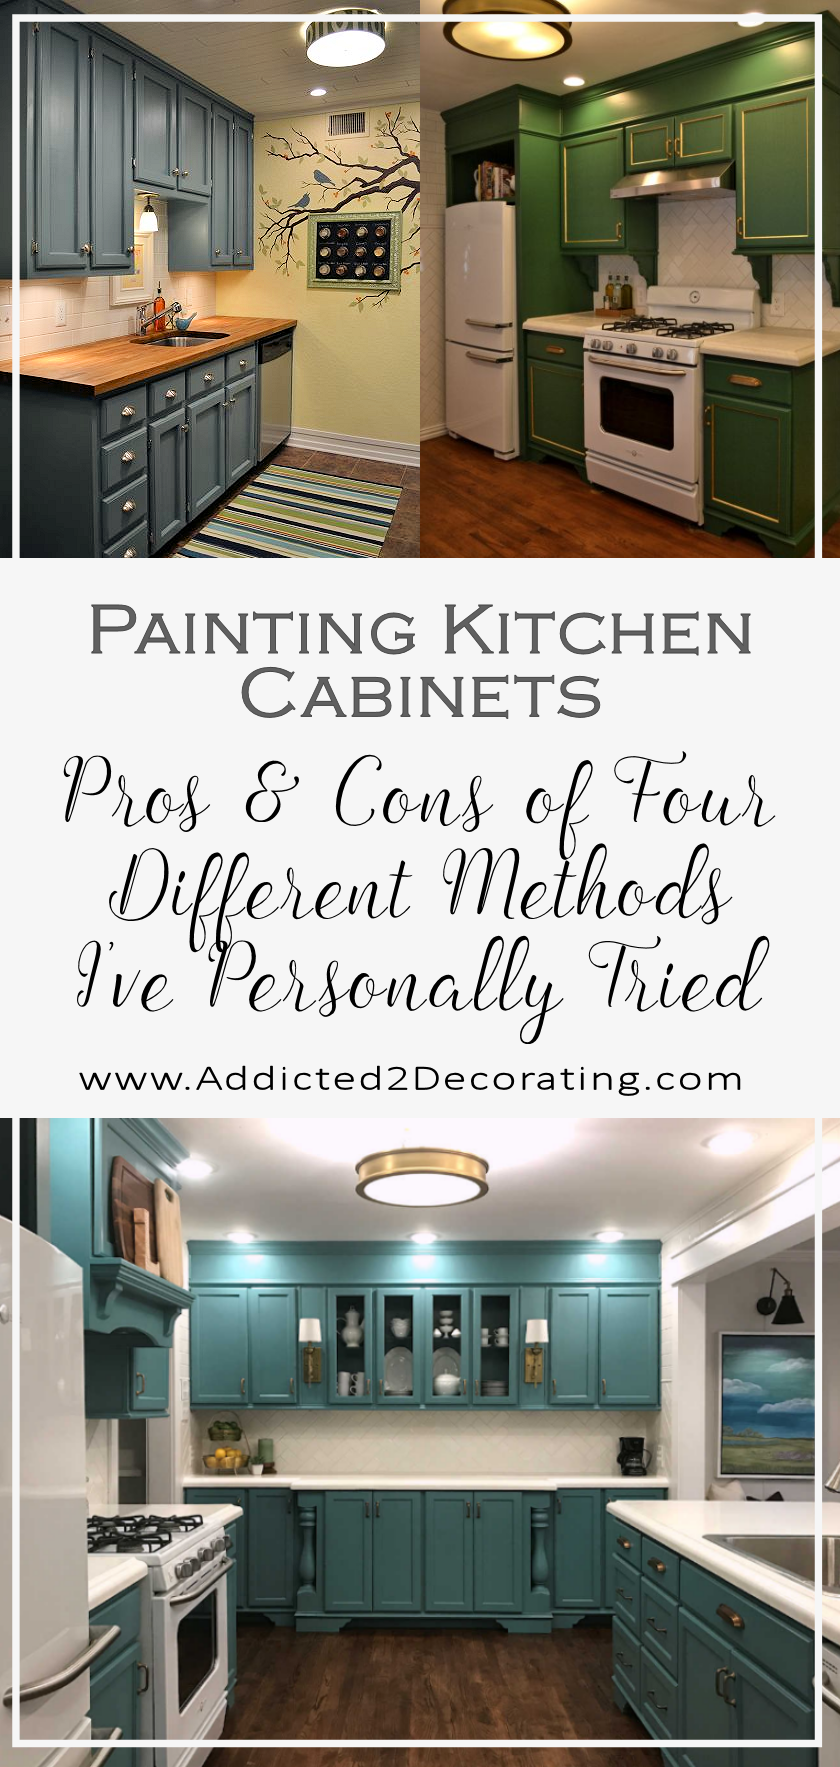
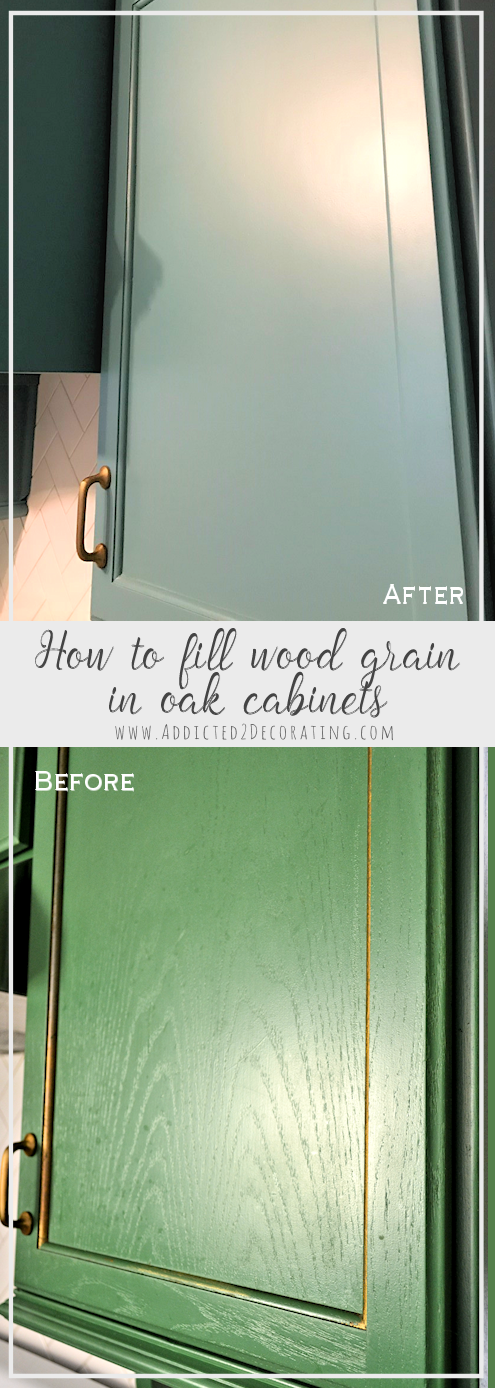
Customizing A Store-Bought Woven Shade
Happy Monday! I hope you had a wonderful weekend! I worked over at John & Alice’s house on Saturday, and then took yesterday OFF. I intended to do a couple of projects, like work on my dining chairs, but I decided I just needed a break…completely.
Anyway, John & Alice’s kitchen is coming along very nicely! Well, except that the electricians broke their glass top stove as they were reinstalling it. I mean, cracked the thing clear across the top, from one side to the other. Uugghhh!!! Two steps forward, one step back.
But on to happier things. One task I needed to take care of was replacing the very dull white blinds on the kitchen window.

I wanted to add a natural woven shade in a medium brown to give some warmth to the cool grays and whites in the room. Unfortunately, my very favorite woven shade from Home Depot didn’t come in the right size. I needed a 34” x 46” shade, and the closest they had was 34” x 72”.
I didn’t want two extra feet of shade bunched up at the bottom of the window, so I decided to customize the length myself. It was actually not any more difficult that customizing the length of those 2” blinds!
I started by placing the shade on the floor, with the length fully extended. (The top is on the left side.)

Next, I used my tape measure to measure out the length I wanted.

The height of my window was 46”, so I allowed a few extra inches, and cut at around the 50” mark. I used a razor blade to cut the thin cords all the way across.

Then I removed about five of the wood pieces to leave about 1” of the thin cords exposed all the way across.

Next I cut the cords that actually raise and lower the shade.

I secured it to the last ring by first tying a double knot in the end of the cord.

Then I tied a single knot around the metal ring, and pulled until the single knot rested on the double knot. I repeated that on the other cord.

Next, using a high temp hot glue gun, I wrapped the thin cords around the last piece of wood, and glued.

I started by doing this in three places…each end and in the middle…just to keep the piece of wood secure.

Then I went back and glued all of the ones in between.

When all of the tiny cords were glued along the bottom, I turned up the bottom of the shade about 1”…

…and then secured with hot glue. This created a “hem” that hid all of the ends of the cords, as well as the hot glue.

And when it was finished, it looked pretty much exactly like the original bottom edge of the shade looked.

Now when it’s hanging in the window, I don’t have 2+ extra feet of shade bunched in the bottom of the window. It’s the perfect length!

Now I just need to shorten the pull cords a bit so they’re not dragging on the countertop.

So there you have it! Don’t be afraid to customize these shades. I showed you a while back how to customize the width, and now you know how to customize the length. There’s no need to spend hundreds of dollars on custom woven shades when you can get them at a fraction of the cost and customize the size yourself!
Have you ever tried this? Did you have success with it?
Psst…Did you miss yesterday’s link party? Click here to see the fabulous projects that were linked up! And there’s still time to link up your own project.

Addicted 2 Decorating is where I share my DIY and decorating journey as I remodel and decorate the 1948 fixer upper that my husband, Matt, and I bought in 2013. Matt has M.S. and is unable to do physical work, so I do the majority of the work on the house by myself. You can learn more about me here.
Those look GREAT! I would never have attempted that without your tutorial. Same with silver leaf…I just did a table yesterday because of your tutorial. AND it came out pretty well!!! Thanks for the great inspiration and advice
Stacy @ http://www.conspicuousstyle.com
Ooooh fantastic! That looks so much better! Also, the tutorial is great!!
Kitchen countertops, and would rather just focus on a particular part of it, such as your worktops or floor. Or you could go for redecorating the kitchen and see how this looks. I don know that you will ever be able to avoid this completely, but if you create an area for tools it will help a great deal.
Thank you so much for this post ~ it is so perfectly timely for me! I'm sick to death of the white plastic shades and have been looking at the woven roman shades at Man Land (i.e. Home Depot), but my problem was length. When shopping online I was stunned at the price of more "custom" shades. I had been researching for directions to shorten the shades, but had only come up with written directions. Not for me ~ I am a very visual person and need to see what is being done. And now I find this post with pictures!!!
Again, thank you so much. I bought the cheap shades and will shorten them this weekend.
Thanks so much for your tips. I too bought the shades at home depo and just left the extra now I can shorten. Yeah!! I hope you can help with this other dilemma, I see that your windows are not wrapped in moulding. How did you get the blinds to fit snugly at the top of the window with out sing the hooks?
Hi. I just googled how to shorten bamboo shades and your post came up. So glad I found you!!! I just found these shades clearanced at Lowes for $4.73 but they will be waaay too long and your tutorial is very clear and easy to follow. I can’t wait to get on it. I don’t have the shades yet but it’s possible they may be a tad too wide also and you said at the bottom of your post that you also adjusted the width; however the link is dead. Did you remove that post? I am looking at possible ways to shorten the width also and since this post was so well written, I was hoping to see your other one. Thank you for this post and if you have deleted the other one, that’s ok too. Thanks again.
An easier way is to ‘paint’ super glue on each string along and above the joint where you are going to make the cut. Let the glue dry. Snip along the joint. Done.