Grasscloth Wallpaper Installation Underway!
I decided that the next project that I’ll tackle in the bedroom suite is the grasscloth wallpaper. So much remains on hold until the grasscloth is up. I can’t hang my foyer mirror until the grasscloth is up. I can’t hang artwork until the grasscloth is up. I can’t install the curtain rods in the bedroom until the grasscloth is up. And I always like to install the curtain rods before sewing curtains so that I can measure an exact finished length for the curtains rather than kind of guesstimating on the length. So for all those reasons (plus, I’m just anxious to see it done), I decided that the grasscloth is the next project I want to cross off the list.
Before I get too far into this post, let me manage expectations really quickly. I only got one piece of grasscloth on the wall yesterday. 😀 I had hoped to get a lot further, and pretty early in the afternoon, I was just about to jump into the project with both feet when I decided that I really needed to slow down a bit, watch a few videos of experts installing grasscloth wallpaper, and making sure that I knew exactly what to do.
I’m SO glad that I did that because had I rushed headlong into this project, I would have messed it up. For example, I didn’t know that with grasscloth wallpaper, you’re supposed to alternate directions when installing. The reason for that is because grasscloth is a natural fiber, and in the dying process, the left side of the roll might be darker or lighter than the right side of the roll. So to minimize those variations, you put the first piece with the top side (i.e., the “top” edge as it comes off the roll) at the top of the wall. And then with the next piece, you flip it over and put the top edge at the bottom of the wall. And you continue flipping each subsequent piece the opposite direction as you work around the room. That was new to me.
I was also unsure about where to put the wallpaper paste. I almost always use unpasted wallpaper, so I just paste the wall, and then put the wallpaper onto the pasted wall. It’s a super easy process, but I’ve only ever used wallpaper that can be wiped off with a damp cloth if I get wallpaper paste on the face of the wallpaper. That’s not really possible to do with grasscloth. You have to be super careful not to get paste on the face of grasscloth wallpaper because it doesn’t wipe off easily, and it can (and probably will) discolor the grasscloth if the adhesive gets on the face of the wallpaper.
Even when I started on the first piece, I was wondering why most people (but not all) pasted the back of the wallpaper instead of pasting the wall, which I find to be so much easier. So with my first piece, I pasted the wall. That worked out fine, but I quickly realized that with all subsequent pieces, I’ll need to paste the back of the wallpaper instead in order to hopefully eliminate the possibility of rolling or brushing any paste onto the edge of the previous piece that I just installed.
Anyway, all of that to say that I spent a good part of yesterday watching and learning, and I’m so glad I took the time to do that. I found this particular video to be very helpful, and I also read the comments for additional helpful tips. In the actual video, they never mentioned which adhesive they were using, but one comment from a professional recommended Roman Pro-880 for grasscloth and other delicate papers. So that’s what I went with. That’s the exact wallpaper adhesive that’s available at Home Depot.
I will say that I found the Roman Pro-880 difficult to use. It doesn’t seem to have a lot of grab to it, and it was especially difficult to get the edges of my grasscloth to stick.
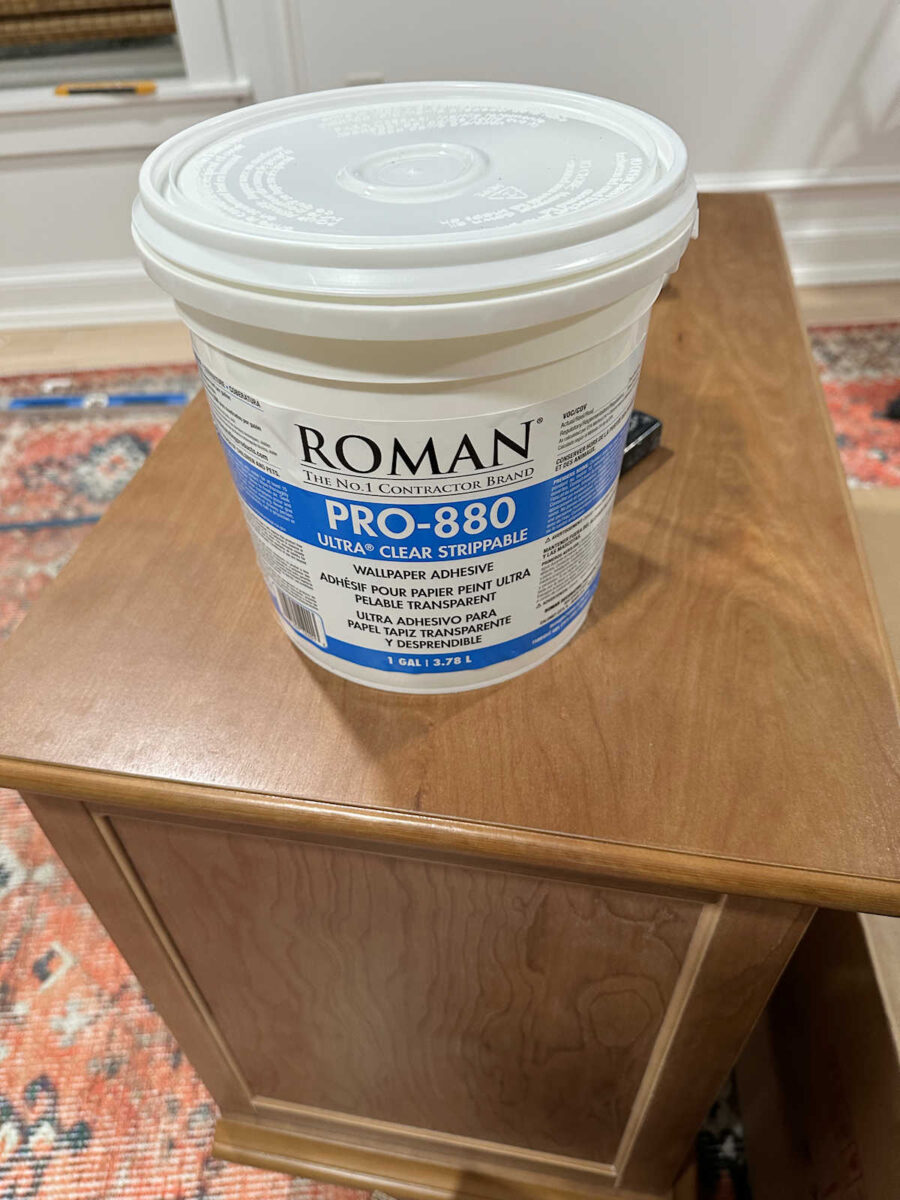
In the past, I’ve always used Roman Pro-555 Extreme Tack, which I find very easy to use, and I’ve never had any problems getting the edges of the paper to stick. So while I do appreciate the input from a pro, I think I’ll probably go back to what I’m used to and use the Roman Pro-555 Extreme Tack on the rest of the walls. I just don’t want to have to babysit the edges of each piece of wallpaper as they dry. Having to do that stresses me out. I just want them to stick the first time so that I can move on and get this done.
Another thing that was stressing me out (and the main reason I was considering hiring out this wallpapering job) was the idea of cutting thick grasscloth wallpaper around the trim headers on the windows and doors. I know the limits of my DIY abilities and getting those detailed cuts are difficult enough with regular wallpaper. I managed pretty well in the closet. But grasscloth is so much thicker than standard wallpaper, and this was the one thing that made me the most nervous about doing this project myself.
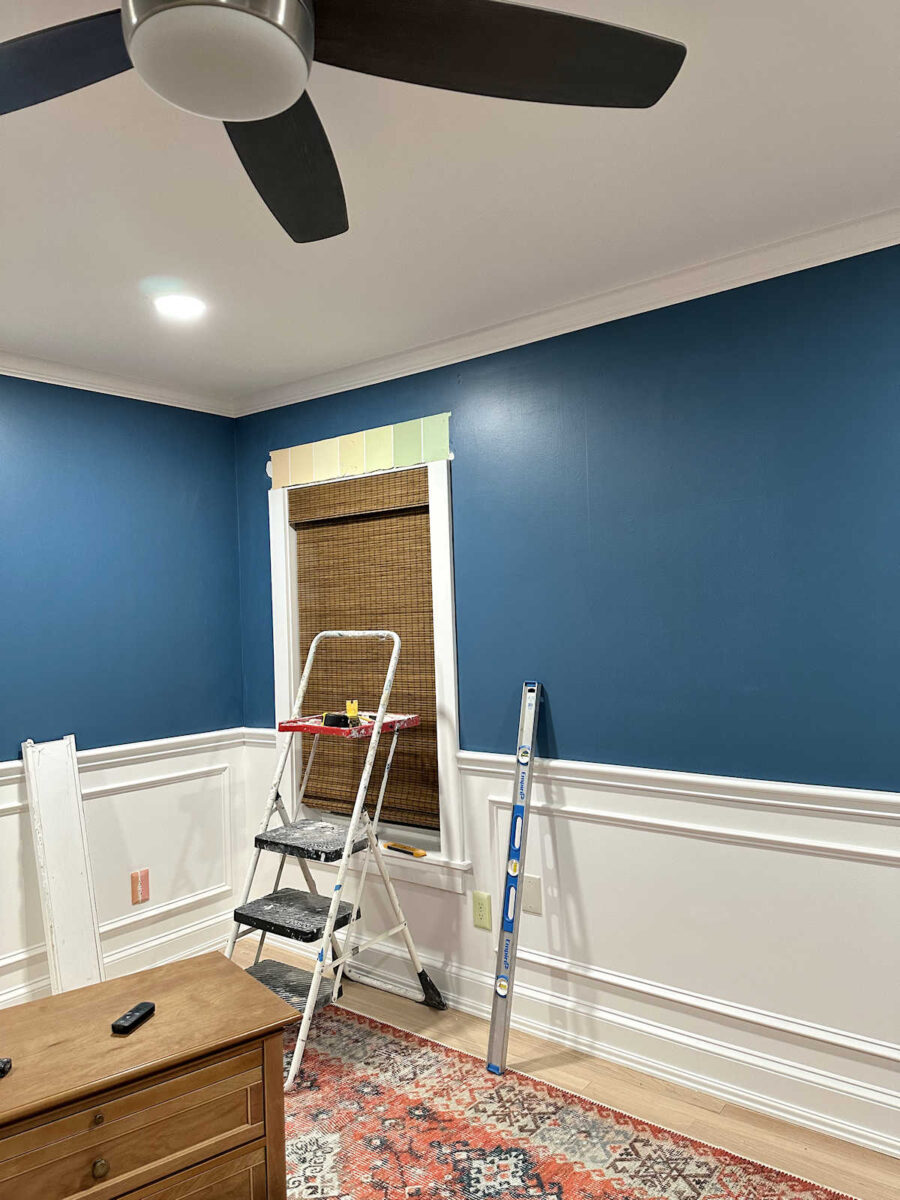
So after discussing it with my mom, we both agreed that the easiest thing would be to remove those trim headers so that I’d just have straight vertical cuts on the sides. And once the wallpaper is up, I can just nail those trim headers back on. Fortunately, I don’t use construction adhesive anymore when installing trim, so removing them will be pretty simple.
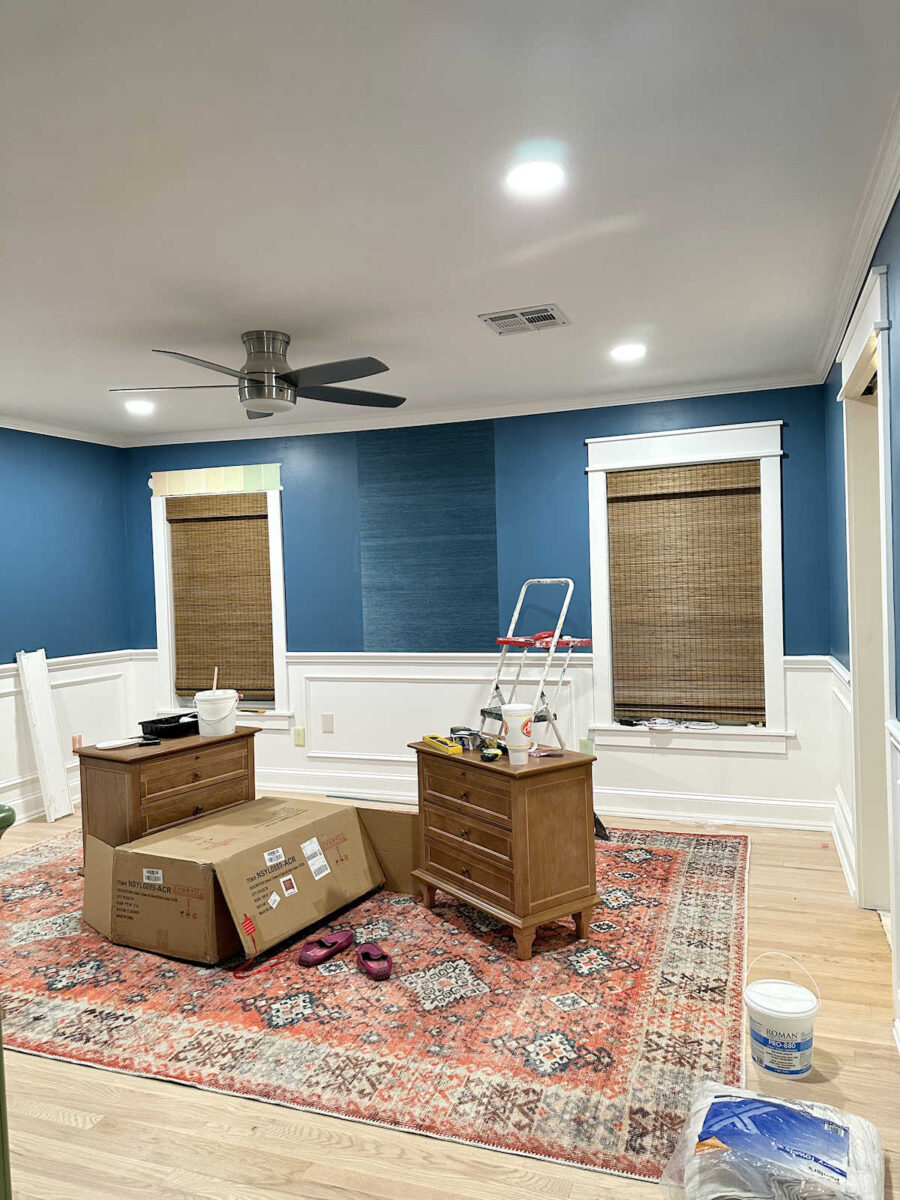
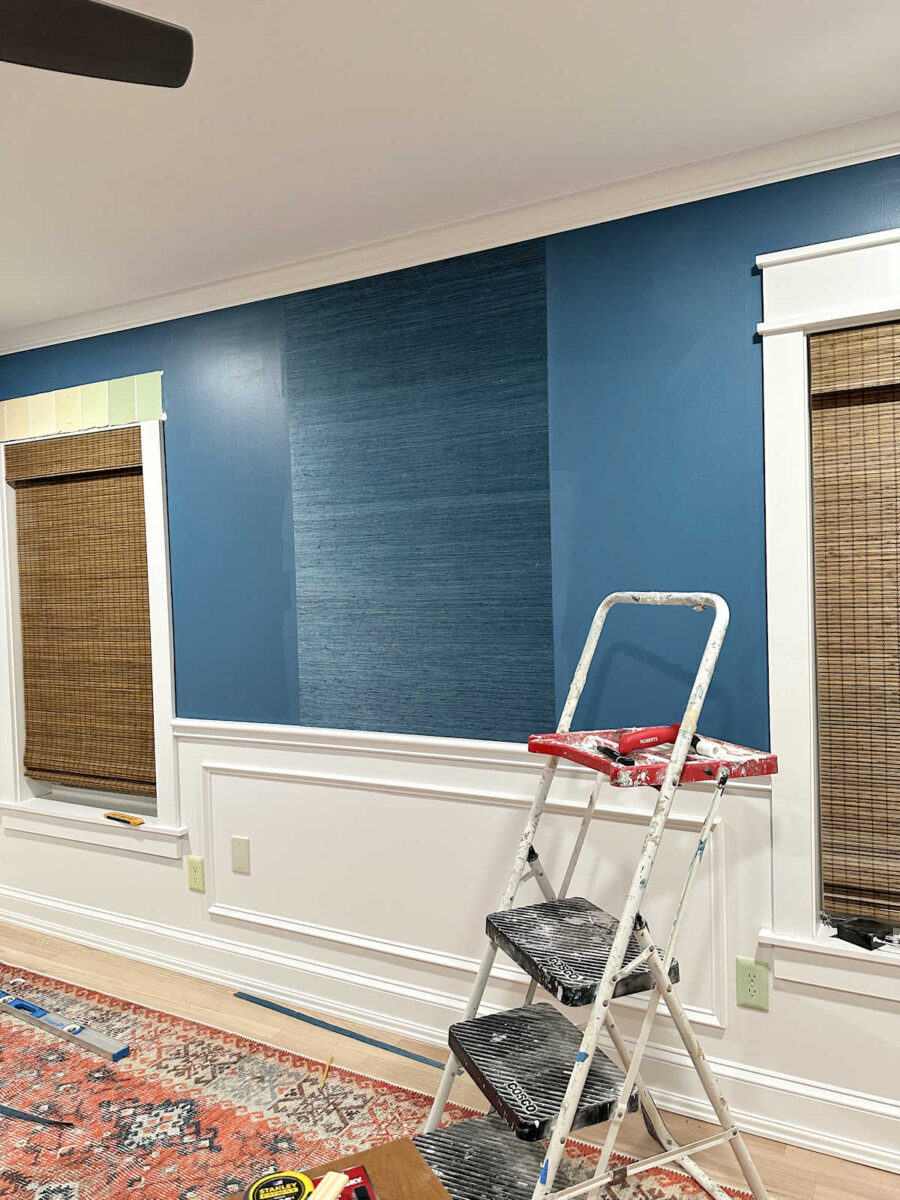
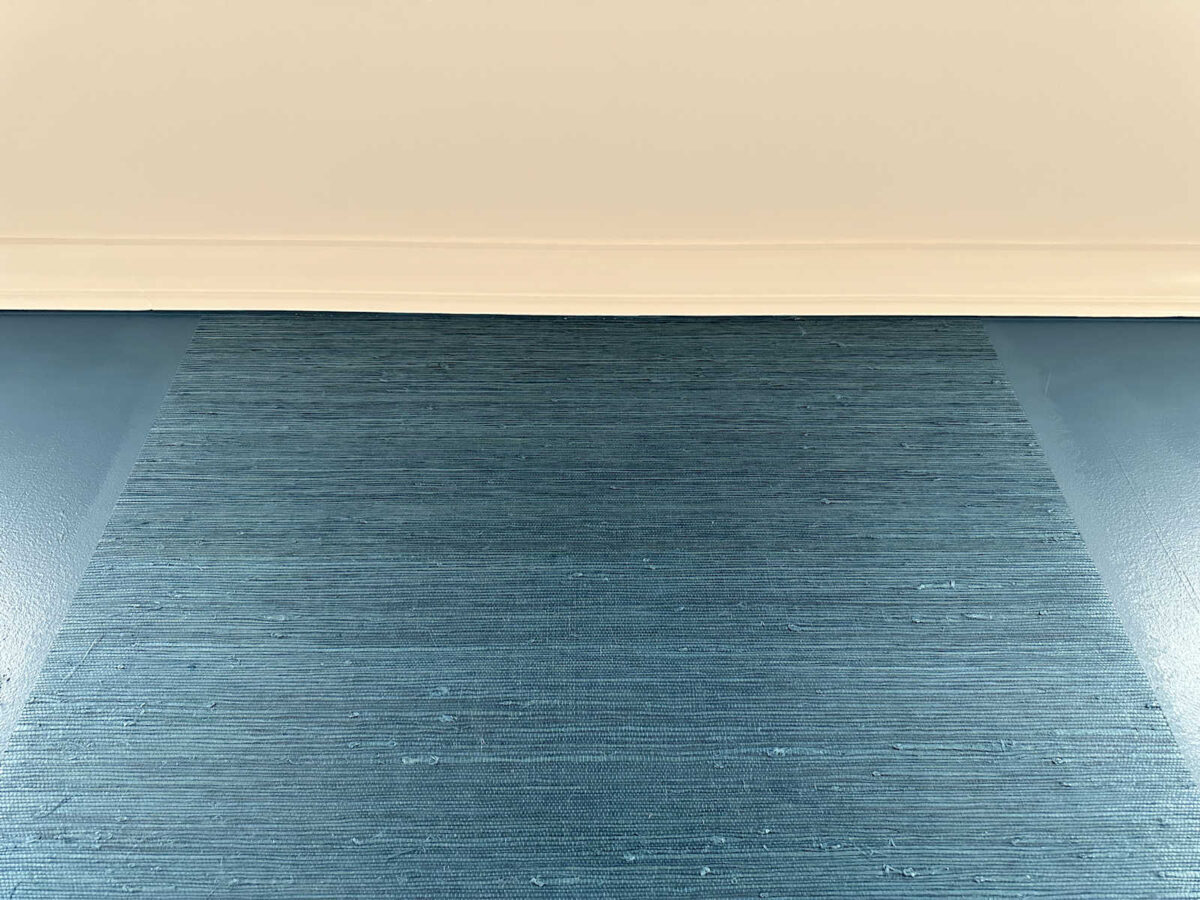
For the headboard wall, I needed five pieces. And it just so happens that I can get five pieces from each roll of wallpaper. I cut all of my pieces and marked the top of each piece with a series of pencil marks so that I knew which end was the “top” on each piece, and I also numbered them as I cut them.
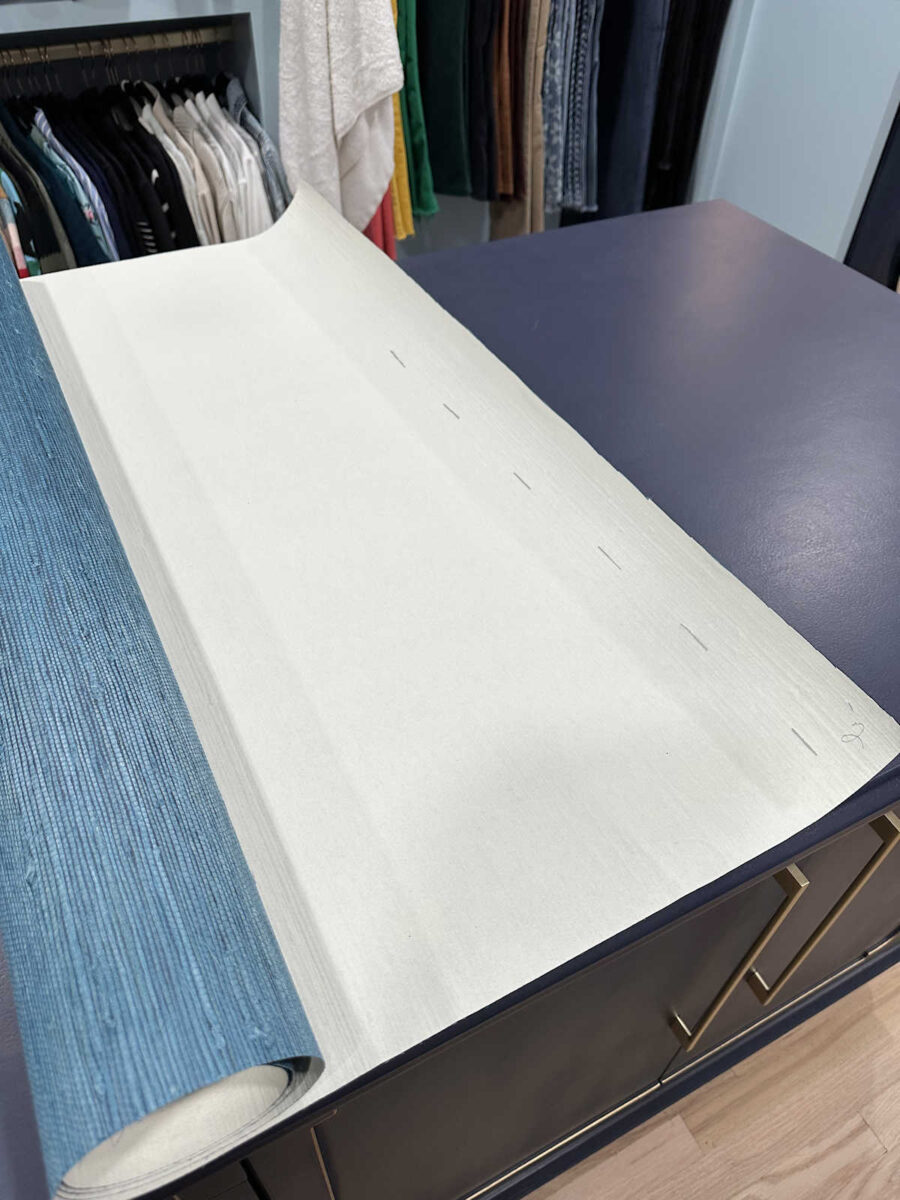
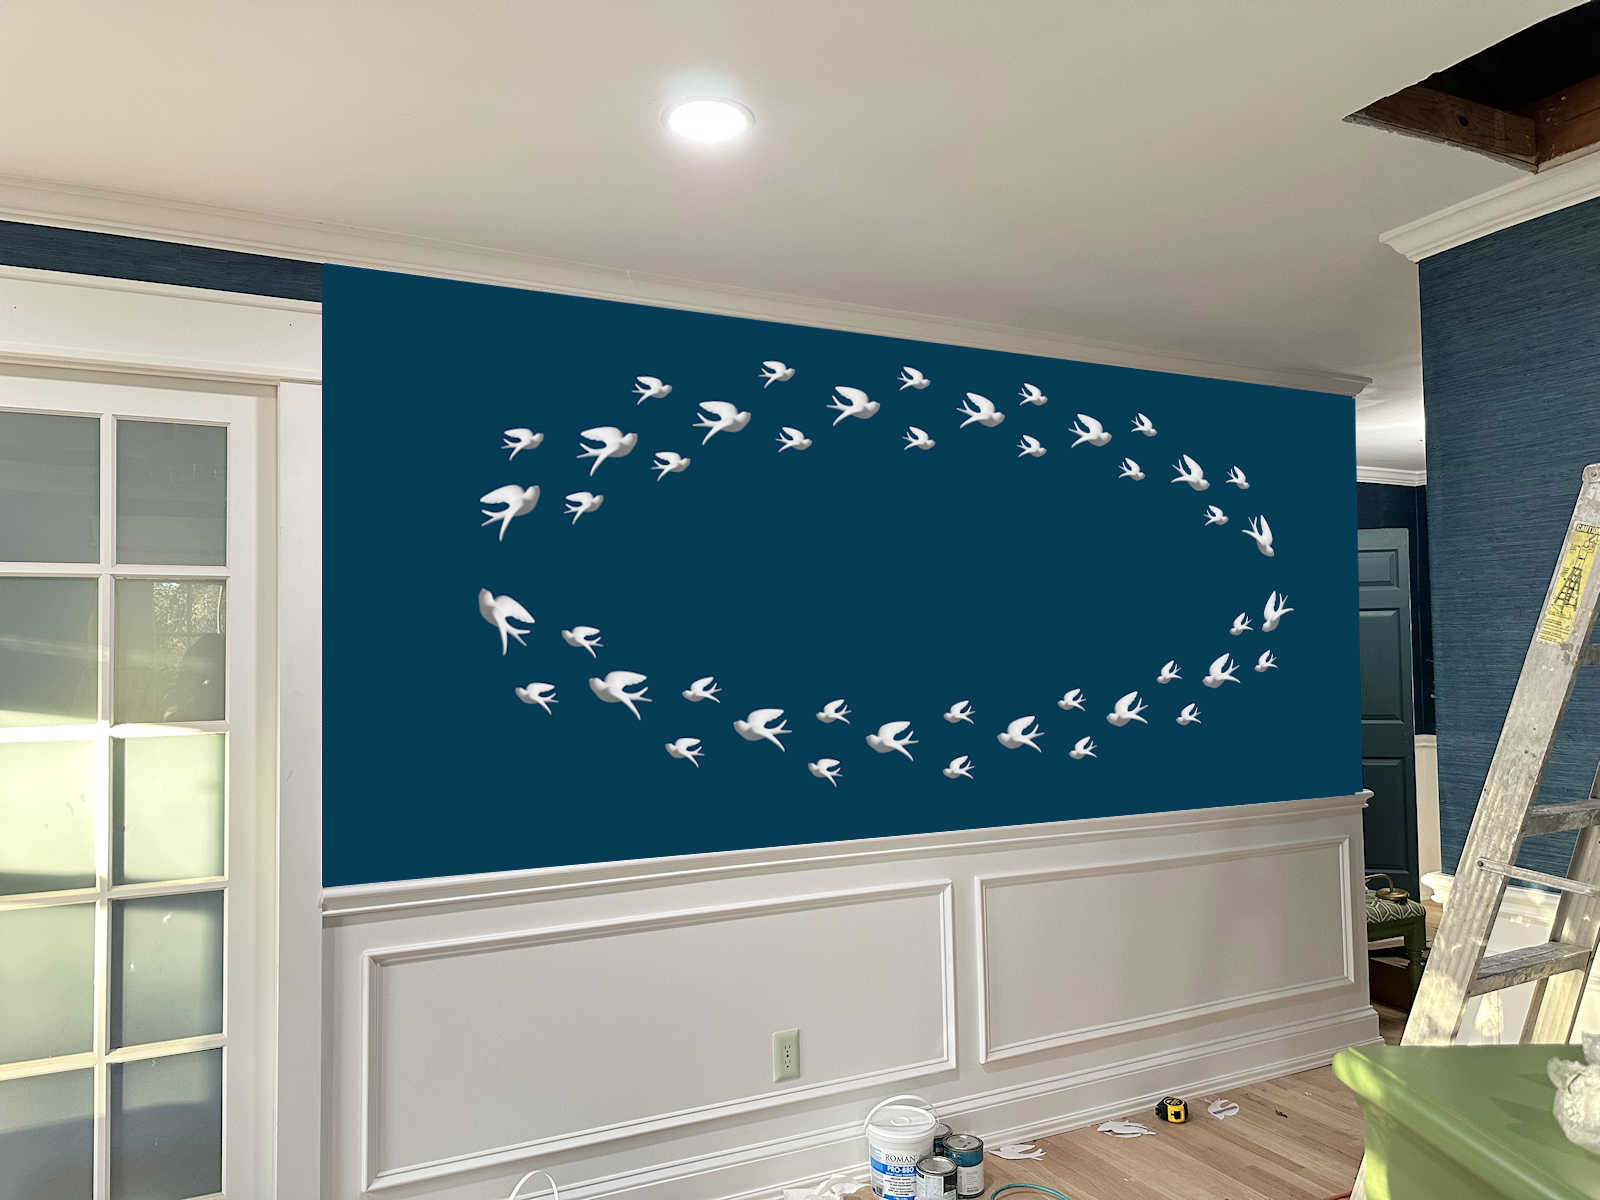
And then I started with the middle piece (literally piece #3 of five pieces) in the center of the wall after measuring and marking the center between the windows.
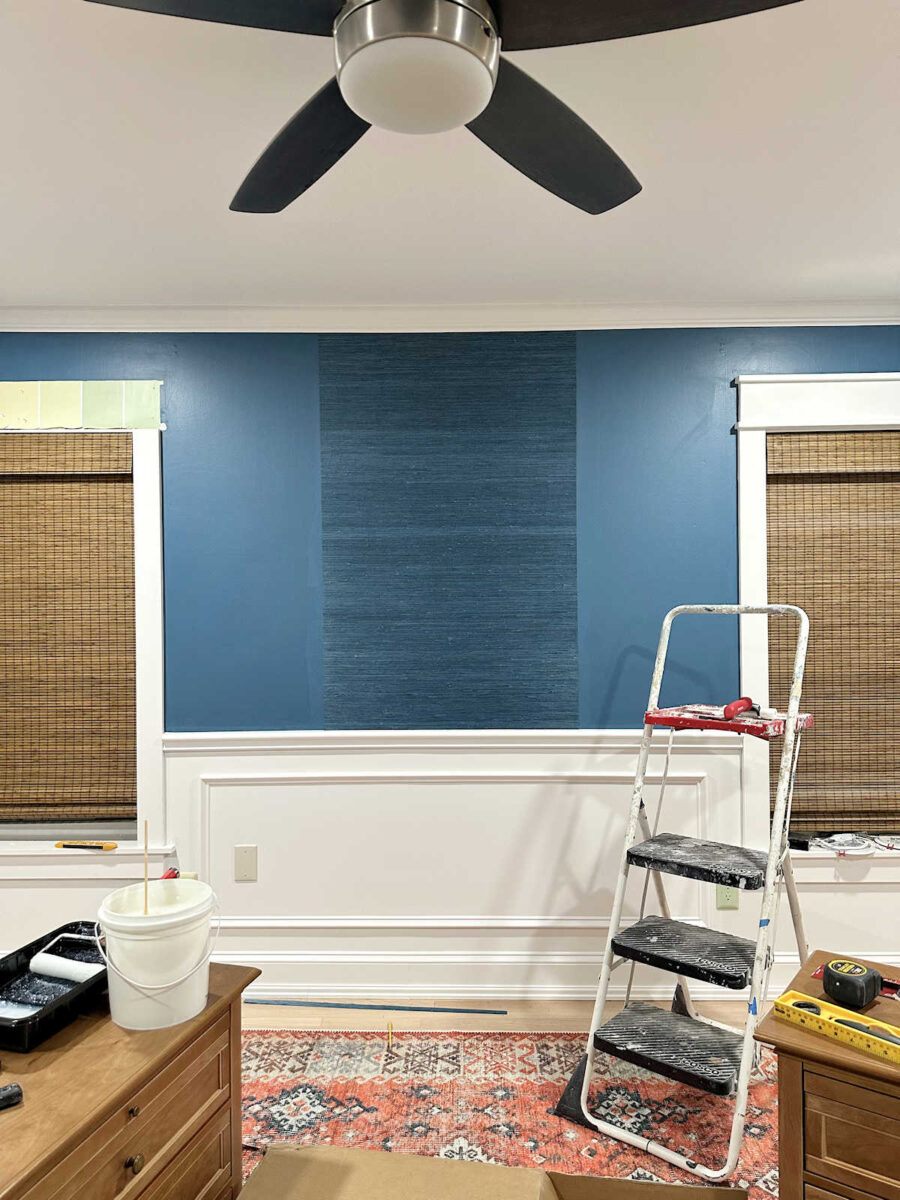
I know it’s only one piece, but I was so excited to see that one piece finally go up. I love how deep the color is. It adds such a richness to the walls. And now that I have that first piece up, a lot of my fears and anxiety about this project are gone.
Well, they’re not completely gone, but I feel like this is totally doable.
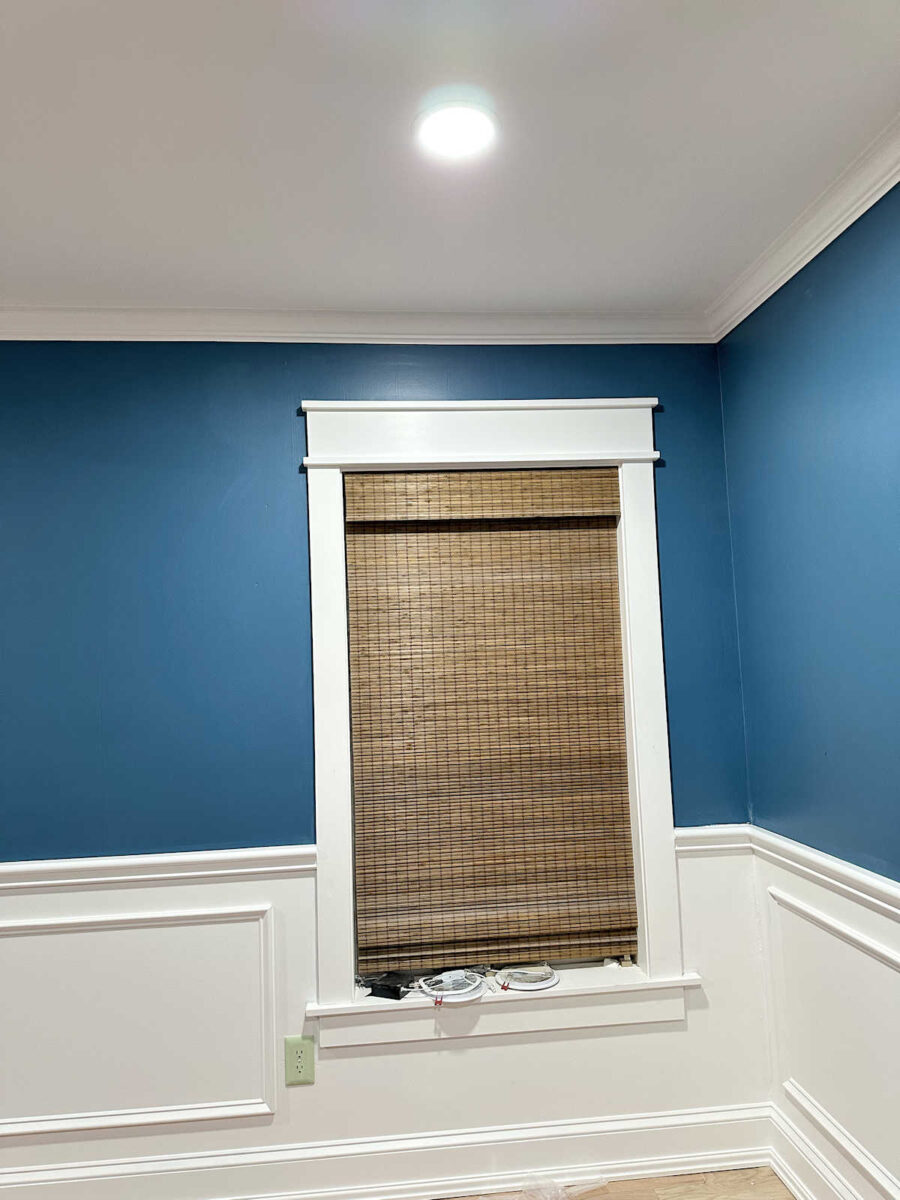
One thing I did when I was painting the walls is that I painted that bottom lip of the crown molding the wall color instead of the trim color.
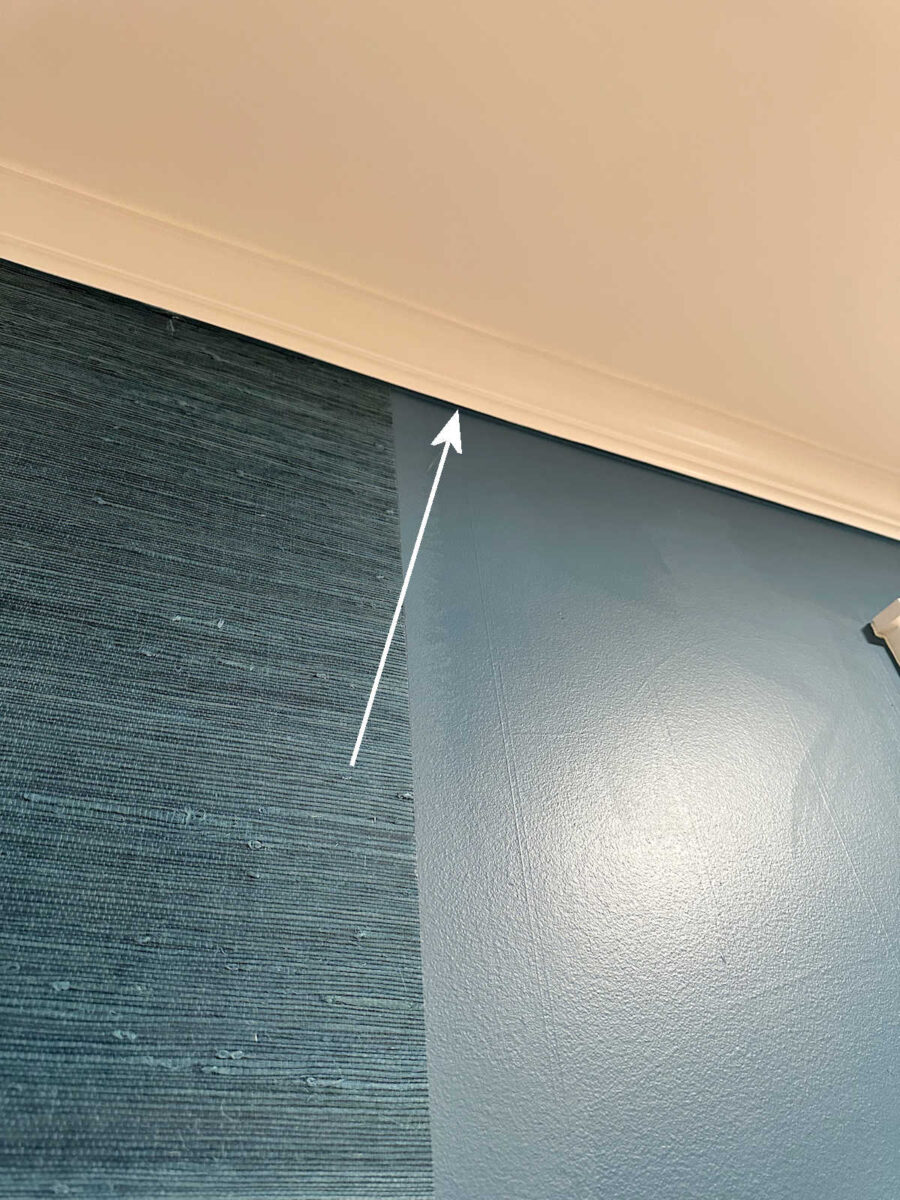
That way, even if my cuts at the top aren’t exactly perfect, that perfectly painted edge gives the impression that the cuts are perfect.
I didn’t have that same kind of safety net when cutting the bottom edge, and I learned on this first piece that you really do have to give it some firm pressure when cutting. If you don’t get through the wallpaper on the first cut, it will leave little fibers sticking out, and those are almost impossible to get rid of on a second or even third pass.
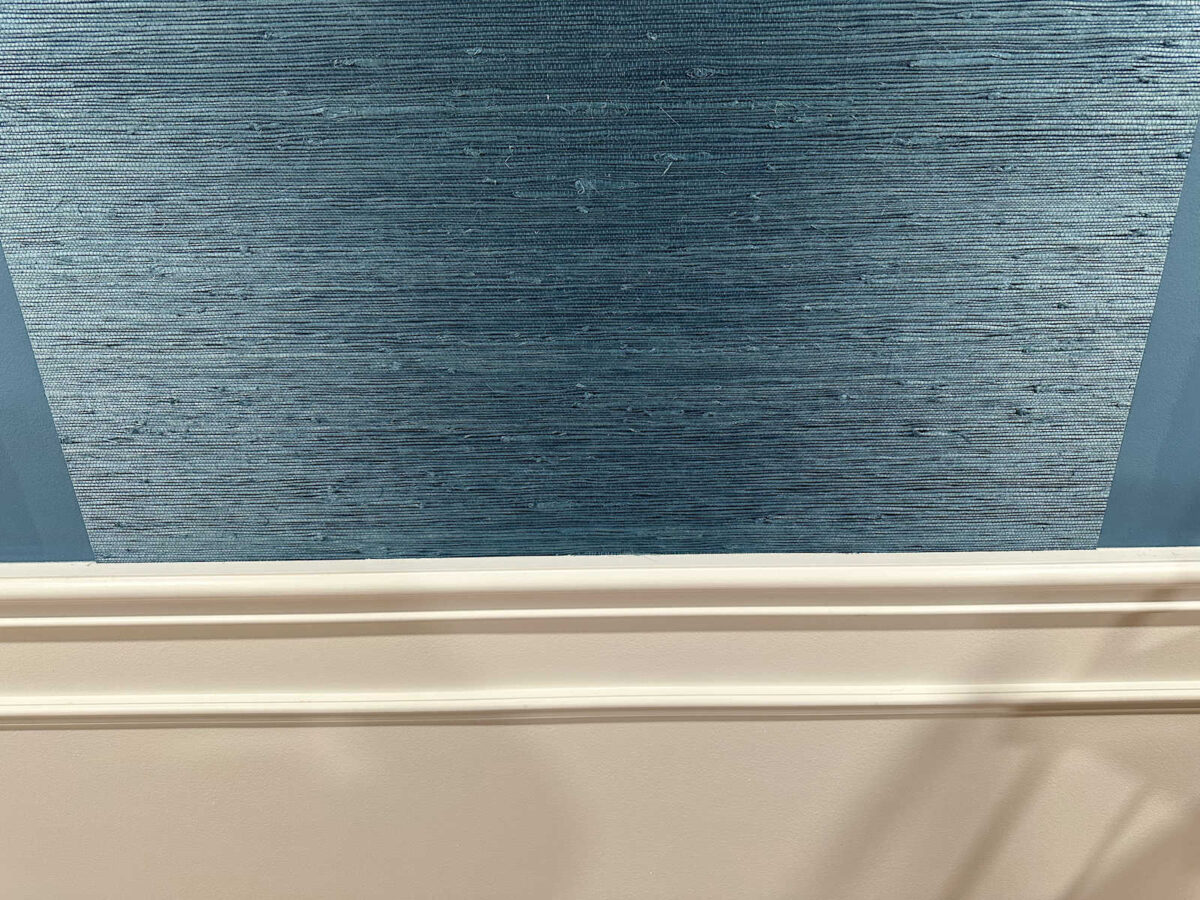
Thankfully, this area will be hidden behind the headboard, so I’m okay with it not being perfect. This was a good area to start and to learn all of these little tricks since so much of it will be hidden by the headboard.
I know this isn’t too exciting yet since it’s only one piece, but I’m amazed at how much more confident I feel just getting that one piece up and also working out the plan for papering around the windows and doors. I was also very nervous about trimming the paper at the top and bottom of each piece, but that worked out really well.
So I feel like, now that I’ve gotten my feet wet and I know what to expect, I can get this done relatively quickly. I don’t want to go too fast because, as I’ve mentioned many times, I have no room for error with this project. If I mess up any of these pieces, I have nothing to fall back on. I purchased every last roll of this wallpaper in this dye lot that existed in the entire country, and I have just enough to paper the bedroom and foyer with no wiggle room. So while I’m feeling pretty confident now, I can’t get overly confident or go too quickly because that’s when I’ll mess up.
More About Our Master Bedroom
see all master
bedroom diy projects

read all master
bedroom blog posts

Addicted 2 Decorating is where I share my DIY and decorating journey as I remodel and decorate the 1948 fixer upper that my husband, Matt, and I bought in 2013. Matt has M.S. and is unable to do physical work, so I do the majority of the work on the house by myself. You can learn more about me here.

Wow, just the one piece is stunning already!
Another great teaching post from Kristi! I have been intimidated to try grasscloth and now this seems doable with these tips. Love the way this color of grasscloth is looking already!
Such a good decision to slow down and take your time to research installing grasscloth. Particularly since you have limited excess paper to accommodate mistakes.
Love the texture grasscloth brings to the party.
With all that said I’m surprised you didn’t spring for professional installation. I couldn’t survive under that kind of pressure but since you are willing to tackle this I say, hooray and good luck. It’s going to be gorgeous!
Some professionals won’t even tackle real grasscloth wallcovering. I give Kristi credit too for going for it!
No one in her area will hang grasscloth, and getting someone willing to come from afar would not work out.
She tried. Couldn’t find any one local to do it.
She couldn’t locate any professional near Waco to do the job. I think it would have been problematic anyway because they always want you to have that 10-20% extra to cover for mistakes/mis-cuts and Kristie has said many times that she has no extra to spare because she has purchased all of that dye run in existence so she has to be super careful to not waste any.
The grasscloth is beautiful! I love the variation in the depth of color and richness of the texture. I was stressed out just reading the first few words about you hanging it! I always wondered how people managed to hang grasscloth without getting paste on the front of it which I’m sure would be nearly impossible to wipe off without damaging the grasscloth. I had never read about hanging one piece up and the next piece down which is great to know about. Removing the trim over the windows was a good idea.
I’m wondering if putting a strip of Glad Press-and-Seal along the edges would help protect the paper from paste during installation…
The color is beautiful!! Take your time and enjoy every piece of your work.
I’ve hung quite a bit of wallpaper in my time and although the pros say to cut the top and bottom with a knife, I’ve always used scissors. My mom taught me this way. I score the paper with the back side of the scissors, then peel the paper away from the wall and cut on the score line. I’m not sue if this would work with grasscloth, but you might want to try it in a hidden spot.
I believe it’s going to be beautiful!
Do you have a framing mat cutter? It does long, straight, cuts and uses regular blades (I think you can set the cut angle). We inherited one, and I’ve used it for so much gotta do it in one cut things. Also easy to make a little $ or easy gift buying full mats and cutting them for people for frames especially since craft stores are fewer.
Gosh that paper is GORGEOUS!
SO GORGEOUS!!
You got this!
That is going to be stunning!! Just that one piece is gorgeous. Best of luck as you progress.
I forgot about reversing the panels of grasscloth. I know you cannot “match” the edges, and that is what throws people off about it, but it doesn’t bother me. And if you should accidently get paste on the pretty side, a DAMP sponge and gentle blotting followed by a dry sponge to blot also, will help to hopefully eliminate the paste. And watered down craft paint can touch up if needed! Also, if you feel you may not have enough paper (for whatever reason) as you get to a good stop point, you could switch to a different dye lot for the foyer, as long as the switch is in a corner or edge of a wall. The difference usually is only obvious when looking at the seam straight on. Keep that in mind if you should have a problem, and don’t stress! It’s your bedroom, and not many people will see if there’s a minor flub! Only you will know the truth! It’s going to be gorgeous!!!
It is going to be stunning !!!
It took my breath away with that first piece up, I mean, WOW!!! I’ve always used paste on the paper, and now I am using the contact like wallpaper, and I am having some troubles there, so a few videos should be in my future. I also have all my dad’s wallpaper knives, these things are superior to a box cutter type knife, my husband keeps them all very sharp. If you are able to measure first, the rotary cutters on a mat board work really well too. Put that straight edge on there and away you go. You might be able to use the straight edge and the rotary cutter at the bottom of the piece next to the chair rail. It’s worth a try in an inconspicuous place to see if it helps with installation. You are doing great, breathe in, breathe out, repeat as necessary. You’ve got this!
Cheers to you, Matt and the Fur Inspection Squad!
P.S. I loved seeing the stripes, one last time.
You’re doing great! Love it. Just make sure you snap a new blade often. I usually snap a new one for each cut.
I cannot believe how much richness is added to the walls with that textured wallpaper. It is beautiful!
Yep…..just BEAUTIFUL!!
I second that opinion! Amazing!🤩
That one piece looks so luxurious; it will be a big WOW when finished. Take your time, don’t get excited and rush, which I would do, and make a ton of mistakes. Happy grasscloth day. Blessings to all.
Saying a prayer all continues to go well. Looks good so far
Yikes. I’m always nervous about cutting all the pieces first–something always seems to go wrong or I haven’t taken something into account…It’s going to look so lovely! Good luck going forward!
Oh, Kristi! It is SO pretty!!!
It looks amazing!! The texture and light play are soooo good. There was old 80s grasscloth in the main areas of our last house when we bought it, sadly in a boudoir peach color that really had to go, but I was delighted to see how cool that kind of “paper” is in real life. Someday I will have the right moment to use it myself!
It’s exciting, it’s totally exciting!!
Don’t you need to finish the ceiling patch & paint n the front and the attic access in the bedroom. I would think that’s going to generate some dust that would settle on the grass cloth.
Your wallpaper looks great. I’d be nervous also and I am glad you took the time to watch the video. You have a lot riding on getting this correct!
Your bedroom is going to be absolutely gorgeous. I am in love with grasscloth and that beautiful shade of teal. Wishing you smooth sailing for the rest of the job! I can see where it is kind of a nail biter with so much at stake. You’ve got this, Kristi!