How To Link Your Post To A Link Party
I’ve had a few people write to me lately and ask for instructions on how to link a post to a link party. I had intended to write this post last Friday, and then completely forgot! So, for those of you wondering, here are the simple steps required so that you can join the fun. And don’t worry…you won’t have to remember how to find this post. I’ll be sure to include a link to it on all link parties from now on.
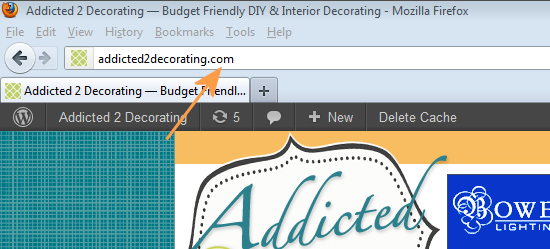
First, go to your blog to the specific blog post on your blog that you want to link. If the URL looks like this, then you are on your blog’s main page, and not on the specific blog post.

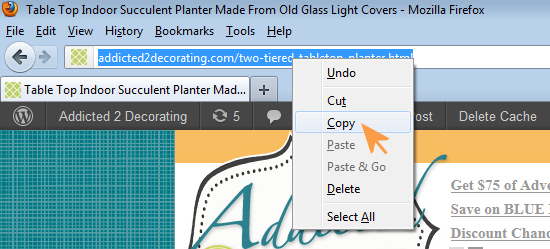
It should look something like this. This is the blog post permalink.

Click on the URL to highlight it, and then right click and choose “copy”.

Now to go the link party, scroll down to the bottom and find the button that says “Add your link”. Click on that button.

It will open up these boxes. Where it says “URL”, right click inside the box and choose “paste” to paste your blog post permalink in the box. In the “Name” box, write a short description of your project. And of course your email address goes in the “Email” box. Then click on the “Next Step” button.

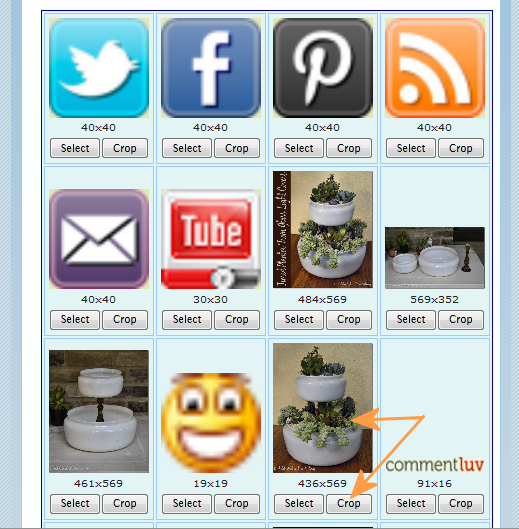
It will then load all of the pictures that it finds on your blog post permalink, so scroll down until you find the picture that you want to use, and then select one of the two options under the photo. If you click “Select”, the program will crop your photo for you, and add it to the link party. That means you’re done! But I always like to crop my own photos, so I select “Crop”.

If you choose to crop your own photo, it will bring up a larger image with a crop box that you can use to select the portion of the photo that you want to show in the thumbnail.

When you have the crop box just where you want it, click on “Crop the selected area”. And that’s it! You’re done!

Now don’t be shy. Come join the fun!


Also, keep in mind that most linky party hosts expect a link back to their party in your original blog post. Not all do, but most do. So, if that’s a requirement, don’t forget to add their link to your post.
Great tutorial. I will definitely be using this in the near future. As a new blogger, I am hoping that this will be one way to help people to find our blog.
Thank you so much!
P.S.
The green will look fantastic on the cabinets. Way to be flexible!
What a great help! I am new to blogging so I am a little intimidated when I hear of link parties and other “craziness”, having just figured out how to correctly size my photos… Seems simple enough though! Great post!
I don’t have a blog to link, I just read/lurk! But, I wanted to comment on the new layout. I like the “Recent Posts” at the top now, that’s where I go the most. Love your blog!
ola, moro em Goiania, Brasil visitando seu blog,encontrei uma luminaria
de reciclagem de cx de ovos,muita linda adorei,gostaria de receber
as instruções como fazer;ficarei muita feliz,adoro artezanato ,uma luminaria na cor roxa,q. esta postada
Q. Deus te abçõe,muito lindo seu trabalho.
Great post thanks for sharing that Iam a newby to this and any help is good help although I have been in the bathroom installation game for years much appreciated
Thanks Rob Jennings
Hi Kristi! You have just taught me in 2 minutes what I have been trying to figure out all week! I am very new to blogging-just built my website and I am a stay @ home Mom-so I have no experience w/ any of this. So…thank you!!!! I look forward to Friday and sharing what my husband and I have done w/ our kitchen and home. I will be happy to share your button on my blog! ~ Julie
I love your site! Was going to show you a picture of my St Patty’s day mantel I did, since it’s the only thing I’ve done lately, but I don’t have a blog, so am far too computer illiterate to figure out how, lol! It wasn’t that great anyway! I’m not anywhere near as talented as most of you! Love your link parties!