How To Mount And Frame A HUGE Print (My 52″ x 78″ Landscape Design Print), Part 1
I told y’all in a previous post about how a very kind and generous reader offered to print my landscape design plan for me, and she had the capability of printing it HUGE. So I took her up on her very generous offer and had the landscape design printed 52″W x 78″H. I wish y’all could see this thing in person because it is magnificent. But it also presented a dilemma. How in the world was I going to mount and frame a HUGE print like that?
If you’re new around here, this is the landscape design I’m talking about…
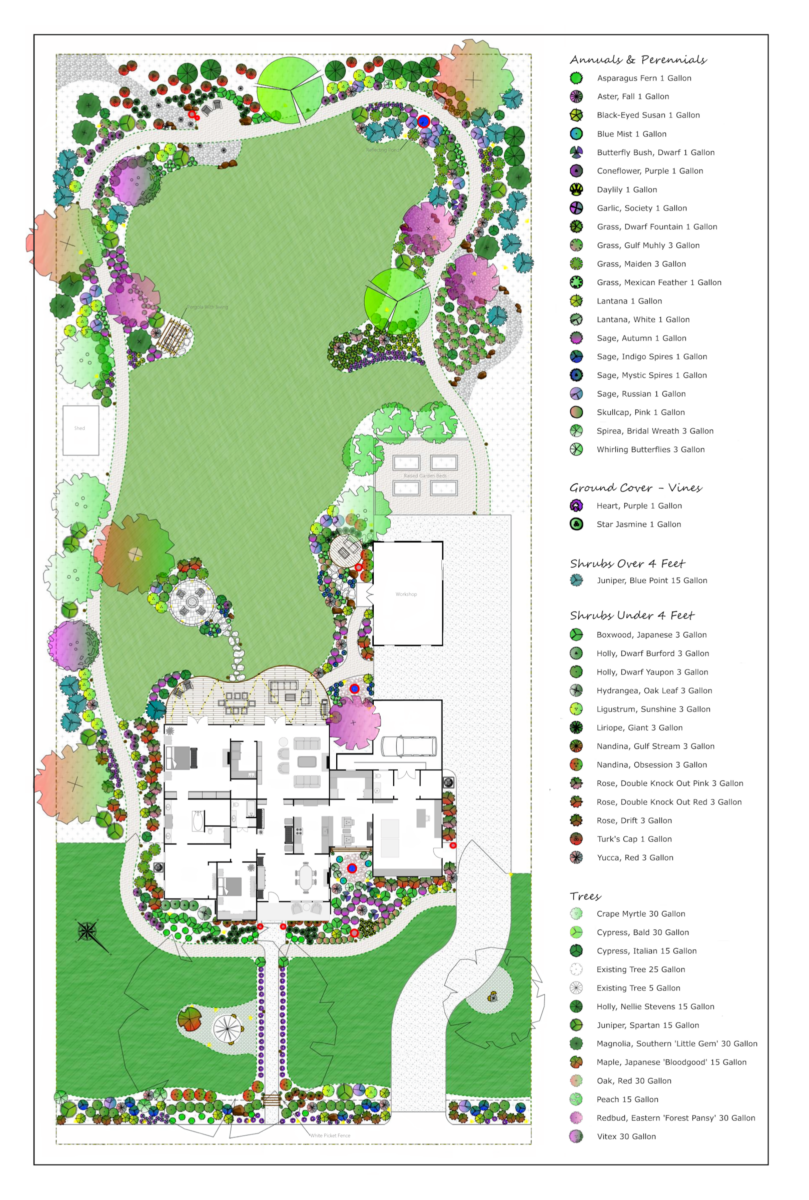
Matt (my husband) had bought that landscape design for me about two years ago. I met with a local landscape designer and told him all of my wishes and vision for our one acre lot, and that’s the design he came up with. I think it’s so pretty, so I’ve been wanting to have it printed and hang it on a wall ever since I saw it the first time.
With the print being so big, I though the easiest thing would be to mount the print on plywood, and then frame it and hang it. Super simple, right? So a couple of days ago, I headed to Home Depot to pick up a piece of plywood for this project, and it wasn’t until I had parked and was getting out of the car that it dawned on me…this thing is 52″ x 78″!! A piece of plywood is only 48″ wide!
So then I had to stop and rethink my plan. What I came up with was a plan to basically build a huge cradle wood panel, which is exactly what I used to mount my little resin petri discs on. It’s basically a frame of wood with a solid piece of plywood or MDF attached to the top to create a wood canvas.

Except that instead of it being a tiny 5″ x 5″, I needed it to be about 150 times that size. 😀
And since I always work alone, another consideration I had to work through was whether or not I’d be able to build this massive cradle wood panel and then mount it on the wall by myself. Since I’m only five feet tall, which means that my arm span from fingertip to fingertip is five feet, I seriously doubted my ability to lift a 52″ x 78″ cradle wood panel off the floor and hoist it onto whatever hanger I decided to use. So instead, I decided to build the cradle wood panel directly on the wall.
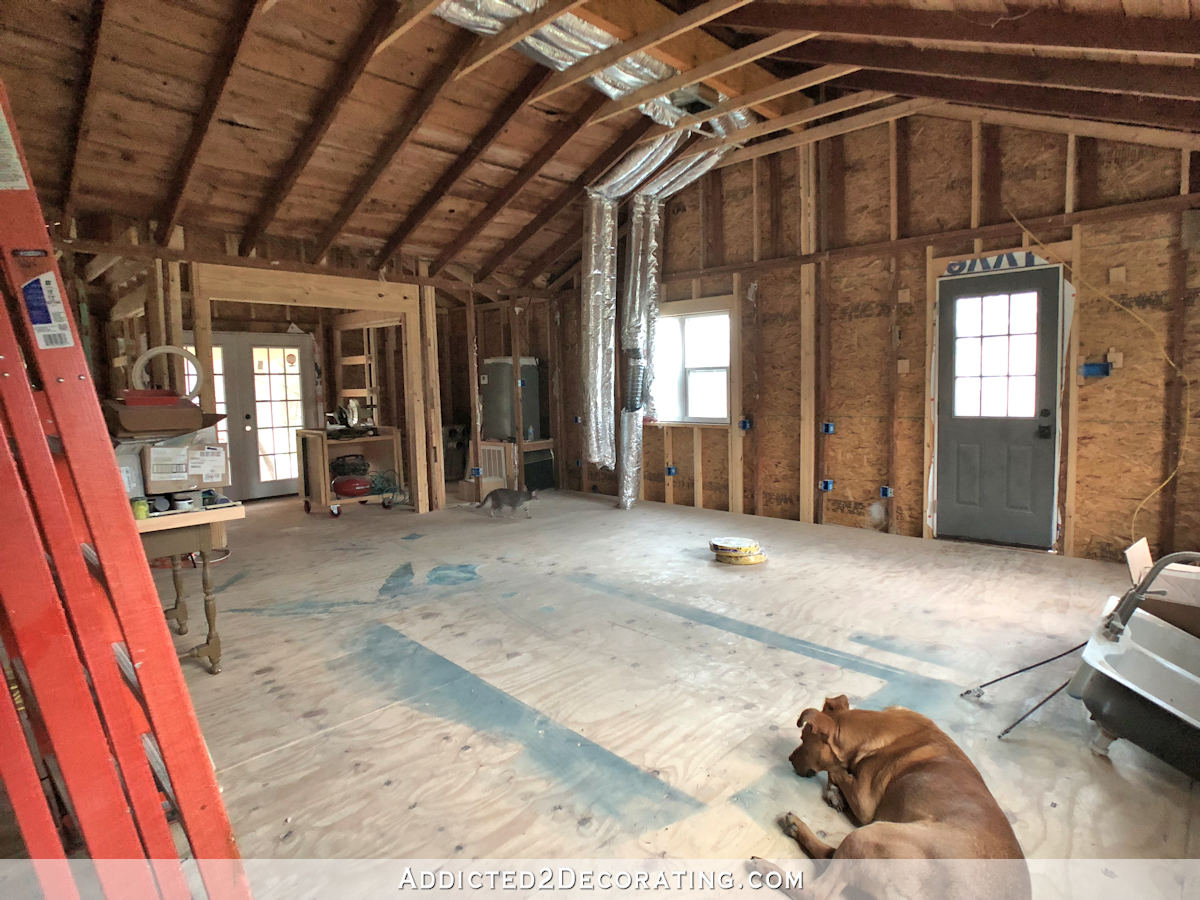
I started by using my level, framing square, straight edge (i.e., a piece of extra lumber), and a pencil to mark off the placement of the bottom right corner. I wish that I could have built this just above the baseboard, but as you can see, I had to clear the electrical outlet.

Next, I used a stud finder to mark the placement of the wall studs along the bottom horizontal line.

I cut a piece of 2″ x 2″ lumber to 52″ wide, and then used the wall markings to mark the placement of the studs on the lumber. I pre-drilled screw holes, and then used my largest bit to drill about 1/2-inch into the lumber so that I could countersink my screws, and so that they would be long enough to go into the studs.

I attached that horizontal board to the wall along the marked line using 2.5-inch screws. I used my level to double check that the line was level.

Next, I cut and attached the vertical 2″ x 2″ pieces. I didn’t screw these to the wall, and I didn’t make sure they were in studs. Since the weight of these pieces will be held by the bottom horizontal piece, I only needed to be sure that these pieces were firmly attached to the wall and to the bottom piece. I started by using my nail gun and 2-inch 16-gauge nails to nail through the bottom horizontal piece and into the end of the vertical pieces. I used three nails on each side.

With those pieces attached to each other, I then used my framing square to make sure the vertical pieces were perfectly square with the bottom piece, and then nailed the vertical piece on the right to the wall using those same 2-inch 16-gauge nails.

Next, I attached the top piece. This one was screwed into studs just like the bottom piece, and it was also nailed to the vertical piece just like I did on the bottom corners.

And then finally, I finished up by nailing the left vertical piece to the wall and to the top horizontal piece.

To make sure that the vertical pieces stayed firmly against the wall, I also went back and added nails going diagonally from the inside edge of the wood and into the wall. The purpose of that is to create tension. With the nails going through the front of the wood and straight into the wall, and the nails going diagonally from the inside edge of the wood and into the wall, these vertical pieces won’t pull away from the wall.

And again, the vertical pieces don’t really have to carry weight because the weight is resting on the bottom piece, which is screwed into studs, and the top piece is also screwed into studs so that it won’t pull away from the wall.

For the face of the cradle wood panel, I had to use two pieces of plywood because, again, plywood is only 48 inches wide and this panel is 52 inches wide. So I wanted to add a piece of lumber horizontally where the two pieces of plywood would meet so that I could nail the edges of the plywood to this piece. I didn’t want to purchase another piece for this, so I just used a scrap, which was just a few inches shy of the whole width. That’s not a problem as long as it is also firmly attached to the wall. So I attached it in the same way as the vertical pieces, with nails going directly through the front into the wall, and the nails going diagonally through the top and bottom edges and into the wall.

Then I was ready to attach the first piece of plywood. I started with the little piece so that I could more easily hold it into place while nailing it to the wood frame.

And then I did the bigger piece on top so that I could rest the weight of the bigger piece on the bottom piece while I nailed it into place.

You’ll notice that there’s a gap between the pieces that gets bigger towards the right side. I had checked and double checked my frame to be sure the corners were perfectly square, so when the second piece of plywood didn’t line up perfectly with the frame, I knew the issue was the plywood. So I had to straighten it out around the edges, which created that gap between the two pieces. Things like that can happen (and have happened to me many times) when I let Home Depot or Lowe’s cut my plywood for me.
I wasn’t quite sure what to do about that gap. Would it show through the print? Would it create an unsightly ripple? I got the print out and tacked it to the panel to determine how to proceed.

This paper is super thick, but I could still see a difference in color at that gap. And I do plan to paint the whole panel white before mounting the print, so leaving the gap wasn’t really an option.

So then I had to decide how to fill the gap. Caulk didn’t seem like a good option. I needed something that could be sanded smooth. But wood filler didn’t seem like a reasonable option because the gap was too wide. That much wood filler would not only take forever to dry, but would undoubtedly crack, requiring several coats and many hours of waiting.
The option I thought was the best was to use drywall tape and mud.

So that’s where I left the project. It will probably need at least one more coat of drywall mud after I sand what’s there. (I’m not good at all with drywall mud.) And then I’ll prime and paint the panel, then mount the print, and then frame the whole thing.

Of course, I could have just opted to attach the print directly to the wall, and then use picture frame molding to frame it. I came very close to doing that, but in the end, I just felt like that wouldn’t give the print the prominence it deserves. It would make it look more like wallpaper than a separate piece of framed art. And I think this definitely deserves to be a separate piece of framed art, so making sure that it projects from the wall two inches will make it look like it’s mounted on a gallery wrapped canvas. This print deserves that.
Note: This is a multi-post project. You can find Part 2 here: How To Mount And Frame A Huge Print (My 52″ x 78″ Landscape Design Print), Part 2.

Addicted 2 Decorating is where I share my DIY and decorating journey as I remodel and decorate the 1948 fixer upper that my husband, Matt, and I bought in 2013. Matt has M.S. and is unable to do physical work, so I do the majority of the work on the house by myself. You can learn more about me here.

So clever! It’s going to look so nice there.
I’m not a big diy-er and skim over a lot of those detailed posts, but this one got me because I thought it was going to be a fiasco – but that was really, really smart how you did that! Looking forward to seeing the final piece framed out.
*fiasco not because of anything with you in particular, but just because it was going to be so big I couldn’t see how you were going to handle it by yourself. Just want to make it clear that I didn’t think that the fiasco was coming because of anything in particular with you, just the size!!
Not a wood worker here, by any stretch, but could you have done a strip of ply to fill the gap, like an inlay?
I’m also wondering why you haven’t put your plug covers on; wouldn’t adding them later throw off some measurements now?
It’s way too much trouble to cut a super long wedge piece of plywood like that. And the panel isn’t close enough to the outlet for an outlet plate to matter.
An idea… If you do put a frame or something clear over see how well the print sticks first. If you are okay with it sticking over time. I’d suddgest a sheet vinyl so you could wet or dry erase notes on it. Just remember some clear products could discolor and may want to be replaced in a few years. Somehow I see you writing notes on here over time as wants adjust.
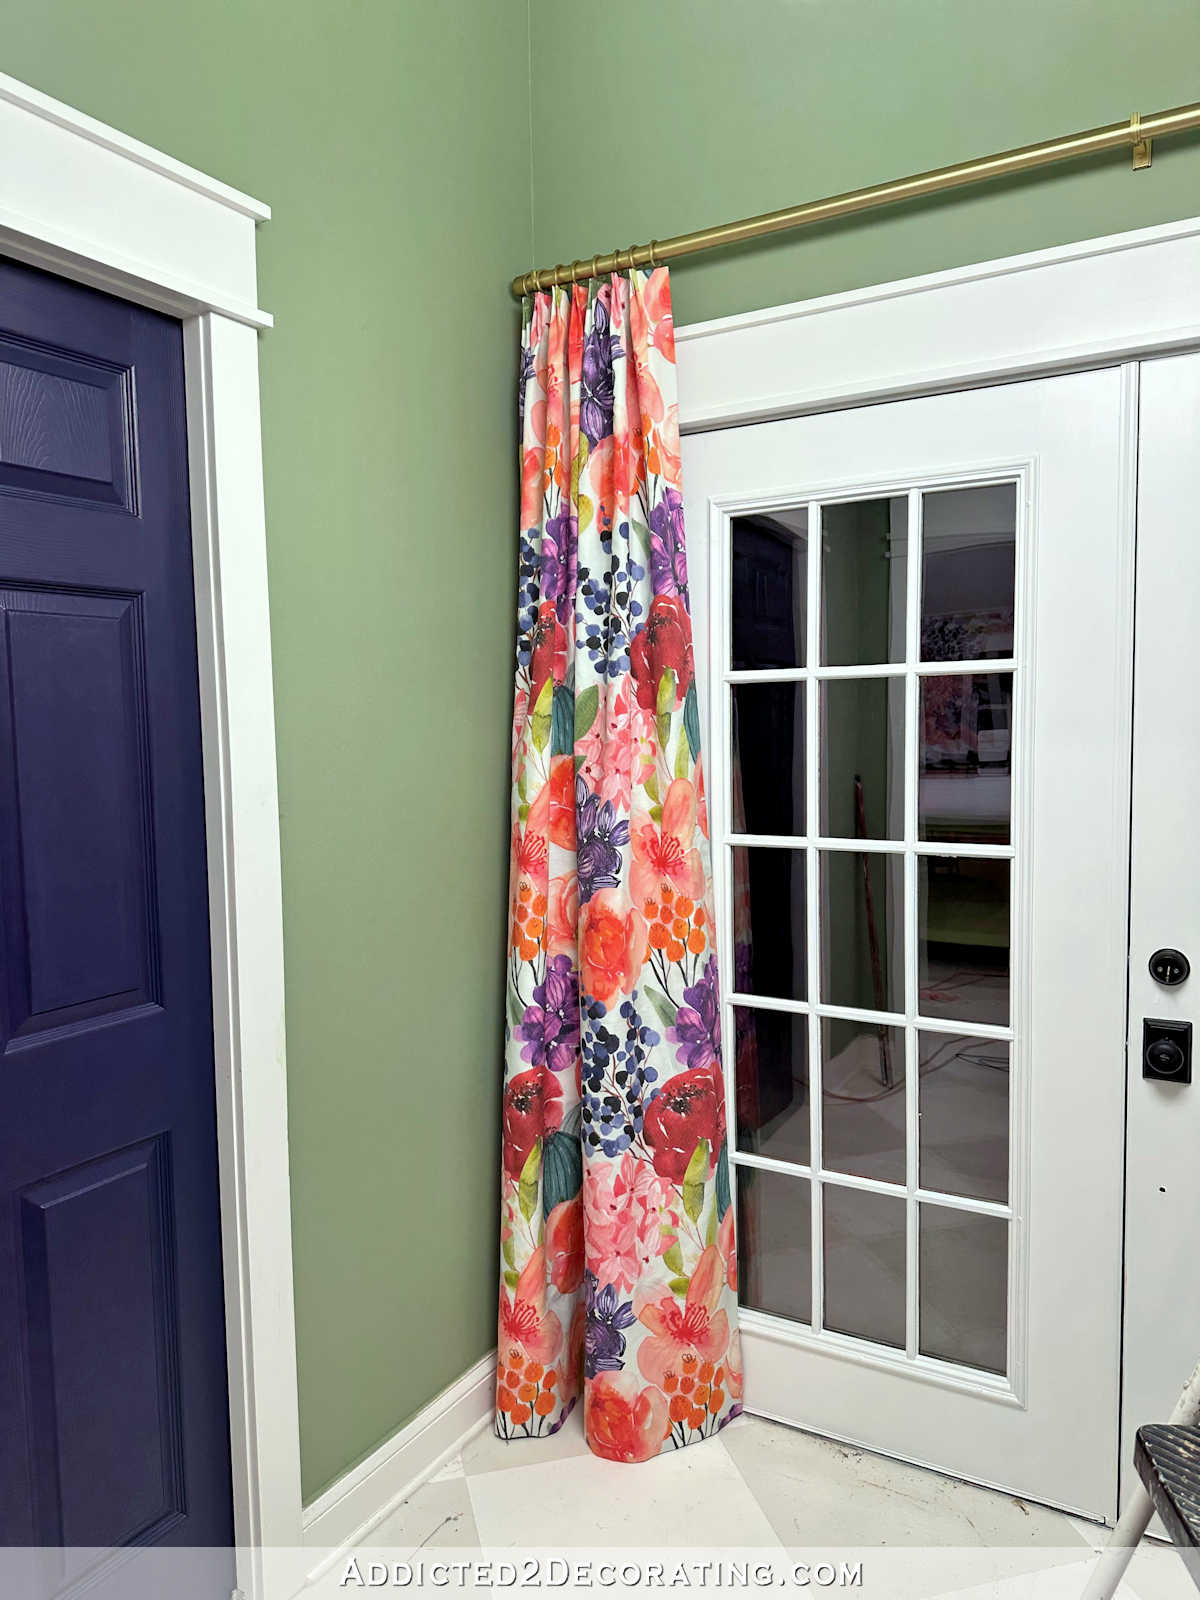
Originally you were going to put the landscape plan to the left of the TV, and the calendar to the right (at least that’s how you showed it in the post a couple days ago). This looks like it’s right next to the door to the kitchen though, so did you decide to flip-flop them? I can’t wait to see how everything comes together!
I have the same question!
Same question here !
Yes. When I got the print and saw how huge and gorgeous it is, I wanted it in the more prominent place. I’ll put the calendar over on the side by the cabinets.
When I used a shower curtain for art, I made the frame out of scrap 1 by 2’s and stretched a white sheet from the thrift store over the frame. White , smooth and cheap. The cross members of the frame didn’t show through. And it was light enough to lift.
Yep, if I were working with fabric, I would have used that process as well. Working with a print requires a solid surface.
If the drywall mud and tape doesn’t work out and still leaves you with a visible line, how about covering the whole plywood box with a sheet of white laminate before you mount your print? Doesn’t laminate come in 5′ widths? Just a thought in case you need it. 🙂 I can’t wait to see this thing mounted on the wall! It’s going to look so great!
What a cool way to make this art piece! It is going to be SO gorgeous!
I’ve read your blog for a long time, but I don’t think I’ve posted before…Yes, I love your creativity and attention to detail. But my favorite thing about you is how you find a way to execute your vision, no matter what. Your comment about being only 5 feet tall and not being able to lift a pre-built panel, etc…for a lot of people, that would have been it. Game over. Not you, though. You were like, now let me put my creativity to use finding not IF, but HOW, I can achieve my goal. My Grandma Pat was a double amputee, and I got lucky to be able to spend my first 6 years of life getting to know her before she passed away. She always told me not having legs never stopped her one bit from doing what she wanted or needed to do, and I still find her to be a source of inspiration on a daily basis. Your determination reminds me of her — I think my Grandma Pat would have really liked you! Thank you for sharing what you do, and being a source of inspiration while you do it.
You know how to fix everything. Good job.
I watch a woman on Youtube who repurposes thrift items…she does a lot of wood items. She uses Bondo when she is going to sand and paint. And even or I should say especially if the gap or crack is to wide for caulking. It drys hard also and is easily sanded it you do not allow it to cure over night or anything. Just until it hardens. This seems to work very well for her. If I could pinpoint the exact video I would send a link but she has too many videos for me to find exact one. Anyway it might be better option than the cault and tape, Harder for sure.No chance of cracking over time.
Hoping you went to a print shop and had a copy made before mounting this. I know you have the original smaller one, but I think you should have a backup stowed away!
Do you think Bondo would have worked to fill the gap? It would have been strong and you could sand it.
Yep, Bondo would have worked also. I just happened to have drywall tape and mud on hand, but I didn’t have any Bondo.