I Gave Up (My Disastrous Wallpaper Installation)
I’m not a professional wallpaper installer, but I’m also not a newbie. I’ve installed wallpaper several times before, and I’ve never in my life had as many problems with wallpaper as I did with the wallpaper in my studio bathroom. So while I had hoped to show up this morning with a completely wallpapered bathroom, I went the opposite direction. I gave up and started tearing the wallpaper off of the wall.
This is very unlike me. I’m not a quitter, and I don’t give up easily. I do change my mind quite often, but it’s generally not because I’ve given up. So the very fact that I have given up on installing this wallpaper tells you just how frustrated I got with the whole process, and just how hopeless I felt the situation was. There was no correcting the problems I ran into.
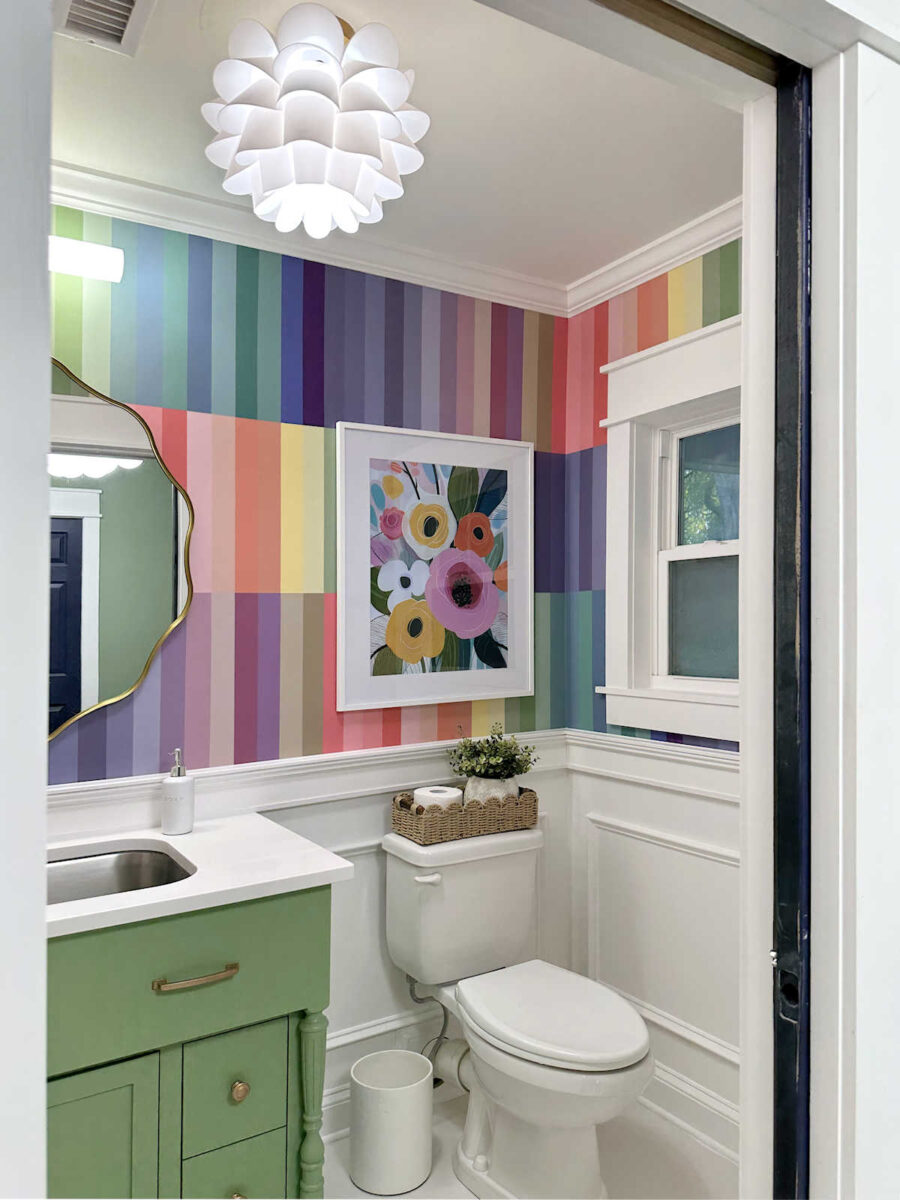
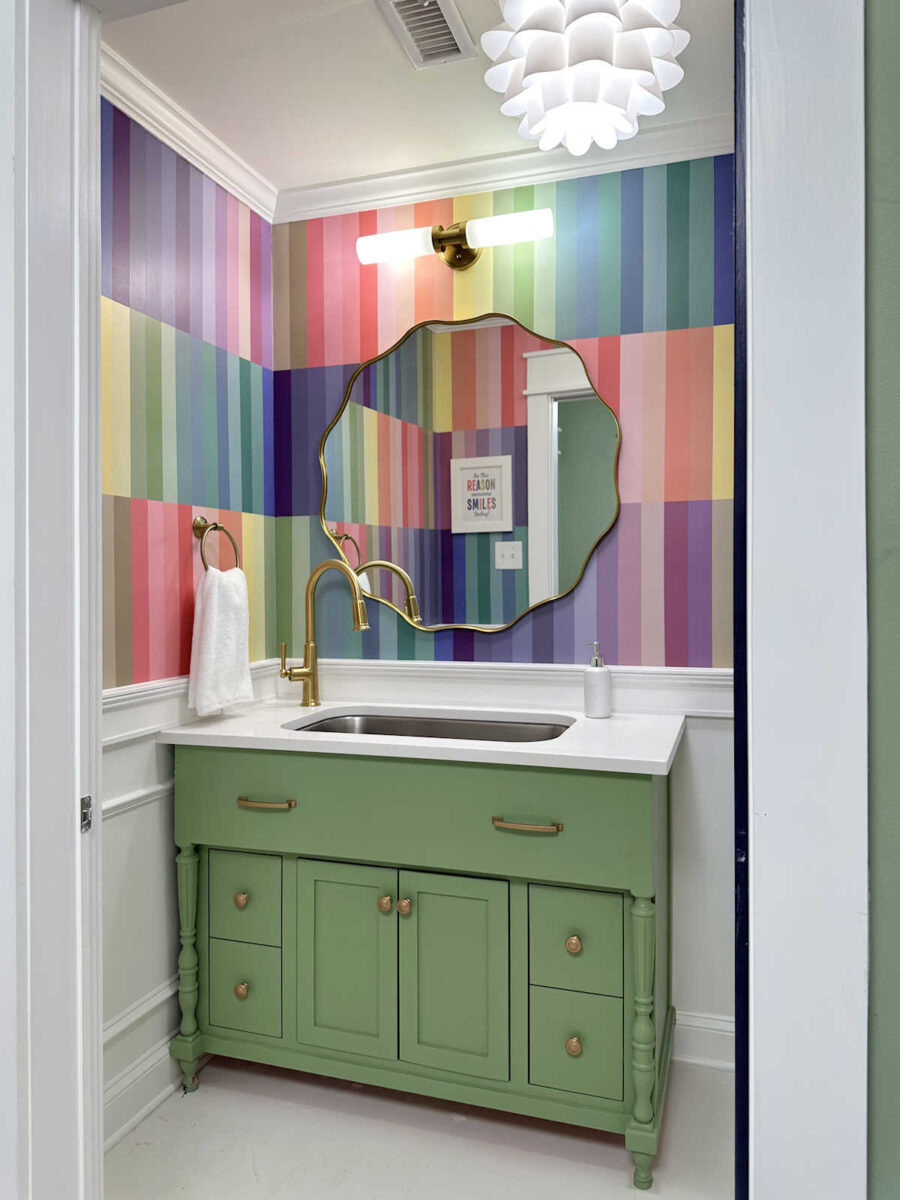
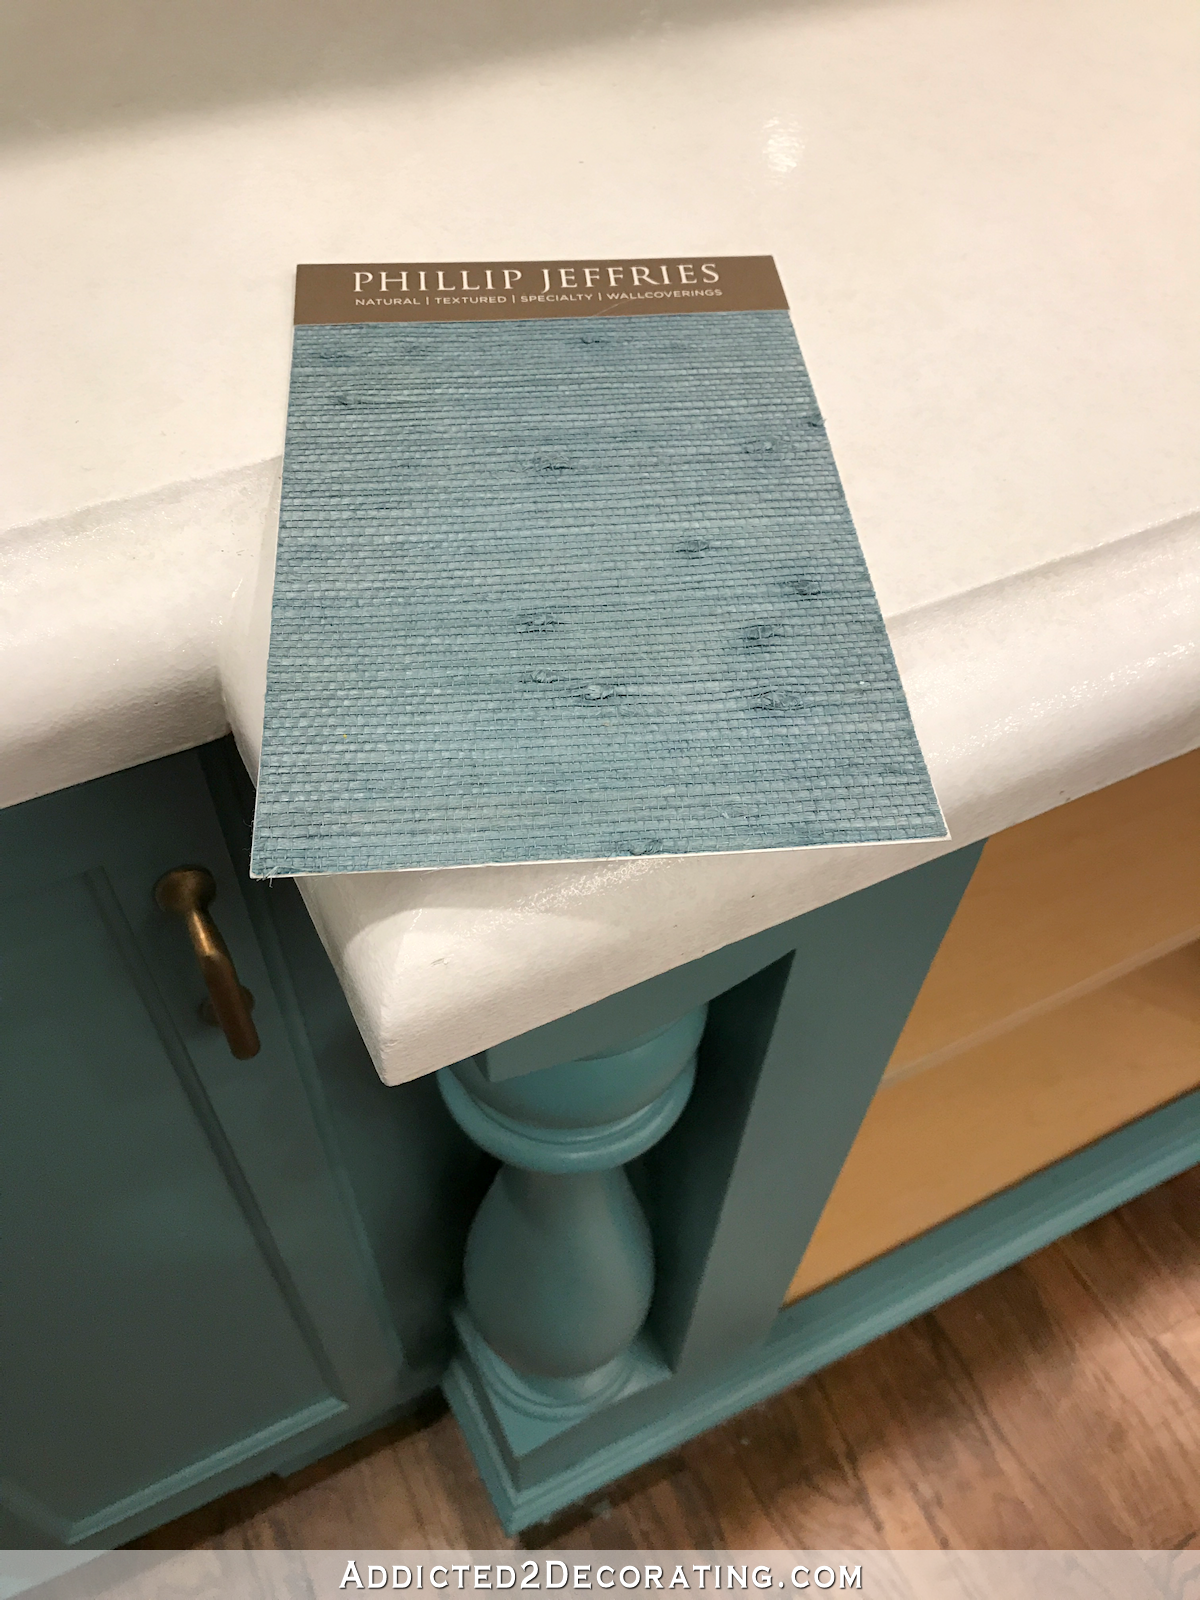
When I put up the first piece, I was so excited to see all of that COLOR on the wall! It was the moment I had been waiting for. I just wanted to see these walls drenched in color so badly. And the first piece went up fine. But when I put up the second piece, I knew there were going to be issues. I don’t know if you can see the first problem I ran into in this photo.
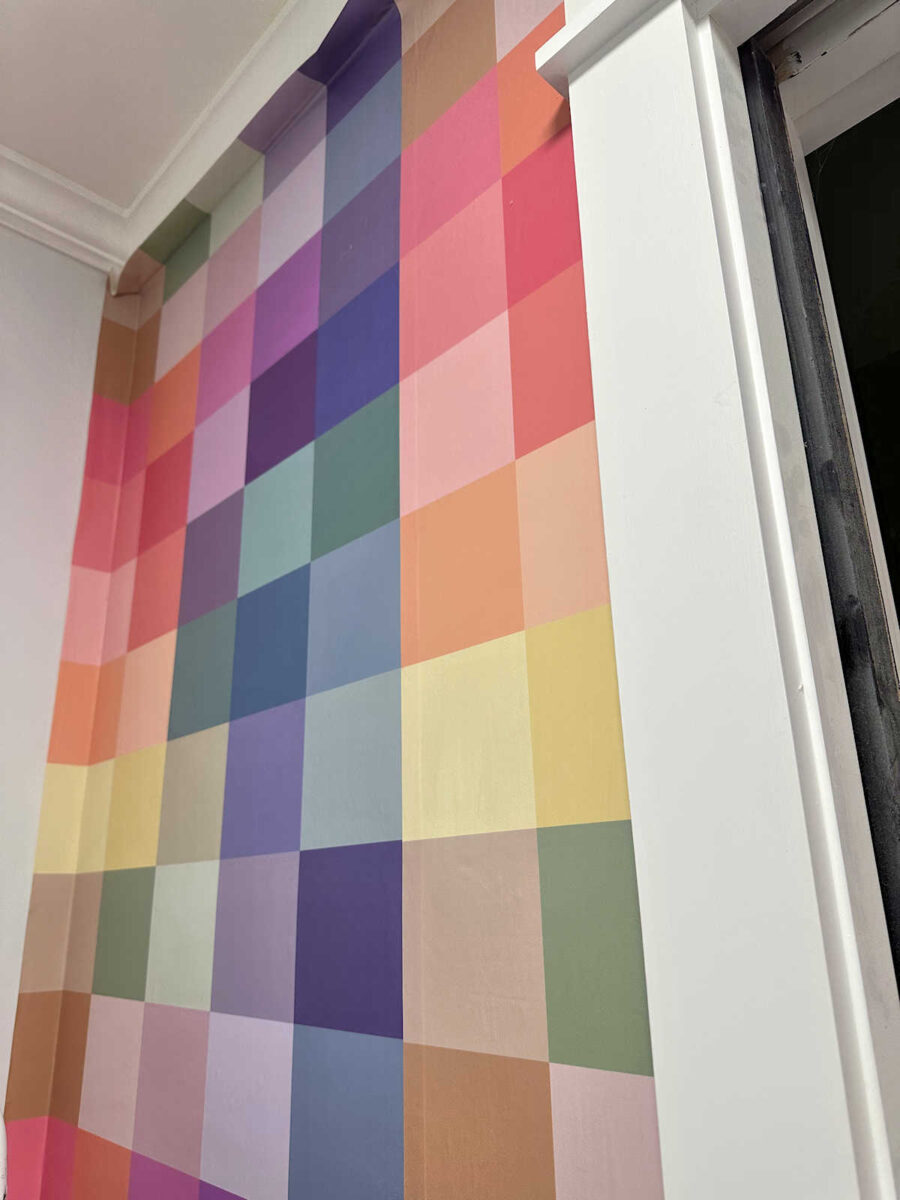
If you can’t see it, let me explain. Spoonflower wallpaper is printed so that the pieces actually overlap each other by about 3/4-inch. I knew that when I ordered it. That’s how my floral mural on the studio wall was, and it was fine. Even when I search for those overlaps on that wall, I can’t see them.
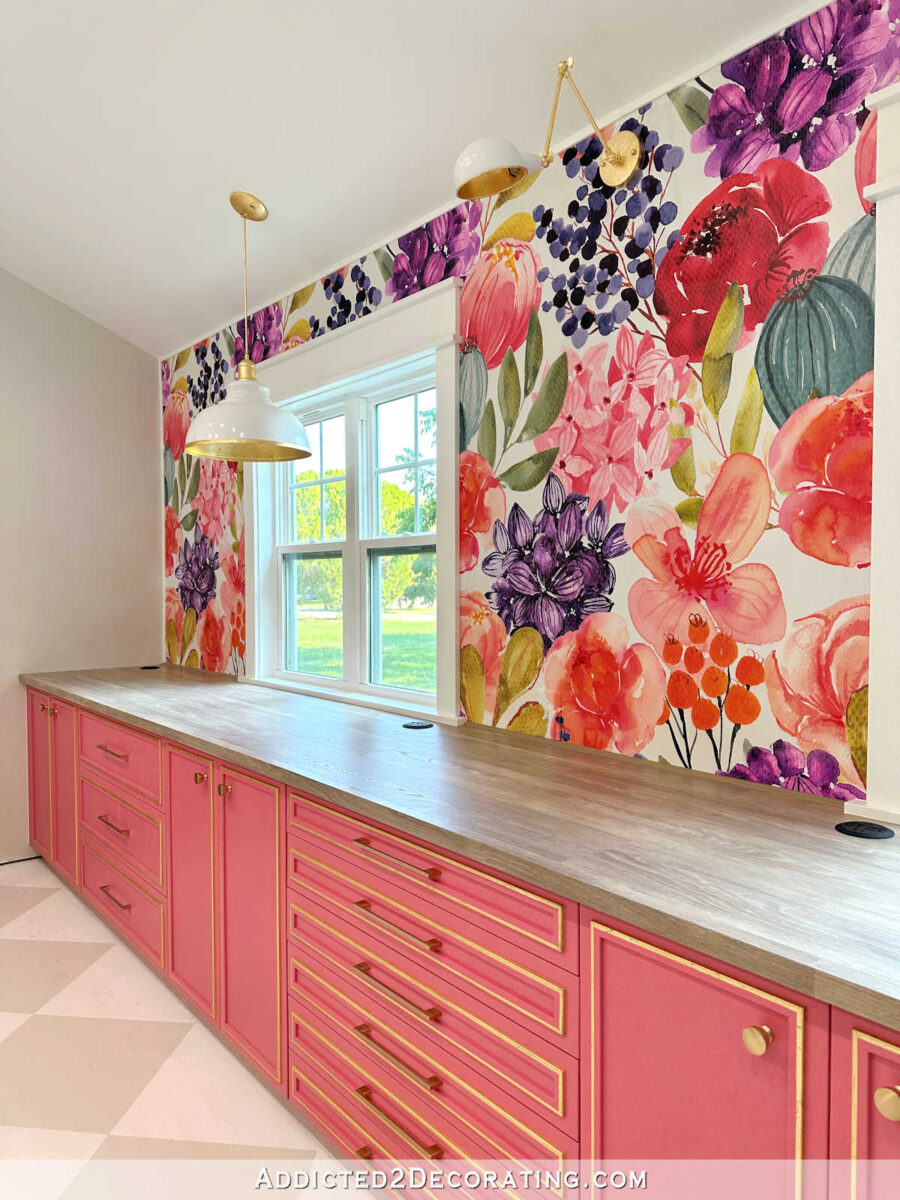
And those overlaps make the installation so much easier, in my opinion. But there’s a vast difference between a busy floral wall mural and a wallpaper that has solid squares of color. The busyness of the floral mural hides those overlaps from sight. But on the wallpaper with colorful solid squares, those overlaps are visible. It might be subtle in pictures, but it wasn’t so subtle in person, especially for a perfectionist like me. Those are the types of things that I can’t stand to see.
So on all of the subsequent pieces, I decided to trim off that extra 3/4″ from each piece of wallpaper. That was no big deal. It only took a couple of minutes with a straight edge and a razor blade to trim each piece. I could have dealt with that had that been the only issue.
But of course, that wasn’t the only issue. When installing the second piece, I damaged the lower portion of the wallpaper when trying to install it around the door trim. Since the wallpaper is just a bunch of squares, I thought I could piece that area together since I had plenty of scraps. But on my first attempt, I didn’t get it just right, but I had left it on long enough for the wet wallpaper to affect the coat of primer beneath it. So when I took that small piece off, it pulled the primer and some of the drywall mud of the wall as well. I don’t think that would have happened if I had let it dry completely before removing it.
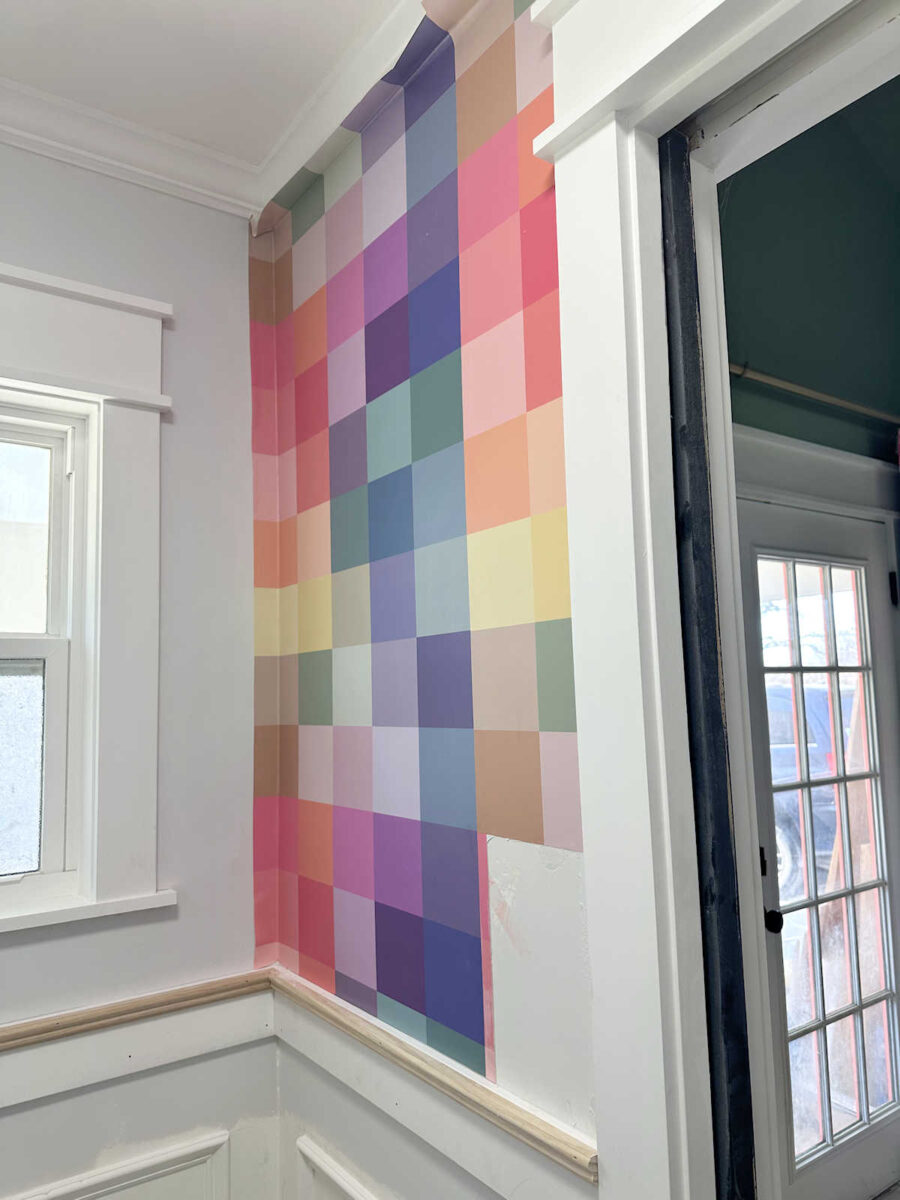
So that left me with this small portion of damaged wall. I was beyond frustrated with that considering how much time and effort I had put into making these walls completely smooth before I started the wallpaper.
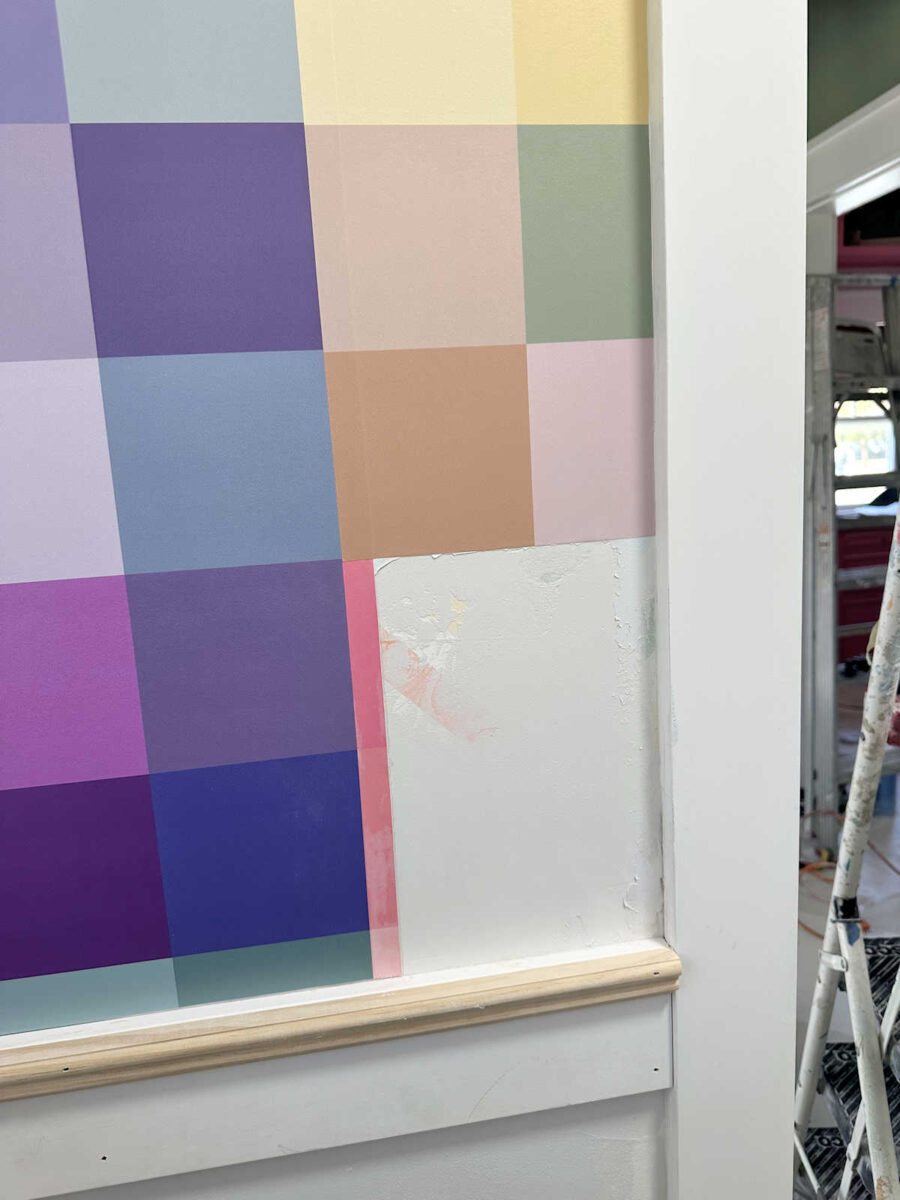
I tried not to let it defeat me. I just left it alone and moved on. But I knew that repairing this damage in a small area surrounded by wallpaper was going to be quite the chore.

But I moved on to the next piece. I was already in a pretty bad mood at this point, but I pressed on. And of course, the next piece had to be the most difficult piece of all with just this tiny sliver of wallpaper that had to be cut around the door trim. I thought I would never get this piece on and trimmed, but I finally got it.
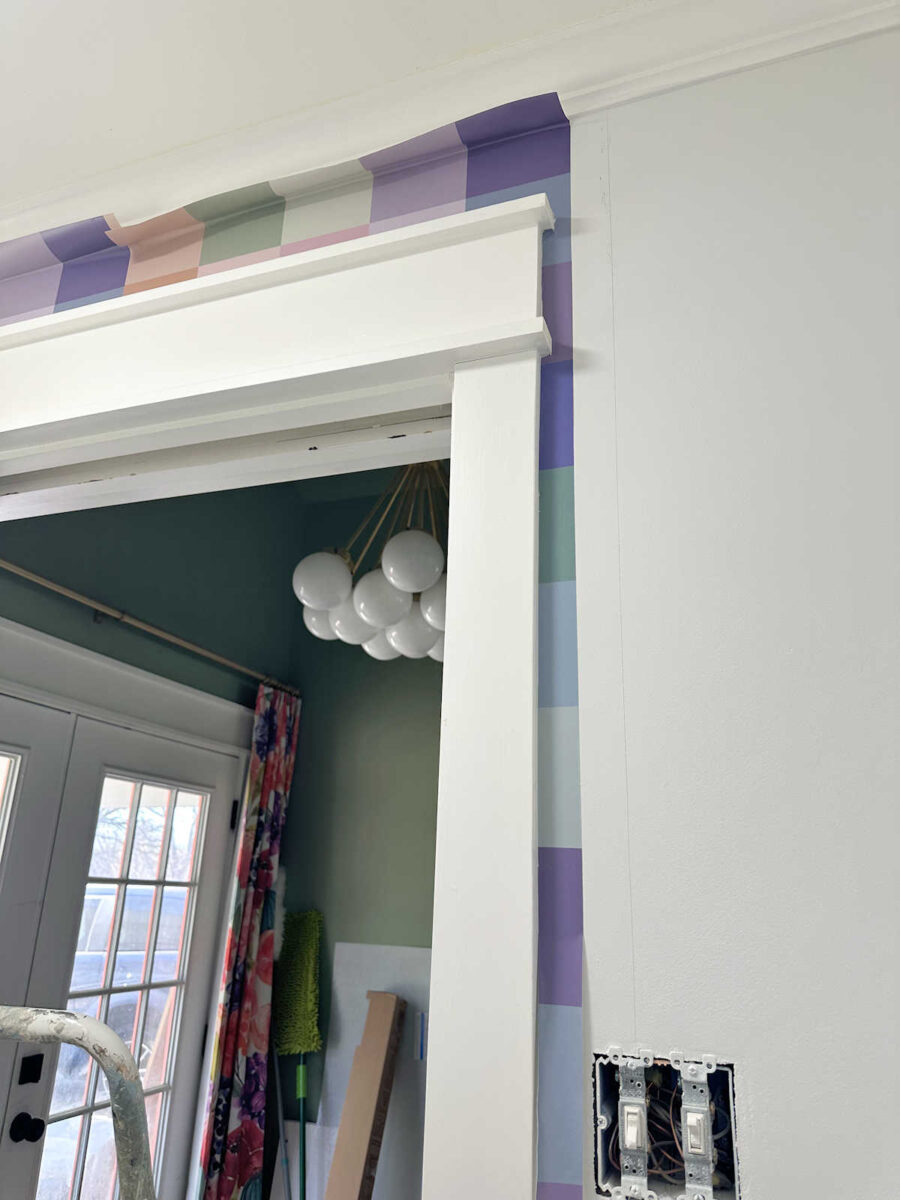
But to be honest, that one single piece got to me so much and had me so frustrated that I decided it wouldn’t be wise to continue. So I got some sleep and started the next day with a much better attitude. I just knew that if I could get around all of these obstacles and get to the two solid walls in the room, I would be home free. Those solid walls would be a breeze compared to working around door trim. But before I got there, I had to install the piece that wrapped around the corner. And this was the final straw for me.
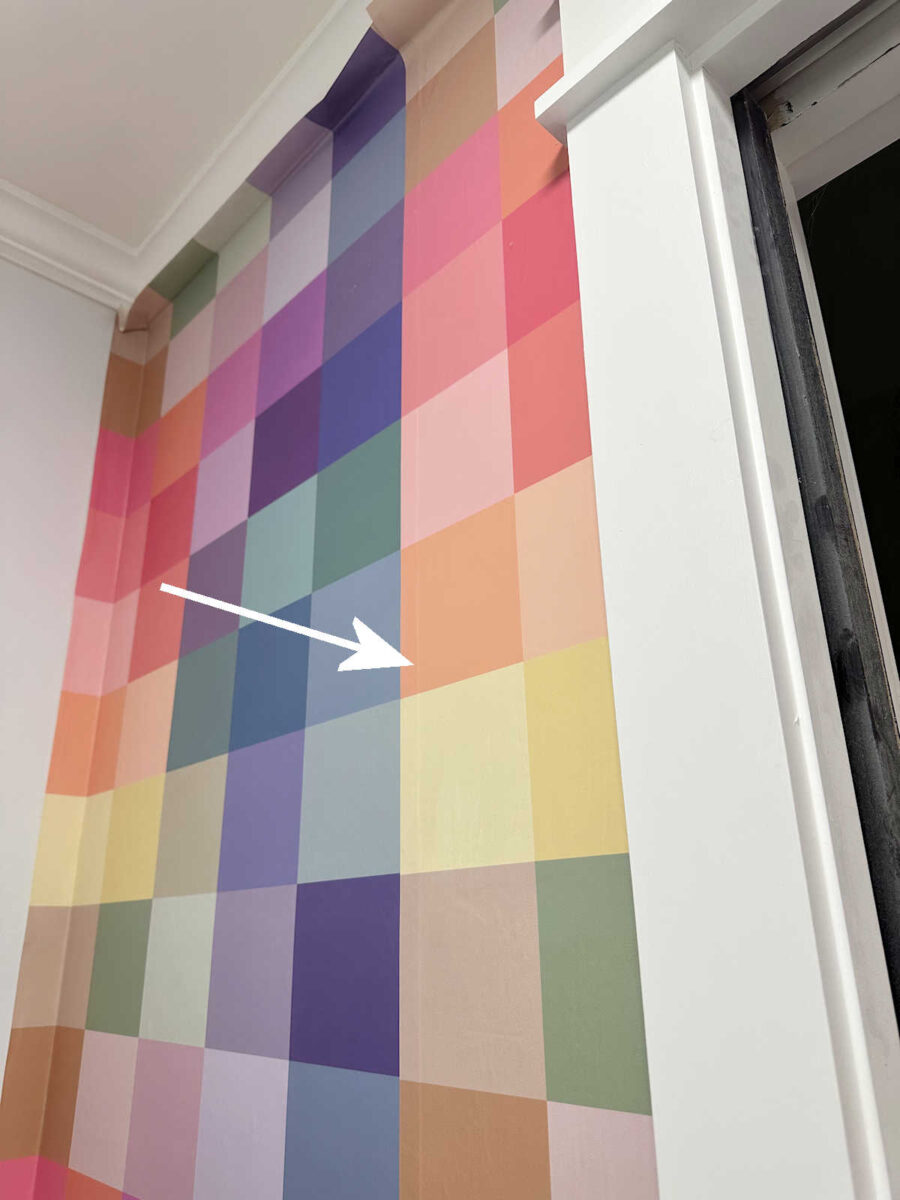
There is no room in any home in existence that has completely square corners from top to bottom. That’s not a problem when installing wallpaper with a busy pattern. The imperfections of the corners are hidden by the pattern. I had this problem with my closet, but because the wallpaper is so busy, you can’t see that the pattern doesn’t line up perfectly once it wraps around the corner. No one is going to stand in my closet and study the yellow flowers along the top of the wall and see that the flowers on the window wall of the closet don’t hit the crown molding at the exact same place as they do on the side wall.
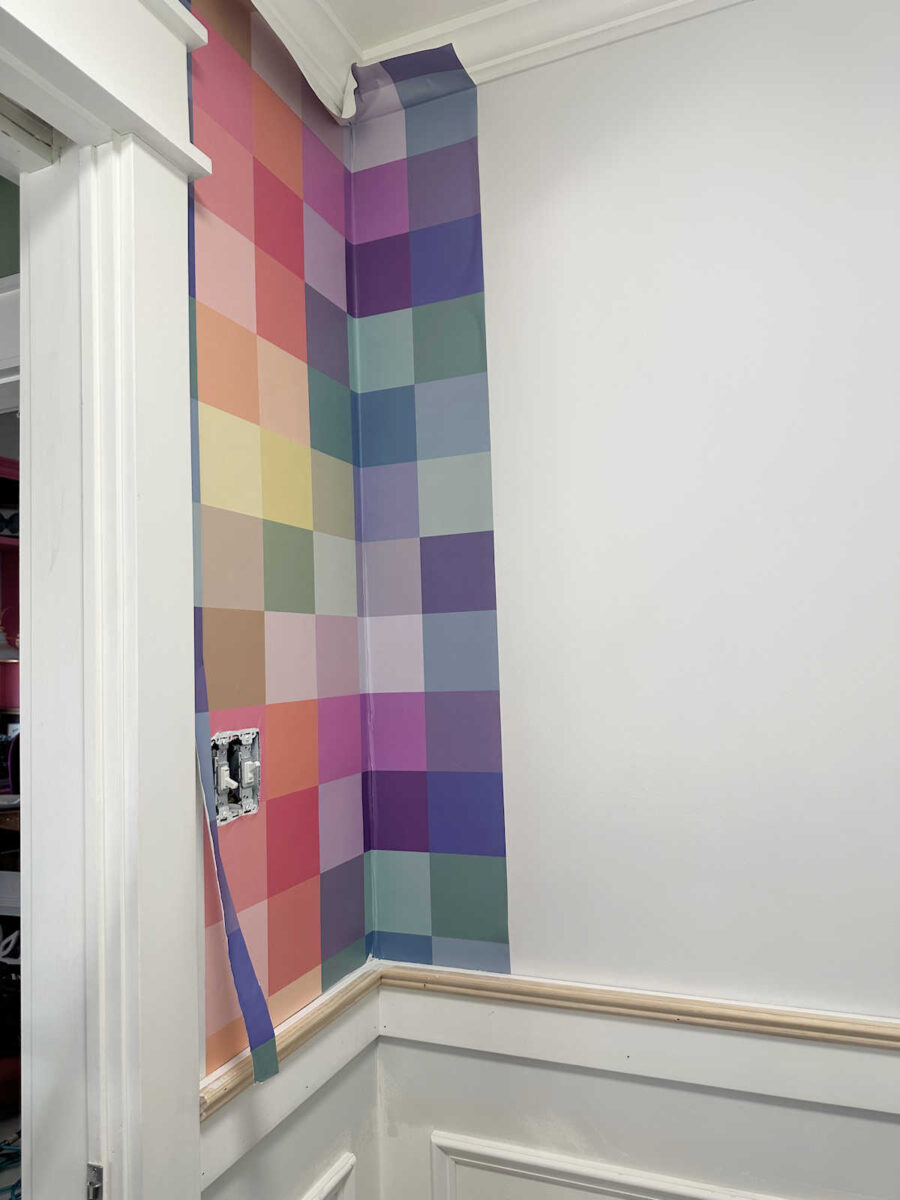
But when installing a wallpaper with a very linear design, it is imperative that the lines in the wallpaper stay perfectly level when going around a corner. It would be very noticeable if those horizontal lines were off by 1/4-inch and the pattern started drifting upward on the side wall. But when I got the pattern perfectly level and perfectly wrapped around the corner at the top of the wall that left excess paper in the corner towards the middle of the wall. And no matter what I did, and no matter how much I tried to push that excess right into the corner to try to disguise it, there was no hiding it. It was a mess.
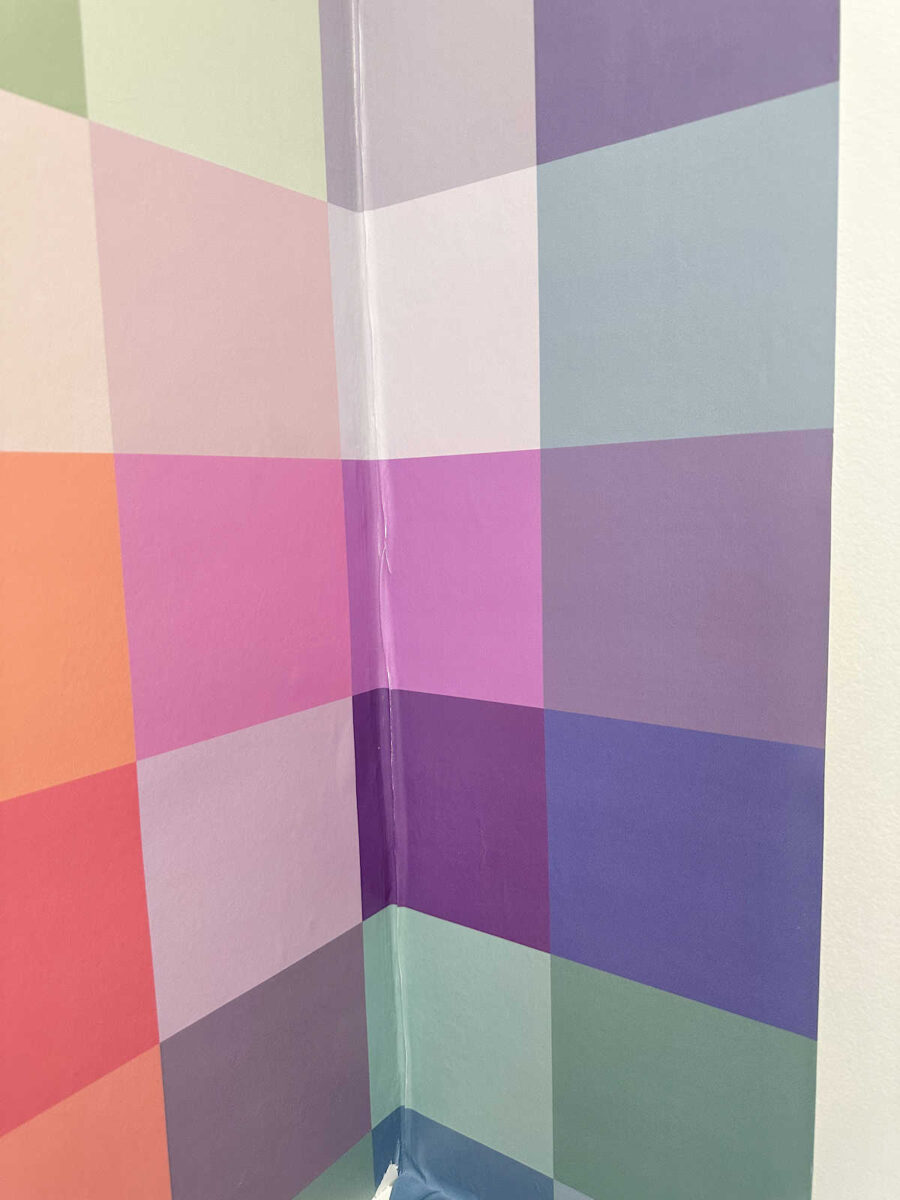
And that’s the point where I gave up. Let’s just say that I learned the hard way that wallpaper with a very linear design (i.e., lots of horizontal lines) should never be used in a whole room application. Perhaps a professional wallpaper installer could have made it work, but for us DIYers, it’s nothing but grief and frustration. This type of wallpaper is great for a feature wall where you’re only installing it on one wall, from corner to corner. But if you have to wrap it around corners, just forget about it.
So needless to say, I’m incredibly disappointed and still feeling really frustrated about the whole thing. I’m not generally a quitter, but I was relieved to throw in the towel on this one. Of course, now I have to come up with another idea. Now that I’ve seen the wallpaper up, I really do have my heart set on a really colorful design, but this time, I’ll be sticking with paint. I don’t have it in me to try a different wallpaper in this room.
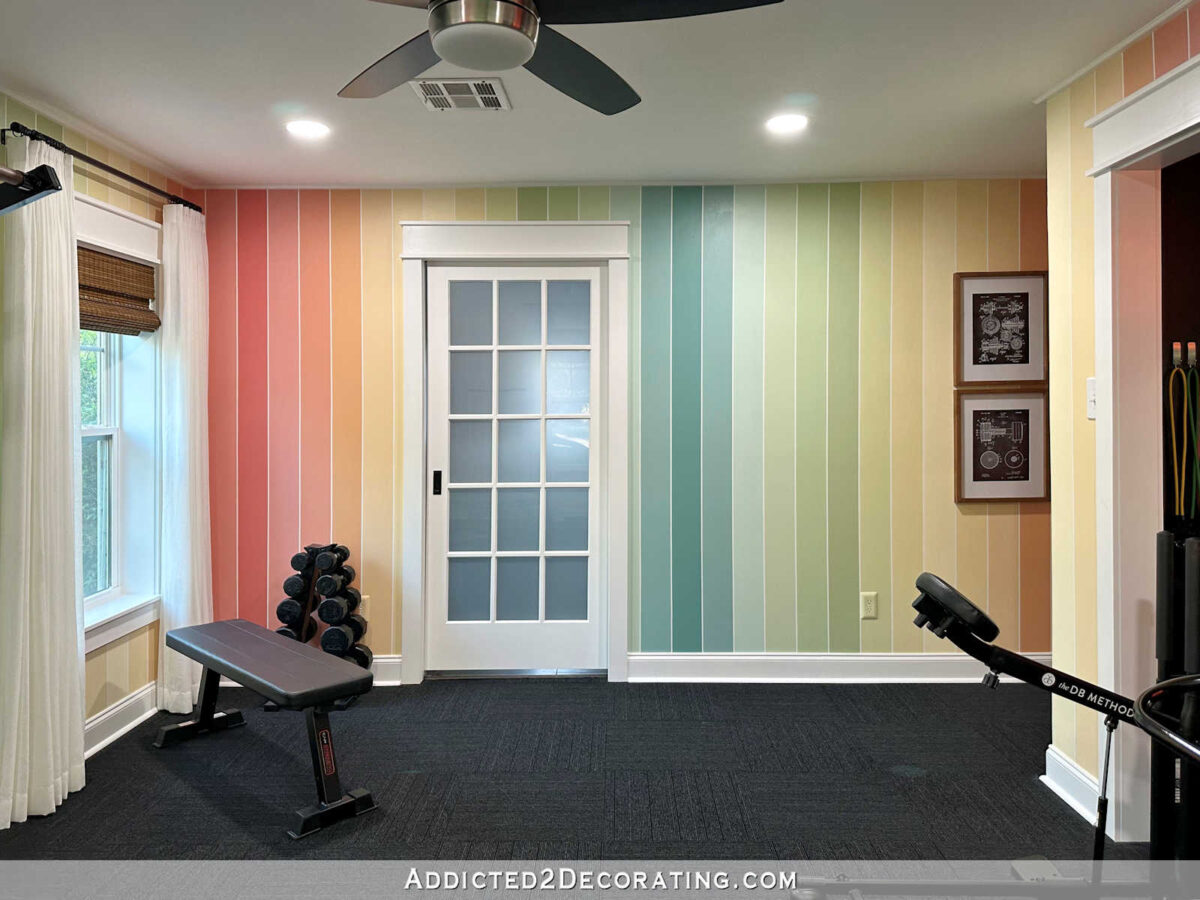
I posed the question about what design I should do on my A2D FAcebook page, and the majority response was that I should just do the same design with the colorful squares in paint. I’m up for it. As y’all know very well, I’m not averse to tedious painting projects. But others suggested that I do something like the stripes that I had in the home gym using colors that would work with the studio floral mural.
I do like that idea…obviously. But I also don’t like the idea of redoing something I’ve already done. I’d like to do something that I’ve never done before. I do have one other idea that I’m considering, which would be kind of a combination of the stripes and the squares, but I think I need to spend a bit of time at my computer doing a couple of mockups before I make my final decision.
So my goal today is to try to rid myself of all of the frustration I feel, get the wallpaper off of the walls, and repair the walls. And then I’m going to take some time and make a decision on the direction I want to go with the walls. The one thing I know for sure is that there will be COLOR, and lots of it, on these walls when I’m finished.
More About My Studio Bathroom
see all studio
bathroom diy projects
read all studio
bathroom blog posts

Addicted 2 Decorating is where I share my DIY and decorating journey as I remodel and decorate the 1948 fixer upper that my husband, Matt, and I bought in 2013. Matt has M.S. and is unable to do physical work, so I do the majority of the work on the house by myself. You can learn more about me here.
A painted plaid/stripe you still get the grid, uses a bunch of colors. Design with colors based on what you got in cans and is close to what you chose for the paper you got. You got soo many samples of blue and pink from the closet, you can likely do something interesting. Appears with Yellow background/base/main. Figure out how you can +/- red to turn the pinks to orange/coral in a horizontal direction then +/- blue to turn blue to green in Vertical stripes. It doesn’t have to be perfect mixed color just the pattern you get with the various widths in a plaid check.
What about cutting out the individual squares and putting them up that way? Or even overlapping them or putting some straight or on the diagonal? That way you can get the colors you want, still use the wallpaper and not worry about straight, plumb walls. Cutting much smaller pieces around obstacles would be so much easier than a long large piece of wallpaper.
Gurrrlll, get you a nice cold ice-tea and hit re-set! You’ll figure it out and those bathroom walls will be exatly what you want 🙂
I wish there was a “Like” option. This is the perfect comment!
Thanks! I think we could feel her frustration as we kept reading her post but we all know she’ll figure it out 🙂
Ugh! How frustrating! I’ve only hung wallpaper once (on the ceiling no less) but I chose a non-directional and non-linear design on purpose. I knew I’d end up right where you are now!
Since you’re up for tediom, why not paint the squares on instead of wallpaper? The design and colors so great, it’d be a shame not to use what you had your heart set on.
I suspect you are thinking about a plaid pattern but have you thought about birds. You love birds and I’ve loved everything you have ever done with birds. The only disadvantage I can think of regarding the birds is there might not be enough color for you in that room. You will figure it out I am sure.
Before you completely scrap the idea of using the wallpaper with squares, here’s a solution. Paint the walls with the same color you are using below the chair rail, and do picture framing mouldings above the chair rail, in large scale. Then fill the upper moulding’s inset with the square designed wallpaper. The mouldings would be even, so applying it to the inset would be simple!
THIS!!!
I thought the same thing! That wallpaper is terrific!
I worked for professional wallpaper people many years ago. They taught me to never wrap paper from the first wall to the second for just this reason. Instead I learned to wrap about a half inch to the next wall and cut the rest of that sheet off. Then you start on the new wall, at the corner covering that half inch, and proceed on. This way you are leveling each new wall on its own. (I hope that makes sense!!!) I’ve papered for many years and it always works for me. Just food for thought! You are amazing!
This! I am genuinely surprised to see that much wallpaper wrapped around the corner.
Yes, you’re not supposed to wrap into the corner and around. You press into the corner, leave the edge of paper on the “new wall” (the one you’re transitioning to) free, so that you can perfectly press into the corner. Then cut at the corner. Then take the excess piece you just created and level that vertically on the new wall, also pressing it into the corner. Then everything lines up and to the extent it may look a teeny bit off if you really study the corner, no one is going to see that. But I’ve never seen paper wrapped around the corner like that. All the how-to videos expressly say not to.
One harebrained idea I’ve always wanted to see if it would work was abstract watercolor on the walls in various colors just sort of blending into each other. I’m not good at describing it, but you’re the type of person who could make somebody’s weird idea and make it look amazing!
I’m with you on this! I really prefer organic shapes to the hard edges in that repeating squares wallpaper.
I’m sorry you ran into those problems with your wallpaper. I know how excited you were about it. I loved the floral wallpapers you were considering for your closet ceiling. I prefer lighter, less bold designs. Maybe one of those would work well in this bathroom, especially with the pretty floral looking ceiling light fixture.
Maybe paint if for now, so you have a useable guest bathroom, then ponder what you want to do while you work on the storage closet.
I totally egress with this. You have enough going on right now that need your time and attention, like the storage and exercise rooms. Re-visit this down the road.
I am so, so sorry for your frustrating experience. Been there! If you do choose to wallpaper in the future, consider doing these few things:
1. If the paper has an overlap, simply cut down the middle of the lap and remove both extra pieces of the lapped paper. You’re left with a perfect seam that’s better than butting.
2. If needing to make a patch, follow the same logic. Make the patch larger and then cut through both layers. Perfect match.
3. In corners ALWAYS (and I mean always) cut and then re-start plumb on the next wall. I measure in several places and then add at the most 1/4″ and hang to the corner. Then get a plumb line on the new wall and go from there. The little inconsistencies will not catch your eye because it’s the corner, you’ll be level and plumb on the new wall, and you’ll never get a puckered corner.
I hope this helps for the future. And I hope you have lots of fun with your new plan.
My father was what I considered a Wallpaper God. The man could hang any wallpaper on any wall, and it looked amazing. He taught me those skills and how to paint with 16 moves under my belt from the Army, I am glad that I had those skills so our homes that we lived in weren’t drab and dreary. A suggestion, we never “wrapped” a corner. We would end with about 1/4 -1/2-inch overhang into the corner, then start the next piece on top of the overhang, if that makes sense to you. This way we had a little more flexibility with out of whack walls and fussy paper. Remember, you are not spending that much time in this bathroom, and neither should your guests. Sometimes good will be good enough, I love this paper and it is so perfect for this half bath. I hope this helps.
Cheers to you, Matt and the Fur Babies!
So sorry for your frustration! Many many years ago I wallpapered a feature wall with plaid wallpaper in my son’s bedroom. The wall had a window in it. There was one spot below the window where I could not get the plaids to match correctly. I fussed and fussed with it. Eventually, I just put a piece of furniture in front of the window and let it be. I NEVER did a plaid wallpaper again.
This comment and KL’s blog today reminded me of why I only wallpapered once. In my 20s in a rental apartment I (very badly) wallpapered a brick patterned paper in a small bathroom. All these years I just thought it was me, unable to make it right, and now all of a sudden I find out that my heroes also struggle with the linear papers. Wow.
It’s very obvious. This is unacceptable from a company as well regarded as Spoonflower. Send then these photos. At the very least you deserve your money back! Or how about a credit for a future project? Maybe not wallpaper 🤣
ps, make your own squares! With paint
A refund for user error?
This might be time consuming but, instead of using wallpaper, could you just paint the squares on the wall? It may be too similar to the cabinet in your studio,but if you have your heart set on this, it would be what your going for.
Why not use this wallpaper on the ceiling and paint the walls a coordinating color?
Wow as long as I’ve been following you this is an interesting outcome. I do understand your decision. Can’t wait to see what you finally decide on.
What about painted plaid in similar colors?
Is it out of the question to use the other wallpaper that you have? I just LOVE that blue floral paper that you were considering. I know you had decided to possibly wallpaper the ceiling of the storage closet with that paper. But, it is so gorgeous! Maybe it’s meant to be in your guest bathroom! 🙂
Oh my, that is the WORST! That kind of frustration is just so…frustrating! I would have been in tears and probably walked away from the bathroom forever. I would hire out finishing it. Good luck as you reset and come back at it with a good attitude.
Maybe a piece of molding running from top to bottom in each corner could cover the problem of the paper not lining up perfectly? The molding could be painted the color of the vanity or a color from the wallpaper. It would kind of frame each wall and hide the mismatching of the pattern.
Darn, I did love that paper…but I know you will come up with something just as colorful. Wallpaper can be AWFUL to install…I gave that project up many years after realizing I could stretch the paper a bit and throw off everything…I HATE that job! Looking forward to the new design.
Kristi, look on internet at the store called ‘ MY FAVORITE QUILT STORE’
Yes it’s fabric and mainly for quilts. I am a quilter. But they have the most interesting designs that make me think of you every time. I’m going to buy a panel to frame. I know you will come up with a unique idea, you always do. Stop stressing and when you relax it will come to you. Works for me.