I Have A Workshop Ramp! (Plus, Driveway Progress And Landscaping Plans)
I have a usable workshop ramp, y’all! I really love how this turned out. I know it’s just concrete, but it’s usable, functional concrete, and I think it looks great!
Let me back up a second. If you’ll remember, I had my workshop built 14 feet away from the edge of the carport, and while my carport is a slab of concrete sitting right on the ground, my workshop was built up off the ground about 14 inches.

So I needed a ramp for easy access, and I was weighing the decision to build a wood ramp or pour a concrete ramp. Matt preferred the concrete ramp, and that’s how this whole thing (driveway and all) was set in motion. While the concrete man was here to measure and give us an estimate for the ramp, I asked him to measure and give me an estimate for the driveway as well, thinking that might be something we could finally get done next year. But the estimate was so good that we decided to do it all at once…NOW.
The concrete guys came last Friday, one work day ahead of schedule, and started building the frames. First, they built the frame for the ramp…

And then they started on the driveway, starting at the back and working their way towards the street. The first day, they got the ramp form finished, the forms for the first two sections of driveway finished, and the third section started.

The third section has a bit of a curve in it. This section was only started on the first day, but they didn’t finish it because they needed the concrete truck to have space to get to those first two sections.

So bright and early yesterday morning, the concrete truck showed up to pour the ramp…


And the first two sections of the driveway…

As soon as those were poured, two of the guys finished out the framing and rebar for the third and fourth sections while one guy worked the poured sections until they were set and finished with a brush finish.

By the end of the day yesterday, the ramp and first two sections of the driveway were finished and almost completely set (enough that they were walking on them), the next two sections were completely framed and ready for concrete, and a third section was started but not completely framed.

And of course, before the concrete set up completely, I had to make my mark. 😀

Here’s a look at the progress about an hour before they left yesterday.

This morning, they showed up bright and early and removed the forms from the ramp. It looks so good!

And then the concrete truck showed up again for another pour. I thought that they were only going to get two sections done again, but they did the first two, and then took about 30 minutes to finish up the framing and rebar for the third section and poured it as well.

So at the end of today, that will be five driveway sections plus the ramp finished, and they’ll have six more driveway sections to go.

I had to share this picture. Do y’all see my sweet little stray kitty sitting at the end of the driveway? He’s not quite sure what to think about all of this. 😀 My neighbors and I have decided to call him Tiger. He’s like the neighborhood cat now. I think a lot of us are looking after him and feeding him. I’d love to bring him inside and make him our cat, but so far, Cooper will have none of that. I keep hoping he’ll calm down a little around the cat, but he’s just not good with cats (he tolerates Felicity most of the time). So for now, the cat has to stay outside.

So after today, all of the sections that meet up with the carport will be finished.

But they still have a very long way to go. That’s already a whole lot of concrete, and they haven’t even gotten to the side of the house yet.


The concrete man originally suggested making the ramp much wider, connecting the corner of the carport to the corner of the workshop on the side in the foreground in the picture below, and then on the other side, connecting the corner of the carport with the edge of the workshop door, and then in the remaining space, pouring the concrete so that it slants to meet the driveway.

That just seemed like an awful lot of concrete, and concrete in unnecessary places. So after giving it some thought, I decided that I just wanted it the width of the workshop door, which is nine feet wide, and then angled out to twelve feet wide where it meets the carport. That’s plenty wide to get things in and out of the workshop, while leaving space on either side for some landscaping. I also like the symmetry of the ramp with the workshop door like that. That other way, the lack of symmetry of the ramp with the door would have made my brain hurt.
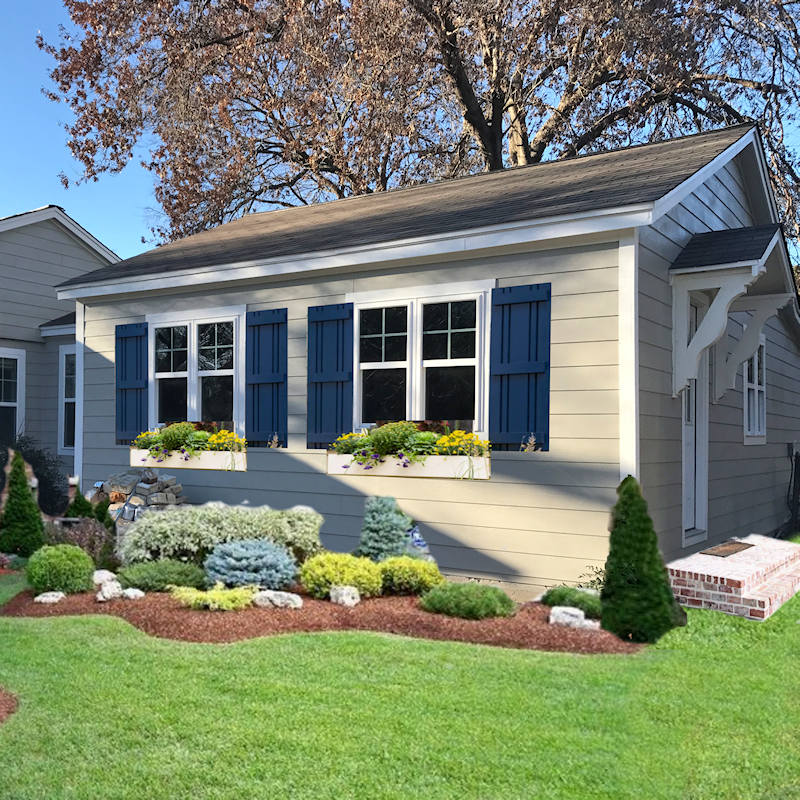
So what I want to do first is put a skirting around the building so that you can ‘t see underneath it.

Then I want to put a two-foot perimeter of gravel around the building to give it a very clean look. I don’t know yet what kind of edging I’ll use. I haven’t gotten that far in my planning yet. And then on the gravel, I can set out some potted plants. And then in the areas on either side of the ramp, I can plant some shrubs or something like that just to soften up all of this concrete.
So with that plan in mind, I did have them leave a two-foot perimeter behind the workshop.

I planned this from the beginning, so I’m glad it worked out. My workshop is only 18 feet wide, and the carport is 20 feet wide, so I had them build the workshop so that the front (i.e., the side with the front door) is lined up with the other edge of the carport, which leaves that two-foot space on this backside with the driveway in line with this edge of the carport.

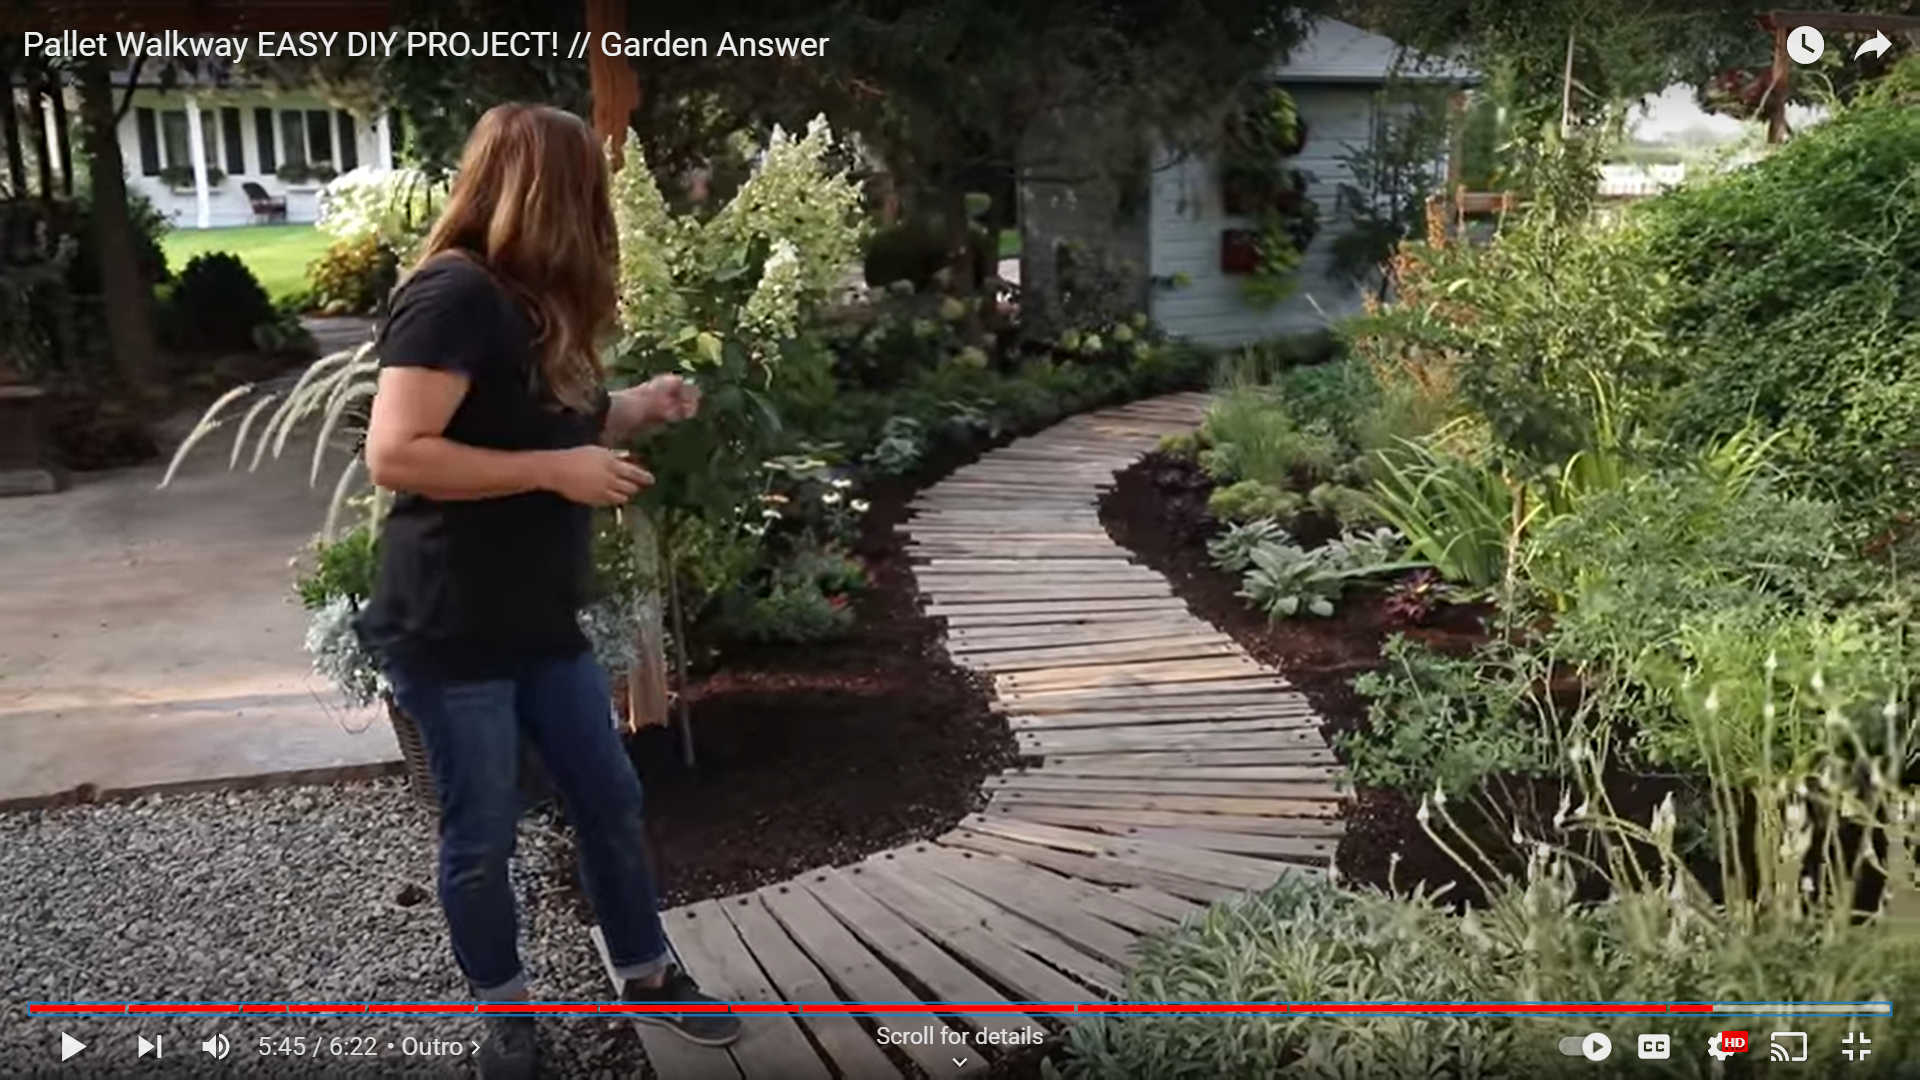
I have no idea if that made sense. 😀 But all that to say that I planned it that way because I have a very clear vision in my head of how this will all look when it’s finished. And then my planned walkway/walking track around the back yard will be right off the end of the driweway and head back towards the back fence of our property.

You can see on the landscape plan that I am following the plan that I am following the plan for the most part. But in the plan, I hadn’t realized that I’d need a ramp to the workshop. So when I realized that, I didn’t see any need in wrapping the concrete around to the other side of the workshop. There’s no need for that amount of concrete when gravel or other landscaping material will work just fine and probably look better. But you can see how the walking path comes off the back side of the driveway to the right of the raised garden beds.
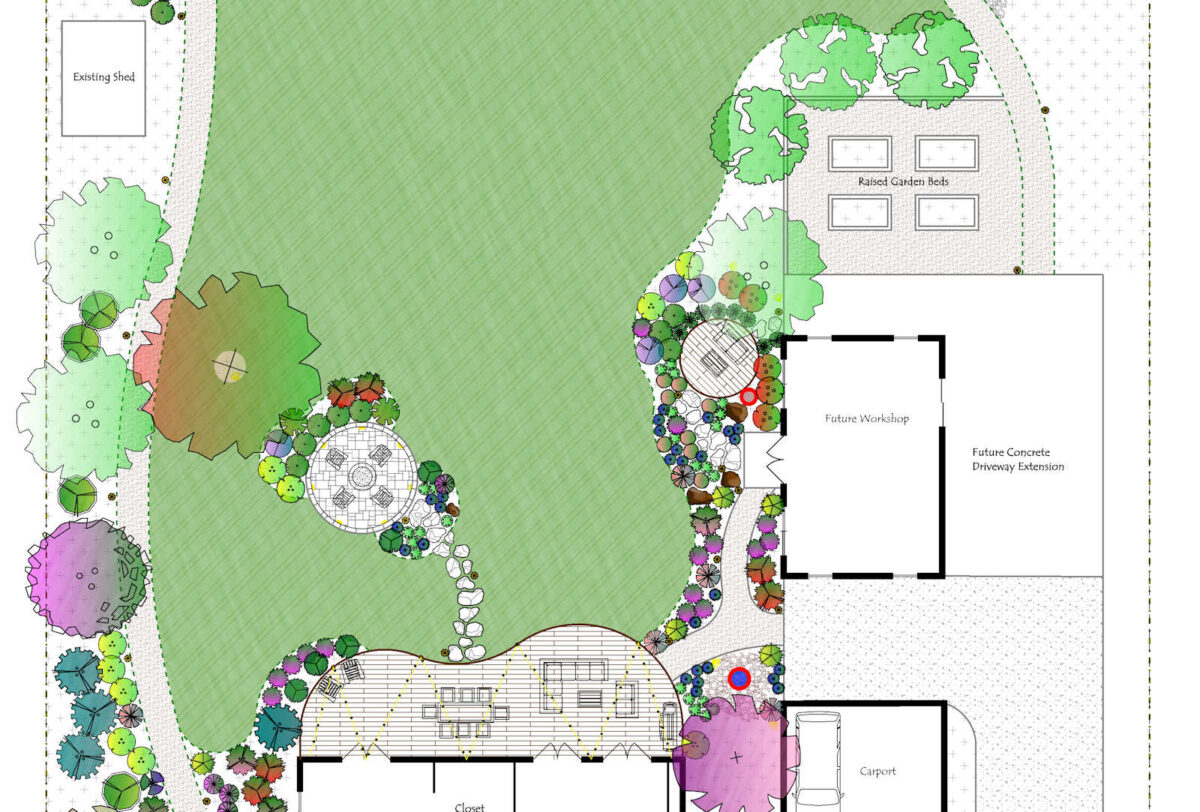
So I am following the plan for the most part, but there will be a few changes and tweaks along the way. But I do plan to keep that two-foot gravel perimeter around the whole workshop, and it will probably also extend along the back edge of the driveway with a break in the gravel perimeter for the walking path.

And then I need to decide what to do on this side of the driveway. The landscape plan didn’t account for any space on this side, so I’m on my own. 😀

Anyway, that’s the progress so far! Tomorrow, they’ll pour the next three sections, and then Thursday morning, they’ll pour the last three sections. So by Friday morning, we’ll have a finished driveway! At least that’s the plan, barring any unforeseen circumstances. I can barely contain my excitement, y’all!
UPDATE: To be clear, the ramp into the workshop was never meant for vehicles. And even if I had let him connect the ramp to the driveway like he initially wanted to, it still wouldn’t be accessible via a vehicle as that slant would have been too severe.
But no, my intention was never for vehicles to drive on the ramp. Anything materials I need to get into the workshop will be unloaded in the carport (where there’s PLENTY of space) and then carried or wheeled into the carport with a hand truck or cart of some sort. I had the workshop built 14 feet away so that the angle of the ramp would be gradual enough to make pushing/pulling things into the workshop, walking to the workshop, or Matt wheeling into the workshop very easy. The ramp was only ever intended for ease of access for humans, not vehicles. 🙂

Addicted 2 Decorating is where I share my DIY and decorating journey as I remodel and decorate the 1948 fixer upper that my husband, Matt, and I bought in 2013. Matt has M.S. and is unable to do physical work, so I do the majority of the work on the house by myself. You can learn more about me here.

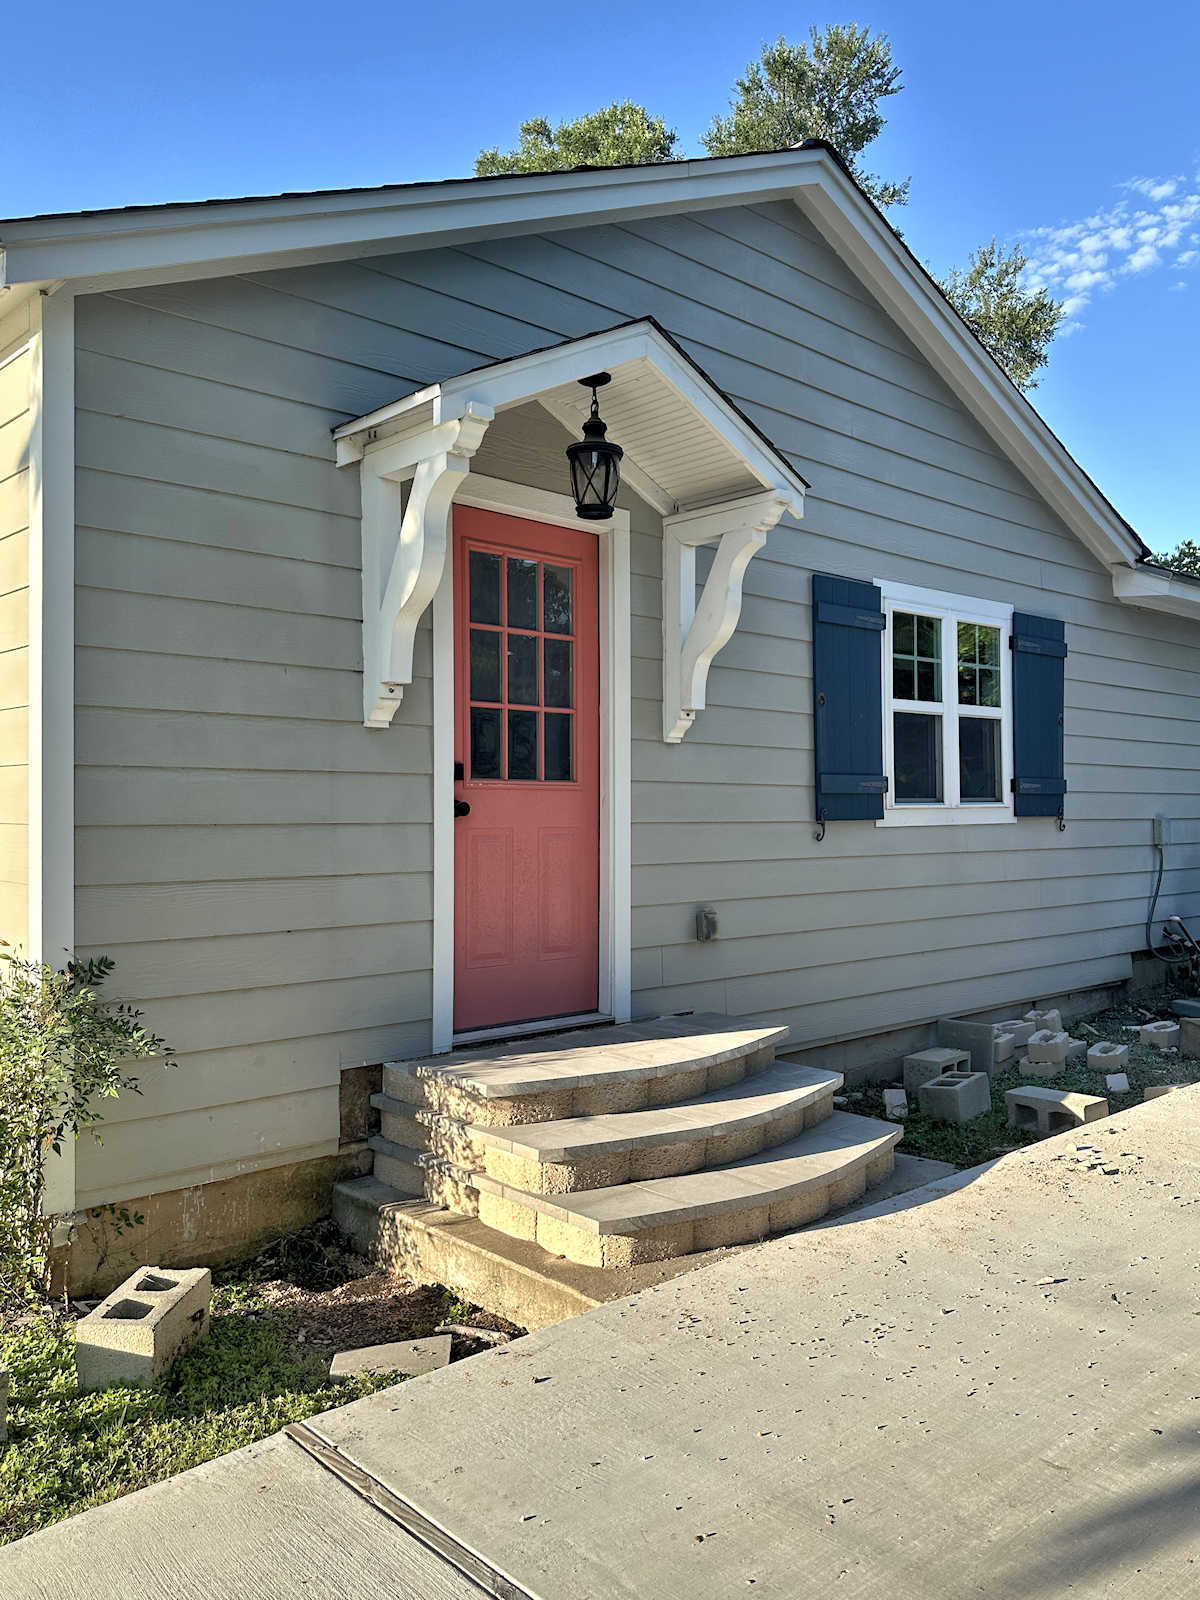

If I remember correctly, you need stairs into the studio. Have you considered having them pour some concrete steps for the studio?
I’ve always envisioned those steps matching the front porch steps. I still plan to do that, and it’ll be so much easier now that the driveway will meet up with that little concrete pad.
I have trouble imagining how objects move through a space— can you draw a little diagram about how you will back a vehicle up the ramp from your new driveway?
The ramp isn’t for vehicles. The ramp is only for ease of carrying items (or pushing them on a cart or handtruck) into the workshop from the carport. So any materials I purchase will be unloaded in the carport, and then carried or pushed on a cart into the workshop. The ramp is only for ease of access so that I don’t have to step up and down steps to carry things inside, and for Matt to be able to get inside if he wants to visit.
How will you be able to back up a vehicle to the shop door with the gap in concrete between the ramp and driveway?
The ramp is not meant for vehicles. It’s only for ease of access for me and Matt to enter the workshop.
Have you considered drainage in the unpaved spots? Also, the ramp slanting toward your carport will naturally funnel water onto your carport.
He poured it in such a way that it won’t funnel water into the carport. The carport is graded so that water flows towards the ramp and towards the driveway side of the carport. He poured the ramp with a dip in it (set into the ramp about 10 inches) and graded it so that water goes to the right. There shouldn’t be any water flowing into the carport. The only exception may be that one day a year when we have an absolute deluge when the sky opens up and dumps inches of rain in an hour or so, but on those days, nothing is safe, so it wouldn’t matter anyway. 😀 And thankfully, that only happens once or twice a year.
How exciting. It looks so good. Everything is coming together and I’m thrilled you always take us along for the ride.
This looks terrific and will make your life so much easier! I don’t know if you already have the hand truck you want but we have had really good luck with this one
Push Cart Dolly by Wellmax, Moving Platform Hand Truck, Foldable for Easy Storage and 360 Degree Swivel Wheels with 660lb Weight Capacity, Blue Color
we have one for inside and one for outside and they have been a lifesaver for our aging backs!
https://www.amazon.com/gp/aw/d/B076ZXL165?psc=1&ref=ppx_pop_mob_b_asin_title
Sorry—don’t know why the link didn’t post
https://www.amazon.com/gp/aw/d/B076ZXL165?psc=1&ref=ppx_pop_mob_b_asin_title
Looking good good good! As it happens I’m in the middle of constructing a small foundation for our garden shed. It helps me greatly that your driveway is a few steps ahead of my schedule. Quick question: did they vibrate the concrete after pouring?
They did not. I don’t think I’ve personally ever seen that done on driveways and sidewalks. I’ve only seen it done on concrete countertops.
I wondered the same….. shakes out bubbles, make good contact with ground base. That is definitely an issue for those of us in colder climates….. water may get into those bubbles, freeze, expand, create cracks. We also have those black supports at every cross hatch, then cut in additional shallow seams on surface in large expanses so that if a crack starts, the seams stop it from progressing. We redid our drive this summer. It was clear why the old one settled so much, broke up, no base and no rebar. The corners some builders cut is disappointing.
I’m guessing I would have to do a lot of research to understand building principles in hot climates to adjust for heat and humidity factors.
Wow, looks great.
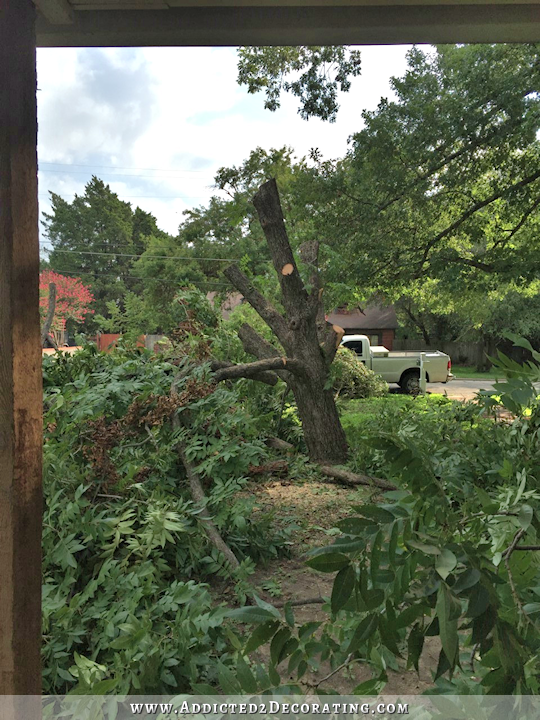
Smart of you to have removed the trees first. It’s been our experience with trees that they find it distressing to have their roots covered by concrete. No doubt what you plant in those 2 foot deep areas will consider choosing things that are happy in that environment. I recently learned that even landscaping with cardboard needs to be done with care as while it blocks, slows weeds it’s also hydrophobic blocking water and nutrient access. So many things to consider.
We put a heavy duty metal mesh band around, then crushed rock the base of our garden shed to keep out animals. Have learned critters will dig under some things, in plain dirt so the rock is the secondary deterrent. It’s been successful with large animals like groundhogs, rabbits, raccoons but some chipmunks have found a work around. It doesn’t get them inside access but great to deter them when possible.
They are making great progress on your driveway. The ramp will be great for you. I wish I had one into my garden shed.
For the area between the fence and the driveway, I recommend a row of North Pole arborvitae, a slender evergreen tree 15′ H X 3’W. These can provide some privacy and cover the fence, along with year-round color, and low maintenance interest down the fence line. Where the space between fence and driveway widens, you can add some pretty flowering shrubs. If deer are not an issue for you, Bobo Hydrangea would look lovely and they are compatible with the arborvitaes, though they are deciduous. Another alternative if deer do trouble you, gardenias would be nice there too. The contrast in foliage between gardenias and arborvitae, plus the lovely scent, would be a beautiful low maintenance option. Gardenia are also evergreen.
You are well on your way to an inviting driveway! So exciting for you! Thank you for sharing it with us!
I’d like to add that arborvitae, gardenia and hydrangea do not have invasive roots and are safe to plant close to the driveway without concern.
Great suggestions Yvonne xx
So helpful
I knew your driveway was long, but seeing all of that beautiful concrete really shows just how long it is—and it isn’t even done yet! It looks so good, and I am in love with all your ideas for landscaping and your walking path. I know for a fact that my brain could never interrupt a blank canvas ( your home and property) as yours has done and continues to formulate. It is all so beautiful but girl you make me tired. LOL
Looking at your photos, I couldn’t stop thinking about what hard work those laborers were doing so skillfully, efficiently and conscientiously. Which made me think of how quickly and well your workshop came together and how responsive your tree guy was in helping make that happen. And how most of the workers appear to be Hispanic. People who do hard physical labor with good results and a strong work ethic deserve a lot of respect. And that has nothing to do with politics.
Thank you for writing this! I thought it but lacked your courage.
Specifically, they’re almost all Mexican or of Mexican heritage and can tell you the best hole-in-the-wall truly Mexican restaurants in Waco (no Tex-Mex). 🙂 I’ve never had a Hispanic work at my house who wasn’t of Mexican heritage. In this area (central Texas), I would say at least 90% (probably more) of those who work in construction (specifically framing, roofing, concrete, sheetrock, etc., but not necessarily plumbing or electrical) are of Mexican heritage. Same holds true with those working in tree and lawn maintenance. My experience has been that about 35% of them speak English fluently (about 40%-45% can speak at least some English and communicate the really important information/questions about the project), about 25% of them were born and raised here (the man in the neon yellow shirt is just three years older than I am, was born and raised here in Waco, and has a thicker Texas accent than I do 😀 ), and about 90% of them who have worked at my house still have family in Mexico. I try to speak with and get to know everyone who works at my house (just because I like people in general, love to talk to people, and love to hear about people’s lives) so those are all just guestimates based on my experiences. And I can say wholeheartedly that 100% of them are incredibly hard workers and are very skilled at their trade, without exception.
It looks so awesome, and I love concrete. On getting things in and out of the workshop, we use stainless steel tables that we have got through Amazon, Temu or Webstaurant, they are sturdy, they help us load what we need to anything from wood for the latest project to wild boar that we have trapped on the property. Rinses clean, they are on wheels, I can throw a tablecloth over them for parties, they have locking wheels, and I just can’t say enough nice things about rolling stainless steel. We poured 83 cubic yards in the back of the house for a VERY LARGE patio and pavilion and then last year 60 cubic yards out front for a new porch, long sidewalk and small patio in front of the master bedroom, we had that colored and stamped, everyone who sees it loves it. So do we. Have fun and just remember pressure washer and blower, it’s awesome for cleanup. Wished I could use that inside the house to clean.
Cheers!
You’re going to feel like a parade queen the first time you get to drive down it 😄
I would put some hardware clothe around the perimeter of the workshop before any critters decide to make it their home.
Have you thought of trapping the cat and having it fixed and then release it? It would be such a good thing to do. I bet you could find a low cost clinic. No need for more kittens in this world 🫤
It all looks great but I know what makes me smile is knowing that Matt and access to everything you do and can be more a part of your home DIY projects
I have never been so interested in a driveway. Seriously, I have been eagerly anticipating your posts about this concrete project! Congrats!
I have to smile, as you continually refer to the ease of taking resources INTO the workshop. It will be the ease of getting your finished products OUT of the workshop which will see the most benefit! Some of those will be large and heavy and your ramp will be a God send!
Very good point!
Great job with your planning and placing, Kristi! I’m so glad you did the ramp on the smaller side and created room for some green planting on the sides. It’s not an industrial complex, for goodness sake.
One of the best days of our own renovation life was when we had a concrete driveway poured up to the garage, walkway around the side, teeny back patio extended to a useable size. Oh, the difference!! My husband and I are DIY-ers due to perfectionism and lack of excess funds more than for the love of it, and laying out the cash for that particular project was absolutely a great decision.
Absolutely! Marvelous!
Kristi, I love your ramp and I can see Matt being able to navigate his wheelchair up the ramp into your work shop. Your driveway is so nice. The workers really have done a fantastic job on it. I love the way it will gently curve from the street to the back area. I like the plans you have in mind for the exterior of your workshop, and the plant areas you mentioned. Thing are really moving right along for you and Matt. I’m looking forward to watching everything get your genius touch.
What about heavy rains….will that ramp make it flow into your carport? Can’t imagine how expensive this was, as concrete is pricey! WOW!!
It shouldn’t. He graded it so that the water flows to the side, and the carport is graded so that the water flows towards the ramp. There shouldn’t be any water spilling into the carport.
Looks like a great place to roller skate! Got any young niece or nephews?
I don’t, but maybe it’s time for me to pull out the roller blades again. 😀
The owner of the company who poured out patio and sidewalk said to NEVER pressure wash concrete. He said to wash it with dawn soap and a stiff bristle broom, then roll on a concrete sealant every couple years.
Hi Kristi,
Everything seems to be moving along so fast now…and it looks great!
One thing I hope you do (and have probably already done, but…) is tell the workers that you have many followers who see the pictures and that they (the workers) have received many compliments for the good work.
Enjoy Kristi! God bless.
I’ve told them! They were fascinated, but I don’t think they completely understood exactly it is that I do. Men almost never know what a blog is, so I have to explain it. 😀
I keep pondering over the future addition and patio, wondering how they will access the construction area then, now that there is limited space. If I recall, the other side of your house is sort of close to the neighbors, so I guess they would have to go behind the workshop and a come back towards the house. Oh well, time to work that out later! This concrete work is so awesome, and I saw your reel where you were figuring out the street end. Hope that lovely trees roots won’t be harmed in the process!
It’s always so exciting to see projects like this come together! Those men have done a great job! Love the little kitty sitting at the end of the driveway; I’m a little surprised that you don’t have some kitty pawprints in the concrete, lol. Did I miss the finished studio reveal?
I think the driveway and ramp look fantastic! I suggest growing tomatoes, peppers, or squash that thrive in the heat or herbs like basil, cilantro, dill, oregano, rosemary, sage, and thyme along the ramp to the workshop until you actually start a bigger raised bed garden area. This will jumpstart your gardening (you can see what grows best and what doesn’t) plus you can easily keep an eye on them in a small area that you’ll access daily. It seems like a less intimidating area to plant.
WOW, that is a whole lot of concrete. I bet he was really smiling all the way to the bank.
Forgive me if I missed it in a previous post, but how do you get your vehicle in position under the carport to get Matt in your car off of the house ramp? Your landscape rendering and previous drawings appear you would now have to drive over your new workshop ramp in order to park in the carport. Help me understand.
Just saw Wednesday afternoon drive way video on Facebook. It is great, makes your house and yard look finished. Also read post for today. I love second rug.
Looks great.
That would be alot o driveway to shovel if you lived in the snow. Just remember there are two things concrete does; it gets hard and it cracks.
Wow, that ramp turned out amazing! It’s so satisfying to see something both functional and nice-looking come together like that. Totally agree with you on the landscaping—clean lines and layered greens will really pop against the driveway. Also, if anyone’s planning outdoor upgrades like this, don’t forget about the importance of reliable gutter systems to protect all that hard work. Can’t wait to see how it all comes together once the plants go in. Your progress is always super inspiring!