Slow Week, Slow Progress
Hey there! Well, it’s been a very slow and frustrating week with house projects. I’m still not finished with my living room draperies. Part of that is because the actual drapery panels are pretty time-consuming with the Greek key trim I’m adding (you can see details about that here), but I also had quite the frustration with my drapery hardware.
I bought the drapery hardware about two years ago. I wanted clear acrylic rods with brass brackets and rings. Well, it turns out that those are pretty expensive — at least they were two years ago. I haven’t priced them since then. So after searching and searching, I finally found that a few other bloggers had just ordered all of the components separately, so I did the same. You can find my sources for the rods, rings, and brackets in this post.
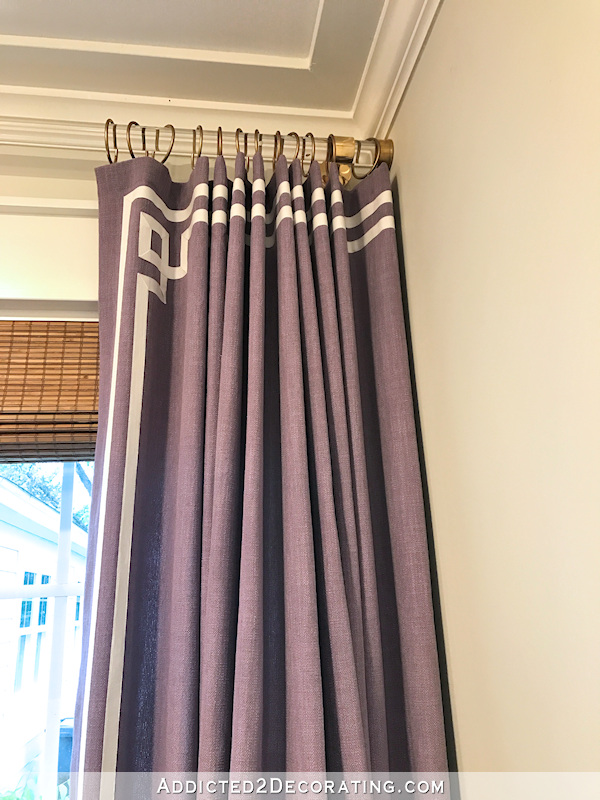
The problem is that the brackets I ended up going with aren’t really meant to be drapery rod brackets. They’re actually mounting posts for handrails, so they don’t project from the wall as far as a drapery rod bracket does. I’ve lived with that for the last two years, but since my window trim has a 1″ x 2″ piece of wood at the top that sticks out 1.5 inches from the wall, the pleats in my draperies are always very crowded on the back and don’t hang right. I don’t know if that ever showed in pictures, but I could tell every time I looked at them, and it frustrated me.
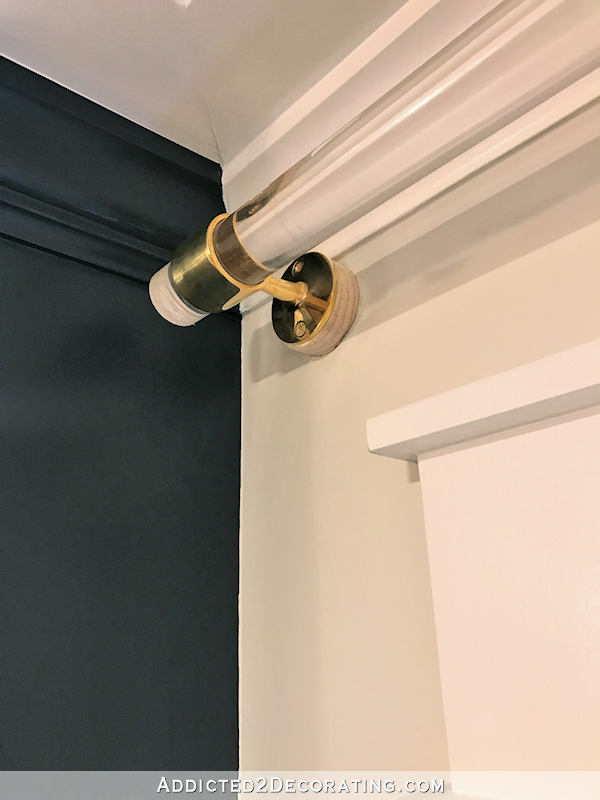
So since I had to remove the rods and brackets completely (at least on the two windows flanking the fireplace) to add additional rings, I decided to come up with a solution to make the rods project further from the wall so that the folds in my drapery headers can hang freely rather than being smooshed against the window trim. I decided to use a 2.5-inch hole saw (one of these) to cut circles of wood out of scrap 1″ lumber, attach those to the wall, and then attach the brackets to those.
I installed it before I knew how I was going to finish it. Do I try to make it a brass color to blend in with the bracket? Or do I caulk and paint it the wall color? I still don’t know what I’ll do, but to be honest, it’s not really even noticeable unless you’re looking at it up close. So I might just stick with that idea of keeping it unnoticeable and caulk around it and paint it the wall color.
But that extra 3/4″ is all that my draperies needed to hang properly. No more fabric folds on the back smooshed up against the window trim.
And of course, that sounds like a very easy process. Pretty simple and straightforward, right? Yep, I thought so, too. But just like most projects, it turned into a real headache, complete with stripped screws that wouldn’t come out of the wall, a hole saw that kind of chewed the wood rather than cutting it, initially using that hole saw in a much-too-powerful drill that nearly sprained my wrist, trying to reinstall the hardware using that much-too-powerful drill once again (because I’m a slow learner, evidently) which just twisted the heads of the screws right off, and on, and on.
The whole thing was a comedy of errors, except I was far from laughing. Thank goodness not all of my projects go this way or I would have given up on DIY a long time ago. It’s so discouraging when something seemingly so simple turns into a long, drawn out project with nothing but headaches and roadblocks.
Anyway, all of that to say that I spent a ridiculous amount of time the last couple of days fixing a problem that probably no one else would have even known was a problem. But I knew it was a problem, and it was driving me crazy. 😀 Now that my mind can rest about the hardware and brackets, hopefully I can just concentrate on getting these draperies finished so I can move on to my next project.
And speaking of my next project, all of my hardware for my shutters has arrived!
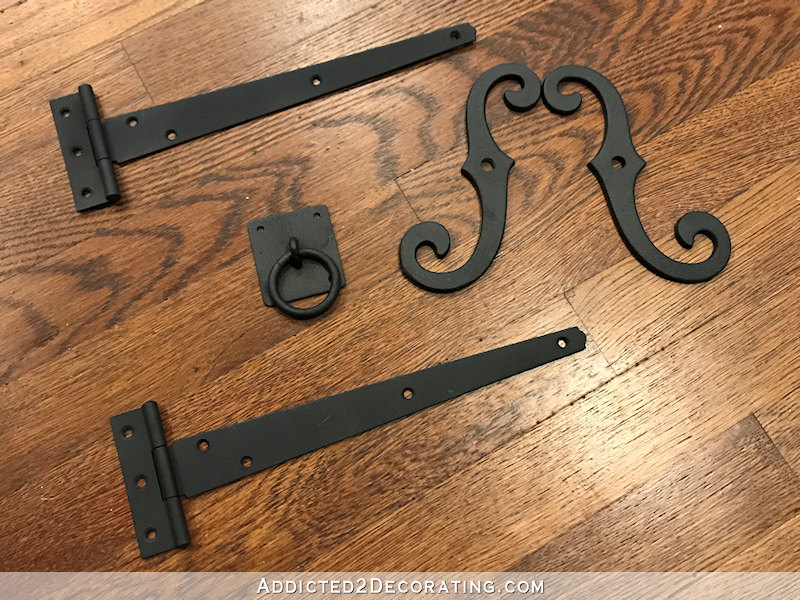
I’m really pleased with the quality of the hardware. They’re all usable hardware, but I’ll just be adding them for decorative purposes. (To be clear, the hinges aren’t meant for shutters. Shutters require actual shutter hinges that attach to the back of the shutter and not the front if you want to open and close them, but again, I bought these just for decorative purposes.)
I searched and searched for just the right hinges that I had pictured in my mind, and most of them were ridiculously expensive. I finally bought these hinges, and they were just what I wanted at the lowest price I found anywhere. I also bought these shutter dogs and these ring pulls, also at great prices compared to what I was finding at other places.
I bought all of my vinyl boards yesterday, as well as my navy blue paint for the shutters, so I’m set. I think I’ll take a break from the draperies tomorrow and work on getting at least one pair of shutters made and installed. I’m so anxious to see how these are going to turn out, and what difference they’ll make to the curb appeal of my house!
And one last detail…
A few of you asked me about painting vinyl boards a dark color, since I’m planning on using navy blue. Generally it’s a bad idea to paint plastic (like vinyl siding) a darker color than the original color since sun + dark colors can make the siding buckle. That would be a reasonable concern about PVC boards, too.
I called the company that makes the PVC boards, and they said that you can paint them a dark color as long as you’re using heat reflective paint with vinyl technology. I’m using a Benjamin Moore paint color on my shutters (Gentleman’s Gray), but the Benjamin Moore store here didn’t know anything about this type of paint. But Sherwin Williams has it! It’s actually not a paint, but an additive that they can add to any of their premium exterior paints.
So good news for those of you who have vinyl siding in a color you don’t like. You’re no longer limited in colors that you can paint over it. And my PVC shutters will be perfectly fine in a dark navy blue. (At least that’s what they’ve told me. Time will tell if it actually works like they say.)
Addicted 2 Decorating is where I share my DIY and decorating journey as I remodel and decorate the 1948 fixer upper that my husband, Matt, and I bought in 2013. Matt has M.S. and is unable to do physical work, so I do the majority of the work on the house by myself. You can learn more about me here.


Good solution for your curtain rod hangers. I would just paint them the wall color and I’m sure they will disappear.
I hope your additive works for the vinyl shutter paint. I love the idea of navy blue. They will look sharp with your siding.
I’m so glad you’re adding hardware to your shutters as it does make a difference in the finished look (at least to me).
I live in the far western US and never once has it ever occurred to me to put hinges on shutters to make them look useful. It make sure perfect sense now, but until now I’ve never even realized shutters had a purpose 😂 No tornado, wind, nor hurricane concerns here. Now I’m going to start looking around to see what hardware people have on their shutters (if any).
Just paint the pole extension the same as the wall. Every time I’ve seen an extension, it has been that way.
Can’t wait to see the shutters. I would take a “drapery break” too, and get outside! I took a good look at our shutters yesterday, and now I want to repaint them! There’s too much brown on the front facade of our house. The bricks and accent siding – all brown shades, and our siding is a pale spruce (to me) shade. So I want to bring the spruce into the front more. Now I just have to convince husband, who hates change! LOL!
I have no knowledge of shutters and am curious…what is the purpose of “shutter dogs”? i clicked on the link you gave for where you purchased yours hoping to see a picture of the shutter dog on a shutter to see what it’s purpose is, but they did not show that. Maybe you can educate me. I love the color blue that you are going to use.
Shutter dogs are little brackets that hold the shutters open. When the shutter is open against the outer wall of the house, you will see the shutter dog at the bottom outside (away from the window) corner of the shutter. Working shutter dogs are turnable so they can move out of the way to allow the shutter to close when needed.
As a child we lived in a colonial-era house on the eastern seaboard. We had workable shutters though never needed to use them.
Thanks Adele for that explanation. That makes perfect sense. I guess I have never paid much attention since where I live, south central Texas, shutters are more deco than functional and I never thought about them. I like that Kristi is going full on functional looking.
I feel your pain on projects that should be simple and turn into something else😫. Been there, done that! Paint you’re extensions the wall color if you want them to disappear. I had to do the same thing for barn door hardware and worked like a charm. It’s kinda nice you can hop to another project, work outside in the sun, and adjust your perspective.
If it were me, I’d just paint the extensions and let them fade into the background. I think trying to brass them would make them stand out like a sore thumb. JMHO 😉 I had to go back and look to see them, because I didn’t even notice them the first time.
Can’t wait to see your shutters. Navy is going to look gorgeous 🙂
Im curious why you are using pvc boards instead of wood for your shutters? You probably said why somewhere but i couldn’t find it!
Wow, you just taught me something…….I had no idea that you couldn’t just paint your PVC shutters whatever color you wanted. I guess I’m fortunate mine are painted white. Thanks for the info. And your drapes are beautiful.
We have painted our vinyl shutters with regular old latex paint twice and they’ve held up perfectly.
Kristi use brass leaf to cover your circles. It should blend seamlessly.
I have used the special Sherwin Williams paint and painted my vinyl shutters black last summer. Great stuff! A few houses in my neighborhood have also painted dark colors but their paint bled a little and left faded run-off areas under each shutter. Ours are still rich black and haven’t had any run off at all! I think you’ll be pleased.
I agree with most everyone else, caulk and paint. Navy shutters will look beautiful with your house. These are the same colors I’m going with on my house (when I get around to it! Paints sitting in the garage).
I’m sorry that you had so much trouble with this project (the result is fantastic, though – I wouldn’t have thought of this solution!).
To cheer you up (hopefully) just let me tell you that you made a project for me go a lot easier than anticipated: I wanted to hang two shadow boxes made from really beautiful old wood (and quite heavy) and didn’t know how to do that without piercing the wood or adding a (visible) device for the mounting – because the Hangman products you’ve recommend are not available in ANY German shop I looked!!
In the end, though, I found them on amazon, for quite a ridiculous price, but because of your recommendation, i gave them a try anyhow, and boy, am I glad I did. It was such smooth sailing attaching them to the wall and the boxes. They now hang perfectly and securely, so I don’t fear putting really dear things in them as I know the boxes won’t fall from the walls. Having said all that I just want to thank you for telling us all the tiny and big details of all your DIY endeavours, as they help so much – there have been many projects I wouldn’t have dared or thought of doing at all myself without having read through your blog!
Have a beautiful weekend in the sun – I keep my fingers crossed for your next project to work more easily!!
What a brilliant solution for your drapery rods! Only you.
It feels as if this is slow, but I can see it turning out great. You are really pushing it while a lot of us are just imagining. Keep up the good work.