Master Bathroom Progress: Second Vanity Built, Drawer Box Upgrade and More
My progress on the master bathroom is moving right along, and while I did get quite a bit done this weekend, I didn’t get nearly as much done as I could have because I ran into a problem that I’ve never had in all of my years of DIYing.
On Friday, I went to Home Depot to purchase more 1/2-inch plywood to build the drawer boxes for the storage cabinet. (You can click here to read more about how I built the storage cabinet/chest of drawers.) There were only a few sheets left in stock, so I grabbed one that looked nice, had them cut it in half for me, and took it home to cut the pieces I need on my table saw.
But the more I cut into the plywood, the more I noticed that the layers were actually coming apart. I was able to use about half of that sheet, but the other half wasn’t salvageable at all, so I took it back. They gave me a whole new sheet of plywood at a very steep discount (which basically amounted to 1/2 sheet to replace what I returned, and 1/2 sheet at 50% off). I got it home and started cutting into it, and the very same thing happened!!
I wasn’t about to waste time returning this sheet, because chances are that the next sheet I got would do the same thing. So instead, I spent time literally gluing plywood back together, and then had to let those sit overnight last night so that I could use them today.
This is what the plywood was doing…
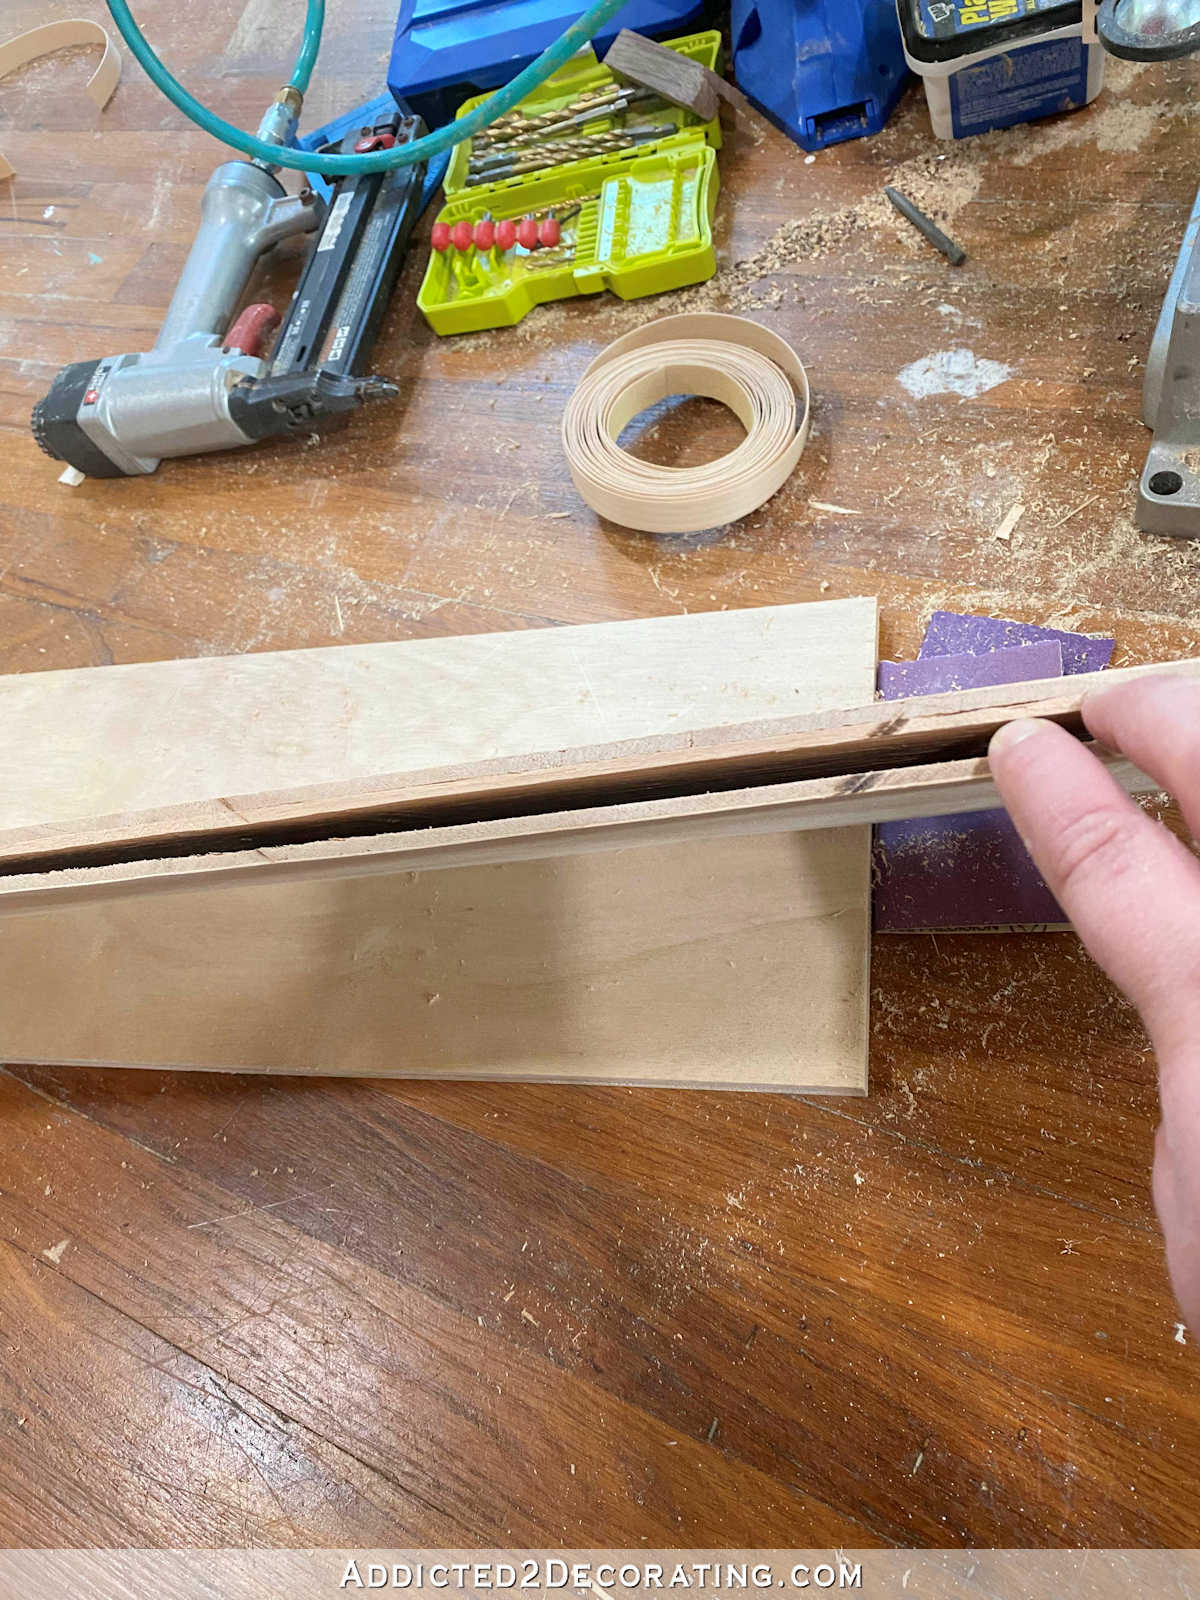
I’ve been DIYing for 30 years now, and I’ve never had this happen unless I left plywood out in the rain or something like that. But I’ve never had plywood straight from the store do this.

And some parts were so bad that as I cut off the pieces I needed, the remaining pieces would come apart completely. As in, there wasn’t anything at all holding the layers together.
So that was frustrating having to spend time returning plywood, literally gluing plywood together, and waiting for the glue to dry.
DIY Drawer Box Upgrade — Wood Veneer Edge Banding Applied To Plywood Edges
I was able to make a little bit of progress on drawer boxes, and I also took the suggestion that many of you gave me and I bought some wood veneer edge banding to finish off the top edges of the plywood drawer boxes.

I’m so glad I took the time to do this! It’s amazing what a difference that edge banding makes. And it’s so simple to use. You simply use an iron on the hottest setting (at least that’s what I do, so be sure to check the directions to make sure that’s right 😀 ) to adhere the pre-glued veneer to the edge. And then once the glue had cooled, use an X-Acto knife (preferably with a new blade) to cut off the excess. Finish by sanding the edges by hand (as in, no electric sander). I started with 120-grit sandpaper to remove the rough cut edges quickly, and then finished with 220-grit sandpaper.
How To Install Drawer Slides And Drawer Boxes
To install the drawer slides and drawer boxes, I used my Kreg Drawer Slide Jig. These make installing drawer slides and drawer boxes so incredibly easy!!
To install the drawer slides, you simply clamp the jig to the rail so that the jig is inside the cabinet. Then set the drawer slide on top, and screw it into place.
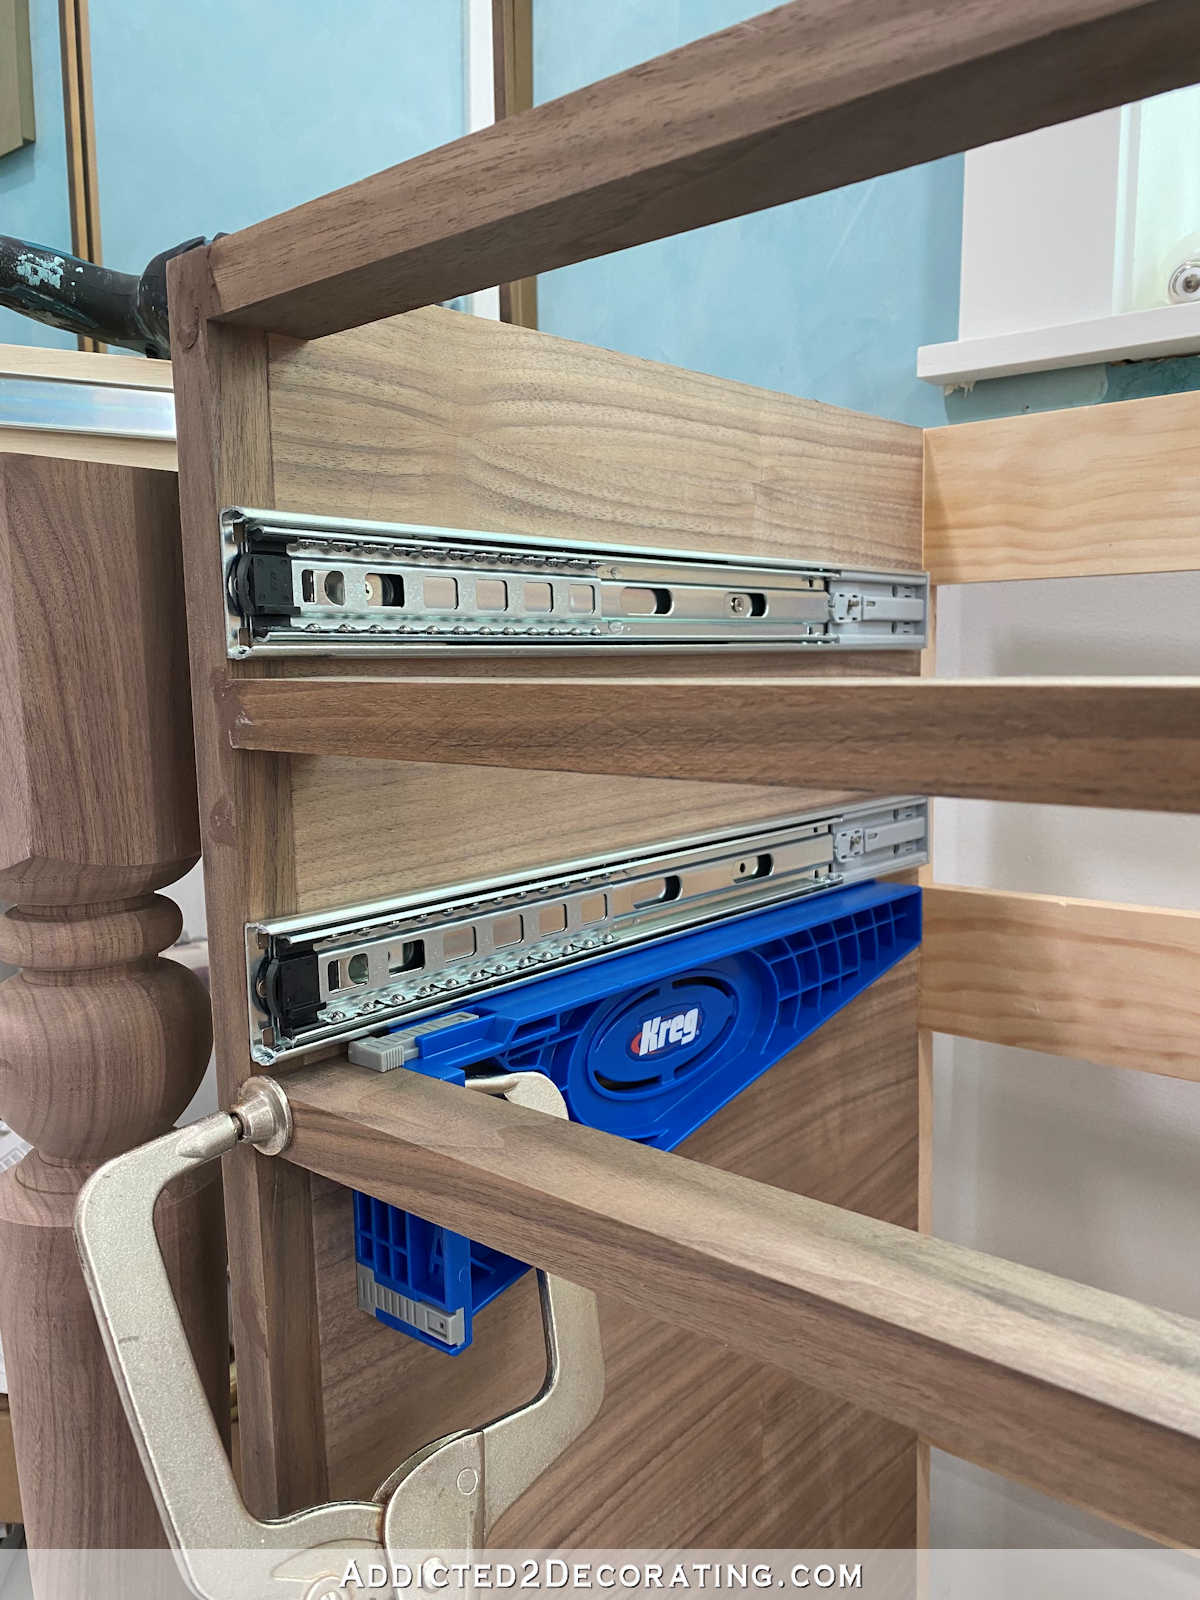
Once the drawer slides are attached, then flip the jigs so that they’re clamped to the rails on the outside of the cabinet…
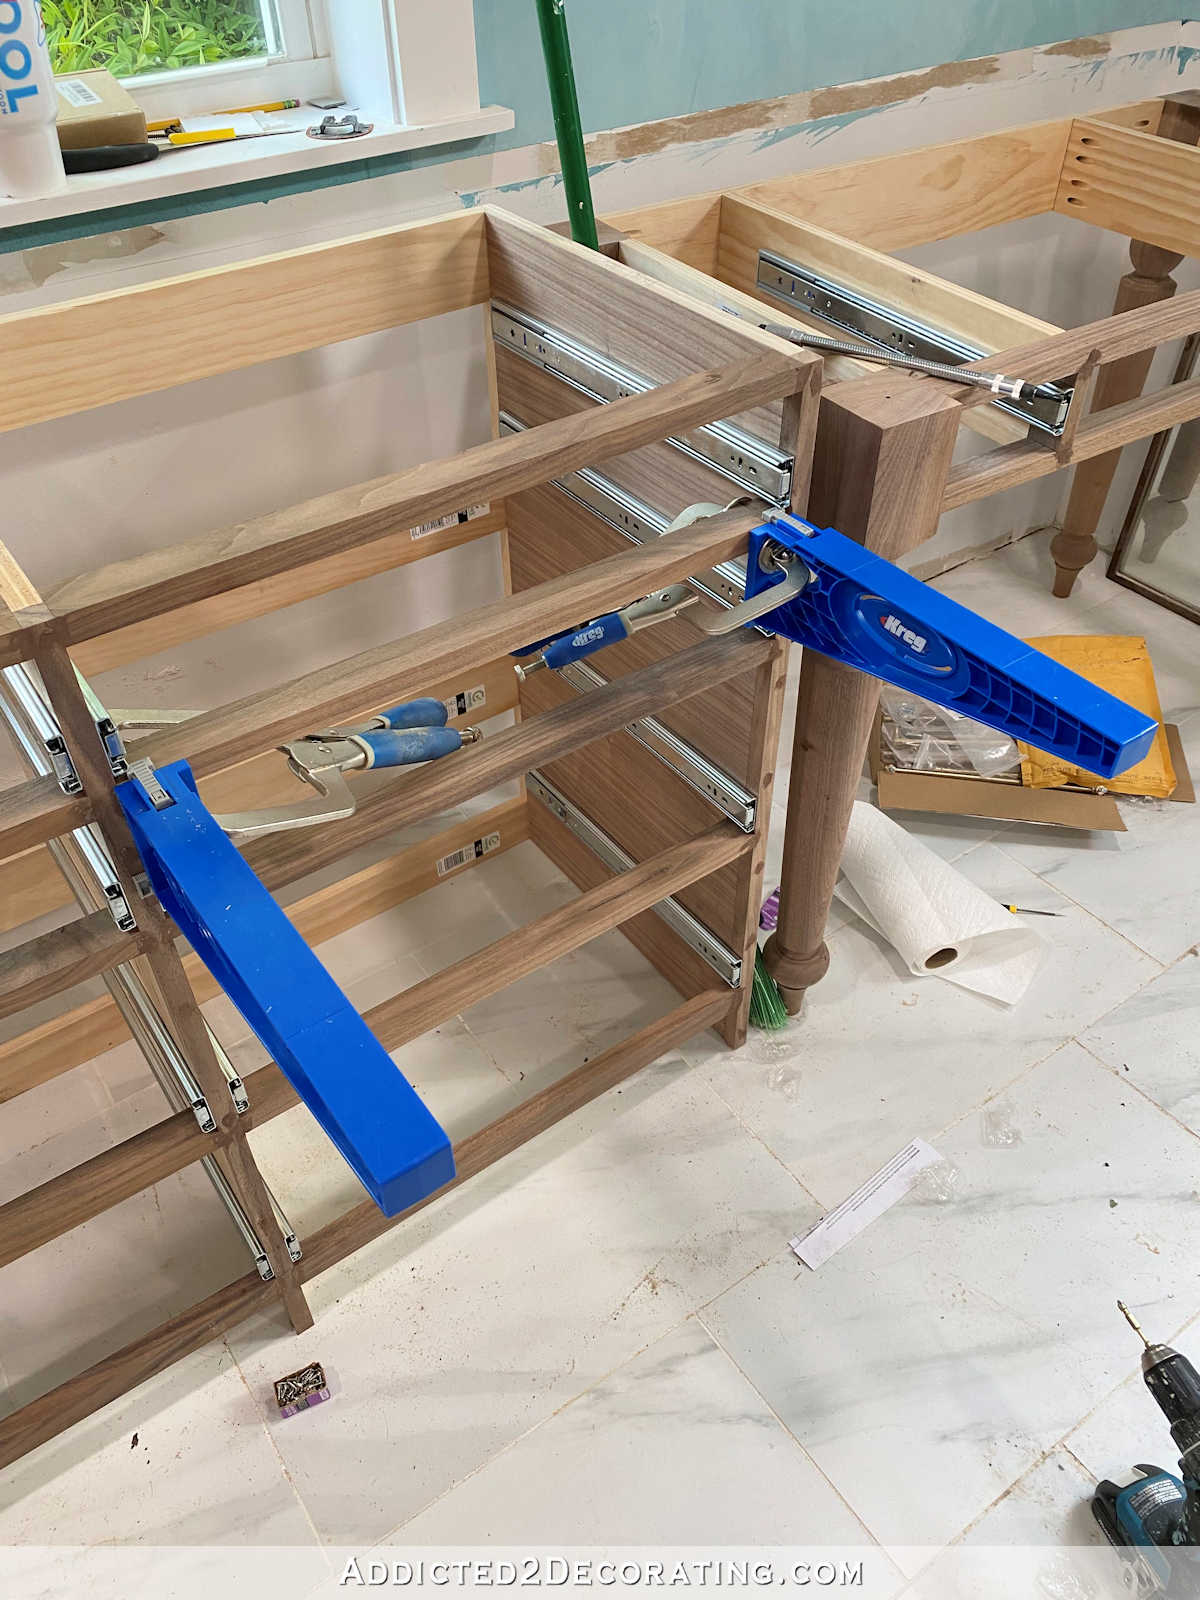
You can see in the closeup below that each jig has two plastic tabs. One keeps it aligned with the rail, and one keeps it aligned with the side stile.
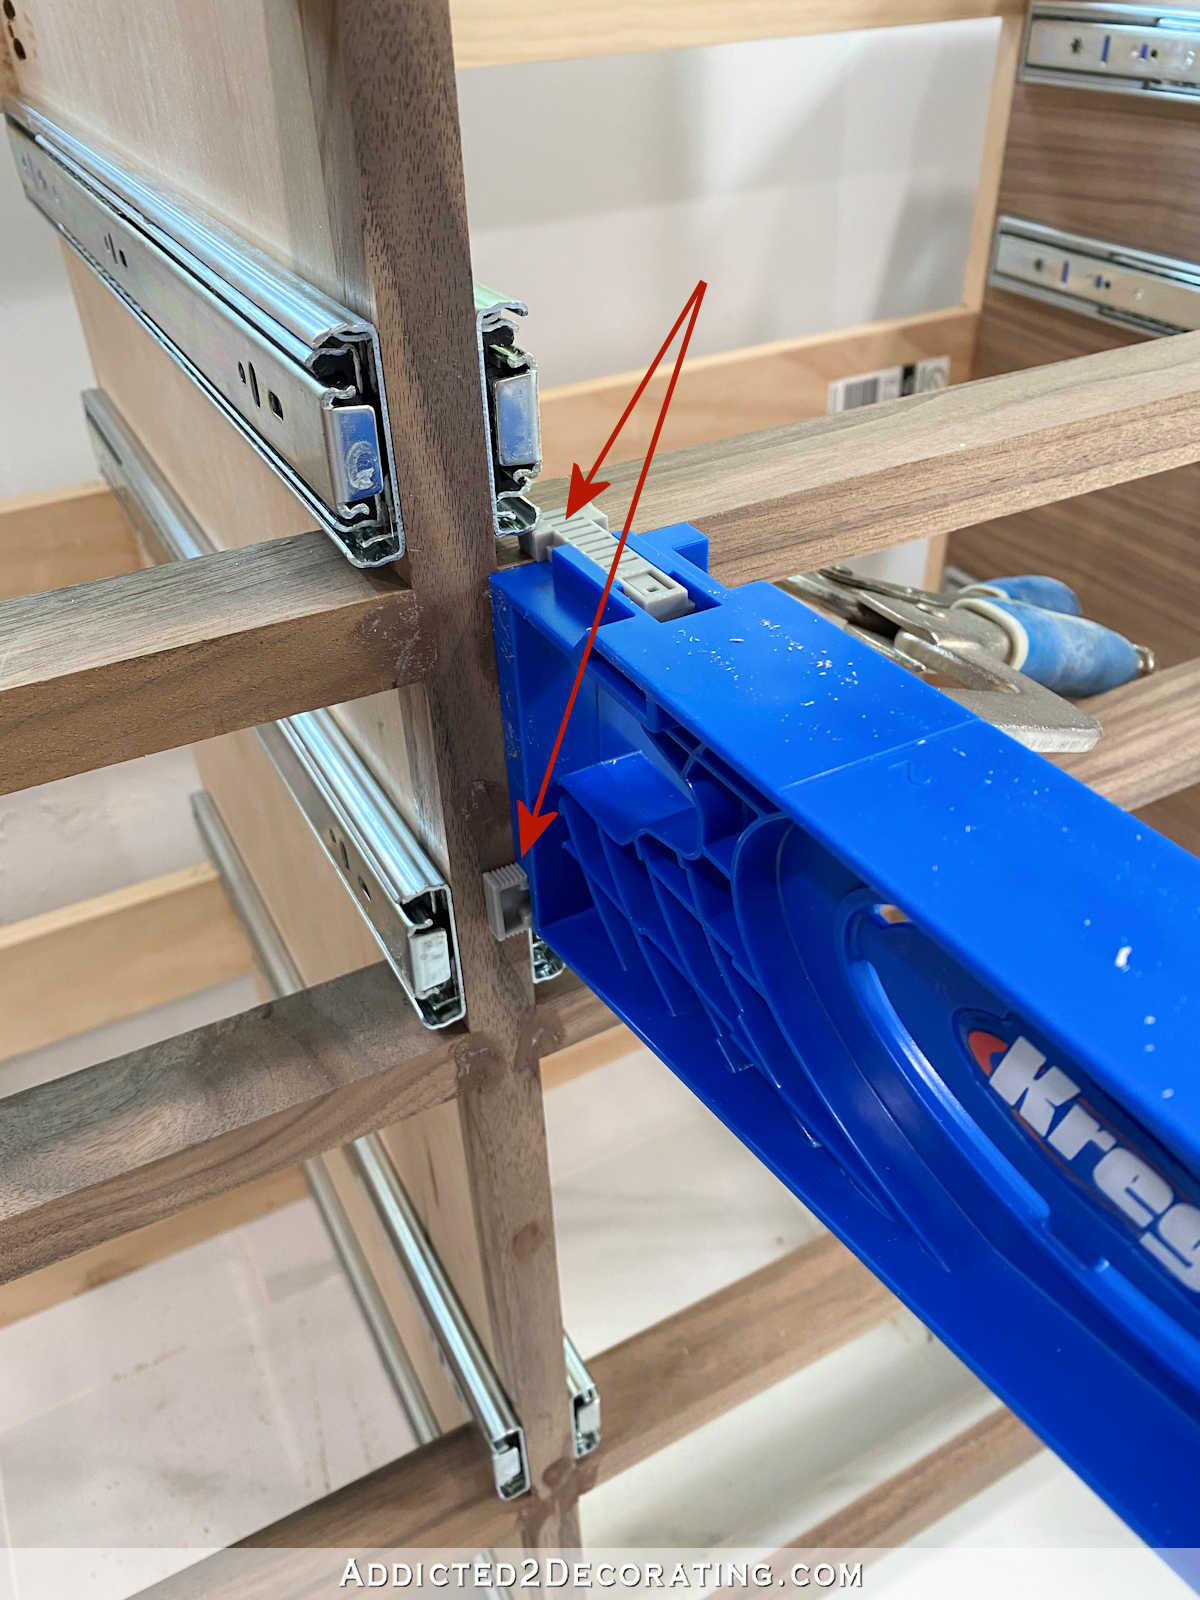
With those clamped into place, you can then place the drawer box right on top.
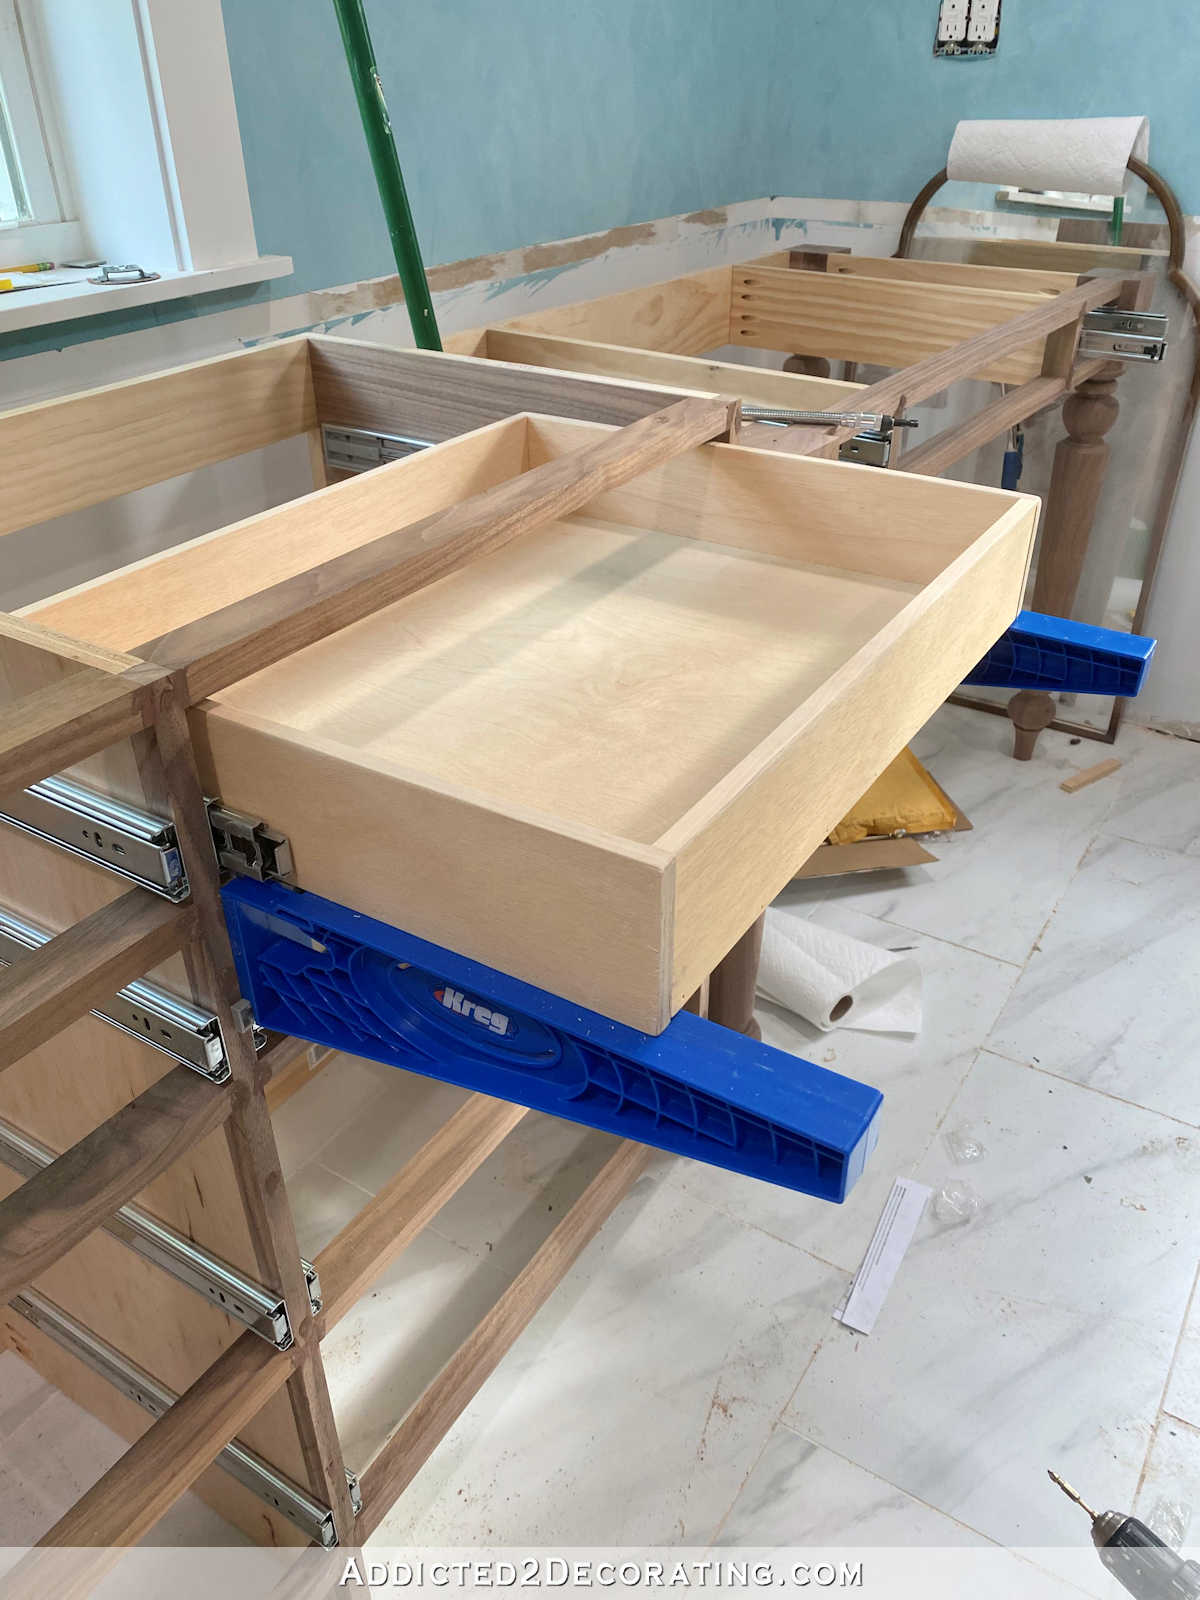
And then extend the drawer slide to the front edge of the drawer box, and screw it into place.
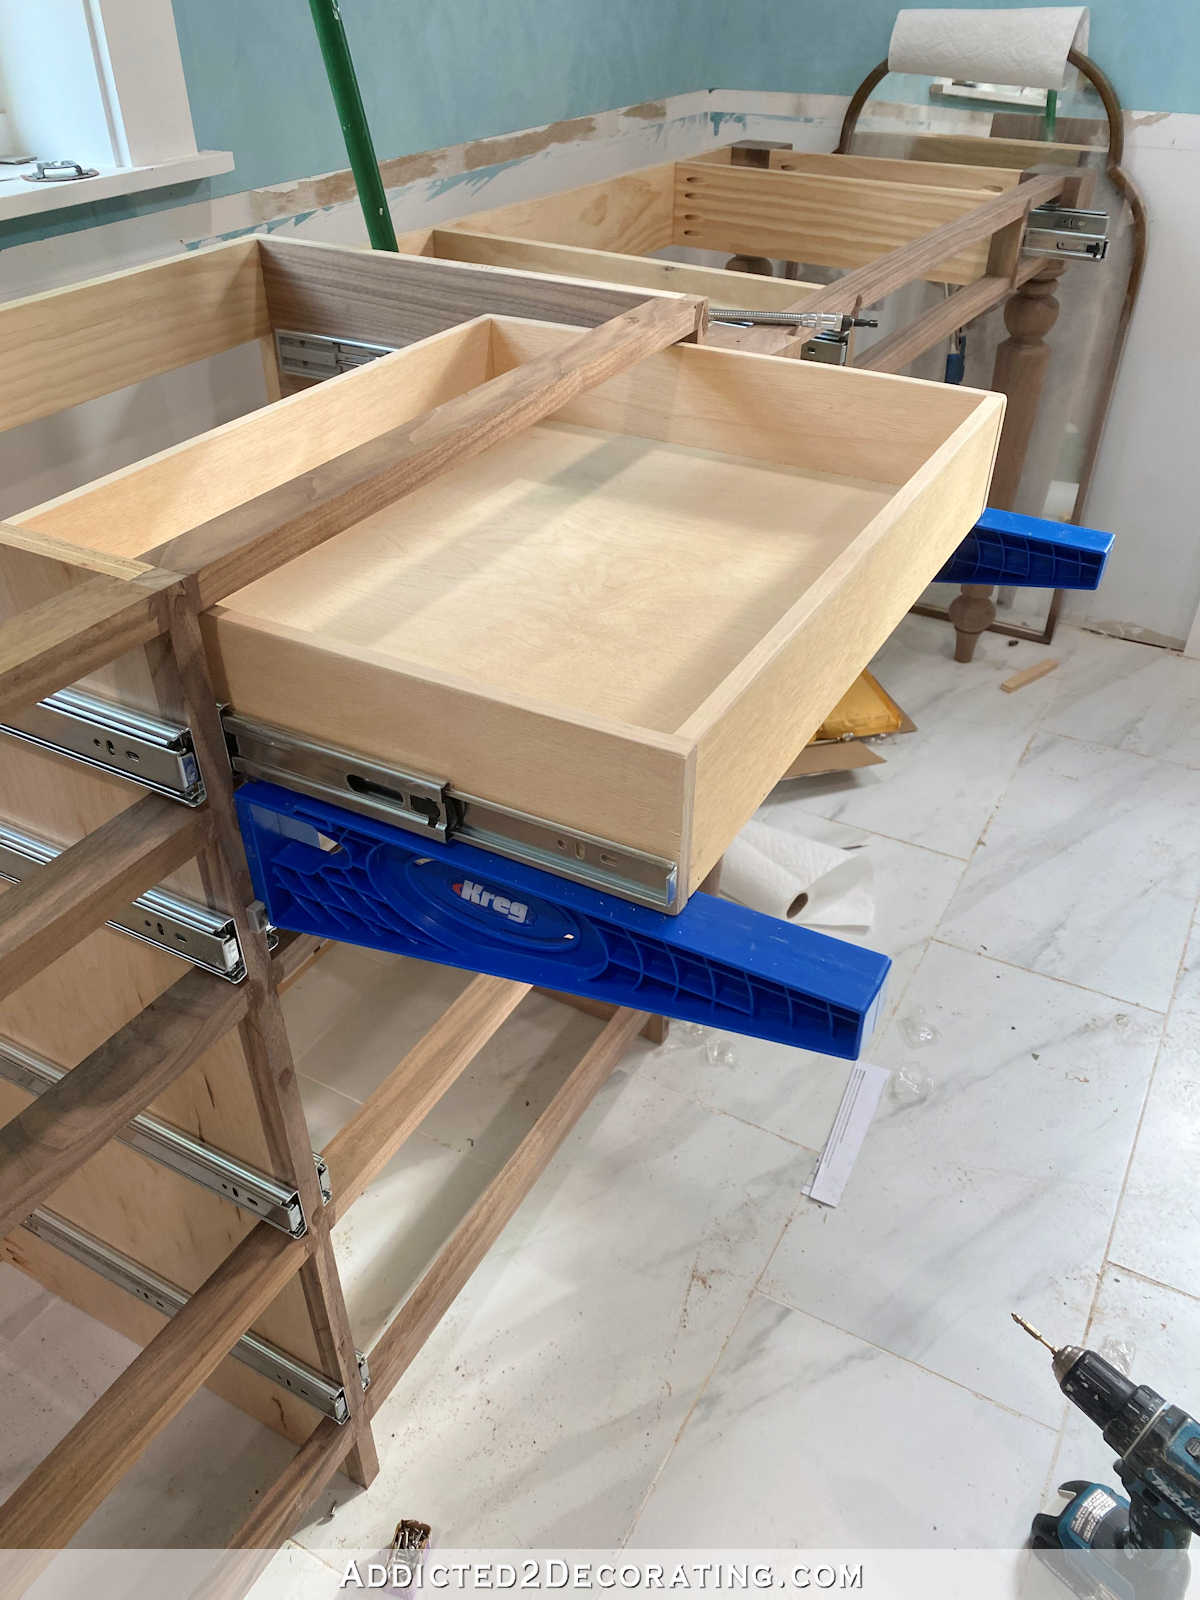
With the drawer slides screwed to the drawer box on both sides, you can remove the jigs, and you have a fully functional drawer.
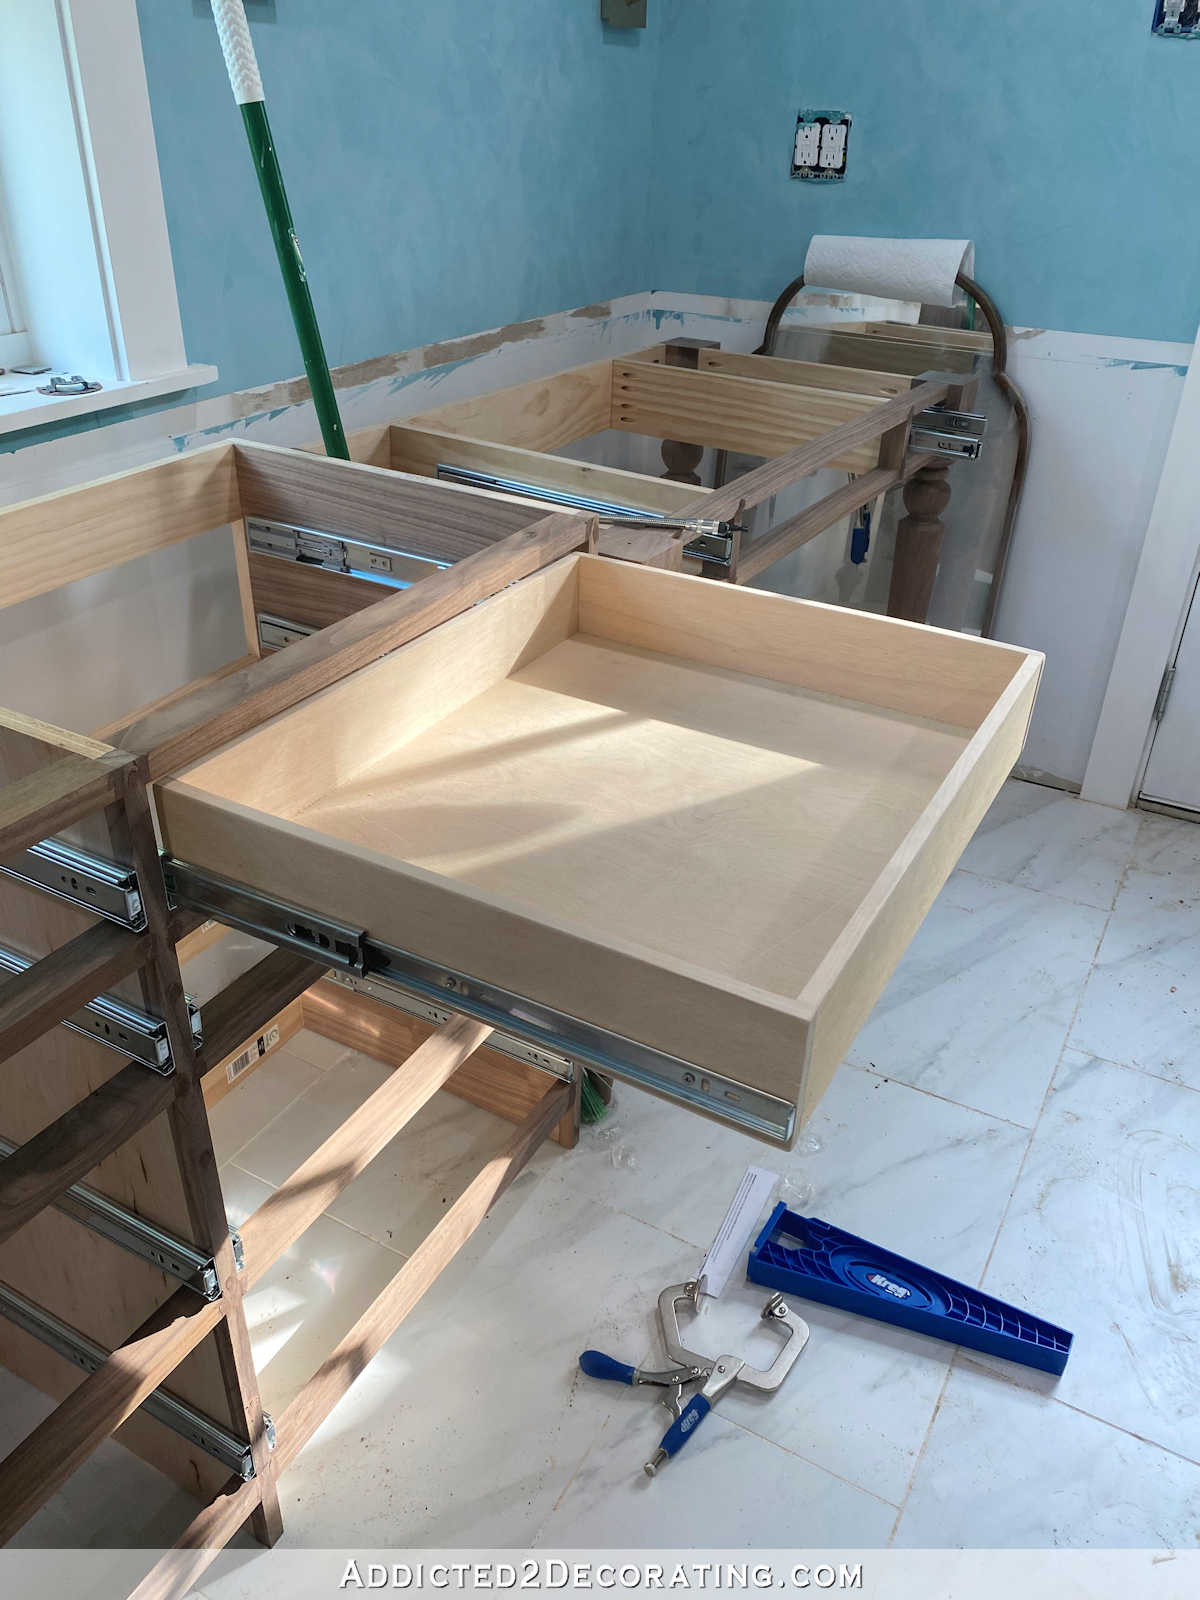
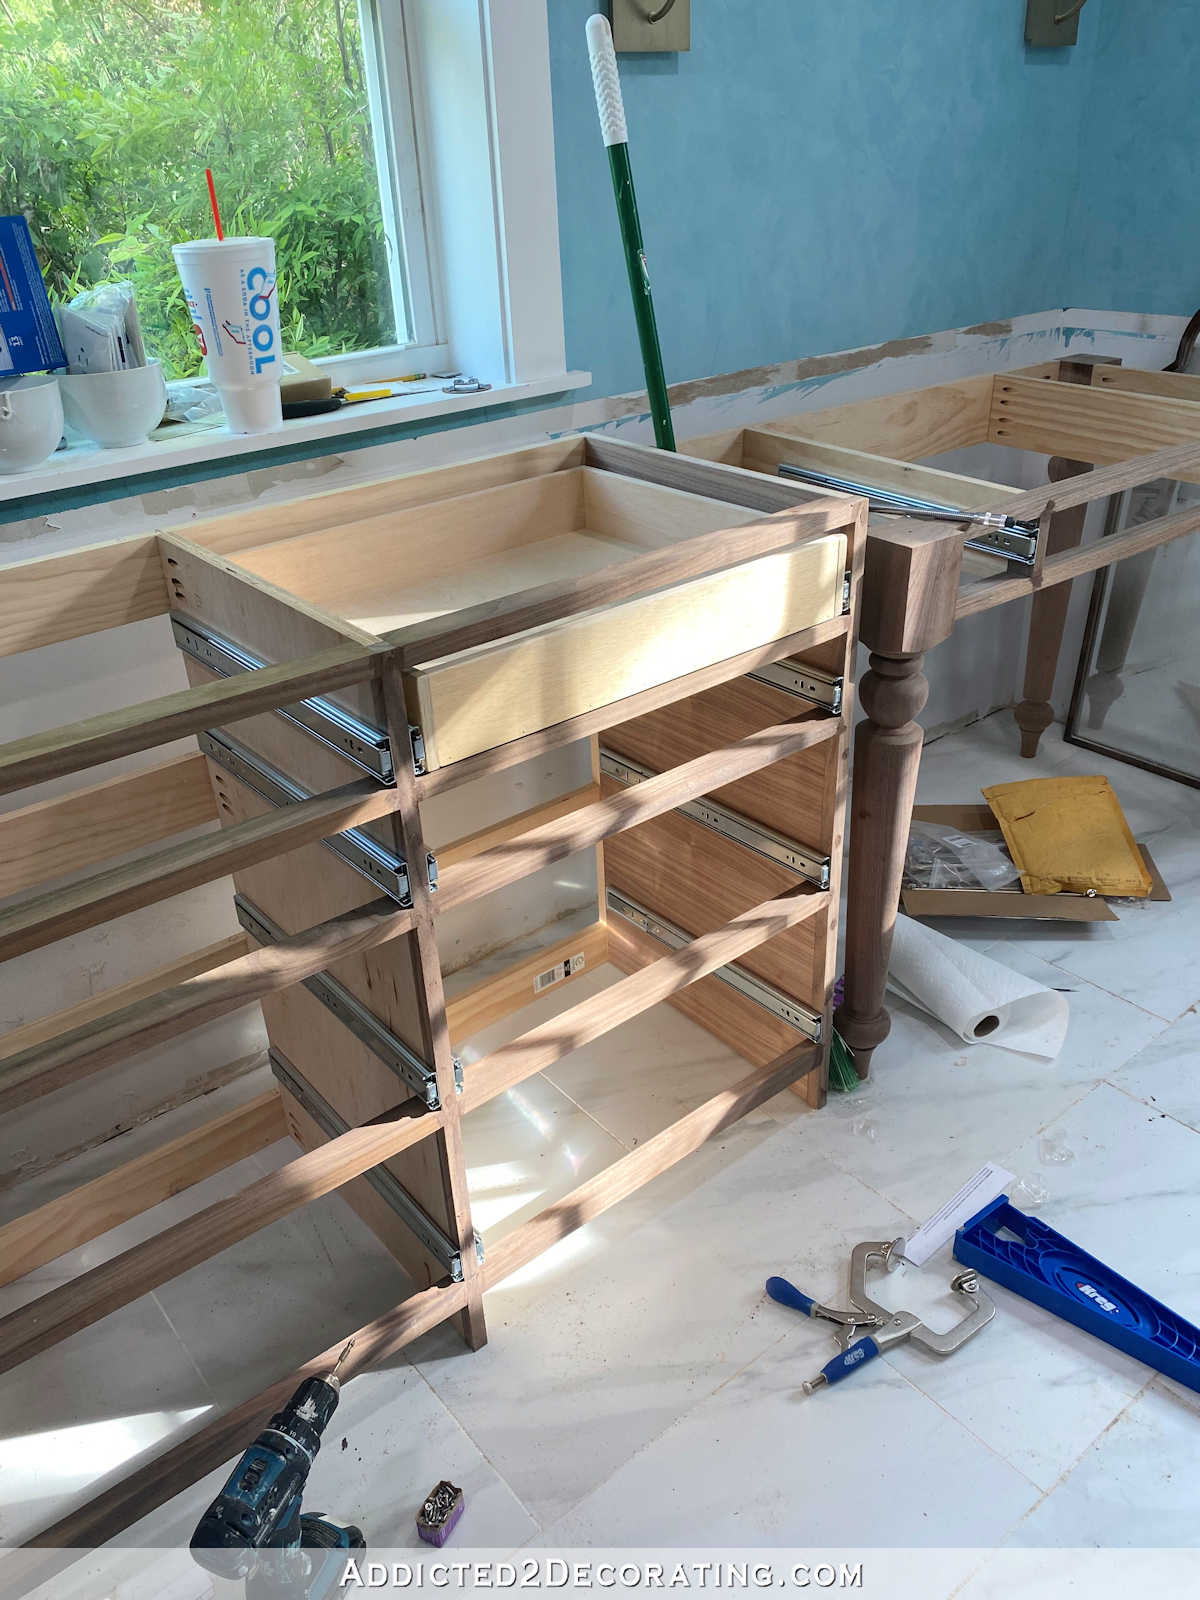
And just take a look at this pretty drawer box with the pretty veneered edge.
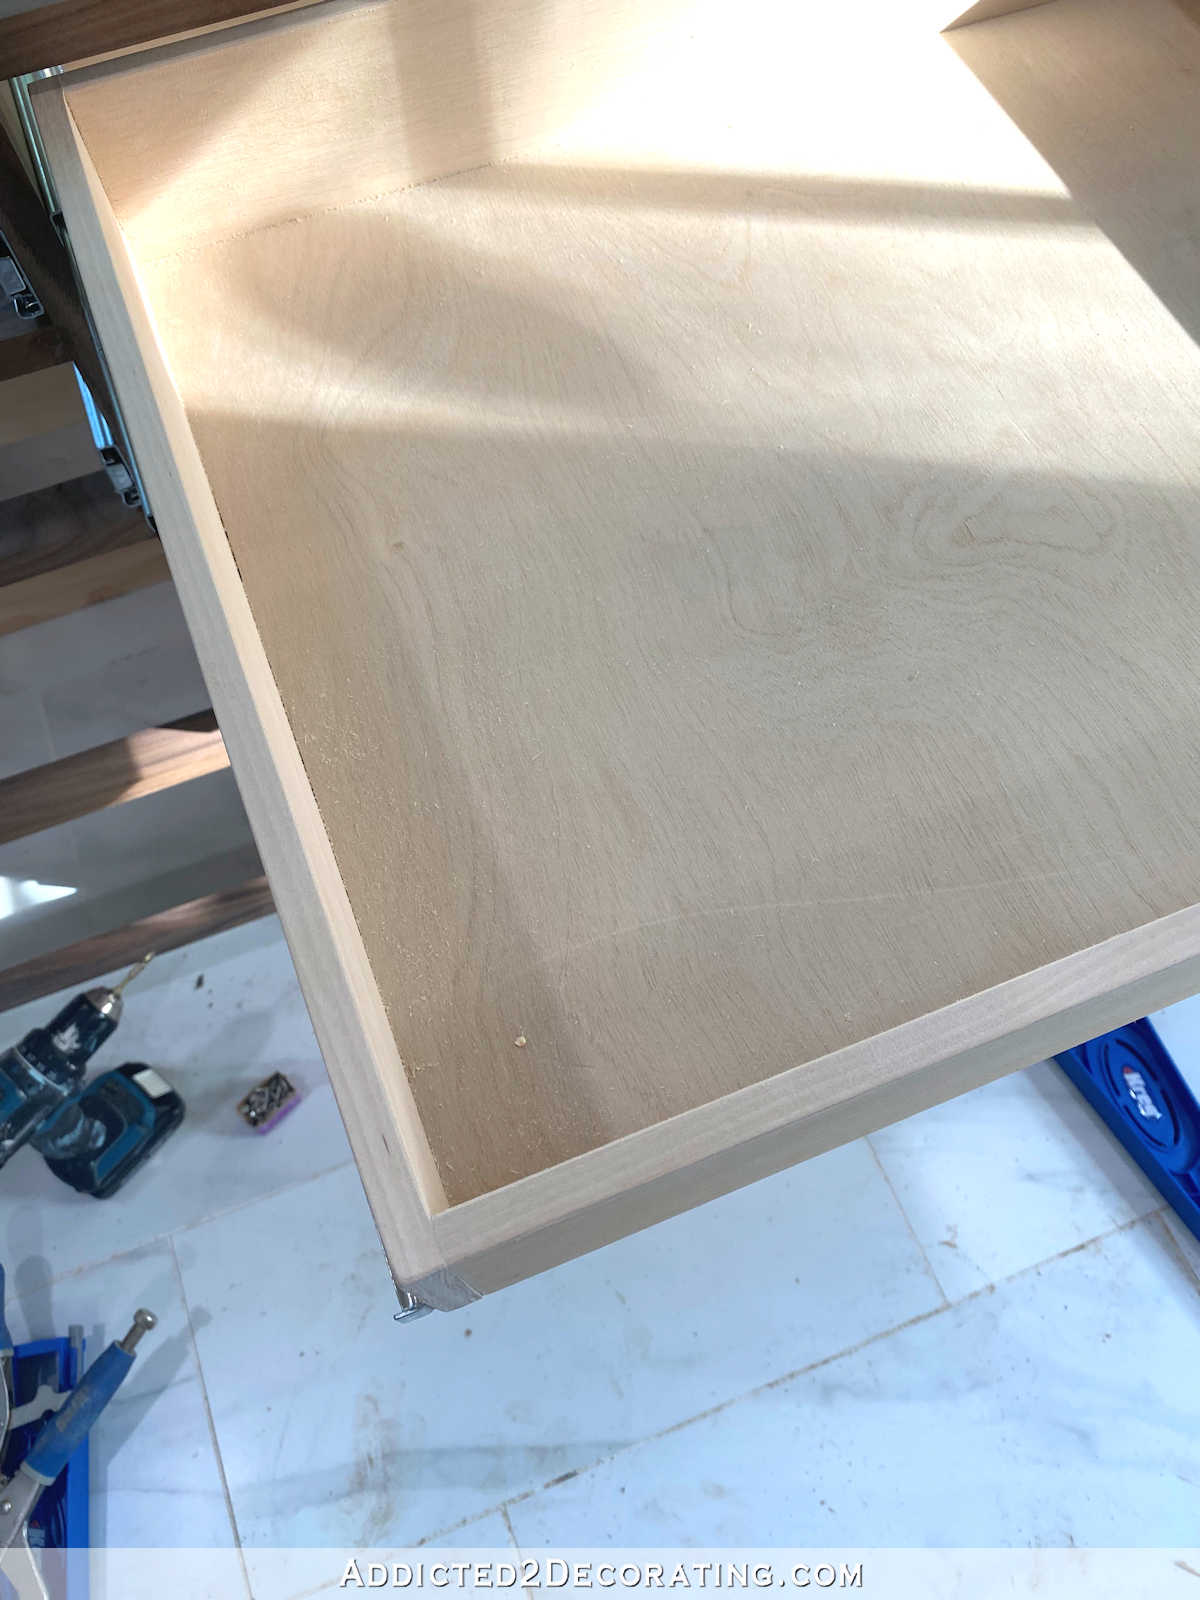
I’m going to have to go back and edge band the two drawers that I already finished for the first vanity.

Now that I’ve seen what a huge difference the edge banding makes, I’ll never be satisfied with seeing the edges of the plywood on those two drawers.
A Small (But Necessary) Vanity Design Change
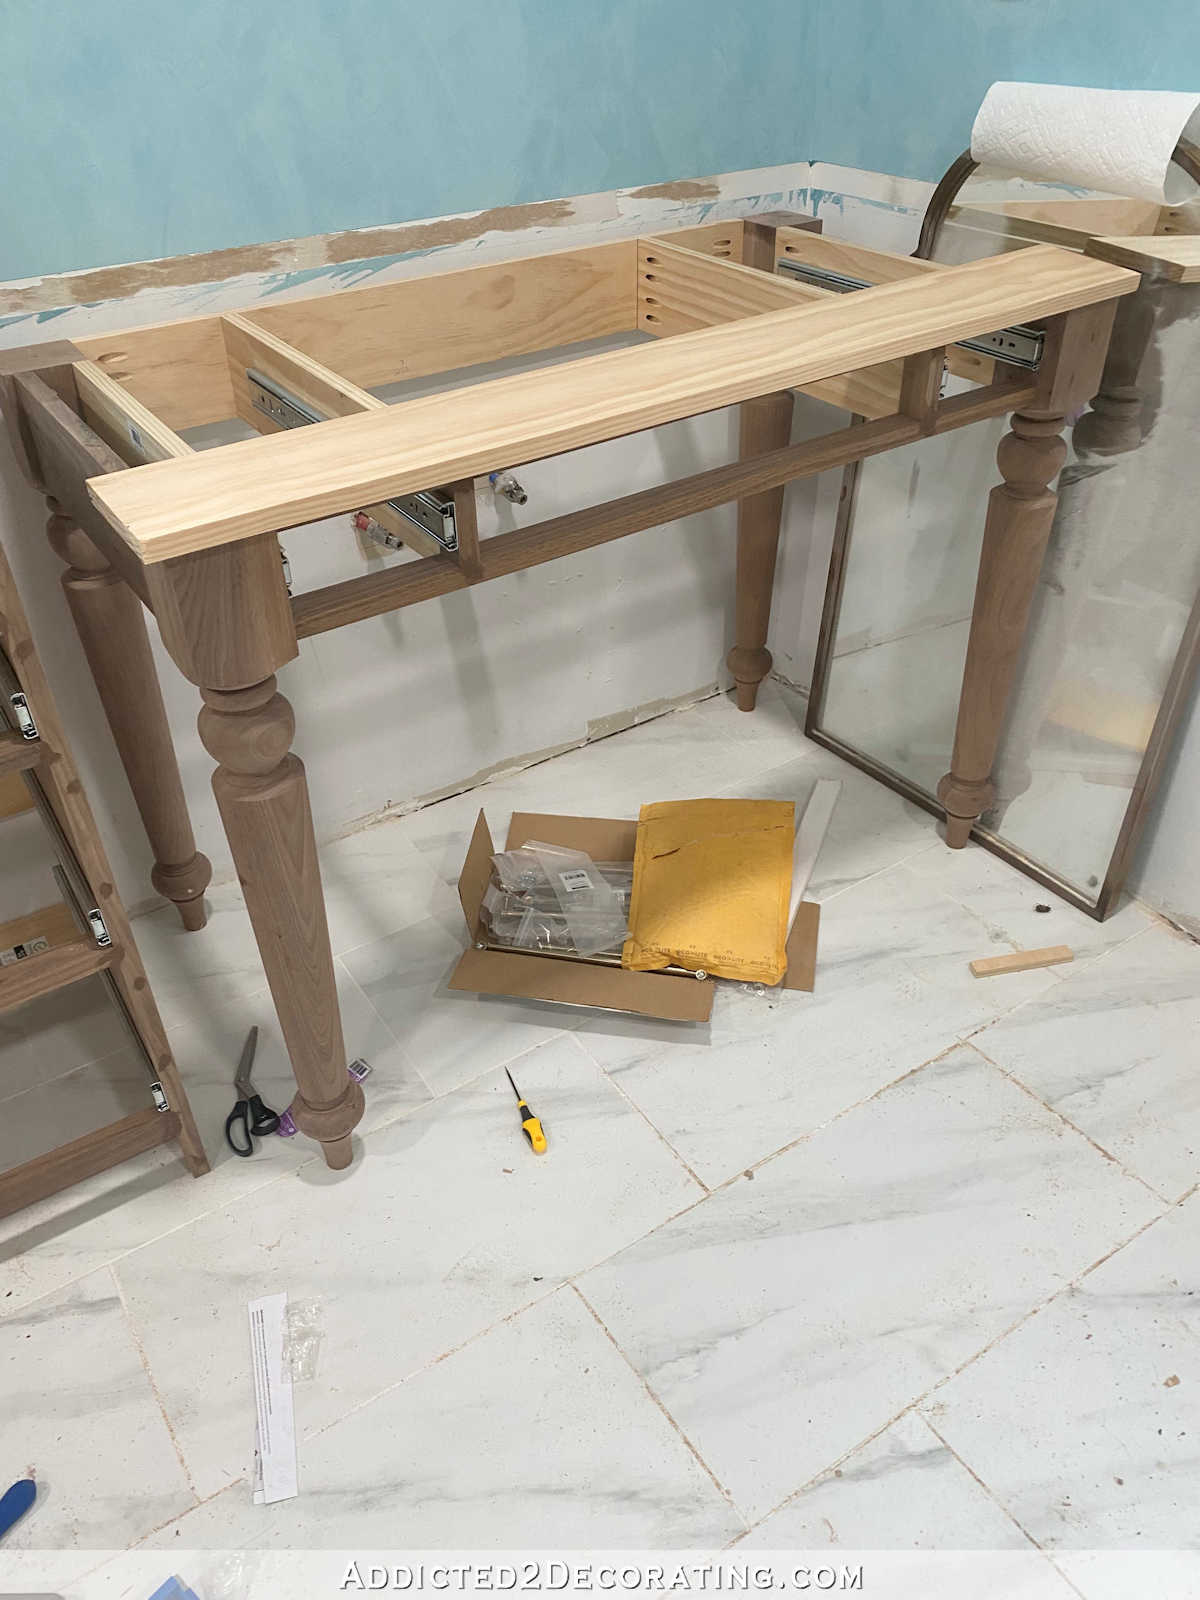
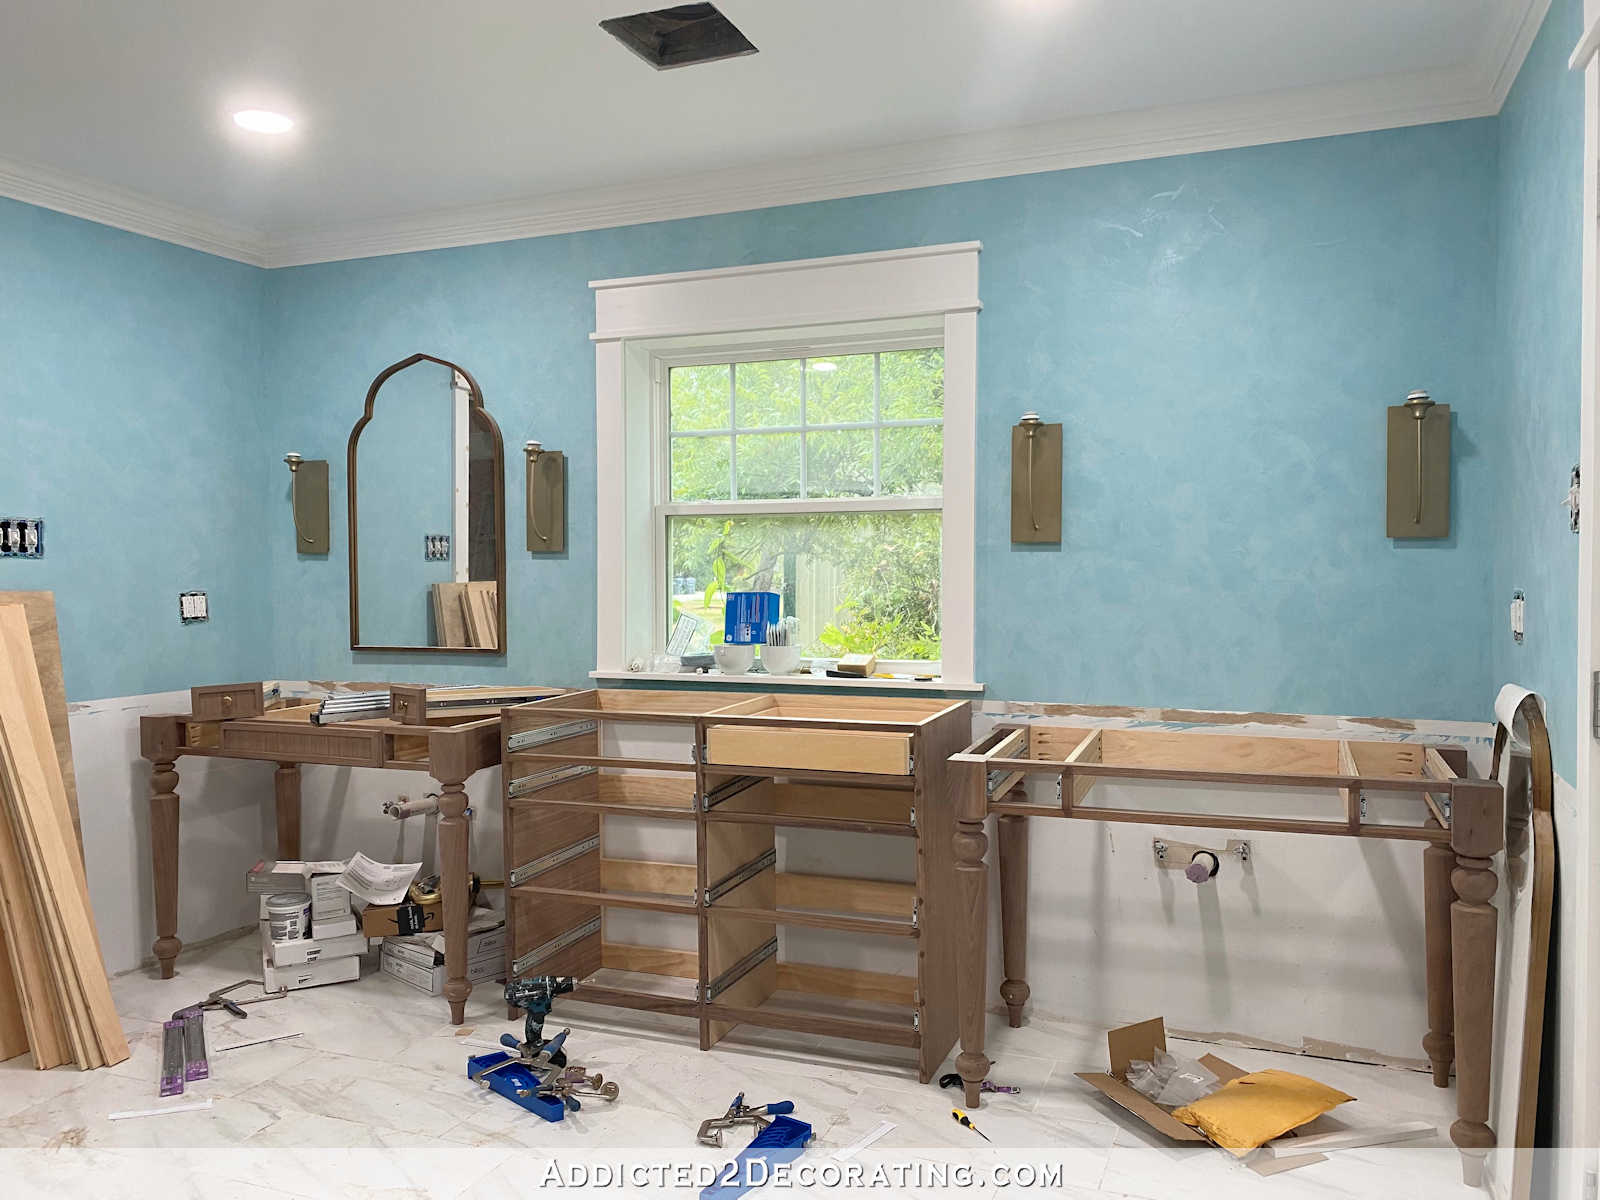
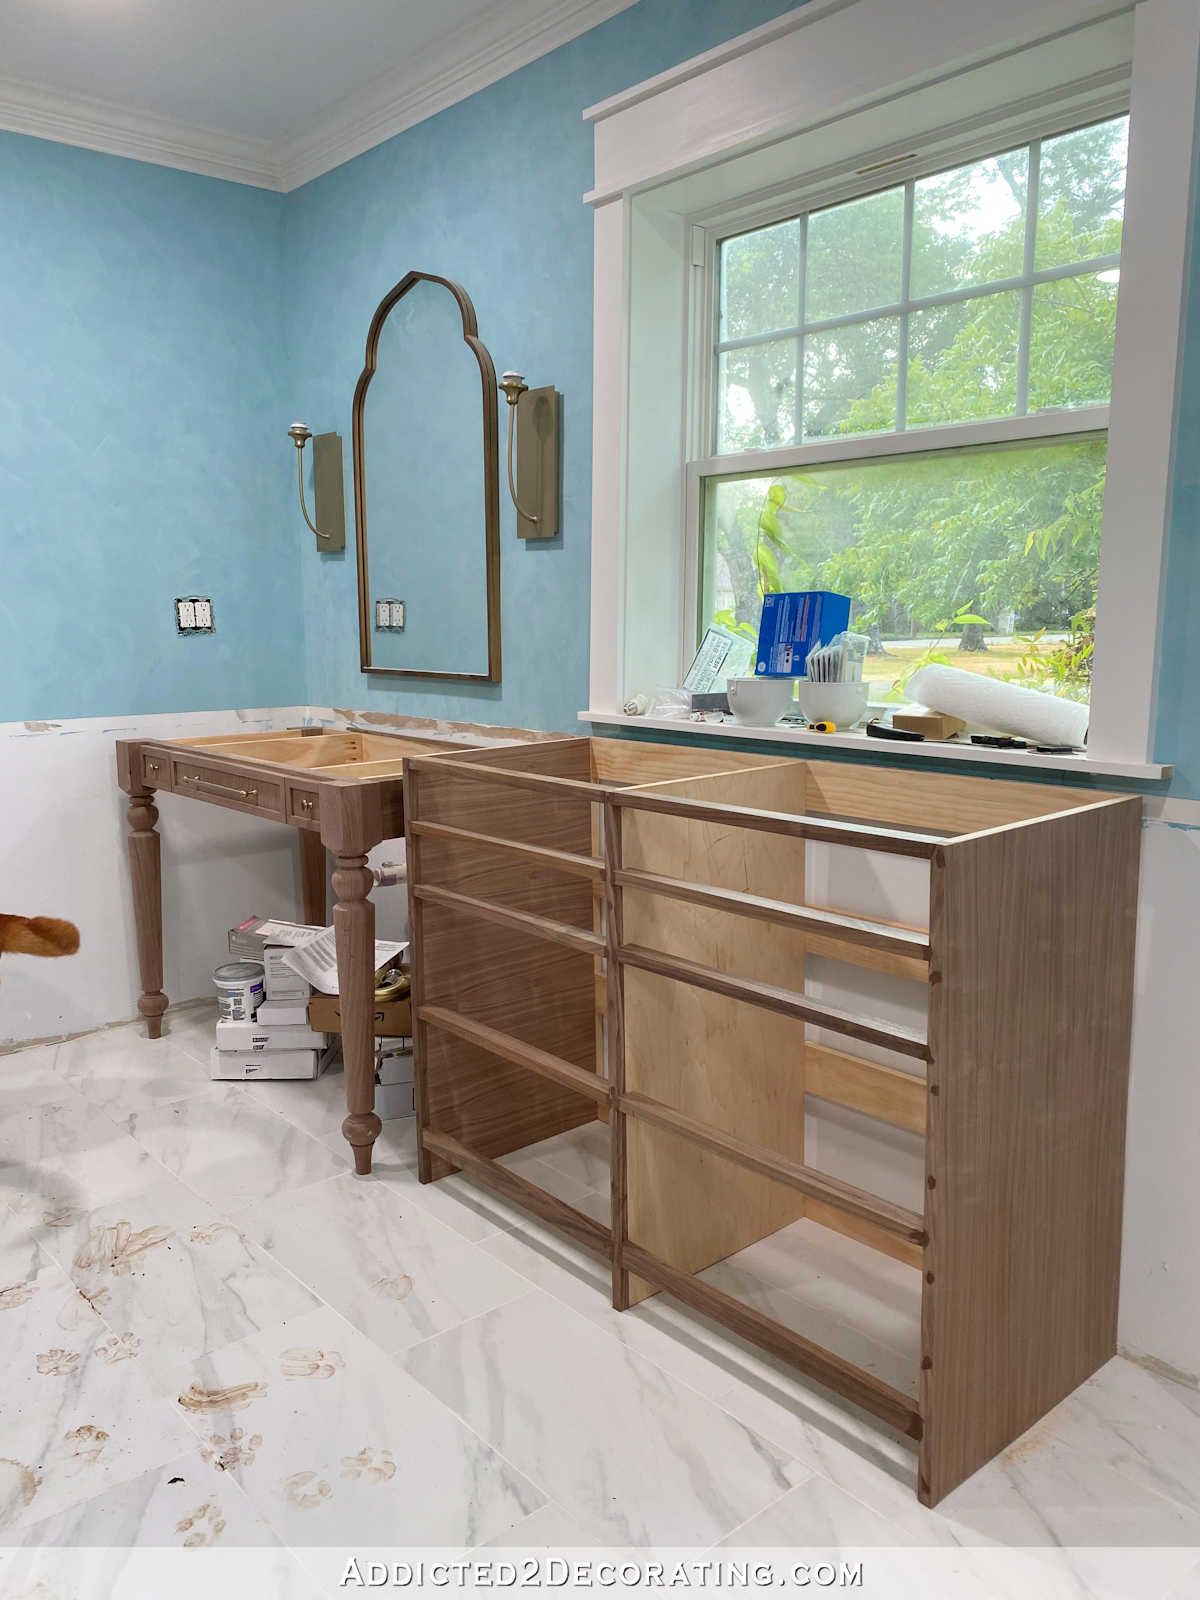
My biggest accomplishment this weekend was getting the second vanity built. And I made a slight change to the second vanity, so now I have to go back and make an adjustment to the first vanity. But I think you’ll understand why this change was necessary.
When I built the first vanity (you can see that process here), I lined up the front walnut 1″ x 2″ pieces with the inside edge of the top block on the legs…
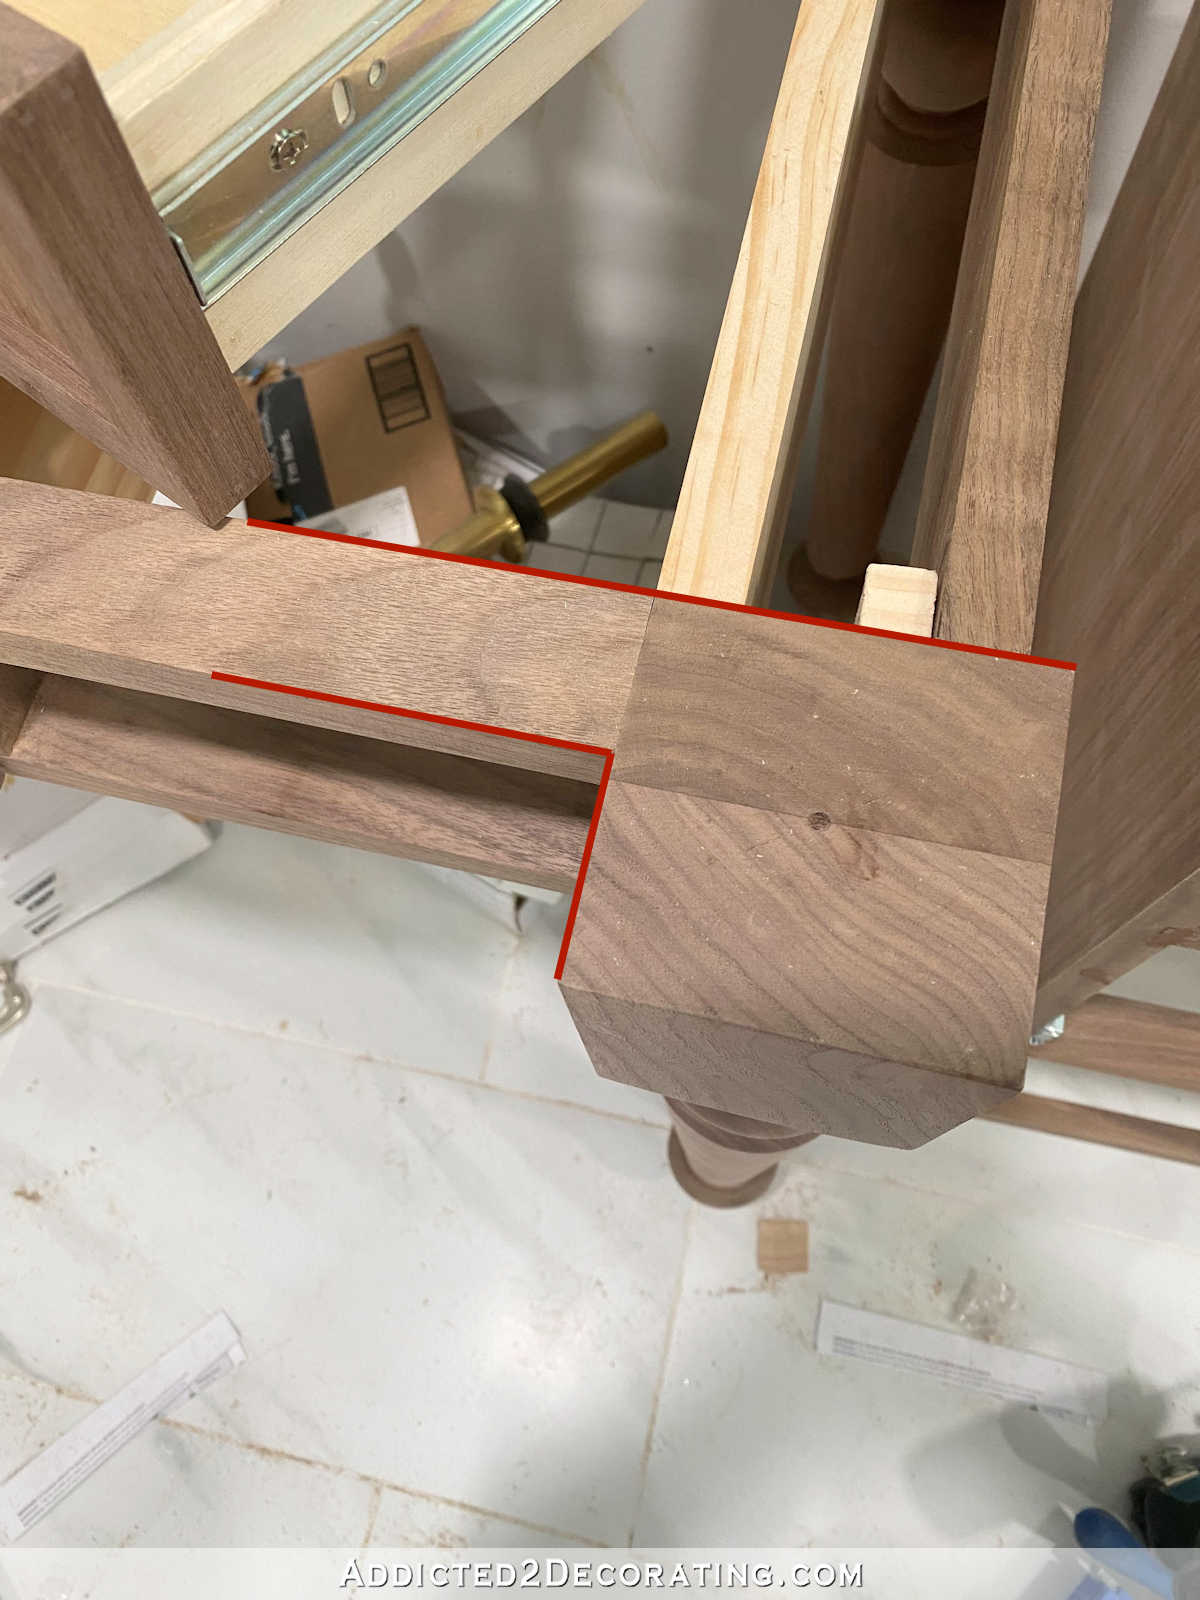
So when the drawers were installed, the drawer fronts were still sitting an inch back from the front edge of the top block on the legs, which you can see here…
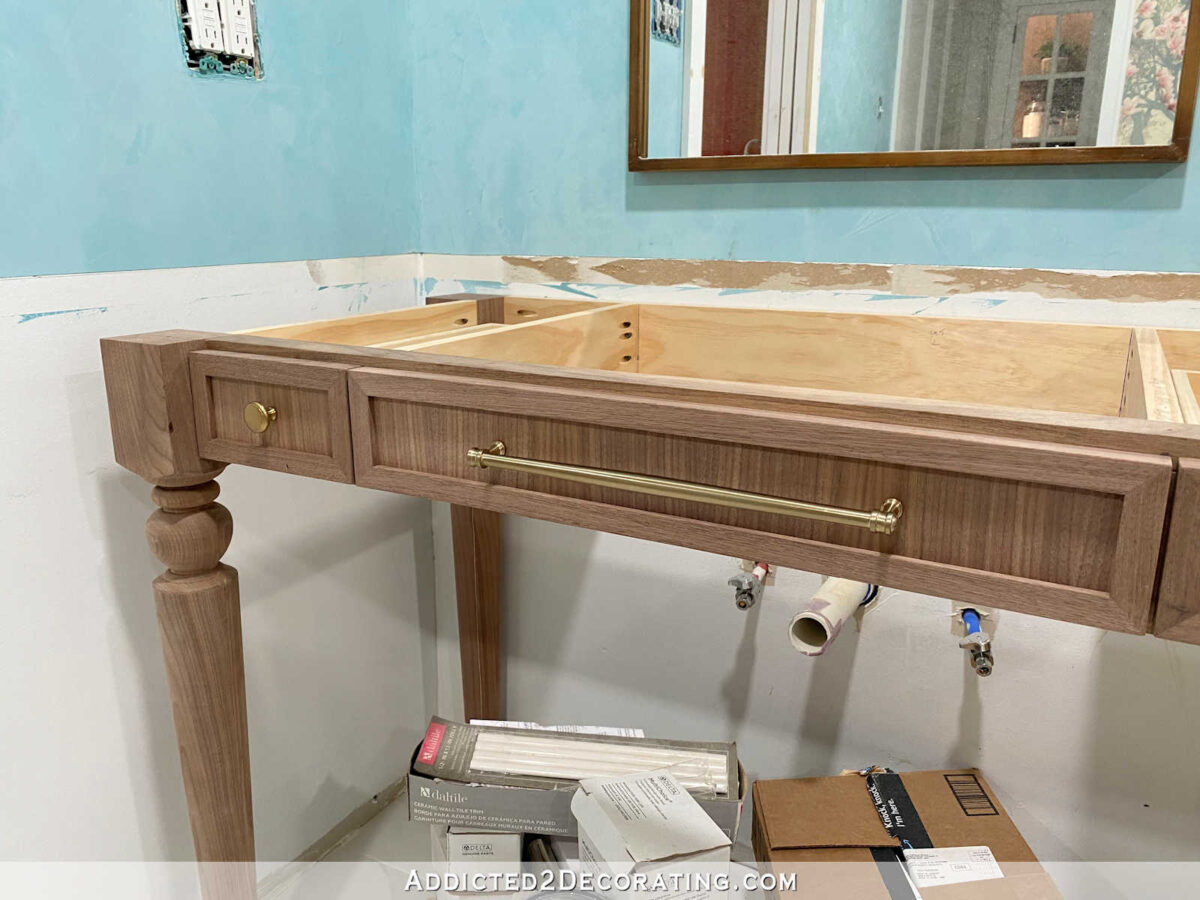
That looked fine as long as the vanity didn’t have a top on it. But I got to thinking that when the quartz countertops are installed, they’ll extend at least 3/4-inch past the top blocks on the legs. That puts those drawers back way too far, in my opinion.
So when I made the second one, I brought those walnut 1″ x 2″ pieces forward on the leg block enough so that when the drawer fronts are attached to the drawer boxes, the front of the drawers will be flush with the front of the leg blocks.
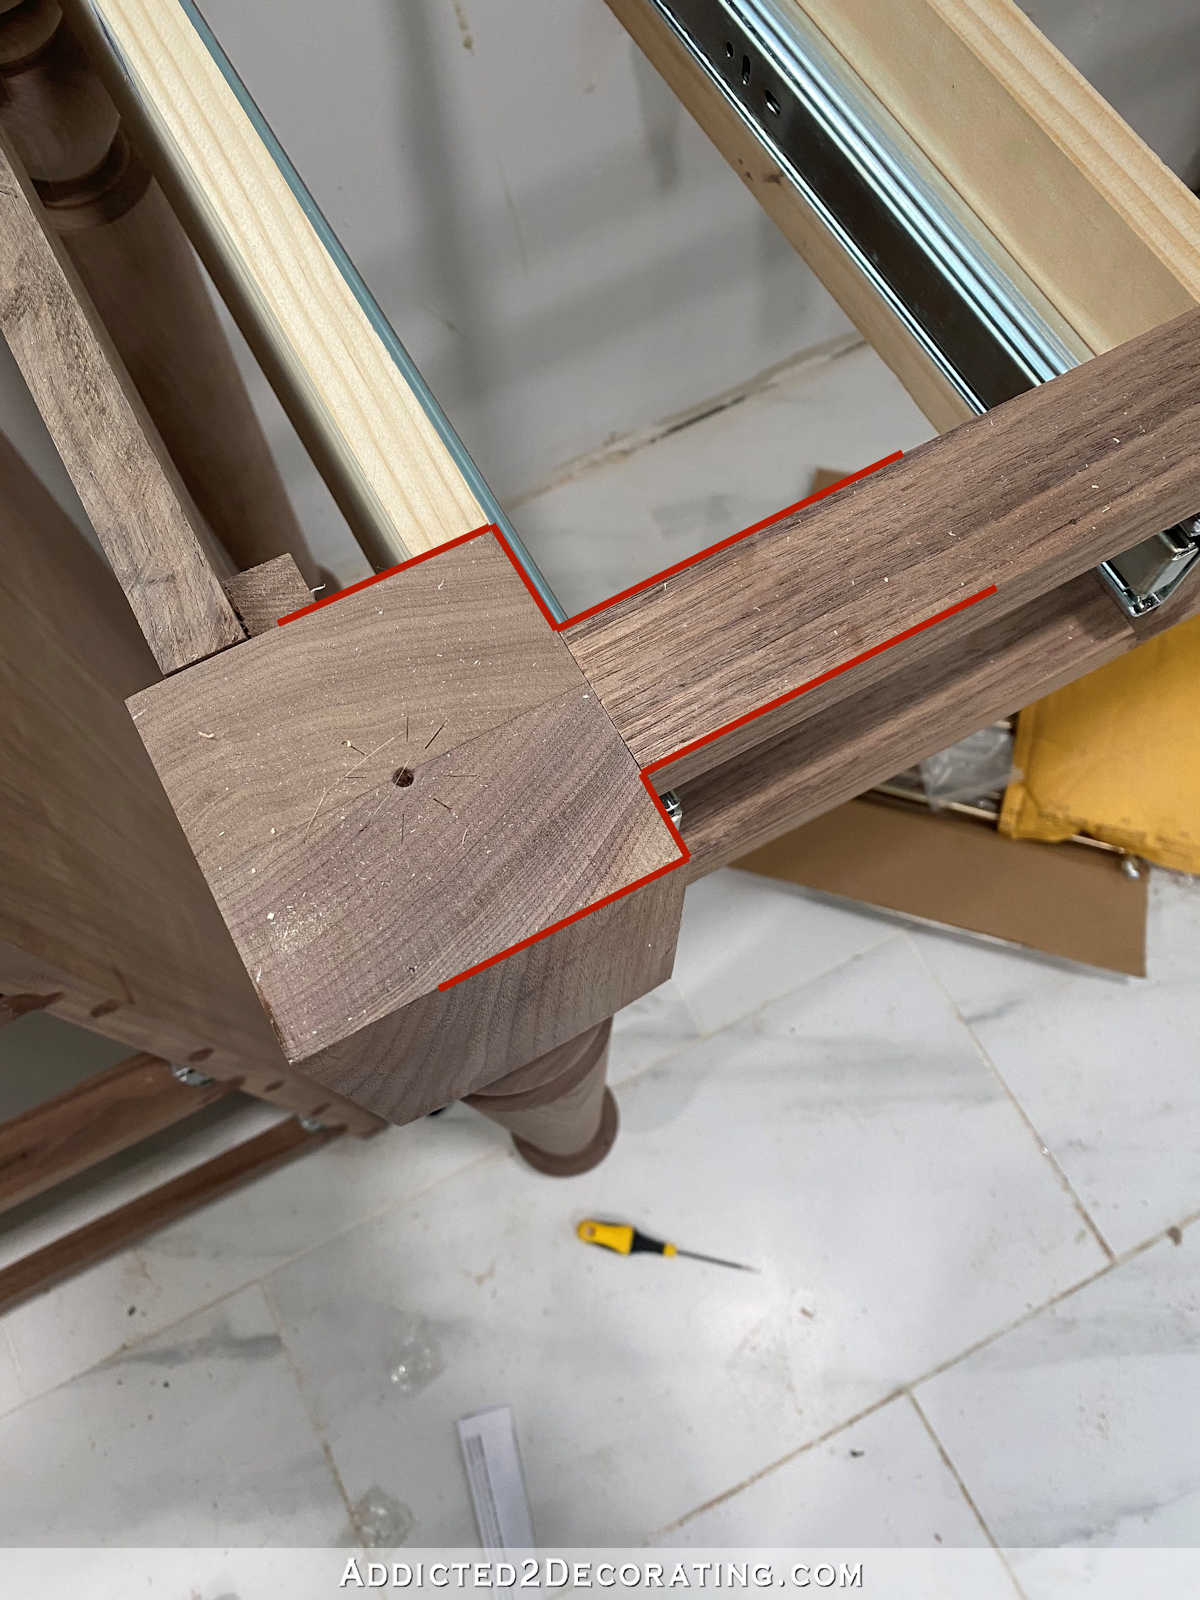
This next picture kind of demonstrates what I’m saying, although it’s not a great picture. I was having to hold the drawer box in place while trying to take a picture. But you can kind of see how the front of the drawers will be lined up with the front of the legs blocks now instead of being set back an inch, which will make a big difference when the countertops are installed.

Anyway, it’s a little detail, but I think it’s one of those very important details that will make a big difference once everything is finished. It’s one of those little details that’s important enough to me that I’m willing to take the time to undo and redo a big part of the first vanity.
So it’s getting there! All of these drawers and drawer fronts are are quite a big job, and they take an extra long time when I have to actually glue plywood together before I can make them. 😀 But at least I’m making progress.




What is the backsplash going to be?
Clear glass penny tile — the one on the right in this picture:
https://www.addicted2decorating.com/wp-content/uploads/2021/09/bathroom-progress-9-13-21-11-1150×863.jpg
You are a marvel! I’ve been looking forward to seeing how you fared over the weekend and this post does not disappoint! The edge banding made a huge difference. You will be done with this giant task in no time. I remember how apprehensive you were about this part of the project. You are doing a fantastic job!
Hope you weren’t impacted by the crazy flooding I saw in the news. Stay safe and dry!!
It is looking so good. Edge banding HUGE difference and so easy…
I totally agree your drawers will be farther back than you’d be happy with on the vanities, but I think you need some reveal from the legs to to drawers. A 1/4″ set back won’t make much of difference in using your drawer but will make a huge difference in the look.
Just a thought–instead of undoing work on 1st vanity, have you thought of having your quartz cut so it fits over legs, but is cut out to line up along drawer fronts? Not a standard straight across cut, but one that fits your frame.
We did exactly that to a large kitchen island, really to make it more interesting than a plain rectangle top. Even our stone cutter loved it, and started using that shape for others. It was just a rounded corner, that sticks out about an inch on each counter top corner…very eye pleasing and different. I wish I could add a photo…not sure how. That would look really nice on those vanities! Kristi – can I send you a photo?
You always make it look so easy!!! LOL. I appreciate your detail tutorials. I want/need to make new cabinets/drawers in my kitchen but this is intimidating to me. i do have some of the Kreg jigs but I think i need to invest in some more before starting my project. I didnt realize they had them for drawers. Thanks for sharing.
Forgive me for this random suggestion. I saw your pup’s prints they left earlier, and smiled. I just realized you have a plug in your water closet. Have you thought of getting a small mopping bot after the bath is finished? You could have it hide in the water closet or under your vanity. It could mop daily and minimize the paw prints. So you can enjoy the bath more when done.
Be sure to hang your mirror before you finish the vanity. It will be much easier, unless the vanity is moveable.
My thought about your first vanity is if you have enough walnut left, you could glue new rails and stiles to the front of the existing rails and stiles to bring the front forward without taking anything apart. I am so impressed with your work!
I was recently reading reviews for 1/2” plywood on Lowes and HD websites and saw several comments about delaminating. So discouraging! Please update if your solution doesn’t work out over time; but I really hope it does work!
This looks fabulous! Love seeing how to work through all the challenges!
WOW – even with that terrible plywood problem you did SO much! Really seeing how wonderful this is going to be. Once you started, you seem to be going so fast getting these done! Love the banding too! You are the BOMB! 😉 PS) I wonder how much of that plywood is giving others problems…that is AWFUL!!!
What I am wondering is why didn’t the guy cutting the plywood for you see that it was falling apart at the cut marks?
Christie, everything you touch turns into gold, such talent! I would gladly pay you to either attend Zoom classes, for example to learn all your Kreg tools or start new branch of your website, with un-bublished Youtube videos for those doesn’t mind paying. I understand what I read so a pdf to remind me of the steps would help too.
I second this motion!
I can handle most any plumbing issues or house electrical but wood scares me to death!
You are such an inspiration with your talent! Please consider teaching some classes on making furniture!
Great job!
Wow that looks neat how the bathroom actually looks smaller now with the 2 vanities and storage drawers. About the plywood it sounds like Home Depot got a bad batch from their supplier.
You probably already told us, but are you using the same material for the vanity tops and the dresser top, or will the dresser top be wood?
The dresser to will be walnut.
With construction (rather than cabinet-grade) plywood, especially only 3-ply like that, you need to watch out for embedded razor blades and other debris between the layers as well when you cut it. If you do a Google search, you’ll see a lot of issues with the lower-cost, lower-layer ply.
Minimum cabinet-grade is 7-ply. Baltic birch is what most cabinet and furniture shops use, but it is in extremely short supply due to its source being primarily Ukraine.
That really is so annoying and frustrating, did you tell the store they are all like that,?? and quite agree with you on the draw fronts not lining up, you definitely did the right thing to alter it, it would drive me crazy knowing that it wasn`t right, even if you can,t see it,you know it,s not right, and it,s starting to look brilliant,it,s going to look fabulous when it,s finished,
Kristi,
Could you please post a link on the mirrors you are using in the master bath? Thanks, Gail
Mine are the medium size in a gold finish:
https://westmirrors.com/products/marco-moroccan-gold-arch-decorative-wall-mirror?variant=37462999007384