Tiling Our Large Curbless Shower Floor
I had such a hard time with tiling the bathroom floor last week, so I took the weekend off from all house-related projects and then got started tiling our large curbless shower floor on Monday. It was a two-day project (not including grouting, which still needs to be done) because (1) the shower is so big, and (2) the order in which I had to tile.
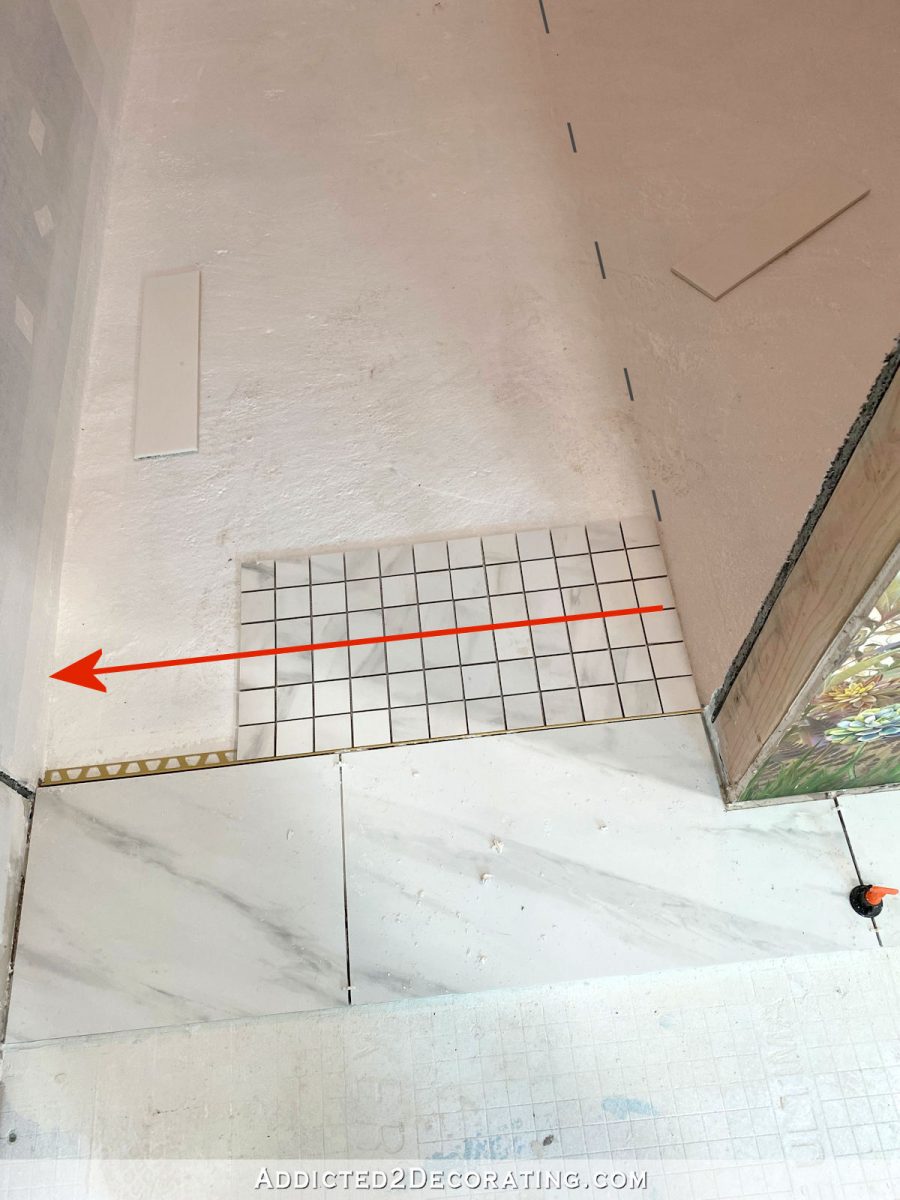
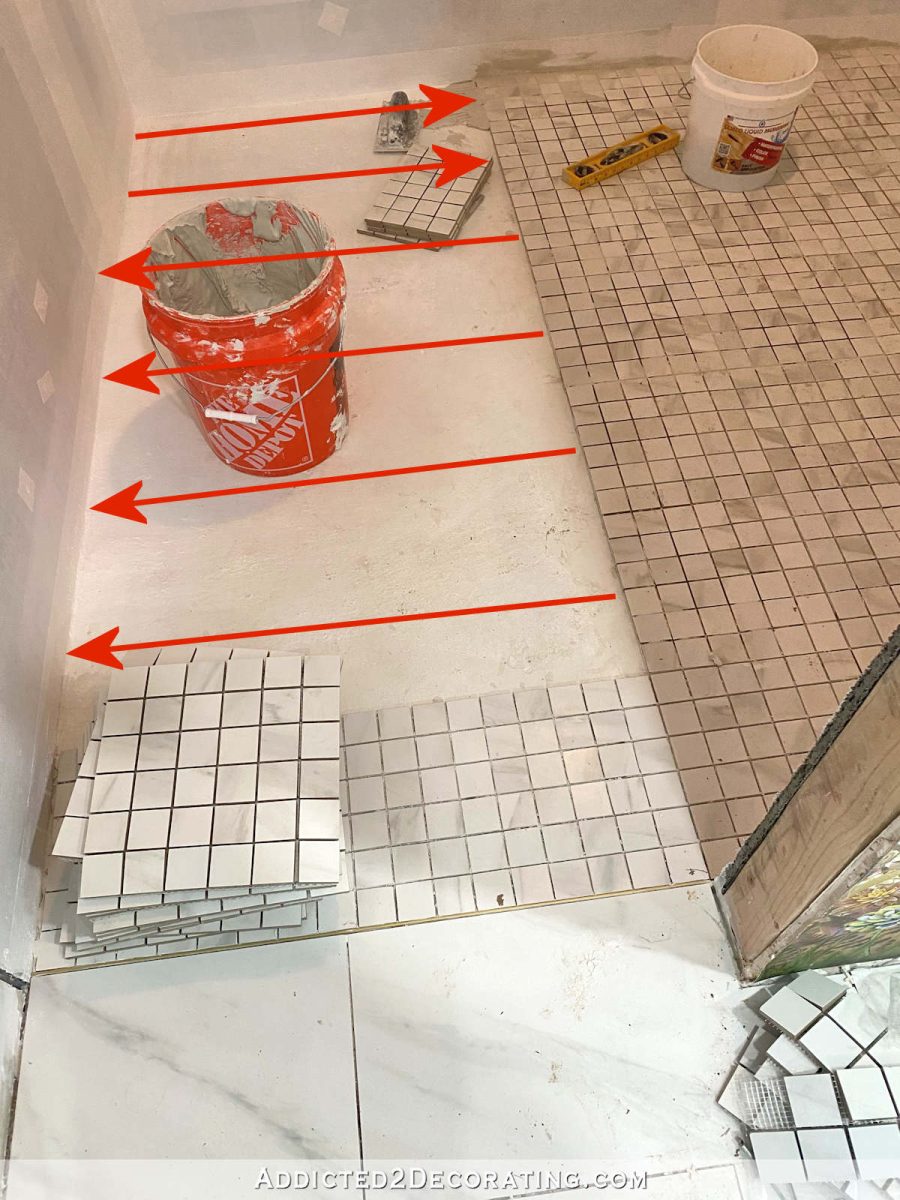
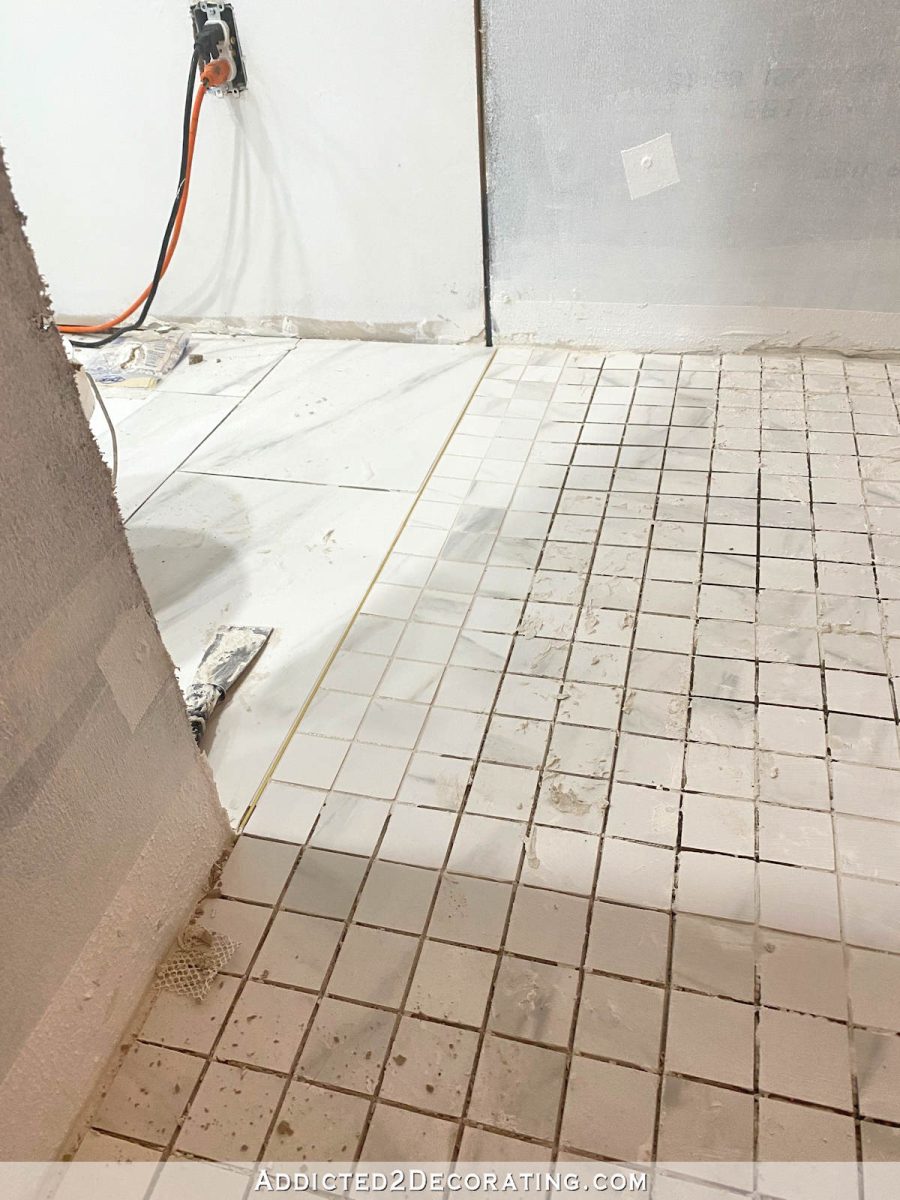
Because the shower is curbless, and I wanted whole tiles (i.e., no cut tiles) meeting together in the doorway with the brushed brass Schluter strip between them, I had to start at the entrance to the shower. And because I needed a grout line following the line where the level shower floor meets the sloped shower floor (you can see where I marked that line in the picture below), that also affected the order in which I had to install the tile.
So I started in the doorway right on the edge of the sloped floor, and worked my way towards the wall.
Then I finished up that row of tiles working my way from the beginning of the slope and going towards the shower head/drain wall.
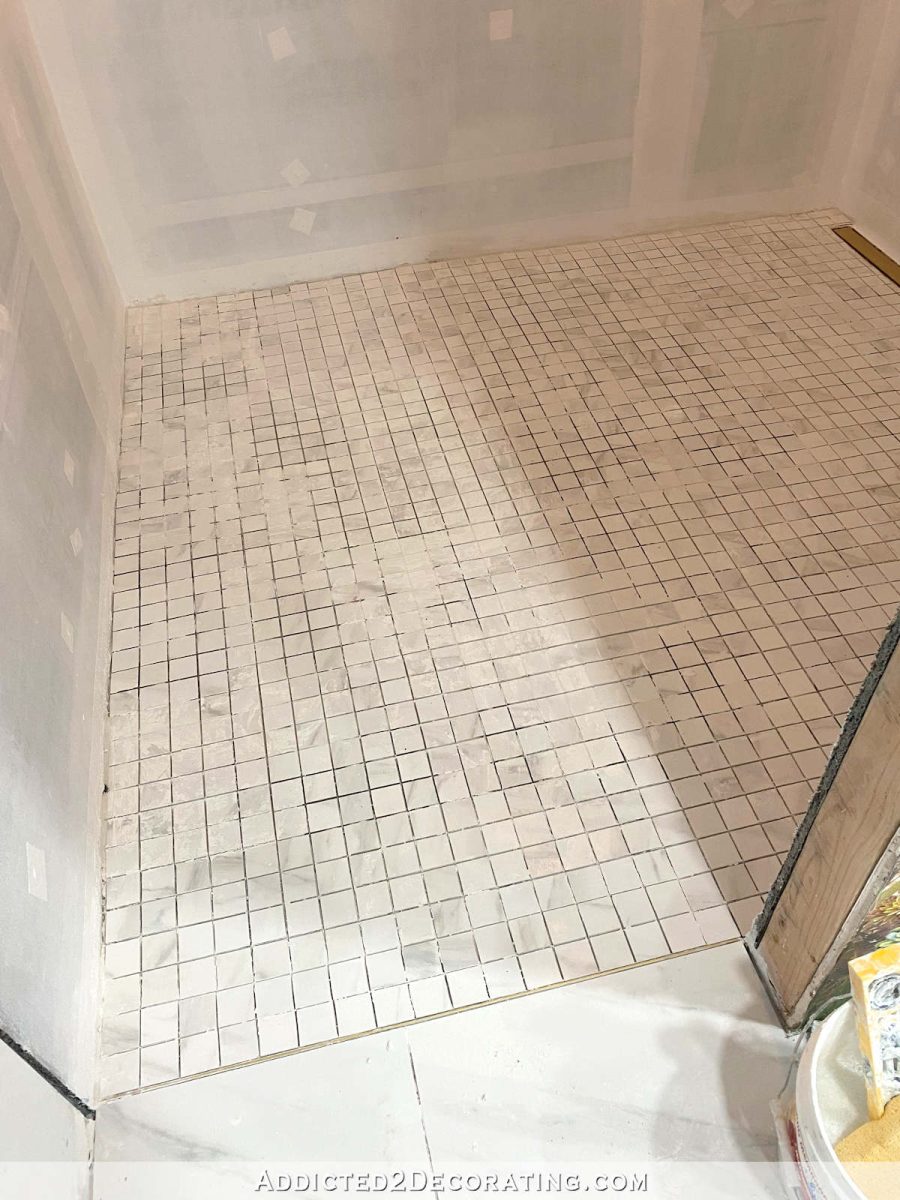
With that row in place, I did the four rows perpendicular to that first row, starting with the row closest to the drain, and working my way towards the line where the sloped floor meets the level floor.
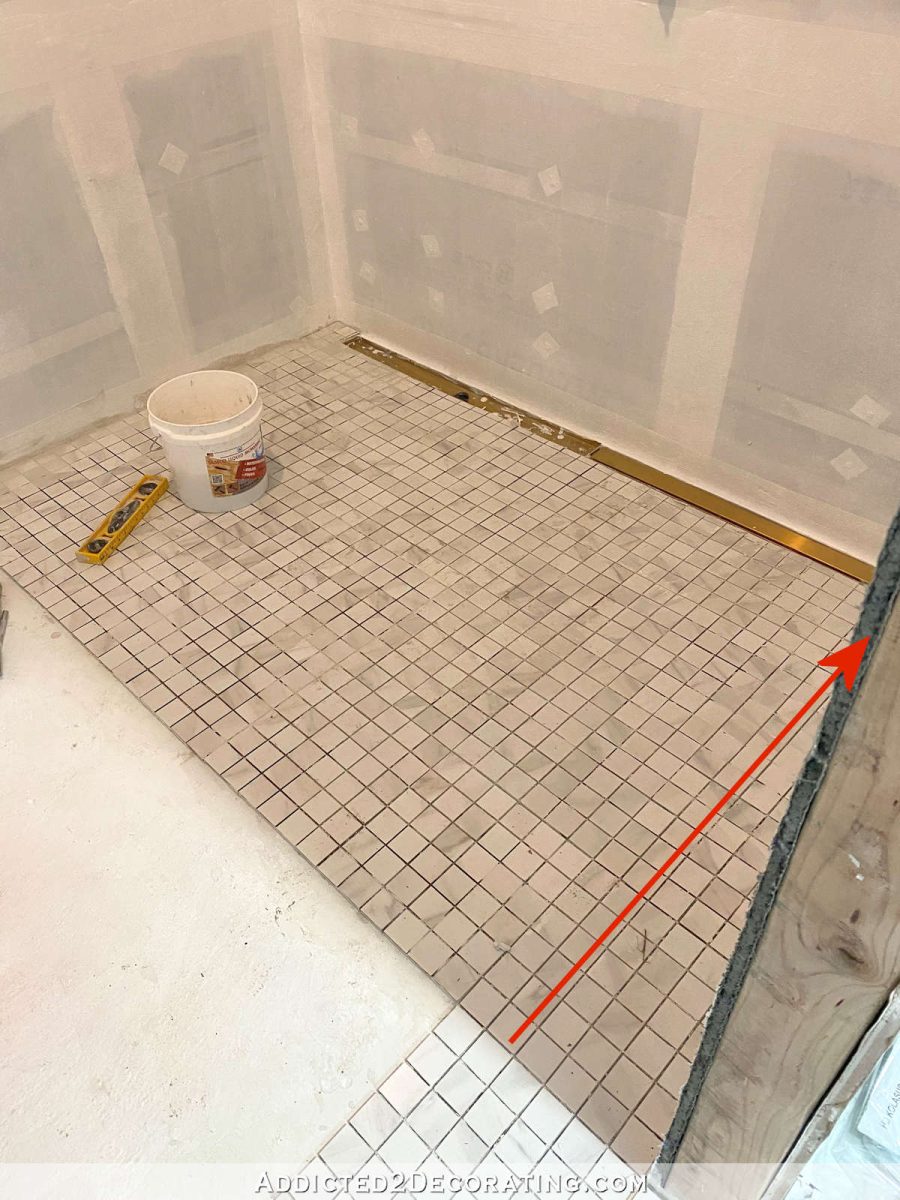
That’s where I had to leave things the at the end of the first day because I had to let these dry before I could walk on them to reach the areas on the level part of the shower floor.
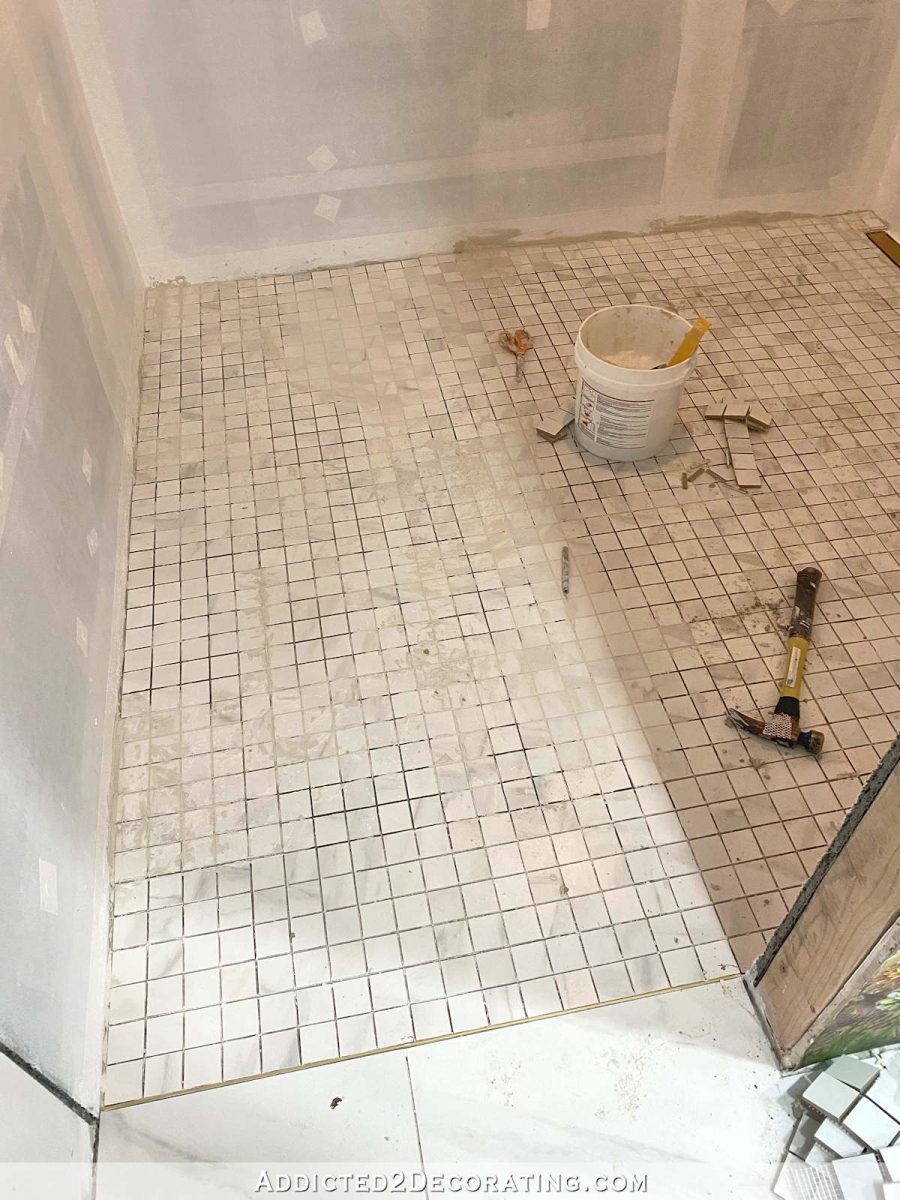
Side note: I didn’t actually set that bucket of water on the tiles while the mortar was still wet. I took this picture the next day, after the mortar was dry, and right before I got started on the rest of the floor.
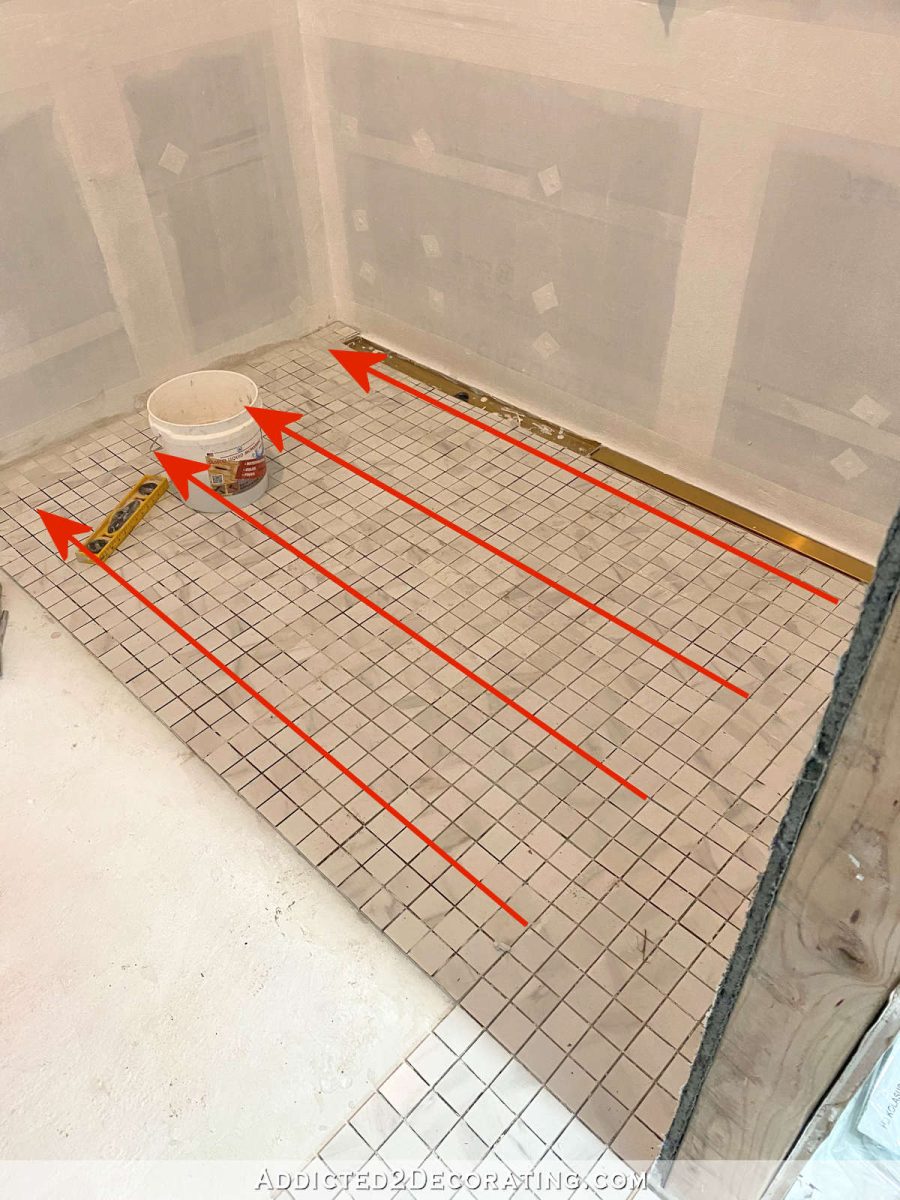
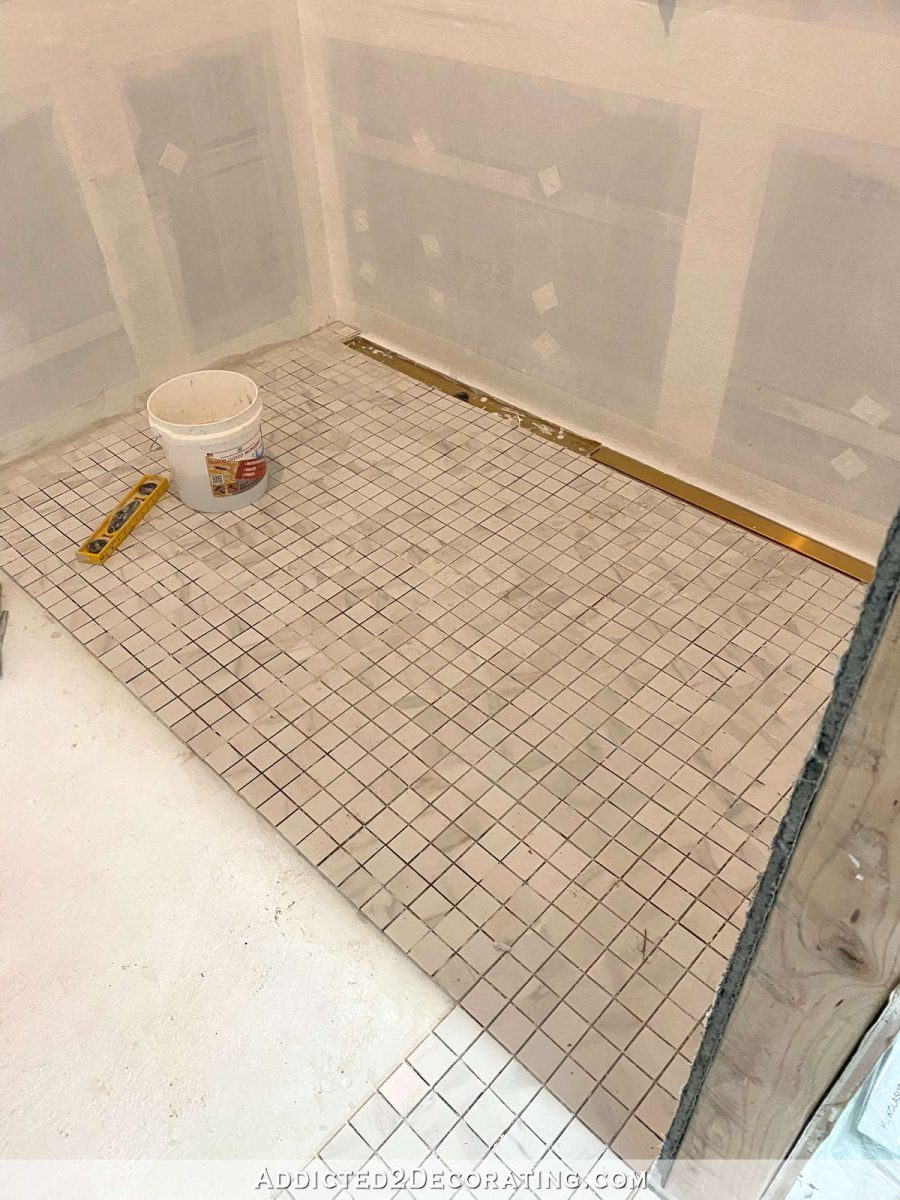
So after letting those tiles set for about 12 hours, I came back yesterday and finished up this area on the level part of the shower floor.

On this section, I started on the row closest to the shower entrance, working from the tiled floor to the wall. I was able to do that until I reached the last two rows, and then I had to work the opposite direction.
This would have been a pretty easy job had I been able to start at that back wall and just work row by row until I worked my way out of the shower. But the special considerations (whole tiles meeting the bathroom floor and grout line along the slope line) turned what could have been a rather simple tiling job into a much more difficult job. But at least it’s done!
To put this into perspective, I used 52 square feet of tile on this shower floor. Our entire hallway bathroom is somewhere around 56 square feet. So our entire hallway bathroom, minus the built-in cabinet and shelf niche, could fit into this shower. 😀
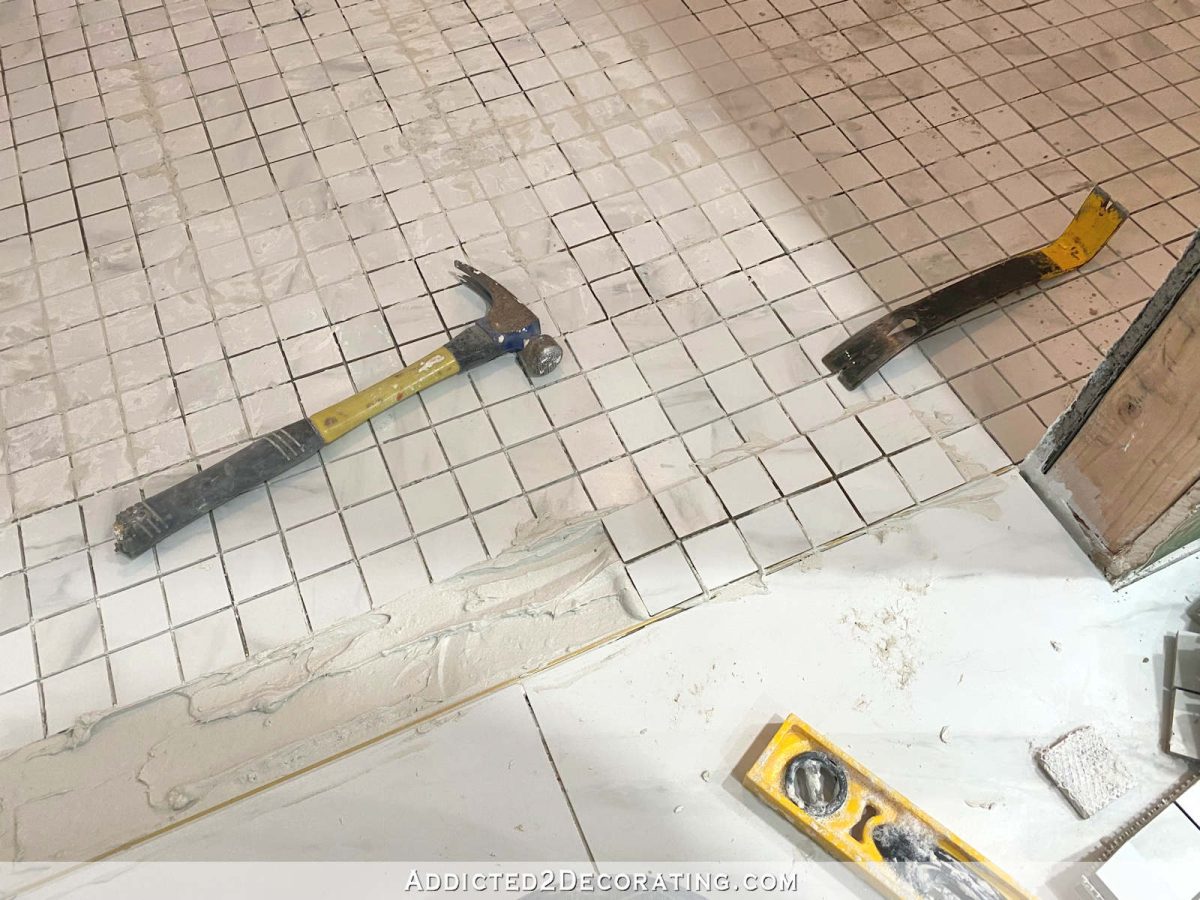
Well, it’s far from done. But at least the tile is installed. As you can see, I have a ton of cleanup to do. I tried cleaning the mortar out of the grout lines as much as I could as I went along, but so often, trying to remove the mortar from the grout lines would shift the tiles. That because so frustrating, so I ended up letting the tiles set up for about three hours, and then I came back and cleaned those out. But then that left areas that I couldn’t reach without putting weight on the tiles and taking a chance on shifting them, so I just left them. Thankfully, mortar isn’t that difficult to clean up. But since these are 2 x 2 tiles, it’ll be time-consuming!
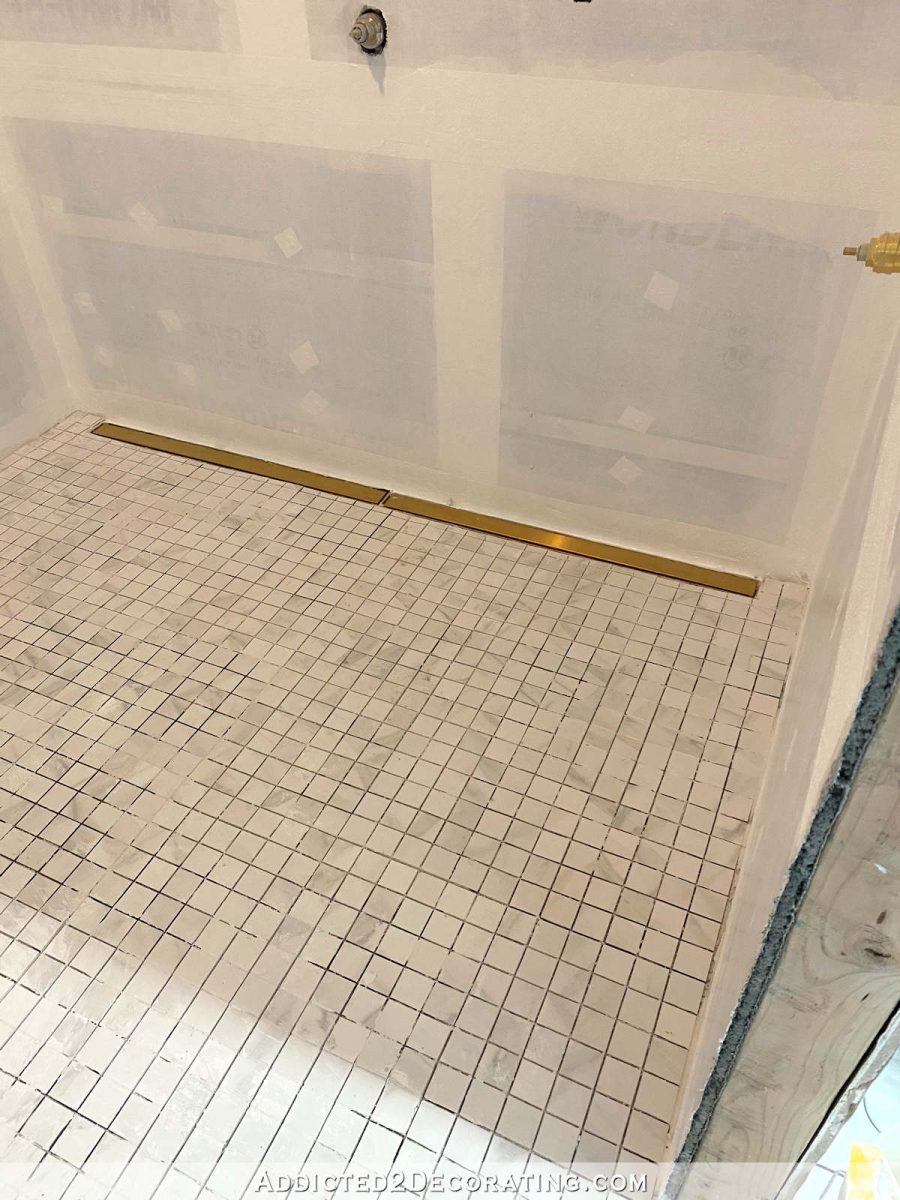
After all of the tile was installed, I did go back and correct these right at the entrance. Since the bathroom floor tile is large format and has to be installed using a 1/2-inch notch trowel, this area where the two tiles meet was uneven even though the tiles themselves are the same thickness. (Installing tiny tiles with a 1/2-inch notch trowel would have been needlessly difficult and messy.)
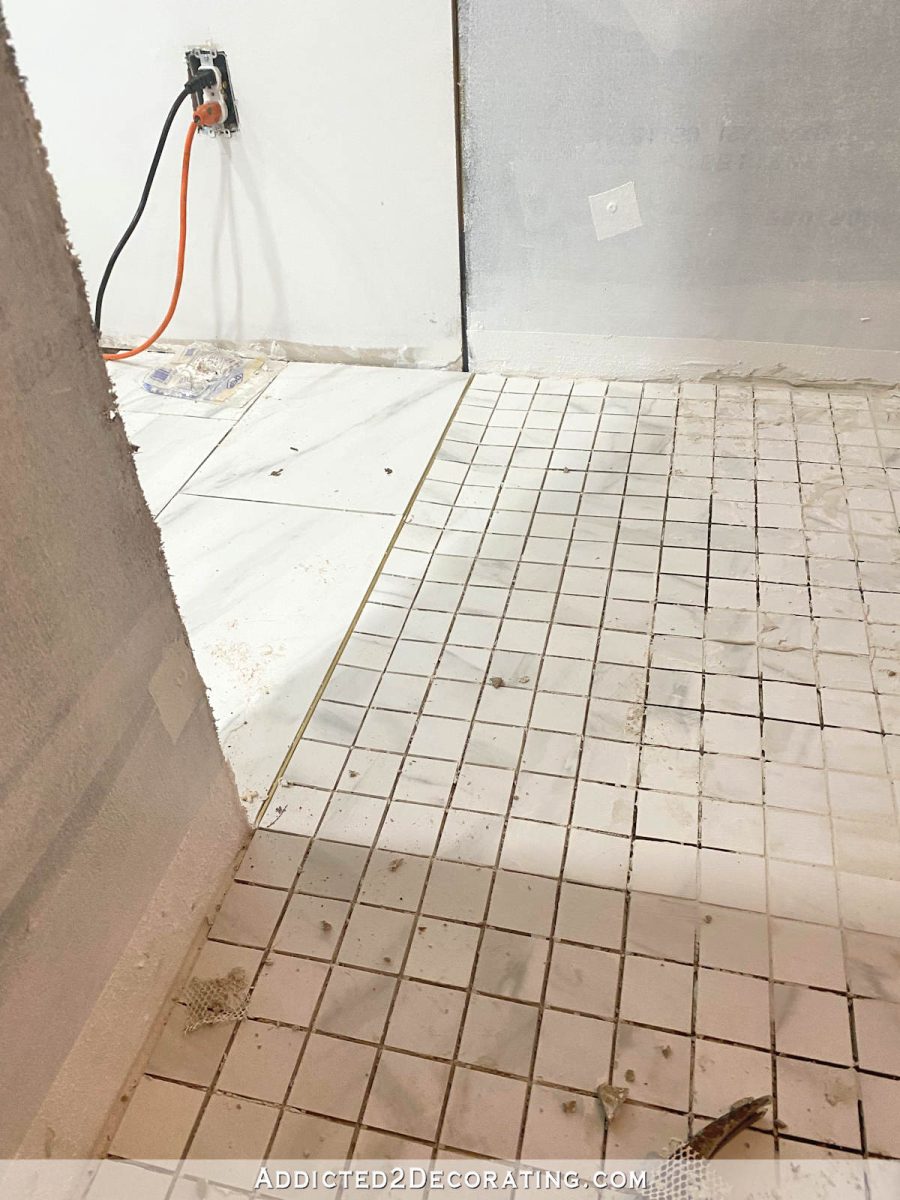
So you can see how that first row right up against the Schluter strip is very obviously angled, and the second row is flat. I couldn’t stand how that looked. I don’t mind a gentle slope, but that very obvious slope just on the fist row was awful.

That was a row that had been installed on day one of this tiling project, so the mortar was very good and dry. So using my hammer to break up the tiles, I removed those first two rows of tiles and cleaned and vacuumed out the area really well. Then I filled the area with a bit more mortar than before, and installed new tiles.
But this time, I created a much gentler (and hopefully less noticeable) slope with two rows of tiles. I think once it’s all grouted, it won’t be very noticeable at all. And I actually think it’s a good thing that there’s just a little bit of a slope there right in the entrance to the shower.
So there’s a lot of cleanup to do, but the biggest part of this floor is done. And while I wasn’t too sure how I’d like the simple 2 x 2 square tiles (my options were limited because of that slope line that required a straight grout line all the way across the shower), I have to say that I really love how this tile looks.
Of course, the whole floor and the grout lines will be much more subtle once it’s all grouted with a light gray grout to match the tiles. I think it’ll be very pretty when all is said and done.

And thank goodness I have a Dremel! I think that will be the perfect tool to use in order to clean up all of these grout lines in the quickest way possible. I haven’t used that tool in years (although I do use my Dremel Multi-Max quite often), but I knew one day, it would come in handy. It’s time has come. 😀

Addicted 2 Decorating is where I share my DIY and decorating journey as I remodel and decorate the 1948 fixer upper that my husband, Matt, and I bought in 2013. Matt has M.S. and is unable to do physical work, so I do the majority of the work on the house by myself. You can learn more about me here.

I’m constantly in awe at your skills and patience with your projects. I often wonder if there is as much cussing as there is on my projects LOL.
Looking really great Kristi!:)
amazing job!
That looks wonderful and it isn’t even done yet!
It’s perfect!
I am so glad you used the smaller tiles in the shower.
When you have it all grouted, it will all flow very well visually, because it is all the same tile and grout.
Looks great Kristi. Worth all the hard work.
You must have the patience of Job. That was/is beautiful with your lines so straight. We hired our kitchen floor and it has 3 places that are crooked. 10X10 kitchen.
A lot of work to get it just right, but well worth it. This will be a bathroom for the books! Functional, beautiful, and done right. Way to GEAUX, Kristi!
Just wondering…I don’t see a drain in there anywhere.
I think the drain is the long brass strip along the wall that you see in the last photo. It is called a linear drain.
Really good attention to detail and I think you’ll be happy there is a slight slope from the main floor. Can’t wait to see the finished flooring much less the finished bathroom.
Beautiful! You are inspiring me to tile the backsplash in my kitchen when we get moved back home!!
I don’t know anything about tiling, but trying to learn. Was the dip in your 2×2 caused by the height of the Schluter strip underneath that first row, and/or also the difference in the height of the mortar using the smaller notched trowel vs the larger notched one needed for the big tiles? I love how it is coming out even though it looks like so much work for you! Wish I could help!
Well done! A well-planned tile layout will make you smile every time you walk in there. The bit of slope will disappear and only you will really notice it going forward.
Will you be sure to post when you come across something you can’t do? You really can do it all and it is so beautiful.
Beautiful job! So glad you went with the schluiter strip …. classy.
Looks great, Kristi! Can’t wait to see it grouted! And I really like those small tiles.
Looks wonderful!
Looks great! Let us know how the dremel on grout lines goes.
Did you ever do the grouting yet on your shower floor?
Yes, I finished the bathroom over a year ago.