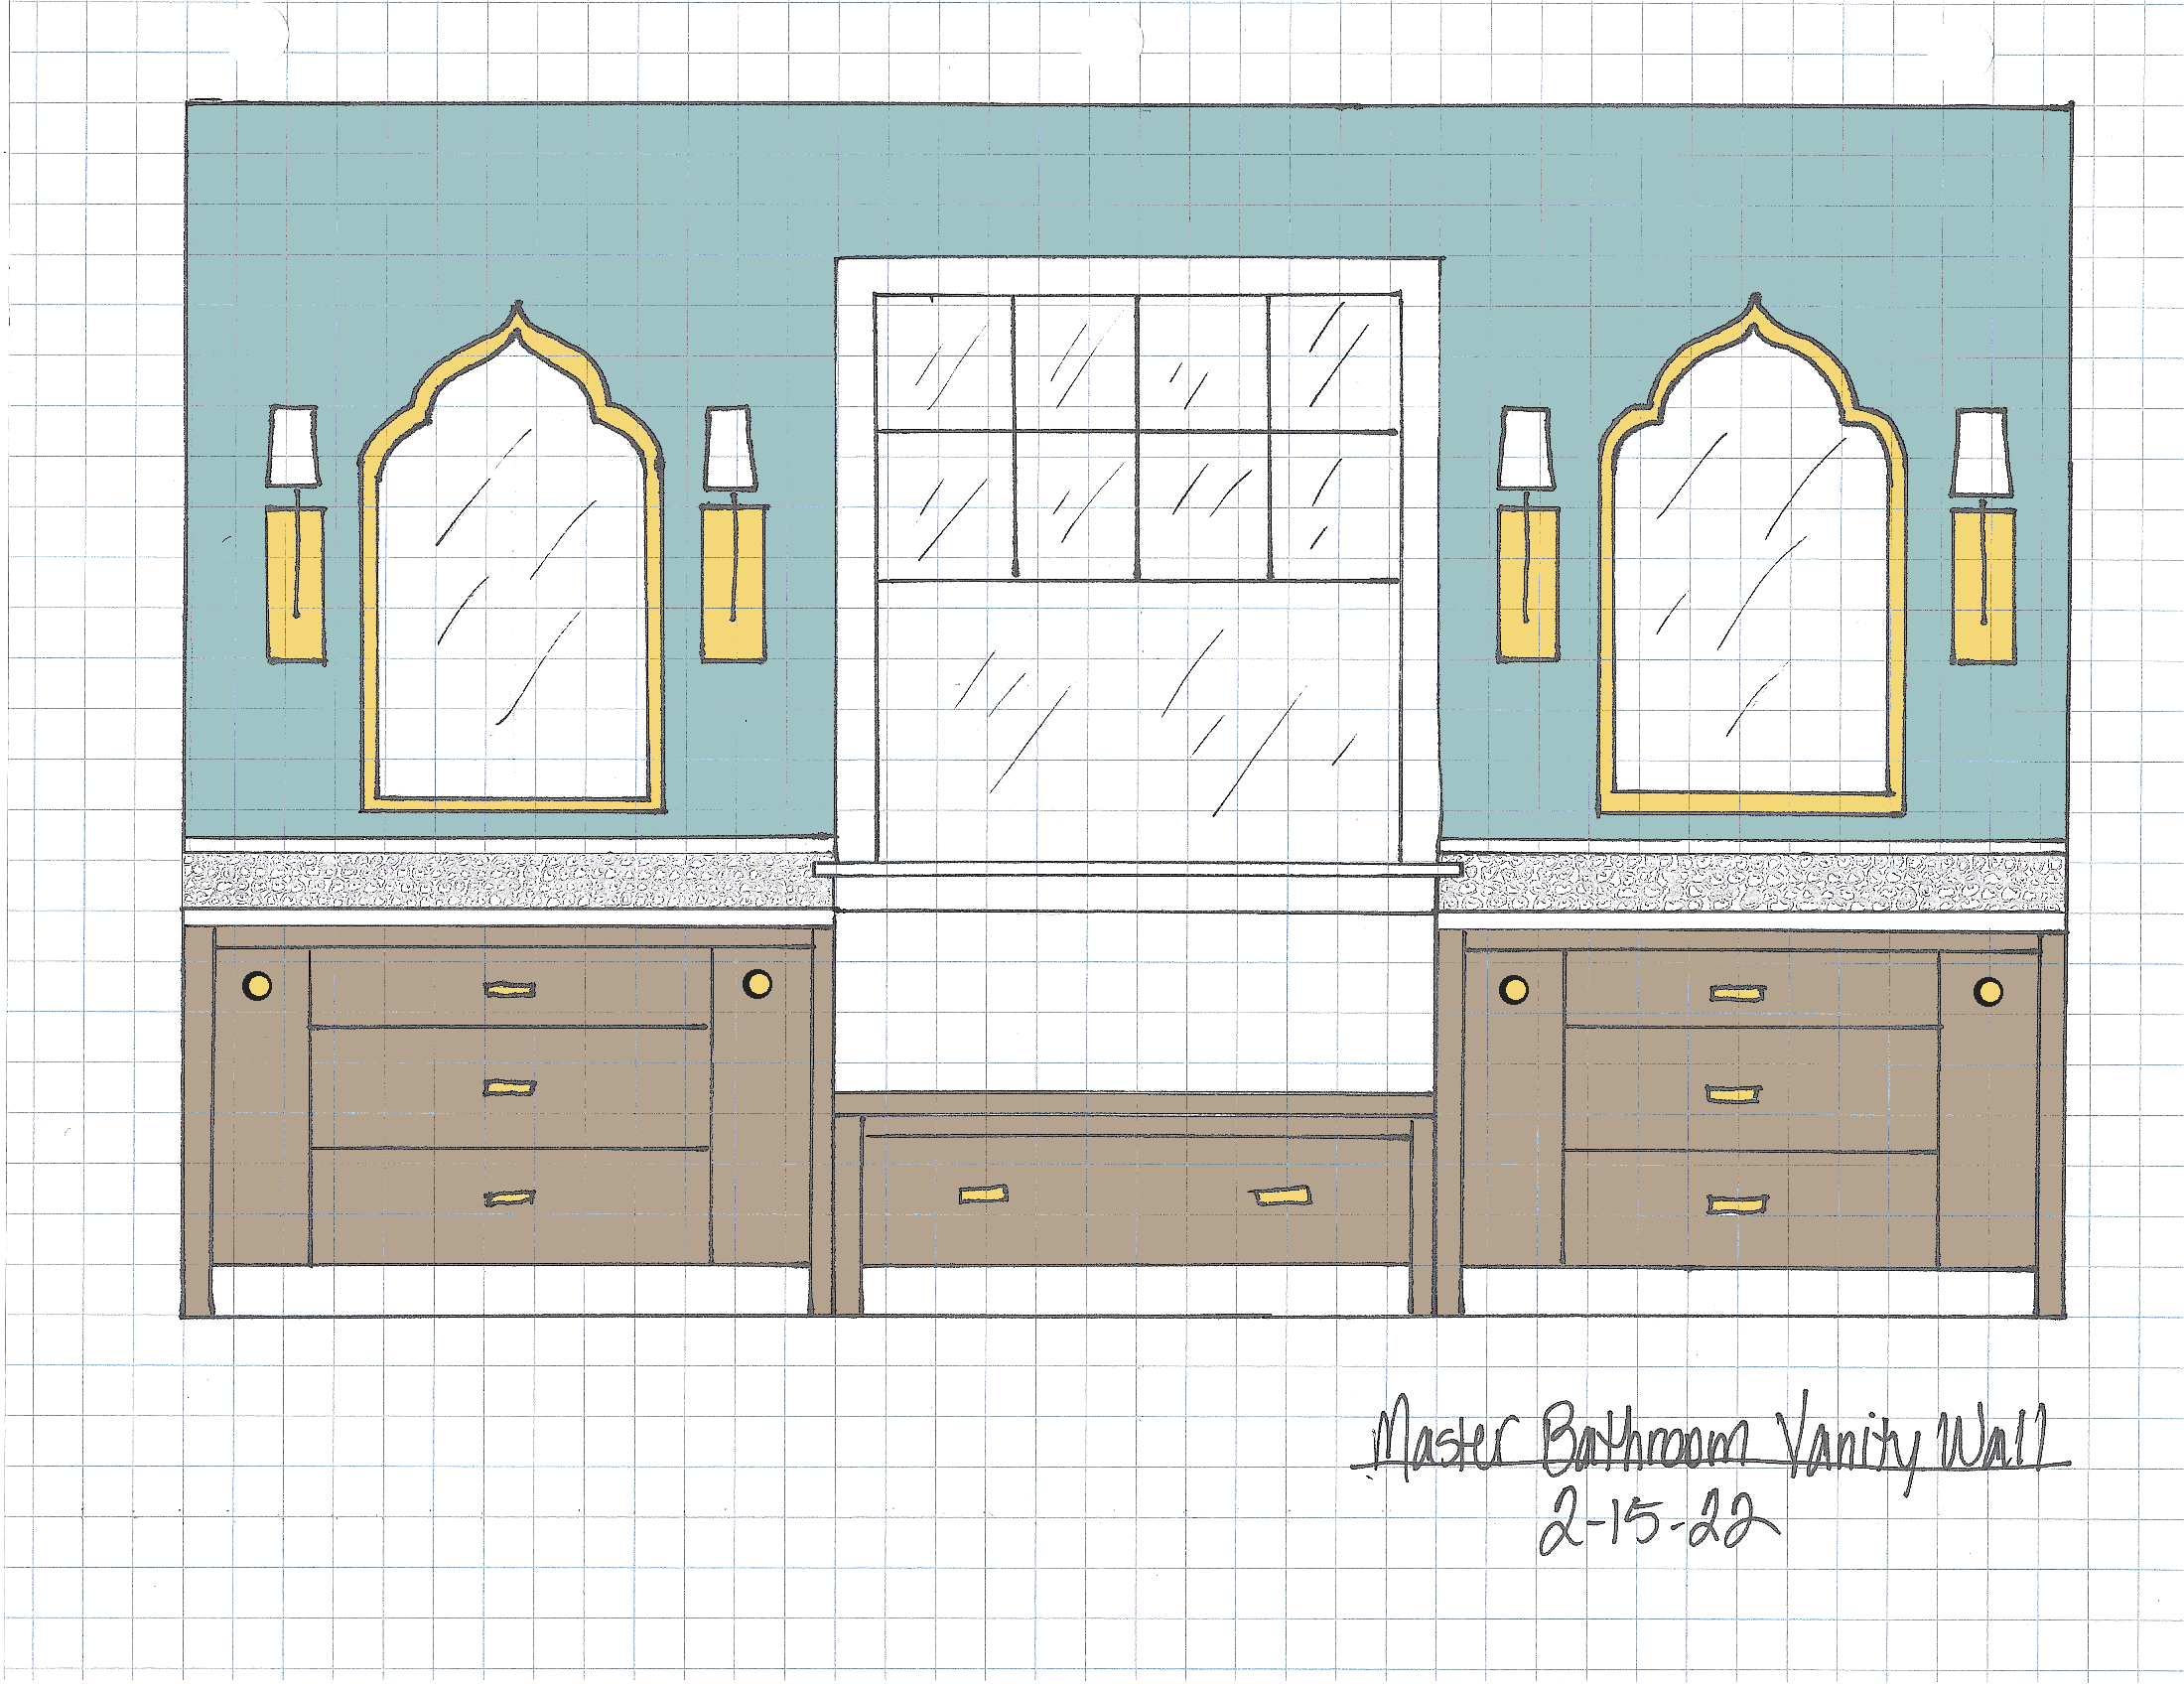
DIY Chest Of Drawers — Part 1 (Walnut Storage Cabinet For Our Bathroom)
Yesterday, I finished the basic build of the carcass for the DIY chest of drawers that I’m building to go between the vanities in our bathroom. Since our vanities needed to be wheelchair accessible, I built table bases with turned legs for those. You can click here to see the details of that project. But those don’t allow much room for storage, so this storage cabinet will go between those table-style vanities and provide all the storage we need.
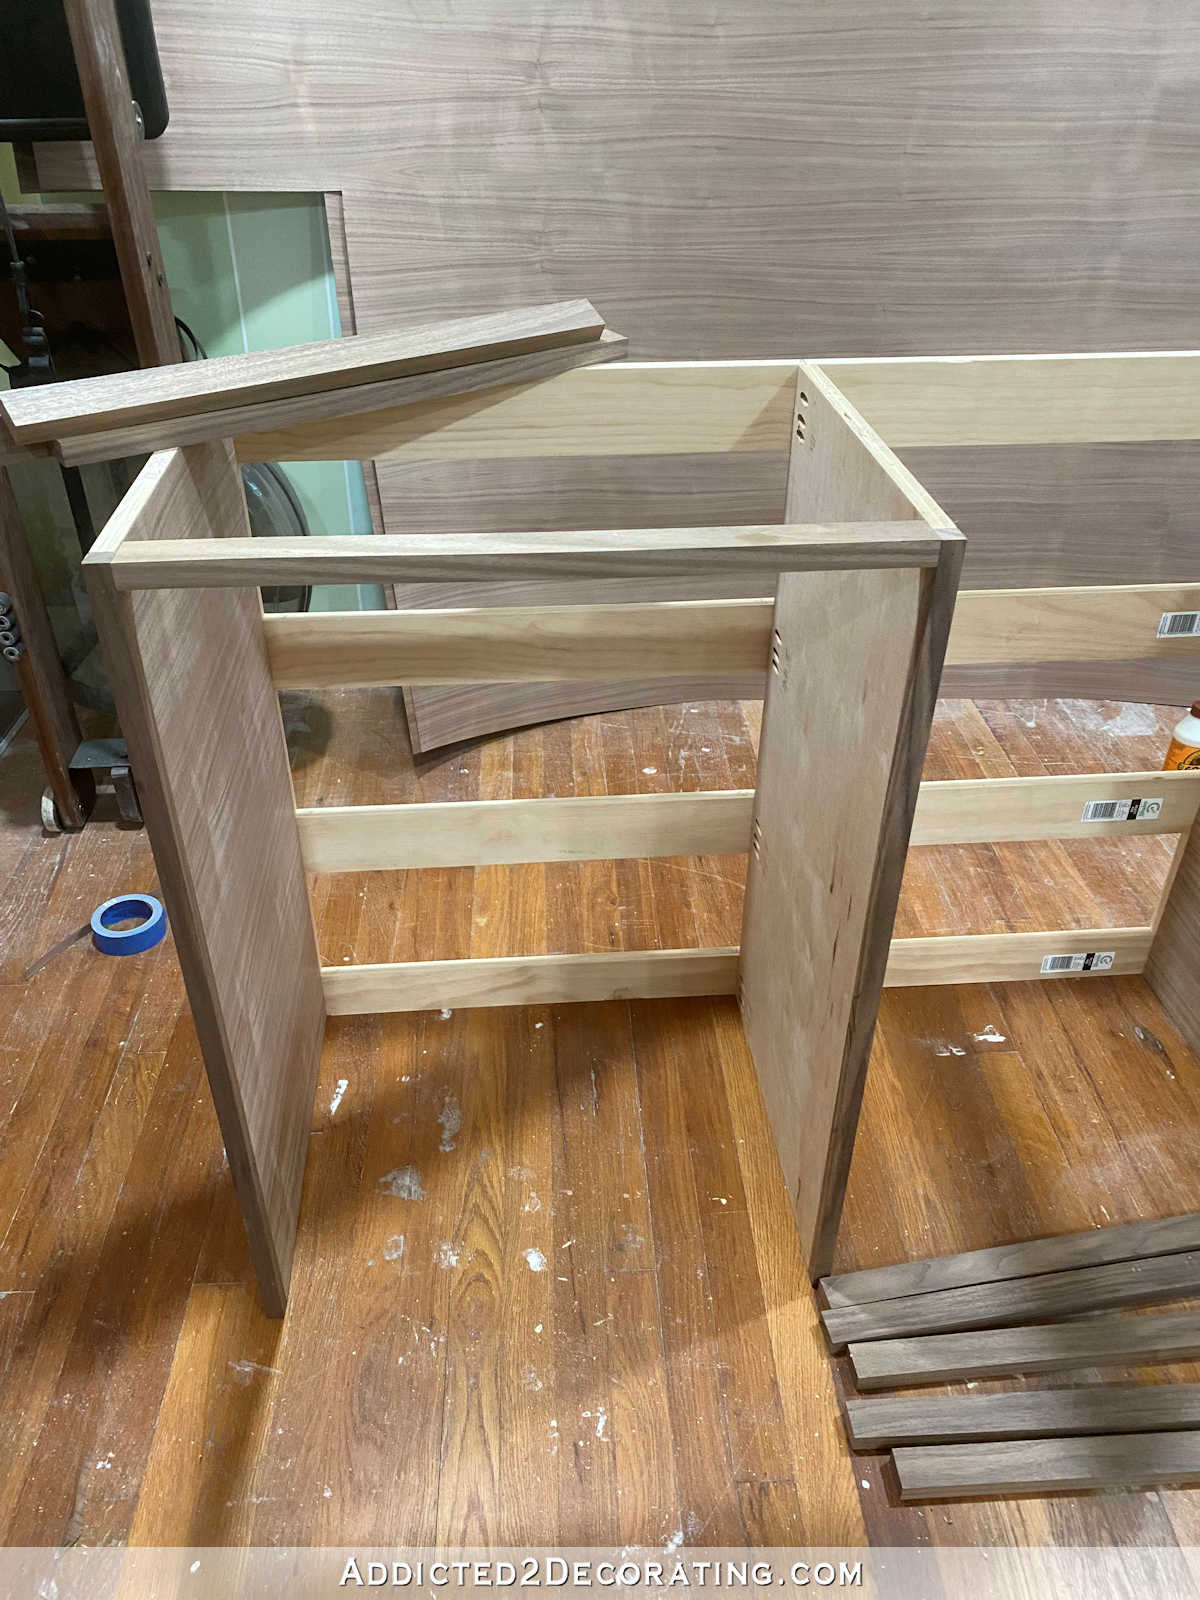
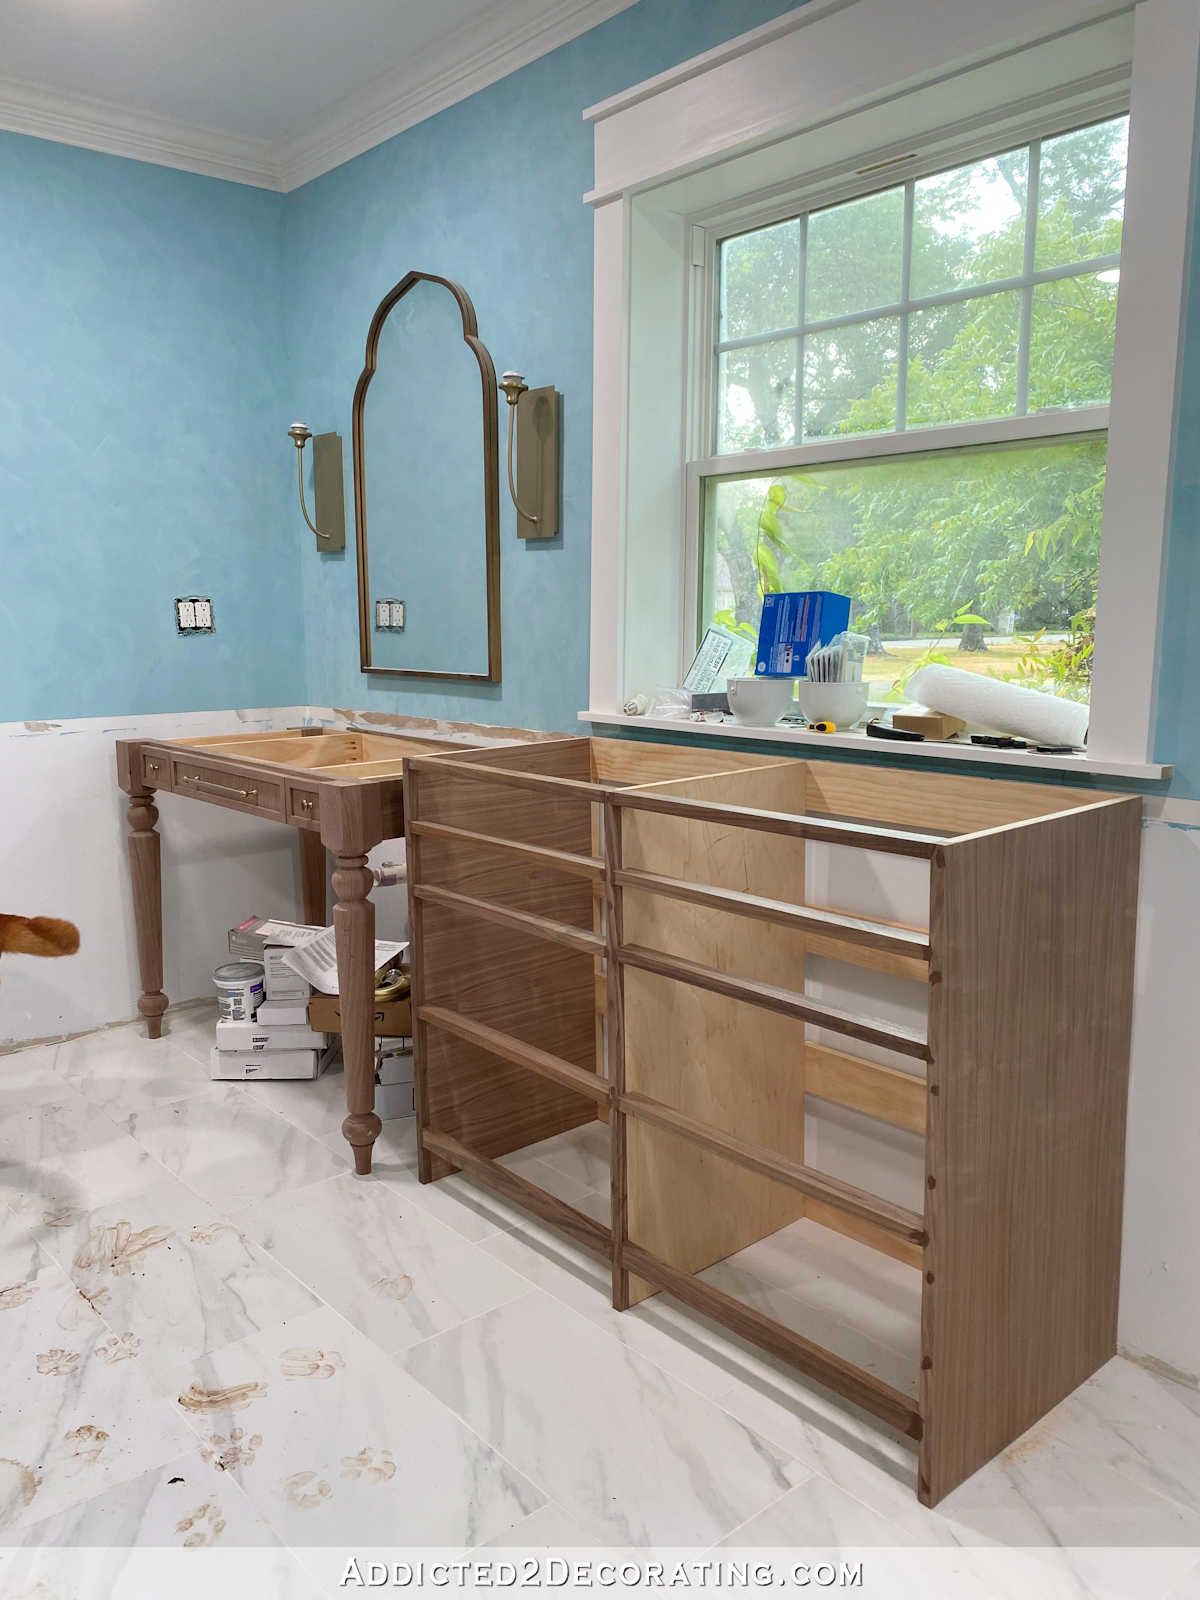
I got the carcass built and veneered with walnut veneer. Here’s how it looks right now…

So let me show you how I built and veneered the basic carcass.
I started by using my table saw to cut two pieces of 3/4-inch plywood to 35 inches high by 18.5 inches wide. Those would form the sides of the cabinet. Then I cut four pieces (only three show below) of 1″ x 4″ lumber to the finished width of the cabinet minus 1.5 inches.
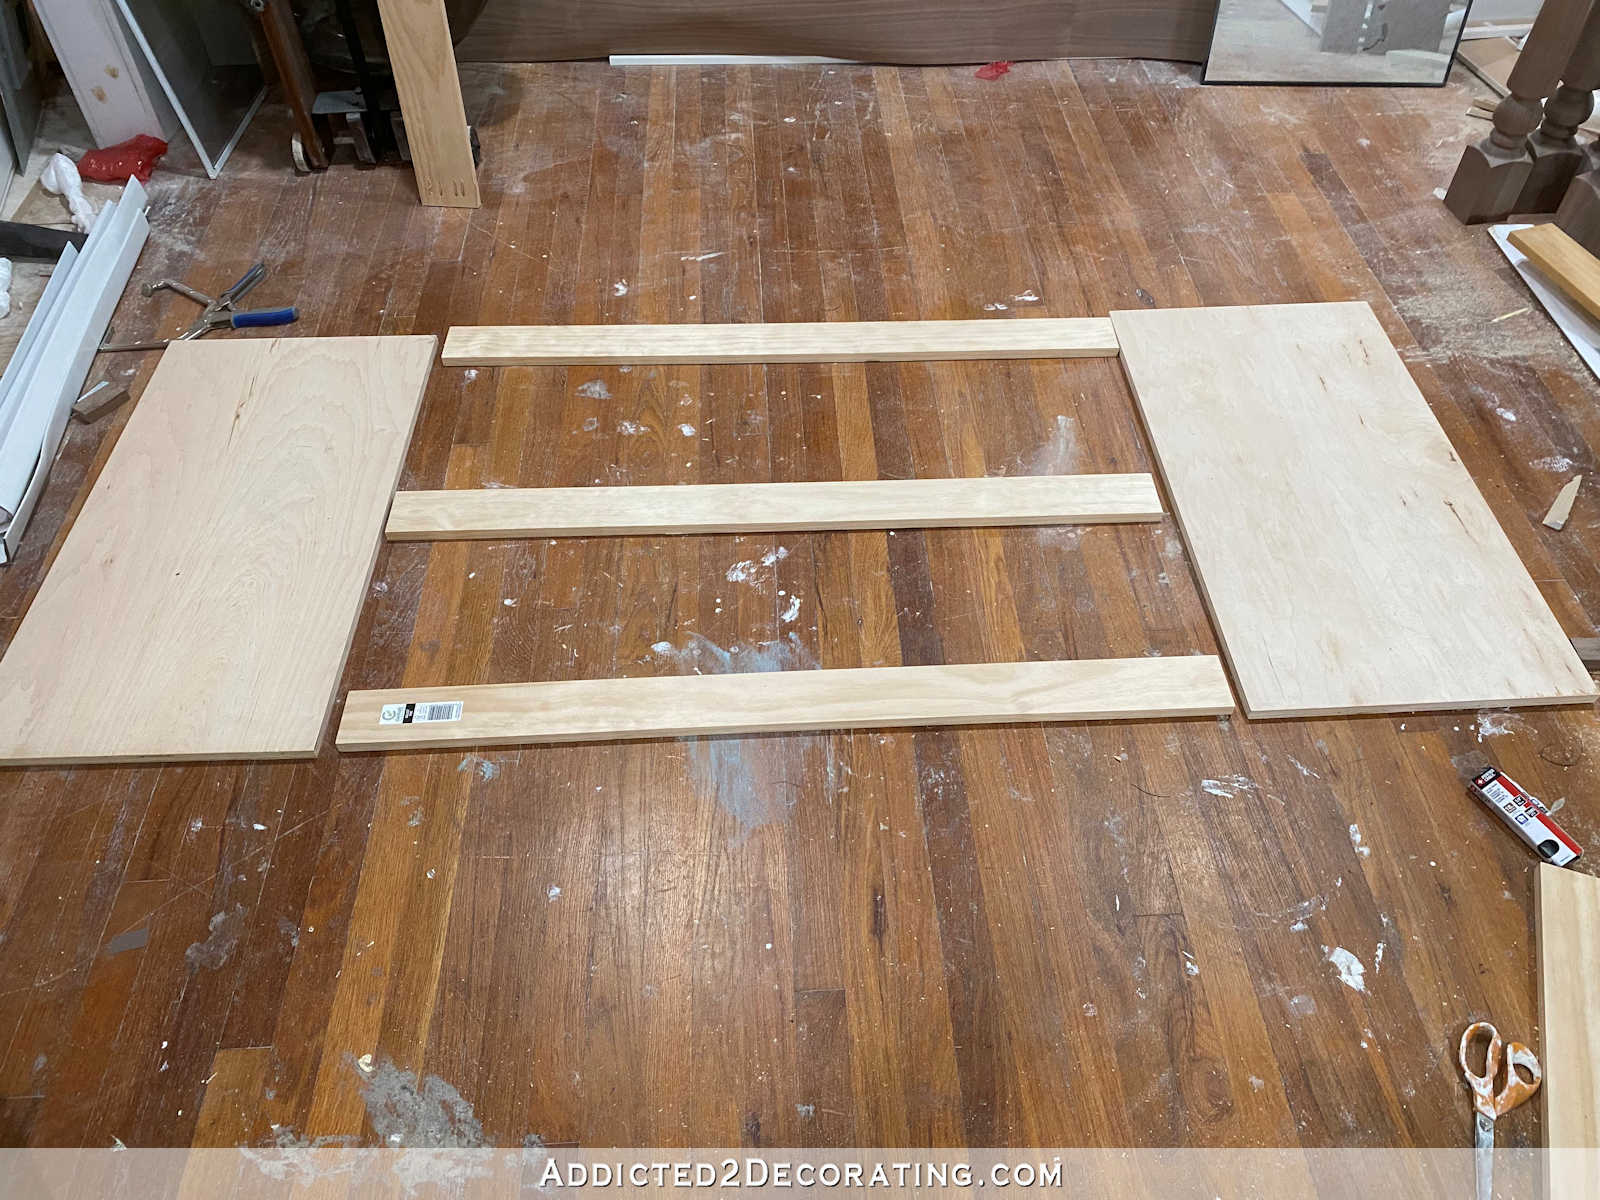
Now let me explain. I would generally use solid plywood for the backing of a cabinet. But plywood is expensive right now, and I’ve had this lumber on hand for a very long time now with no plans for it. So I decided to use what I have on hand. It won’t show on the finished cabinet since it’ll be up against the wall, but you can certainly substitute plywood for the back instead of using 1″ x 4″ lumber.
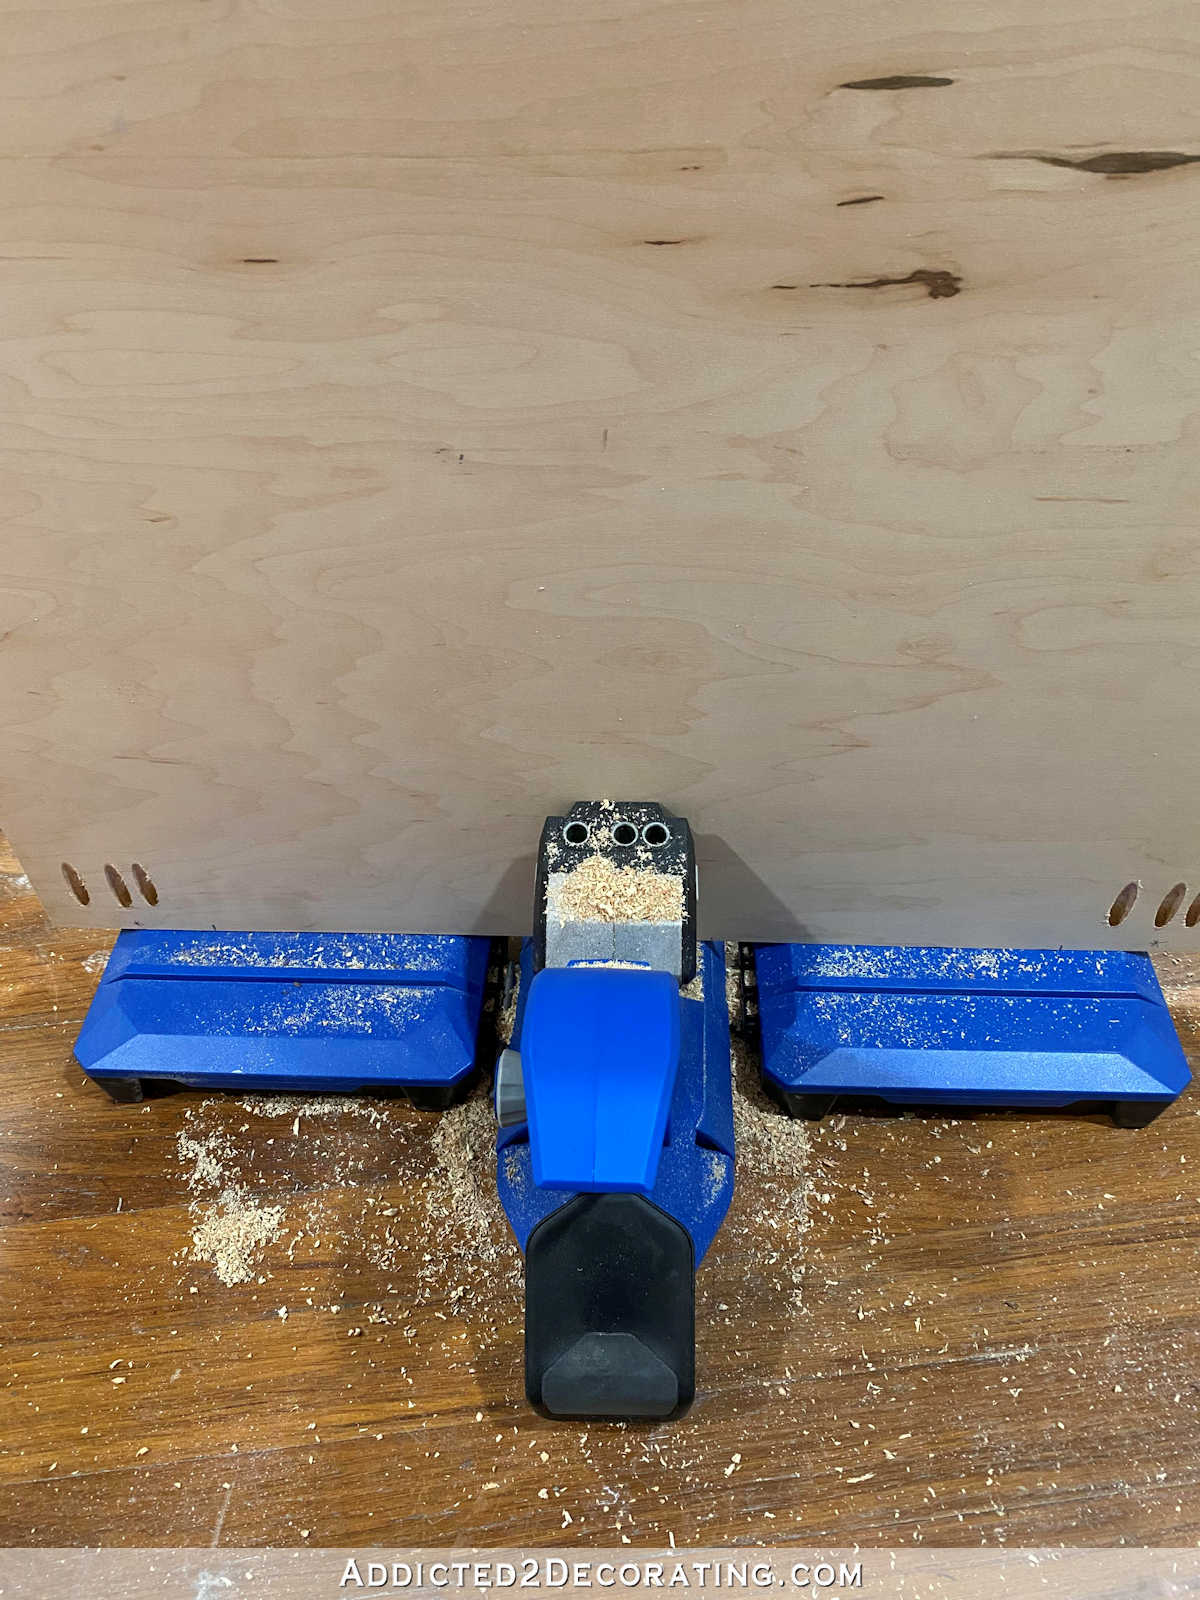
Using my Kreg Pocket Hole Jig, I drilled four pocket holes into each end of each of the 1″ x 4″ boards.

And then with one of the side pieces lying flat on the floor, I screwed the backer boards onto the side plywood piece as shown below.
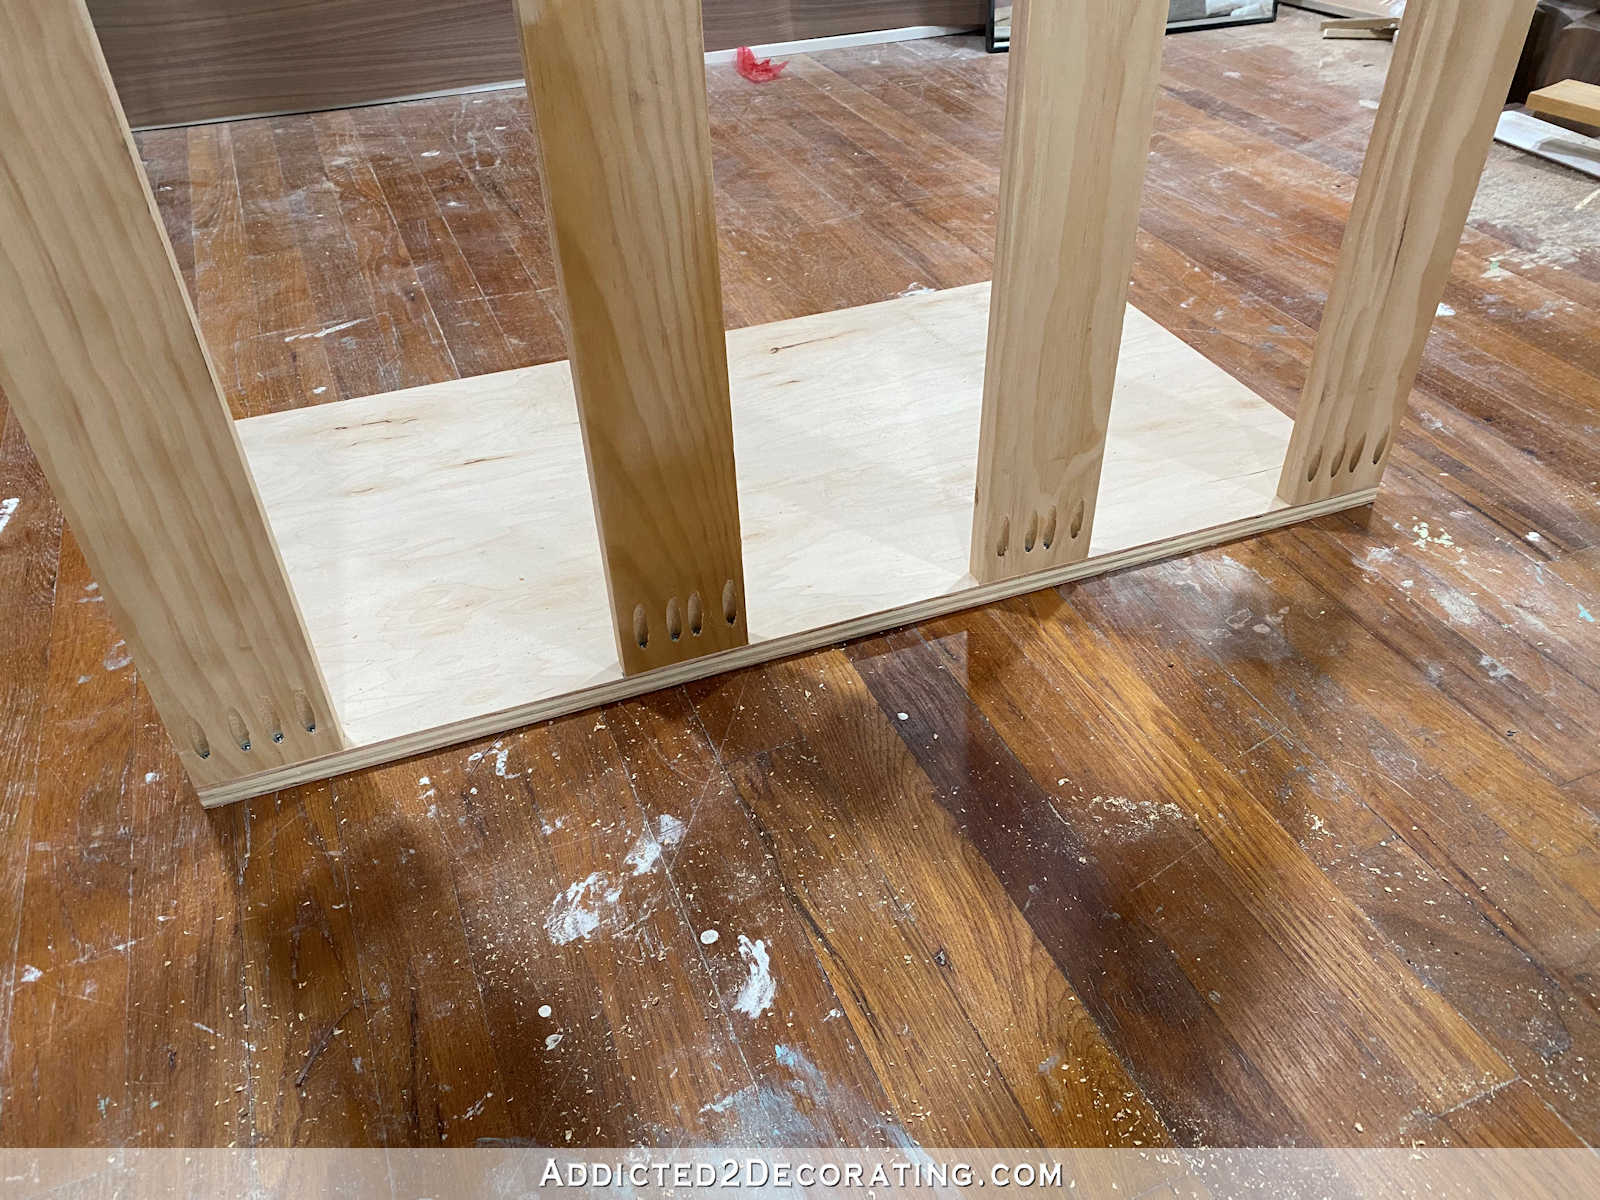
Here’s what that looked like with all four assembled…
If you use a plywood back, you would do the very same thing except that your pocket holes could be more evenly spaced along the edge of the plywood piece.
Then I stood that assembled section upright and attached the other side plywood piece.
With those all assembled, this is what it looked like from the front…
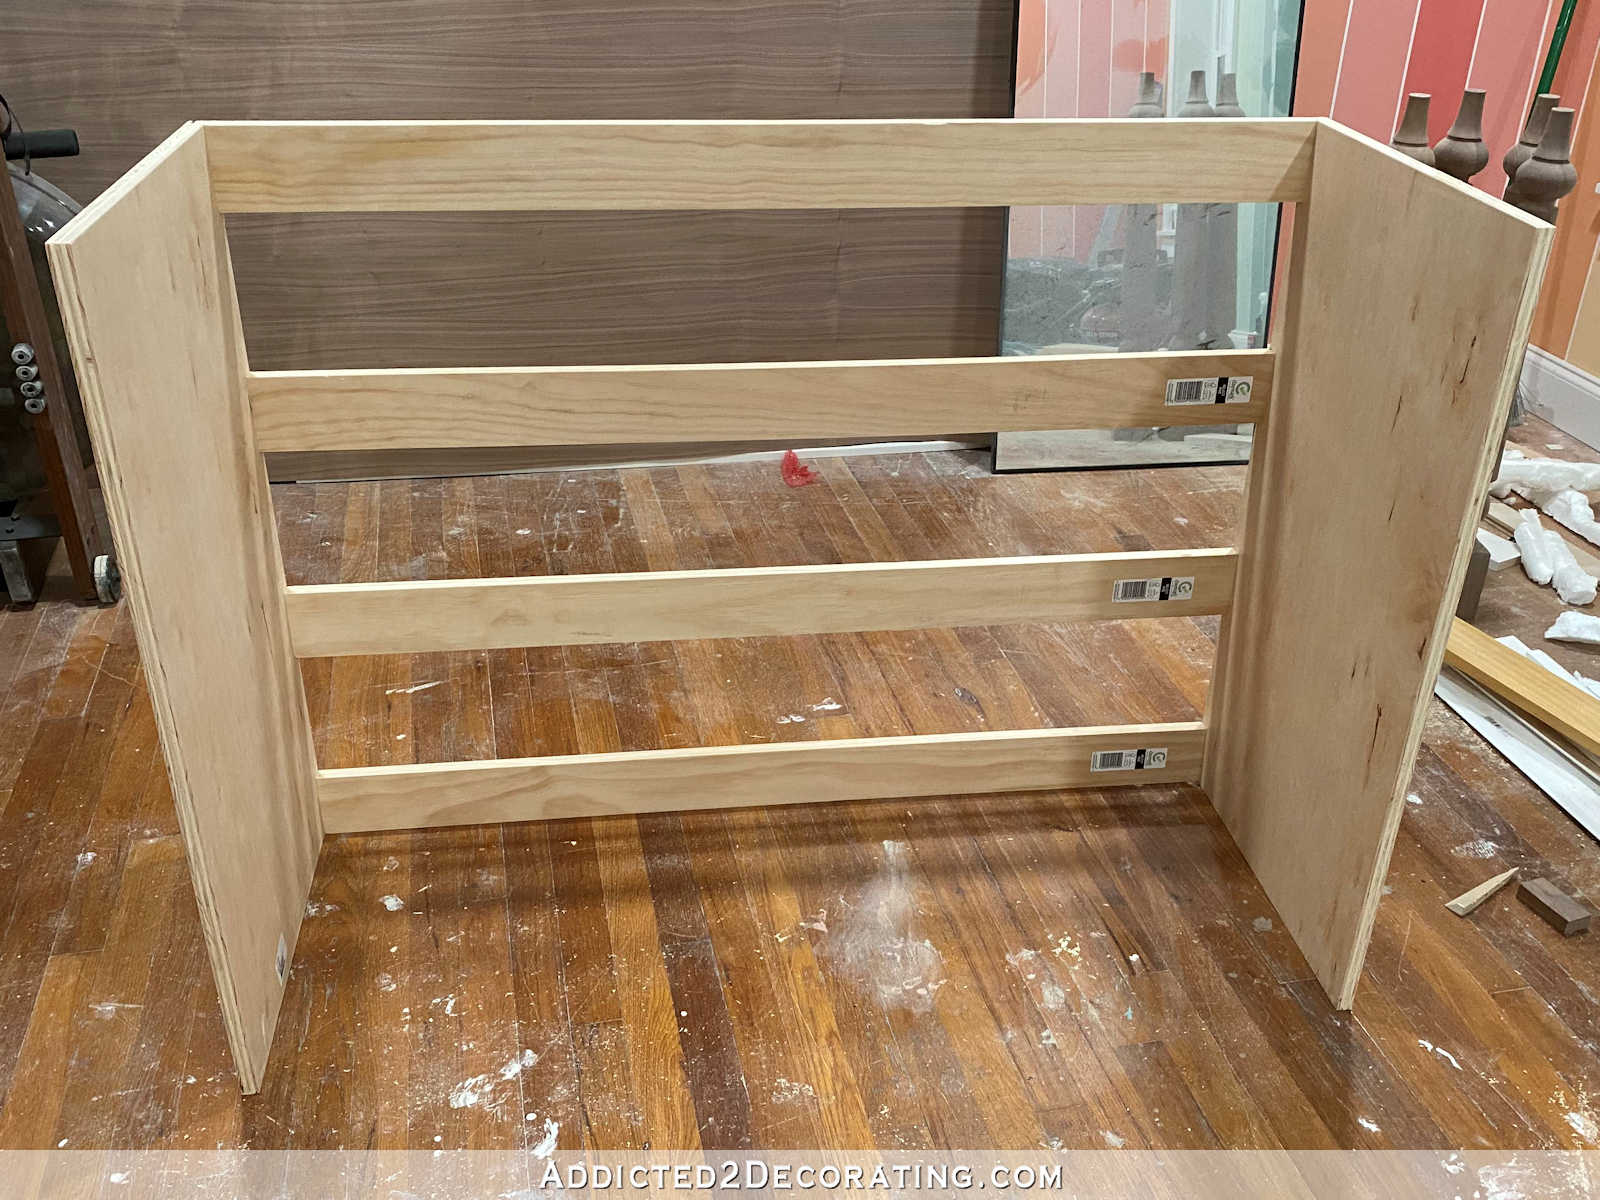
And this is what it looked like from the back…

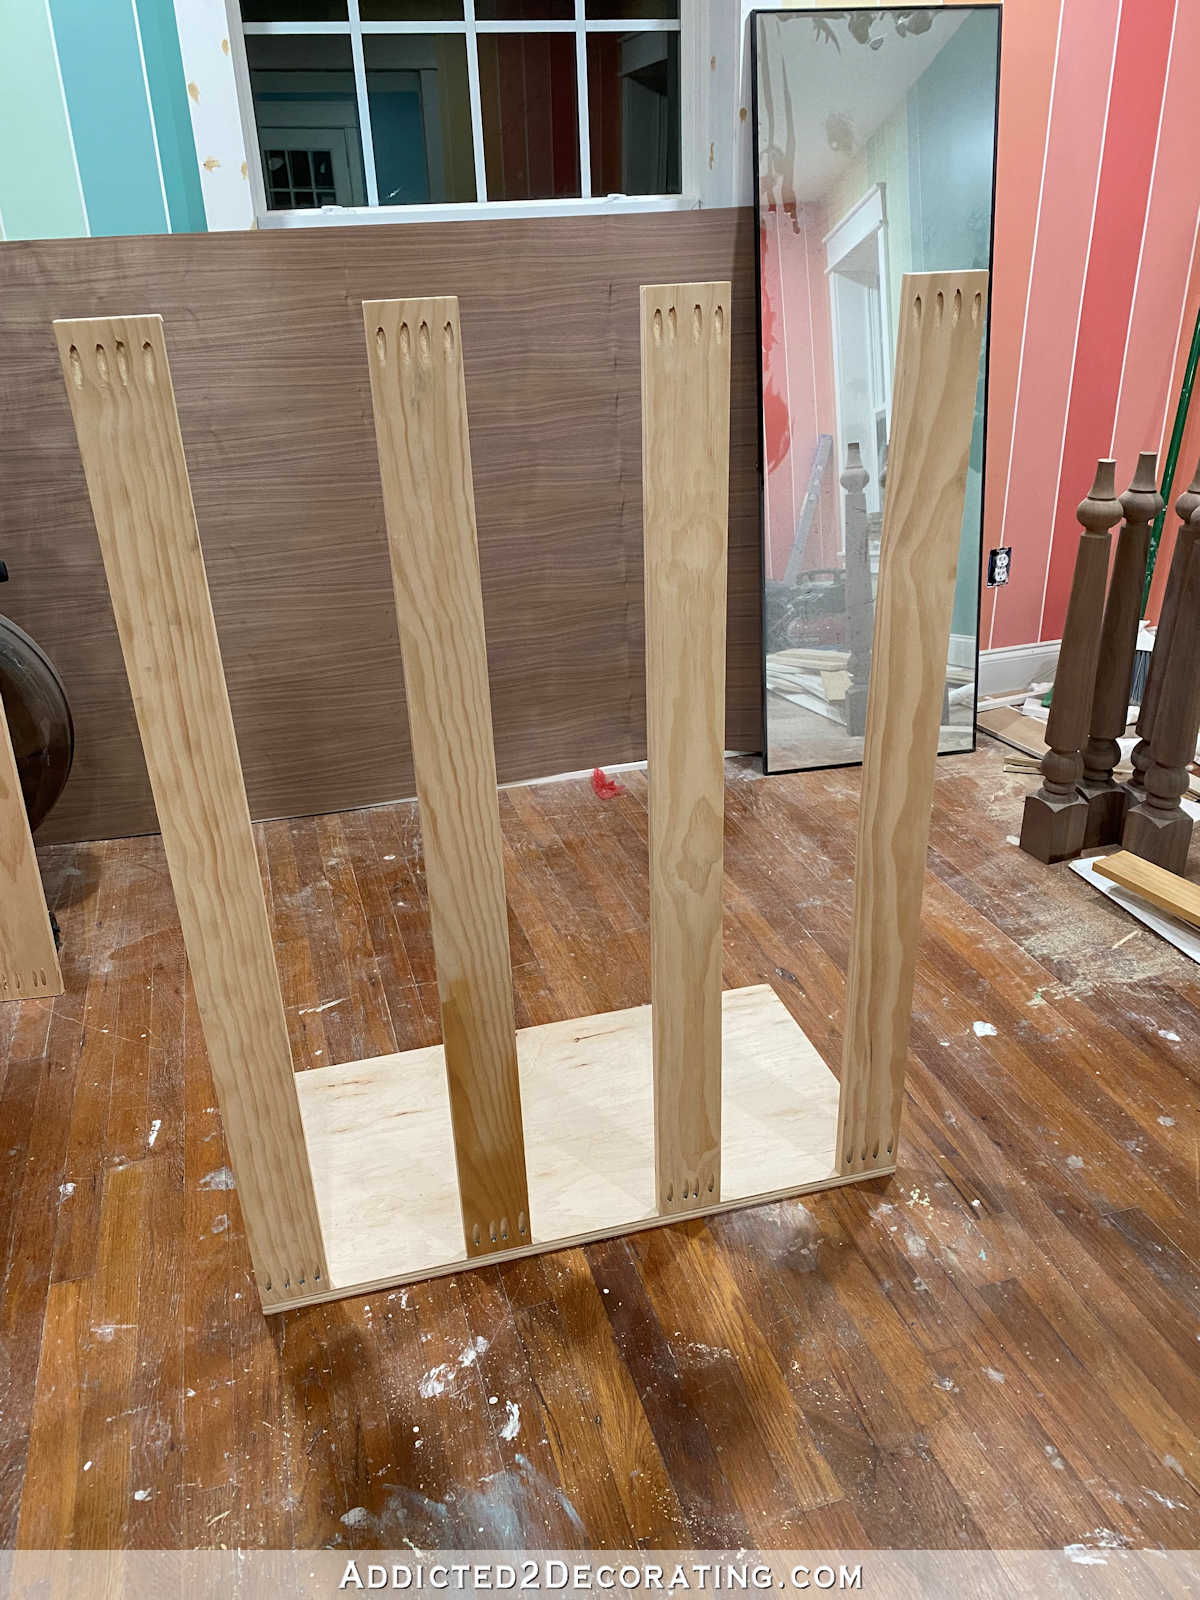
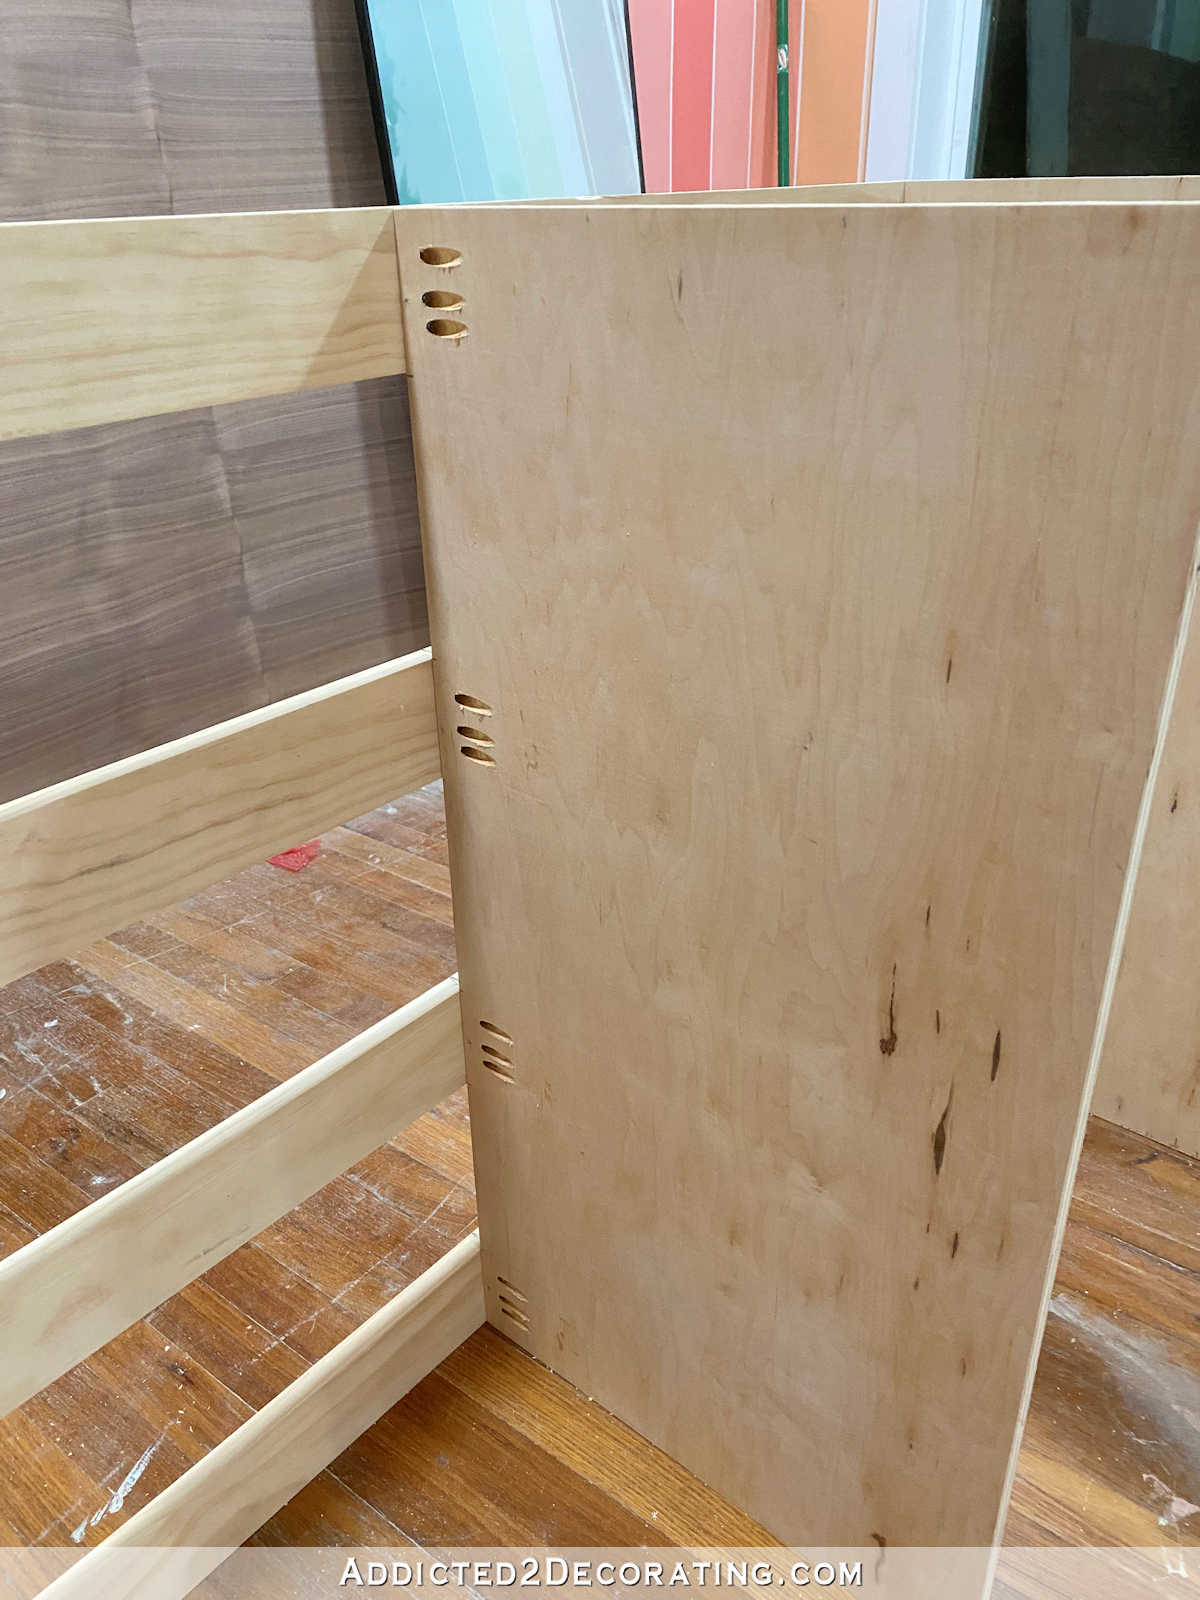
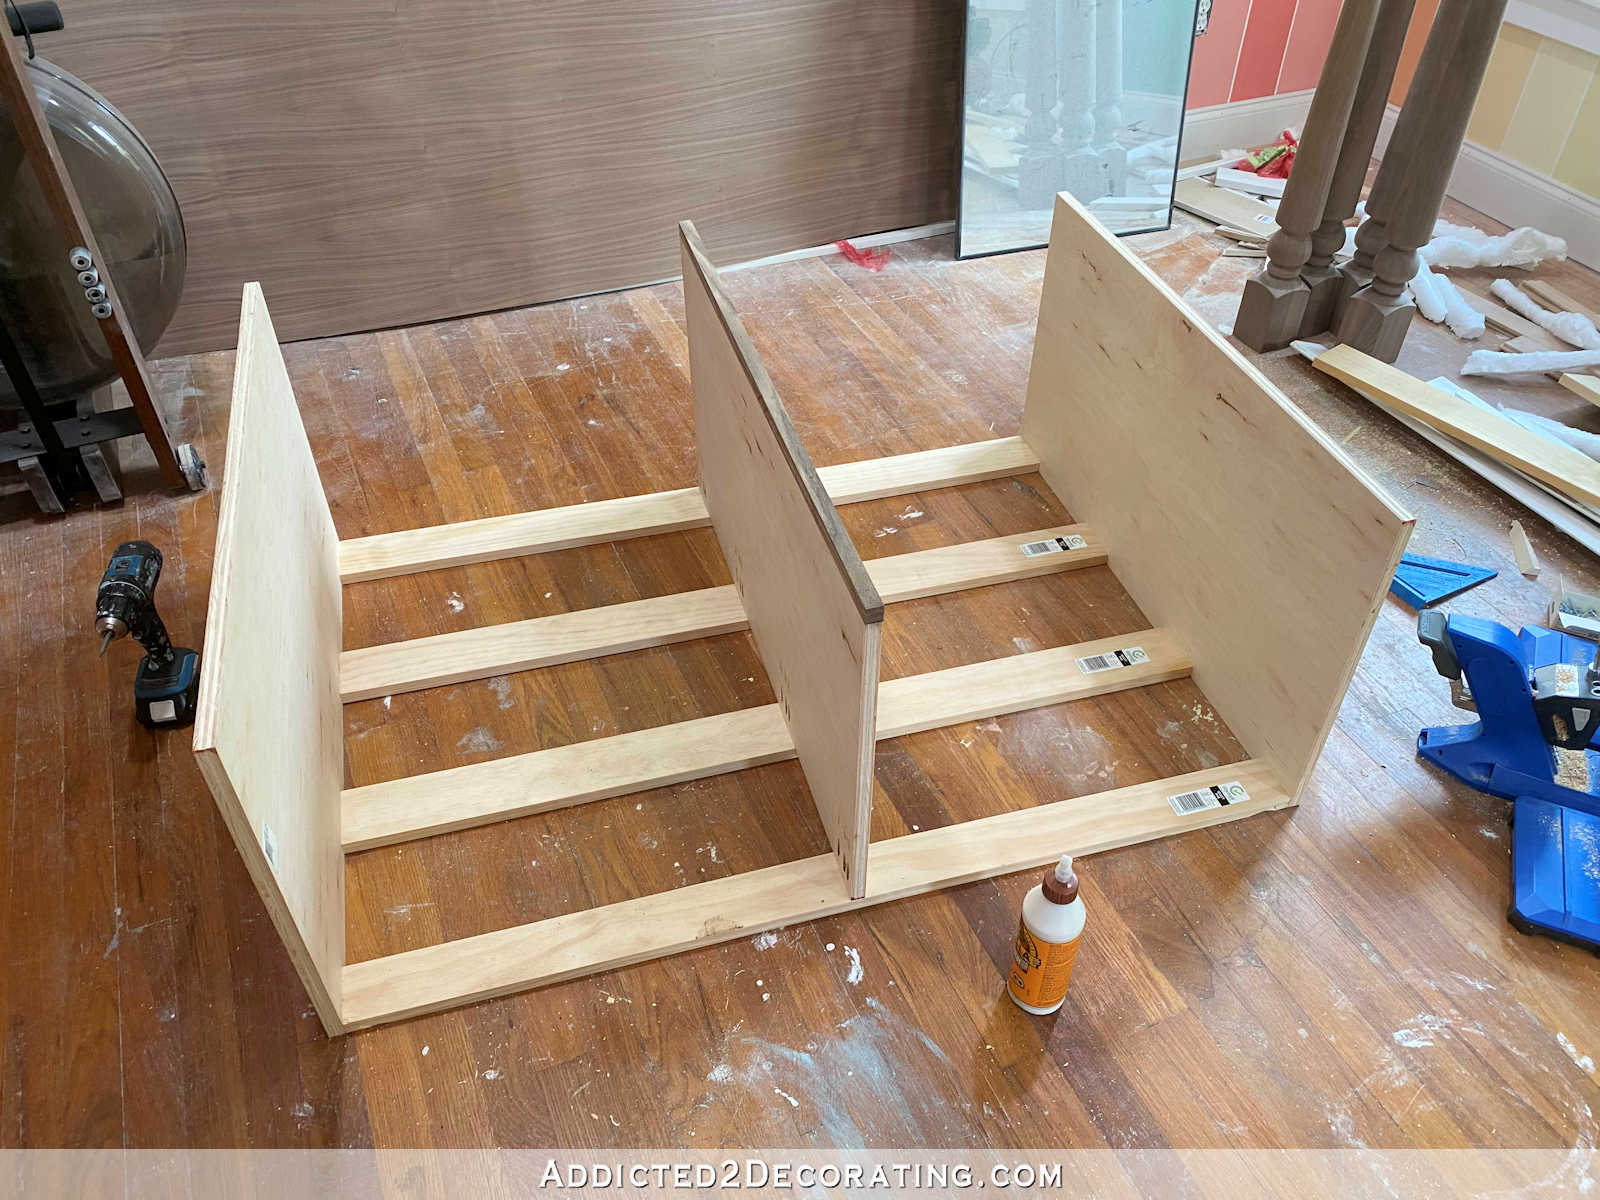
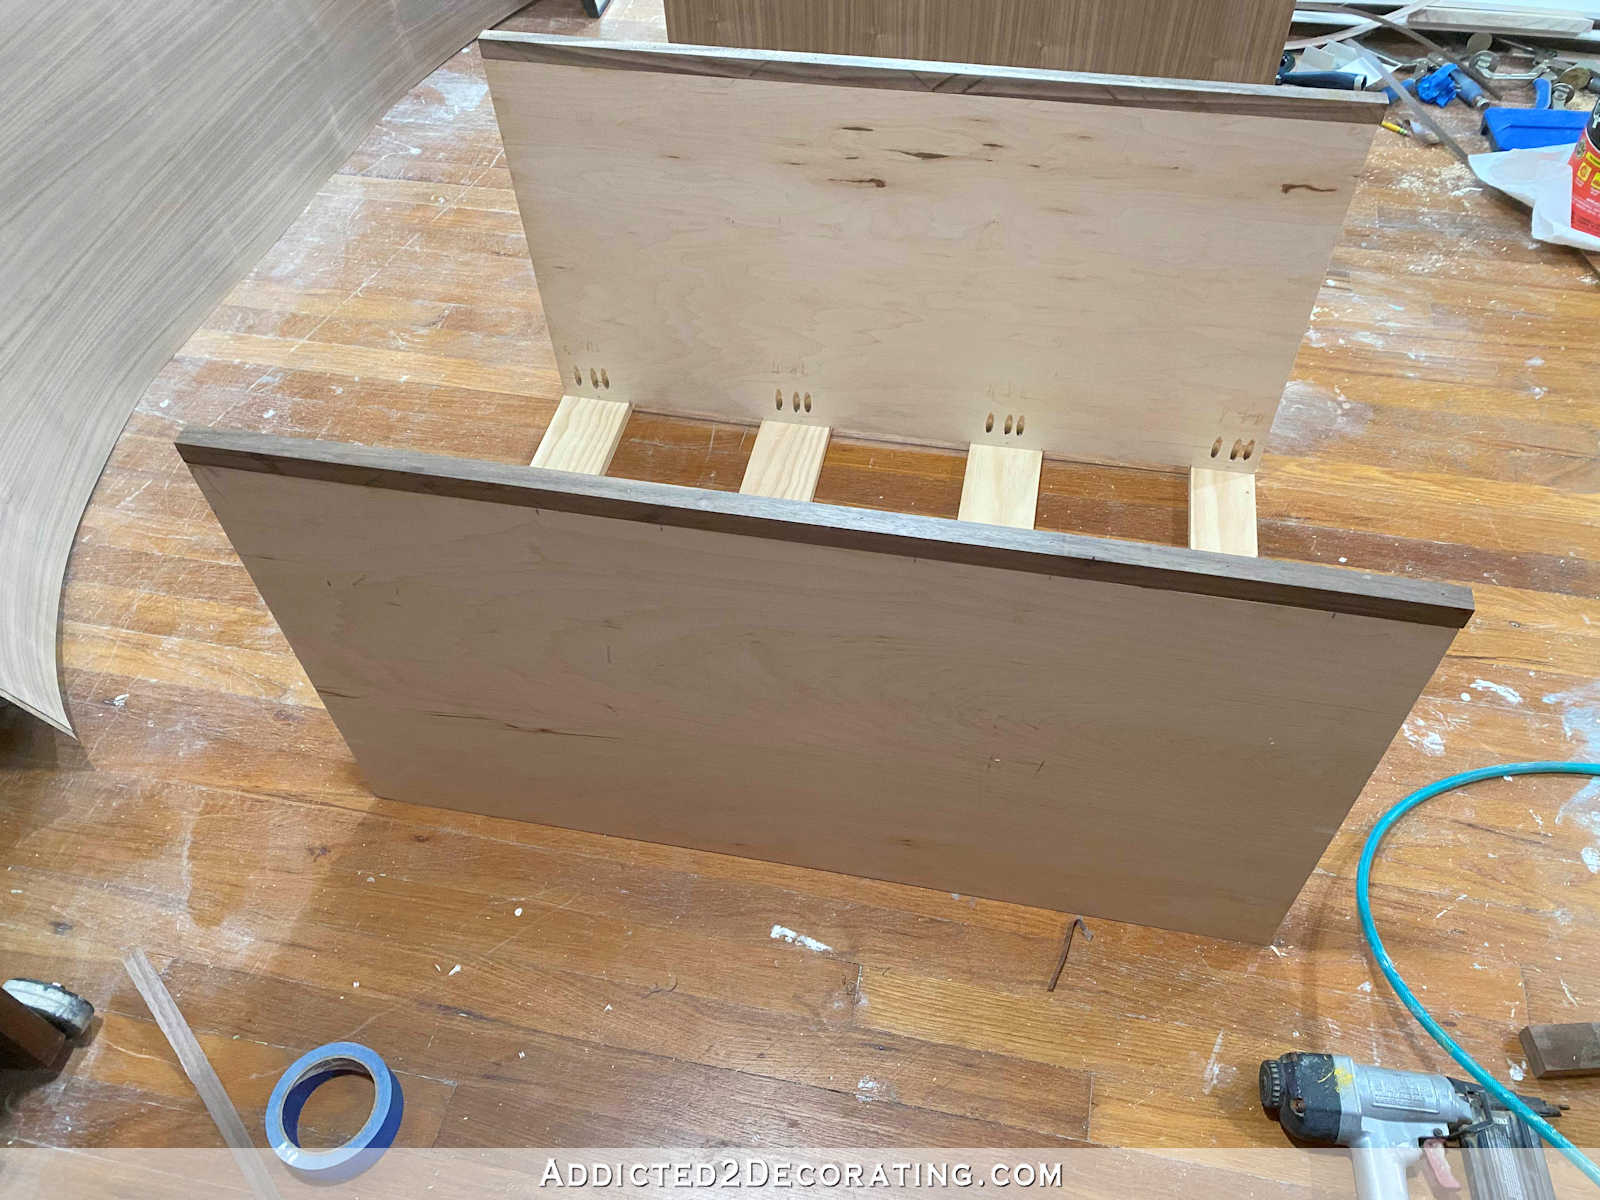
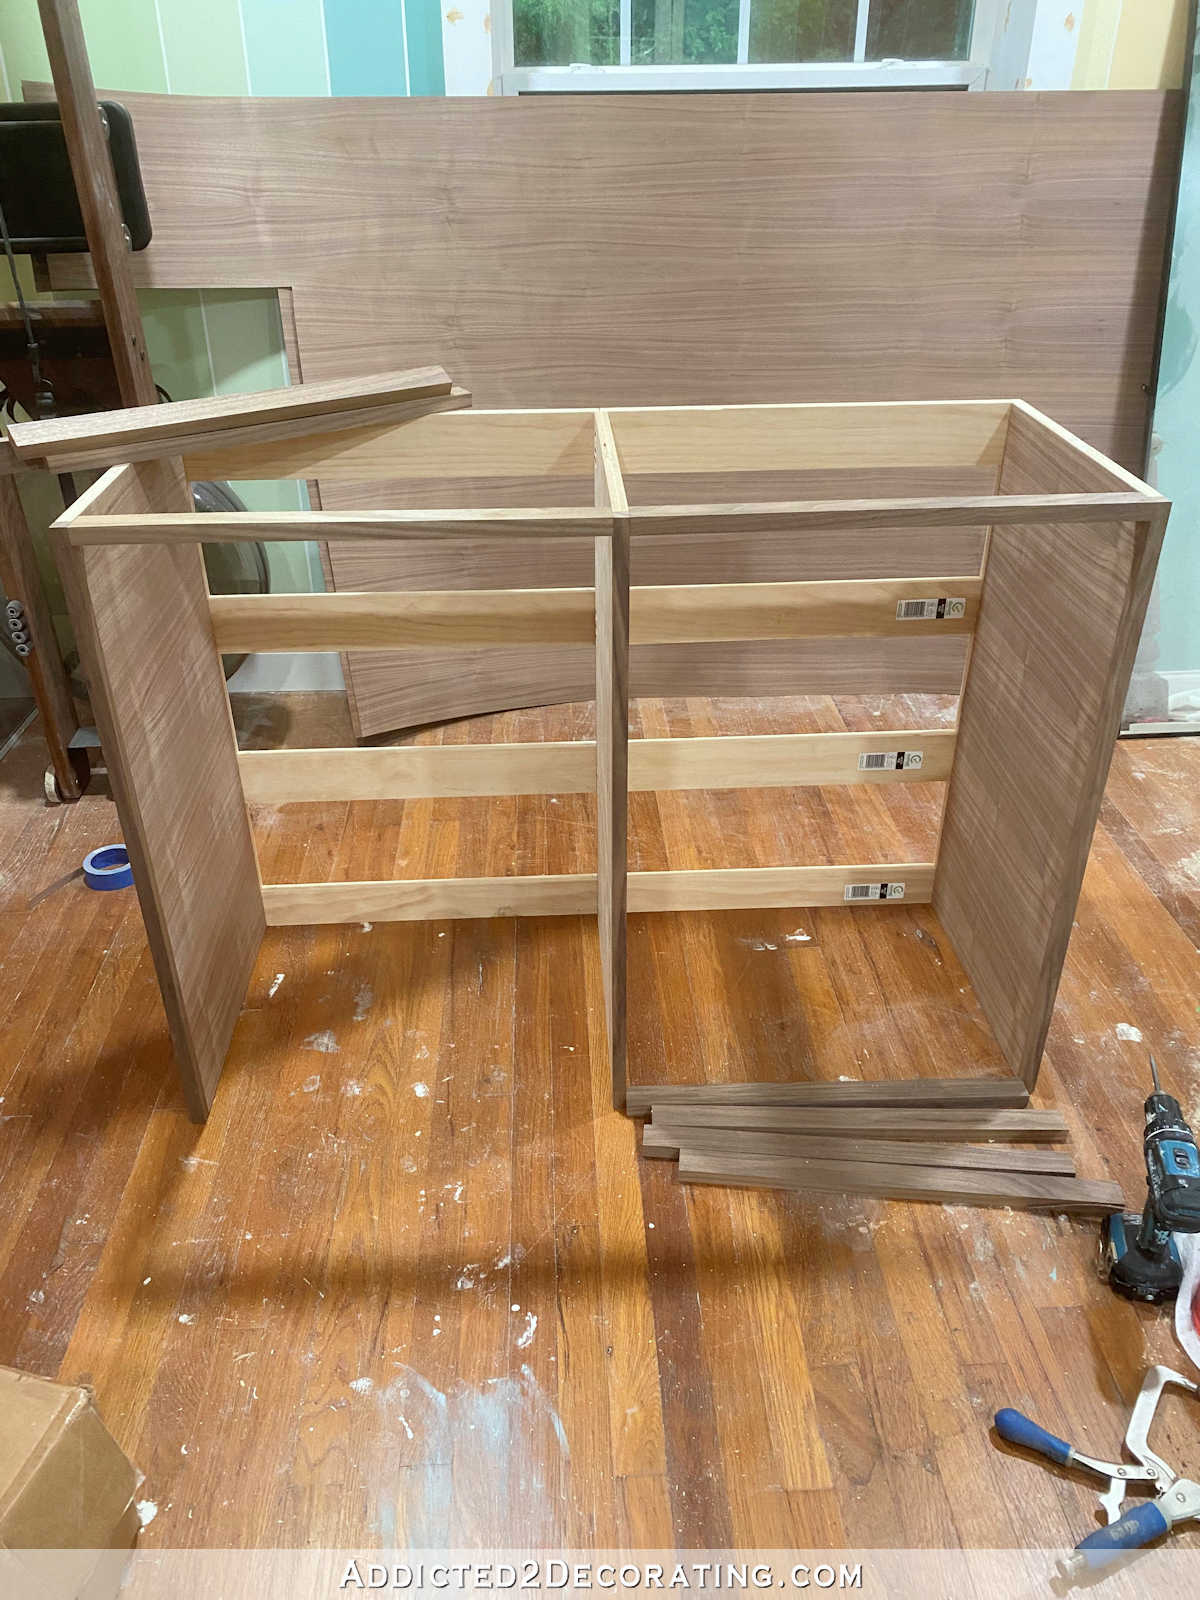
Next, I cut another piece of plywood to section off the two banks of drawers. I cut this piece 35 inches high, but only 17.75 inches wide (the width of the side plywood pieces minus the 3/4 inch for the back boards).
After marking and measuring where the back boards would line up against this plywood, I drilled three pocket holes in each section…
Then I marked the center of each back board, lined up the plywood piece so that it was centered on those marks, and screwed the plywood to the back boards using the pocket holes I just drilled.
Once again, if you use plywood for your backing, you can just space those pocket holes more evenly across the height of the back plywood piece.
Here’s a close up look at these assembled pieces…
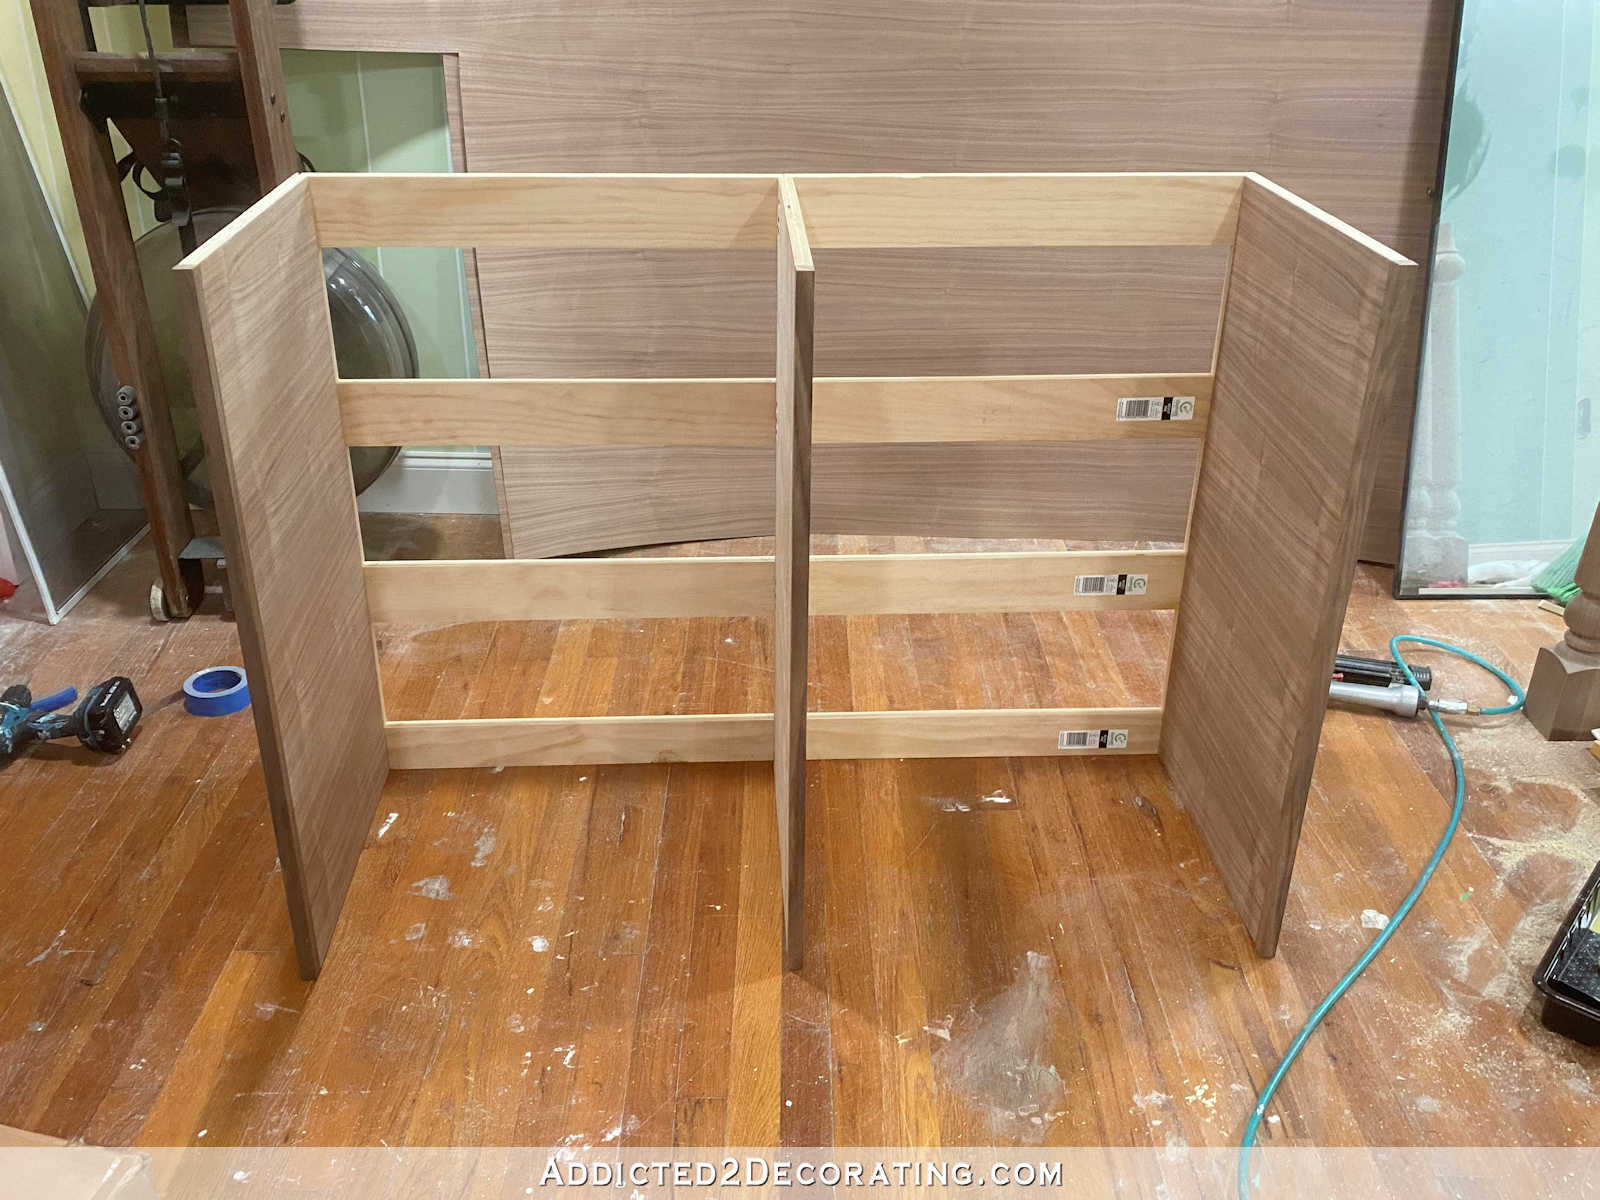
And here’s what the whole carcass looked like at this point…
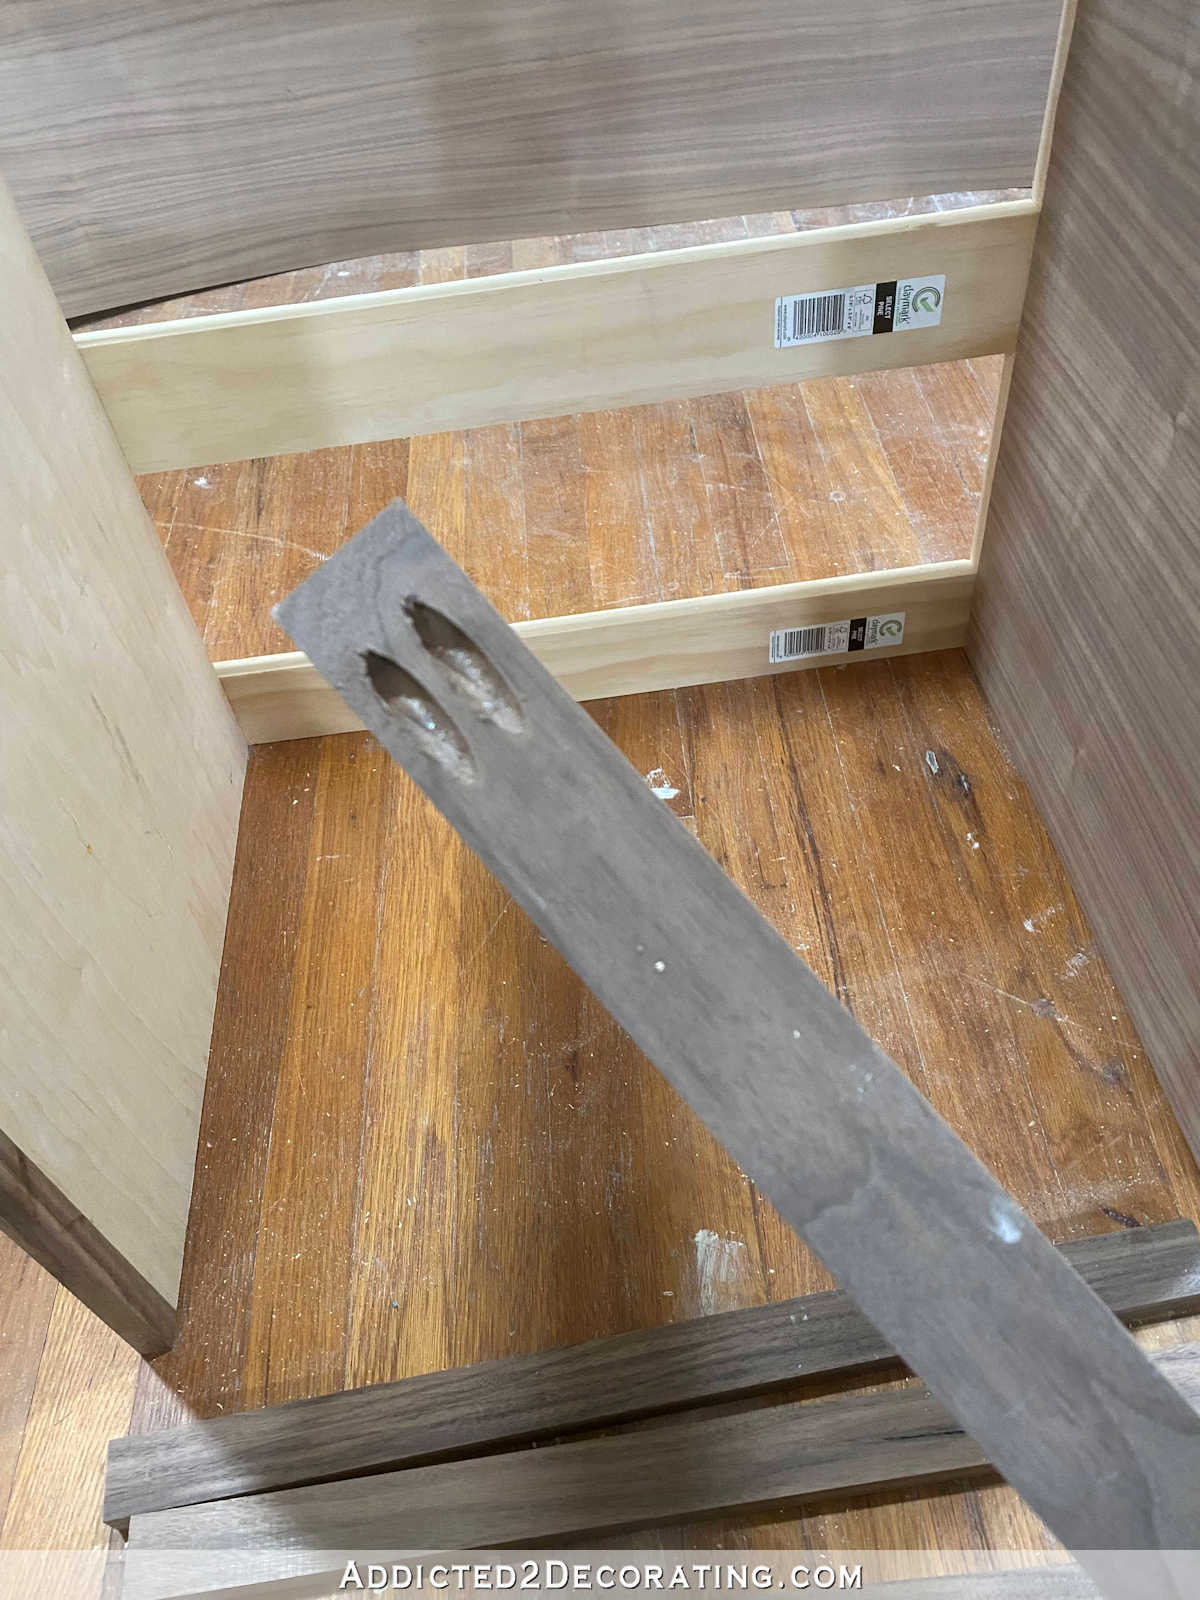
Next, I used my table saw to rip a piece of 1-inch lumber down to fit onto the edge of the plywood. Using my miter saw, I cut it to length, and then attached it using wood glue and 1.5-inch 18-gauge nails in my nail gun.
Here’s how that looked…
Before attaching walnut to the edges of the outer plywood pieces, I needed to veneer the insides of those pieces.
Two things to note:
(1) Yes, it would have been easier to veneer these pieces before assembling the carcass, and if you can do that, I suggest doing it that way. The reason I didn’t is because plywood and veneer need at least 24-48 hours to acclimate in the same room before putting them together. My plywood hadn’t acclimated that long, but I didn’t want that to stop me from making progress. So I started the build, and then applied the veneer as soon as I could in the process. But if you can apply this piece of veneer before attaching it to the back, that’s preferable.
(2) I put the plywood on the inside with the grain going horizontally in order to not waste veneer. This won’t show on the finished cabinet, so I’m not really worried about the grain going the wrong way. But I did want to veneer it because it’s best practice to veneer both sides to minimize the chances of the plywood warping.
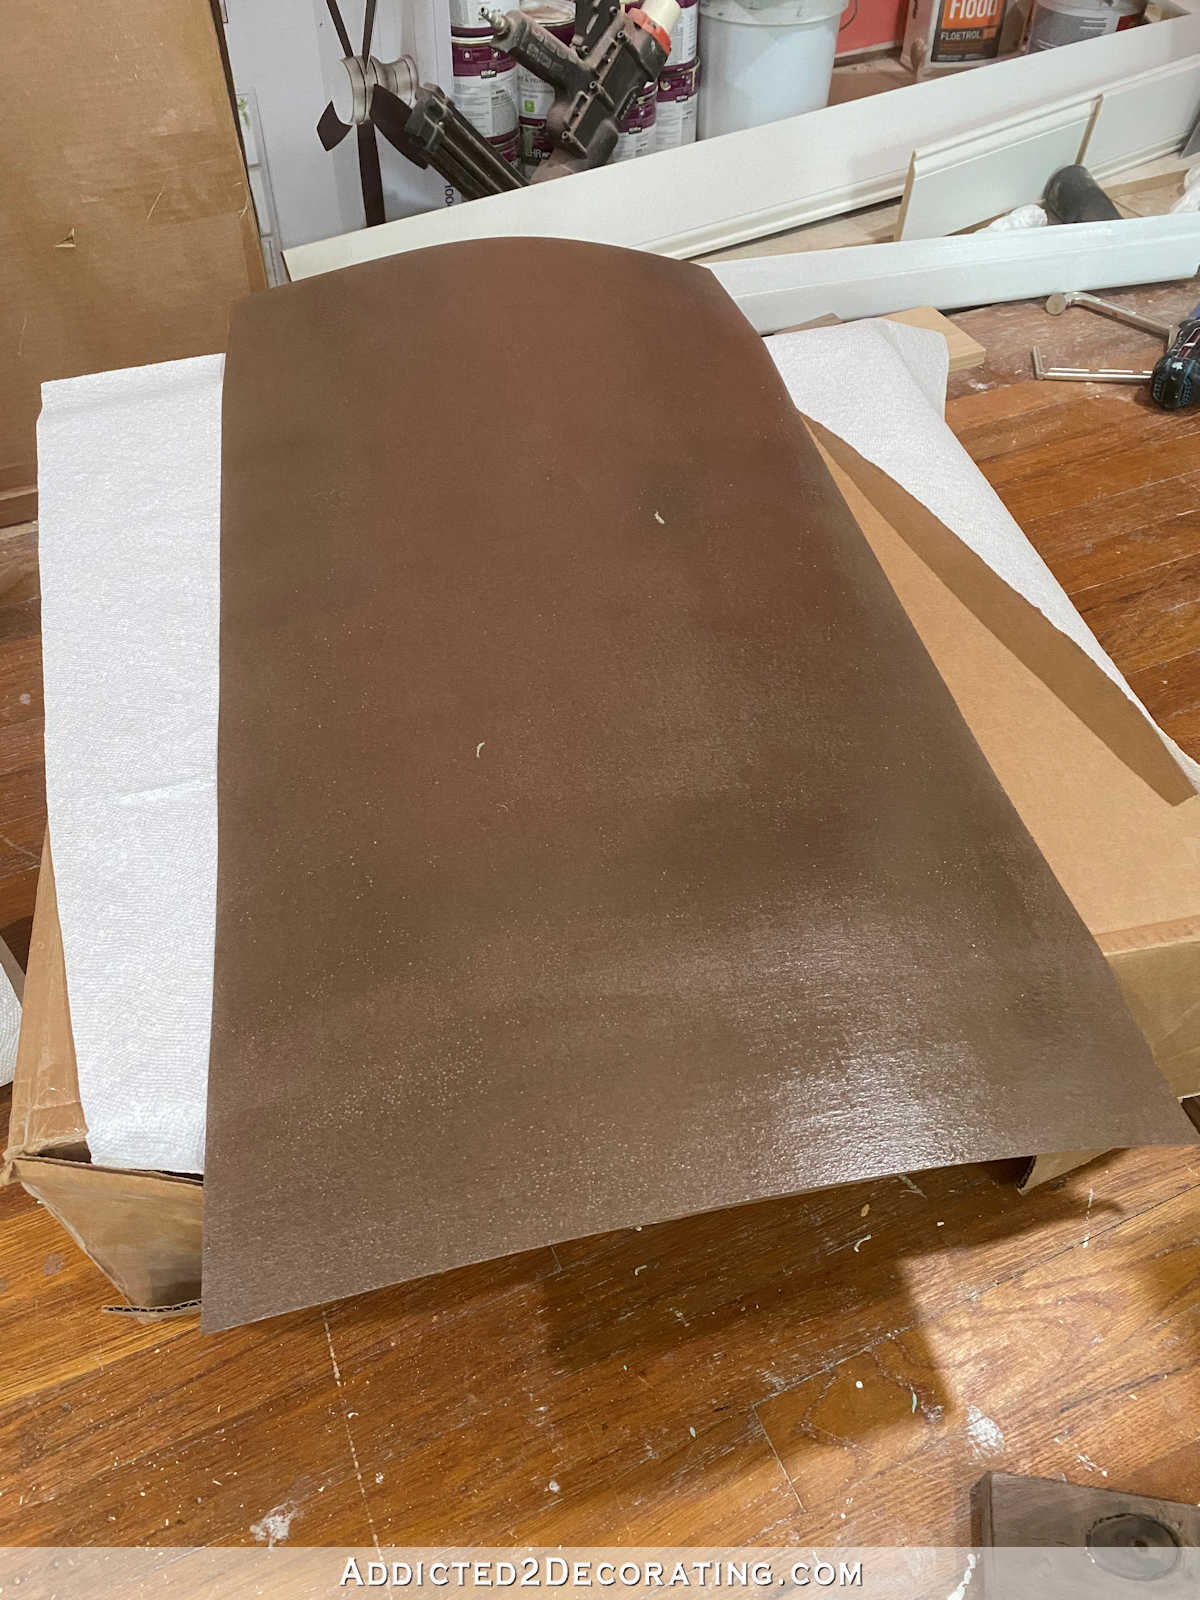
So, with all of that said, I cut a piece of veneer for the inside of each side plywood piece. I cut them so that they were just a bit larger than the plywood. To attach the veneer, I used Weldwood Contact Cement, applying it with a 4-inch roller to the plywood and to the back of the veneer.
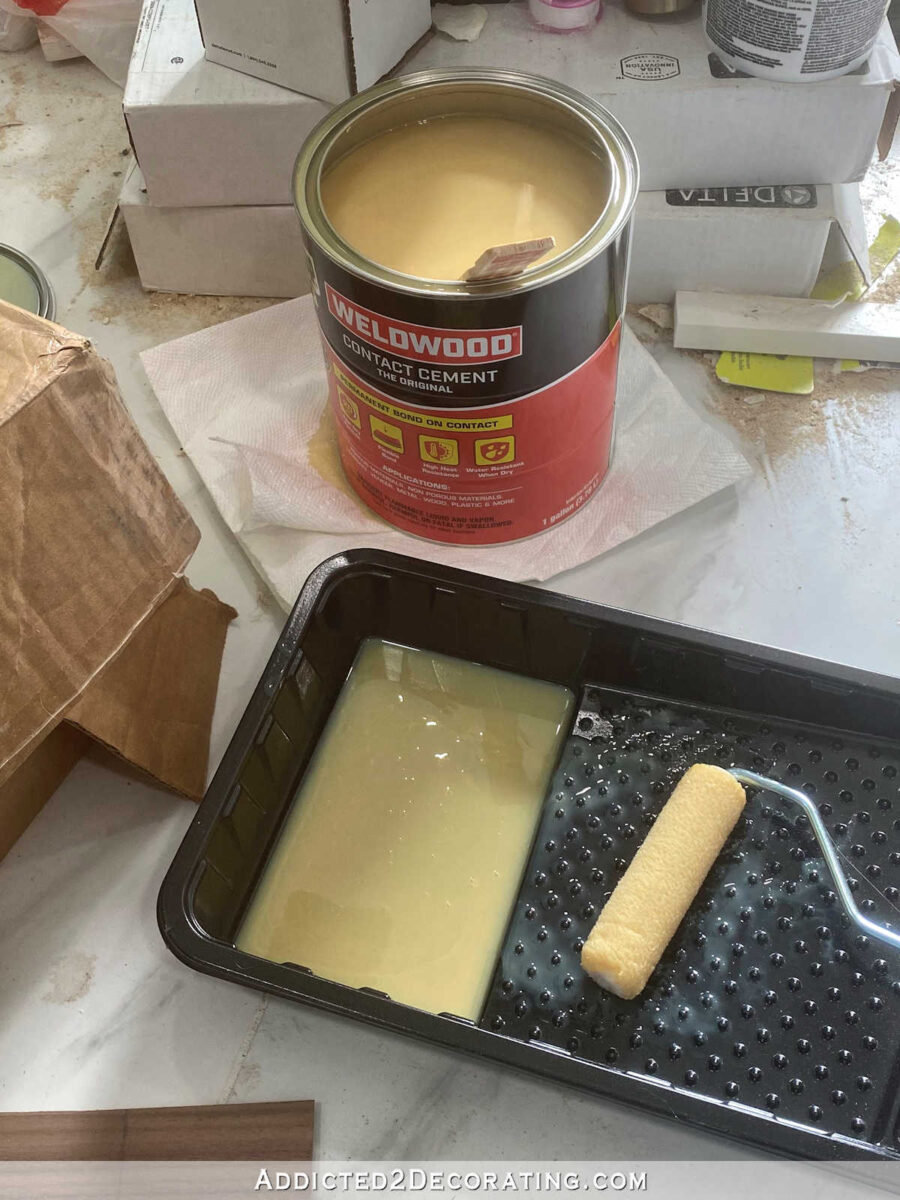
I used two coats on each, letting the first coat dry thoroughly before applying the second coat. When it’s dry enough, it gets shiny, but it isn’t sticky when you touch it.
Then with the cabinet lying on its side, I carefully applied that veneer to the inside of the side piece, and burnished it with a scrap block of walnut (not the long piece you see in the photo below) to get all of the air bubbles and ridges of contact cement out.

This is the piece of walnut that I used to get all of the air bubbles and glue ridges out from the veneer.
I sanded it to remove all of the really sharp edges first so that it wouldn’t leave any scrapes or gouges in the veneer, and it worked wonderfully.
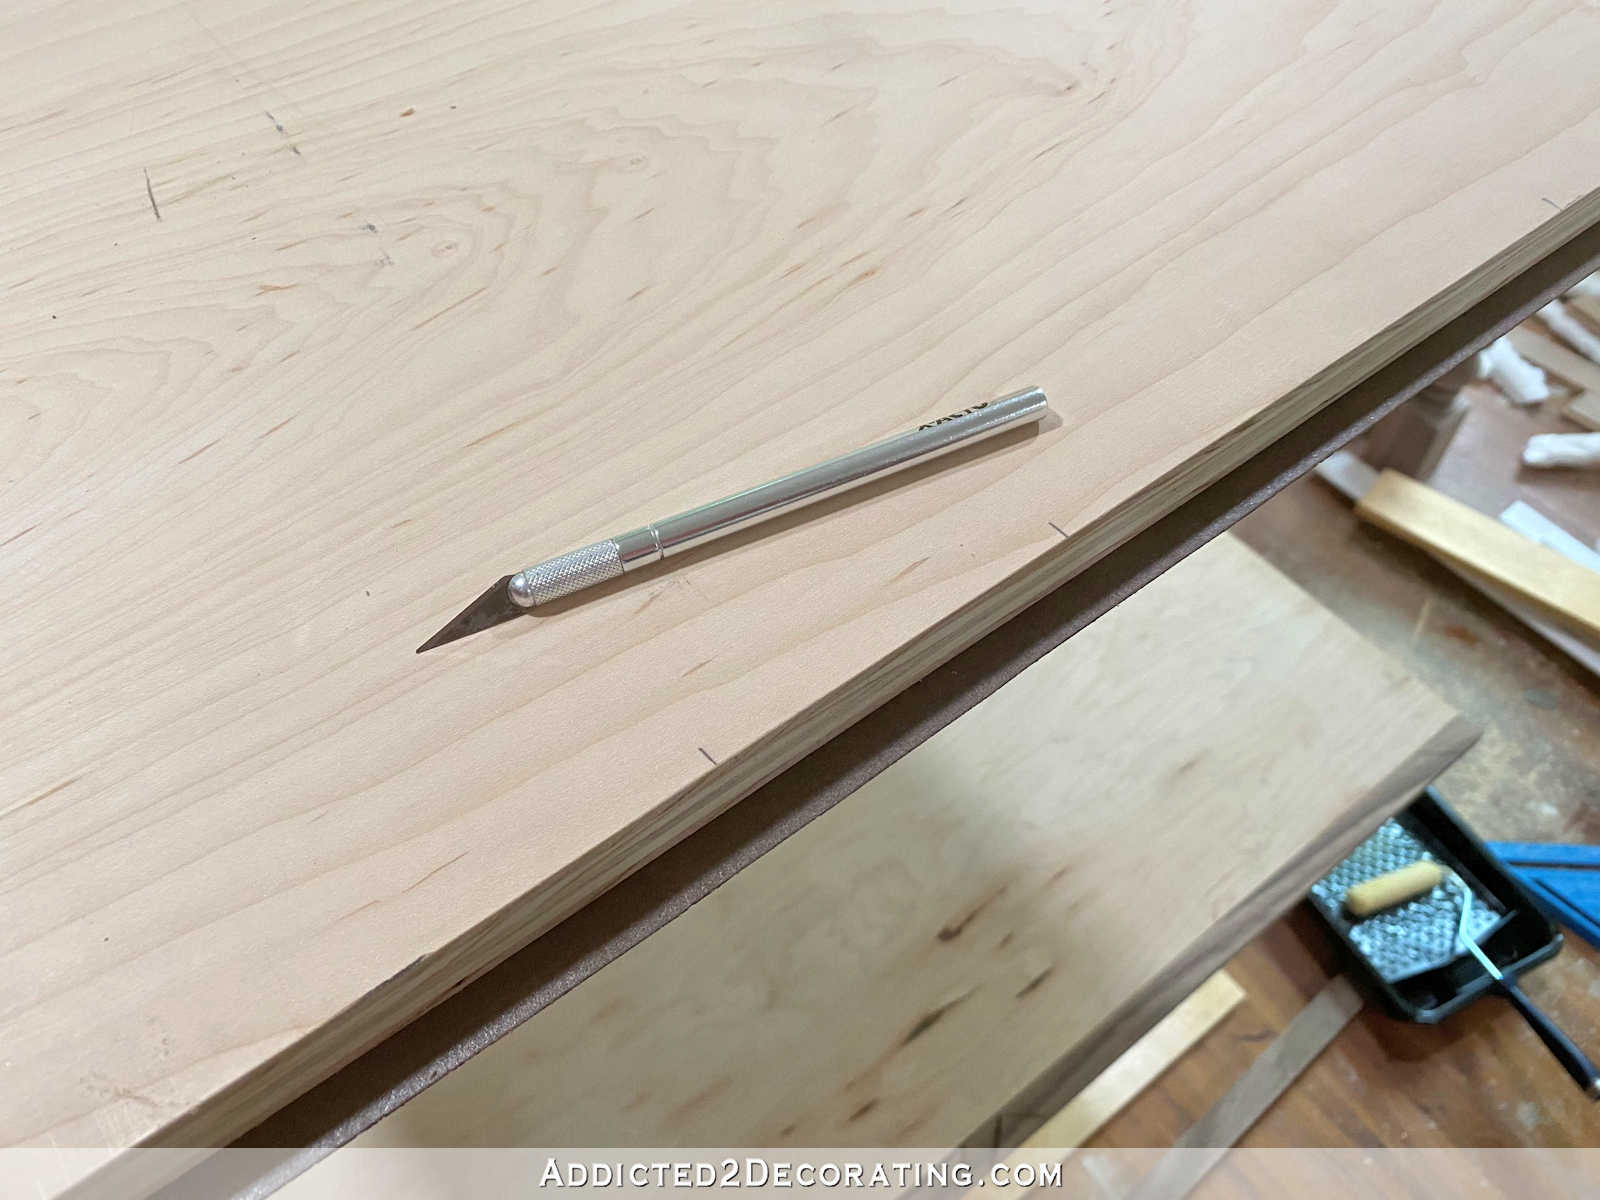
Next, I flipped the cabinet onto the other end and rolled the contact cement onto the veneer and the plywood. While those were drying, I used my X-Acto knife with a new blade to trim off the excess veneer from the first side that I had veneered.
With both of the inside side panels veneered and trimmed, this is what it looked like…

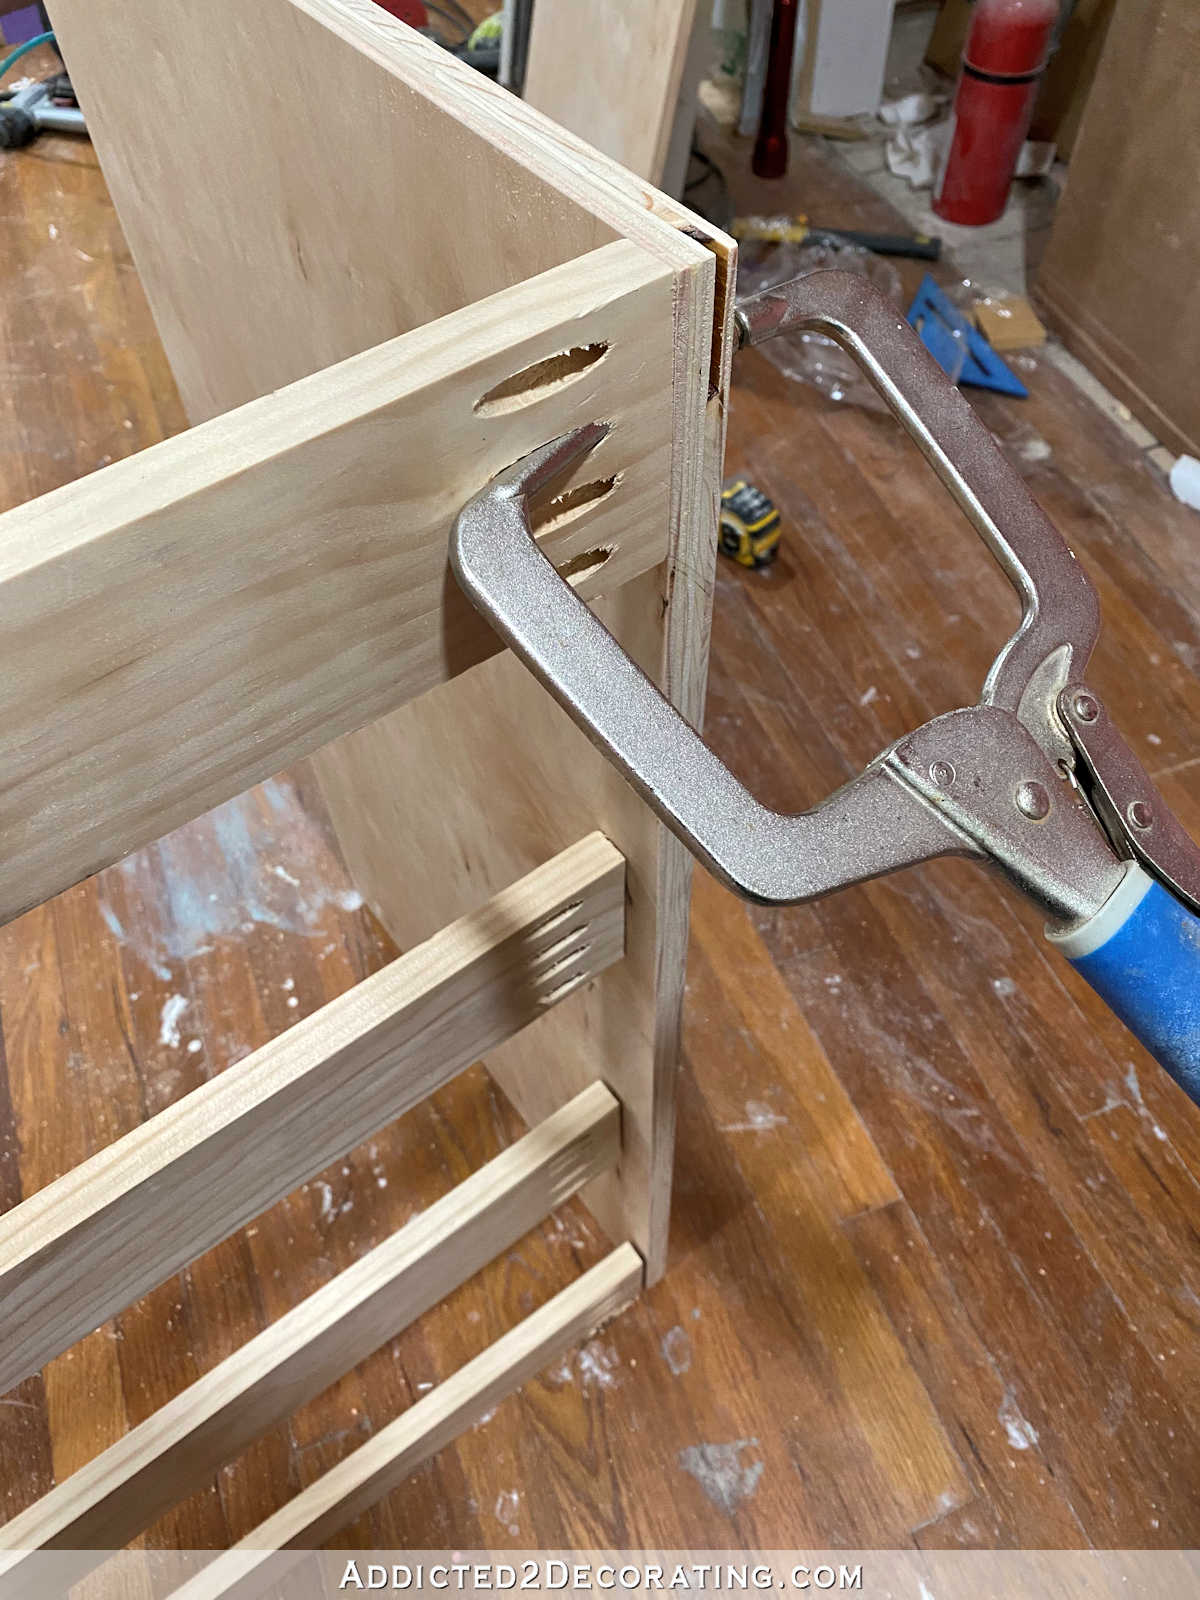
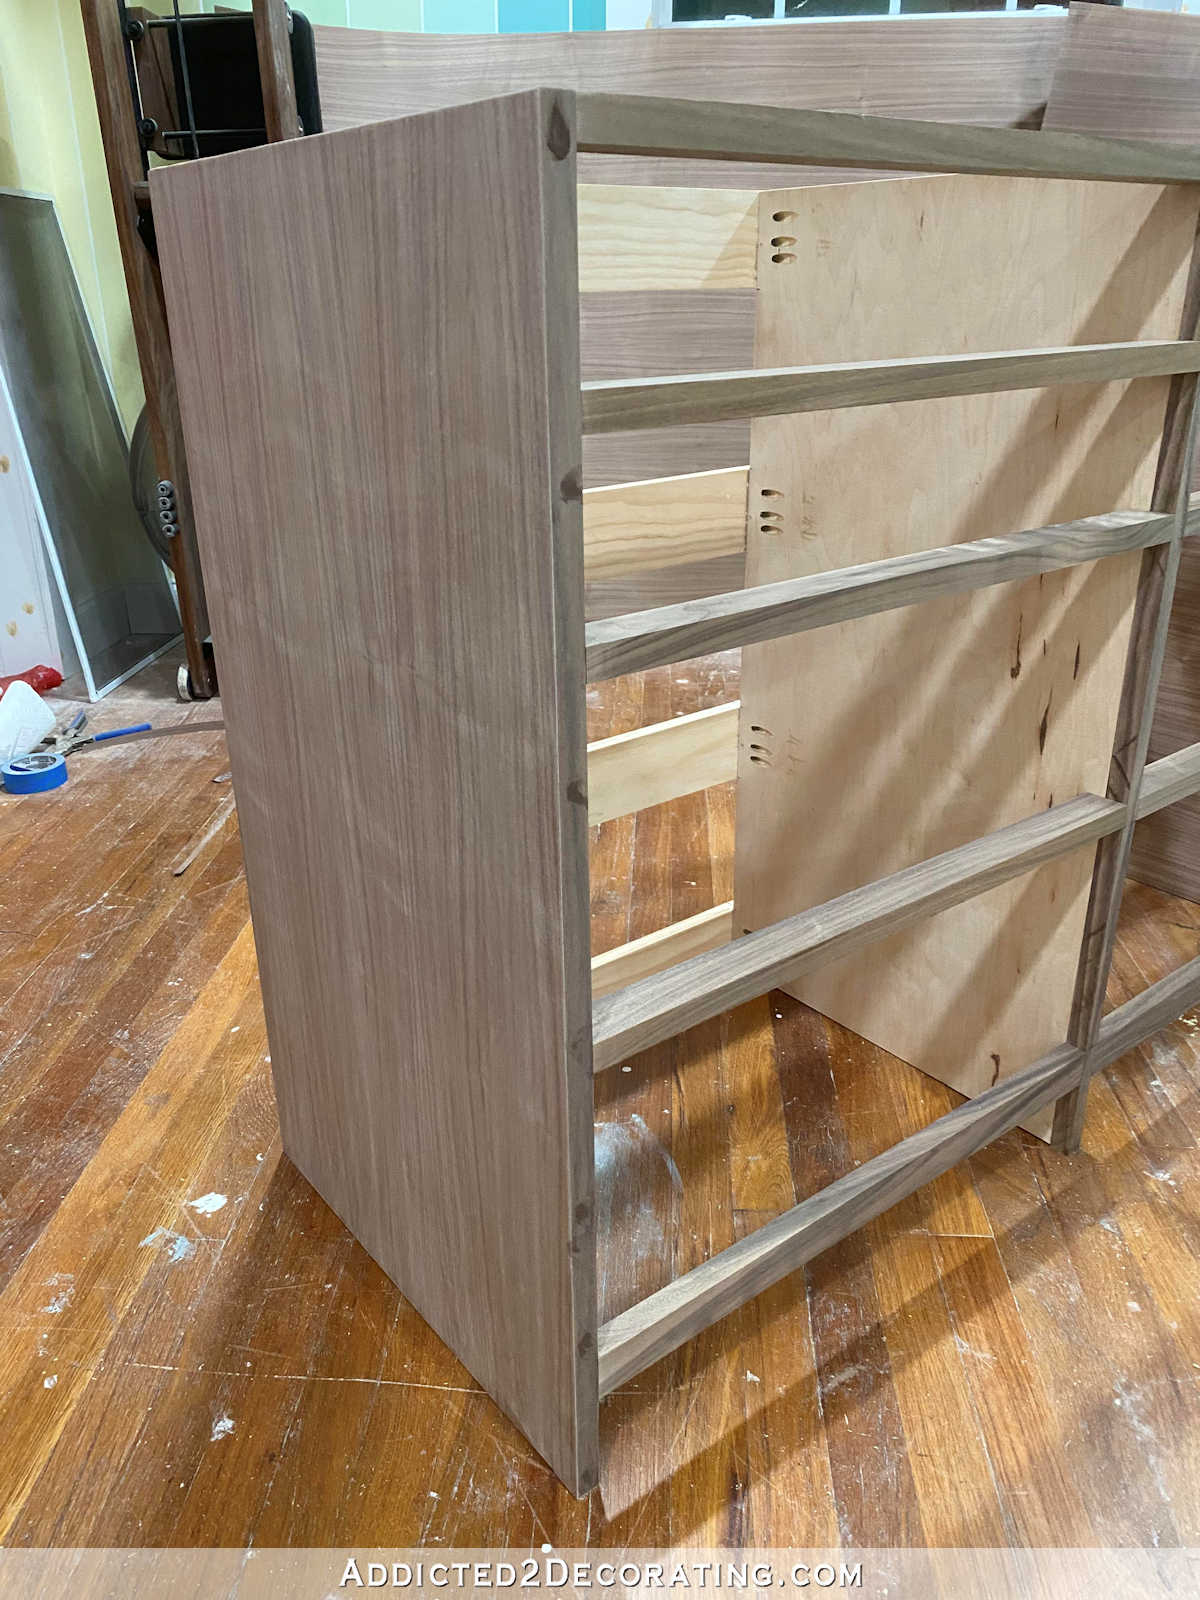
Then I placed the cabinet on its back, and attached the pieces of walnut to the edges of the side plywood pieces in the same way I did the center piece.
Here’s what the carcass looked like with those pieces attached to all three plywood pieces…
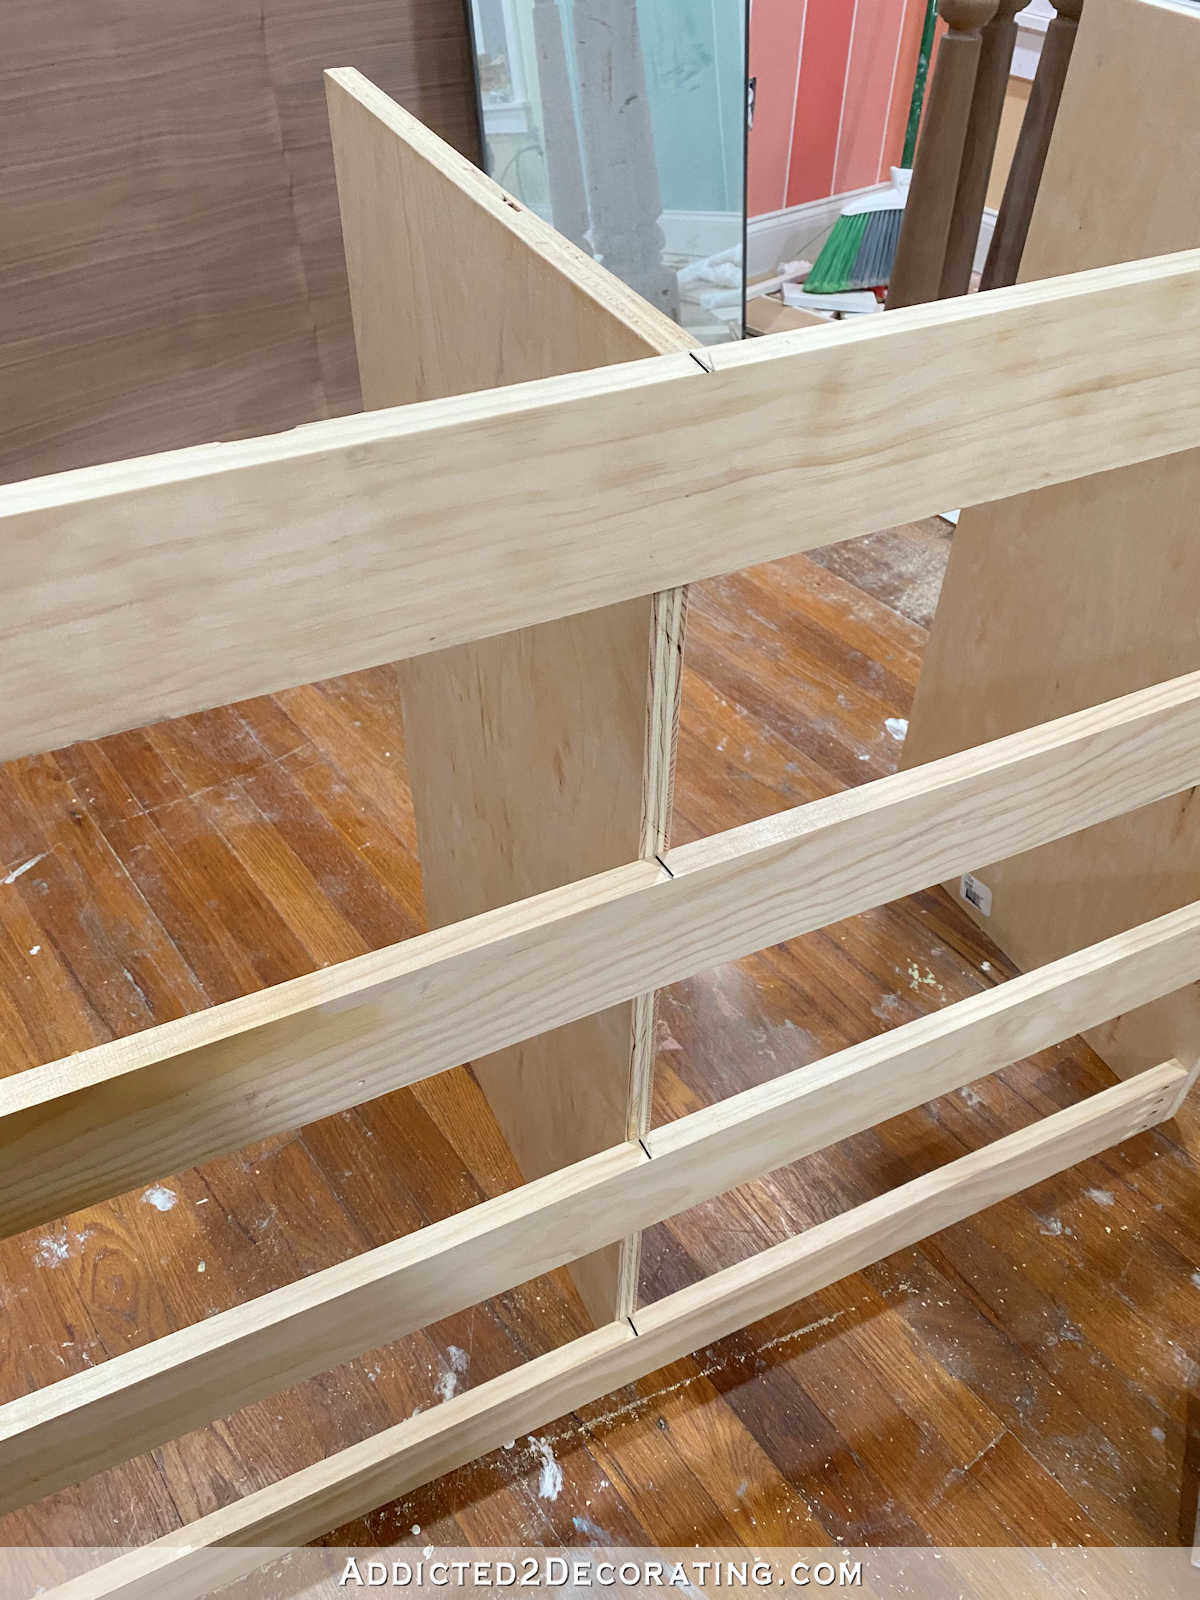
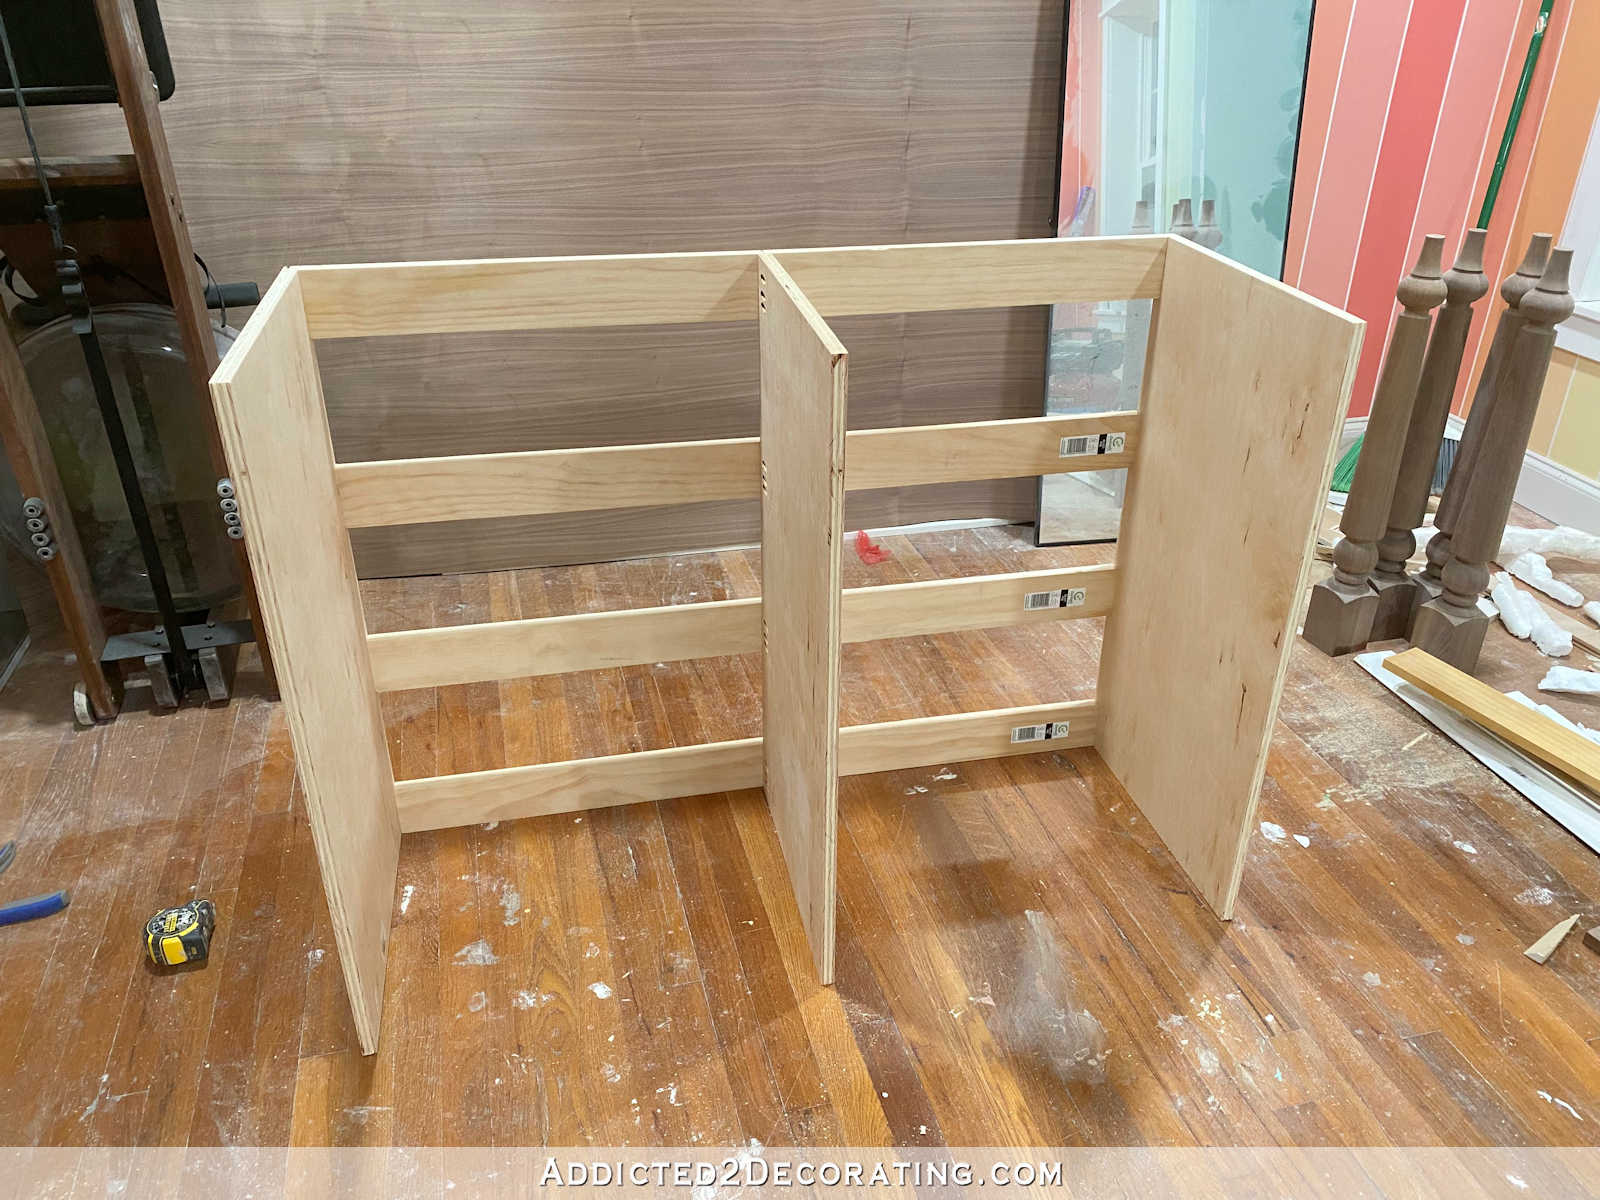
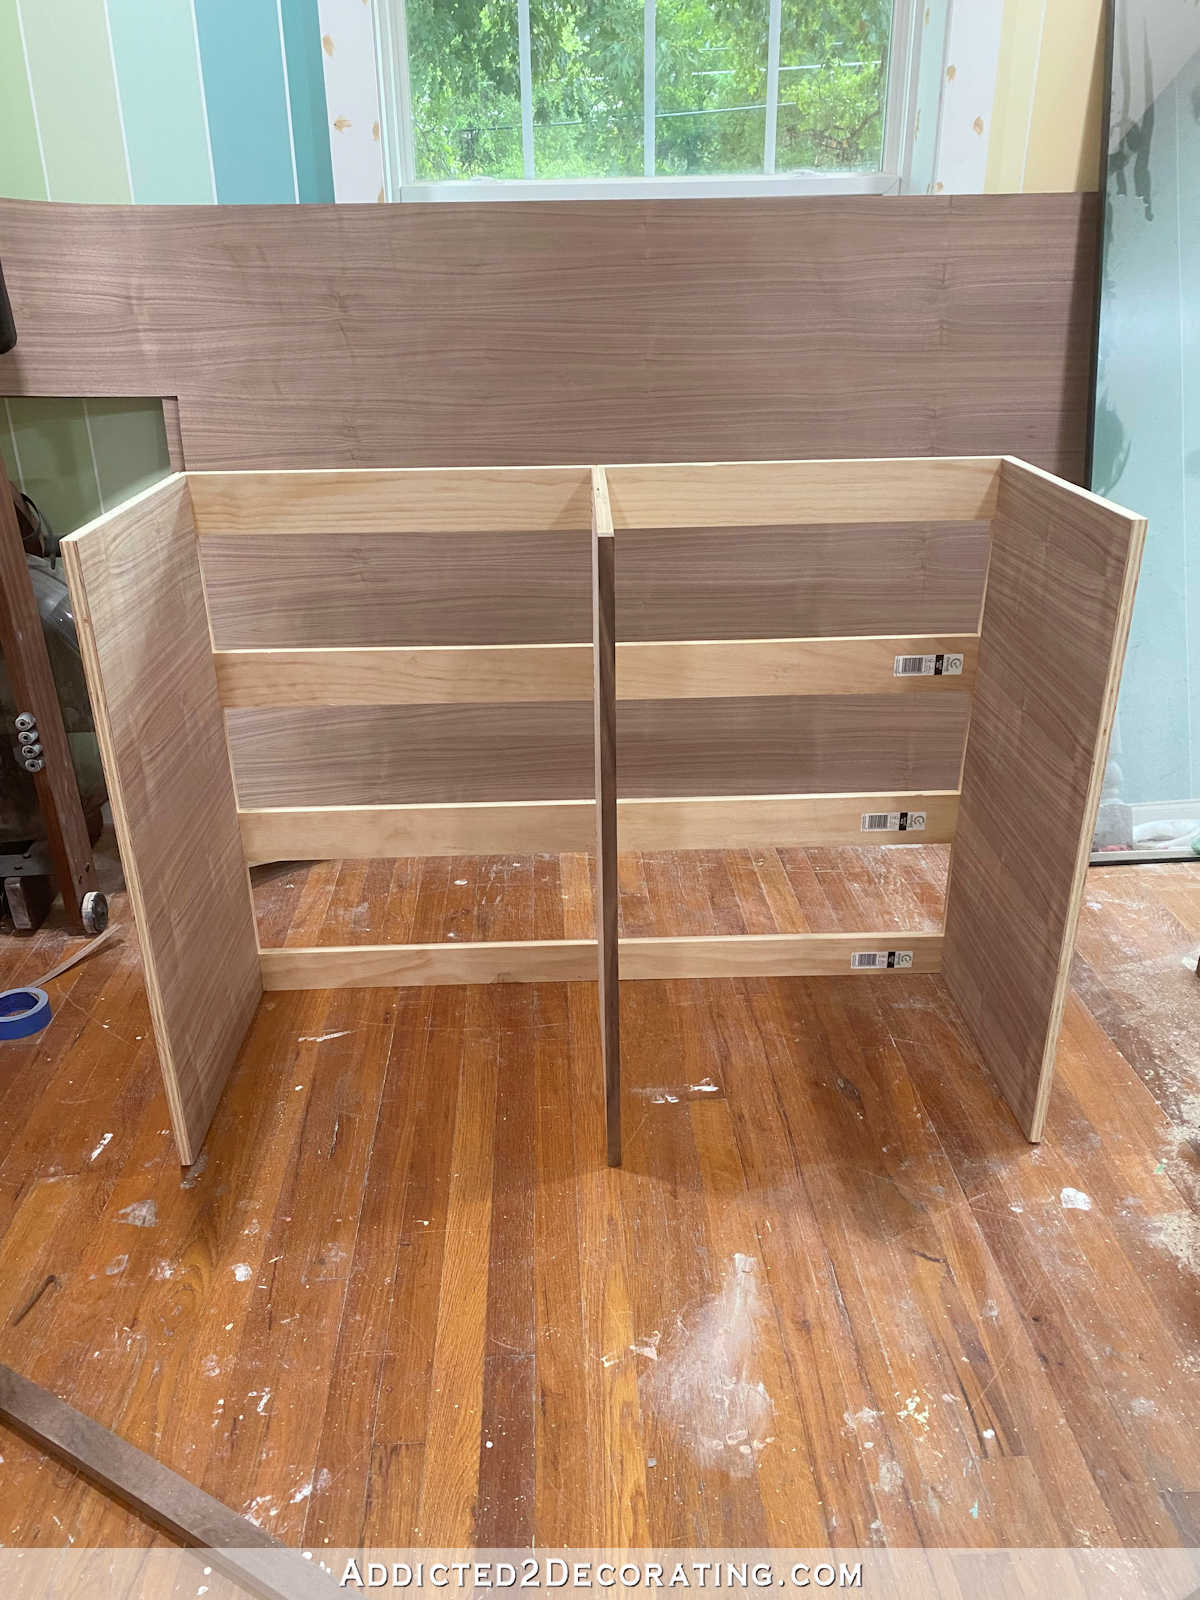
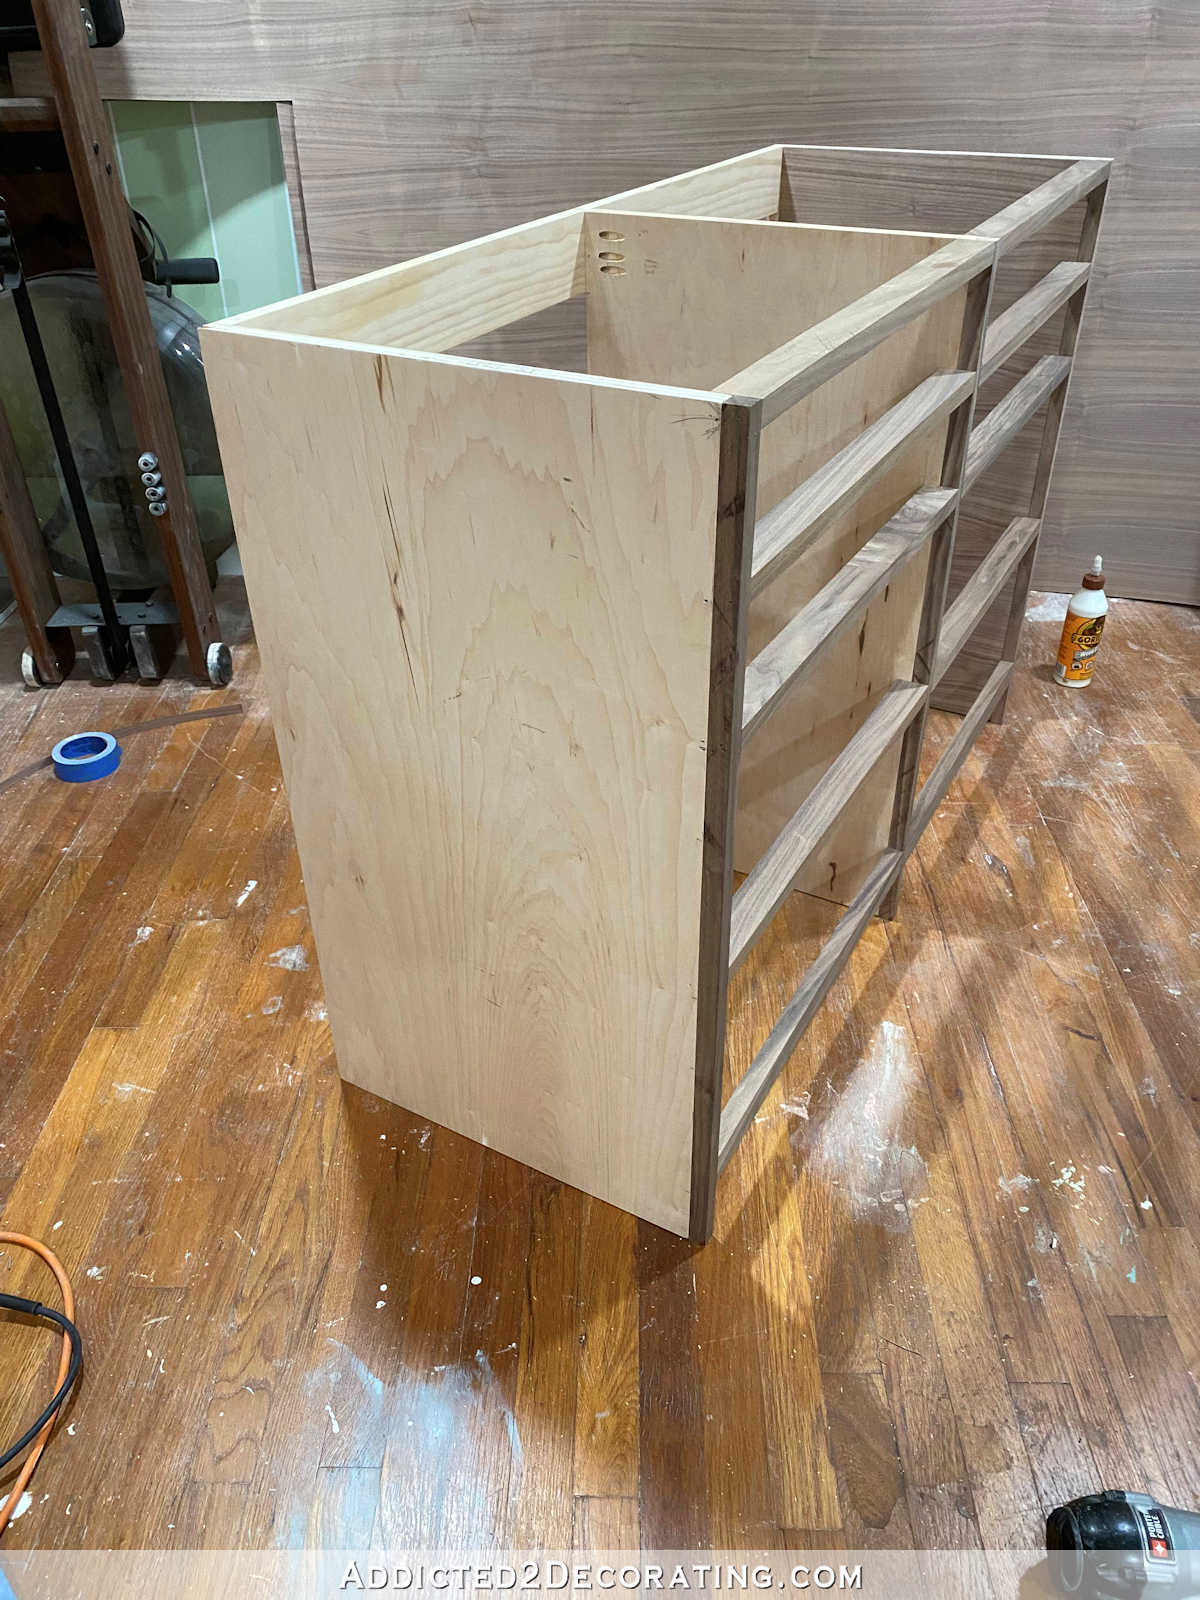
At this point, I was ready to attach the rails to create the individual sections for the drawers. I cut these out of 1″ x 2″ walnut lumber, and with the cabinet standing upright and working from top to bottom, I attached the rails in the left section using 1.5-inch 16-gauge nails shot through the plywood on each side and into the ends of the 1″ x 2″.
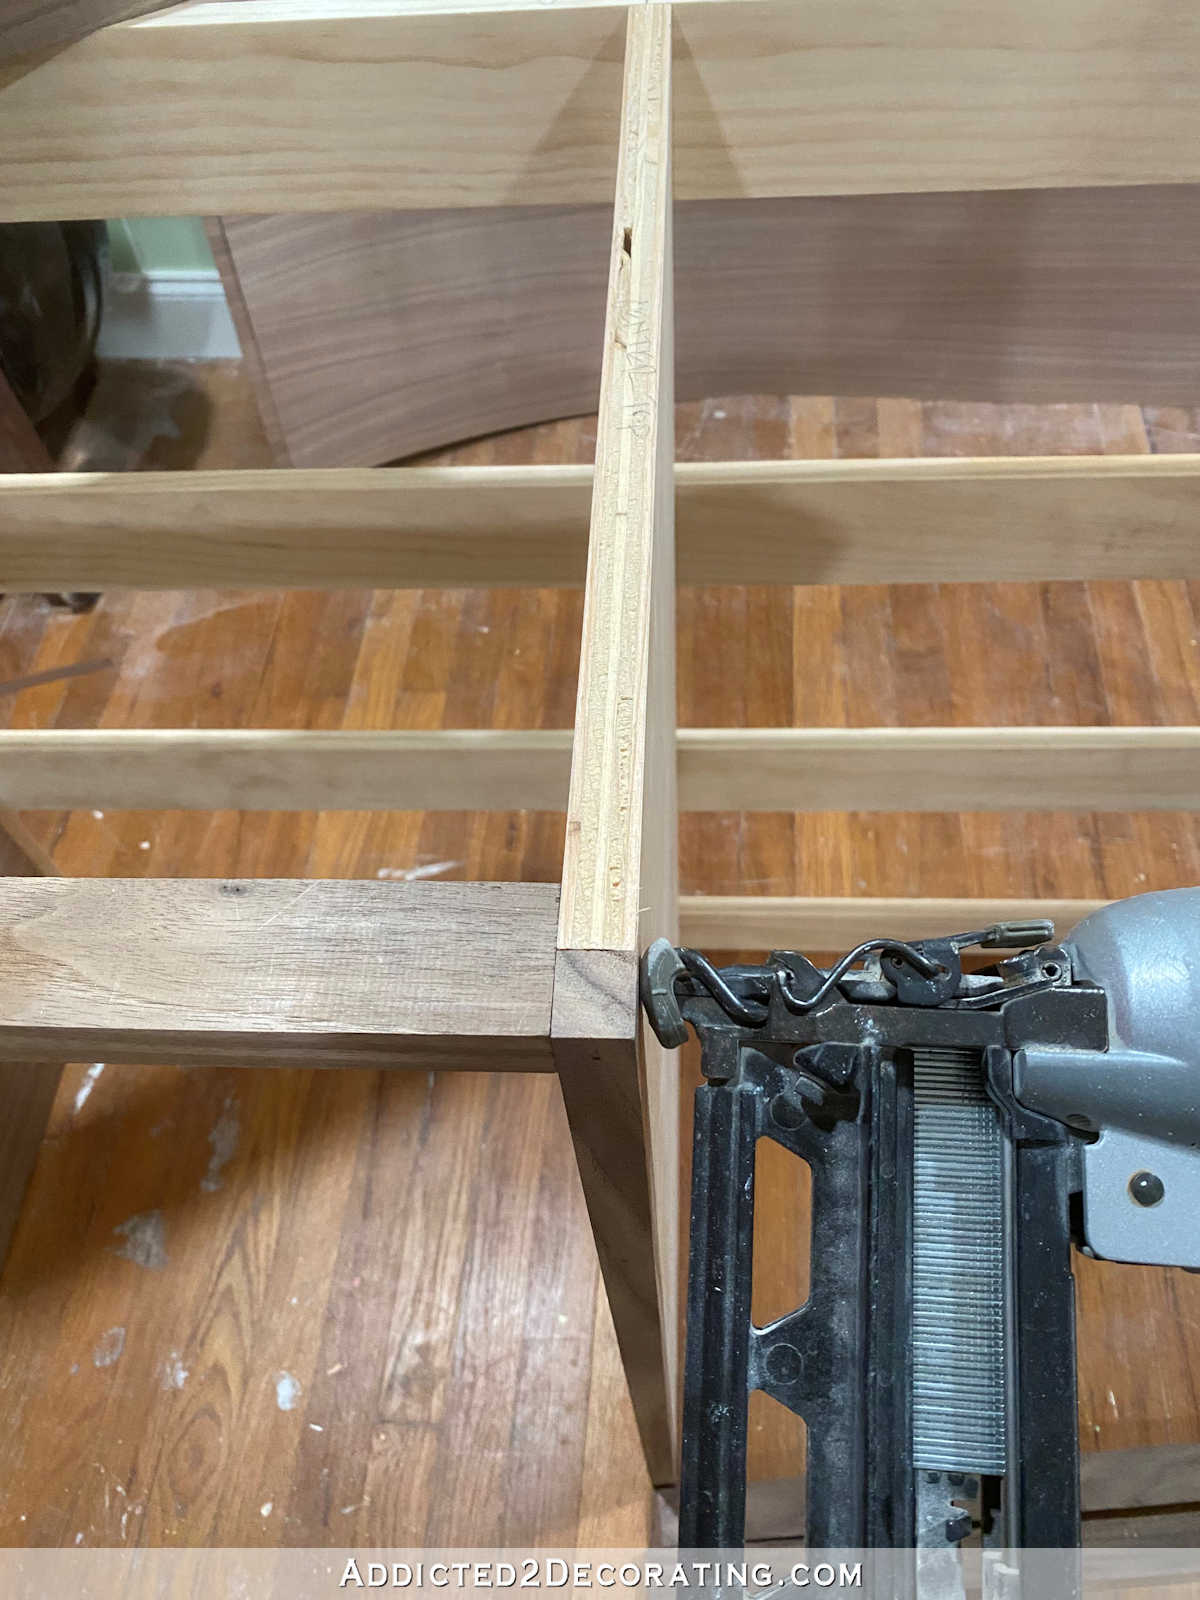
I attached them so that the thin edge was facing forward, and the wider side was facing up so that the width of the rails would match the thickness of the walnut-edged plywood pieces.
All of the rails in the left section could be attached in the same way with a nail gun, but for the right section, I could only attach the outer side with the nail gun (since I couldn’t nail through the center plywood piece with a rail in my way). The inside had to be attached using pocket screws, so I had to drill pocket holes into one end of those rails.

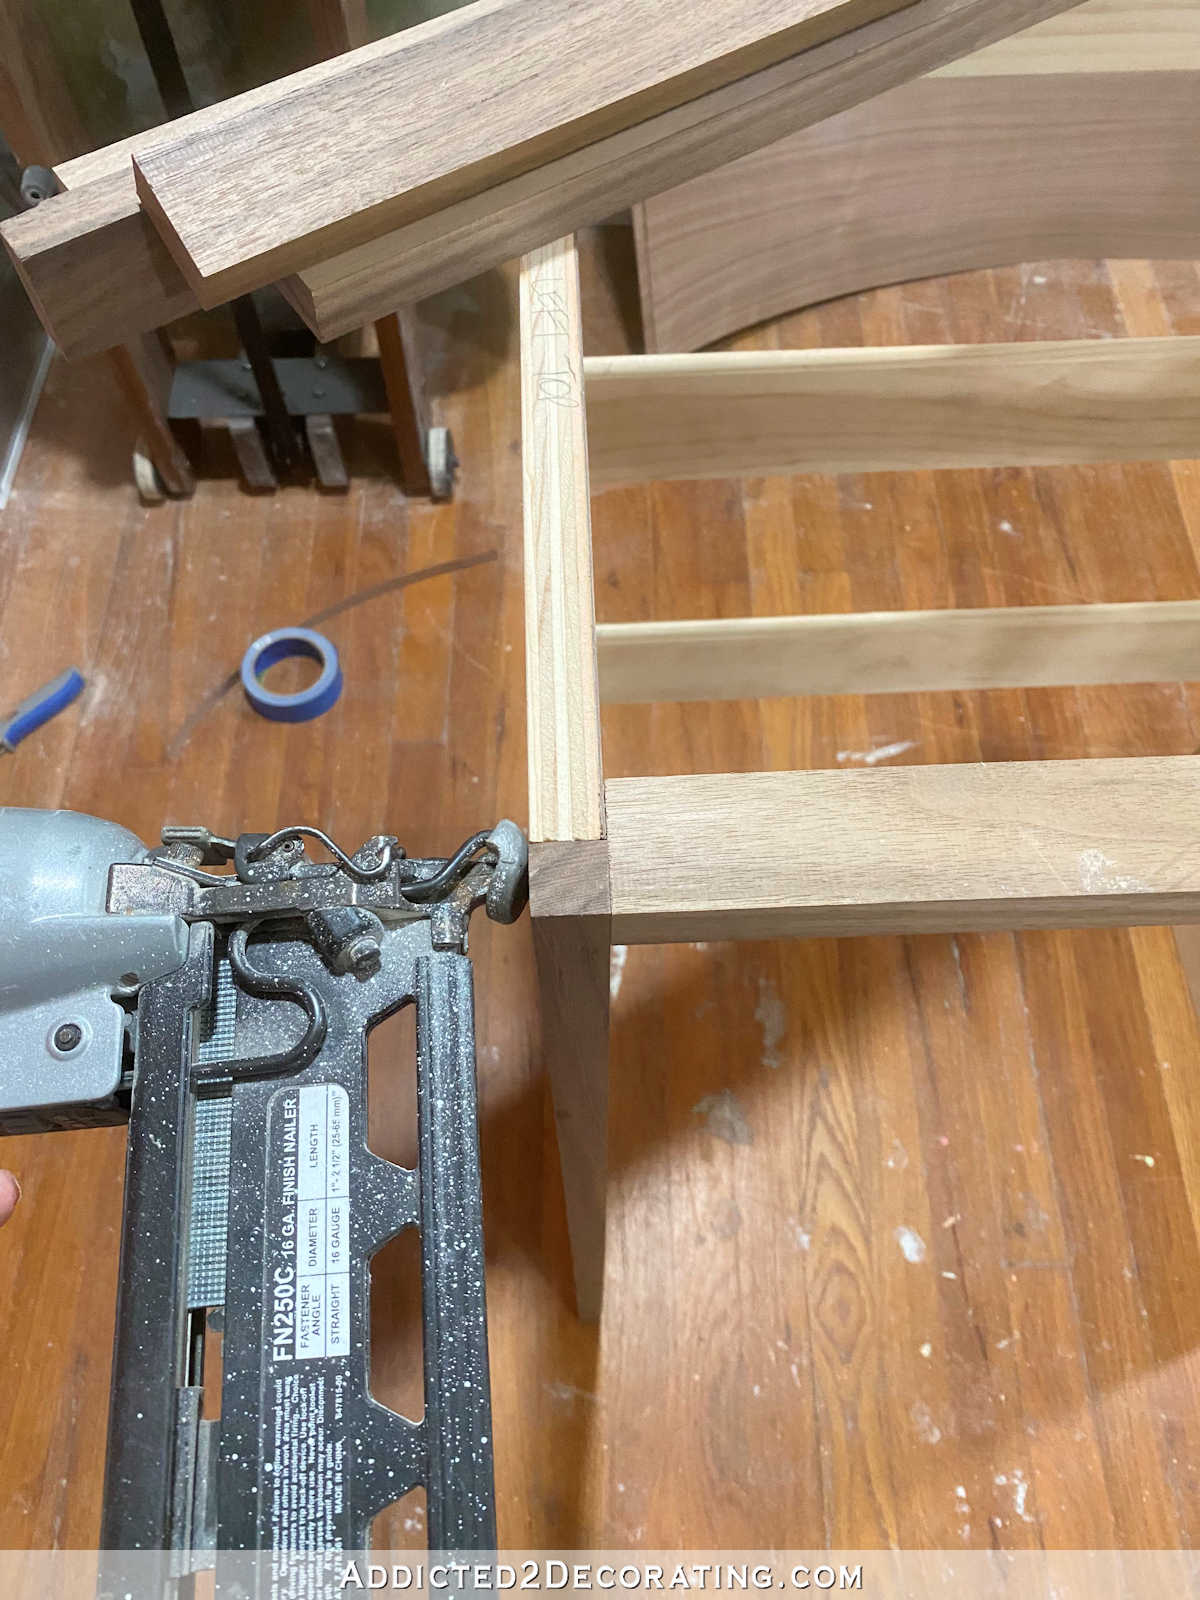
Here’s what it looked like with the first two rails attached along the top…
Those first two rails were easy to line up along the top edge of the plywood, but for the rest of the rails, I had to use my speed square to make sure they were sitting square inside the stiles before attaching them.
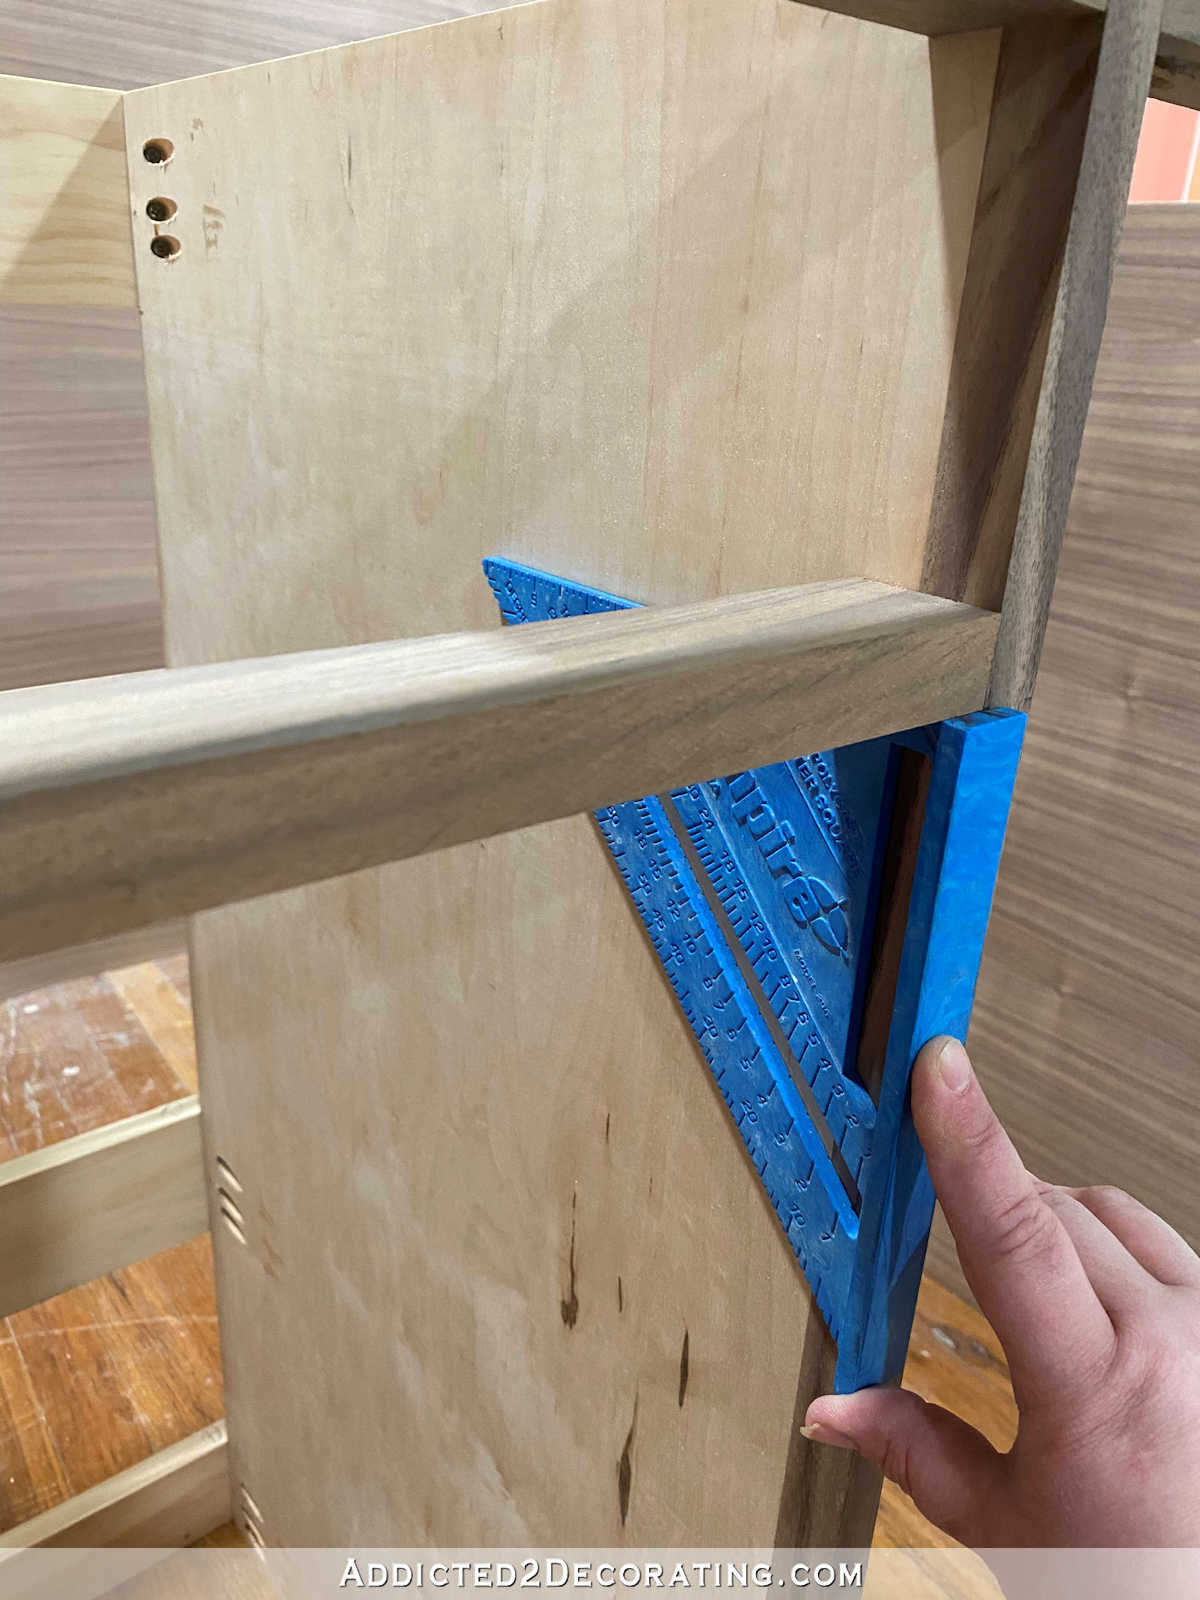
And here’s what it looked like with all of the rails attached. I made the top two drawer sections about 4.5 inches high, and the bottom two drawer sections about 9 inches high.

You may notice that I attached the bottom rails so that the wide side was facing forward…
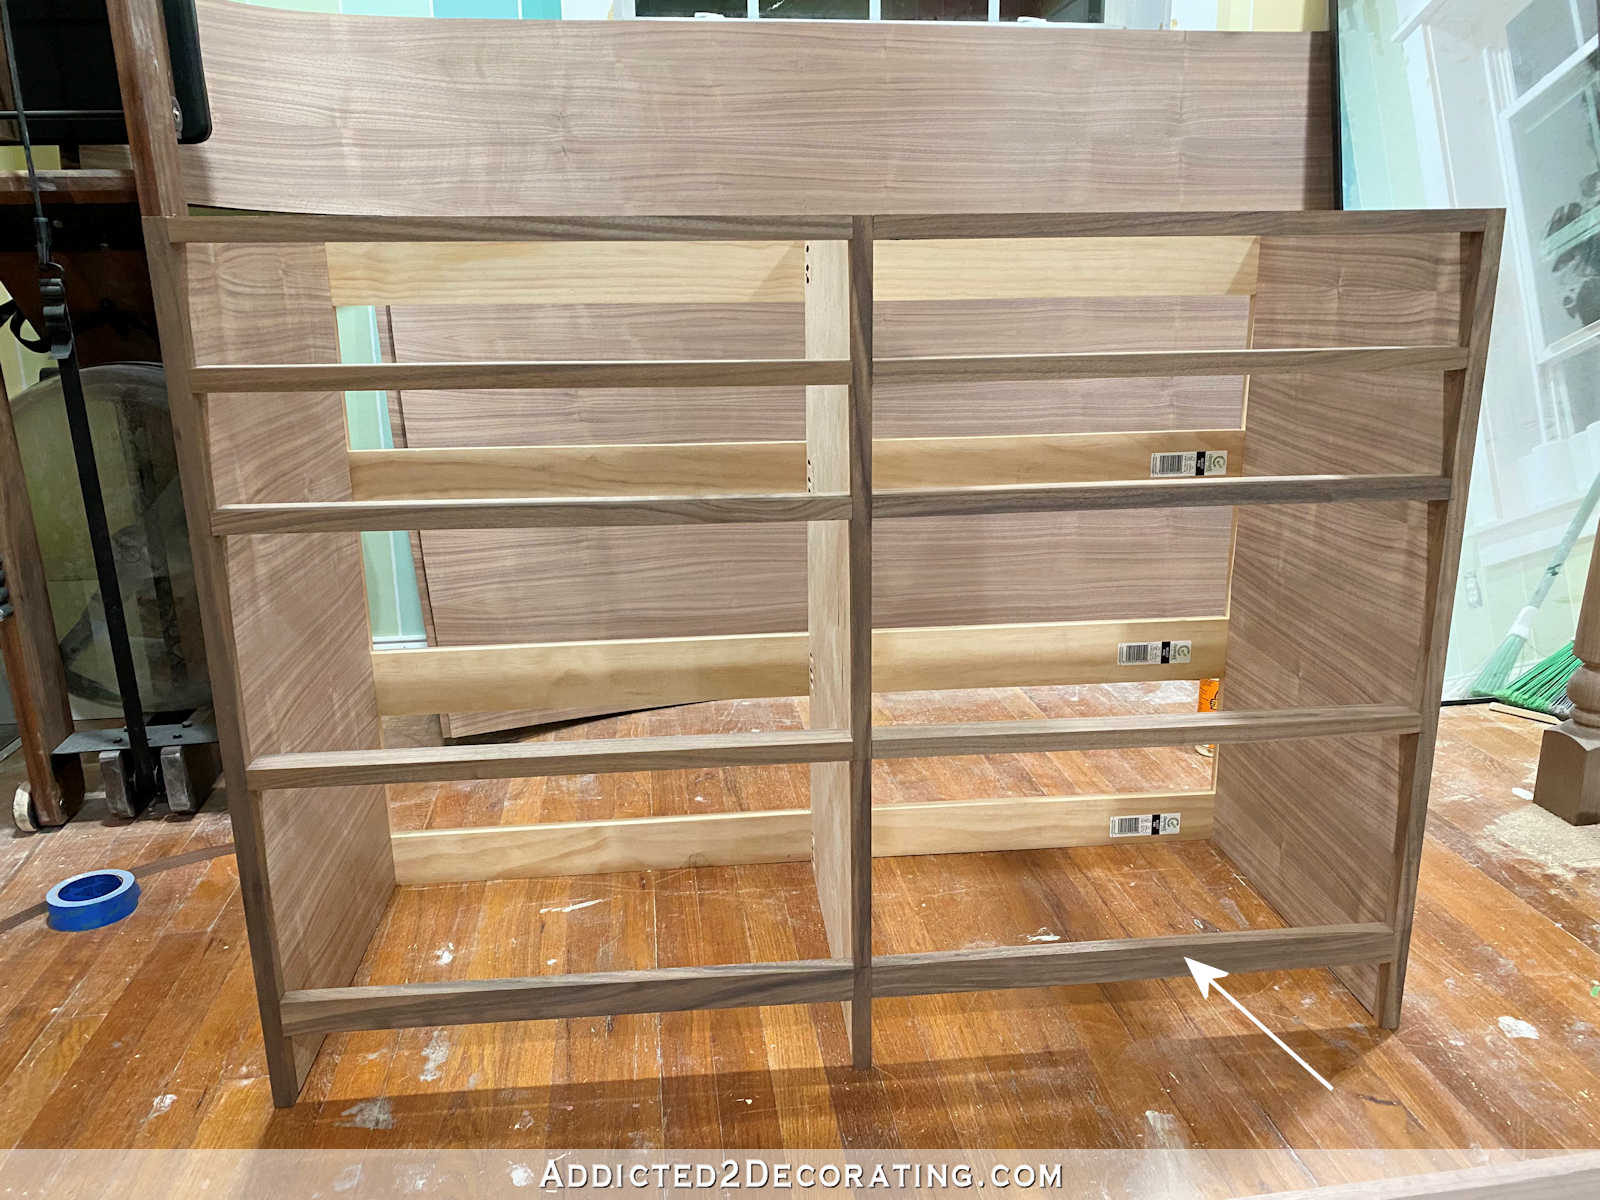
I did this because this wide board will be used along the bottom to finish it off, and I wanted to be sure there was no space between these two boards.
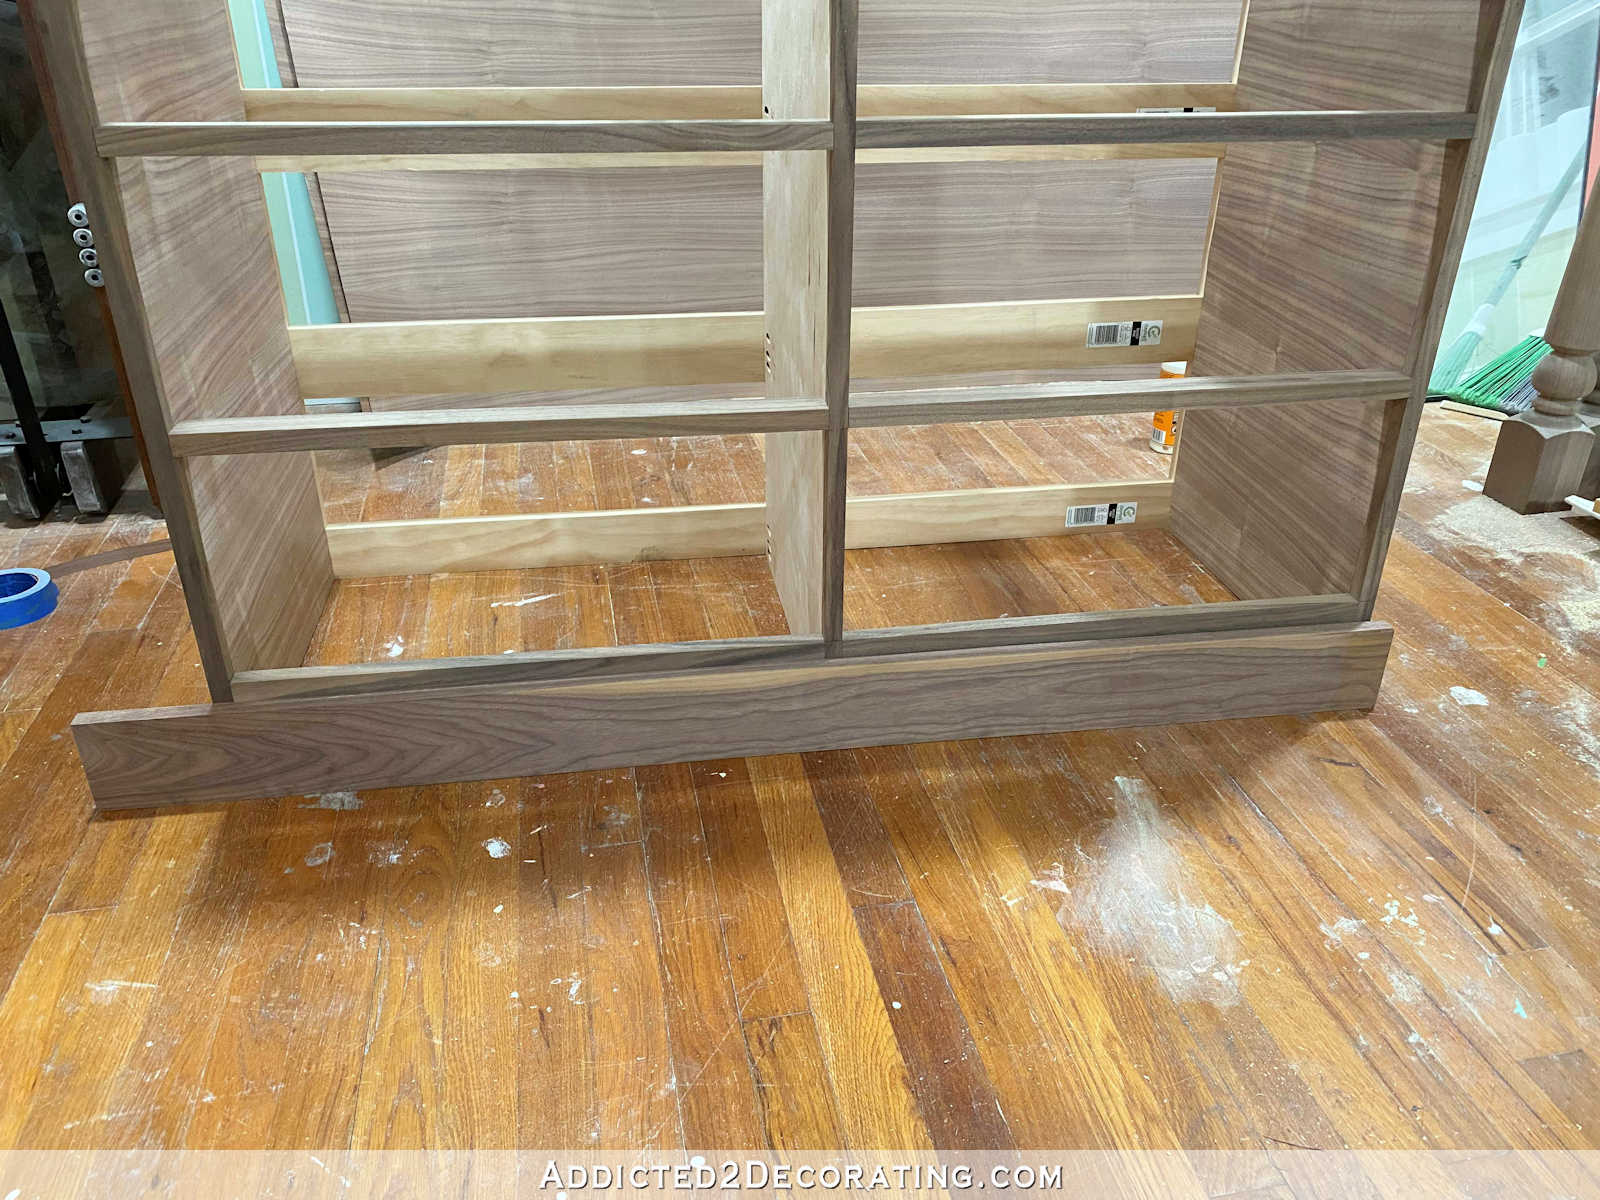
I’ll be using my router to create a routed design in the top of that board before cutting and attaching it to the bottom of the cabinet.
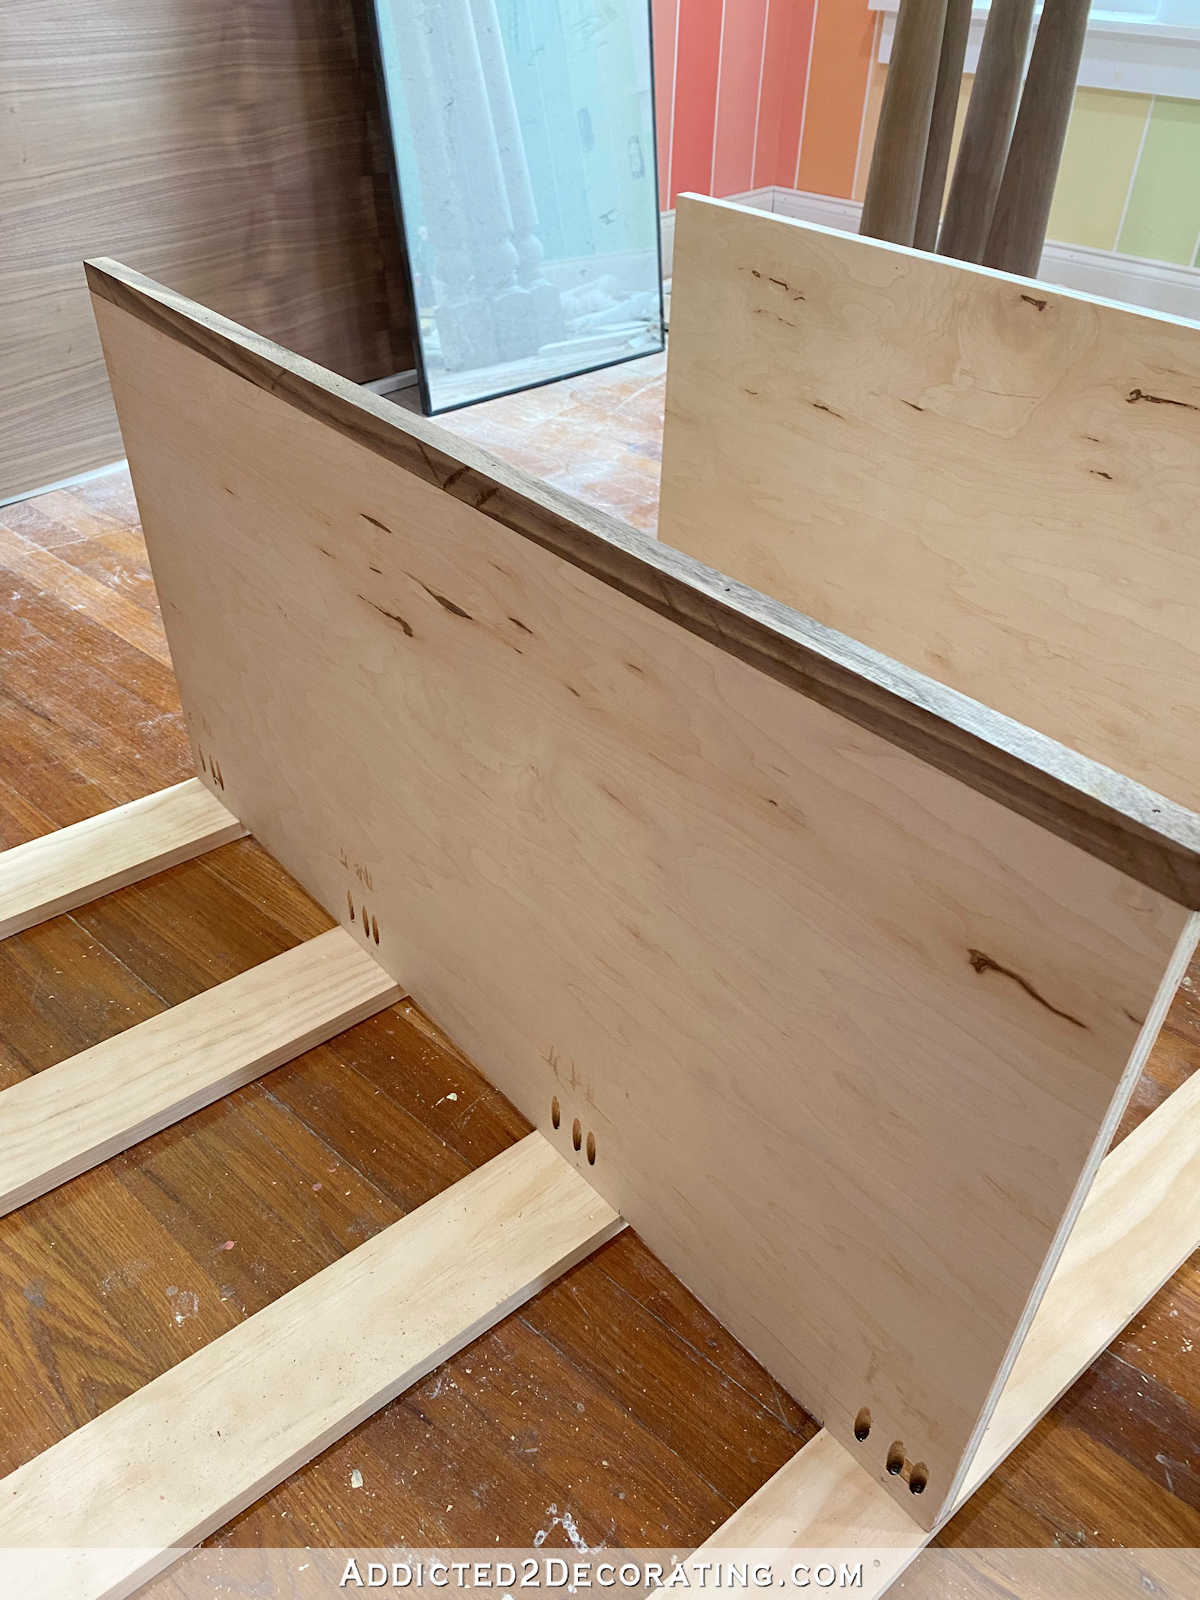
With all of the rails attached, I could finally veneer the outside of the side panels.
I stood the cabinet on end once again, and rolled on the contact cement all the way to the edge. I wanted the veneer to cover over all of the nail holes as well as the edge of the walnut piece.

I attached that veneer the exact same way as the other pieces — burnishing it down with the walnut block and trimming the excess with the X-Acto knife. Once the edges were sanded, it looked pretty perfect! I do wish I had gotten a picture before adding the wood filler, though.
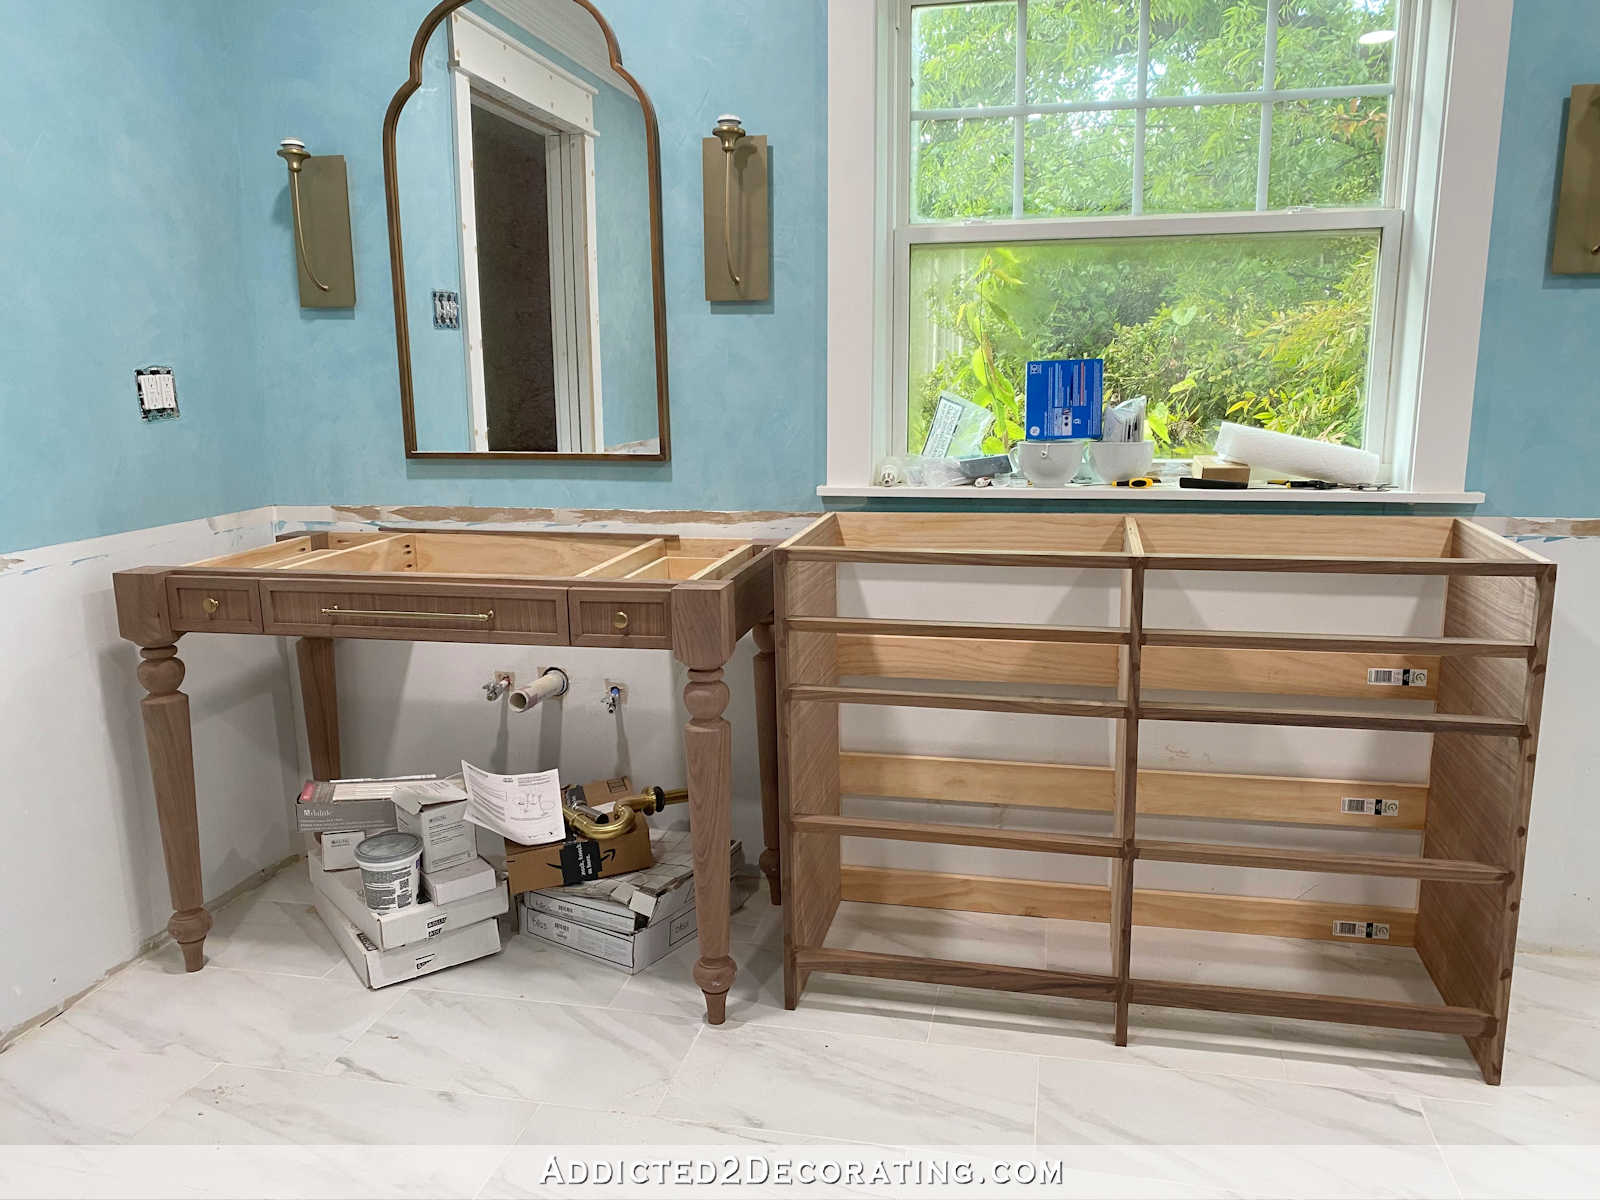
And after repeating that veneering process on the other side, the basic carcass was finished.
As you can see, I got the side apron piece on the vanity attached. So now there’s no unsightly pine showing on the vanity.
I hope to get all of the drawer boxes and drawer fronts finished for this cabinet this weekend, so we’ll see how it goes. I can tell you one thing, though. I’m so excited and motivated to get this DONE! I’m absolutely thrilled with how everything is turning out, and I can’t wait to get everything built so that I can put the Rubio Monocoat finish on all of this walnut. I think it’s going to be beautiful!

Addicted 2 Decorating is where I share my DIY and decorating journey as I remodel and decorate the 1948 fixer upper that my husband, Matt, and I bought in 2013. Matt has M.S. and is unable to do physical work, so I do the majority of the work on the house by myself. You can learn more about me here.
It is going to be so beautiful!
You just blow me away. It’s going to be wonderful!!! It’s really nice.
See what were you worried about?😛 haven’t made a mistake yet! I bet Matt is amazed at your talent!
Where did you purchase your veneer from?
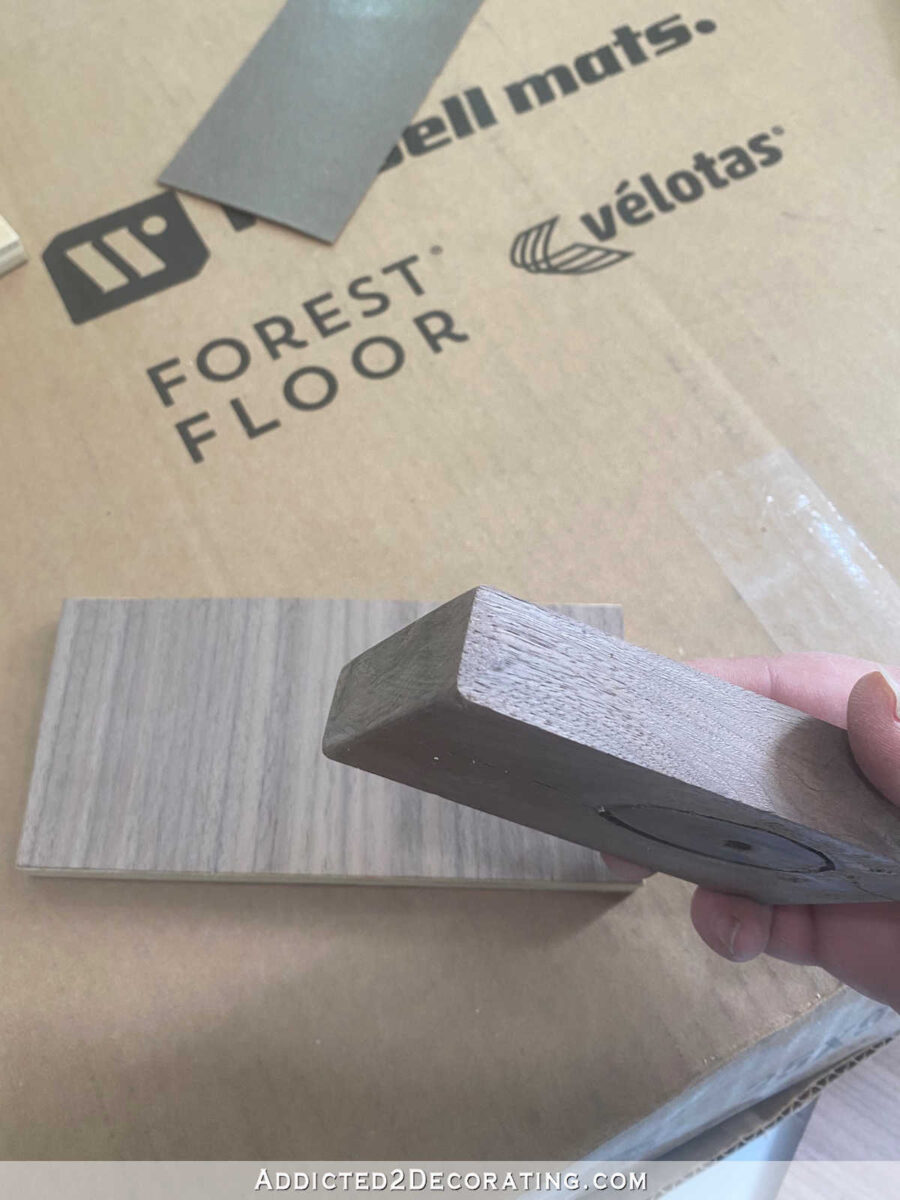
I purchased it from Oakwood Veneer. This is the exact one I got — Walnut veneer, quartered. And the backing that I chose was the 22.2 mil BFV (bubble free veneer).
https://oakwoodveneer.com/walnut-veneer-quartered.html
Evidently it has a layer in it that prevents moisture from going all the way through. So if you use a water-based adhesive to apply it (like wood glue), it’s less prone to bubbling. And the once it’s applied, if you use a stain or finish on it that can affect the adhesive, it prevents it from going deep enough to affect the adhesive so that it won’t cause any bubbles or warping.
I thought I would see the next vanity this morning, but this is even more exciting. You are going to have so much storage – that is a dream! We have a lot in our bathroom too, and so we actually keep clothes in one cabinet and I keep my nightgowns in one drawer to grab after a shower. So handy….but we are downsizing so we will not have that kind of storage again. I know we will miss it.
I love that you changed this middle section to being less deep. It shows off the turned legs more.
You are so talented!!!
Awesome work! I bet you are getting excited to see it all coming together.
I am almost 80 so I will never be able to do what you do. Besides I don’t have the tools. I just hope people realize the time you spend to take pictures and detail the steps as you work on your projects. I really enjoy the journey.
And to think how nervous you were about building this…you are absolutely amazing!
I read every word of this. I am a 75 year old wood worker, but I would never tackle anything like this. I am so impressed!!
It’s already beautiful! What a talent you are! I agree with all the other commenters thus far – you are amazing and very impressive. I’m so excited to see the rest of it come together one would think you were building it just for me! 😀
Thank you for taking the time and making the effort to share your steps and progress.
Wow, Kristi! It’s just looking better and better, and your detailed descriptions are very illustrative. Thanks for taking us along on your journey. Glad to see you got your mojo back and are proceeding apace, lol.
Why did you choose to use walnut veneer rather than buying walnut plywood?
You get a finished product with a much cleaner look with veneer. The way I did the sides, by attaching the ripped piece of walnut to the front edge of the plywood and then covering the entire side all the way to the edge with veneer, gives the look of a solid piece of walnut. If I had used plywood instead, there would have been a very visible transition from the side piece to the front edge piece, and that front edge piece would have e been visible from the side view of the cabinet.
Not sure if that makes sense. Suffice it to say you have more control over the finished look of the piece with veneer.
You never cease to amaze me! I often wonder if there is anything you cannot do 🙂 These pieces are beautiful. Thanks for taking all the time to document your steps. I can’t wait to see the finished cabinets. You may get a kick out of this … I’ve been channeling my inner Kristi this week. LOL … my daughter and son-in-law just bought their first house. The previous owner is a handy man and from what I have seen he does beautiful work. The problem is he didn’t finish anything. Started taking down a popcorn ceiling, stopped half way, put in hardwood floors but only put corn around on half of it, tiled the basement entry but never grouted it, finished the basement but didn’t put up the window trim or kitchen counter tops, painted the front of the house but not the other three sides … I could keep going. But you get the picture. The last few days I have painted three bedrooms and the master bath (including the ceiling) after taking down a wallpaper border that had been painted over and the rest of the popcorn ceiling. In three weeks I’ll be painting the kitchen, family room, dining room and entry. I’m loving it! I’m itching to finish the cord around and grouting but I have this son-in-law who also enjoys DIY so am having to back off. Needless to say he is excited about the new house and all the projects. Not bad for a 64 year old woman who 10 days ago was on crutches with a sprained ankle. LOL … life is good. Keep up the good work, I look forward to your blog every day.
Its starting to look amazing, can,t wait to see it finished,
Kristi, You always amaze me with your talent! I love walnut, my favorite wood! That will be beautiful!
Krist everything is turning out just perfect! I was wondering though, why veneer the inside? I noticed the inside of the sides are veneered but not the middle?
https://oakwoodveneer.com/veneering-both-sides-of-mdf/#:~:text=Answer%3A,the%20side%20that%20is%20veneered.
I was just coming to ask this question myself! Thanks for the link, Kristi. I’ll never build a furniture piece like this but it’s so interesting to learn as you do!