My Kitchen Ceiling Progress
I could very easily have named this post “How Many Pictures Of My Kitchen Ceiling Can I Get You To Look At Before You Lose Interest Completely?” But that seemed kinda long.
Let’s get right to it, though. I’ve made progress…finally.
First, let me remind you of my inspiration.
 |
| via Miss Mustard Seed |
 |
| via The Lettered Cottage |
Now let me remind you of the reason that I want to do this on my ceiling…
 |
| Water damage from an air conditioner leak. |
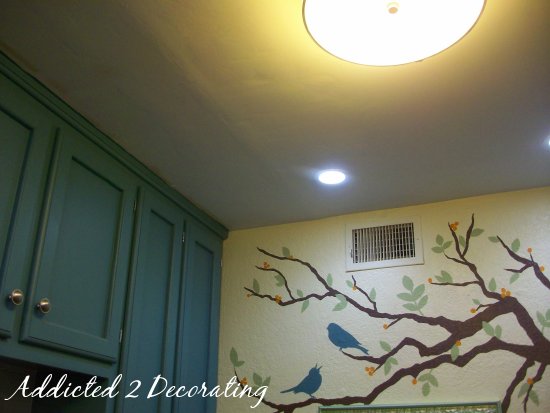 |
| Uneven area where old (thicker) sheetrock meets new (thinner) sheetrock. |
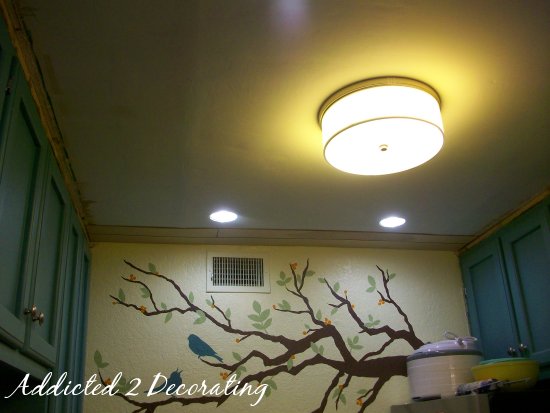
This ceiling has been driving me crazy for a while now, so this weekend, I decided to go for it. I went to Home Depot and purchased two 8′ x 4′ sheets of 1/4″ plywood, had them cut it into 4″ strips for me (yes, they actually did it for me!!), and then I used my miter saw to cut the strips to the length that I wanted. I used Loctite and my nail gun to attach them to the ceiling.
The first two rows went up without a hitch, although I started doubting if it really was going to disguise that ridge like I had hoped.
Then I hit a road block with the third row. I had this idea that I could apply the strips, and then use my jigsaw with a brand new blade and cut out the circles for the light using the light as a guide. WRONG!! That idea didn’t work at all. So I tried to pull the strips down to cut them, but the Loctite has already set. So, I had to use a utility knife and pliers to cut and pull away the part covering the lights. Not fun!!!
On the next strip, I tried a new strategy. I rummaged through my pantry, found a can that was 4″ in diameter, held the strip up to the ceiling, and used the can to trace a circle for the light. Then I took the strip outside and used my jigsaw to cut away the circle BEFORE attaching it to the ceiling. That worked quite well.

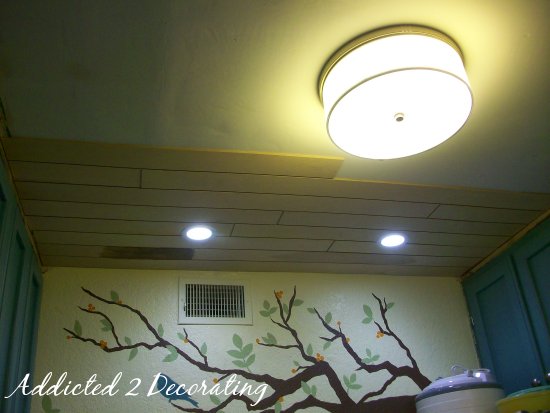
I only got five rows done before I started getting anxious to move on to the next step–deciding how I was going to finish the ceiling! I got out some stain and did a little test spot. I liked how it looked, but was concerned that it would be too dark once the whole ceiling was stained.

But then I decided to go for it. I knew if I didn’t try it, I’d always wonder what it would have looked like. Indeed, I think it’s too dark for such a small space. It’s pretty!!! But way too dark.


So then I thought maybe I could do some sort of whitewash over the stain just to lighten it up a bit. I tried that on one board, and it definitely lightened it up, but I’m just not sure if it’s enough.

It’s hard to determine from one little board whether or not the whitewash would lighten it up enough.

So who knows? I may end up staining and whitewashing the whole thing, or I may end up painting it white. But either way, I LOVE this look!! And now that I have several rows on, I really do think it’s disguising that ridge pretty well. Now on the water-damaged area, I definitely think I’ll need to do some repair with drywall compound first to smooth out the area as much as I can before applying the boards. I’m NOT looking forward to that.
So, so far so good! Any input regarding the finish? Do you think a whitewash over the stain would be enough to lighten it up? Or should I just paint the ceiling white? It makes me a bit nervous, because once it’s painted, I can’t go back if I don’t like it. Hmmmm…decisions, decisions.

Addicted 2 Decorating is where I share my DIY and decorating journey as I remodel and decorate the 1948 fixer upper that my husband, Matt, and I bought in 2013. Matt has M.S. and is unable to do physical work, so I do the majority of the work on the house by myself. You can learn more about me here.

I think it looks great! I agree though, probably a little dark for a small space. I would whitewash it and then you could always paint it if it's not light enough still, but like you said once you paint it you can't go back. I can't wait to see it all finished. I think it will look awesome! Love that mural on the wall too!
I agree with Mrs. DeVore, whitewash first if you don't like it then paint. Maybe two coats of whitewash would that work? you could always sand it back to knock it down a bit to show more wood in areas.
And by the by I have the exact same ridge in my ceiling where two different dimensional drywalls meet lol
I love it…I have been wanting to do that for years..good job
Oh my gosh I love your ceiling! I would love to do that to my kitchen! Is it hard to do by yourself? I would like to have a junction box moved so I don't have to use track lighting over my island. This wood treatment would cover up the mess that would make. I don't know how to use my husband's nail gun, but sure would like to learn! What type of plywood did you use? It has a pretty grain. Maybe you could just whitewash it without the stain part. It would be light but not solid.
LLinKS
Looks good. I might be the minority, but I love the dark wood! I agree that it makes the space look smaller but I love the "cozy" feel it creates! 🙂
LL, it's a bit challenging to do by myself, but that's never stopped me before!! 🙂 And I should clarify…I don't have a nail gun, I have a brad nailer. It shoots tiny little finishing nails up to 2" long. I used 1" finishing nails for this project.
The plywood I used was 1/4" stain grade plywood from Home Depot.
I really like how the darker wood looks, it's so warm looking!
I really like it alot!!! I would have never thought to use plywood strips. Very clever!
One suggsetion… once you whitewash it, give it a few days – time to get used to it. It's going to be much darker than you're used to, so it's going to seem awfully dark. But once you get used to it, it might not seem TOO dark.
I love that look! I've admired the Lettered Cottages reading room for awhile now! I would whitewash it and then paint it if that's still not light enough. I don't understand how you have so much energy!! I envy all the projects you do!! =)
Love the dark stain, but also like the whitewash. My daughter put up pine on all her ceilings in her 100+ yr. old house and left the pine untreated and it looks awesome.
That is beautiful!! I applaud your progress and can't wait to see the finished project!
You're going to love it!
We had the same problem in our kitchen. We put grooved paneling on our ceiling during our remodel. Then we painted over it and added some molding to cover the seams. Just a little bit of texture up there looks pleasingly retro without going all heavy Victorian.
I'd go with white. Looks really good so far though!!
I'm about to do this in my guest room. Painted it last this last weekend and can't wait to cover up the popcorn texture on the ceiling. For your kitchen, I actually like the light pine color before you did anything to it. Oh well, too late now… so white wash with a stain glaze maybe?? I know whatever you decide, it'll be perfect!
It's hard to say without seeing it in conjunction with everything else in the room, but I kind of like the darker stain. I'm not a fan of the whitewashing, but that's just a personal preference thing. 🙂
I think painting it would also be quite nice.
Is sanding it back a possibility if it goes somewhere you aren't happy with?
I think it would look best stained in the same color as your countertops, even though I know you're still not 100% happy with the color of your countertops!
I like it NO LOVE IT… I think the stain and then whitewashing would be perfect for your kitchen.
This looks absolutely amazing, it looks like a real plank ceiling! It is a very clever solution to your water damage problem. You might consider putting some sort of water-impervious finish on the backs of the boards, incase there is a moisture problem again. The plywood might try to warp if it gets damp.
I agree—whitewash first; give it some time and if you still don't like it, paint it white.
We used tongue and groove white pine for our walls and ceilings in our great room/kitchen-dining areas with just clear finish. It's darkened over the years, but it's still comfortable with enough natural light coming in.
We used beadboard plywood in the bedroom/bathroom and laundry, painted it white and used a thin decorative molding (left natural) over the joints. It's gorgeous—light and airy.
Kristi,
I have wanted to do this on my walls. I think it will look great in your kitchen. I wanted to ask you a question…. when you painted your kitchen cabinets, what type of paint did you use? And did you use a sprayer?
Melissa
Hi Melissa~
I painted my cabinets with a brush, and used Kelly Moore interior oil-based paint in a satin finish. 🙂
This is just what I did in my living room! I love the look, it's fabulous in your kitchen!
It looks amazing.
Yes, I agree! White wash first then paint if you don't like the white wash! The boards create an amazing look! I love it.
Yes, I agree! White wash first then paint if you don't like the white wash! The boards create an amazing look! I love it.
This looks absolutely amazing, it looks like a real plank ceiling! It is a very clever solution to your water damage problem. You might consider putting some sort of water-impervious finish on the backs of the boards, incase there is a moisture problem again. The plywood might try to warp if it gets damp.
I think it would look best stained in the same color as your countertops, even though I know you're still not 100% happy with the color of your countertops!