Studio Progress — Electrical, HVAC and Spray Foam Insulation
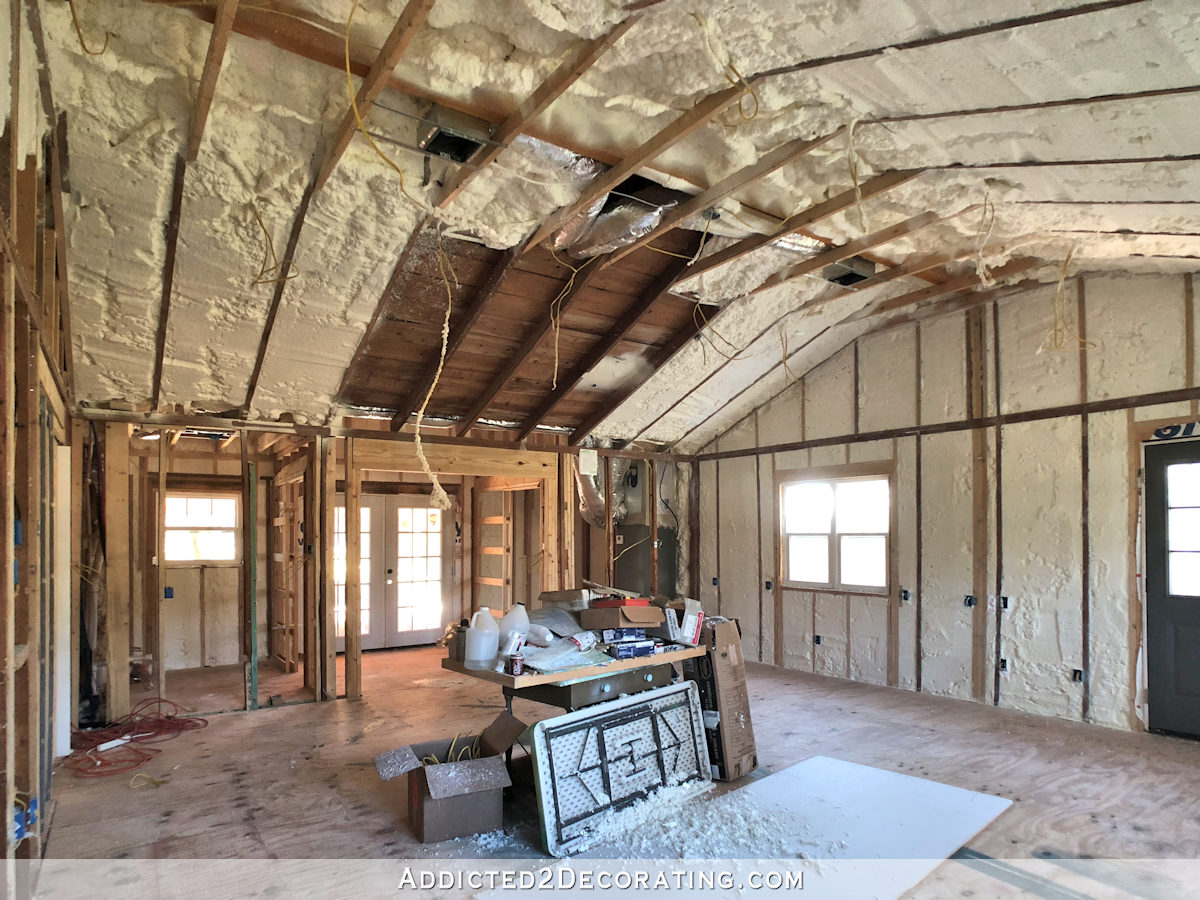
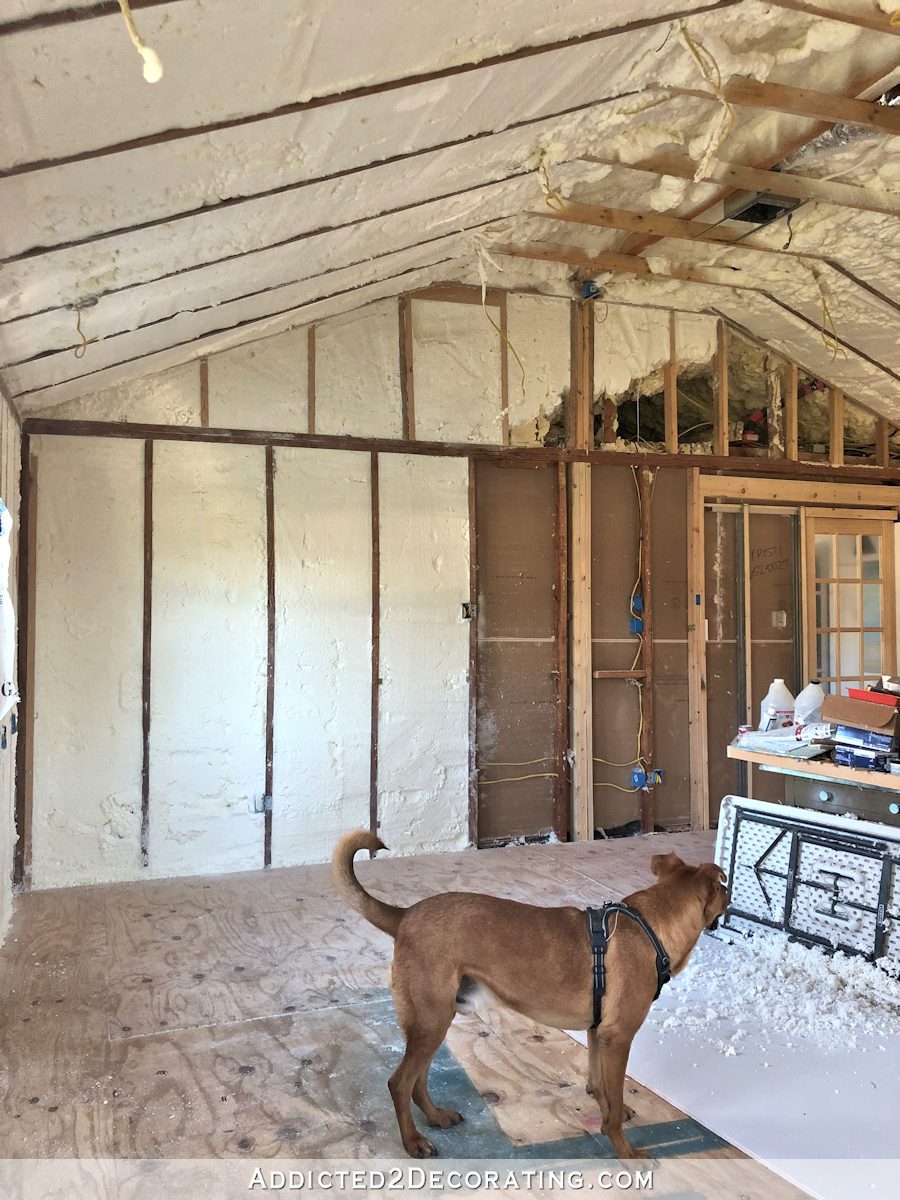
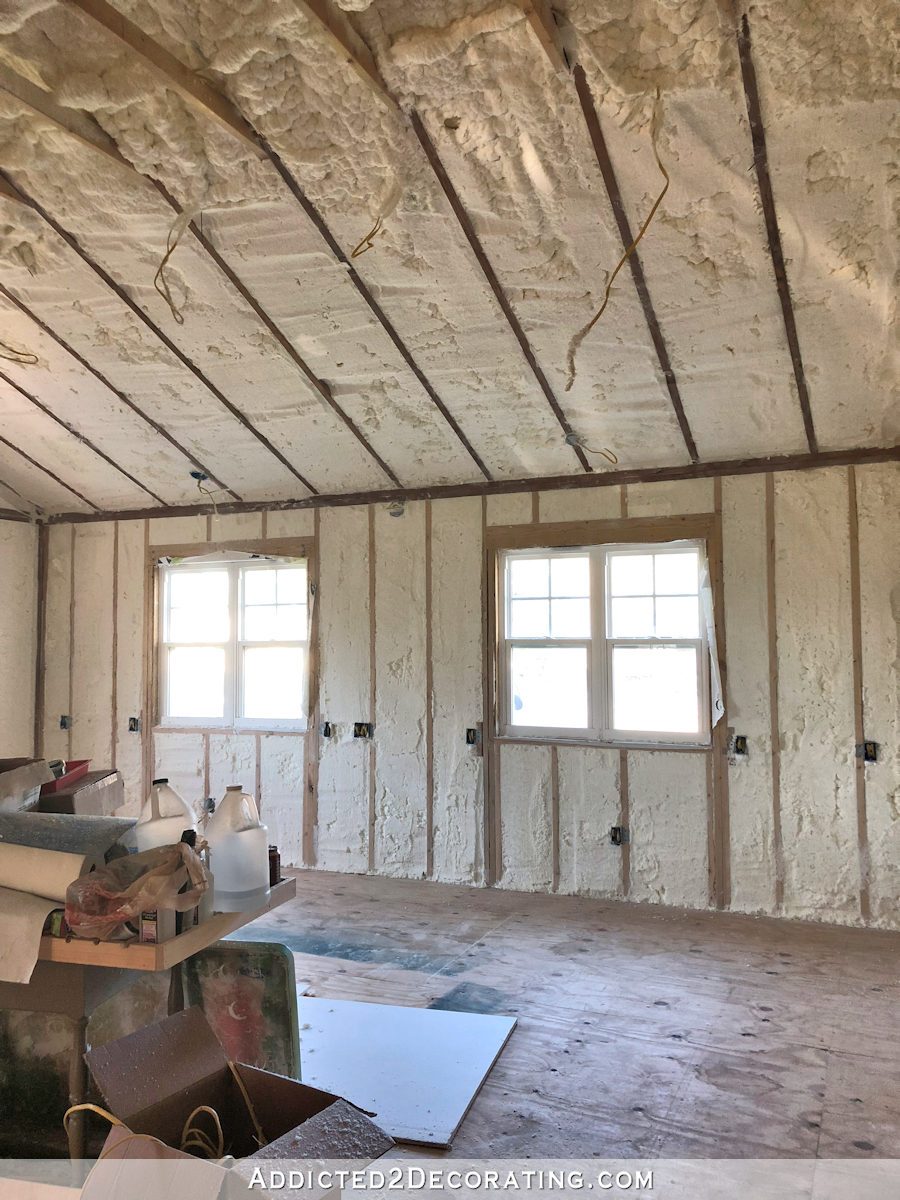
Three out of the four things that I hired the contractor to take care of have been finished. All of the electrical has been finished to the point it needs to be before drywall goes up. The HVAC ductwork has all been rerouted. And the spray foam insulation went in yesterday.
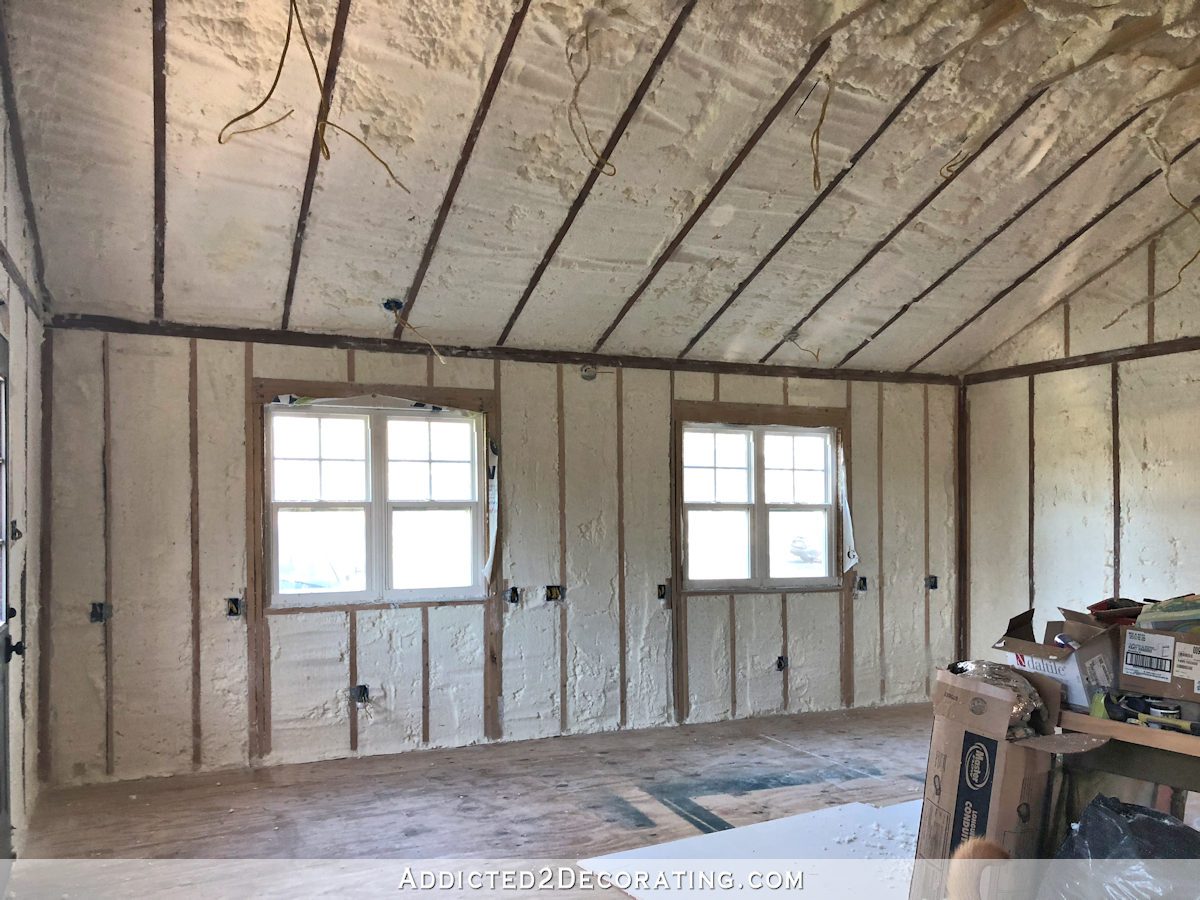
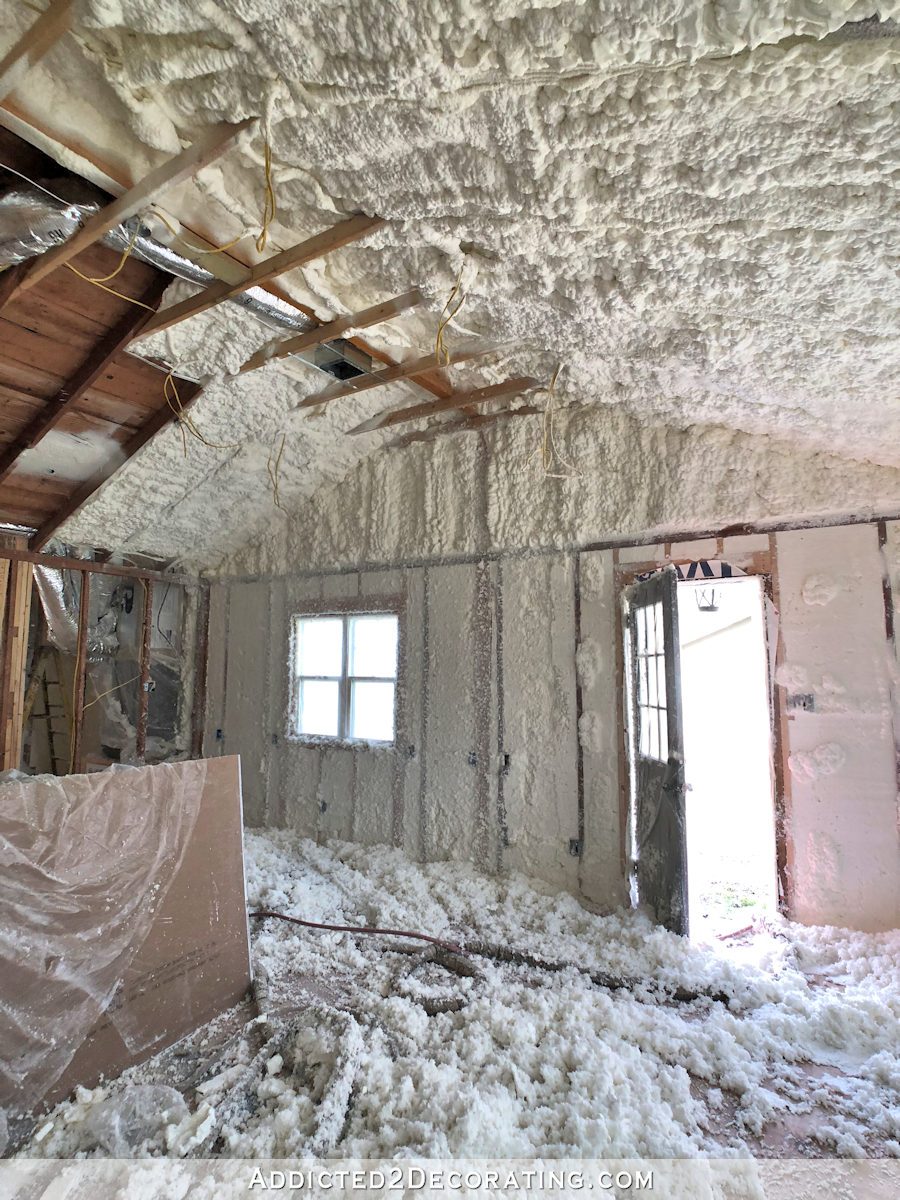
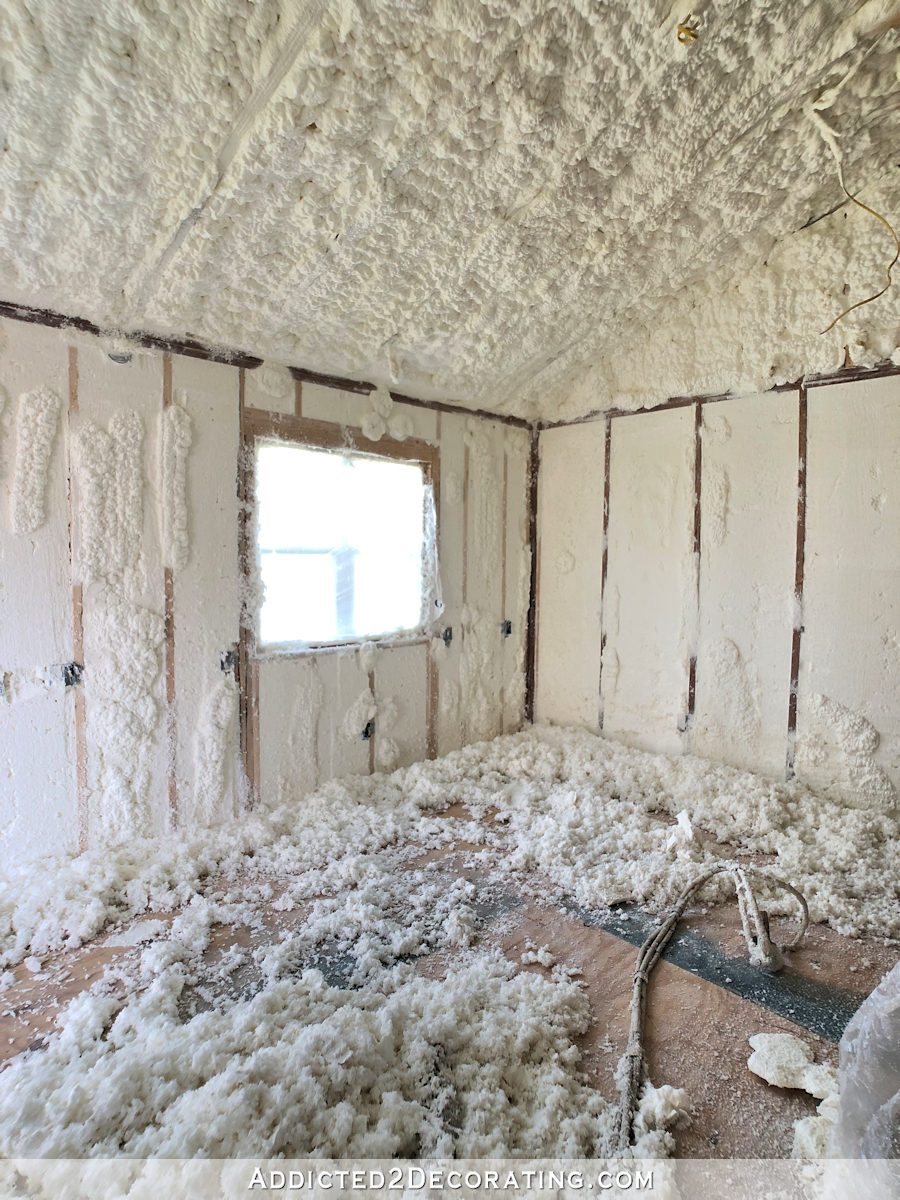
I’ve only ever had spray foam in an attic, so it was very interesting watching how they had to do the walls and vaulted ceiling. The spray foam initially puffs up and sticks out past the studs and rafters, so then they have to go back and shave off all of the excess so that the drywall will fit right up against the studs and rafters.
It’s an incredibly messy process!!
I was amazed that they got it finished and cleaned up as quickly as they did. They arrived at 7:30 and began taping up doors and windows, and then started spraying around 8:30 or so. They had everything sprayed, shaved, and cleaned up by around 1:30 or 2:00.
There’s one area inside the studio vaulted ceiling that they didn’t do because the new carport roof extends over that area, so they sprayed that area between the carport roof (i.e., the new roof) and the studio roof (i.e., the old roof). So while it looks like part of the room isn’t insulated, it really is.
And they didn’t insulate any of the interior walls, either. They drywall guys will be using RockWool Soundproofing insulation between the interior walls before they install the drywall.
And speaking of dyrwall, that’s starting today! They’re here right now getting everything ready to start the drywall.
It’s getting exciting! And we’re getting so close to the fun parts!
But even in its current state, it’s a far cry from what I started out with. It started out looking like this…
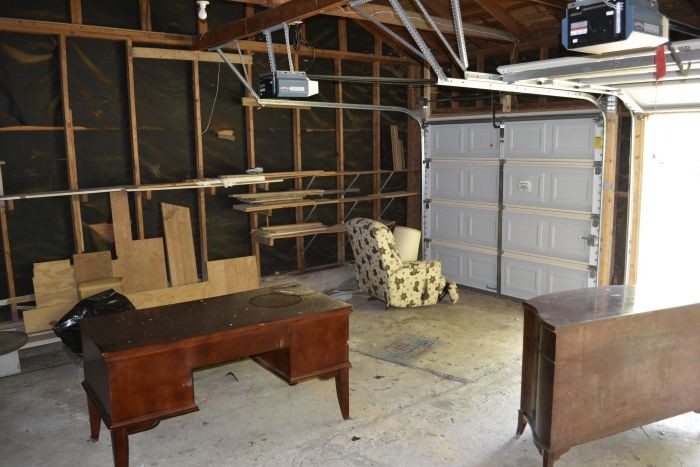
And now it looks like this…
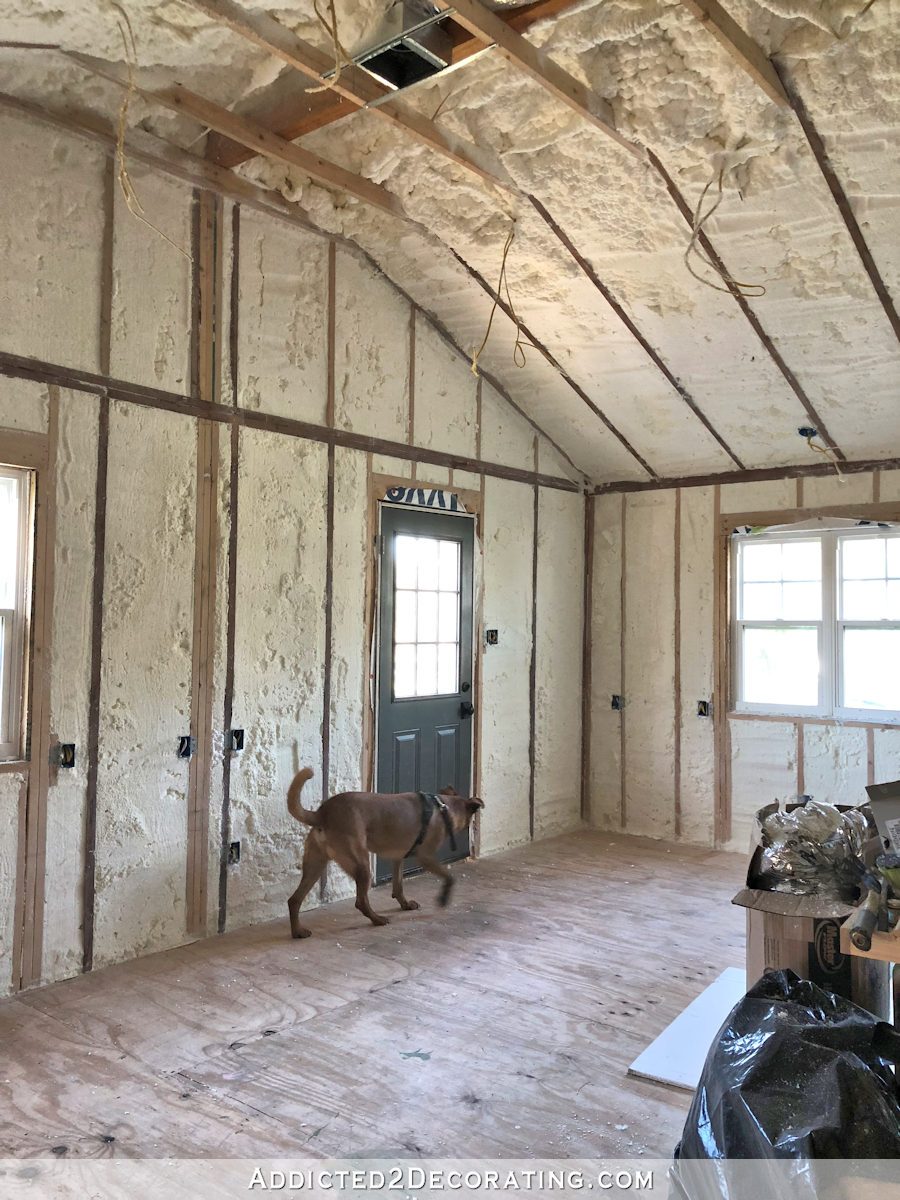
Those two pictures are of the same corner of the room. Where there once was a garage door, there is now a window. And where there was once just a solid wall, there is now a side door. And of course, the current floor of the studio is about 16 inches higher than the original garage floor was.
I love finally seeing this progress!

Addicted 2 Decorating is where I share my DIY and decorating journey as I remodel and decorate the 1948 fixer upper that my husband, Matt, and I bought in 2013. Matt has M.S. and is unable to do physical work, so I do the majority of the work on the house by myself. You can learn more about me here.


Looks like they’ve made great progress! Very exciting. Xx
You are going to love, love, love the spray foam insulation. We did our basement walls with this when we had to do some work due to a water issue. Wish it could have been the entire thing, but that would have meant taking down all the good drywall just because. Nope! We also did outside walls in upstairs bathrooms when we remodeled. If we were ever to build again, we would absolutely go the expense of all outside walls being finished with spray foam insulation. What a difference it has made here in upstate NY!
Just looking at your room after they shaved the insulation made mecwant to sneeze!!! I cant wait to see your next few steps
Very exciting! I feels like you’re going to be able to get to the pretty stuff SO QUICKLY, as compared to if you had done all of that yourself.
I do have one question, though. Not to be too negative, but it seems like there is a lot of waste on the floor after the scraping? Or does it just look that way from the pictures? Are there any environmental concerns over that? I know that current insulation is so much more efficient than what we used in the past. Just curious.
It’s very fluffy, so they compacted it all into about four or five large trash bags.
I install spray foam insulation for my job and there is no environmental concern in its finished state. Those shavings are not toxic. And all that could be compacted to fit in one garbage bag with the right equipment.
I love this room! I love the pitch of the ceiling, those big windows, oh, the possibilities and the spaciousness! I’m loving following along during this part…So exciting to watch this progress!
Wowee scowee! Very exciting! What is the R value of the spray foam, do you know?
I have no idea. I know it’s better than bat insulation, but I don’t know the specific R-value.
I actually just got the invoice for the insulation, and here are the line items:
Insulate and seal exterior walls of structure with 1/2 lb density open cell foam at an approximate thickness of 3-1/2″. (R-13)
Insulate and seal roofdeck of structure with 1/2 lb density open cell foam at an approximate thickness of 5-1/2″. (R-21)
So it looks like it’s an R-value of 3.7 or 3.8 per inch of thickness.
Open cell foam insulation has an R-value around 3.5, closed cell foam insulation is around 6 or 7.!
Looking good with a lot accomplished this week, so far. Once the drywall is up, you can really go to town on this room.
Well THIS IS EXCITING! So glad you went this route – it takes some of the nasty work off your plate, and now you can really concentrate on the more beautiful/practical things you are planning – it is going to be such fun to see how you finish this space. Of course we are all going to be so jealous!
I’m so excited for you! You’ve got a great crew going with you on this journey…..us too😀. .
It looks like it meets the dog’s approval.
Good to see that Cooper is obviously happy with the progress. They like to ‘supervise’, don’t they?
Saw your IG video yesterday, and couldn’t wait to see a post! So exciting! They must really like you, I thought they told you 2-3 weeks before they could start! I bet you are glad you hired this out, because you would not be near this point yet on your own, and like you said – soon you’ll be on to the pretty part!
I actually expected them to start right away, but he said it would take three weeks to finish. They do seem to be making great time on it, but the drywall will be a lot slower than the rest. I asked them today how long they think it’ll take, and he said it will probably be finished by the middle of next week. So definitely less than the estimated three weeks!
Sprayed foam insulation is amazing. You will save at least a third on the studio cooling cost.
Eagerly awaiting further developments.
That is major progress! So happy you were able to let someone else do these difficult parts of the project for you. Love seeing Coop on the job, too. What a cutie he is.
I’m so dang happy for you! And I’m so happy for us out here following you too….getting to the fun parts soon! Onward you go 😉 I do hope your hand has healed up.
How very exciting! Good for you for hiring this out, many hands make light work! Cooper looks so healthy. Kristi, you and Matt are such a positive light and influence in my life. Thanks for being you.
Oh Boy! This is so exciting! Looks great so far. Can’t wait to see your progress. So glad they were able to get it all done within a few days.
Hi Cooper! Looks like you’re hard at work supervising and inspecting. 😉
I’m sure your shoulders and hands thank you! Looks great.
That was quick! You must be pleased 🙂
I’m so happy for you…!! I know it cost a pretty penny but you will do wonders on this HUGE space… We all can’t wait to see what you create..!!!
LOVE YOUR WORK….!!!
Looks great. I am so happy for you. By the way, Cooper rocks my world! Love him!
This room will be the “Grand Ballroom” of your home! Can’t wait to see it filled with all the “pretties” . Oh what a sight to see, it will be. I can hear all the gasping 😲 of “oh and awe” from everyone now 😍
Love spray foam! Just can’t get past the “fungus amongus” look as they finish the spraying. No way would I attempt to tackle that! Is the 1/2 lb foam going to be OK in the Texas heat? I checked on doing this in my shop (steel building) and was told that I needed 2 lb foam to handle the FL heat on the steel roof.
I can definitely see how you’d need denser material for a metal building in a hot climate. I’m trusting that the 1/2 lb will suffice for a wood structure. Fingers crossed! 🙂 Actually, I can already tell a big difference in the room without the drywall, so I’m confident it’ll be fine.
Progress is exciting! We had the spray foam insulation done and I too thought it was cool. Messy but cool. It works really well for us even in an attic in the Texas summer.
Ooooh this is so exciting!!!