Studio Progress — A Little Painting, More Cabinets, And Installation Decisions
This week didn’t quite go as planned. Our air conditioner stopped working on Monday, and we were without it for a few hours. So having to deal with that, plus make sure that Matt made it through several hours without air conditioning on a day with 100+ degree temps completely threw off my plans for the week. And then the curve ball of dealing with the unexpected changes in the hallway bathroom took up even more time that I had anticipated being able to dedicate to the studio. But isn’t that the way life works?
So it’s been a bit of a hectic week, but I was still able to make some progress in the studio. The progress is slow, but it’s steady, so at least I’m heading in the right direction. I haven’t had to tear out any more drywall or undo anything else that’s already done, so that’s always good news. 😀
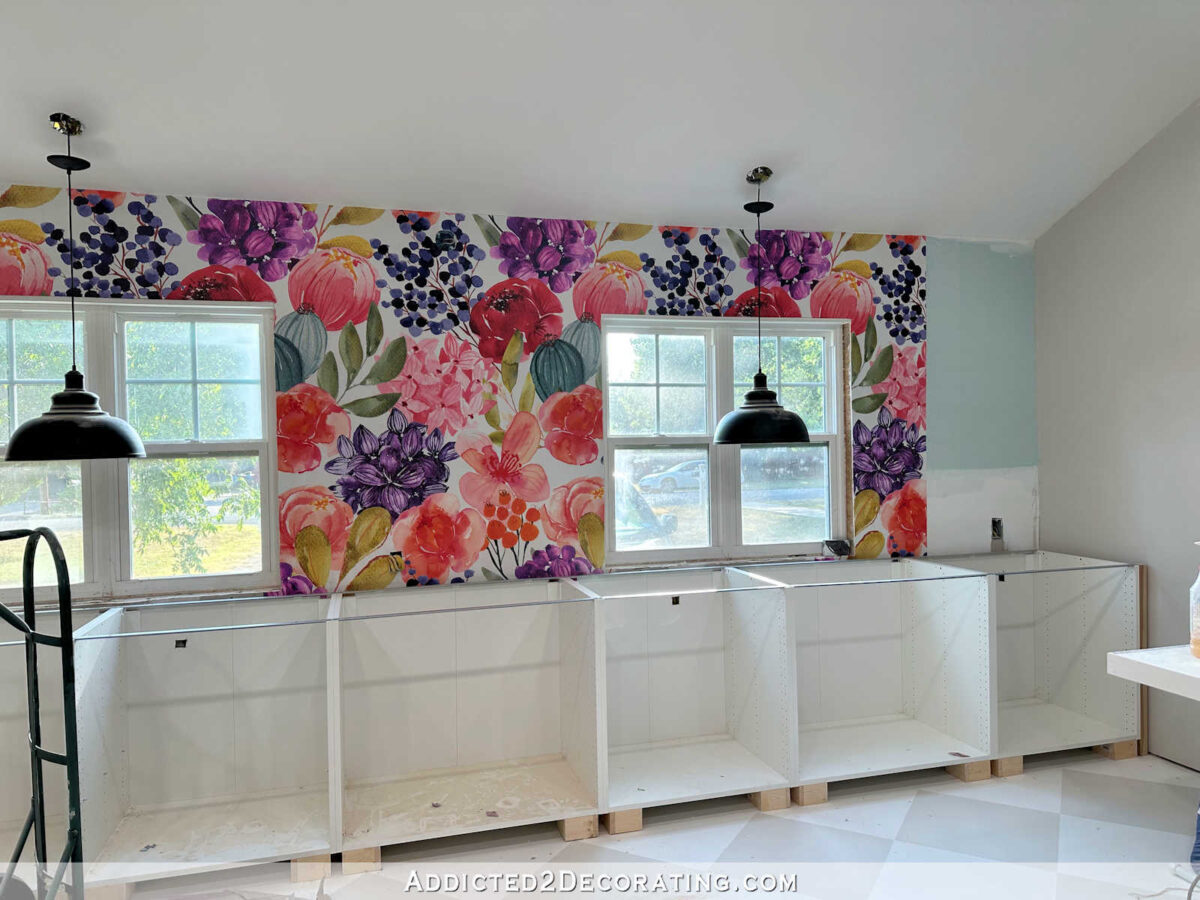
Earlier in the week, I showed y’all how I modified the IKEA Sektion cabinets to use on the long front wall of the studio. I got all of those installed, and now they’re ready for trim and a countertop.

Before I got sidetracked with the A/C and hallway bathroom countertop, my plan was to work on the countertop and have the upper cabinets put together in time for some men in our Wednesday night group to be able to lift those into place for me. But after losing almost an entire work day because of the A/C, I knew that goal wasn’t going to work out, so I decided to move on to the other cabinet section instead. That way, I can get all of the cabinets installed, then get all of the cabinets in both sections trimmed out, and then build both countertops at the same time.
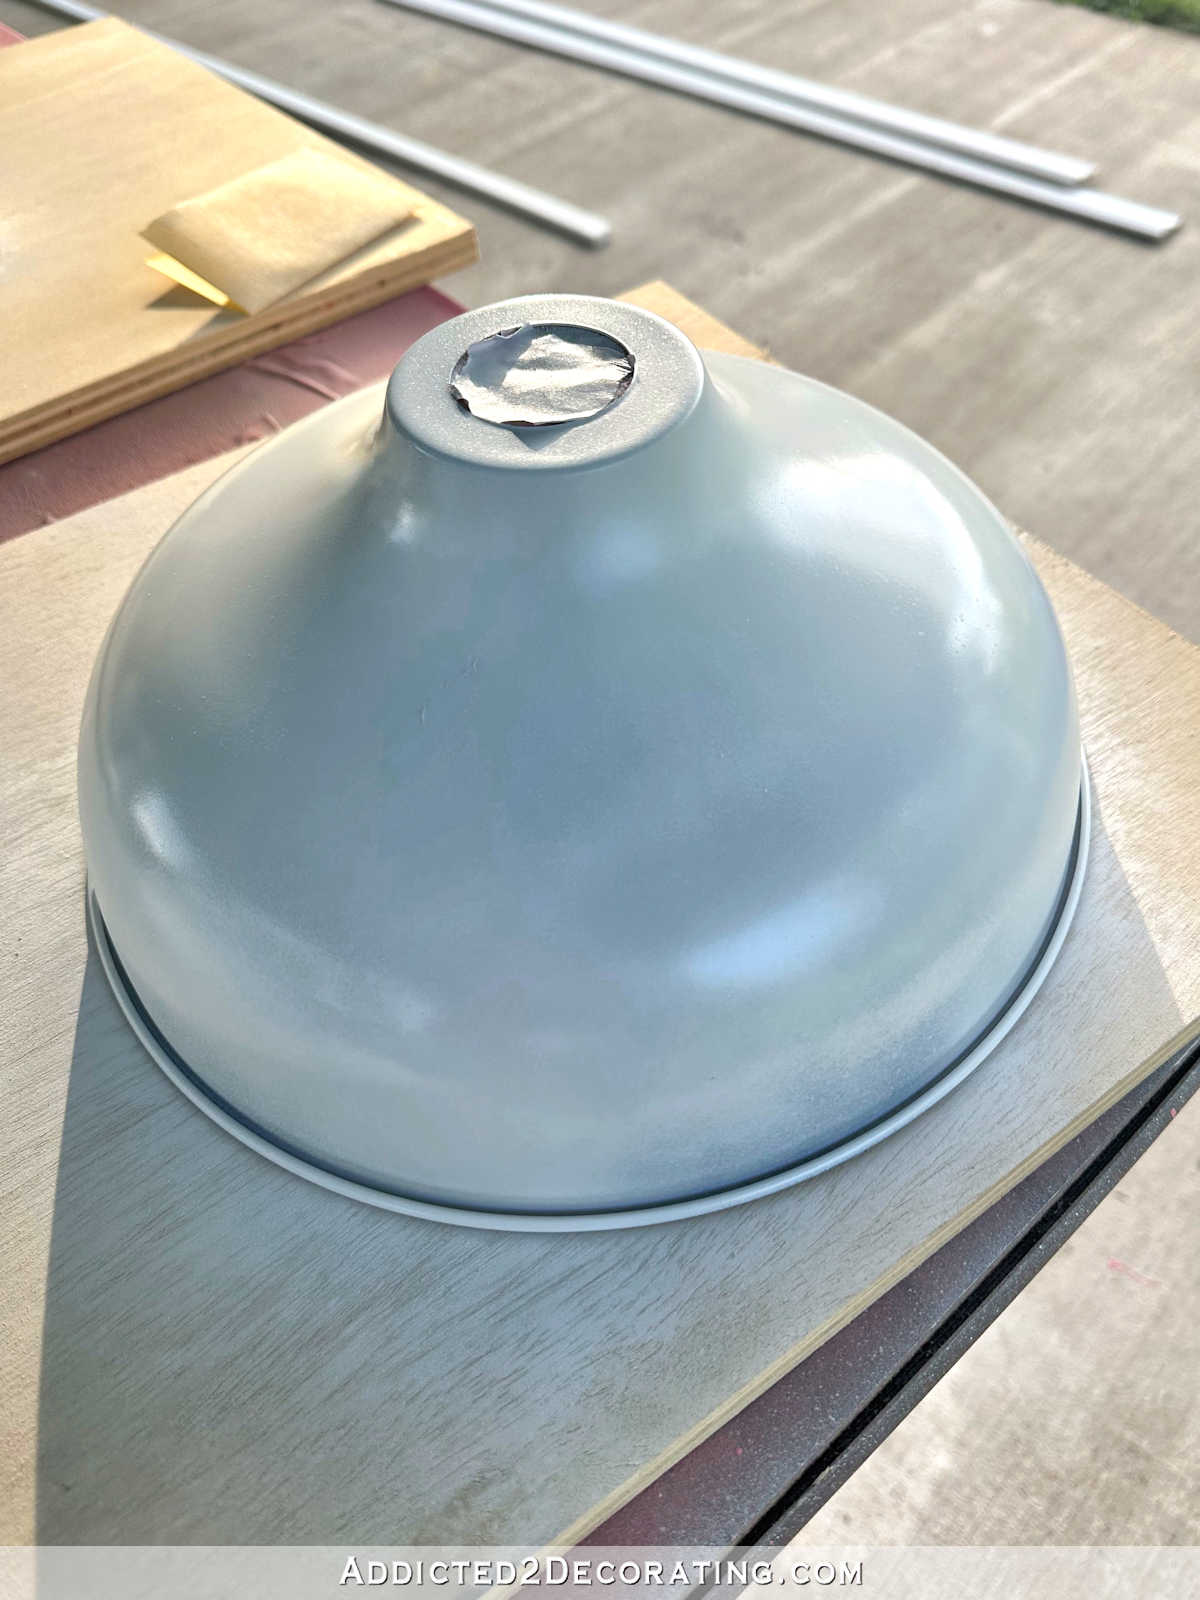
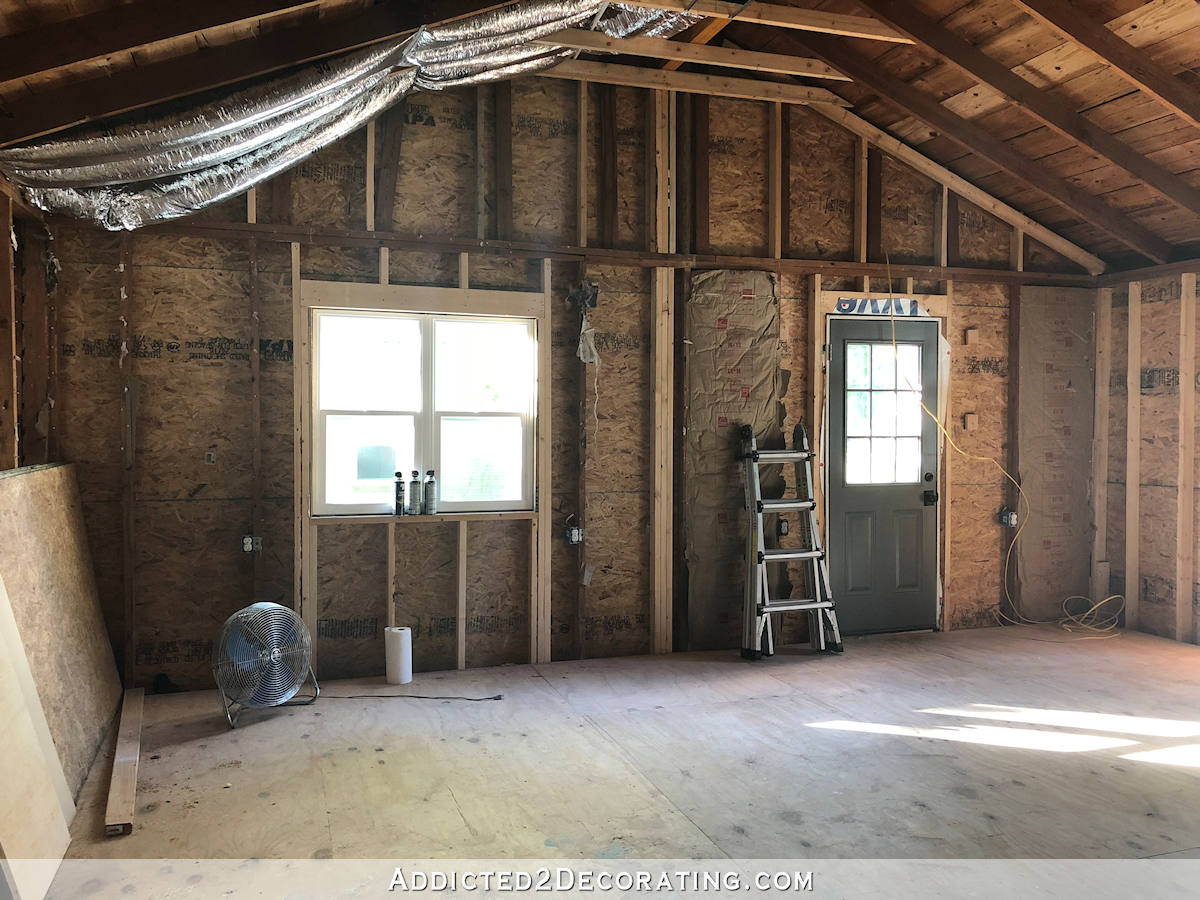
But before I could install cabinets, I had to get that section of the room painted. Rather than paint the entire room at once, I’m having to do it in sections because of the things I’m having to work around. It’s not the most efficient way to work, but it’s fine. It’ll all get done. 🙂 But for now, I painted the area of the ceiling that is above this section of cabinets, and then I painted the part of the wall that is behind and beside this section of cabinets. I still have to go back and do that little section above the door.

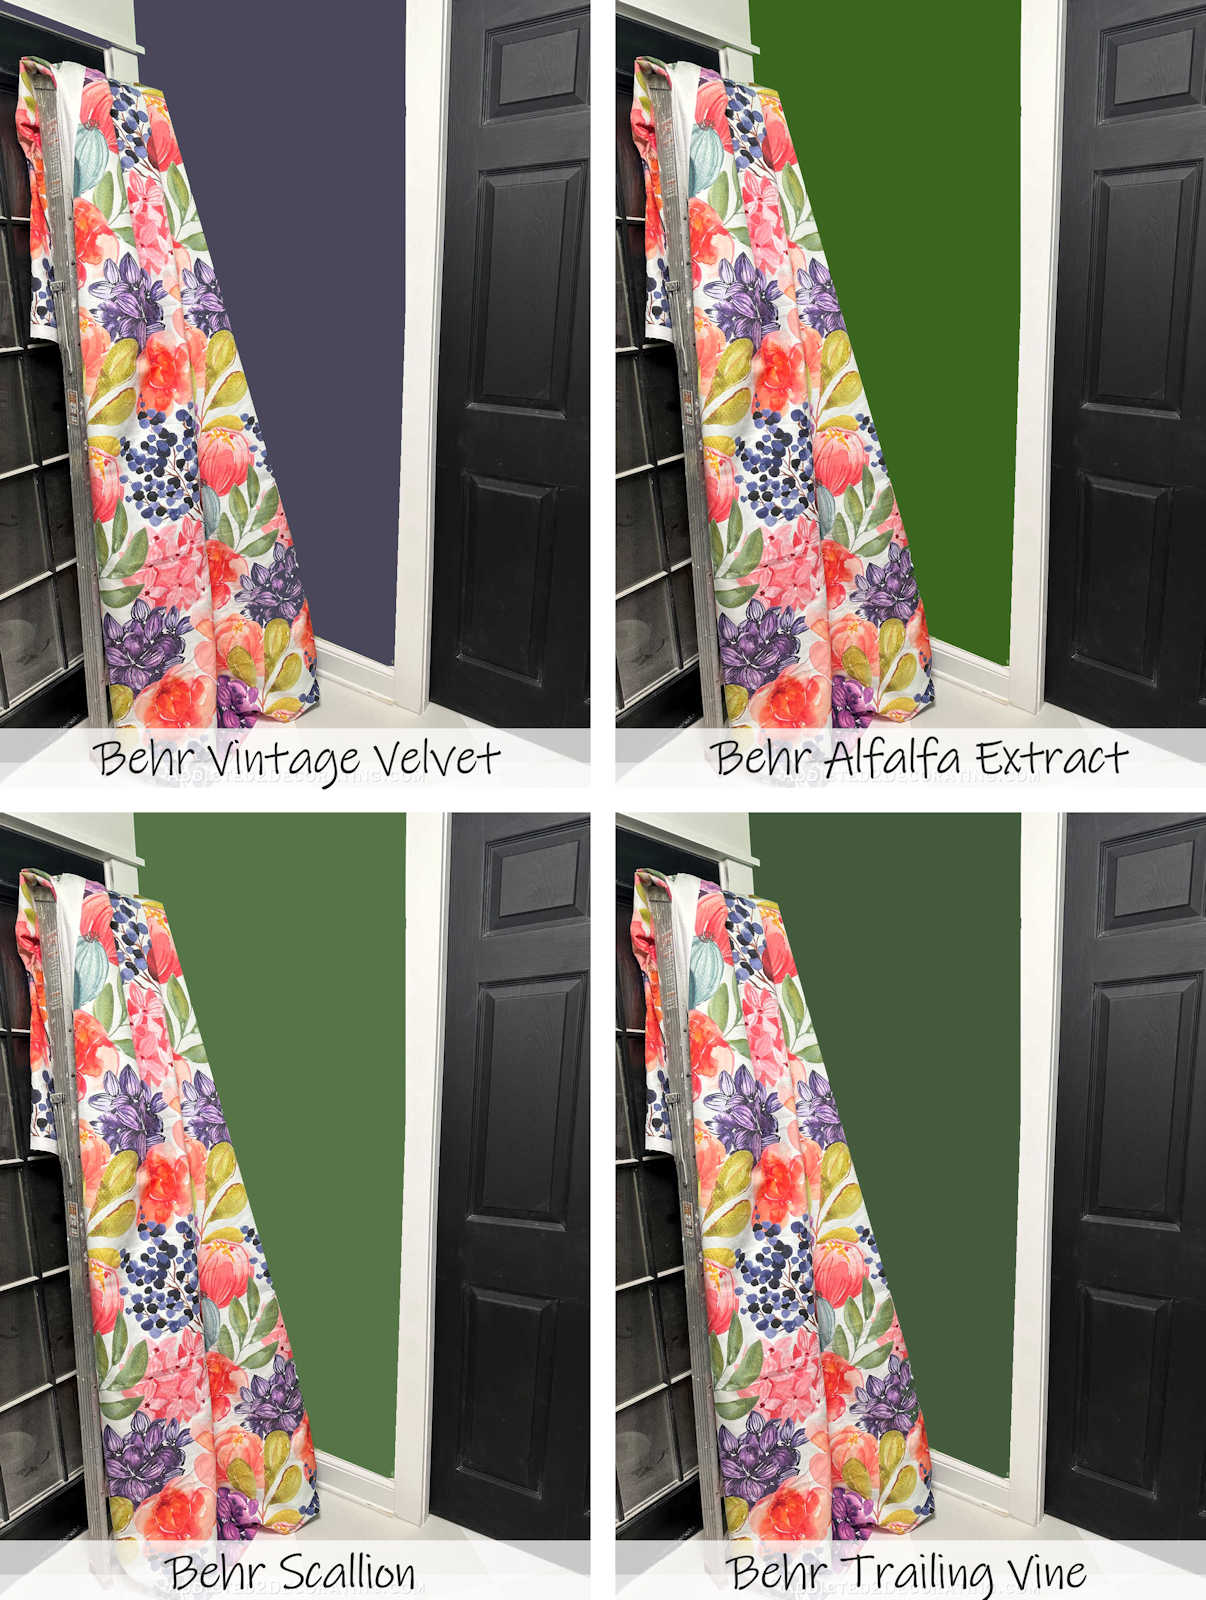
I generally enjoy painting a room, but I can tell you right now that I’m not enjoying this one. I don’t like having to climb up and down a 10-foot ladder (I don’t like tall ladders), and I’m eventually going to have to drag out the 12-foot ladder. I’m dreading that. But I’m getting it done, section by section, slowly but surely. I’m very happy with the colors that I finally settled on — pure white ultra flat Behr ceiling paint for the ceiling, and Benjamin Moore Classic Gray for the walls (mixed in Behr Premium paint).

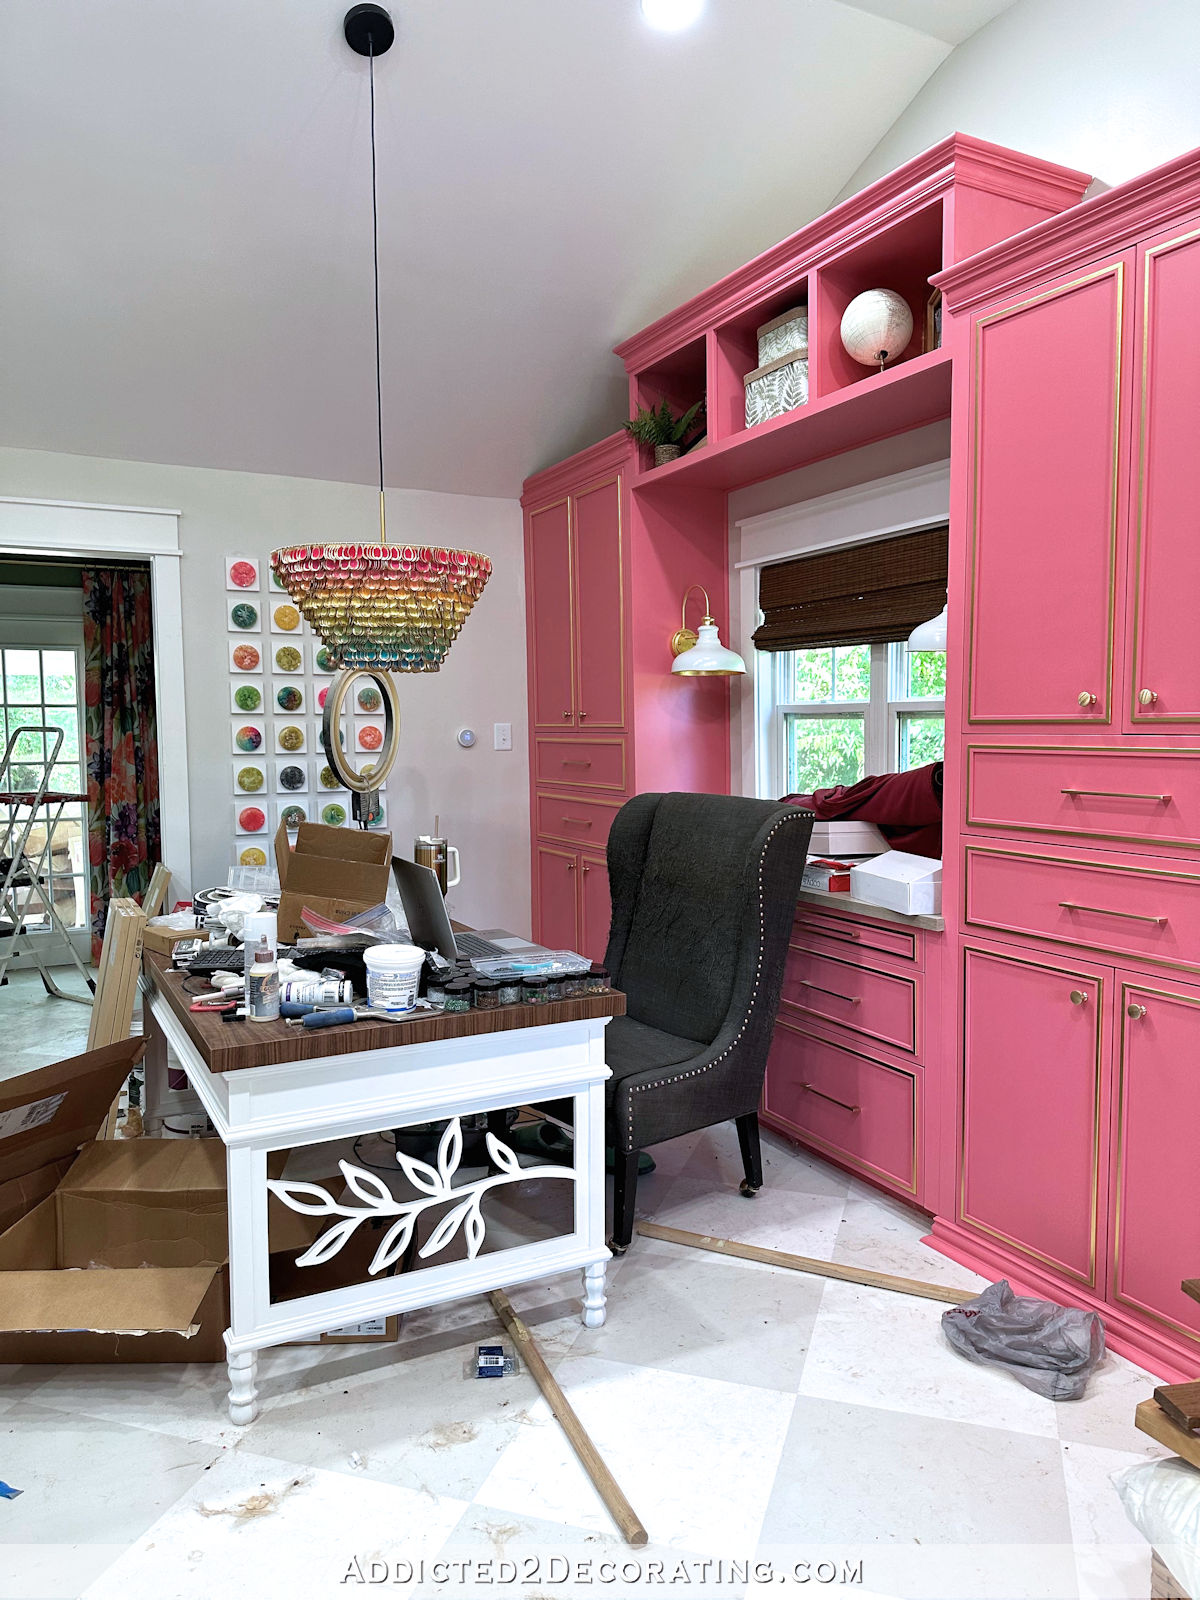
So once that section of the wall and ceiling were painted, I could get to the fun part — assembling and installing the cabinets. I made and added 3-inch feet to these cabinets just like I did for the ones on the long wall. (You can read more about that here.) Those feet don’t have to be pretty because they’ll be hidden behind trim.
I haven’t actually installed the cabinets yet (i.e., attached them to the wall) because the installation on these cabinets won’t be as straightforward as the other wall of cabinets. As you can see, this wall will require some spaces between the cabinets.
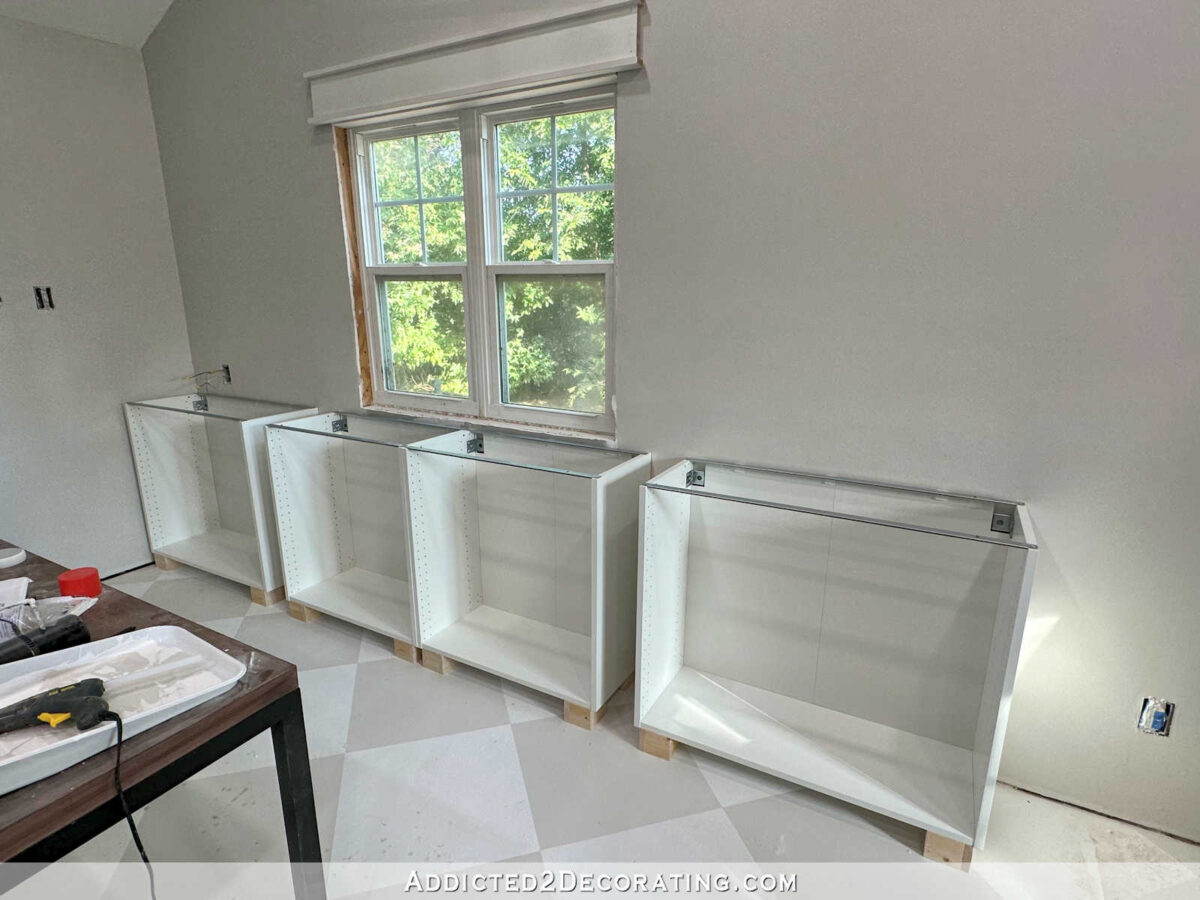
Since I’m using IKEA cabinets instead of building from scratch, I only had specific widths to choose from. I chose the sizes that would fill the space as much as possible, but the fit wasn’t nearly as good for this wall as it was for the long front wall. I know that I want the two middle cabinets to be right against each other (i.e., no space between them) and centered under the window.

But then that leaves spaces on either side of the cabinet in the corner. It needs a space between the left side and the wall of at least 1.5 inches, but then that leaves a 5-inch space on the right side of the cabinet.

I had thought about framing that out and having a slot for something useful, but I can’t think of any reason I’d need a 15-inch-deep, 5-inch-wide, 30-inch high slot in an office setting. If it were a kitchen, and the cabinets were 24 inches deep, it would be a great place for cookie sheets. But I can’t think of any use for this space, so I’ll probably just cover it with a 5-inch-wide spacer.

But whatever I do on that side, I’m also going to have to do on the other side in order to keep the whole thing symmetrical.

I’ll figure it out. It’s just going to take some thought and planning to get it just right.
I’m really hoping I can get these installed and then finally make some progress on the countertops this weekend. Barring any unforeseen circumstances, that’s the plan. We’ll see how that goes. 😀

Addicted 2 Decorating is where I share my DIY and decorating journey as I remodel and decorate the 1948 fixer upper that my husband, Matt, and I bought in 2013. Matt has M.S. and is unable to do physical work, so I do the majority of the work on the house by myself. You can learn more about me here.

Build a cubbies in the gap space in the lower cabinets. I can think of a lot of things (stencils, rulers, tools, yarn, paper, thread,etc) that can go in cubby space in a craft/workroom. Don’t hide the space. Use it.
Agreed, or maybe even pull out like spice cabinets in a kitchen?
That’s exactly what I thought of, cubbies!
Hi
Could you use that 5″ gap for wrapping paper? Or art paper of some sort? I’m loving your progress.
Great place for cutting pads, paper cutters and the like, if you have those.
The 5″ space would be great if you use mat(s) for rotary cutting or Cricut type machines.
It is looking good.
I have two storage pieces with a long open slot at one end and use one for sheets of poster board, foam core and cardboard and the other for storing picture frames and canvases.
Blank canvas storage, hide tech (router) or a home for scrap to do artwork on. Create cleats in the top and bottom corners, to attach removable cover trim to blend in visually.
Do you use any cutting mats, I always struggle with where to store them. Love the cubby and paper ideas also.
It is looking good.
We have tall ceilings and we bought from the hardware store, a small folding scaffold. It has locking casters and feels much easier than a ladder. I painted walls and installed crown molding and painted ceilings with it–so much better than a ladder. It is currently folded up and hanging on hooks in the garage. You can take your bucket and trays up there and don’t have to come down a lot. If you don’t lock the casters, you can side to side move it without getting down. I love it.
On this note Kristi, any thought to using your paint sprayer? Or just too much taping off to use in sections? I bought mine because of you!
I love that paint sprayer! I so wish I could use it, but there’s just too much in the room for it to be practical. If I could move my desk, the two work tables, and a few other things out, it might be worth it to try to tape off everything else and spray. But having to work around these big items, covering and taping off everything, and then spraying just seems overwhelming to me.
I’ll be doing some outdoor painting with it later this year (hopefully), and I’m looking forward to that. It’s such a great sprayer and will make quick work of finally getting our carport painted.
maybe tall clamps could fit there? rolls of extra papers? tall drill extensions like those for stirring mortar?
It is taking shape!
Since you are using these for office supplies, etc., I can understand why you might not want canvases, etc. there…but that pull out idea is great, and small extra supplies would fit very well in a 5″ area. Then you don’t have to keep so much in/on your desk. I also think the idea of wrapping paper storage is great…all in one place, and a nice big flat desk to wrap things as needed. WOW I didn’t expect to see so much done, and even more impressive since your week was wild.
Off the subject a bit…I read some of the more negative reviews on the steam cleaner…did you find a lot of water dripping out instead of steam? Not hot enough?Do the brushes seem like junk and we would need to buy a lot of them? I’m wondering if these people just didn’t know what they were doing, or if they got a bad one. There are SO many good reviews I’m thinking they didn’t read the directions, and didn’t pay attention to the tips. Thanks…I really want one!
I went to Amazon right away and looked at steam cleaners, too! My grout and window tracks could use a good cleaning! I have the same questions…I’m very tempted to go for it!
The brushes don’t seem like junk at all to me. And it comes with either four or five of the small round bristle brushes, which is probably the attachment I’ll use the most.
As far as the water, I did have that problem at first, but I figured out why. I misread the instructions, and though that I was supposed to hold down the trigger on the handle while filling the container with water. But if you do that, water will get into the hose and just sit there. Then after the water heats up and the button lights up green showing it’s ready to use, all of that water in the hose has to go somewhere, so it comes when you press the trigger. At first, it was a huge mess. But as soon as all of that water came out, it was just steam.
I tried it again today, and didn’t hold down the trigger as I was filling it. So no water got into the hose. When the green light showed it was ready, I held it in the sink and pressed the trigger for just about two seconds to make sure no water was in there, but it was just steam, so it was ready to go!
The steam seems really hot to me! I’d be afraid to put my hand in front if it! I don’t know exactly how hot it gets, but it was hot enough to do a really fast job on my grout. What I used it on this morning was the filter on my vent hood over the stove. It was filthy, and I keep forgetting to buy a new one. But I used my steam cleaner on it, and in about two minutes, this one was looking brand new. I absolutely love it! I can’t wait to try the window cleaner attachment!
You know, when life throws a curveball at you the best you can do is pivot as gracefully as possible. Looks like you’re doing just that. Slow and steady wins the race. You’ve got this🤩🤩
How about putting all the cabinets touching and then you will have a 10″ space at the end where the wall to the storage room is. That way you can store a small step stool, cutting mats, yardsticks, metal rulers or T squares, and stuff like that, that won’t fit in a cabinet.
I’ll miss the blue walls, but look how nice the new wall color looks with the floor! It makes the room look so finished and airy!
You and Matt need to get a BedJet. Its a portable a/c and heater. Its meant to be used on your bed to blow cold or hot air between your sheets. But when the ac is out, it could blow over his body in a chair or bed. I’ve had mine for 3 years and love it for hot summer nights. About the space, could you store tv trays or small foldable work tables in that slot ? Do you draw a lot on large paper ? You could roll up the paper/canvas for storage. I used a lot of wooden tv trays beside my crafting tables ti hold supplies giving me more work space on the table.
I’d use that space for things like envelopes, staplers, etc to free drawer space.
Like other commenters have said, there’s lots of things to could put in that space, but you could also turn one of them into a built in trash can where you could just slide excess materials off into a trash can underneath.
How funny – when I saw the first photos, I thought you were painting the white ceiling a pale, airy blue to mimic the sky, not painting the blue drywall white.
(I do like the pale blue with the wallpaper 😉 )
Similar to other posters, it seems to me there are many uses for that open space, but specifically for your vocation – floor plans! These are so awkward and huge! We had a bunch at work for the various buildings, and I would just groan when I had to look through them at the back of a closet. Also – a trash can. It always surprises me to see an ugly trash can (although I admit some aren’t so ugly) sitting in the middle of the room. Your studio is looking beautiful! Be careful on that ladder!
I just read all the comments up to # 26 and the first thing I want to echo is “Please find a use for that space.” Cover the 5″ opening somehow, if you must, but it would be a shame to have it closed. It will take some noodling on what to put there.
The second thing I want to mention is the true joy I always feel when I see the generosity of your faithful followers who take their precious time to cheer you on and offer such practical suggestions, ideas, and their experience with products, methods, and pitfalls. We all benefit directly and indirectly even if we are not building something. It truly touches me to see how much they care for you and wish you success. (I’ll include myself.) Hugs to all of them.
There will be much more ahead to view. As for right now, your studio is going to bring you so much pleasure as you keep producing within its walls. The fun has barely begun.
Arn’t your plugs behind the cabinets? when are you cutting access holes on the cabinets. Maybe drill a few holes in the connecting sides. On the top and bottom so you can run cords from one cabinet to the next. Easier to do now than when full and covered. If you are worried to have a hard time in that 5″ gap get some pvc or make a little “U” shaped chase to attach between to ease running cords. Also can hide power strip in the 5″ gap.
I see an outlet just above the cabinet on (our) left and one on the right farther down the wall. Rest assured, when she screws the cabinets to the wall, any/all outlet holes will be cut then.
Just about every idea I had has been mentioned. Leave it open at the top and store fabric or paper rolls? Or build cubbies and use for folded fabric storage? Baskets of paint whether they are acrylic, oils, or watercolors? Baskets of markers? A basket for your glue gun and extra glue? A basket of small tools like screwdrivers, tape measure, pliers, etc that you use in the house for small jobs. Even picture hanging supplies. Household binders with warranty info, owner’s manuals and the like. Do you do any mosaics or stained glass? You could have containers for those small items, scraps, and ephemera. I’m sure you can find a myriad of uses for cubbies! Even a space for a trashcan is better than just closing it off. Or space for a small wet/dry vacuum or dustbuster would be nice (*My house vacuum is only 8″ wide with a carry strap so this is my POV).
I would separate the two center cabinets so the stiles are all the same width on all the cabinets, a stile could be centered under the window. All the different size stiles would drive me crazy.
I’m quite sure her need for symmetry means positioning the cabinets precisely under the window. So they remain equal on both sides, she’s leaving the 5” gap. We all do things in our own way. This is Kristi’s.
I love this comment!
I do, too. She gets me. 😀
You know, when life throws a curveball at you the best you can do is pivot as gracefully as possible. Looks like you’re doing just that. Slow and steady wins the race. You’ve got this🤩🤩
I agree with one of the other comments, regarding installing some little pullout spice cabinets with shelving. So looking forward to seeing what the finished room will look like.
Maybe a slider to hold spray paint? Not sure if you use it as much as I do, but that would be an awesome feature if you do!
Hi Kristi,
I love your decorating projects. I had never thought of painting my interior doors blue, but yours are so pretty. I fell in love with the fabric you chose for the bathroom shower curtain. Would you be willing to share the name of the pattern and where you purchased it? And, how much I would need to make a shower curtain?
Thank you so much.
This is the pattern, but I’m pretty sure it’s discontinued. You may be able to find some on Ebay, though! https://housefabric.com/Pattern-Play-Tutti-Fruiti-P223144?. For a shower curtain on a standard bathtub, I order six yards (adjusted if needed in order to match a pattern at the center seam). To cover the whole shower, you’ll need two widths of the fabric, and I always made my shower curtains full length like a curtain panel.
Given your drive for symethry, have you considered putting equal amounts of space between all the cabinets, including the two in the middle?
Instead of having two large spaces on either end you’d have a more balanced look of having a smaller but equal space between each cabinet, and the two in the middle would still be centered on the window.
It might make the entire thing look more intentional and balanced instead of like you tried to deal with a bad fit.