Studio Side Steps Progress (A Change In Design)
Last Friday, I was sure that I would get the studio side steps finished over the weekend. That didn’t quite work out for two reasons. First, I decided to take a day off to relax and not think about house projects, so I lost a whole day of work. I chose air conditioning and relaxing over working in the hot sun. 😀 (Those side steps are in the direct sunlight almost all day long.)
But the second reason is the main reason. I wanted to do more research and reading before I pushed forward with my plan just to make sure that I was building steps that would stand the test of time. And I’m so glad I took the time to do that because, based on what I read, I ended up making a pretty significant change to the design of the steps.
If you’ll remember from last week, my plan was to use the retaining wall blocks as the risers for the steps and then use the concrete pavers for the steps. That’s still the plan, but the internal structure is what changed.
NOTE: This is a multi-post project. You can find all of the posts about this project, from start to finish, here: DIY Exterior Concrete Steps Archives
You can find the previous (first) post in this series here: Studio Side Steps Progress (DIY Steps With Retaining Wall Blocks And Pavers)
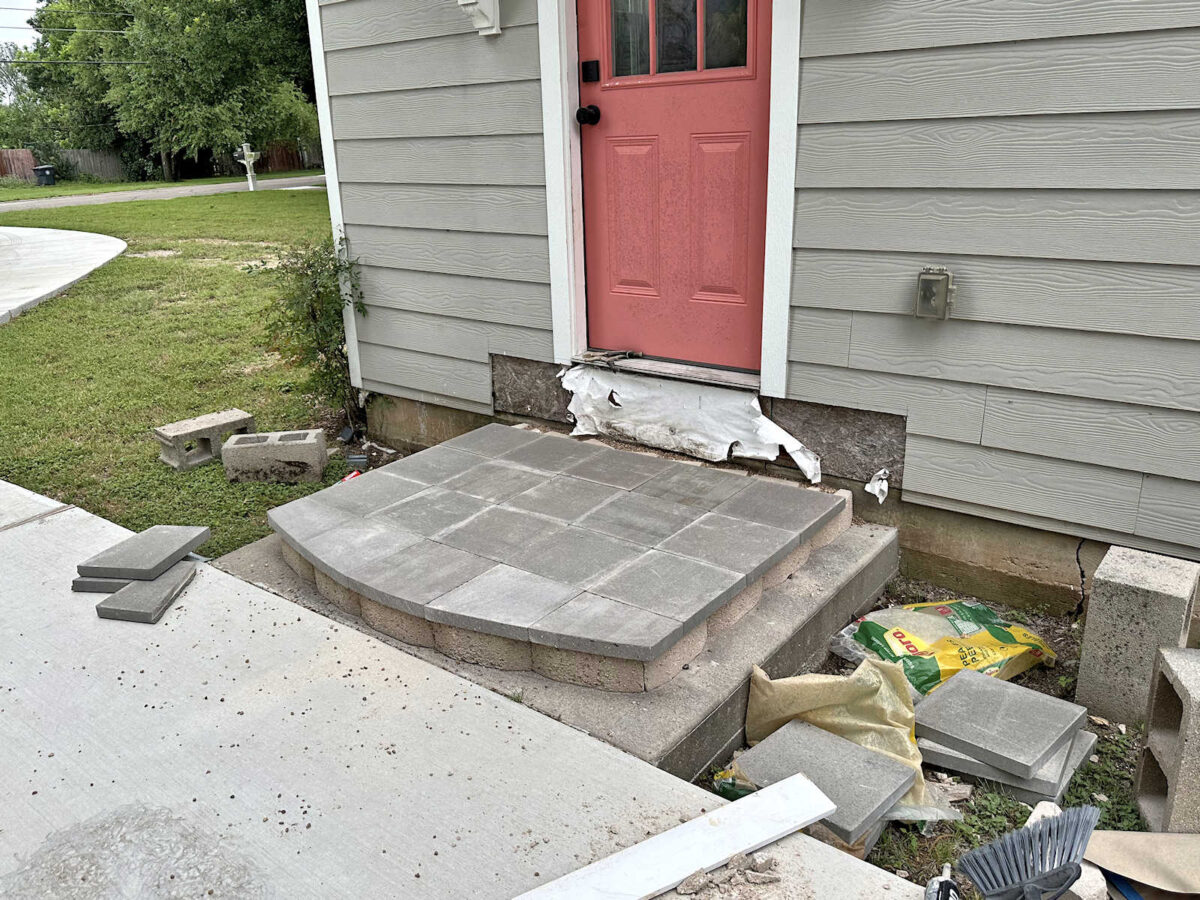
My original plan was to cut the retaining wall blocks for the internal supports in half and just use those to support the four corners of each concrete paver. This was the last picture I showed of that plan, but I took the picture before I got to the point of cutting the retaining wall blocks in half.
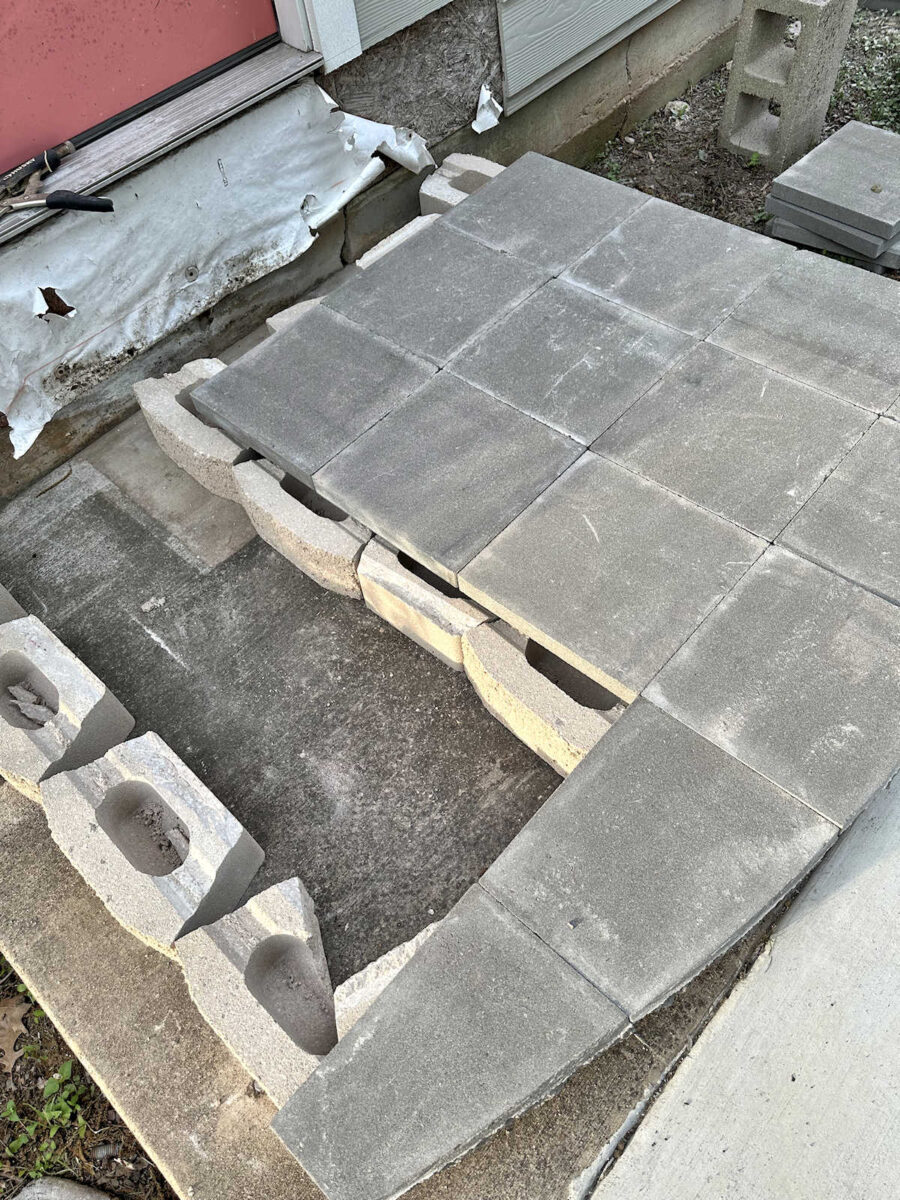
So as you can see, if I had cut those supporting retaining wall blocks in half to use as supports on the corners where the pavers meet, that would have left the center of each paver unsupported.
But before I started cutting those blocks in half to proceed with my plan, I decided to do a bit more research to see if this was the best way to go about this. So I sat down at my computer and started googling. First, I wanted to know how much weight 12″ x 12″ x 1.5″ concrete pavers can hold. This was the Google AI response: “A standard 12 x 12 x 1.5-inch concrete paver can typically hold between 3,000 and 8,000 pounds of distributed weight, provided it is fully supported by a flat, properly compacted base.” It’s that last part that obviously got my attention — fully supported by a flat, properly compacted base. Obviously, that’s how pavers are generally used. They’re used flat on the ground over layers of leveled and compacted gravel and sand. And I know they’re very strong when used that way because we have random concrete pavers around our property that are in perfect condition and look like they’ve been there for decades.
Next, I asked how much weight they can hold if they’re suspended and only supported on the four corners. Here’s the answer I got: “If suspended and supported only at its four corners, a standard 12 x 12 x 1.5-inch unreinforced concrete paver will fracture under a central point load of only 150 to 350 pounds.” That’s obviously a problem, and that meant that my original design had to change. Thank goodness I hadn’t yet cut those retaining wall blocks in half, and none of the internal supports and none of the concrete pavers had been glued down yet.
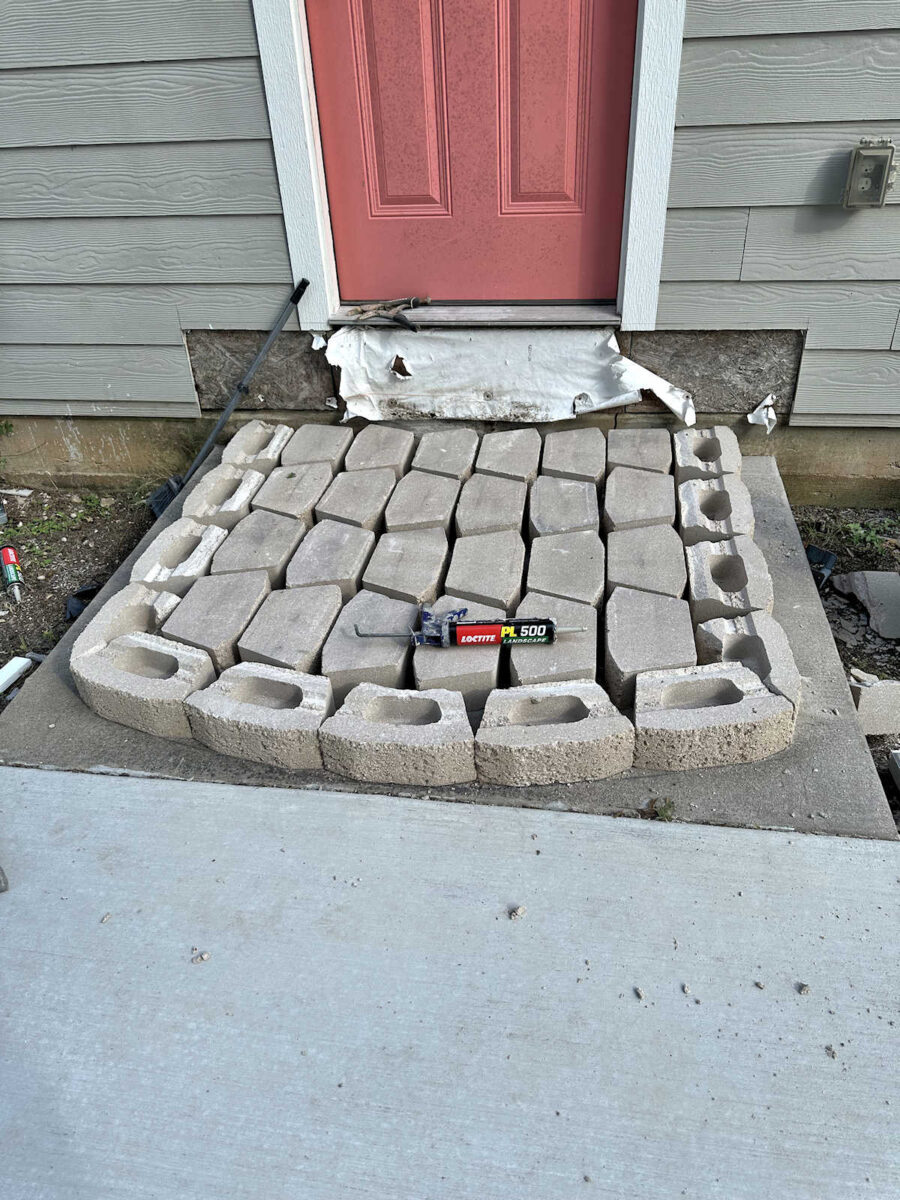
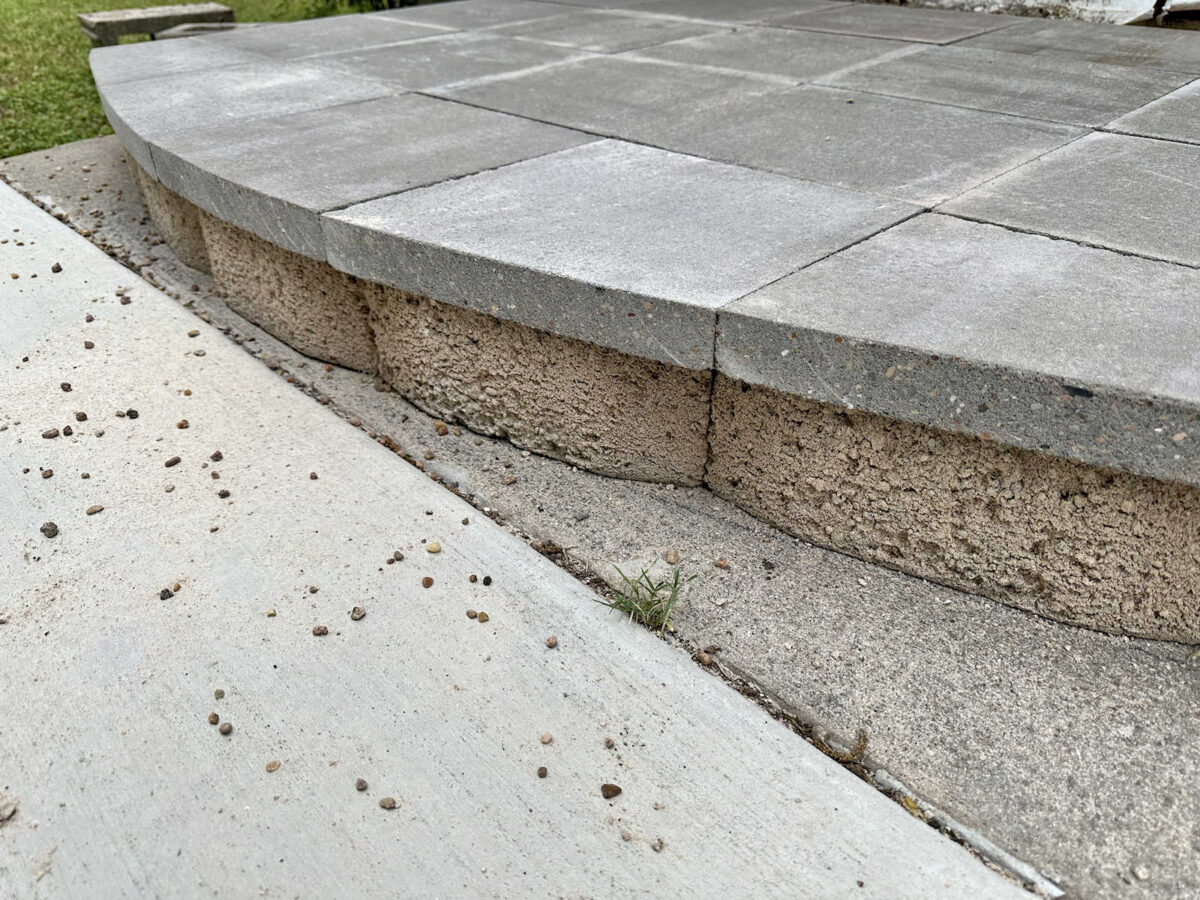
So back to the drawing board I went. In order to provide the needed support for the pavers, I ended up filling up the entire cavity inside the perimeter blocks with as many blocks as I could fit in there, with only small spaces between them. I still had to cut that back lip off of each one so that they could lie flat on the concrete pad, and once I got them arranged, I glued them down with the same Loctite PL 500 polyurethane adhesive that I used for the perimeter blocks. It really didn’t add a whole lot to the price since these blocks are only $2.37 each.
After giving the adhesive a bit of time to set, I filled in all of the cracks with pea gravel. I had planned to use paver gravel, but that gravel is a little bigger than pea gravel and I didn’t think it would fit into the smaller cracks. Pea gravel was the perfect size to get into every single crack. I packed it down as well as I could using various tools that would fit into those small cracks, and then I brushed the excess away, making sure that there was no gravel on the tops of the blocks.
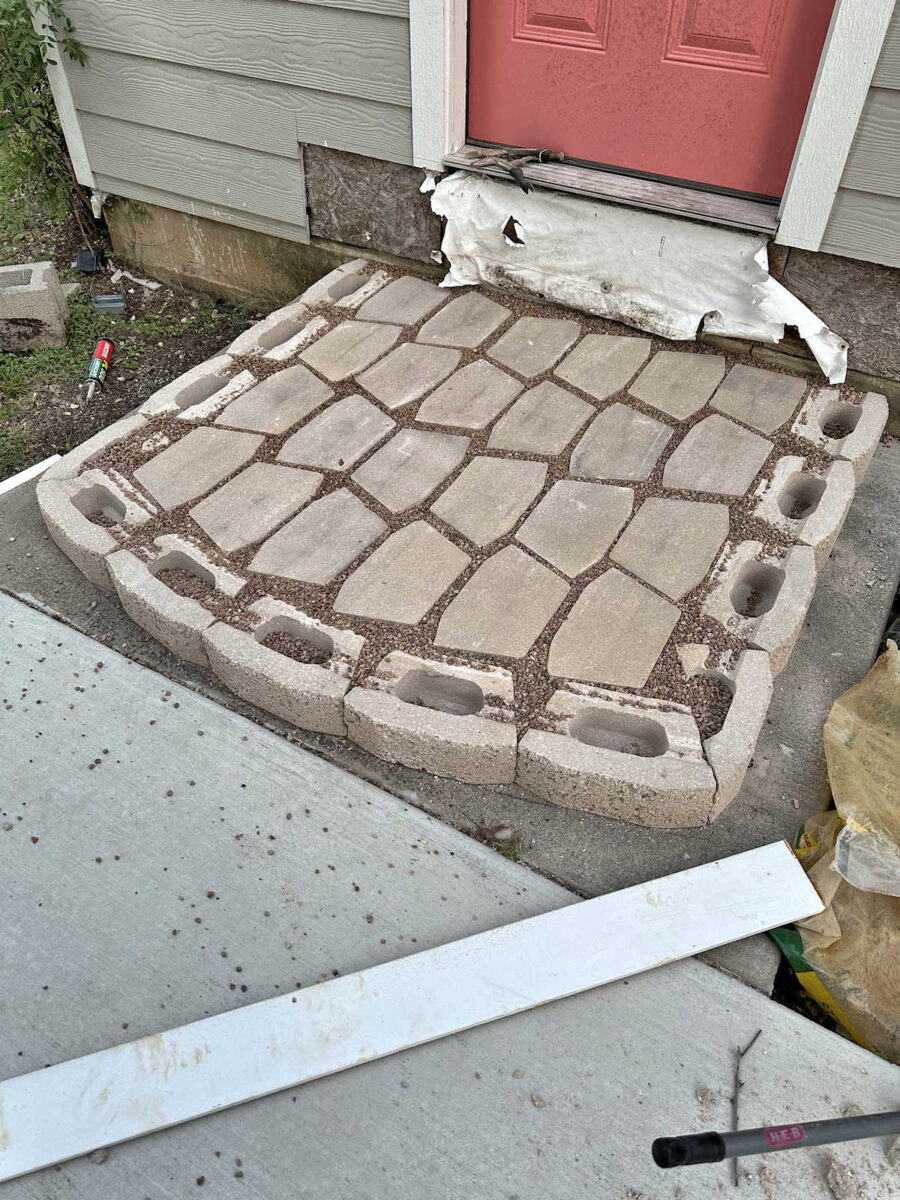
I didn’t fill up the hollow voids in the perimeter blocks. I’m not sure if I need to, but I still might go back and do that.

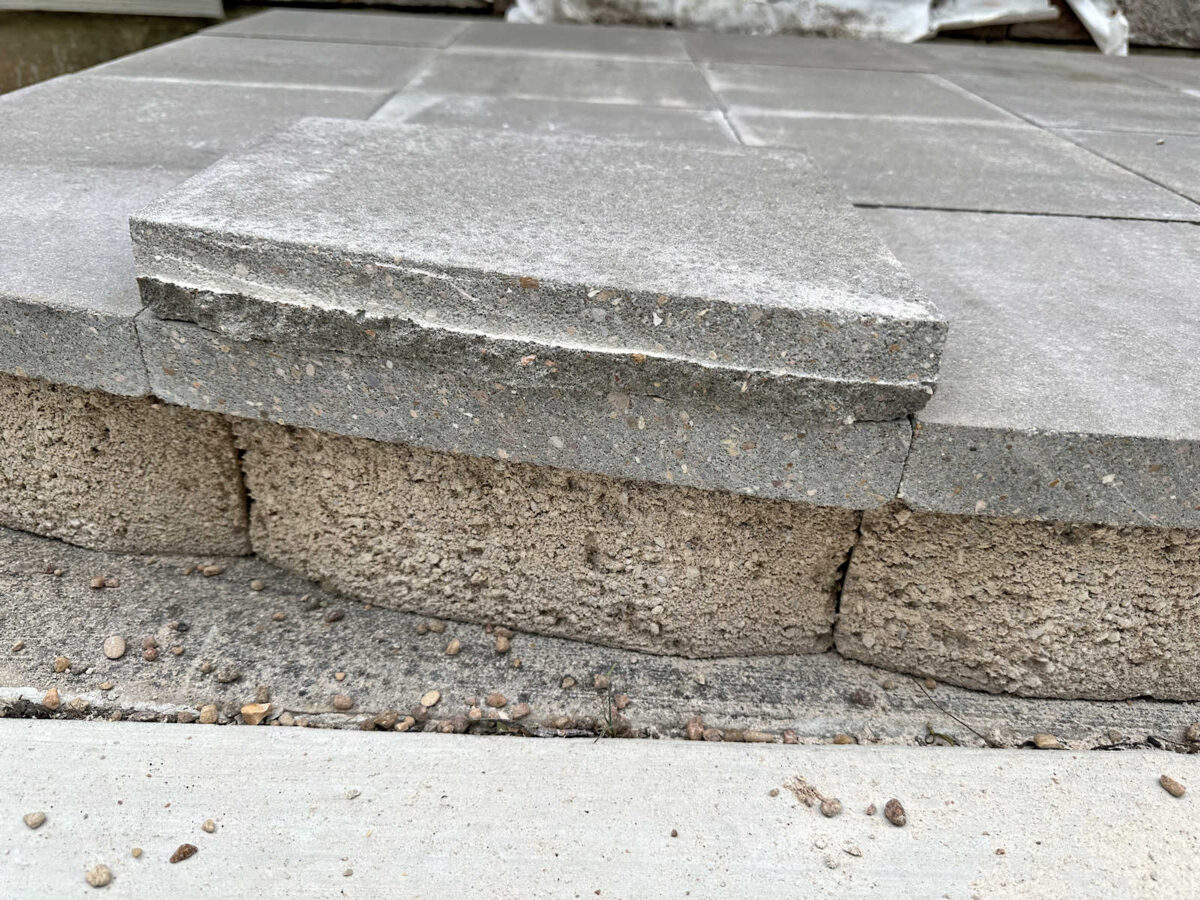
Another thing that I did differently this time is that I used my wet tile saw to cut the curve in the front pavers. This worked out so much better! With the tile saw, I was able to get a clean cut all the way through on the first cut, and that gave them such a better appearance. It wasn’t as quick and easy as cutting 1/4-inch-thick tile, but with the right blade, it got the job done.
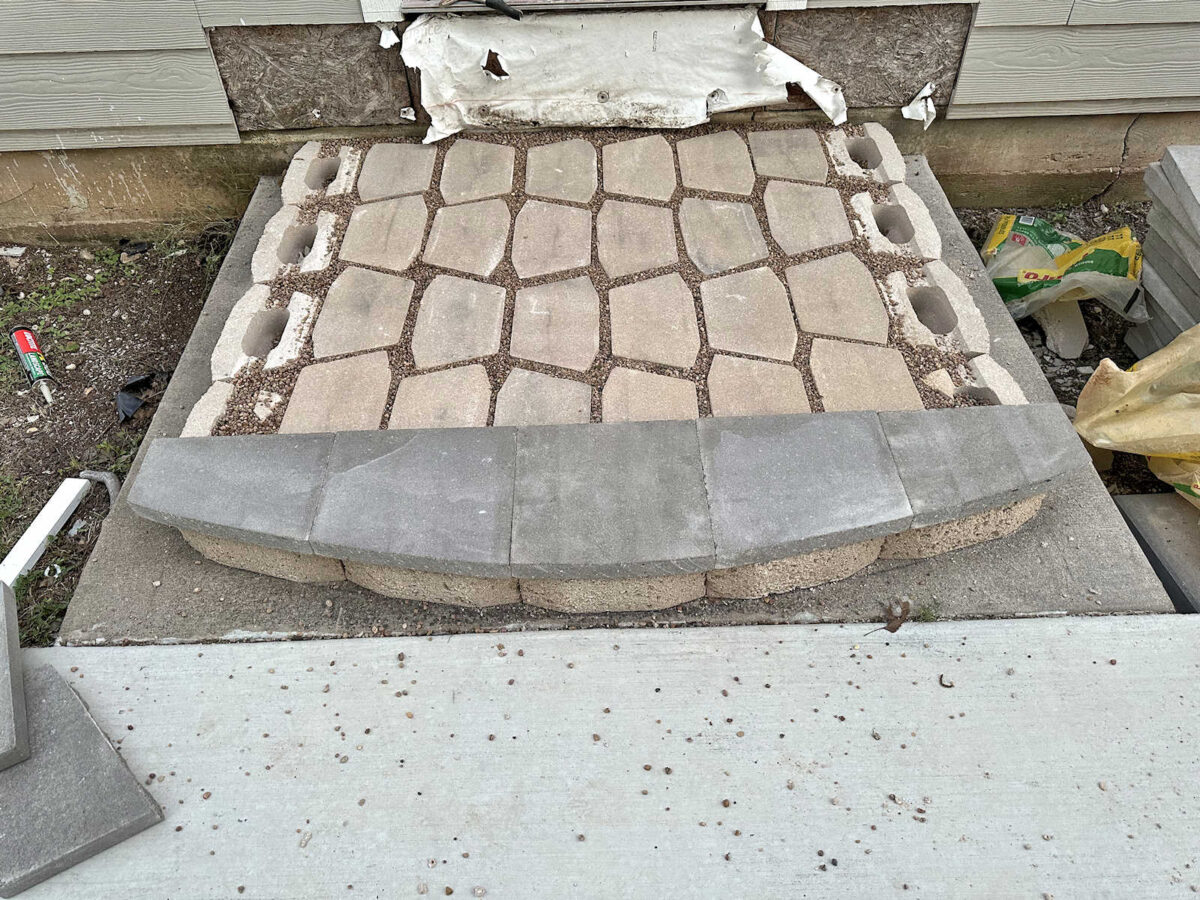
There are still some blade marks on them, so I still want to grind those off once I get the grinder/polisher disc for my handheld grinder. But even as they are right now, I think they look really nice.
Here’s a comparison of one of the pavers cut two different ways. The one on top is one that I cut using my handheld grinder halfway through and then knocked off the excess using a hammer. You can see just how much grinding and polishing that would have needed in order to get it smooth. On the bottom are the ones that I cut using my wet tile saw. The difference is day and night. The cut with the tile saw is such an improvement that those blade marks really don’t even bother me that much. But I’ll probably still try to clean them up a bit.
I still haven’t adhered these pavers into place. I need to do a little bit more readjusting before I do that. And after they’re adhered, I want to get that grinding/polishing disc to go over the tops of all of them just enough to get the dirt and dark color off of them so that the color is consistent. And then I’d like to seal them before I move on to the next step so that they’ll be less likely to get dirty and dark again.
I’m so glad I took the time to do more research on this before forging ahead. At this point, I feel completely confident in my plan. This step is solid. It took a while to get the plan just right, test out the plan, etc. But now that I have a solid plan in place, and I know the exact steps that I need to take to achieve this, I think the other two steps (and the other set of steps by the bedroom door) will go much faster. The trial and error, researching a plan, designing a plan, and then figuring out how to execute that plan is the slowest part of a project. But now that I have all of the kinks worked out, the rest should be much smoother and faster.
NOTE: This is a multi-post project. You can find all of the posts about this project, from start to finish, here: DIY Exterior Concrete Steps Archives
You can find the next post in this series here: DIY Concrete Steps Build Finished! (For The Most Part)
More About Our House Exterior & Yard

see all exterior &
yard diy projects

read all exterior &
yard blog posts

Addicted 2 Decorating is where I share my DIY and decorating journey as I remodel and decorate the 1948 fixer upper that my husband, Matt, and I bought in 2013. Matt has M.S. and is unable to do physical work, so I do the majority of the work on the house by myself. You can learn more about me here.


I really like the look of your work, and sounds like it will last forever! The finished top will be wonderful. Glad you did the research…before all those last steps. And, glad you decided to forge ahead on your own…I think you did it very quickly even though it was figured out as you went. I’m sure it cost less than hiring it out…and it is your vision.
Make sure you seal them with something that has some grip so they don’t get slippery when wet or frosty. It turning out nicely 🙂
Girl, you are in-dus-tri-ous!!! I like the look and I’m glad it’s working out for you but that’s a lot of labor. I’d fill in the outer blocks just to keep spiders and other creatures from taking up residence.
Will you not put a ramp by the bedroom exterior door to facilitate Matt’s exit in an emergency? Right now there is only one way for him to leave the house in his wheelchair, correct?
I’ll have a ramp, but not a permanent ramp. Right now, we have two exits for Matt.
Yup concrete is strong, but brittle like chalk. Steel is added in concrete to manage tensile stress and become a composite.
I’d wish to clean and seal that first step since it might interfere with adhesion for the top step.
I love the design you worked out. Beautiful lines, sturdy, and practical.
Well worth the research time you spent. Plus, how good you had a relaxing day.
So glad you did more research because now your step looks very sturdy and safe. Remember you have to finish the siding before you create the other step. Yes, your other steps will just be a slam-dunk because you have done all your homework. Just like a professional!
Have a good week.
Is the step down coming outside from the door too far? I know that stairs have code compliances but not sure about a step from the door to a slab. Will the one from your bedroom be slanted downward to make pushing Matt’s chair out easier? I’m glad you filled in the middle with more blocks and gravel, it does look much safer
There will be three steps, not just one. The steps outside our bedroom will look exactly like these.
I’m curious what your plan is for the base for the other steps. Are you pouring a concrete pad? Or do you feel confident that a gravel and sand base is adequate?
I’ll be having a concrete pad poured.
Hey Kristi, looks really good! Just wondering if the reason you didn’t take the steps all the way to the sides of the concrete pad because you are going to do a banister?
I’m about to do something similar so am keen to see how you will do that!
I won’t be doing a banister on these steps. I didn’t take the steps all the way to the edges of the concrete pad because that would have required cutting the retaining wall blocks used for the risers to be on the front of the steps, and I was pretty determined to only use whole blocks for the front for aesthetic purposes. I figured having them five feet wide was wide enough.