DIY Basics:: Decoupage Paper Without Wrinkles Or Bubbles {Video}
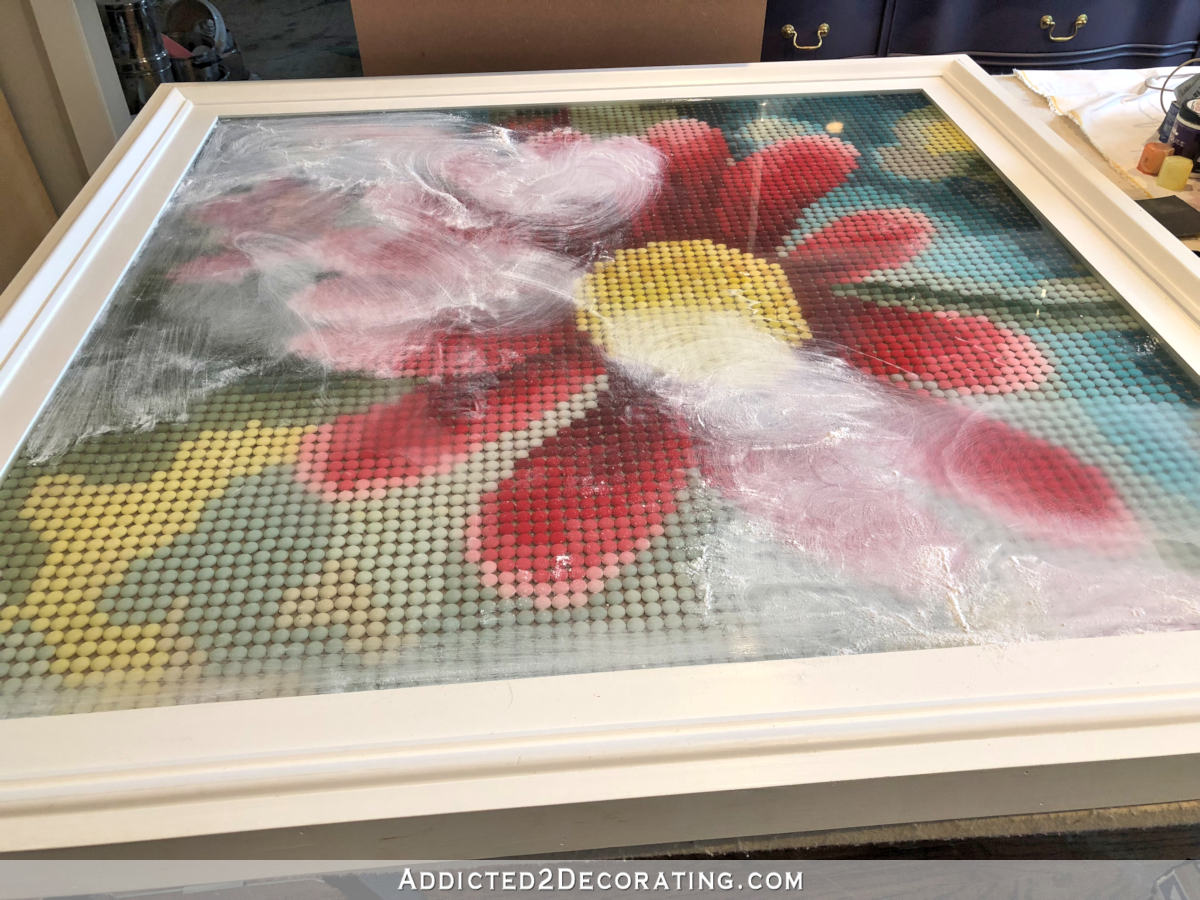
I finally learned the trick to using Mod Podge to decoupage paper without ending up with lots of wrinkles and bubbles in the paper. Hopefully these tips can help you avoid the frustration of less than desirable results with decoupage.

Addicted 2 Decorating is where I share my DIY and decorating journey as I remodel and decorate the 1948 fixer upper that my husband, Matt, and I bought in 2013. Matt has M.S. and is unable to do physical work, so I do the majority of the work on the house by myself. You can learn more about me here.

This is great Kristi! I just did a Mod Pog project with Ella the other day and I was bummed about the result, now that I know the way to do it without bubbles and wrinkles we'll have to try again!
Thank you!
There is a Mod Podge designed specifically for use with paper, there is an Outdoor Mod Podge that is water resistant, and a Hard Coat Mod Podge that is great as a final coat on furniture.
You can go here (http://www.plaidonline.com/apMP.asp) to read about all of the different kinds of Mod Podge (I own 9 of them).
Hi Kristi!
Loved the tutorial as I too have had very mixed results with my Mod Podge projects. When I use small pieces of paper, I usually end up with a fairly good end product. However, have you ever tried using something large and thin like wrapping paper to cover a somewhat big area using this technique? I tried to do the top of a dresser and the drawer fronts and chucked the whole project because of the bubbles. I think I may try again with your directions. Thanks for posting!!
Great tutorial. LOVE LOVE LOVE this…. did you use that new video camera????
BT, I haven't tried large sheets of paper yet with this new technique. One of my very first ever Mod Podge projects was a desk with wrapping paper decoupaged on top. It was HORRIBLE!!! I was so frustrated that I cried. I just watched a video by Amy over at Mod Podge Rocks blog, and she recommends using a brayer. I think if I ever do another large project, I'll definitely buy a brayer first.
Kim, yes, I used my new Kodak ZI8 video camera. It's fantastic!! But I'm still figuring it out. I'm sure it'll take a few tries before I get it right. 🙂 It's a fantastic little camera. Just under $100, and shoots in high definition. I love it!
Hey Kristi,
Thanks for your response. I will definitely try using a brayer AND your technique on my next attempt at decoupage. Laying a bigger sheet of anything always has its challenges but I hope this will now be much easier! Thanks again!!
Thank you for this- I could never figure out what I was doing wrong. Great tips.
Hi there. I am writing from Canada and found you via Tatertots and Jello. Great how-to video.
I find that if I lightly coat the back of the paper with a spray lacquer (found in hardware/home improvement stores), the mod podge is less likely to soak through the paper giving bubbles and wrinkles. Plus with larger pieces of paper, ie: dresser, tabletop or drawer fronts, I found it is best to do a section at a time. Just cut your paper to the size you need, roll it up with the design towards the inside and start with about a six inch section of mod podge on the surface, let it dry for about 15 minutes. Tha gives you a good hold to continue with the rest. A brayer is a really good choice for smoothing the paper and you need to check it every so often for any missed spots that need smoothing. It may take a bit longer but it will save you frustration and headaches in the end. I have used wrapping paper, ordinary white writing paper and even fabric (mod podge the back and let dry overnight). I use this to cover old books that I use for my Fairy House Books. And I always use the matte finish mod podge, at least for the first coat. I have tried a couple other podges (for fabric and paper) but always come back to the matte for the first coat. The real trick is to: keep smoothing, let dry completely and don't overdo the podge. Oh and seal the back of your paper, especially the thinner paper. Hope this helps.
I feel so enlightened. Thanks for sharing. I've been so frustrated with the bubbling and wrinking in past projects.
I found your blog through Mod Podge Rocks. Thank you for posting this video, it was very helpful. I know I tend to use a lot of thick, wet sealer and cross my fingers that it will be smooth (which rarely happens). Next time I'll try your technique.
Wow! Thanks so much for the tips. I can't wait to decopage my next project!
Very informative, Kristi! I am new to decoupageing and have not had great success….yet! I love love your blog, a new world has opened up for me! I am a
collector of alot of cute stuff, not really knowing all the fun things that can be done. !!
glynn from Riverside, Ca
If there any way of correcting the bubbles and wrinkles in your paper after they are there. I followed exactly what you did above. Please email me back on what I can do to fix my desk. Please I would appreciate your input into this. I waited 20 to 30 minutes in between placing the paper and then brushing on another coat. Thank you very much.
If you still have a few bubbles, try using a straight pin and stick it through the middle of the bubble, then work the air out through the bubble.
Thanks!
🙁 it was all going fine. But the top layer is bubbling my smoothe work 🙁 do I have to do a top layer? Can I just spray a thin layer of glass polyurethane instead?
…. I was so hopeful and encouraged with that bottom layer
🙁
*that was supposed to say GLOSS not glass
Whatever i do I still seem to get these horrible wrinkles when I try to decoupage larger pieces of paper onto the lid of a shoebox. I even used a brayer and that did not help either. I really have no idea what I’m doing wrong. My other lid that has smaller pieces decoupaged on it looks fine, but I can’t seem to get it with these larger pieces. Any ideas?
Thank you so much for making the video, I feel inspired to try it myself. much love from England.
Hi! Kristi. I love this advise!!! However Im finding it way too late 🙂 I tried to mod podge painted art ( 1 from each of my children when they were in kindergarten) and ruined both of them with wrinkles 🙁 Do you think there are any fixes I can try to salvage my childrens art?
SOOOOO Upset I could cry
Thanks for this. What would be even more helpful would be if you could tell us what to do if you DO get bubbles and/or lifting when you’ve laid it on to the bottom coat and have let it dry.
I notice that you don’t flatten from the middle to the edge, which is one way I’ve always been told to get out air, and that can be done with a brayer or tiny roller.
I wouldn’t know how to fix the problem once the glue and paper are both dry and set.
Thanks so much for the video