Hallway Progress…and a Minor Setback
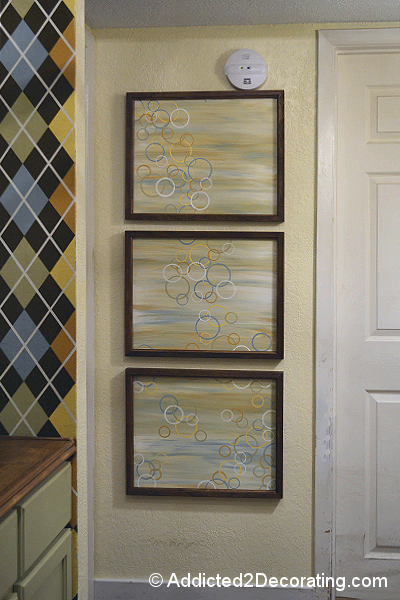
I’m so excited about the progress being made in my hallway and utility closet!! There’s still soooo much to be done, but as of now, this is what it looks like…

Still much to be done, indeed. But you’ll notice that all of the construction has been completed, and the walls have been textured, primed, and painted. Yippee!! No more gaping holes in the ceiling! No more dark, depressing khaki color on the walls!
I also removed the dinosaur of a smoke detector that we had and installed a new sleeker model (although it’s still wearing its cute pink dust cap in this picture). And lastly, I installed a new hall light just around the corner out of sight. That’s where all the light in coming from in the picture above.
Still to do:
- Paint the closet (I settled on apple green!);
- Stencil the closet walls (still haven’t settled on a design);
- Paint the cabinets (a creamy white);
- Install and paint the baseboards;
- Repair the wainscoting that had to be cut;
- Finish installing and grout the floor;
- Find and install new doors on the bedroom and office;
- Make curtains for the washer/dryer closet on the right; and
- Repaint the light fixture.
Wow. When I see it listed out, I realize that there really is quite a bit left to do!! Oh well. Even so, I’m still ecstatic considering that it started off like this…

Even with all the unfinished projects, that’s still quite a change, right?!

Now on to the minor setback…the light fixture. If you’ll remember, it started off as an outdated brass light…

I turned the glass part into a candle holder for John & Alice’s family room, which left me with the actual light part. So I put two hanging plant baskets around it like this…

Then I decided I wanted it a bright, fun color and painted it yellow. Obviously that was a silly choice. I’m going to remedy that soon.
But the problem is that this “new” light hangs too low. Yep, the clearance from the bottom of the light to the floor is 6’ 3”, and the minimum clearance should be 7’. Oh sure, I could fudge it a couple of inches, but that means I still have to find a way to shave 7 to 9 inches off the length of this light. Hmmm…I really have no idea how to do that without completely taking it apart and starting over again with a shorter rod.
It’s a little disappointing…a little frustrating…but I’m not ready to give up on this idea just yet.
In other news, I can’t find a stencil I like for the utility closet walls. I know I want a geometric type design (so no flowers, vines, etc.). Any suggestions?

Addicted 2 Decorating is where I share my DIY and decorating journey as I remodel and decorate the 1948 fixer upper that my husband, Matt, and I bought in 2013. Matt has M.S. and is unable to do physical work, so I do the majority of the work on the house by myself. You can learn more about me here.
I used a wall stencil from Hobby Lobby for my pantry and loved it! I think it was called Iron Lattice
Looks like you are getting there, always more to do but when you get one project finished it really feels good.
You need to check out Cutting Edge Stencils (on the web and on facebook). They have hundreds of beautiful and modern stencils. I am finishing up with one of their designs in my guest room – super easy to use snd I get professional looking results. Be sure to look them up – you will love their products (and inspirational pictures!)
Kristi, you are such an inspiration. I love this light idea…so creative. Lori
I just had to tell you about "Cutting Edge Stencils", but I see that someone already did. You definetely have to check them out if you haven't. They have a whole section on "Geometric/Allover" stencils. I also need to tell you how much I love your light fixture! Did you purposely leave the inside of the planters yellow? I love the idea of a bright color on the inside and oil rubbed bronze on the outside! Very cool.
It is amazing how different it already looks……
Fantastic pics.The entire collection of things are really fantastic.I really like the concept of this post and I
feel that this is a very unique and rare information that you have managed to
compile