30 Years Of DIYing, And I’m Still Learning!! (How To Extend An Outlet For Tile Or Wainscoting The Easiest And Safest Way)
I’ve been DIYing for 30 years now, and sometimes I’m astounded at how much I still don’t know. Some of those things that I’m still learning seem so basic! For example, yesterday I finally learned how to extend an outlet for tile or wainscoting using the safest, easiest, and fastest way I’ve ever done it.
So if you’ve ever done tile or wainscoting, you know what I mean. You get your tile or wainscoting done, and your electrical outlet is set back anywhere from 1/4-inch to 3/4-inch because that’s where the original box is. Then you have to find a way to extend the outlet so that it sits against the new tile or wainscoting.
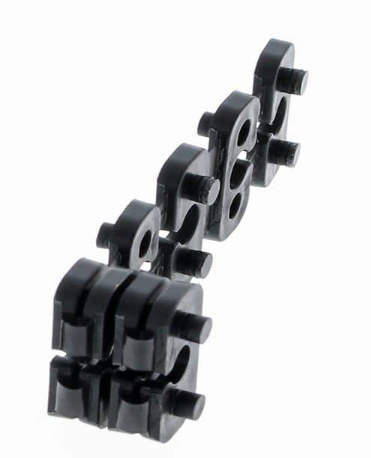
In the past, I’ve always used these caterpillar spacer shims, which are small plastic pieces that snap together like Legos and wrap around the screws that hold the electrical outlet in the box.
I can’t stand those things. I can never get them to stay in place while screwing the outlet back on, and it takes me several attempts to get them to stay. And they just seem flimsy. Plus, they can really only be used to extend an outlet so far — maybe 1/4-inch or a little bit more. But if I needed the outlet brought out more than 1/4-inch, I wouldn’t really want to use those. And the final issue with those is that if you do have to bring the outlet out more than 1/4-inch or so, then you have the screws on either side of the outlet (the screws that are actually conducting electricity) exposed to building material rather than being safely tucked away inside an electrical box.
But I never knew I had other options until this week. This week, after 30 years of DIYing, I discovered electrical box extenders! I mean…WHAT?! How in the world have I gone this long without knowing about these? How many tile backsplashes have I installed? How many walls have I covered with wainscoting? How did I not know these things existed?!
And they are so unbelievably easy to use. No more fumbling with tiny, flimsy Lego-like spacers. These box extenders are the only way to go!
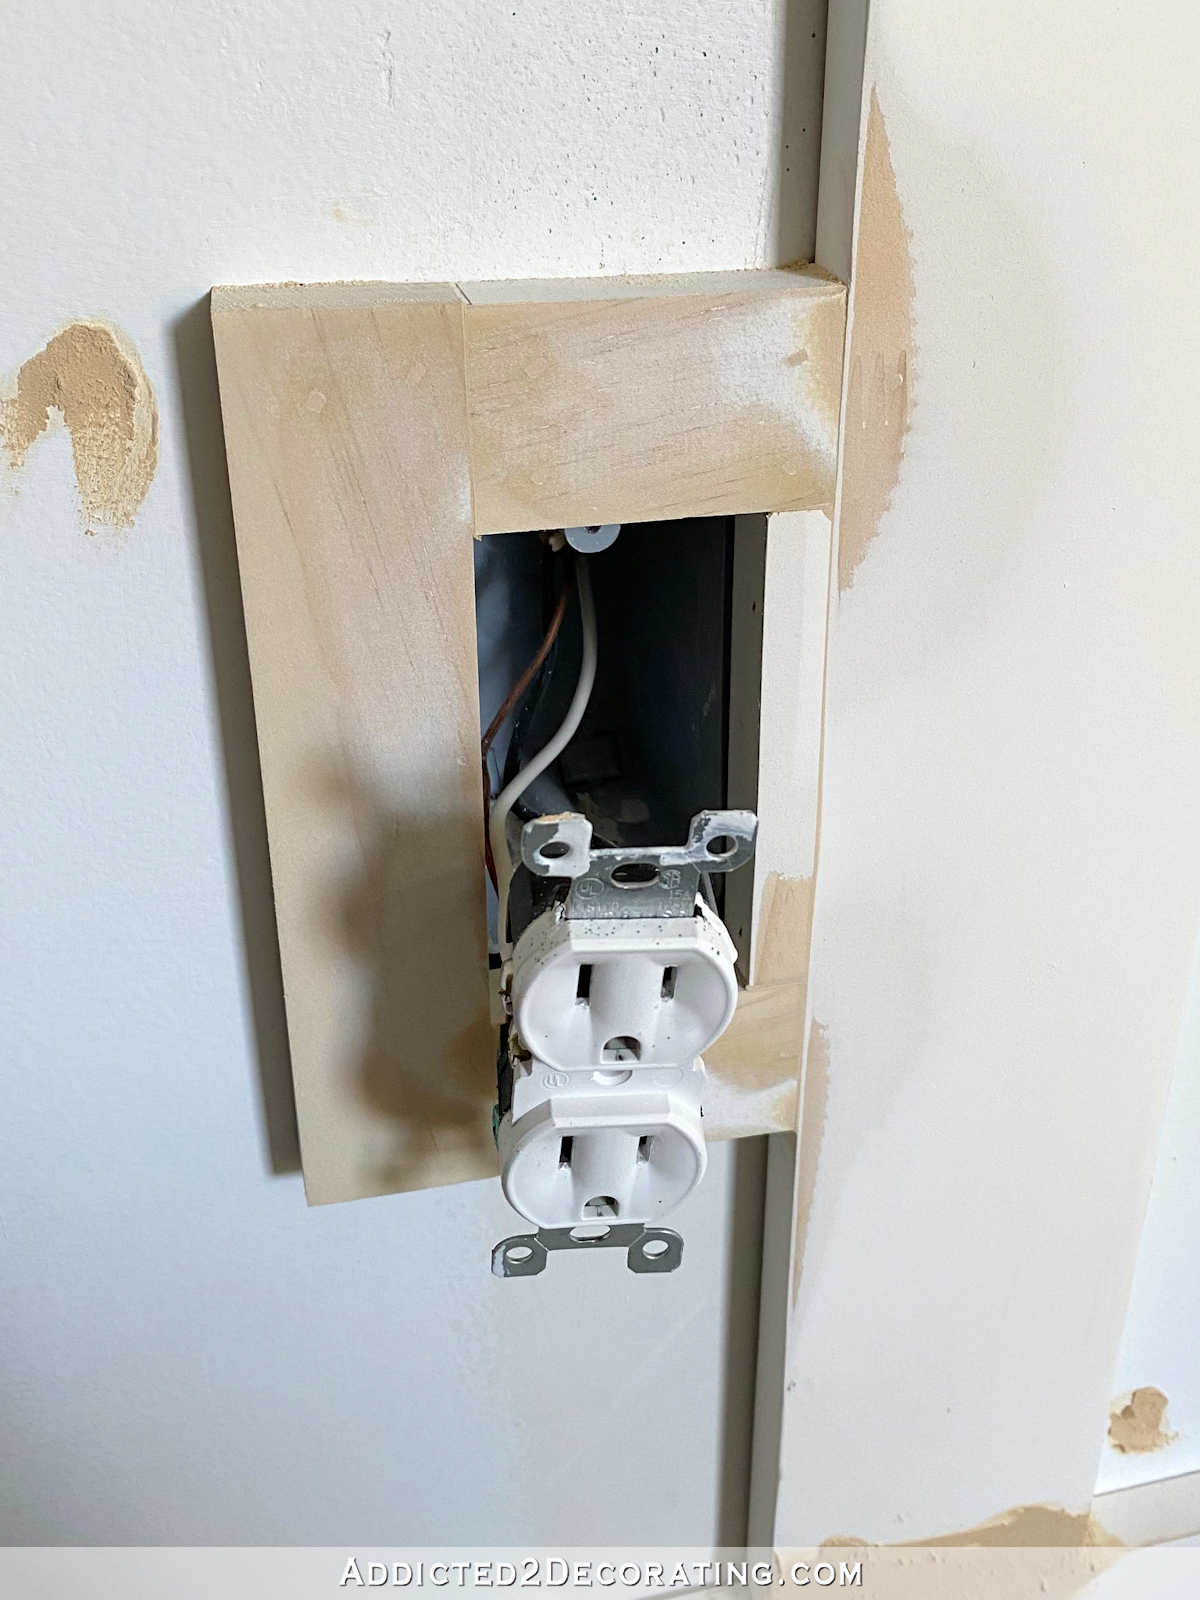
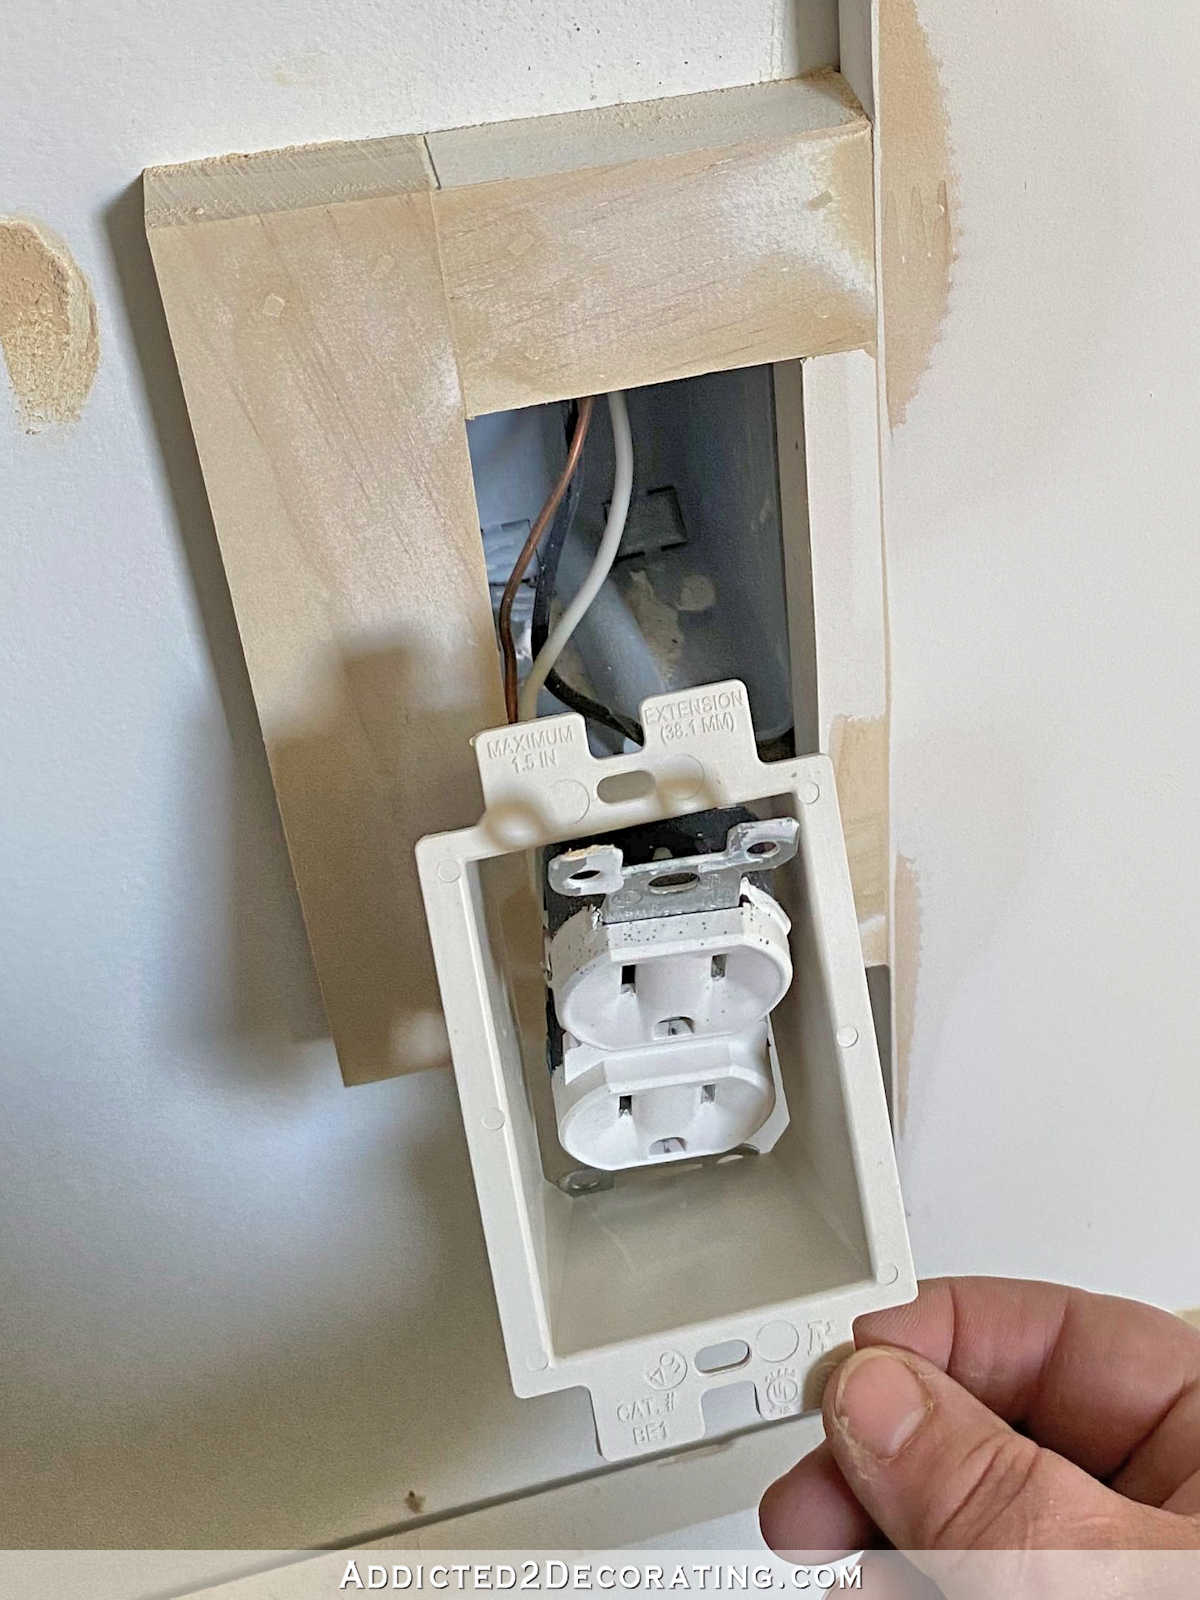
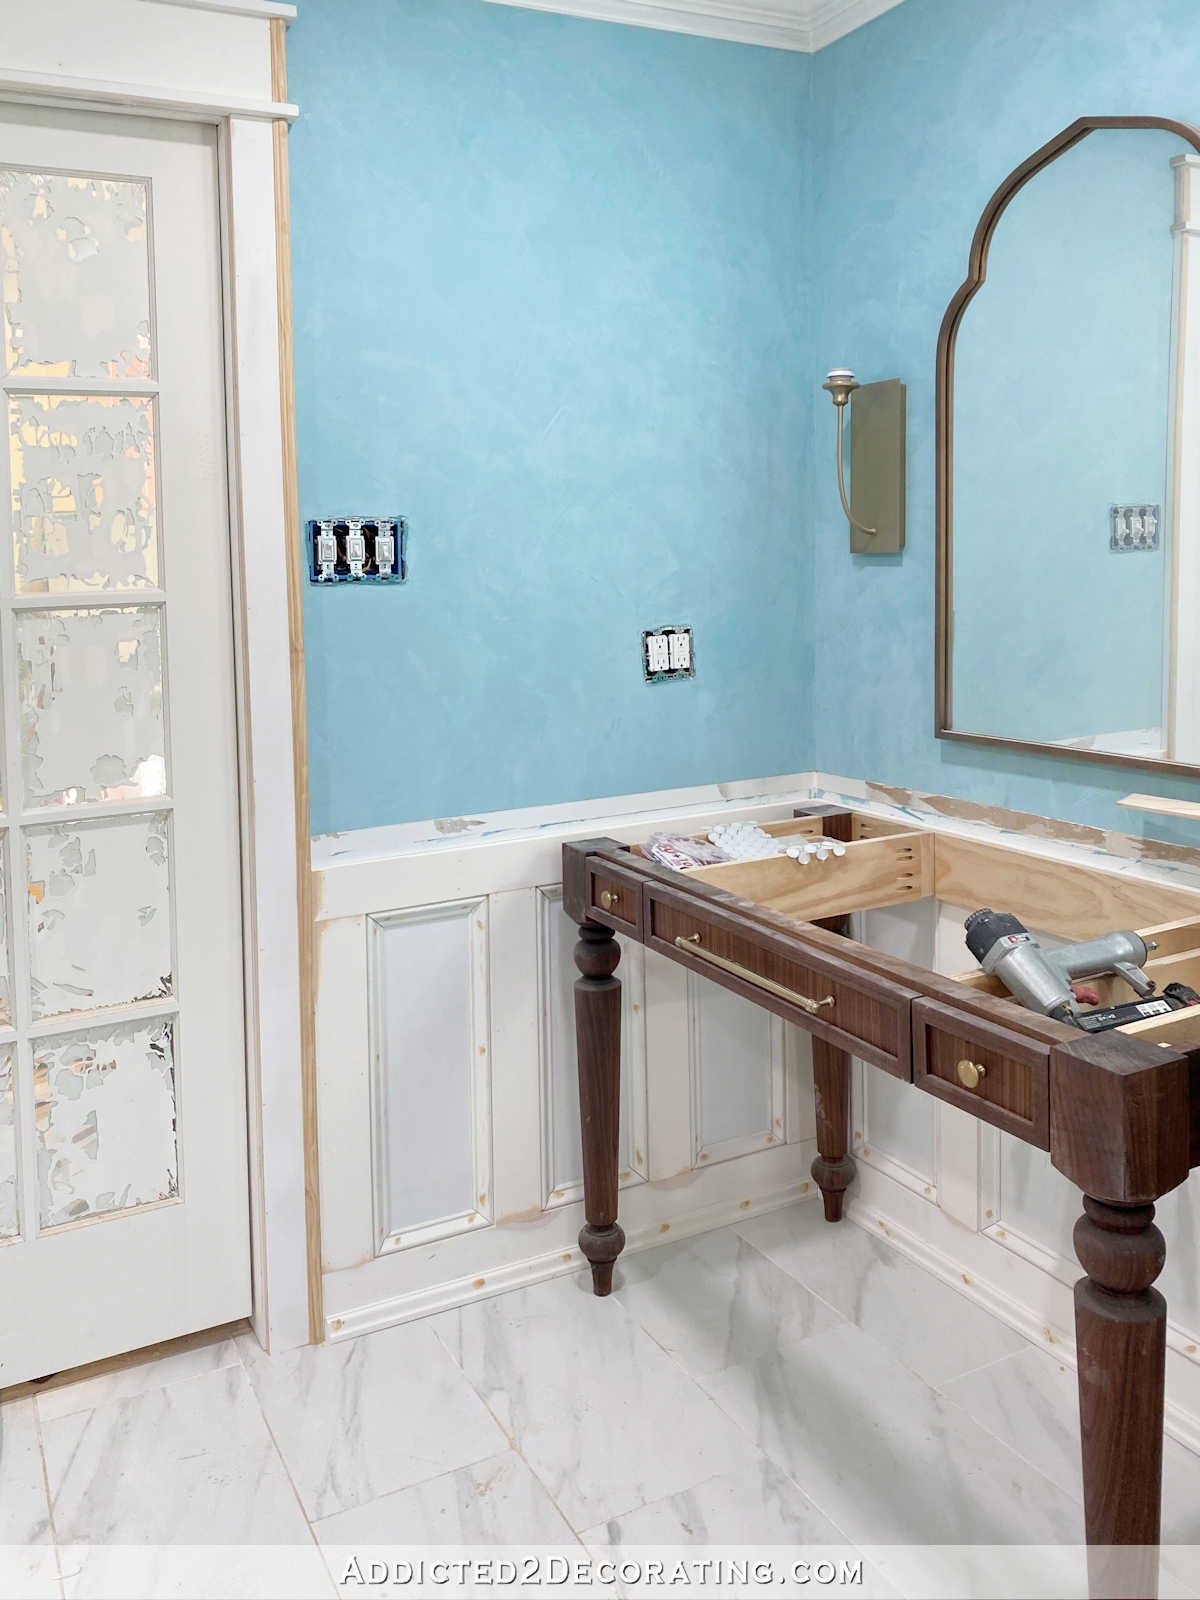
The reason I needed one to begin with is because on one wall of the bathroom, the outlet box is right up against one of the wood pieces of the wainscoting, and that’s without the inside trim (base cap) installed yet. I hate the look of trim just dead-ending into an outlet, so I decided to add trim around the outlet and bring the outlet out to the front of the trim. (I turned off the power to this room before starting.)
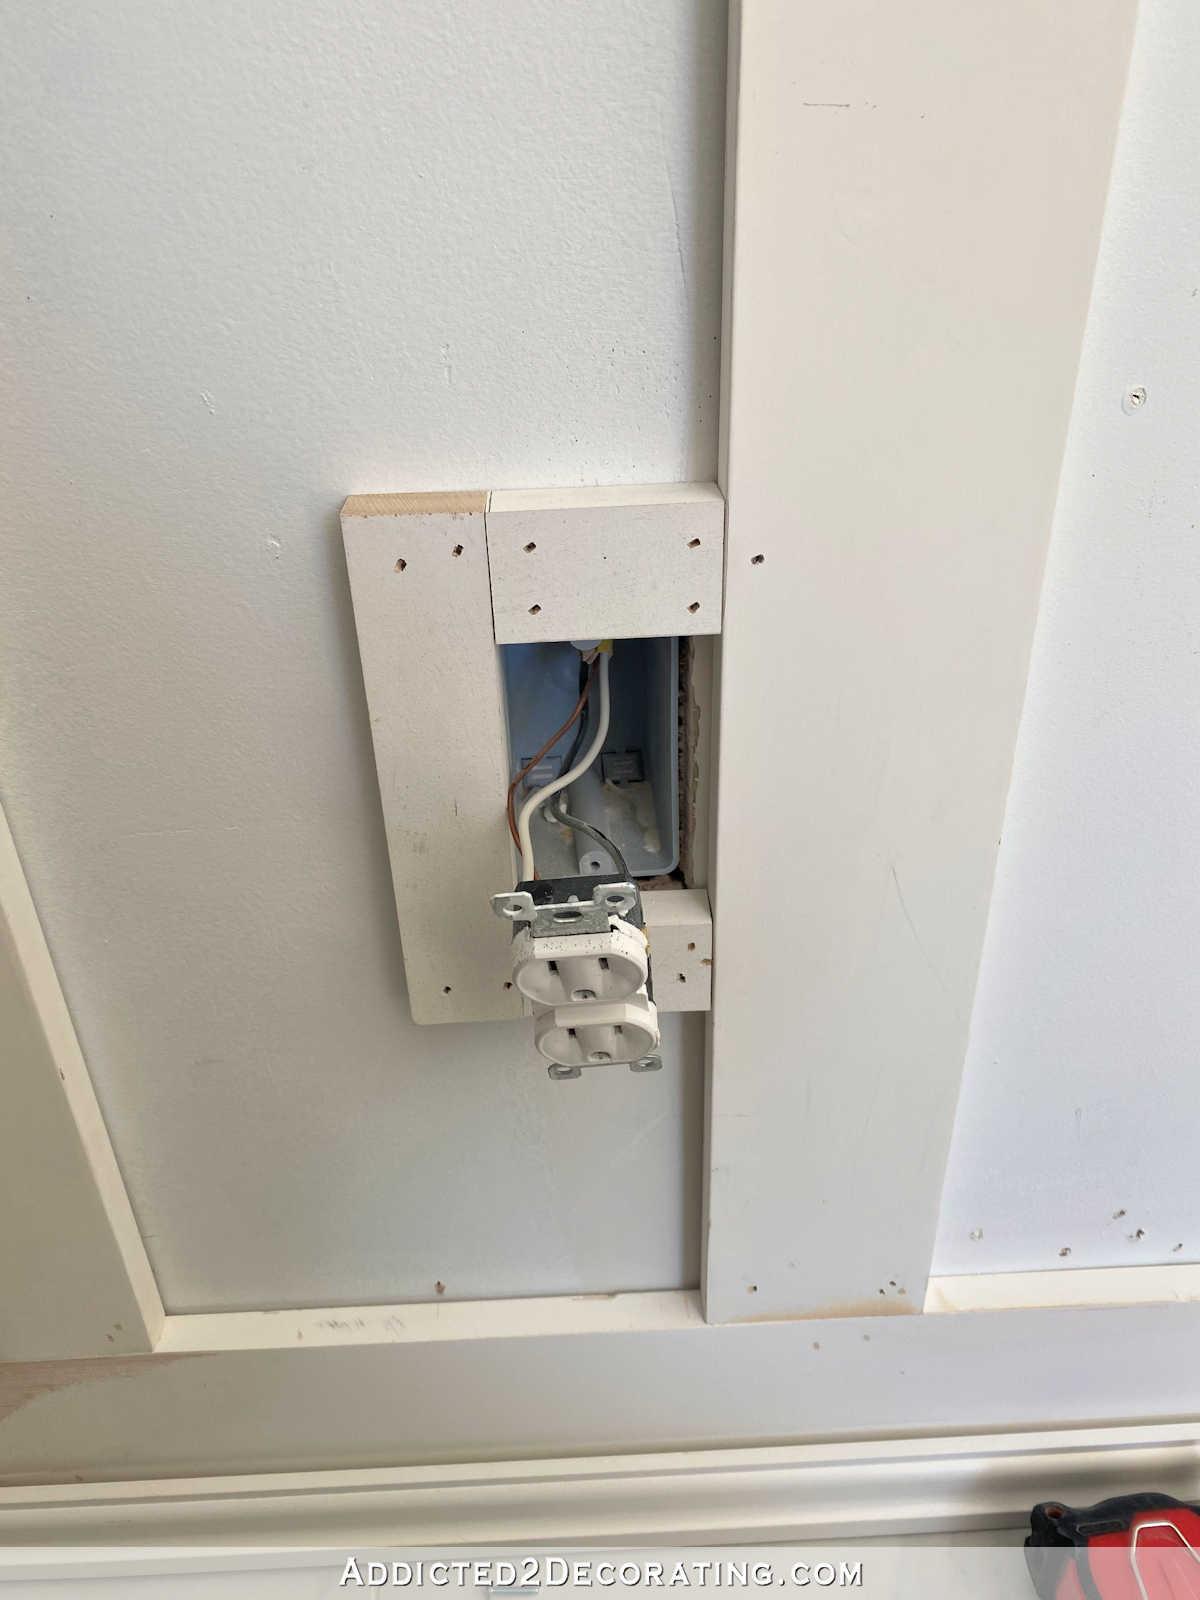
So I got the trim pieces attached around the outlet, and then used a liberal amount of wood filler, as is my M.O. 😀 While I was waiting for that to dry, I screwed the outlet back into place so that I could show you the problem (and danger) that arises when you don’t use a box extender, or when you use the little caterpillar spacers. See where the screws are on the sides of the outlet? Those screws conduct electricity, and they’re right there next to building material. That could be a potential danger.
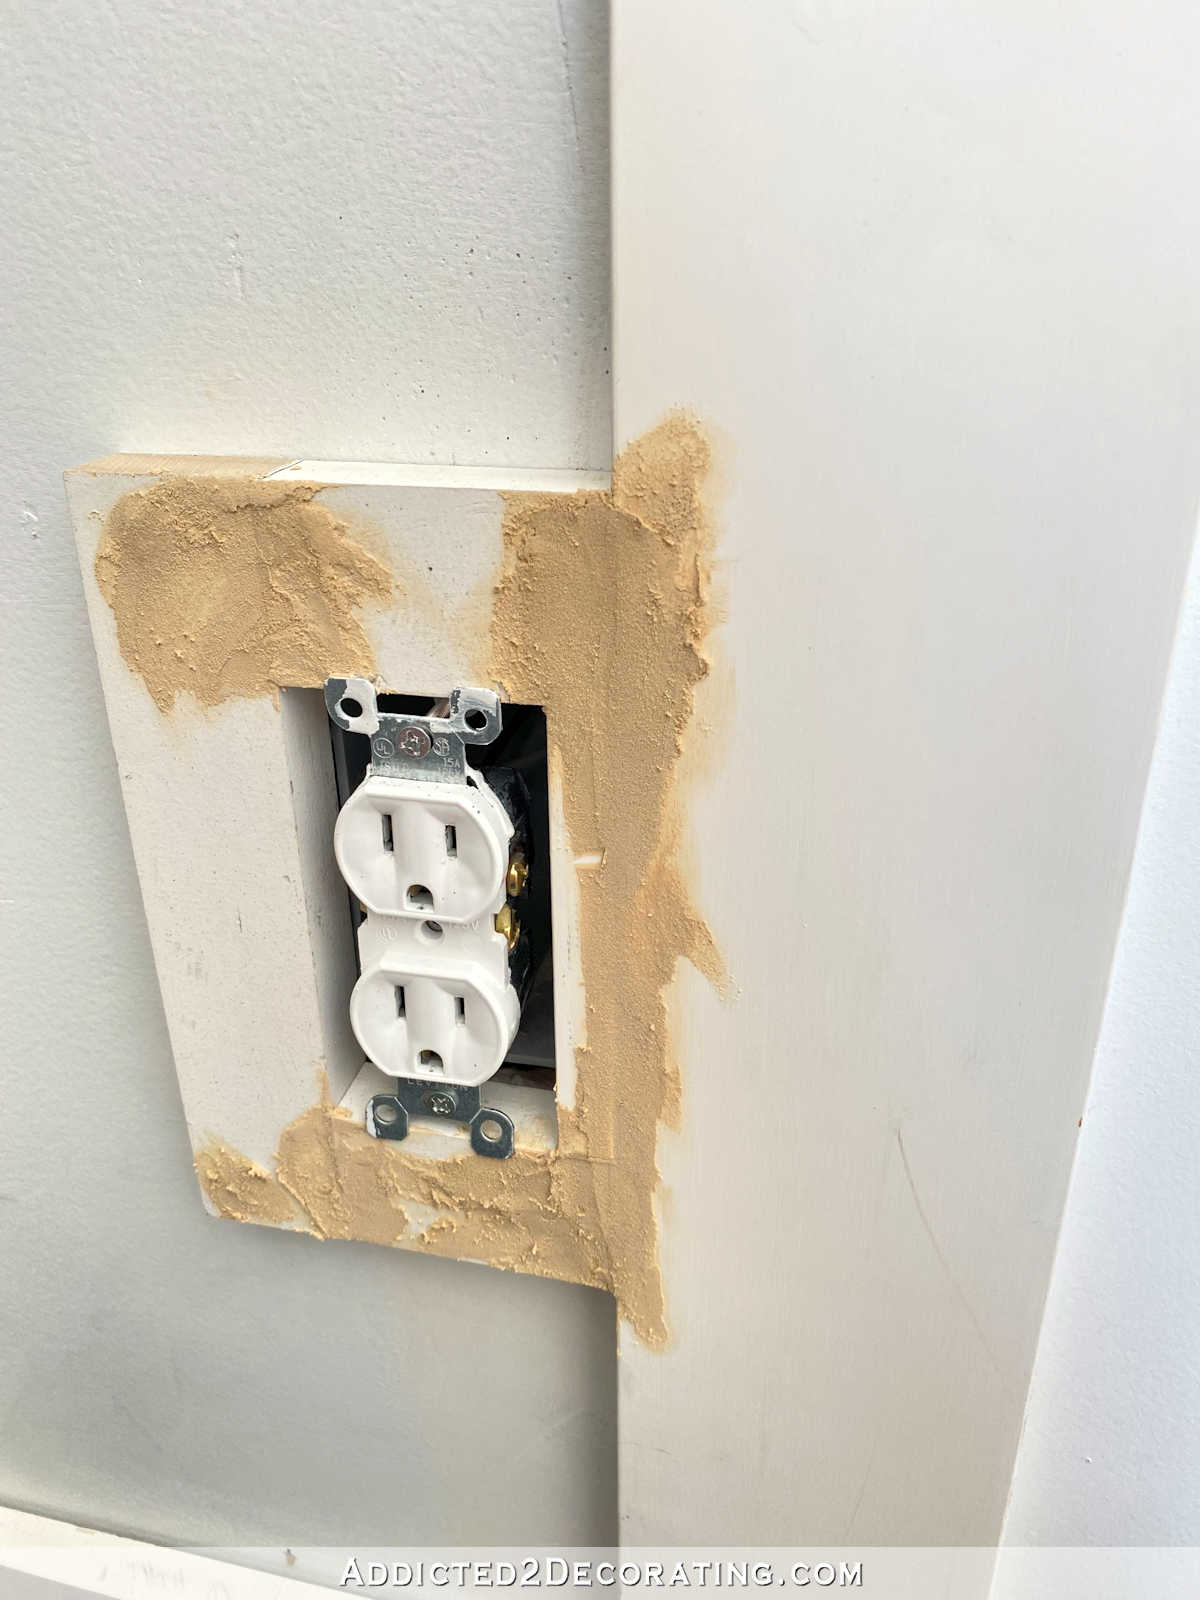
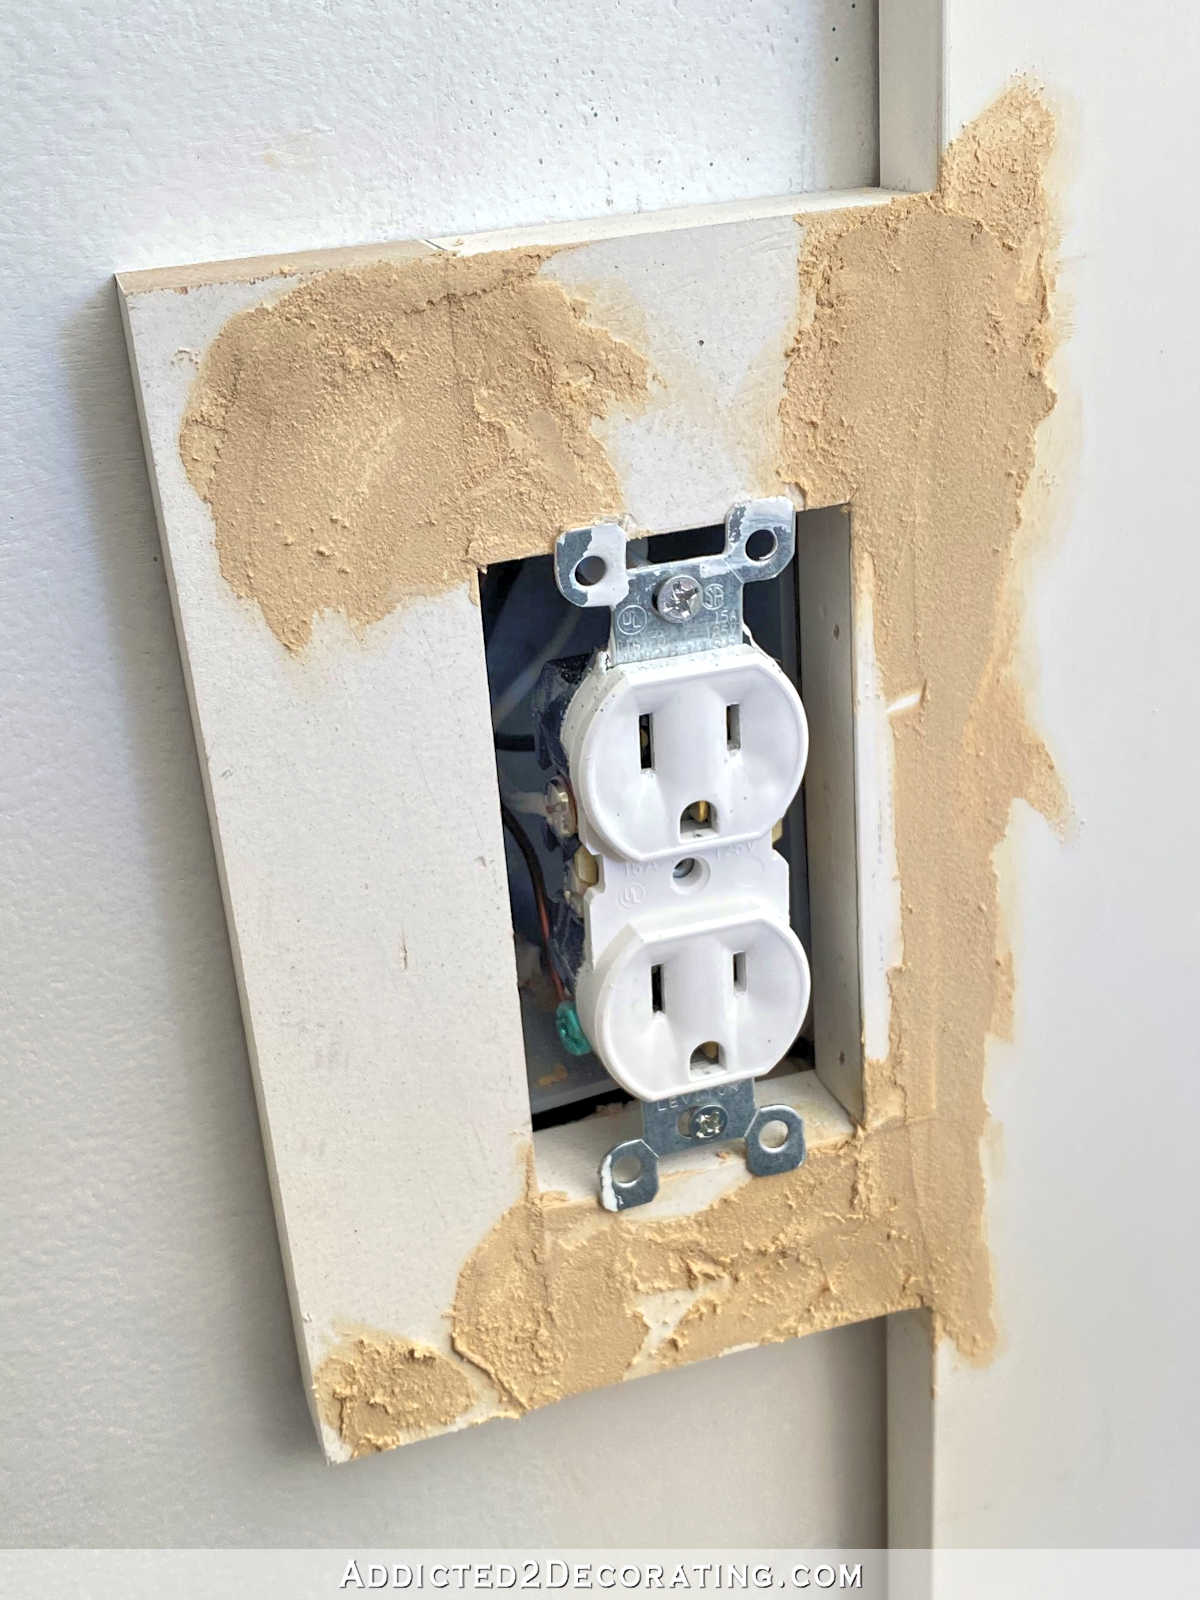
So I unscrewed the outlet and sanded my wood filler smooth once it was dry…
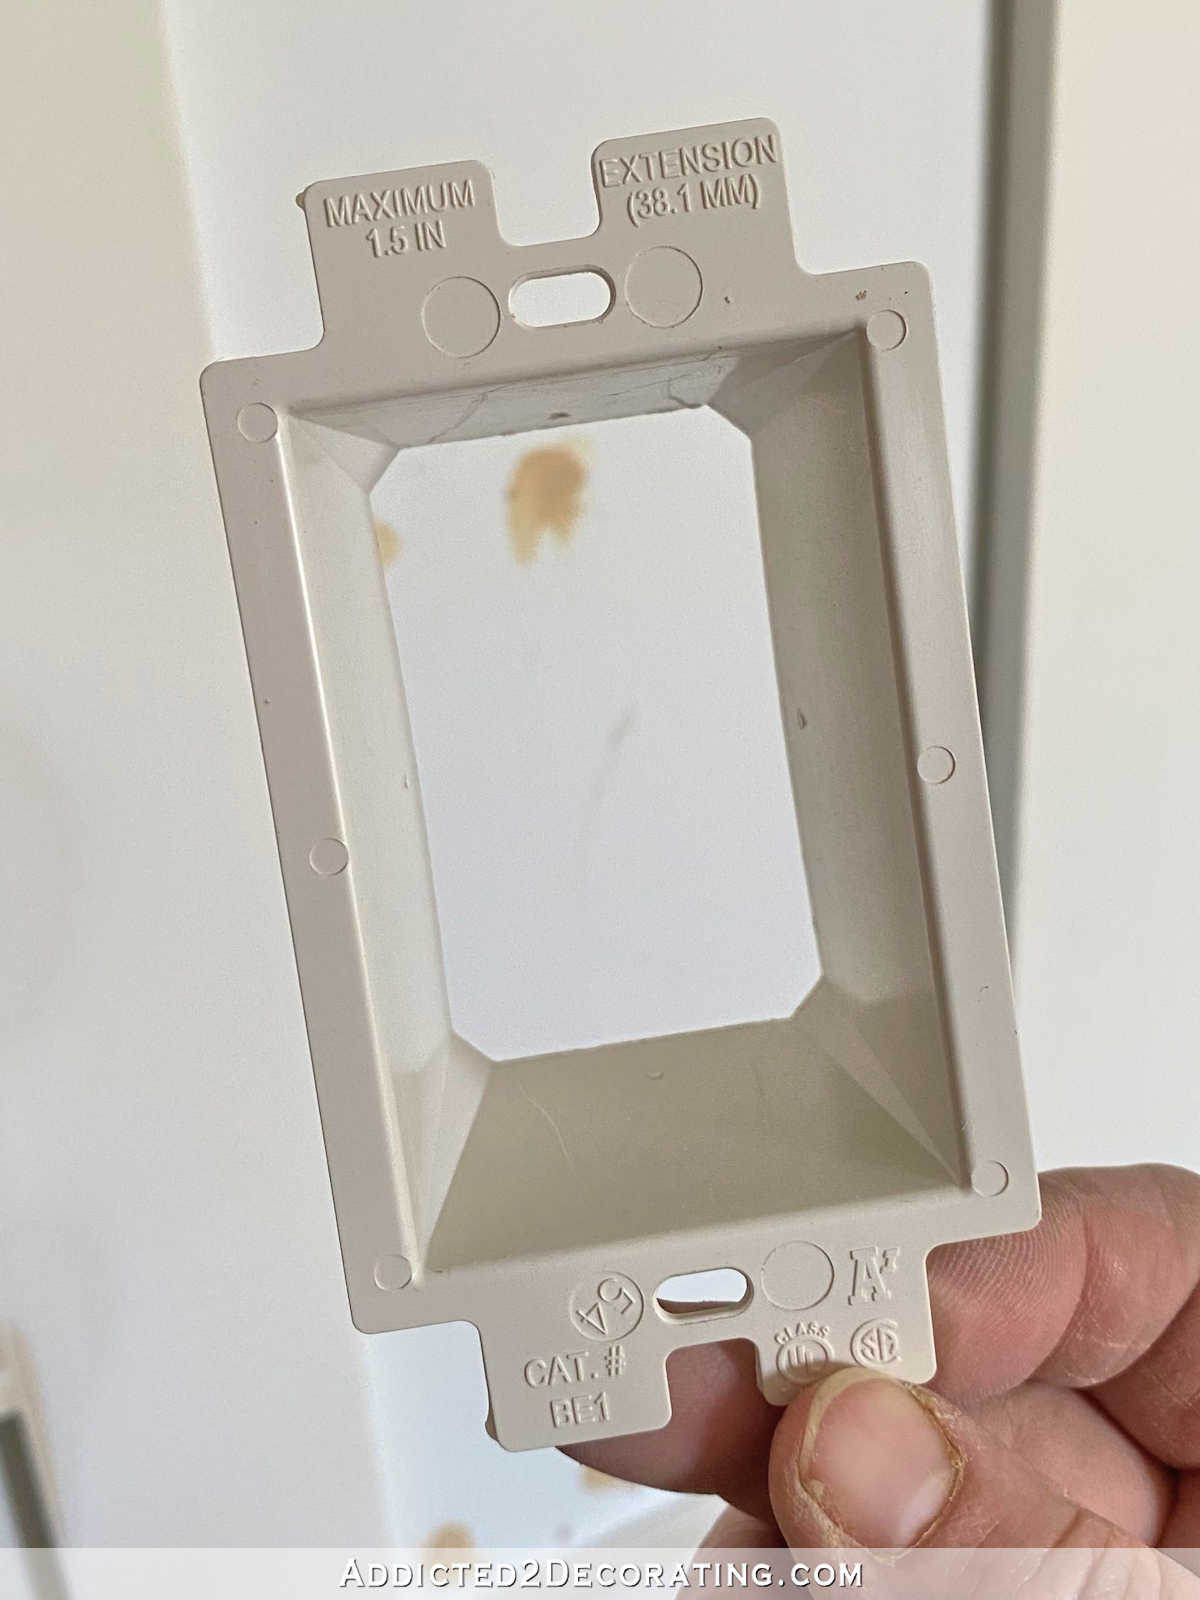
And then I used an electrical box extender, which looks like this…
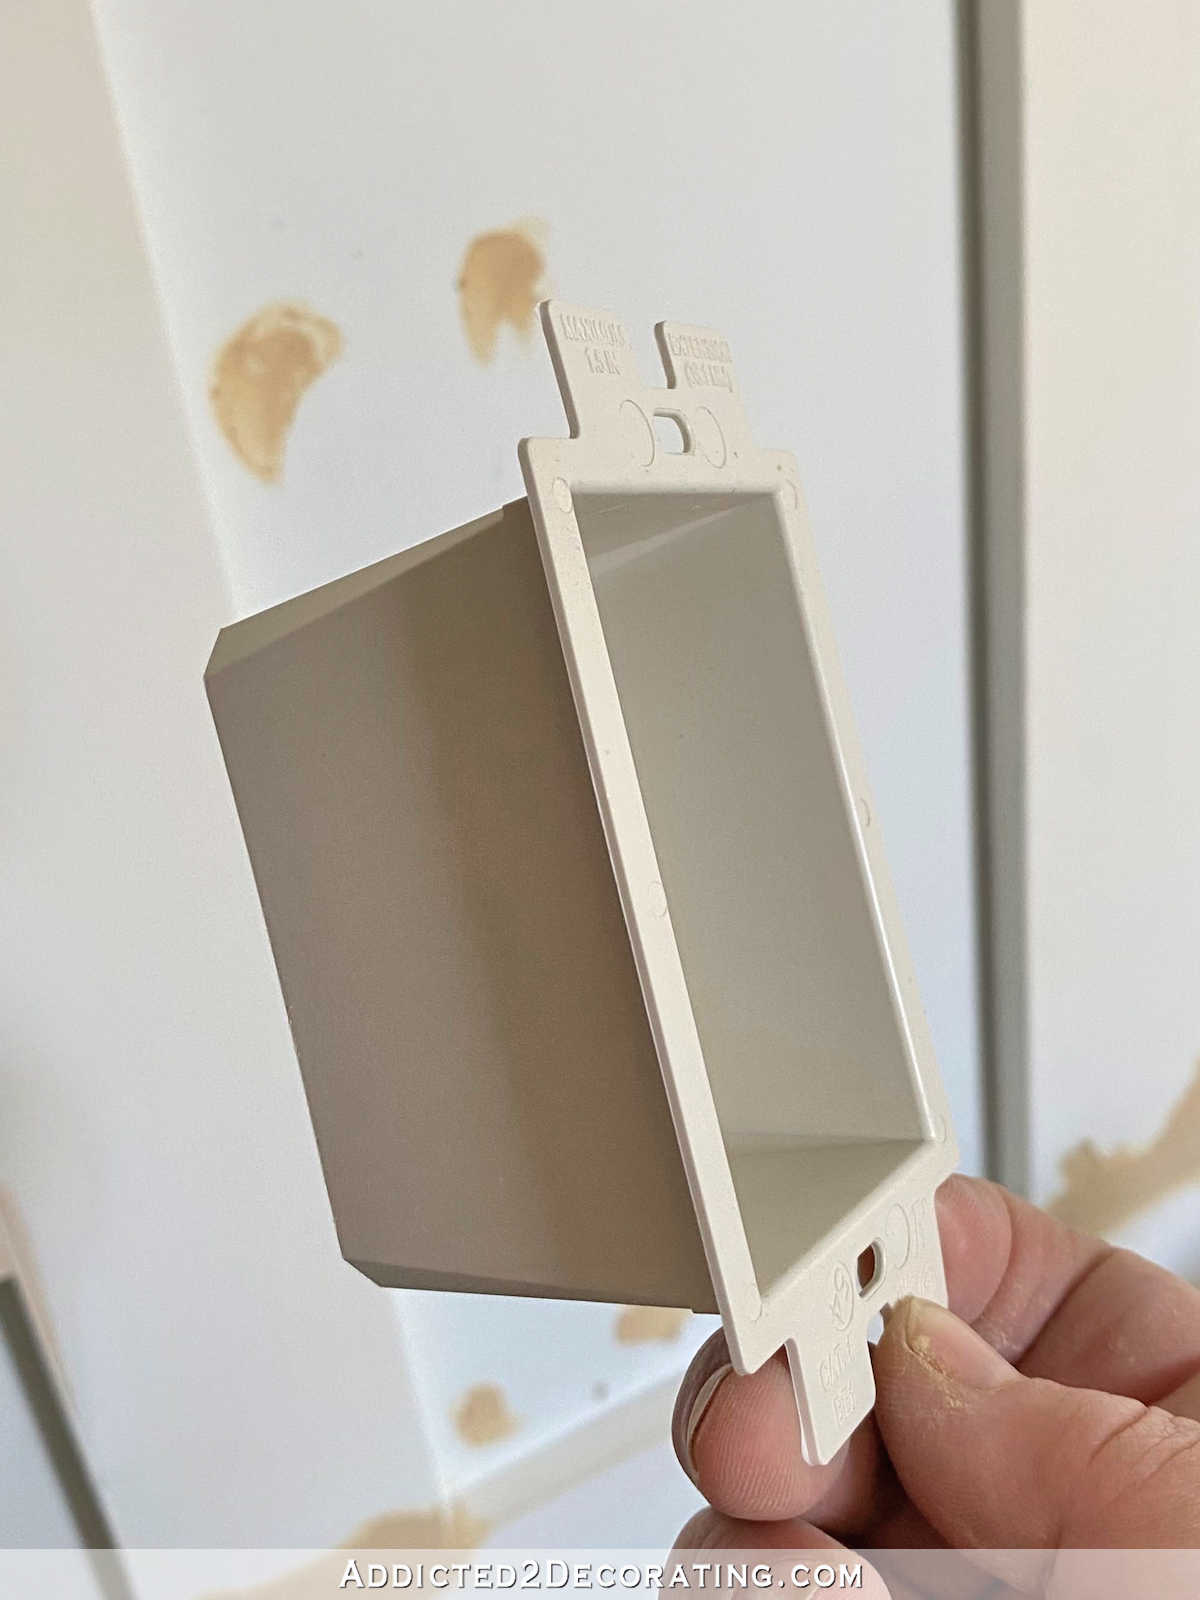
It has sides, but no back…
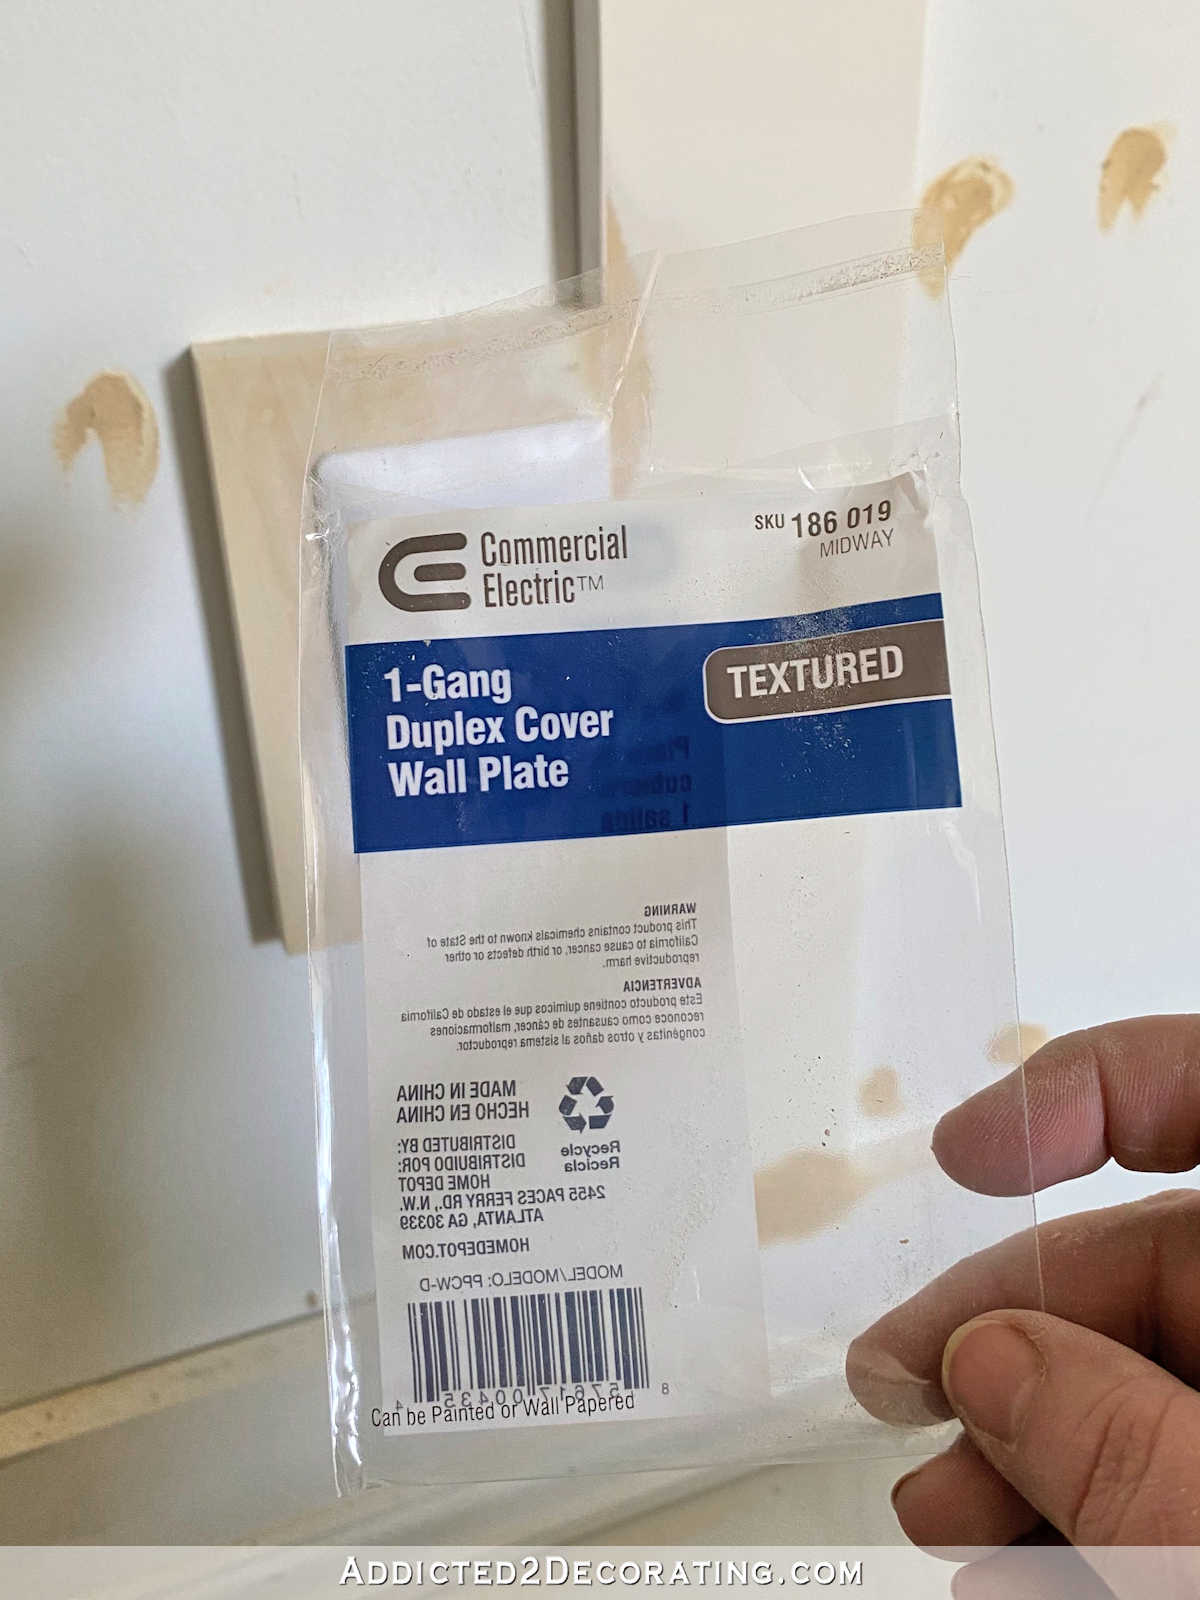
This is the package for the one I used…
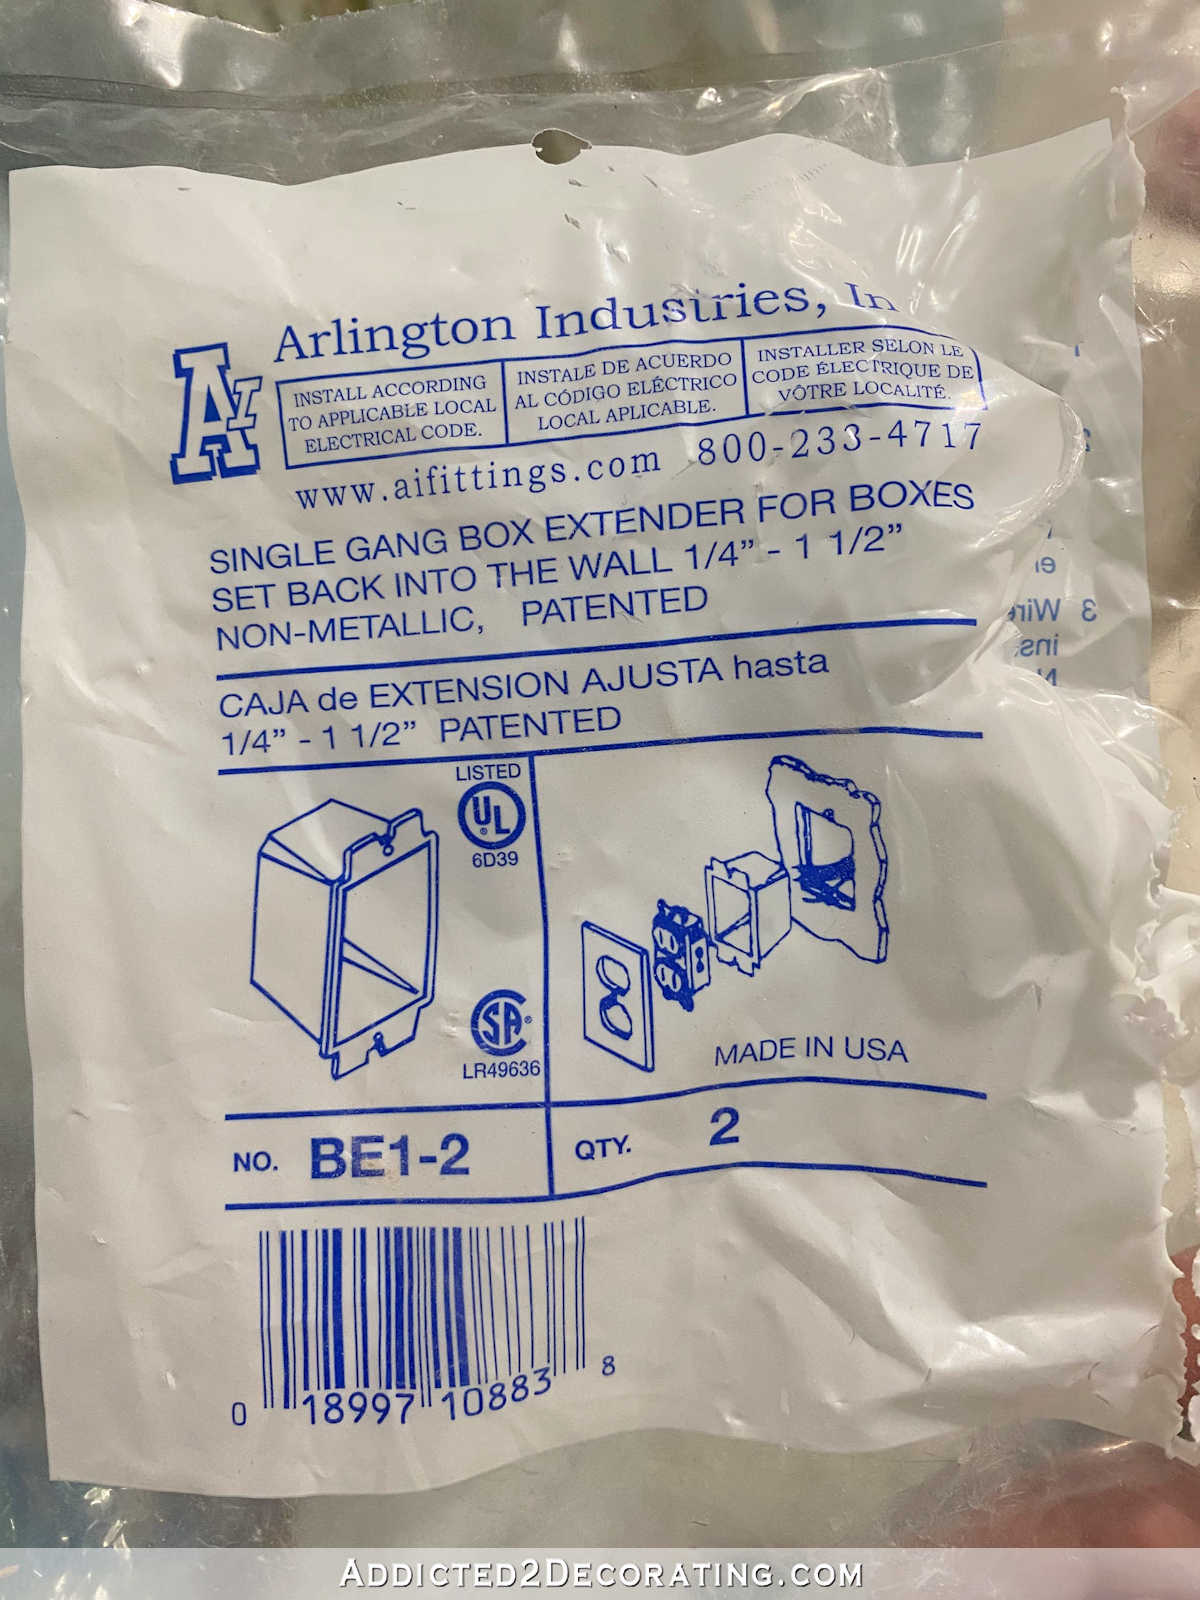
I like this style because it’s completely variable, meaning that it can extend the box anywhere from 1/4-inch to 1.5 inches, and anywhere in between. There is this other style of box extender, but what I don’t like about those is that they come in specific sizes, generally 1/4-inch, 3/8-inch, and 1/2-inch. But if the space on your wall isn’t exactly one of those measurements, then you run into other issues.
To use this extender, I simply put the outlet through the back of the extender…
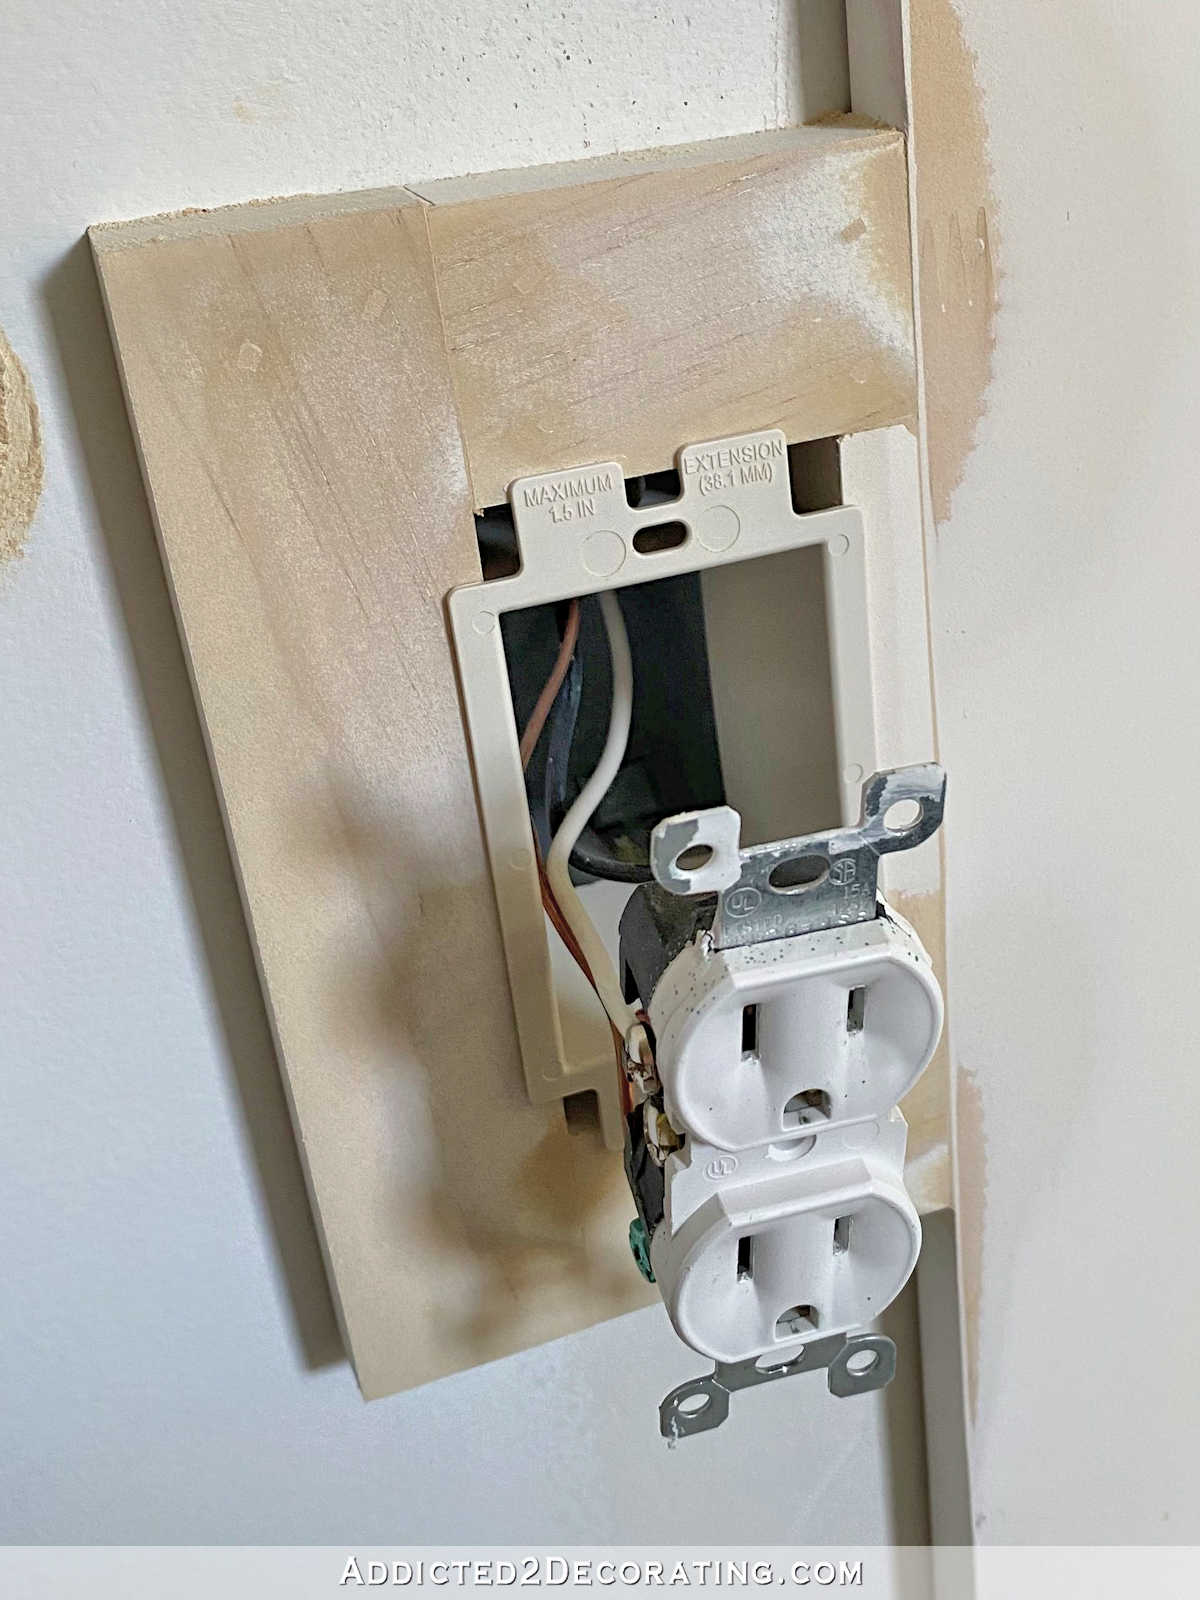
And then used the extra-long screws that came with it, and put those screws through the outlet, through the box extender, and into the holes in the original electrical box. And now those electricity-conducting screws on the sides of the outlet are once again safely inside a box and not exposed to building material.
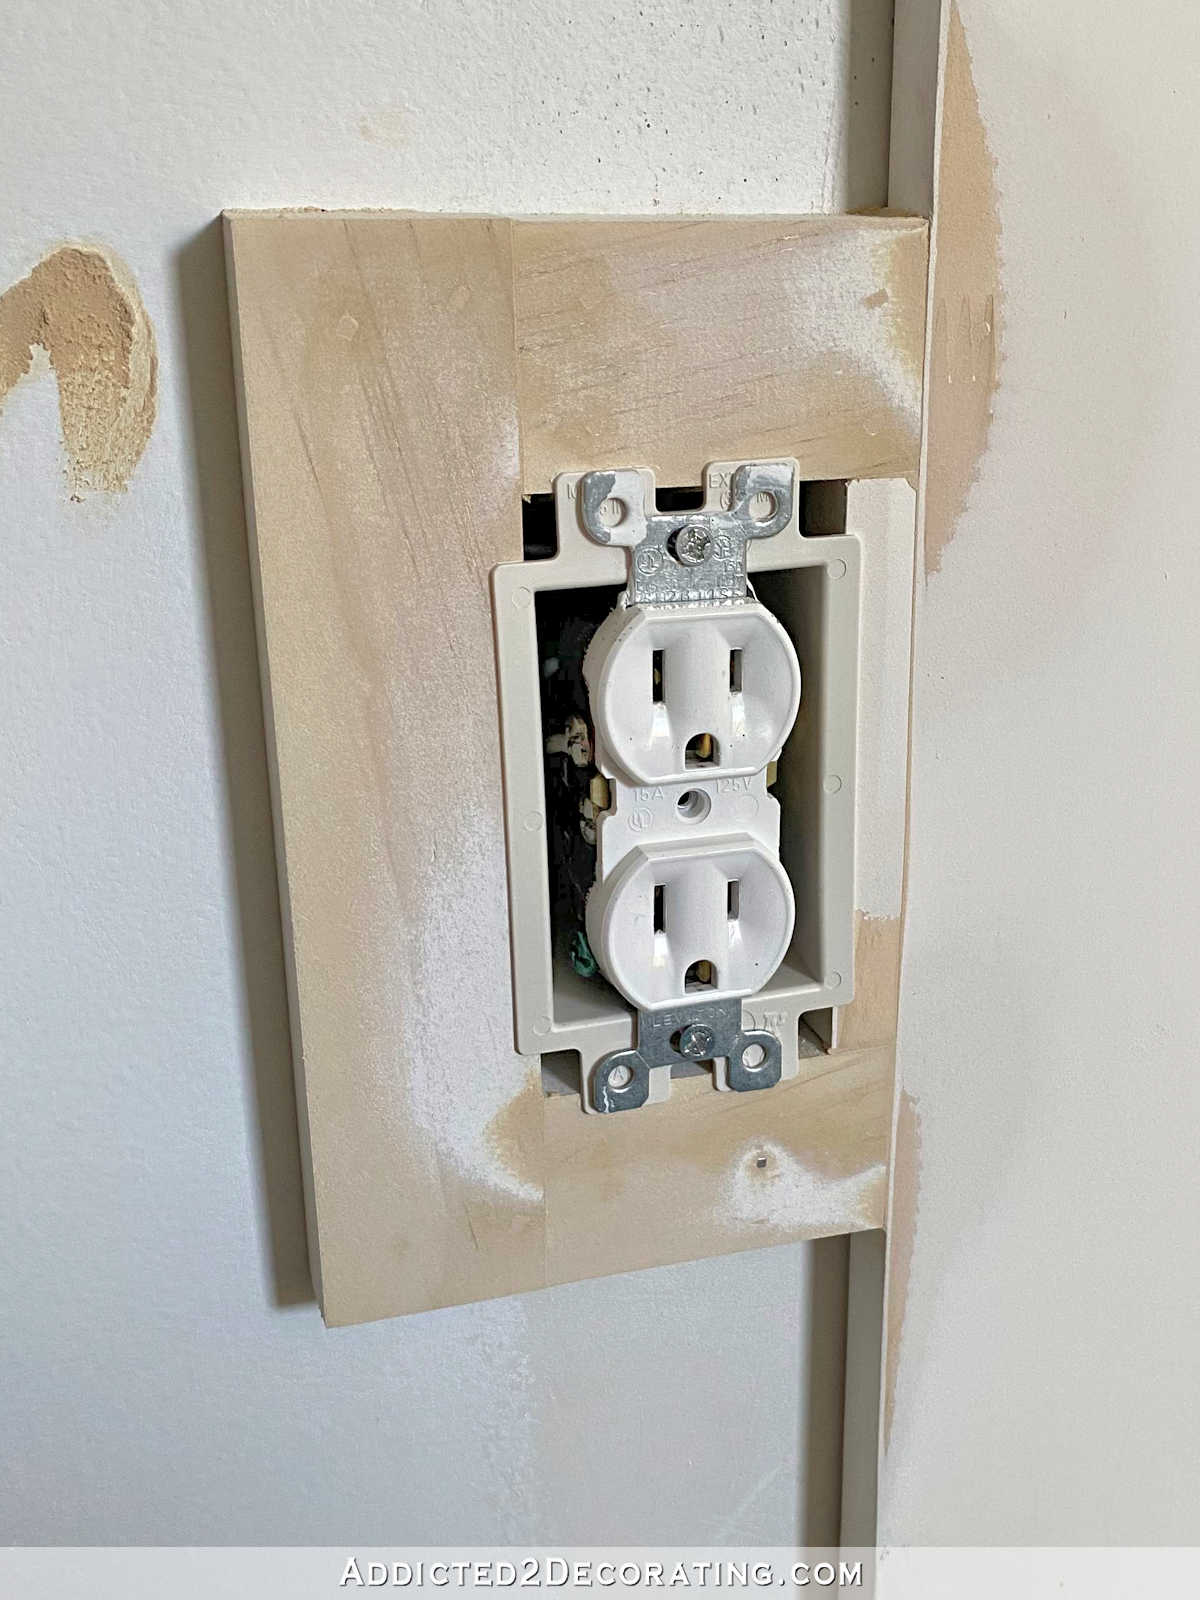
And the outlet cover fits perfectly…
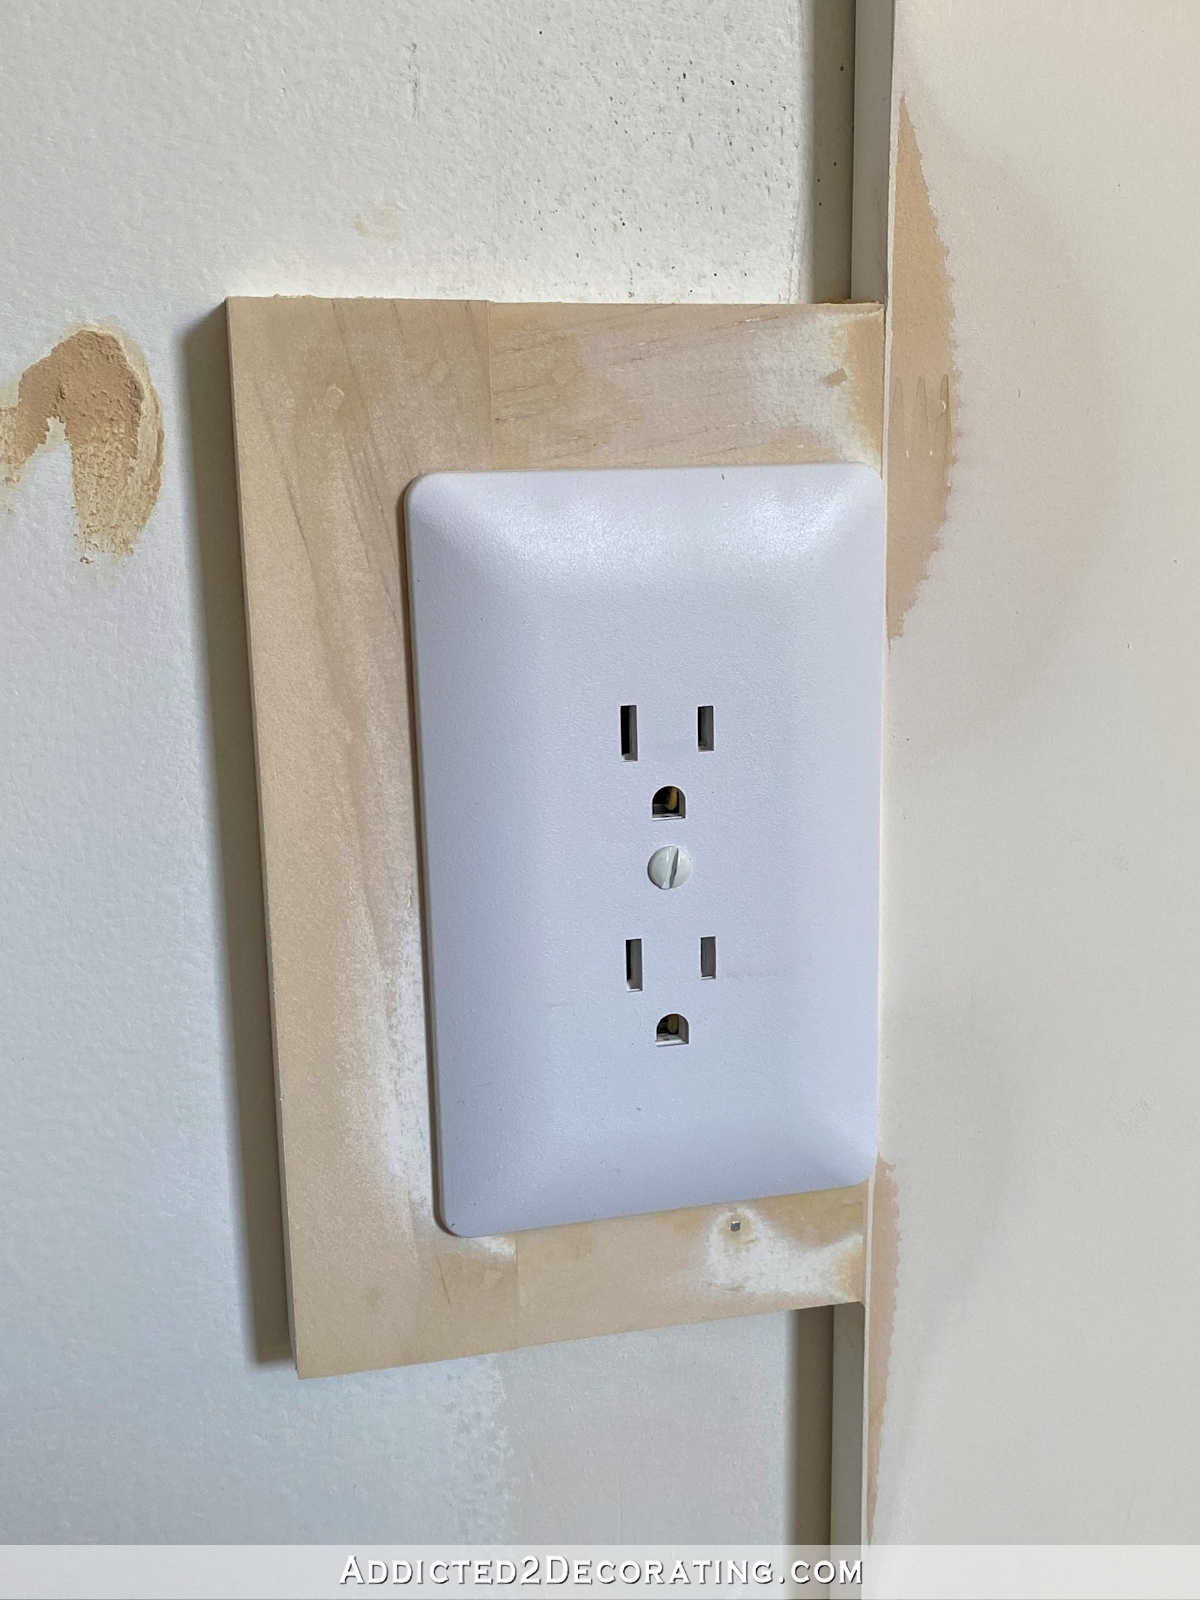
These are my favorite outlet covers. I like how sleek they look, and they’re also paintable so that they can blend right into the wall.
I use them pretty regularly, but I especially use them on areas where I don’t want a glaring white rectangle calling attention to itself, like on the end of my kitchen peninsula. See it there on the end?
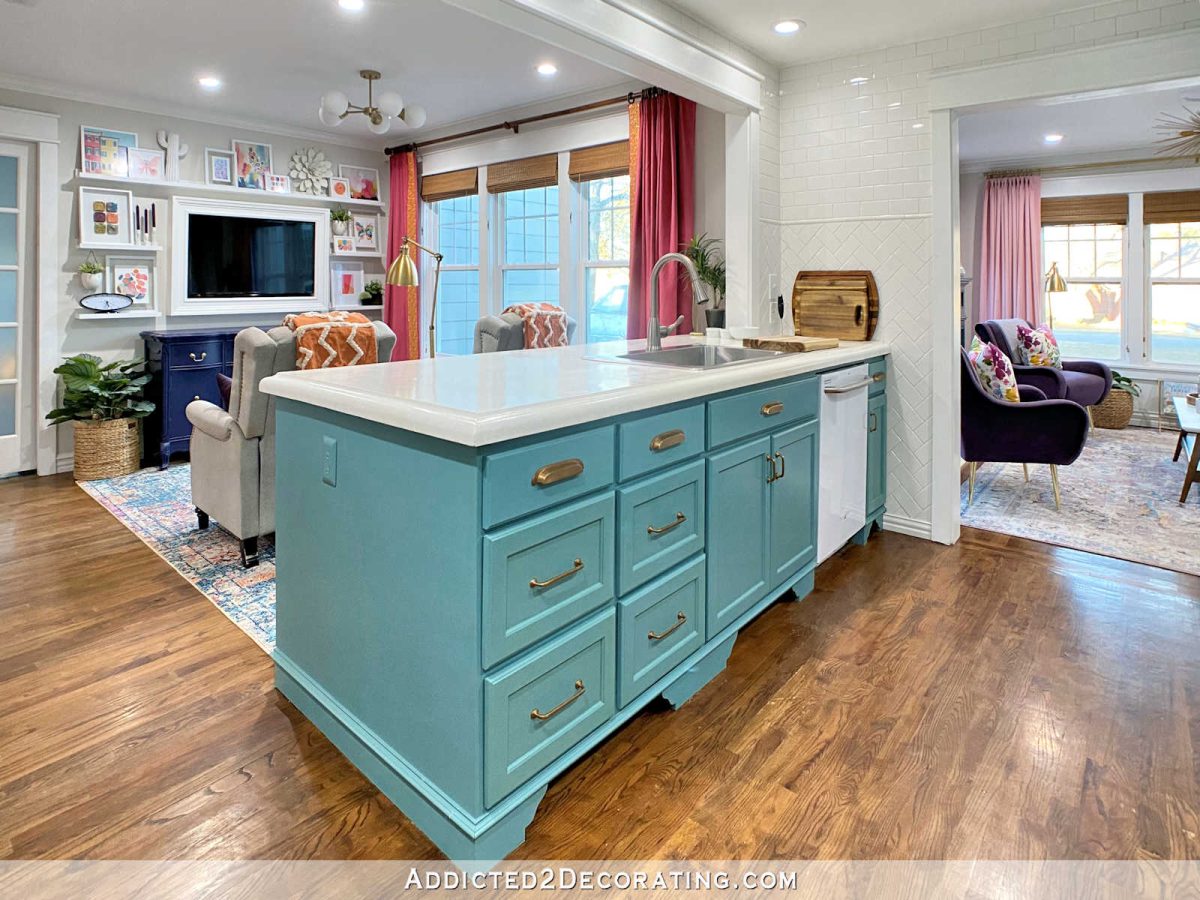
They hold paint very well. I painted that one when I painted the cabinets in April 2017, and I’ve never had to do any paint retouching on it.
So on white walls, cabinets, or trim, I don’t find them absolutely necessary. But on walls, cabinet, or trim that are any color other than white, the full-cover, paintable outlet covers are my standard go-to covers. I couldn’t imagine having to look at a glaring white outlet on the end of my teal kitchen peninsula.
Anyway, I’m 30 years into DIYing, and I’ve done my fair share of remodeling in those years. And yet, I’m still learning all the time, and sometimes I’m still learning the basics.

Addicted 2 Decorating is where I share my DIY and decorating journey as I remodel and decorate the 1948 fixer upper that my husband, Matt, and I bought in 2013. Matt has M.S. and is unable to do physical work, so I do the majority of the work on the house by myself. You can learn more about me here.


This is post, and others like it, are one reason I love reading your blog! Thank you for sharing such useful information.
Yes! I need those! We have a couple outlets that are weirdly recessed and that’s EXACTLY what I need. Thank you!!! Also, thanks for covering how you address outlets in general. So often we get to the end of project, or at least to the end of the big stuff, then are left thinking “Now what?” How do we button up all those little things that really can make a big difference in how a room feels or looks. Don’t forget to show us how you handle wall switches on painted walls when you get to that point.
Oh wow that is so needed! Thanks for showing us.
I think I saw somewhere that those extender boxes are fairly new – as in the last 5-10 years. (Probably saw them in a Handyman magazine.) Wish they had been around when we did our 1st tile job in our 1st kitchen. I think my husband chipped out the surfaces of tile around our outlets so the screws would reach, then trimmed the outlet cover to fit. All I remember is it took him forever, and he never did another backsplash! Luckily, our daughter married a guy who is handy at the things my husband isn’t, and together they mak a great team!
I always remember your helpful posts, Kristi, and am happy to know that your blog is searchable when I need that information again. It’s like an enclyclopedia! Thank you!
I’ve learned about new (to me) products and techniques from a YouTube Channel called everyday home repairs. He gets right down to business and doesn’t have a lot of chatty content, he’s very straightforward and thorough.
You have no idea how this post came at exactly the right time. I just finished backsplash in the kitchen and was having hard time with the switch/outlets due to them not fitting now. Thank you for having the solution.
Great to know! I’ve seen the other extenders, but this is a much better solution. Thanks for passing this on!
You are amazing!
I would have moved the outlet box to the left instead of installing the trim around it. I think it would have been much less noticeable that way. Just my opinion.
There’s a stud there. And if I move it to the other side of the stud, I run into the same problem on the other side.
Dang studs! I’m sure all the pretty things in the bathroom, like the vanities, tub, mural, light fixtures, etc., will draw all the attention and the electrical outlet will not be noticed.
Oooooh bringing SUCH good info, Kristi! Thanks for sharing the extender and the outlet cover. This is info that will most likely come in handy for me on the renovation we are just undertaking.
good to know!!!!
Whoo hoo, I have been doing this for 60 years and have run into this problem several times. In fact, I just found long enough screws to finally get one in the bathroom fixed. I should re-address that box, because I didn’t think about the electricity being next to building material! Also I was interested in your outlet covers. They are more sophisticated than the regular ones. Learned something good today. Thanks
Thanks Kristi for the tip! It’s so neat seeing the little easy fixes that some inventive soul has come up with!
What would you do to extend a 4 gang rocker switch box?
I’d use the same thing. They make them for four gang boxes. You might have to buy online, though. I doubt HD or Lowe’s would carry them in stock. Amazon has them.