A Look At The Finished Bathroom Vanity
I’m still making progress on the bathroom, and feeling incredibly motivated and excited about it. Tomorrow, I’ll share the DIY steps detailing how I finished the vanity (if you missed Part 1 of this DIY project, you can see it here), but I’m in a bit of a hurry to get out the door this morning to get to a lunch for my brother’s birthday. But I couldn’t NOT show you how this vanity turned out because I’m just so excited about it!
I’m pretty sure that this is the first piece of wood furniture I’ve ever built that needed to look as close to perfect as possible right after the build because it’s just going to get a clear coat and nothing else. I’m not a cabinet builder or finish carpenter, so I generally rely heavily on wood filler and caulk to make up for my lack of professional skills.
That’s a fine plan when a piece of DIY furniture is going to be painted. But when the piece is going to be left in its natural state with just a clear coat because the goal is to show off the gorgeous wood, there’s a whole lot less wiggle room in the building process, and there’s no relying on a lot of wood filler and caulk to make up for lack of skills.
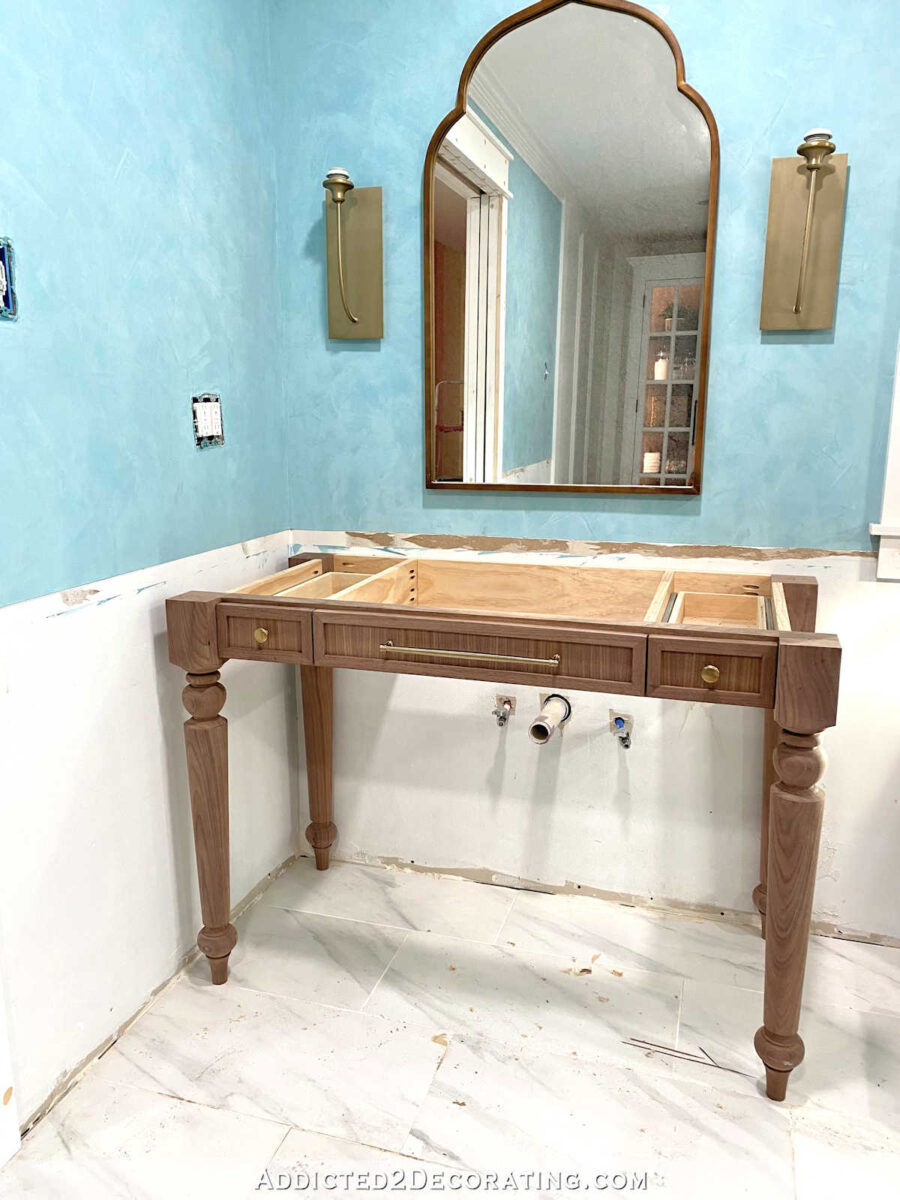
With all of that said, I’m pretty proud of how this vanity turned out. It’s not perfect, but it’s the closest to perfection I’ve ever gotten.
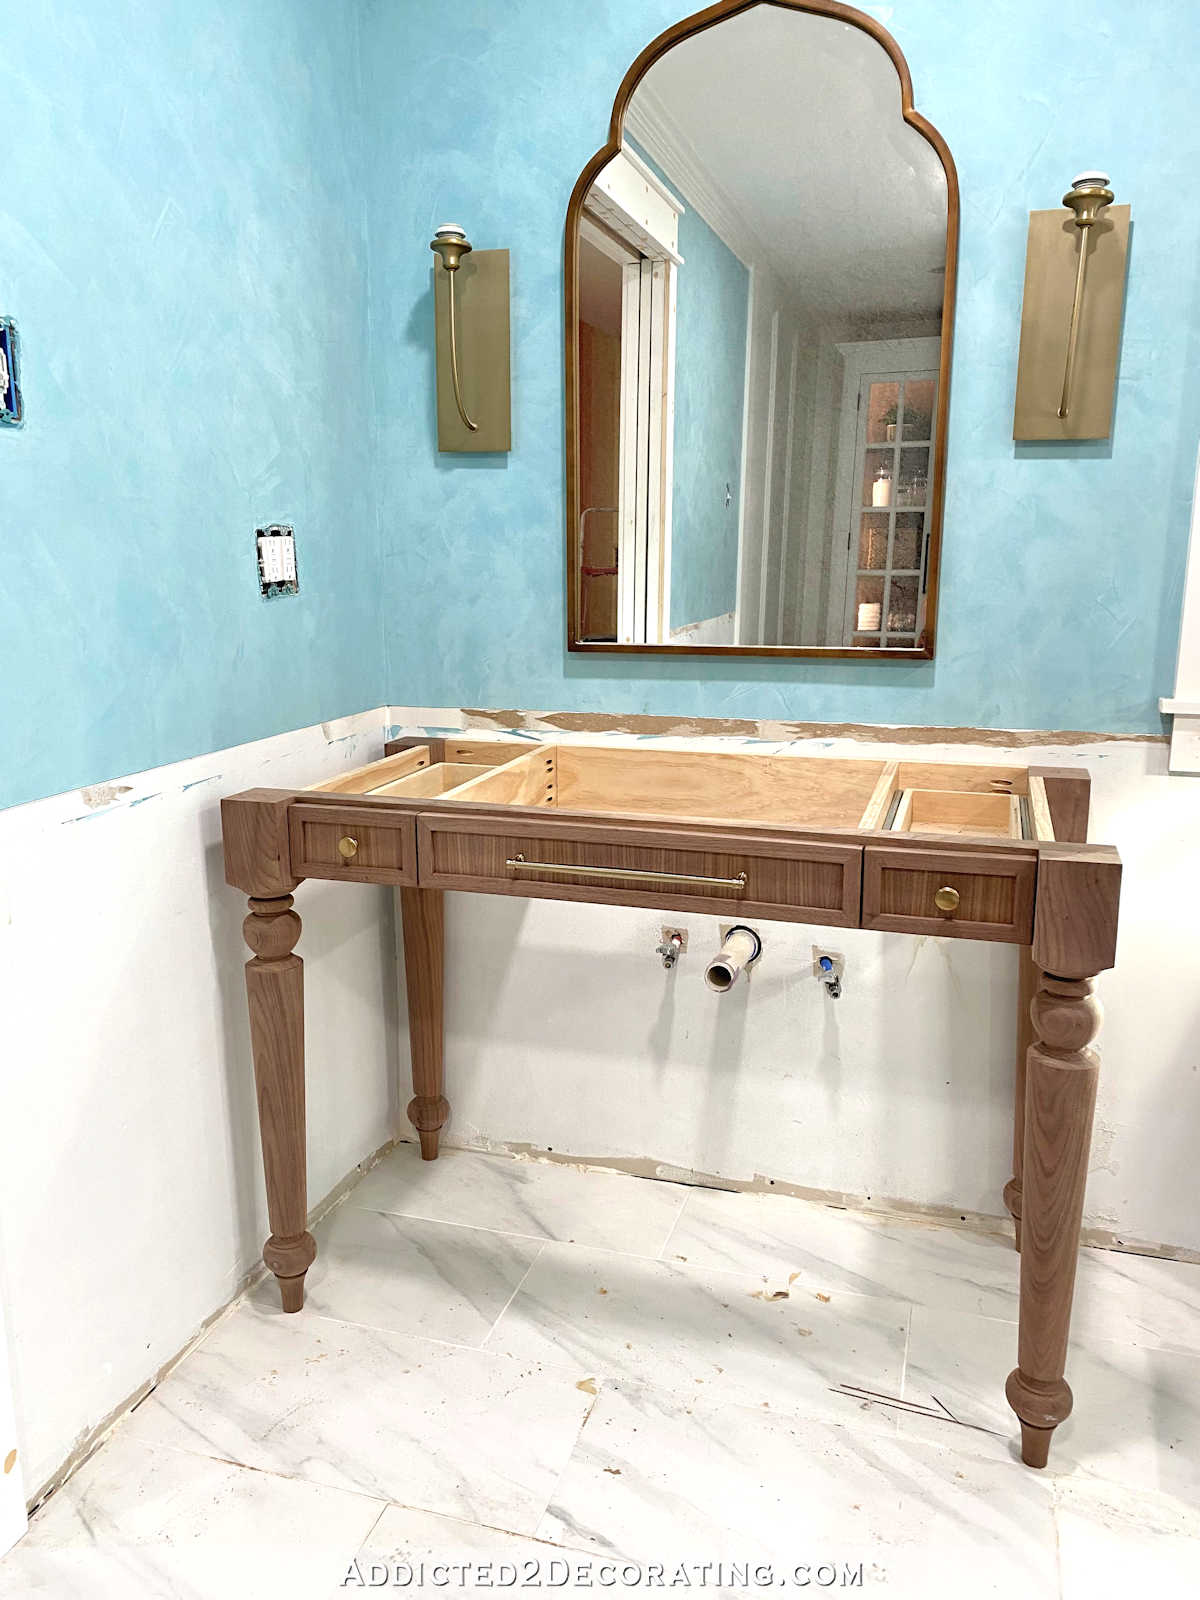
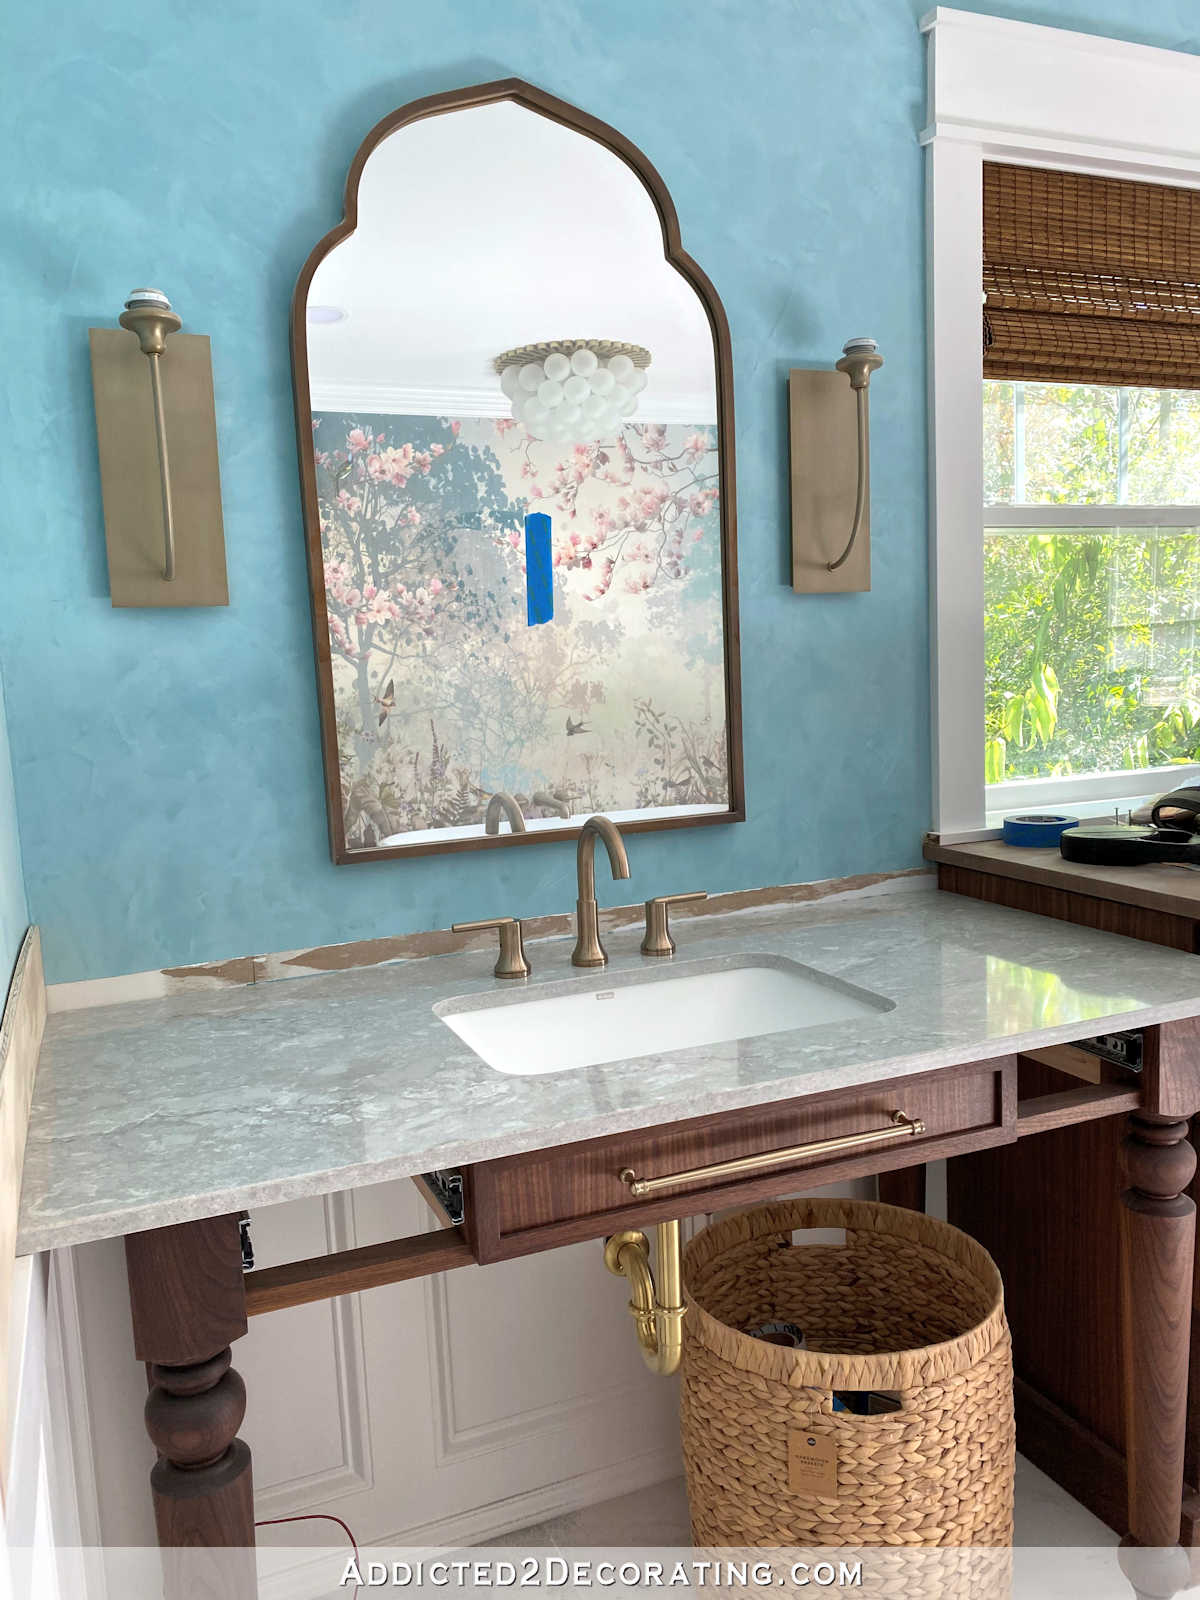
I went ahead and put the pulls on because I always like to drill the holes for pulls and knobs before painting or clear coating a piece of furniture. I don’t like taking the chance that I’d mess up a brand new finish on a piece while drilling holes for pulls. But those are easy to remove before I finish the vanity.
Here’s a close up look.
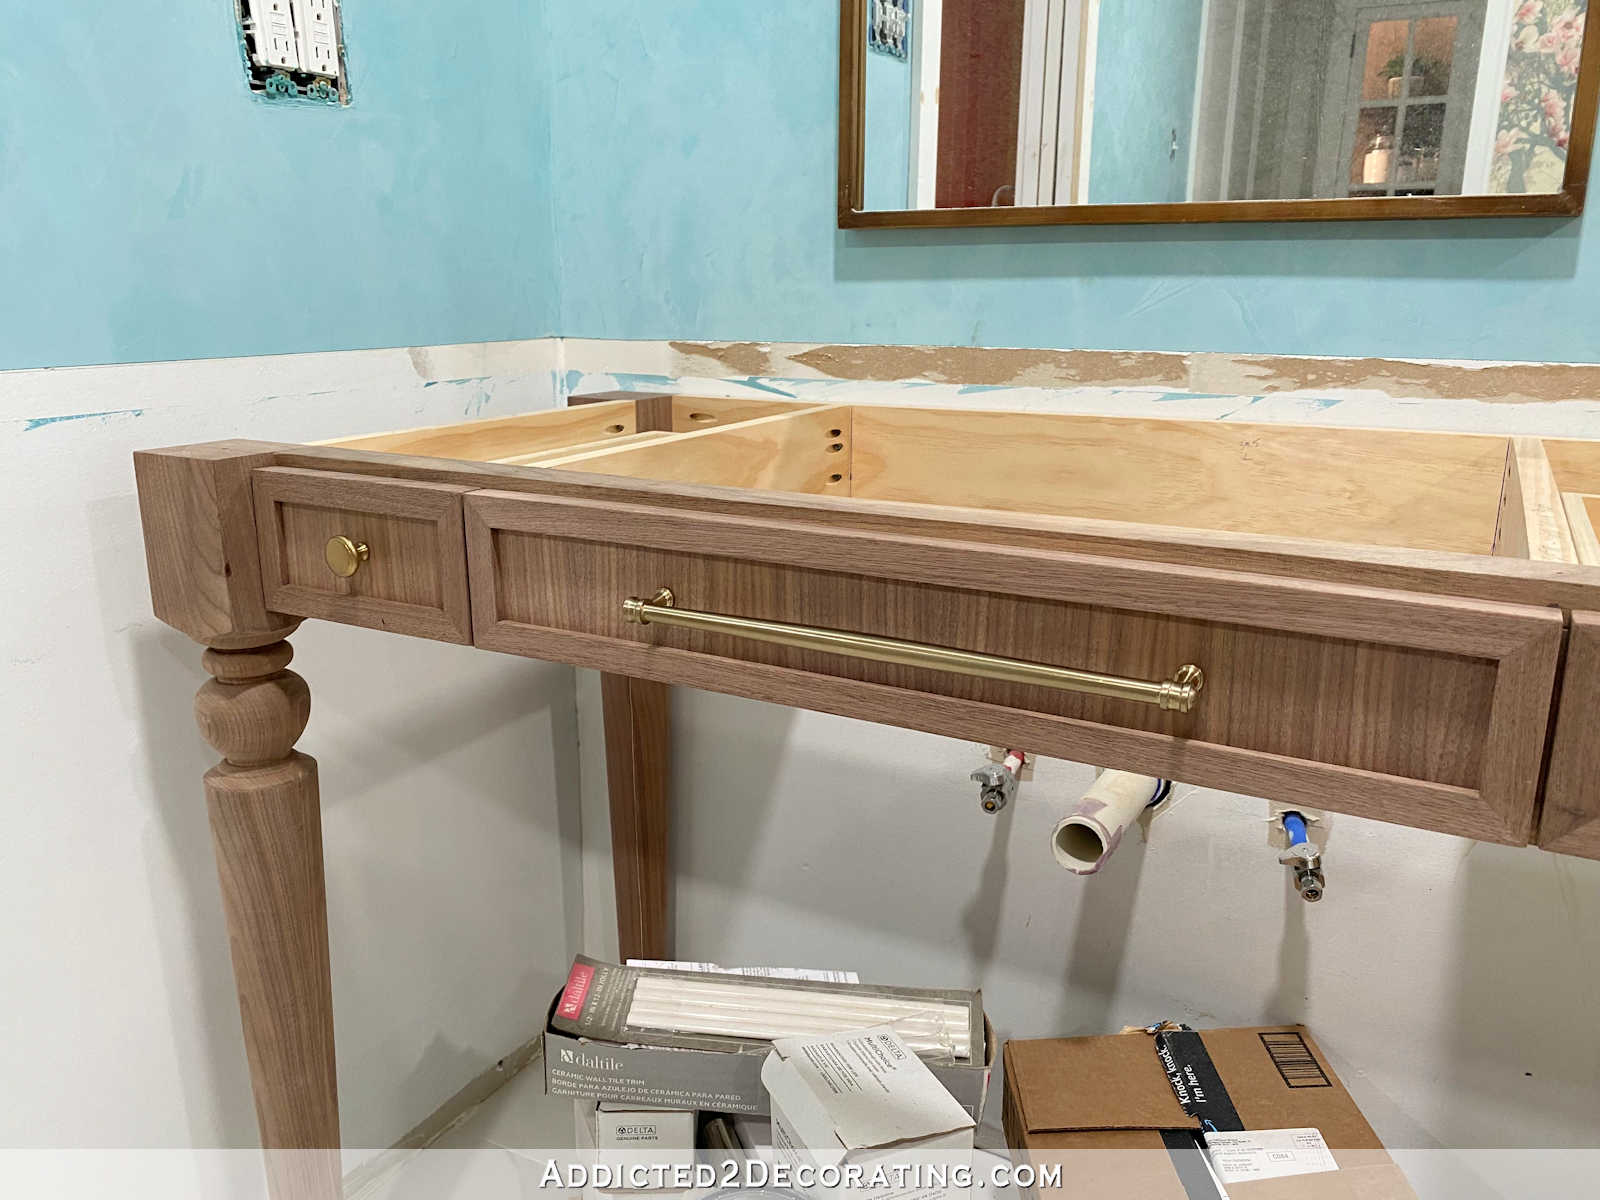
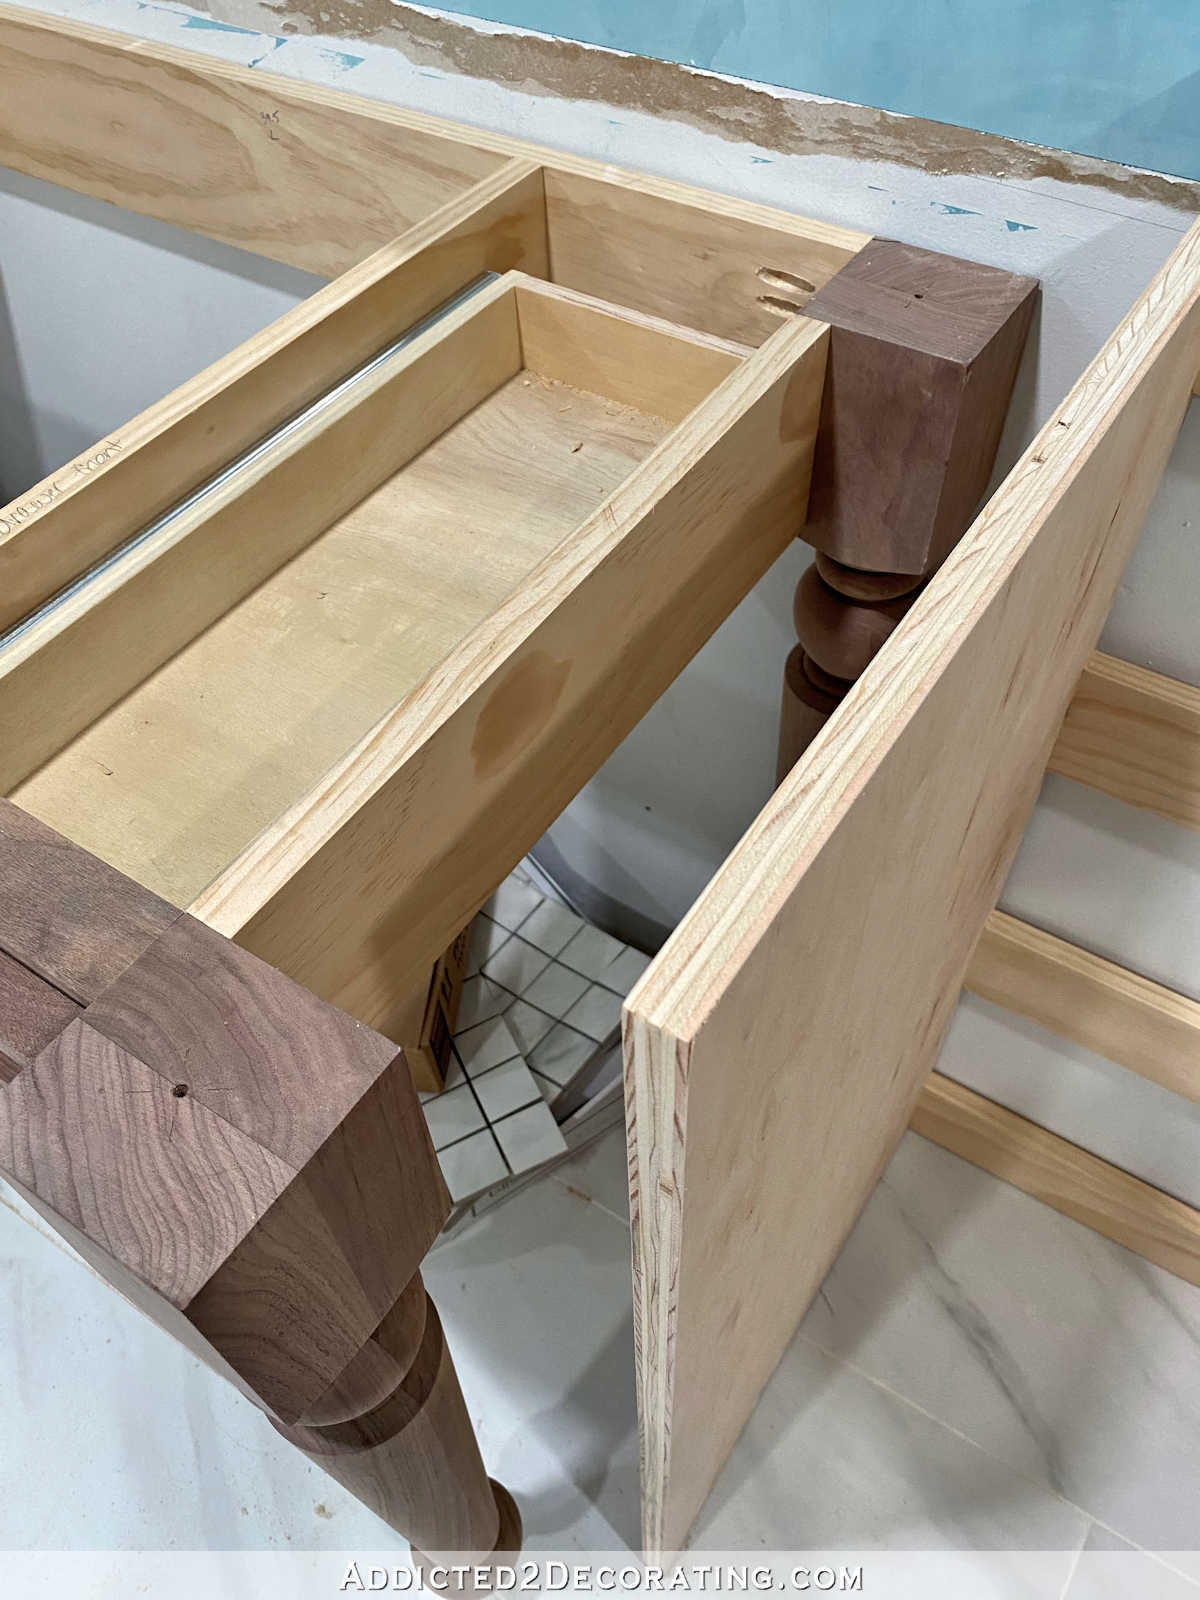
I was a little nervous that the walnut veneer and the solid walnut wood wouldn’t blend together enough since these components all came from three different places (the legs from one place, the lumber from a local place, and the veneer from a third place), but I think they all blend together very nicely. I hope it stays that way with the clear coat!
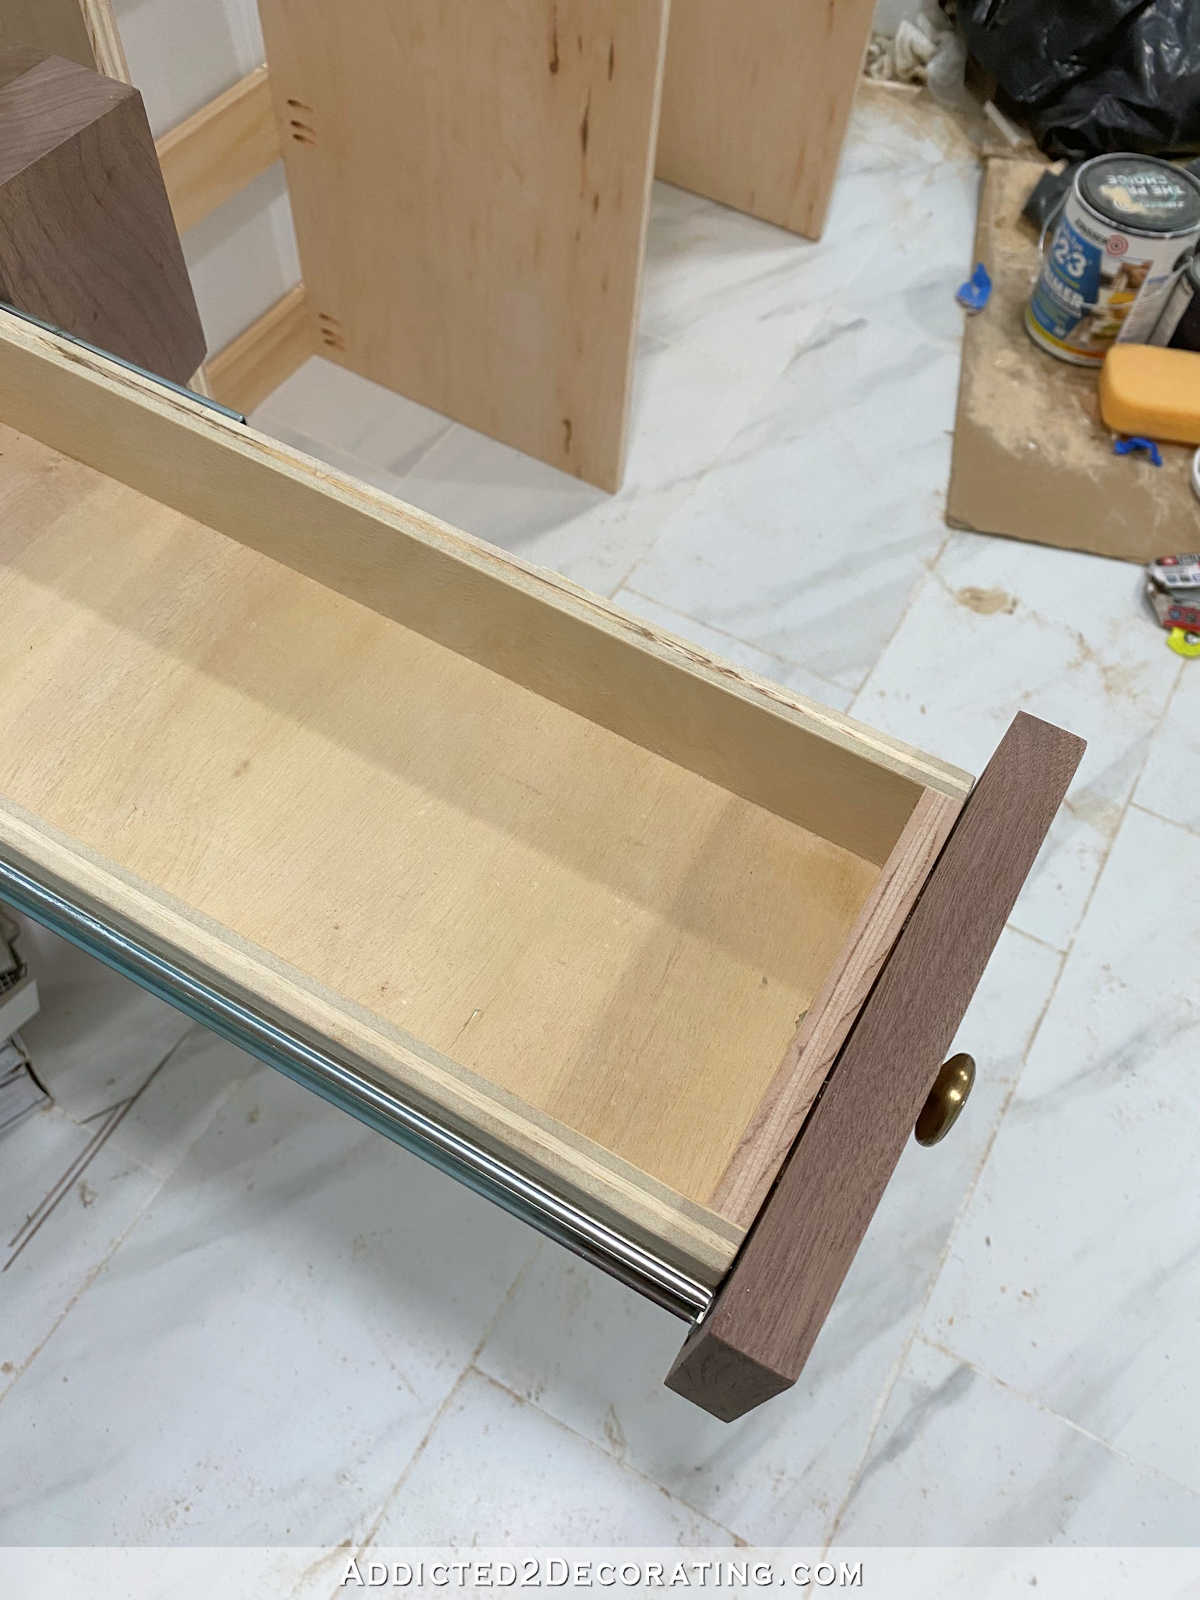
The drawers have full extension soft close drawer slides. So while the drawers aren’t very wide or tall, I do have a full 18 inches of depth for each one.
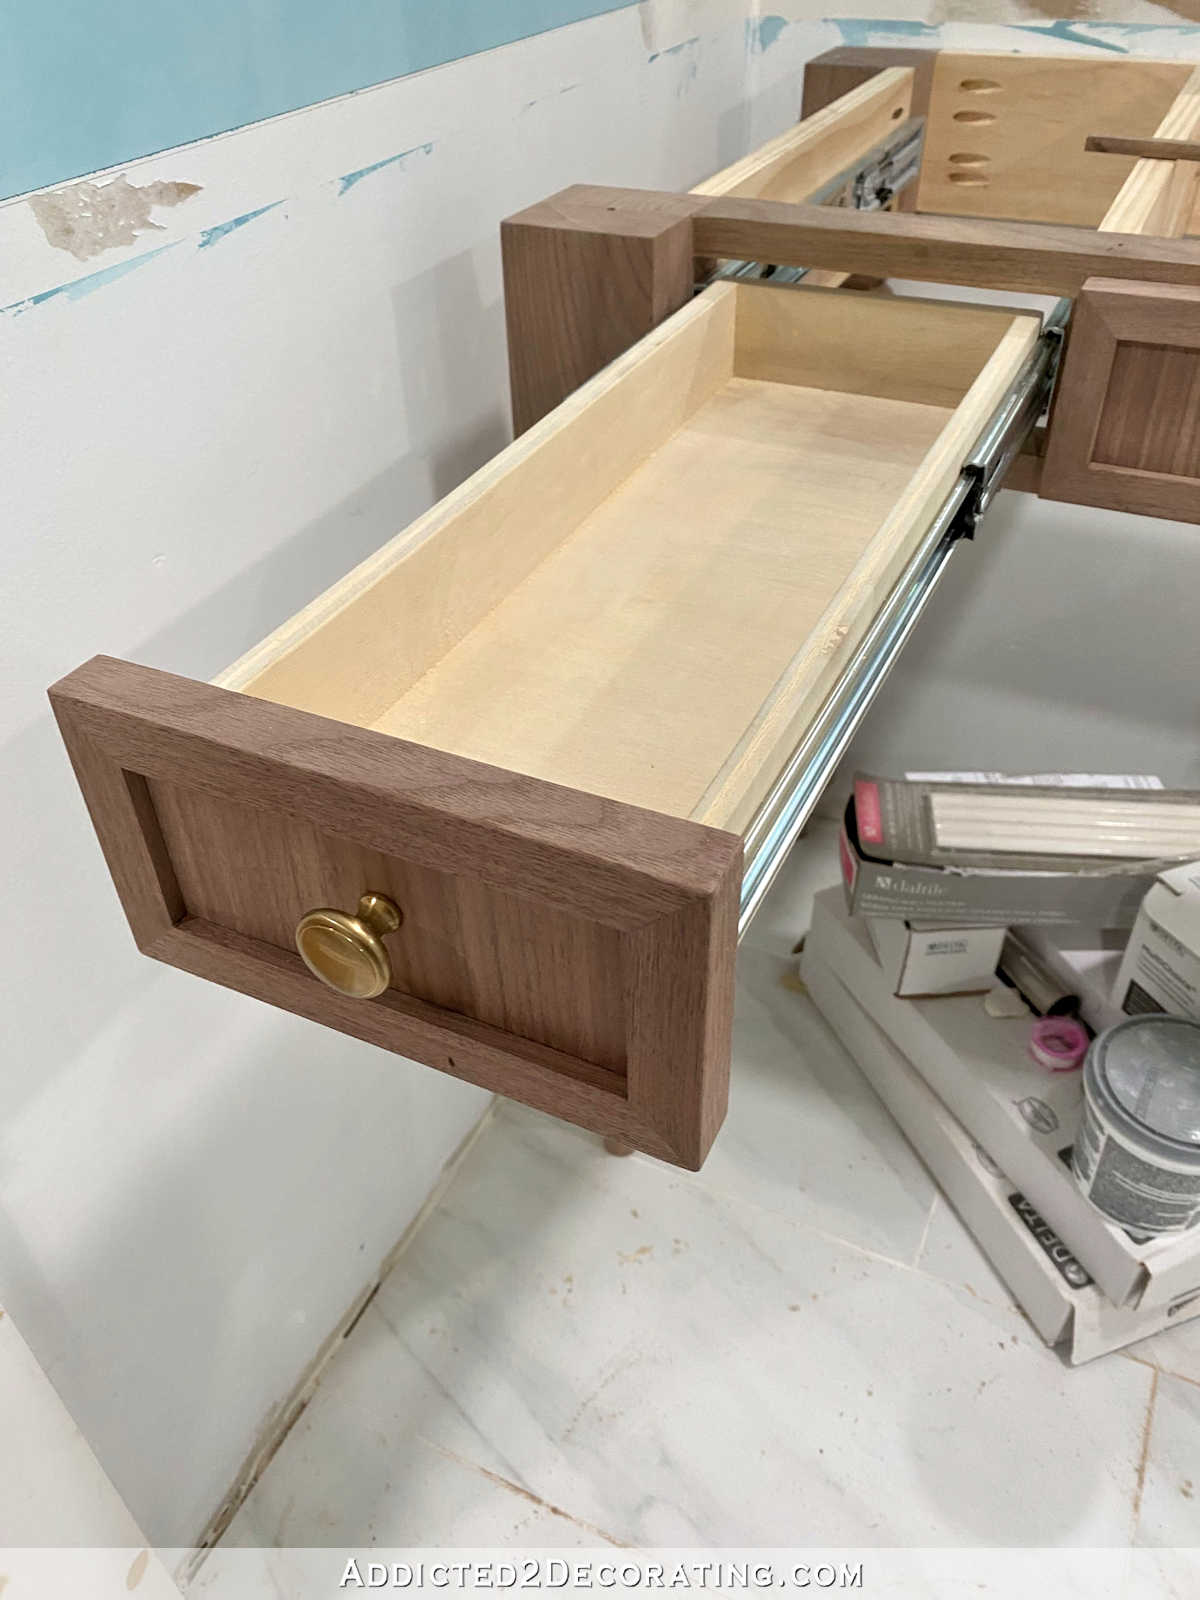
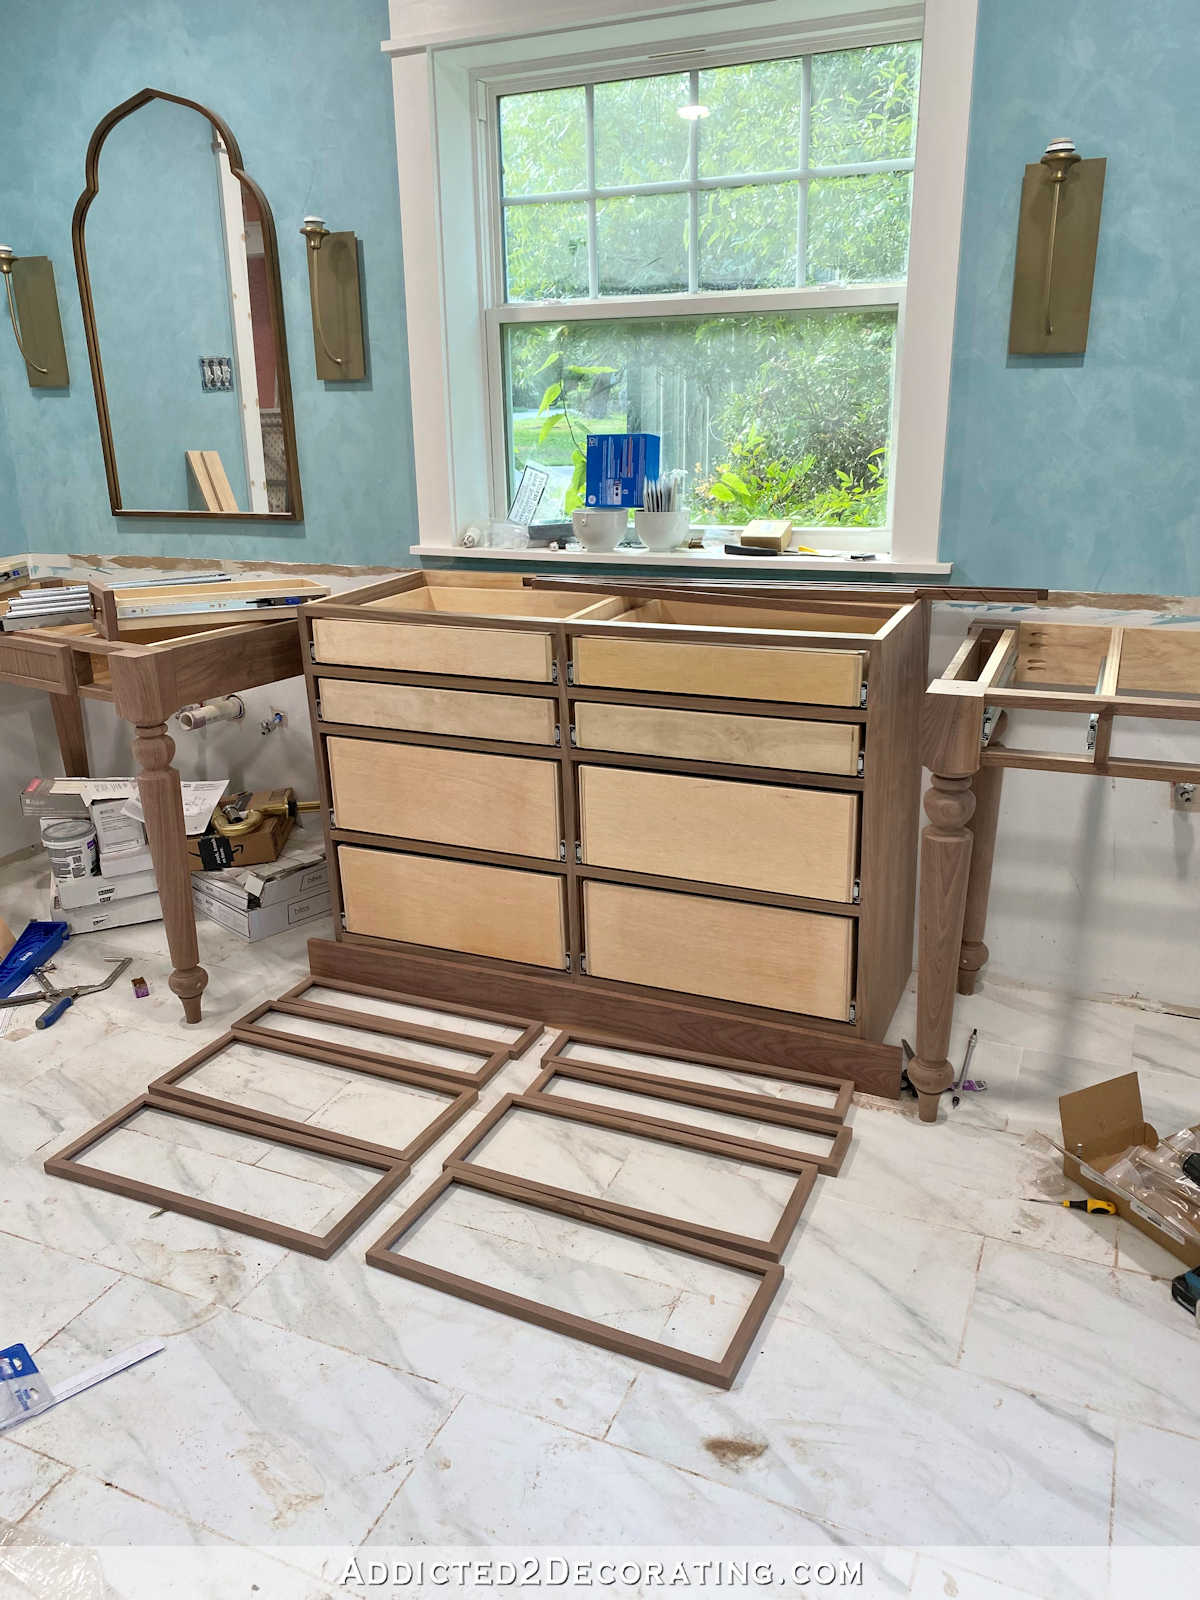
I had originally planned to stain the drawer boxes with my new favorite walnut stain (Behr water-based wood stain), but now I’m unsure. Maybe I should just leave them the color they are and just clear coat them. Y’all can let me know what you think. Would you leave them as is and just clear coat? Or would you stain them to match?
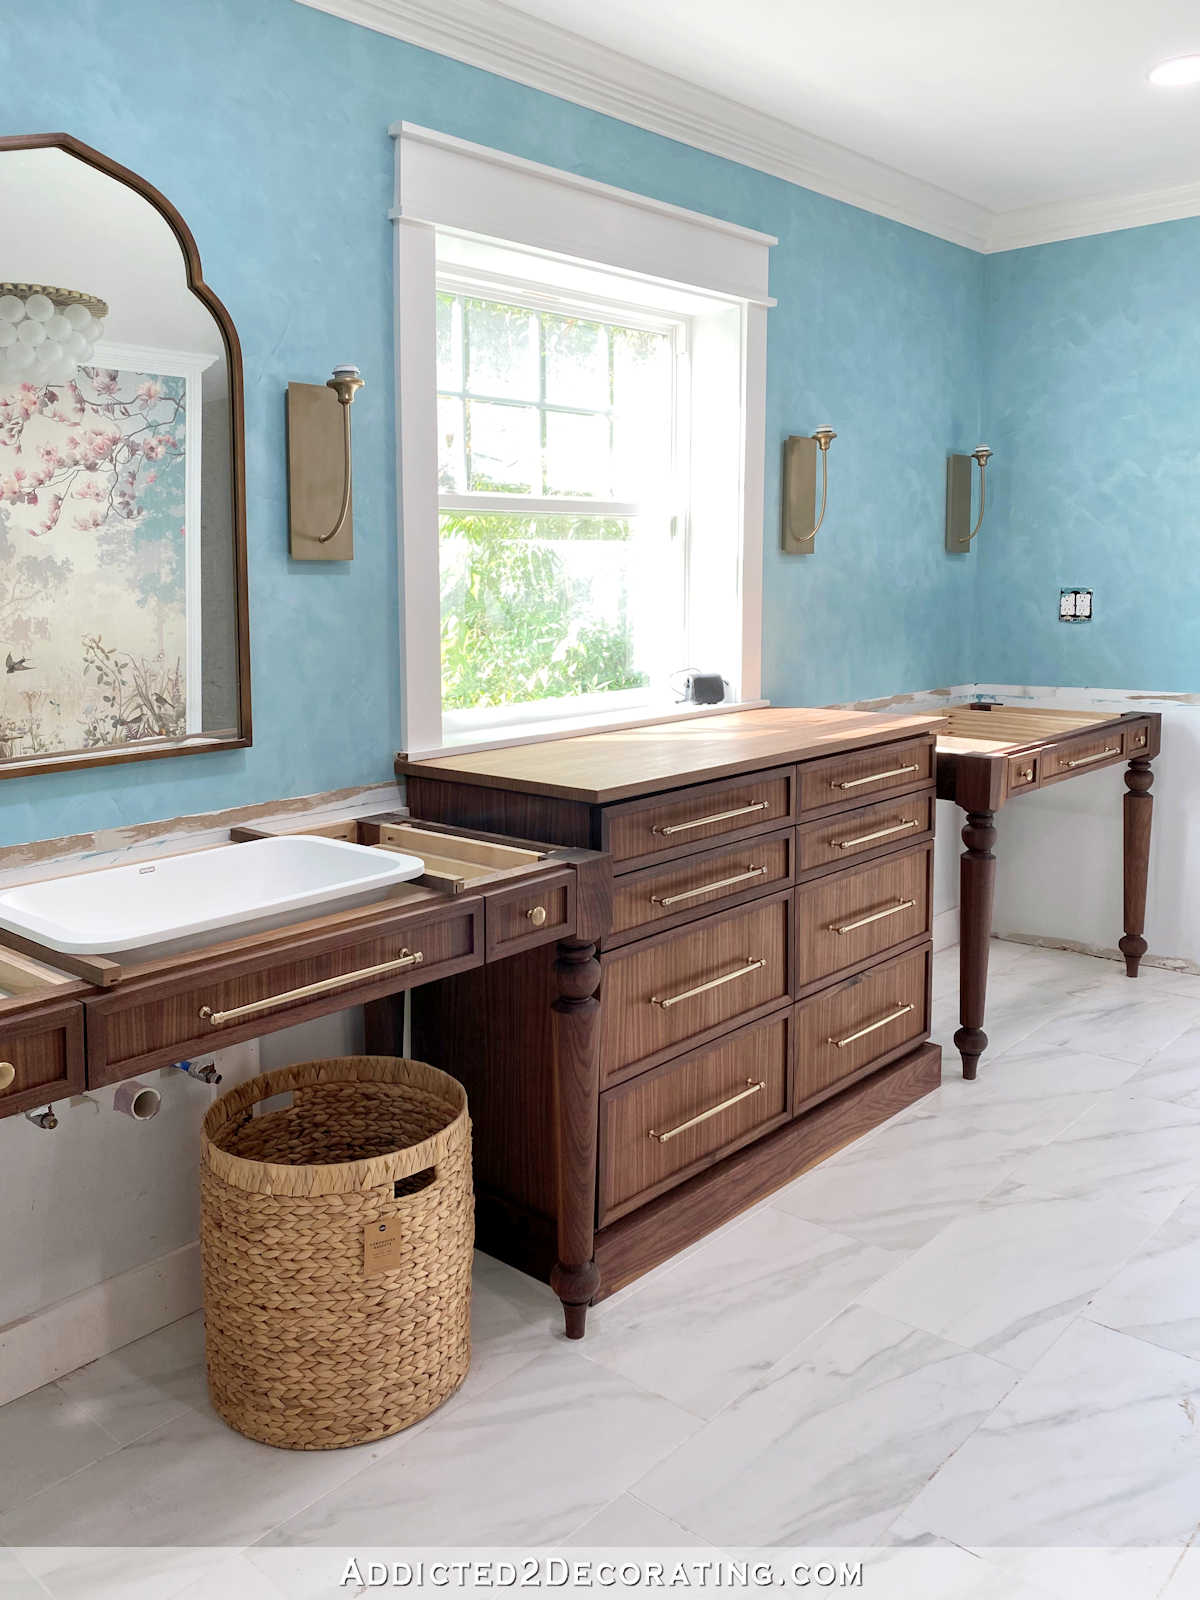
I do need to make one small addition. I started building the carcass for the center storage cabinet yesterday (more to come on that later as well), and I changed my plan for this cabinet.
My original plan was to have the vanities 24 inches deep, and the center cabinet 27 inches deep, which means that the center cabinet would stick out three inches past the vanities. Ever since I came up with this design for this wall, I’ve imagined the center cabinet being deeper than the vanities.
But I realized that if that cabinet is 27 inches deep, I won’t be able to reach the window to open and close the window. I don’t like having windows that I can’t reach. So I changed plans, and decided to have the vanities be three inches deeper than the storage cabinet, which still gives us plenty of room for storage while allowing me to reach the window.
While the countertop of the vanity will butt up against the side of the storage cabinet, the table base of the vanity was never meant to touch the side of the storage cabinet. So now, with this shallower depth on the storage cabinet, that means that at certain angles (even with the countertop covering all of this area), this side will show. It’s an easy fix. I just had to order a short piece of 1″ x 6″ walnut (which should be here this afternoon) so that I can cut a piece to fit between the legs on this side. The wall side won’t need it.
But that’s a very minor change/addition that needs to be made, and it’s just one of those things that happens as a project progresses and changes have to be made.
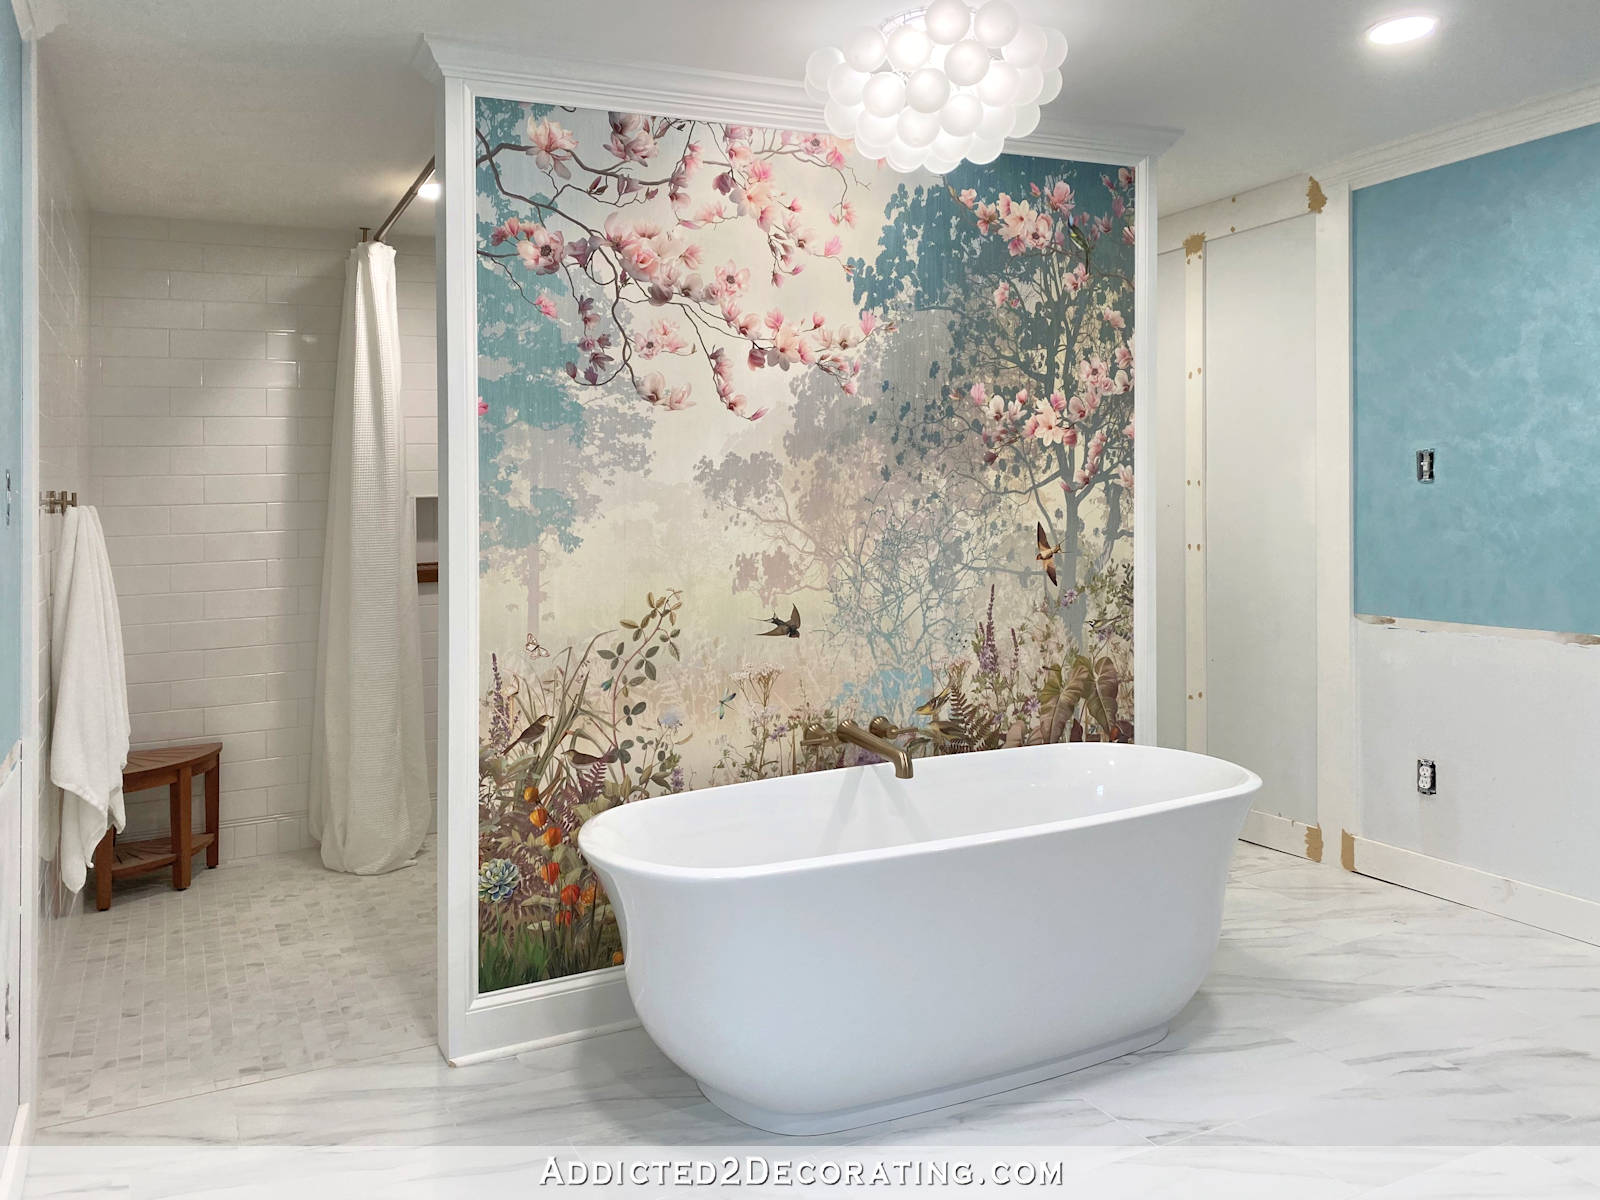
So let’s not end there. Let’s end with this beauty. 🙂

Addicted 2 Decorating is where I share my DIY and decorating journey as I remodel and decorate the 1948 fixer upper that my husband, Matt, and I bought in 2013. Matt has M.S. and is unable to do physical work, so I do the majority of the work on the house by myself. You can learn more about me here.
Personally I would still stain the pine boards, if only for the visual satisfaction of everything matching. They do look fine as they are, but you’ve come this far, why not one extra step for aesthetics’s sake? 🙂
I would normally say stain the interior to match. However, I find lighter backgrounds in cabinets and drawers helpful for my aging eyes. Also, knowing your beautiful knack for organization, I foresee you making drawer dividers for these very deep drawers. Would that make a difference in your staining decision?
Out of my usual character I think you should stain the outsides of the drawer boxes, and lacquer the insides a hot pink drawn from the mural. Still light enough to see what’s in there, but punchy.
It’s absolutely gorgeous! You would’ve had to pay big money for a vanity like that!
One suggestion for taking your construction to the next level: Edge banding applied to the top of the drawer boxes! That way, you won’t have to see the plywood ends…
You’re right. I probably will make dividers, and that would make staining even more complicated.
I would leave the drawers unstained. It’ll be easier to see what’s in the drawers if they’re not dark.
Gorgeous!
Clear coat the drawers and call it a day. I prefer light backgrounds I drawers and cupboards. Your craftsmanship is beautiful!
Well done! I think I would stain them.
Stunning!! Coming along so beautifully. Personally, I would just clear coat the drawer boxes. Mine are light and I think you can see better just what dirt needs to be cleaned out periodically. Perhaps a strip of pine or birch veneer at the top of the boxes to hide the plywood layers?
I would not stain the inside of the drawers. The contrast is nice and fresh.
WOW! Just Wow! Beautiful piece of furniture! Can’t wait to see the new design for the center cabinet. Great work!
I would not stain the drawers.
I would leave the drawers. Finished purchased cabinetry is almost always pine or poplar regardless of the outer wood.
Since the middle cabinet will be shorter depth, are you going to have a pretty or interesting scalloped edge on the counter top? I can’t remember if it will be a solid piece of counter across
Gorgeous! Can’t wait to see it with the top, sink and faucet. I say clear, no stain.
Also, what are the tops going to be?
The vanity countertops will be white quartz.
The edges of the vanity countertops will be square. I plan to do an ogee edge on the wood top of the center cabinet.
It is so lovely! I am of the opinion to just clear coat the whole thing. I would be worried about the pine not taking stain well and it looking blotchy or unattractive. The contrast currently is very intentional looking.
Beeeeeeeeutiful! I would just clear coat the drawers. It’s a much cleaner look. You’re awesome!
You will apply the wall trim separating the blue and white before installing the cabinets, right? Just didn’t see you mention it. Beautiful work on the cabinet.
I’ll install the center cabinet first, then do the walls on either side, and the install the vanities.
I would definitely not stain the drawers, just add a clear coat. I like to use Shellac, it dries super fast so you can add several coats and puts a nice smooth surface, easy for wiping out. I would edge band the edges of the plywood, gives a more finished look.
I like my drawer boxes either clear coated or white, so I can see better if they need cleaning. You did a beautiful job on the vanity so far! Will the 1″x6″ cover both yours and Matt’s side of the vanities, or are you just covering where it will be seen? Happy Birthday to your brother!
You did a great job!!!! My dad is a furniture and cabinet builder, he stains the outside of the drawer boxes and the top edges and leaves the inside unstained. Then he sprays sealer and finish coat on them. Whichever way you decide, it will be gorgeous!!!
Beautiful! I would clear coat the interior drawers just for easier cleaning down the road.
It looks gorgeous! I’m so glad you’re excited and happy with it. I would not stain the drawer boxes, but would clear coat them. Keeping them light makes things easy to find, clear coating them makes them easy to clean.
Absolutely beautiful vanity. Clear coat the interior, your eyes will thank you.
Very lovely.
I was just thinking that for stability and to withstand the weight of the countertop and sink you should probably put some additional pieces on the sides anyway. Could just be whatever wood you have around on the wall side.
I’d just clear coat the insides. Lots of cabinets have lighter insides because it’s easier to see what is in there that way.
Great job.
Don’t stain the pine! Just do a clear coat. I have walnut stained, maple kitchen cabinets and the interiors of the drawers are natural. I love them that way!
I think it IS perfect. Good job.
It’s absolutely gorgeous! You would’ve had to pay big money for a vanity like that!
One suggestion for taking your construction to the next level: Edge banding applied to the top of the drawer boxes! That way, you won’t have to see the plywood ends…
Use a piece of scrap walnut to stain one half and clear coat the other half then make your decision.
Clear coat.
Looks beautiful. Clear coat will be easier to clean and see exactly what is in the drawers. The banding of the top of the drawer side sounds like a nice idea though. I wish I could remember what the vanity top was going to be??? Looking forward, as always.
The vanity top will be a white quartz.
Beautiful grain, lovely design, gorgeous craftsmanship.
I love it! Great job!
Whether you stain or just seal, it’s fantastic! (You really can’t go wrong, can you?)
It’s SOOO pretty!!
I agree with most here. Band the tops to hide the plywood, clear coat the rest. It is so beautiful. My cabinets are a darker oak with clear drawers and I love being able to see inside them.
😍
Just WOW – you are a rock star – I cannot believe what you have pulled off – Not that I am being sexist – but from one woman to another – Respect!!!!
Leave the boxes the color they are, maybe edge band to fake a solid wood look, but it’s not necessary unless plywood edges bug you. Seeing wood is nice enough of an upgrade. Think custom kitchen cabinets and pullouts come in a lighter wood quite frequently. Most drawers have the face as the fancy wood. I don’t think all matching boxes for fancy cabinetry. Good move on deciding to swap that one side piece.
So proud of you! A+ !!
The vanity is GORGEOUS! Well done, Kristi! After reading the other comments already posted, I would agree with those who suggest banding the top edges of the plywood drawers and then clear coating everything, leaving the pine unstained. I think the contrast will be refreshing and give more emphasis to the walnut wood. Staining the pine would just look like an attempt to imitate walnut with pine. Your work is IM. PRESS. IVE!
Stunning, Kristi!