DIY Table-Style Bathroom Vanity With Drawers – Finished! (Part 2 — Making The Drawer Fronts)
Yesterday, I showed y’all the finished DIY table-style bathroom vanity that I built for our master bathroom remodel. So today, I wanted to back up a bit and show the step-by-step process for how I made the drawer fronts.
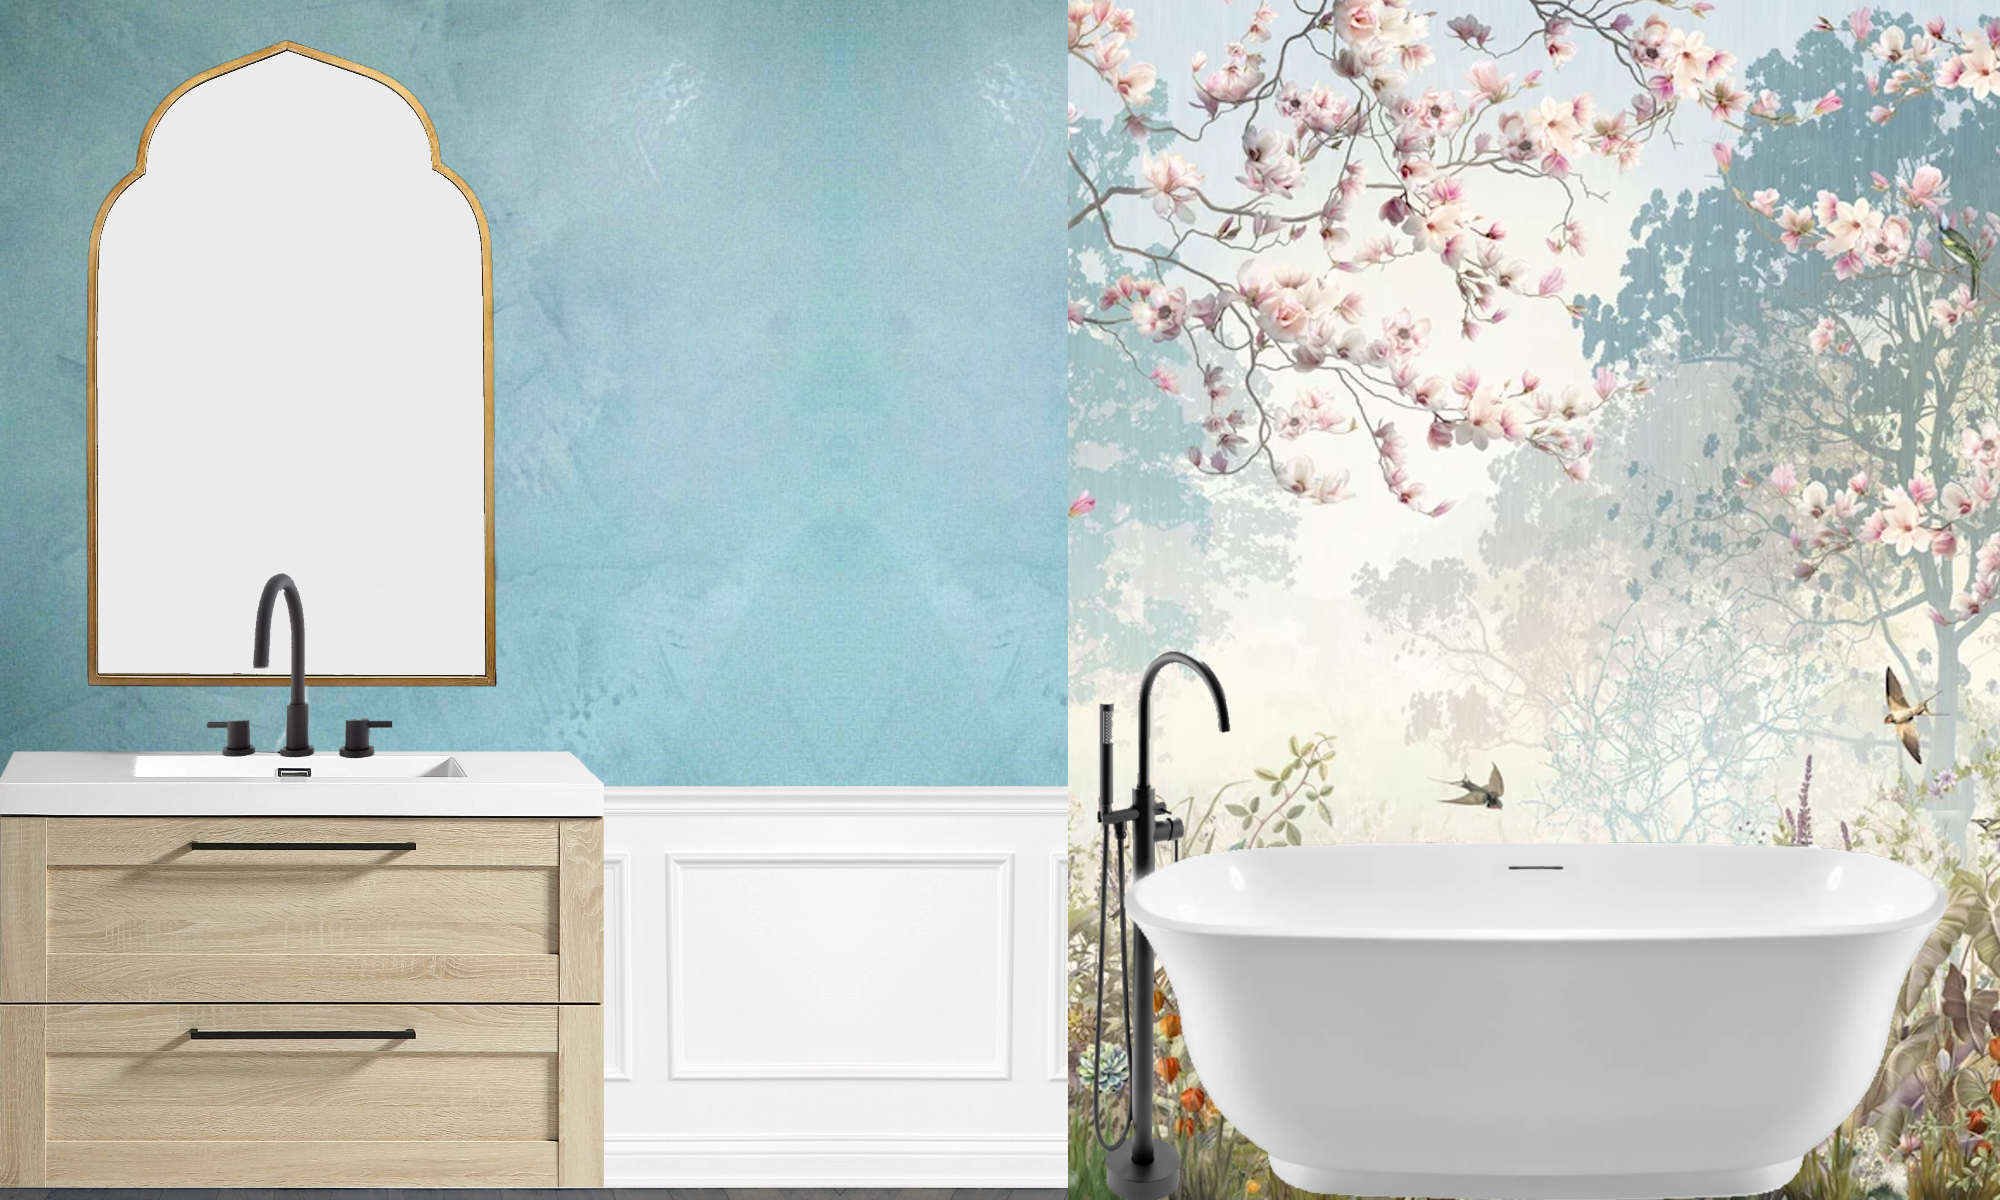
This is Part 2 of this vanity project. You can click here to find Part 1 showing the basic build for the table base and drawer boxes. So here’s another look at the finished vanity with the drawer fronts finished and attached.
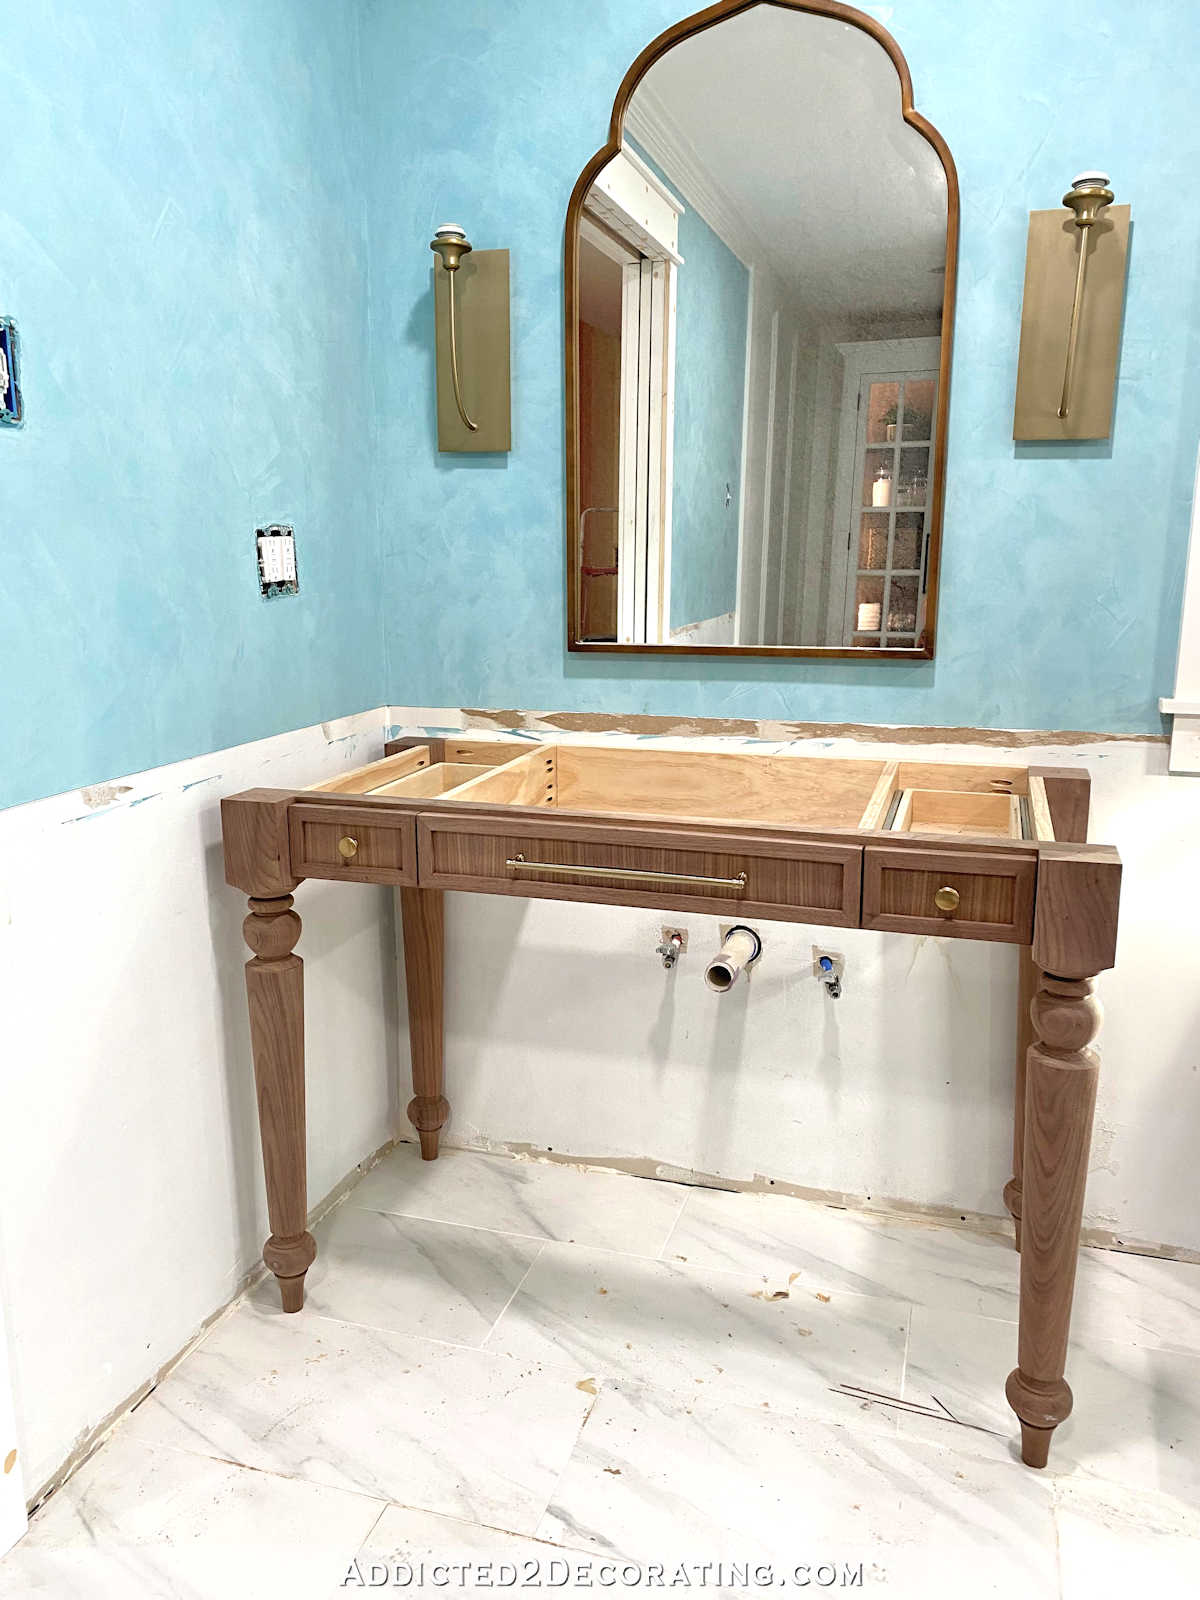
Hopefully you can see that the drawer fronts are made up of a frame with a recessed panel set inside. The frame is cut out of solid walnut lumber, and the recessed panel is 1/2-inch plywood covered with walnut wood veneer.
With that basic info in mind, let me show you how I made these drawer fronts.
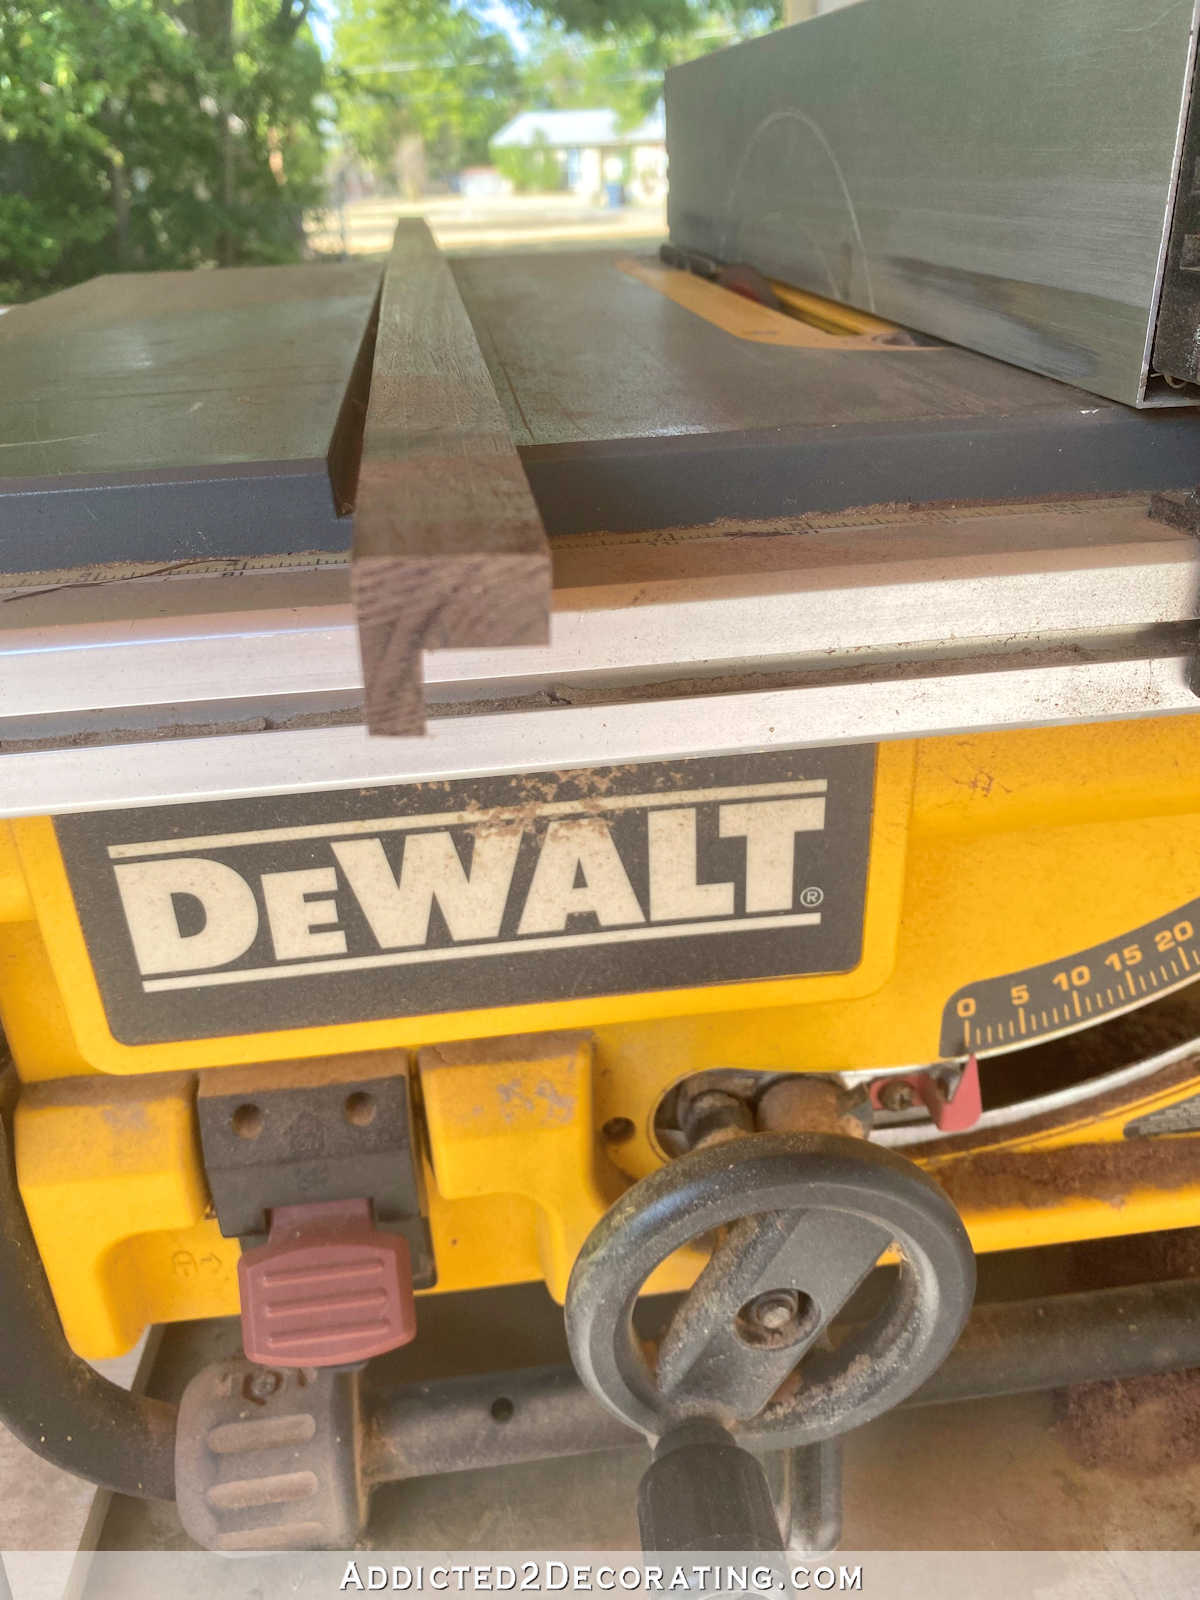
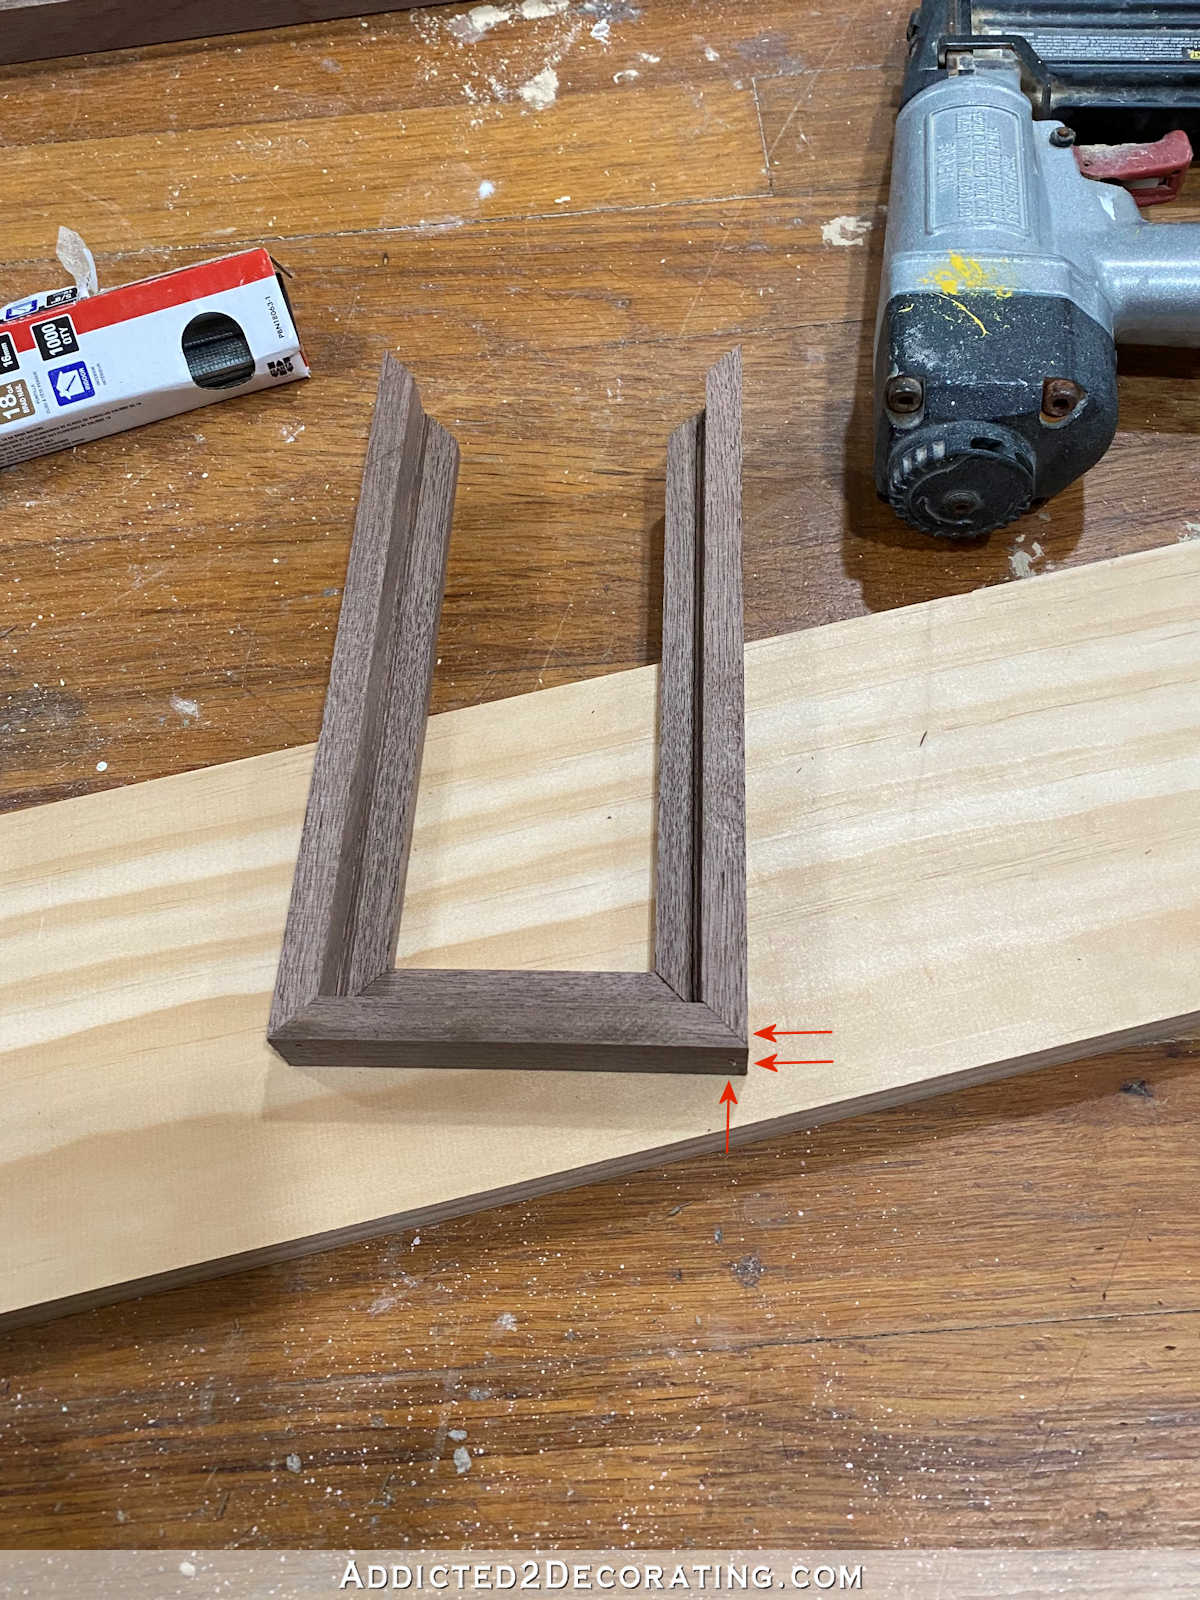
I started with 1″ x 3″ walnut lumber and cut them down into pieces that are basically large square dowels. (1″ lumber is actually 3/4-inch thick, so I set my table saw fence to rip 3/4-inch widths and cut the pieces so that they were 3/4-inch by 3/4-inch.) Then I measured the thickness of the material I would be using for the recessed panels (two thicknesses of walnut veneer and one piece of 1/2-inch plywood). That measurement was approximately 5/8-inch, so I set my blade to that depth, and set the fence a little over 1/4-inch from the blade, and ran all of the pieces through the saw to create the first cut to make the rabbet to hold the recessed panel.

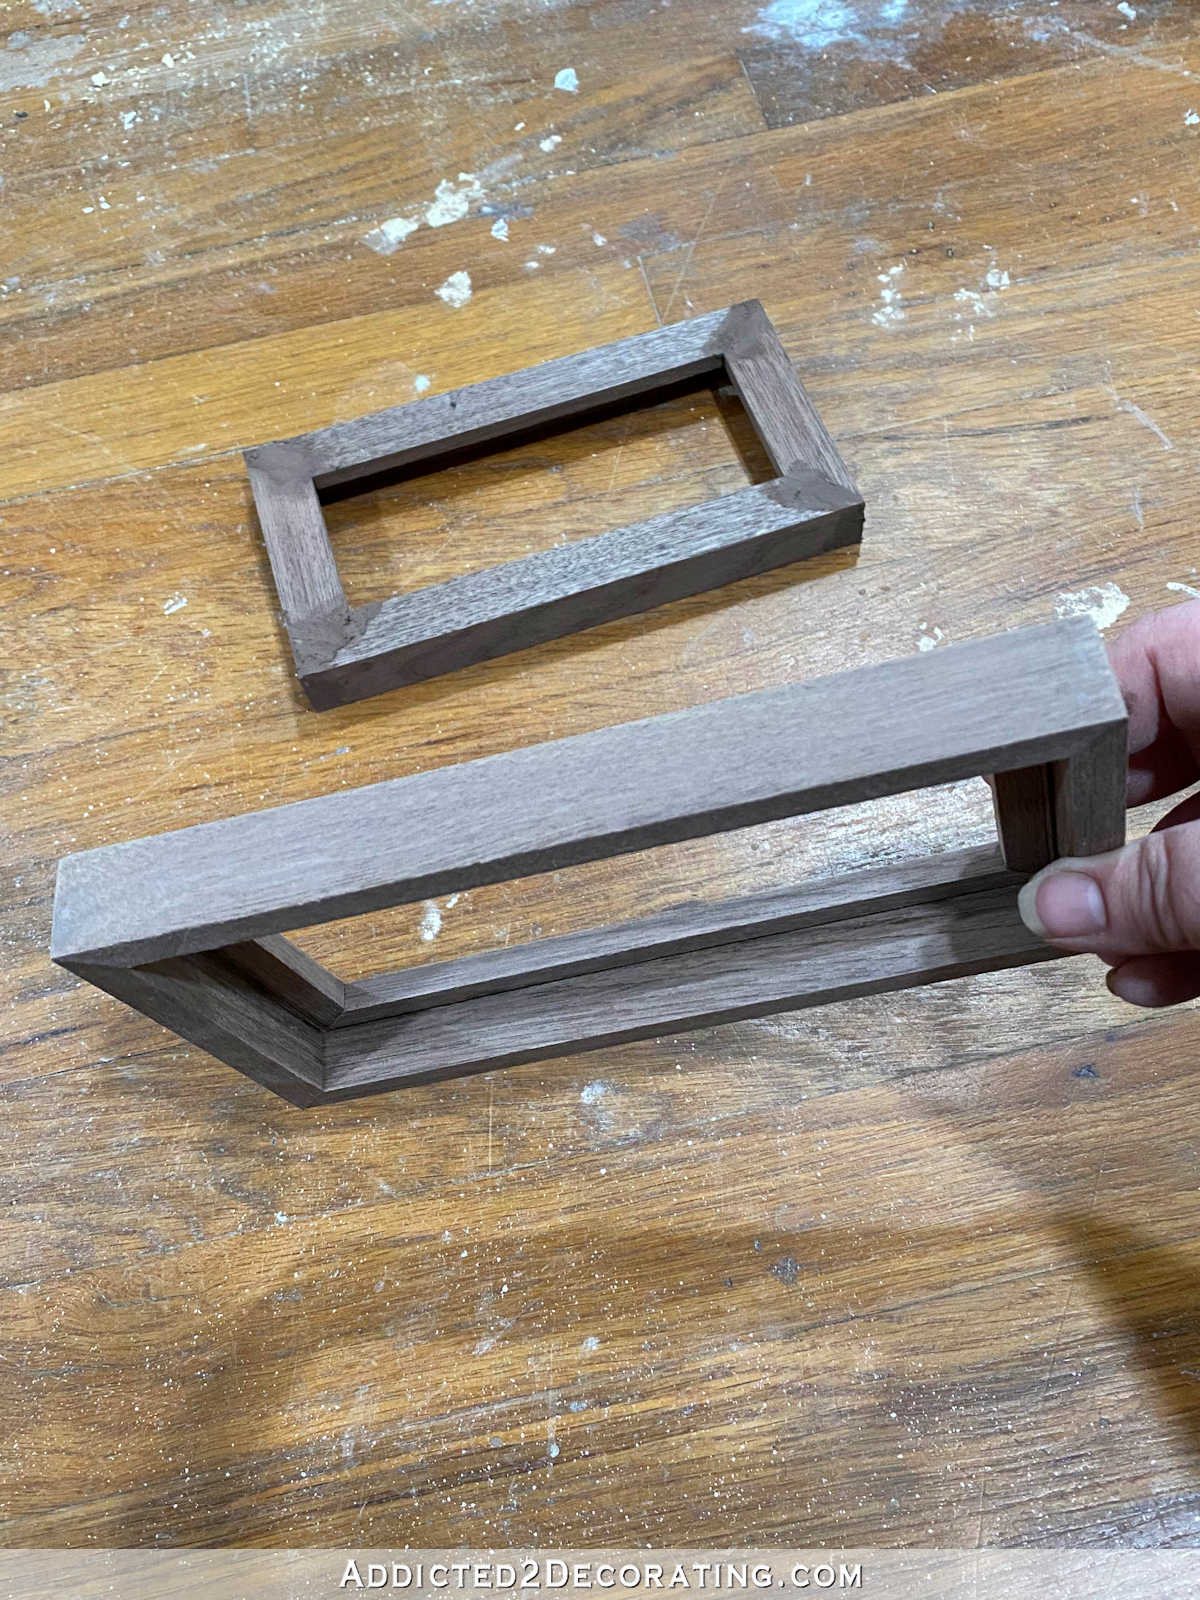
And then I flipped the piece over and re-set the saw blade and fence so that the next pass would remove that piece completely. This was the step that took me a couple of tries to get right, and I ended up ruining a couple of pieces of walnut. But here’s what the profile looked like after both cuts were made. The thin side that’s left (facing left) will be the top of the frame, and the thick side that’s left (facing up) will be the side of the frame.
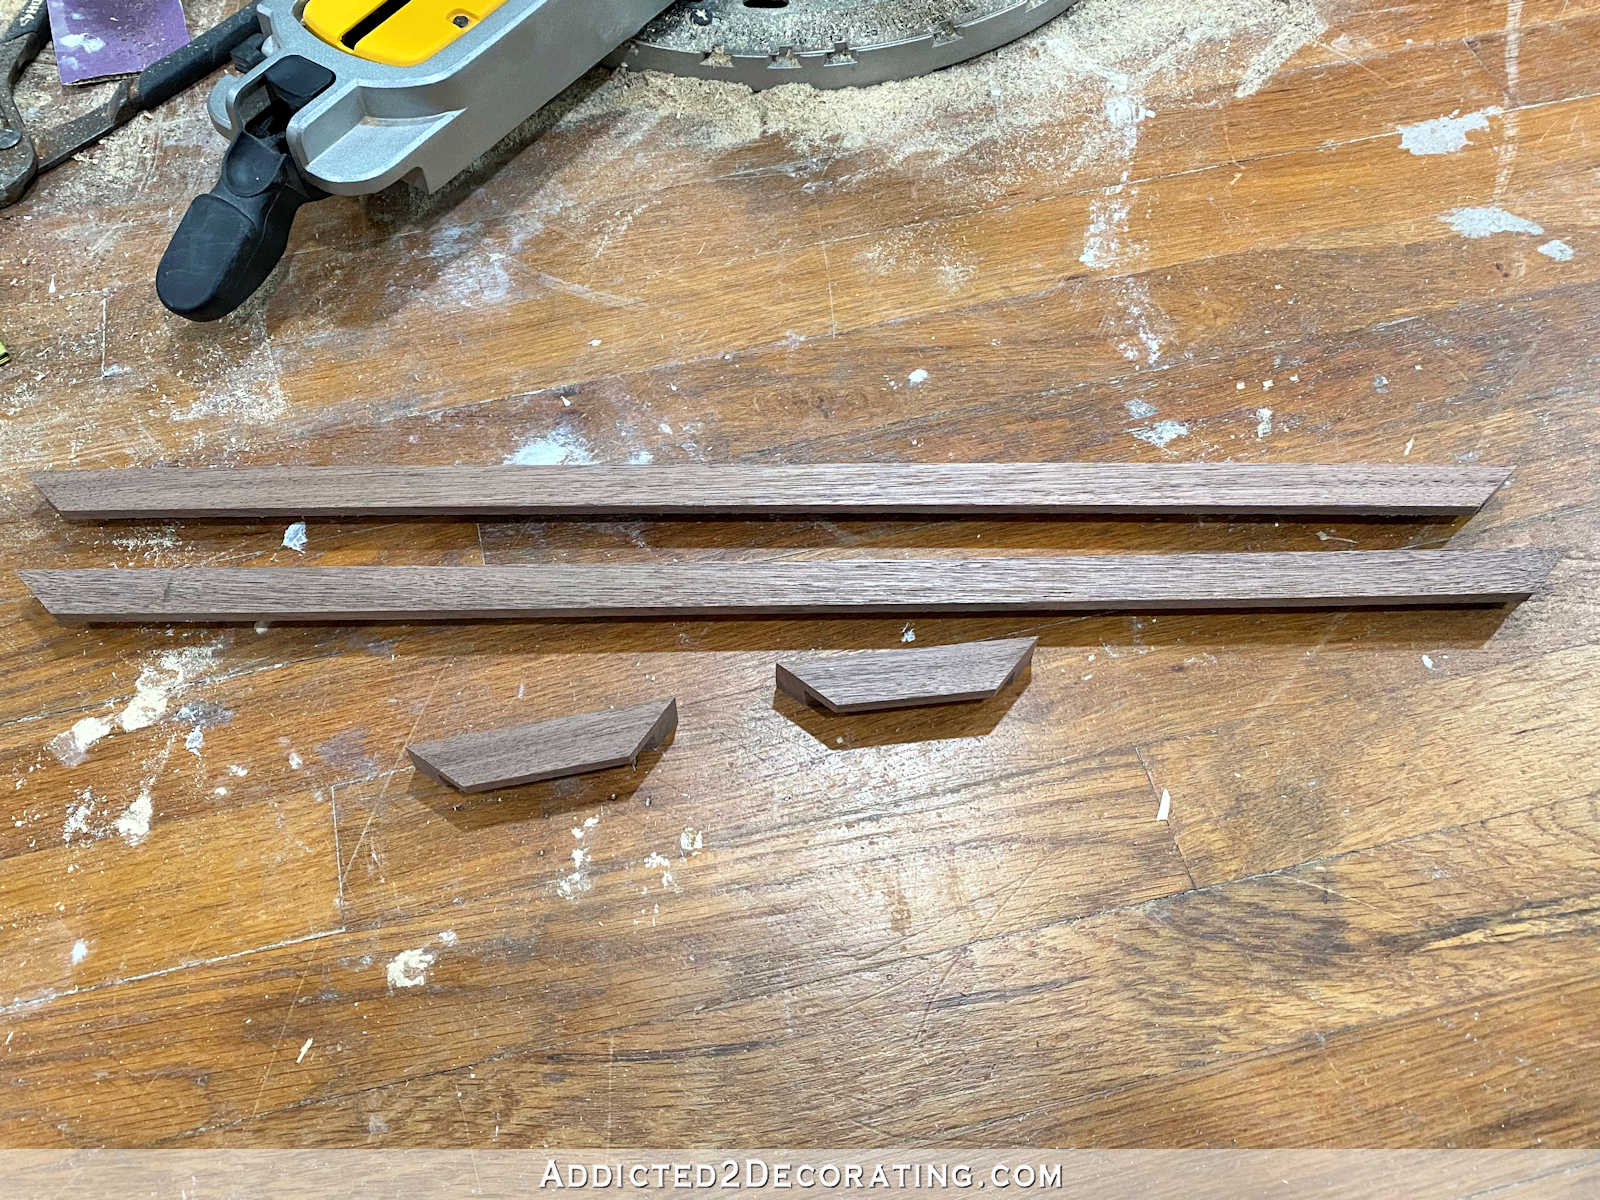
It’s very important to cut all of the pieces at the same time. In other words, I’m making two vanities and a storage cabinet, so I cut all of the frame pieces on my table saw at the same time. That way they’d all be perfectly consistent. I’ve found that if I have to go back and re-cut pieces like that, and try to get my saw set exactly the same way I had it the first time, it’s almost impossible to get it just right. And when that happens, assembling frames with parts that came from different pieces cut at different times can cause problems that will result in a less than desirable outcome.
With all of those pieces cut, I then used my miter saw to cut the individual pieces for the frames, mitering each end at a 45-degree angle.
To assemble the frames, I used wood glue and 5/8-inch 18-gauge nails. If you don’t want to use nails, then you can just use glue and 45-degree clamps. I’m more of an immediate gratification kind of person, so waiting for wood glue to dry isn’t really my style. 😀 I opted for the immediate gratification of nailing the pieces together.
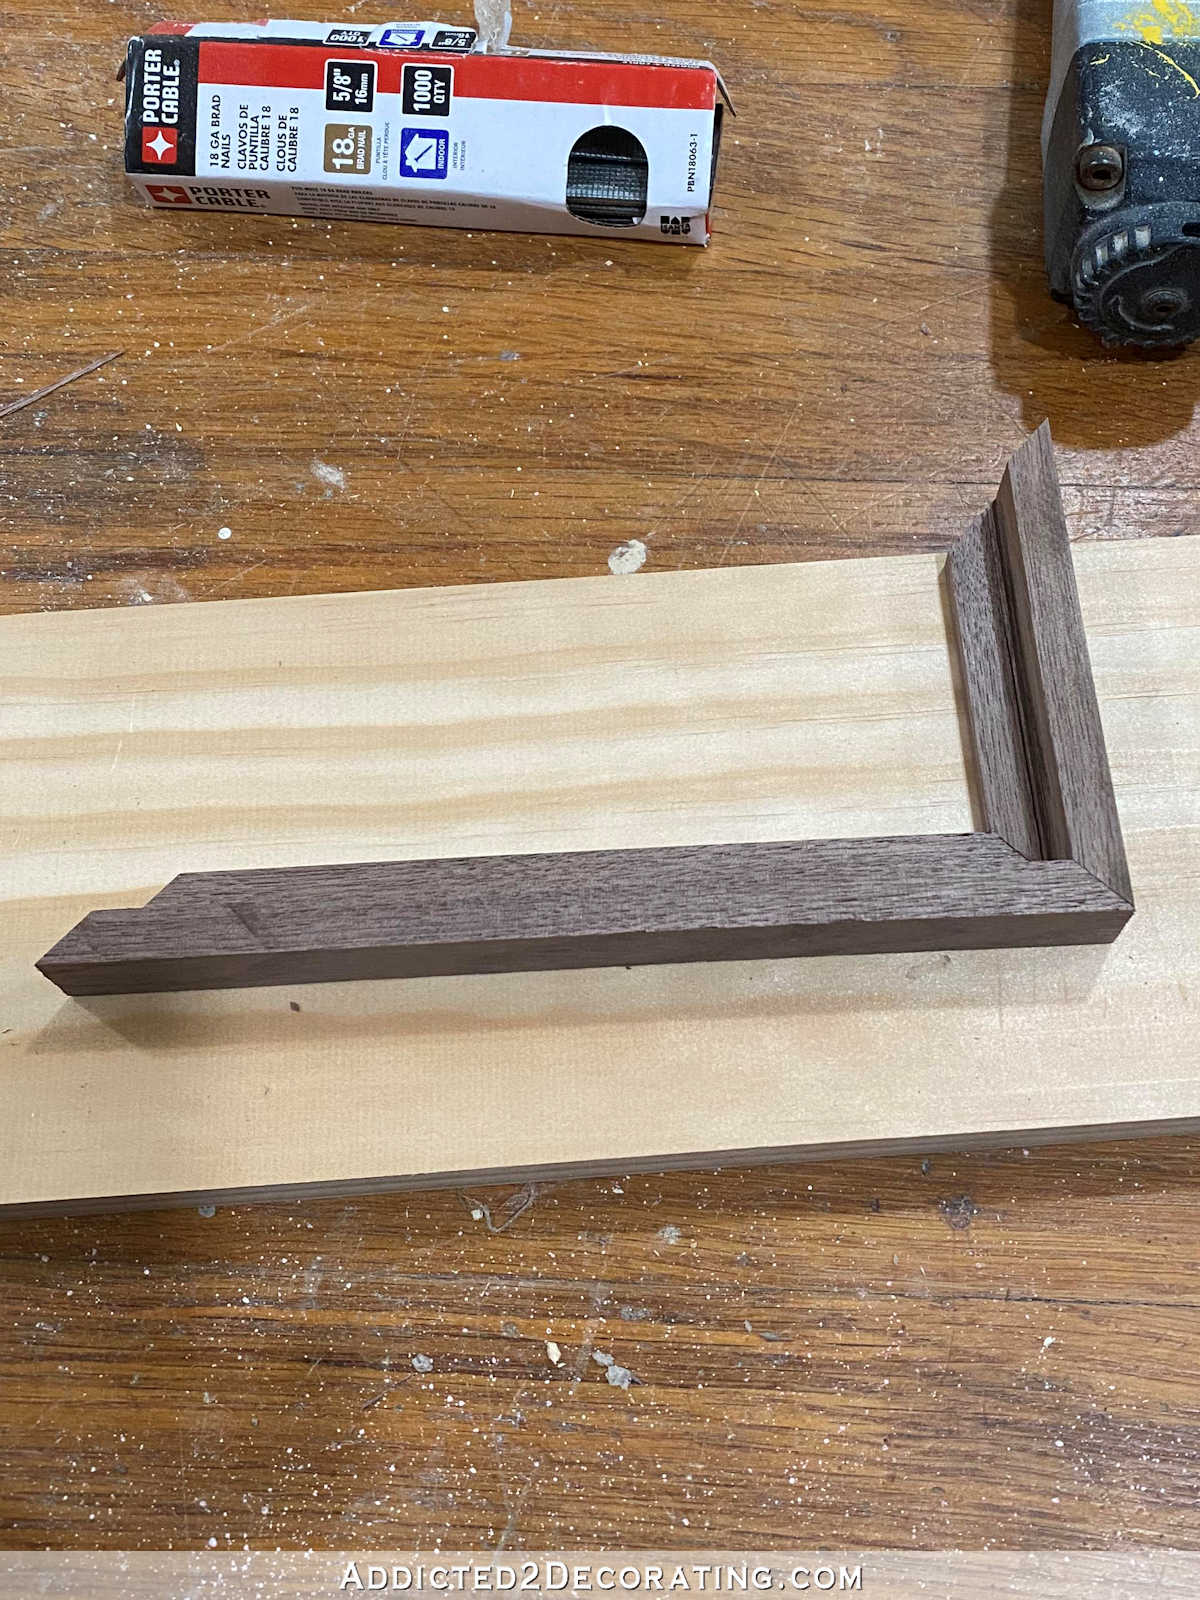
As I worked my way around each frame, I used three nails (these nails are really tiny) in each corner — two from the right side (one on top, one on bottom), and one centered from the bottom. See the arrows on the picture below if that description doesn’t make sense.
Here’s what the back of the frame looked like when it was assembled.
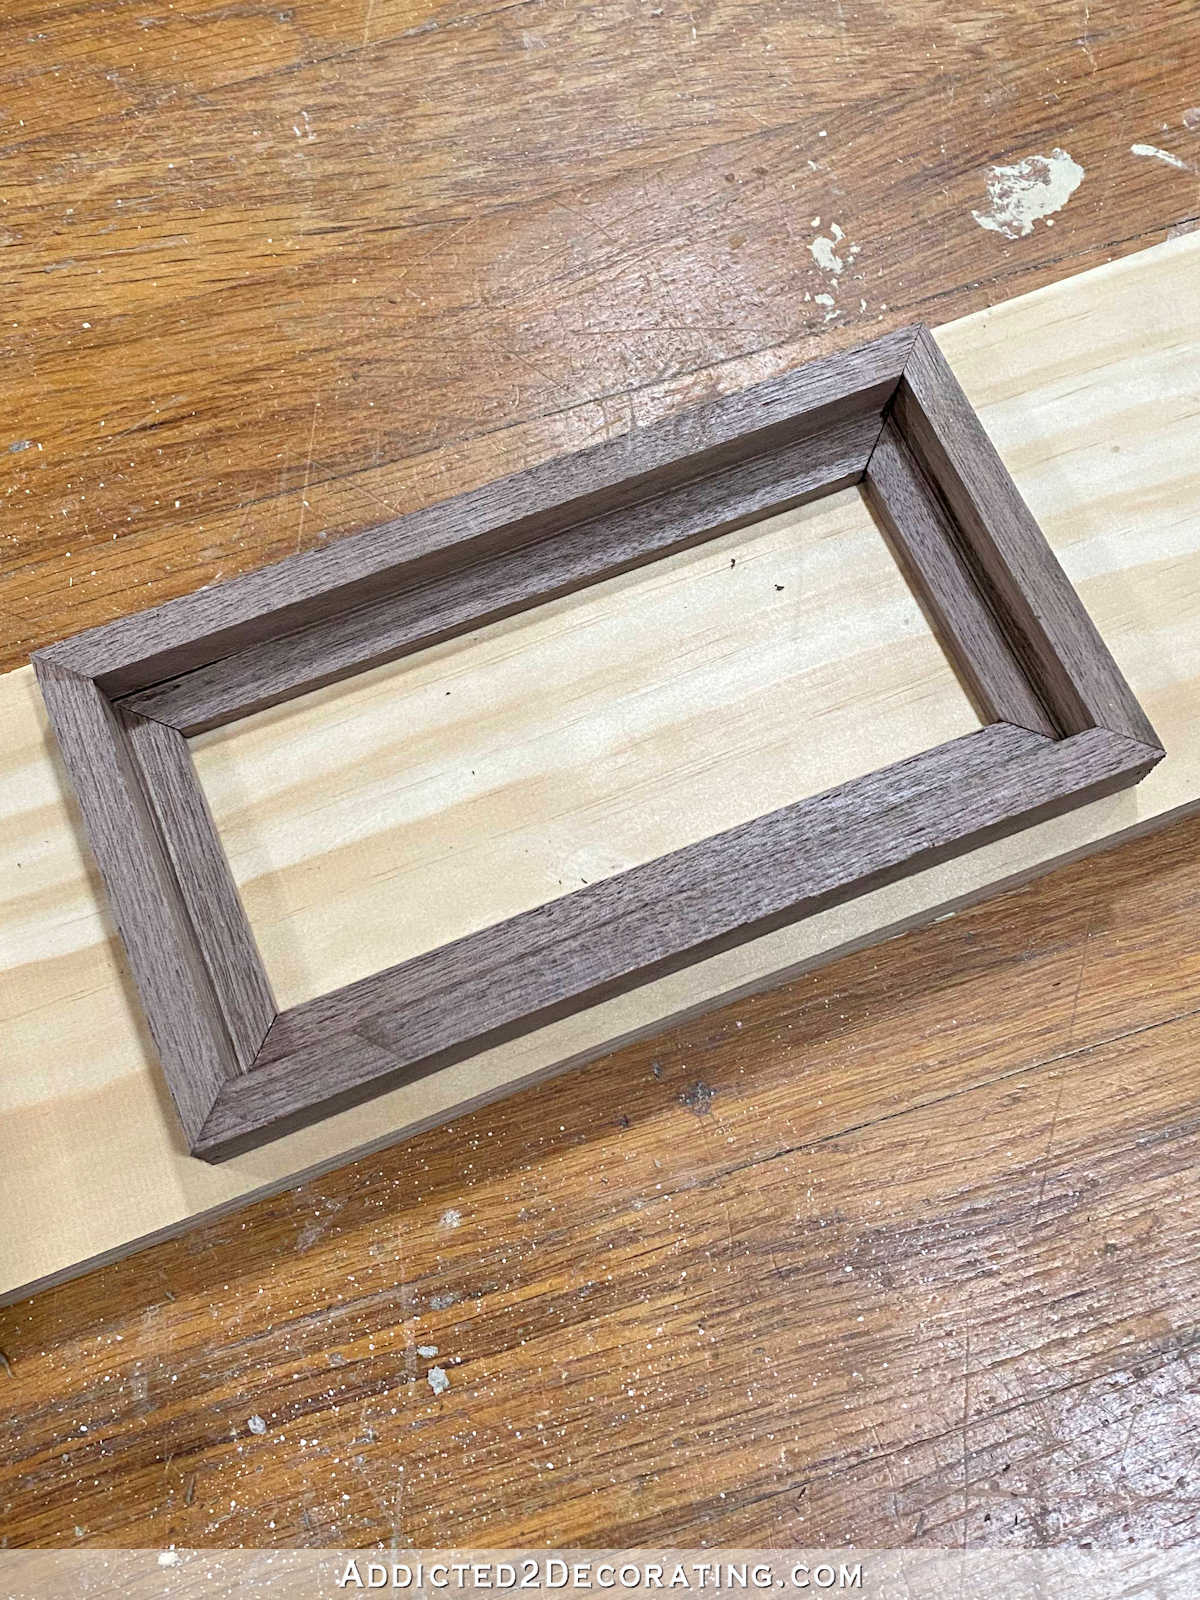
And here’s a look at the front.
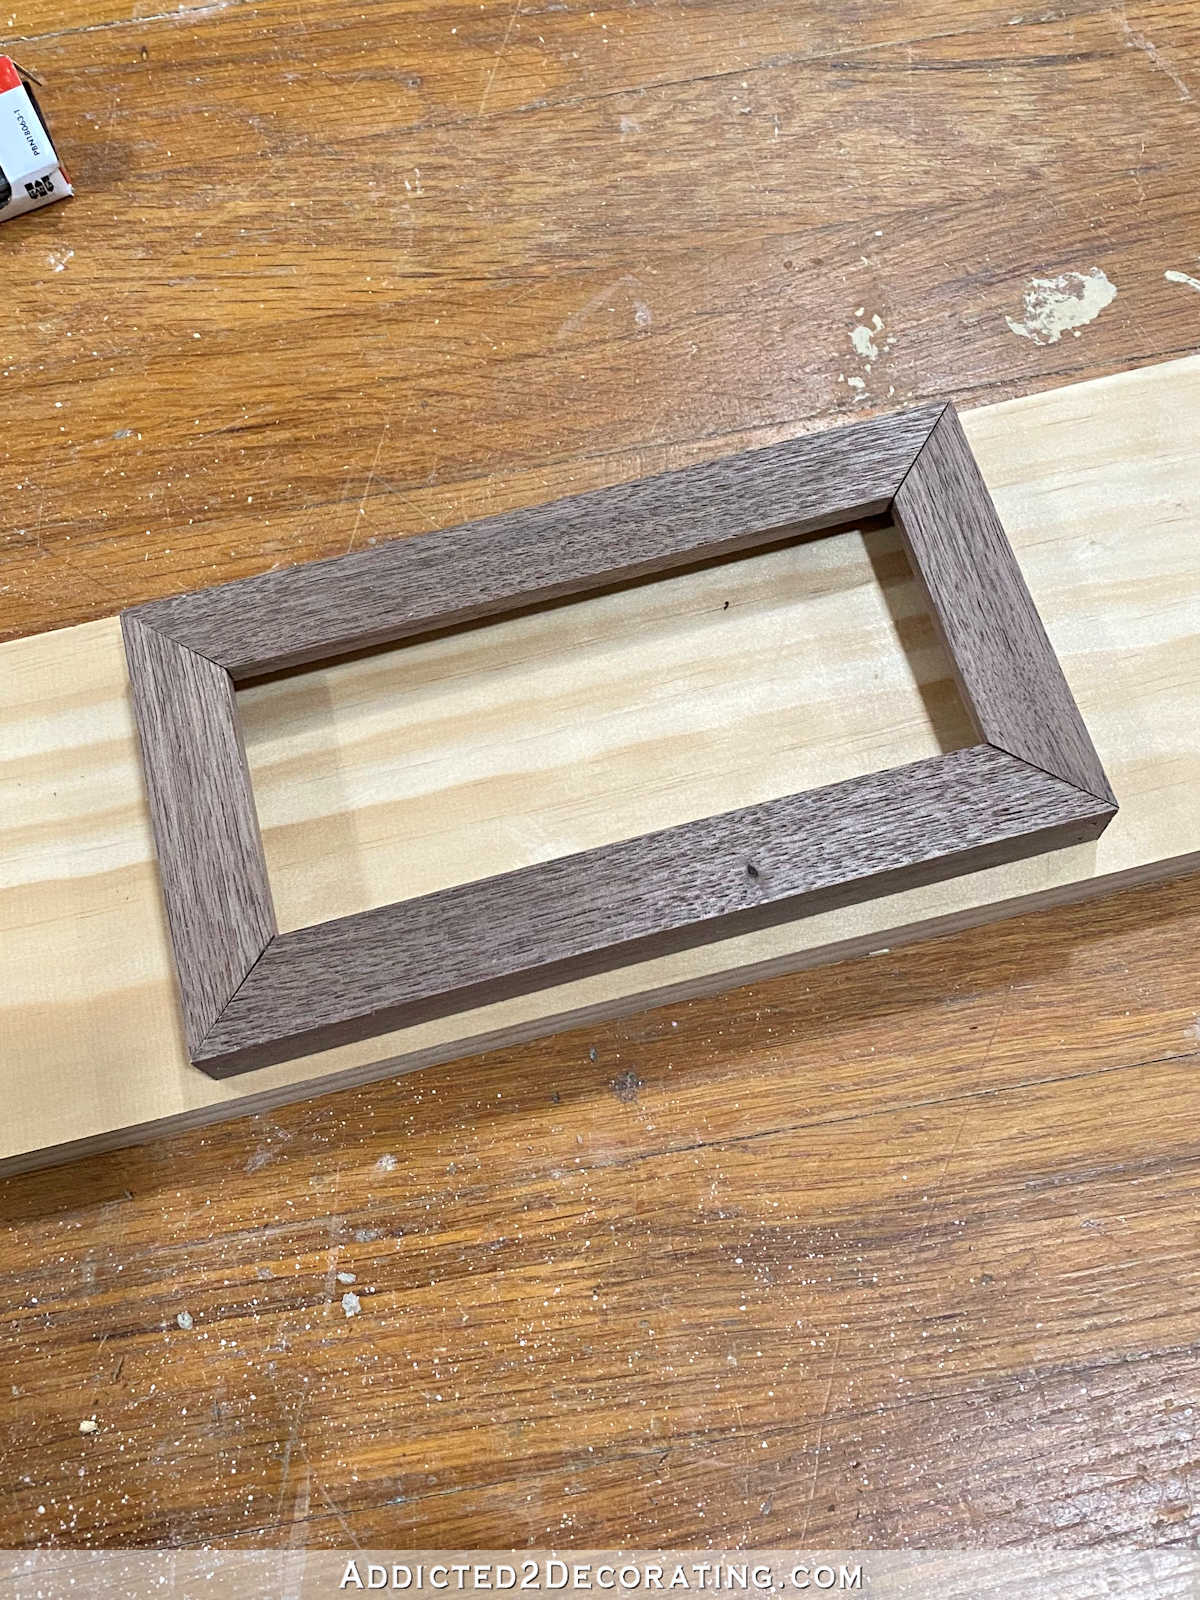
I was actually pretty pleased with my mitered corners, but I always fill and sand my mitered corners on every project I do, so this was no exception. I used Goodfilla water-based wood filler in walnut to fill the mitered joints and the nail holes on the sides.

After it dried, I sanded the frame by hand with 120-grit sandpaper. I generally sand my project up to 220-grit, but the instructions for the clear finish I’m going to use on this vanity say to sand only up to 120-grit. You can see below the sanded frame compared to the unsanded frame.

Here’s a look at how the edges turned out after sanding.
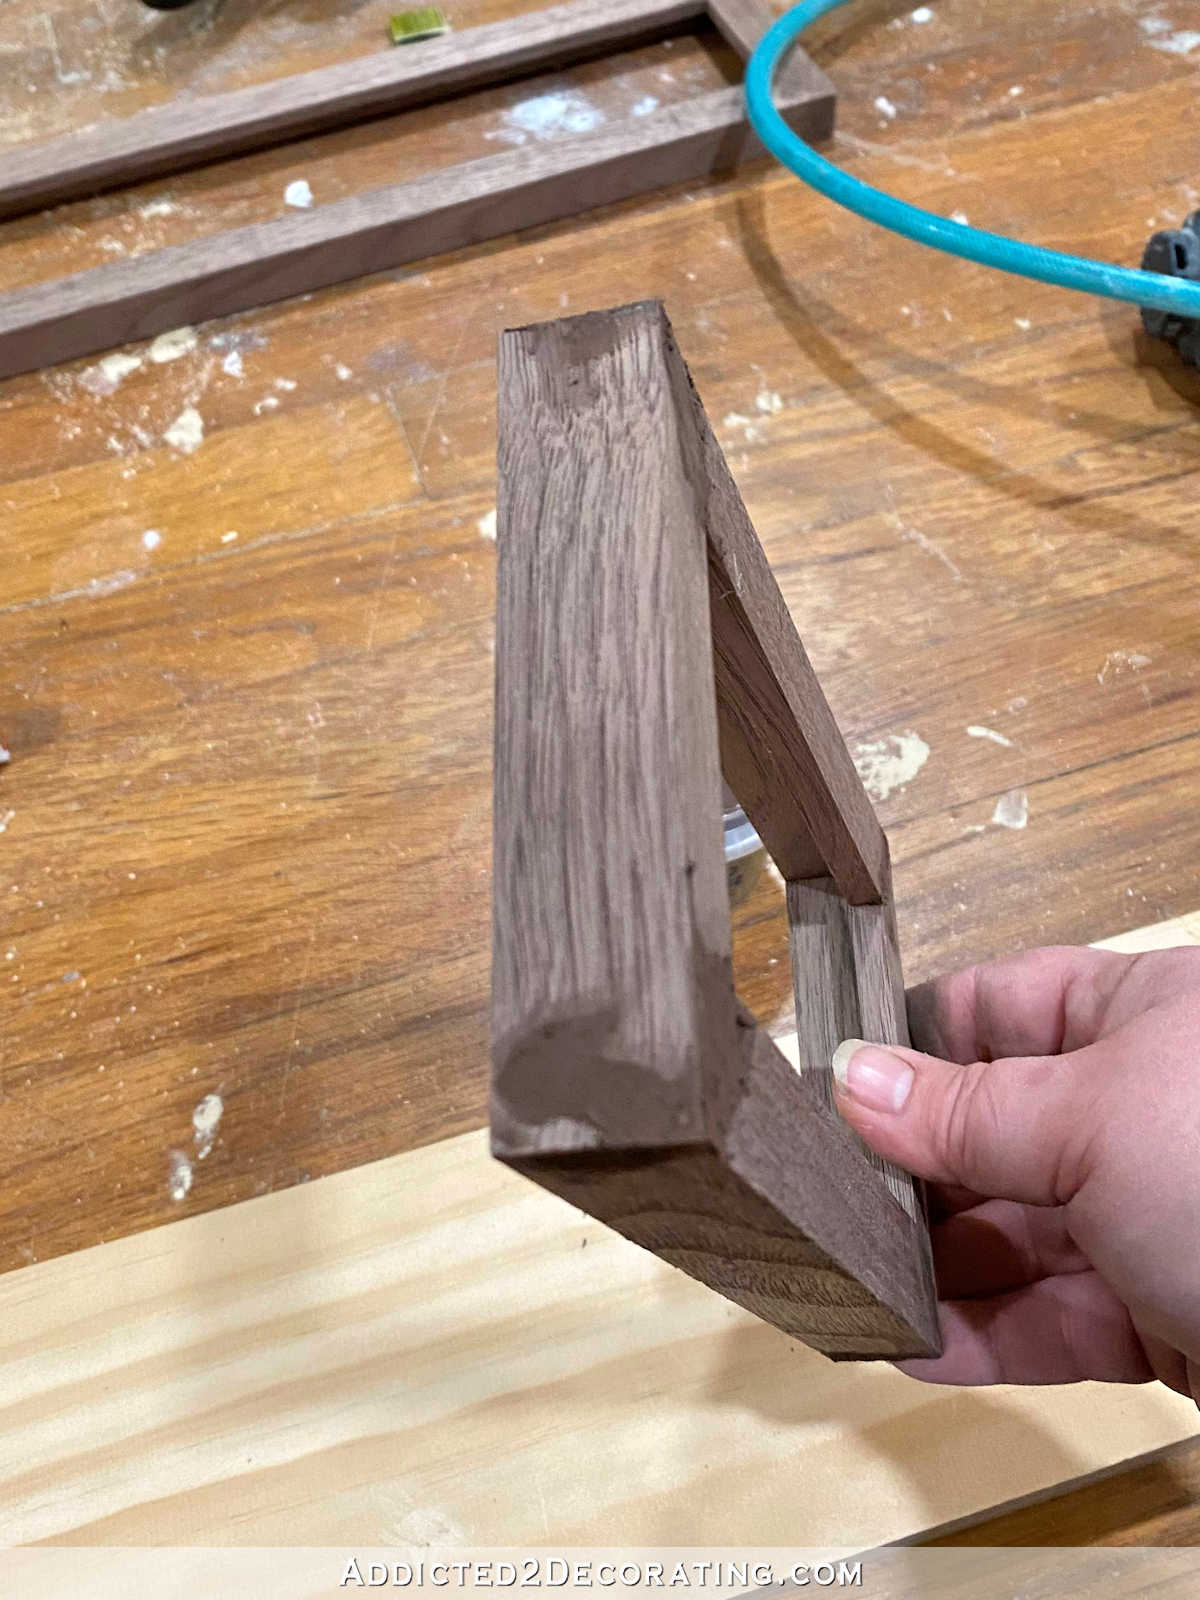
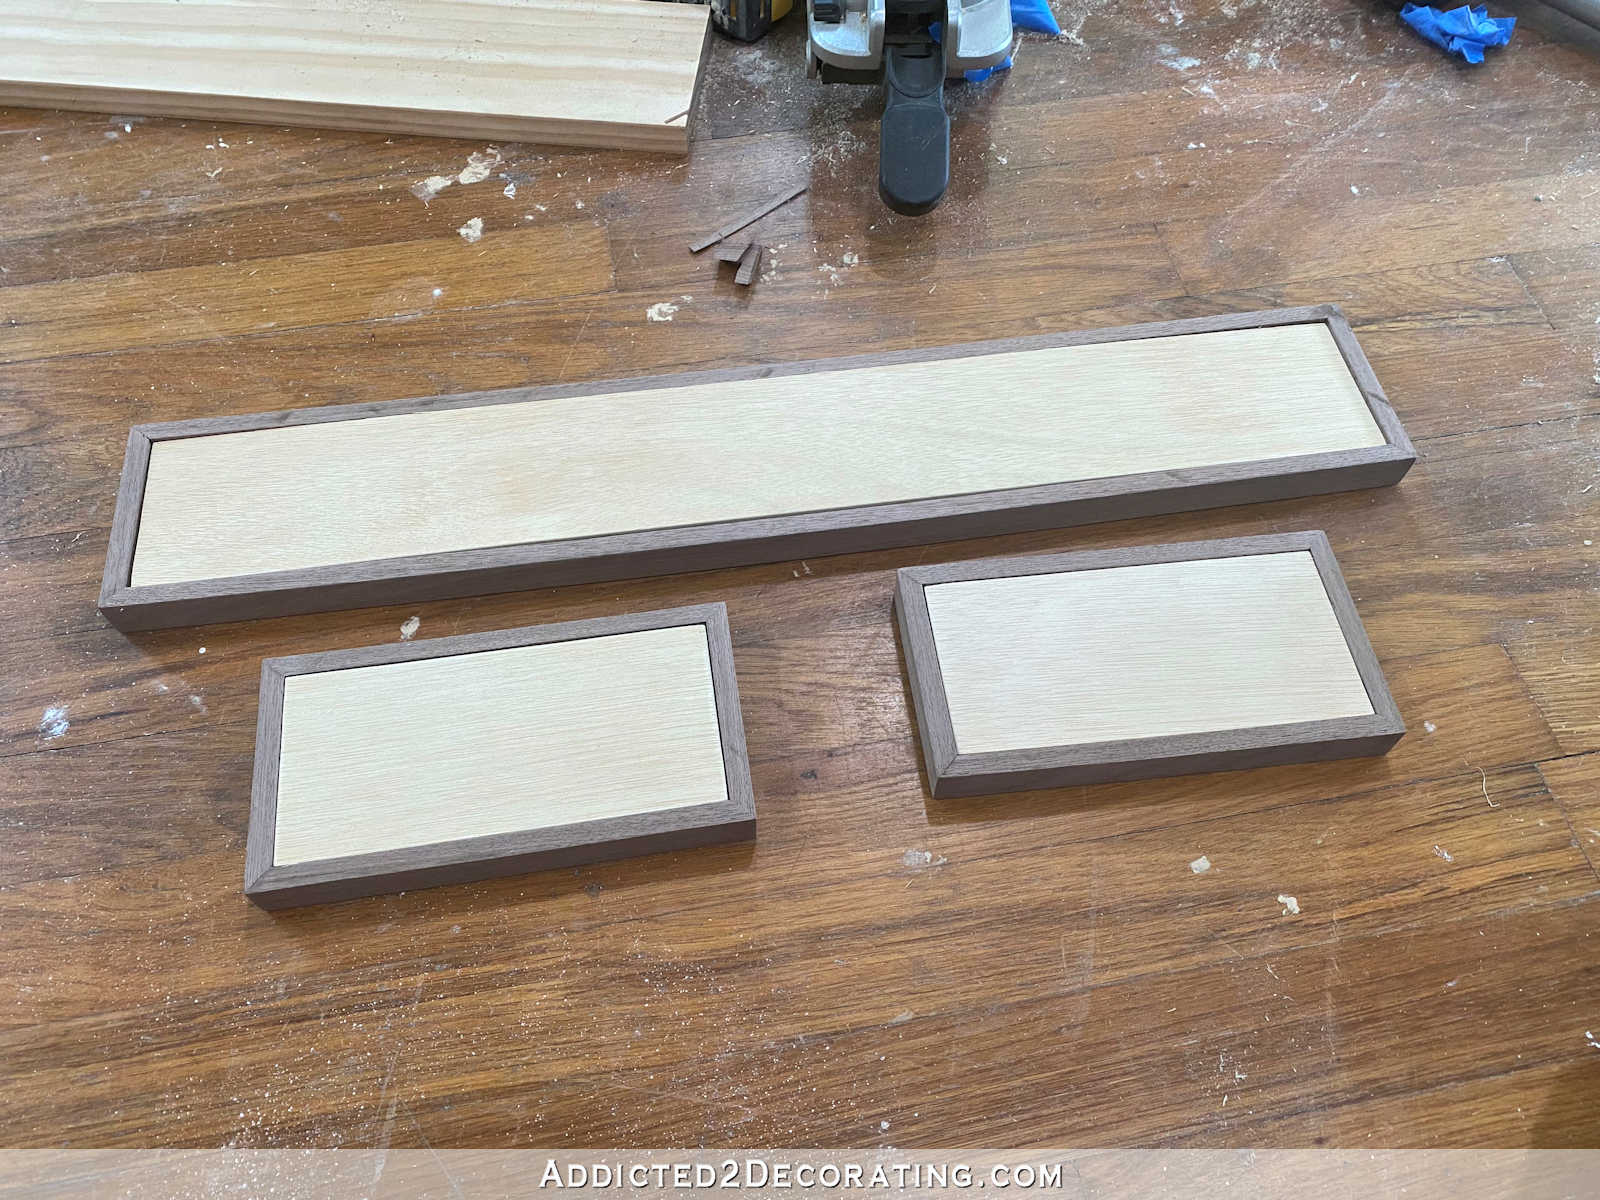
Next, I used my table saw and miter saw to cut pieces of 1/2-inch plywood for the inserts.
To adhere the walnut wood veneer, I used Weldwood Contact Cement and a 4-inch roller.
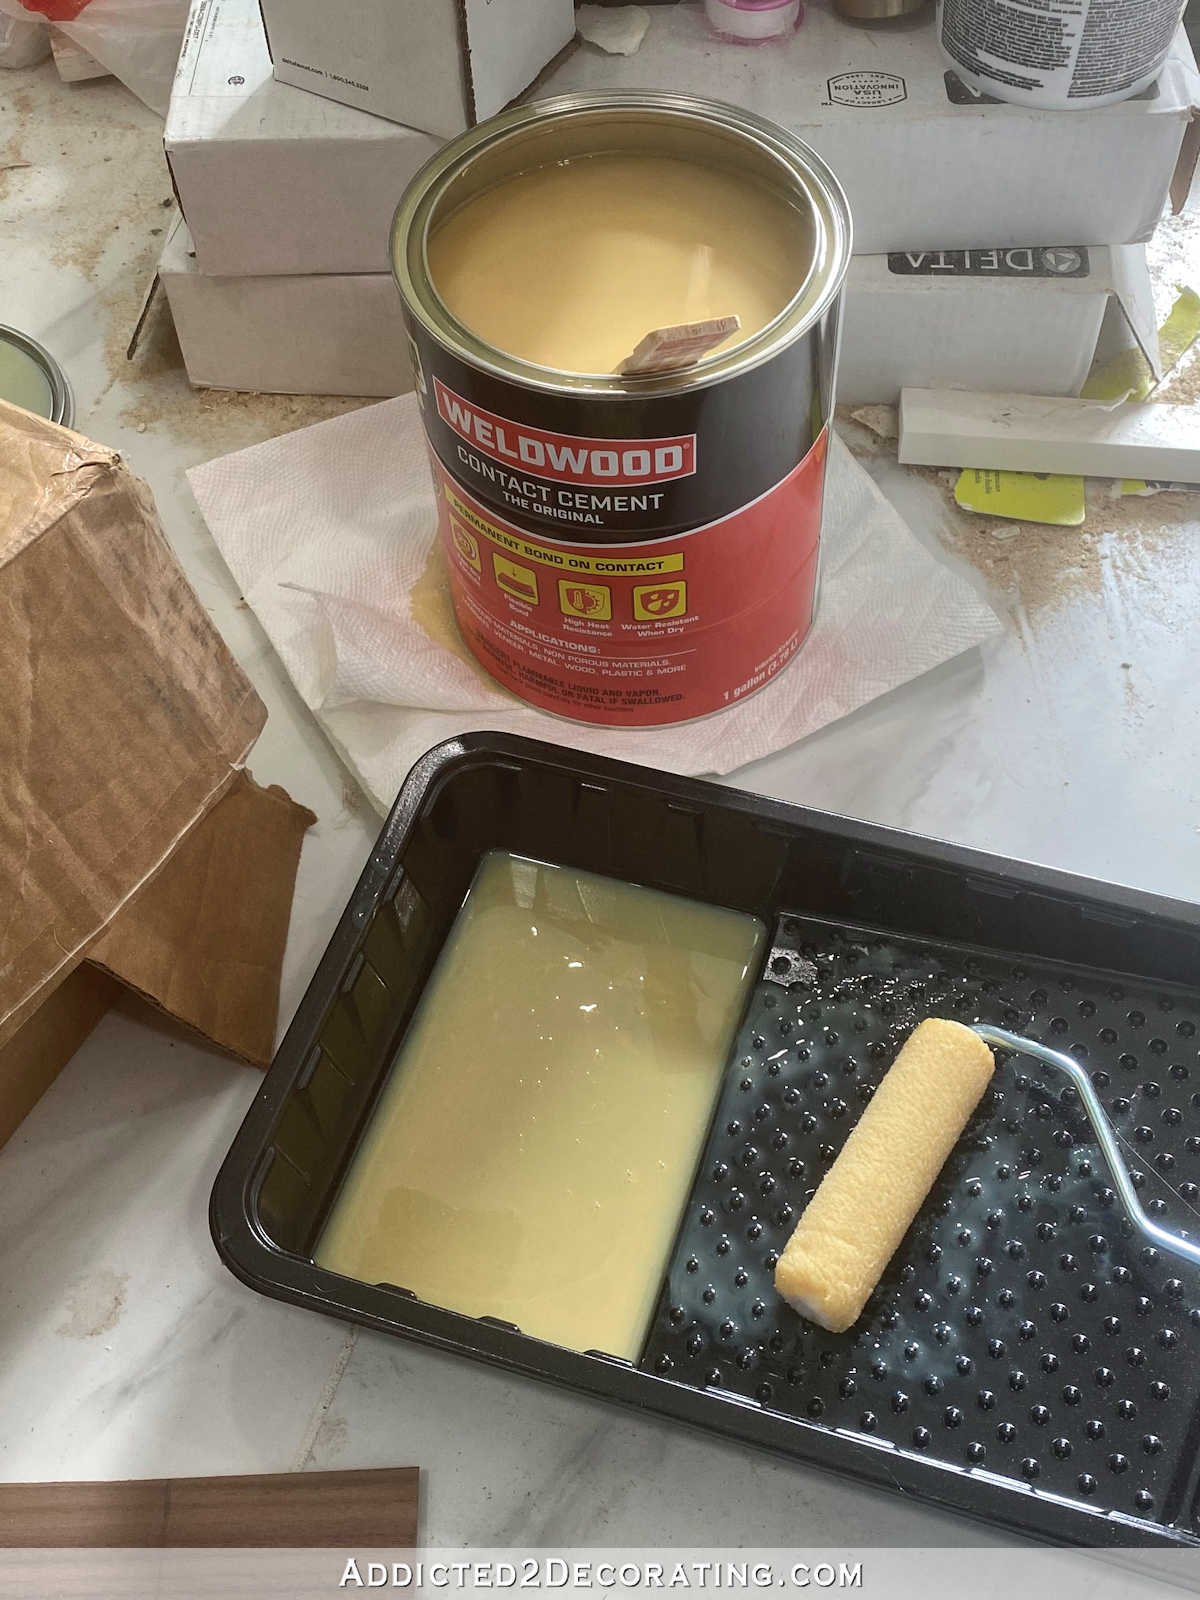
I applied two coats of contact cement to the plywood and to the back of the veneer, letting it dry completely between coats (which only took a few minutes).
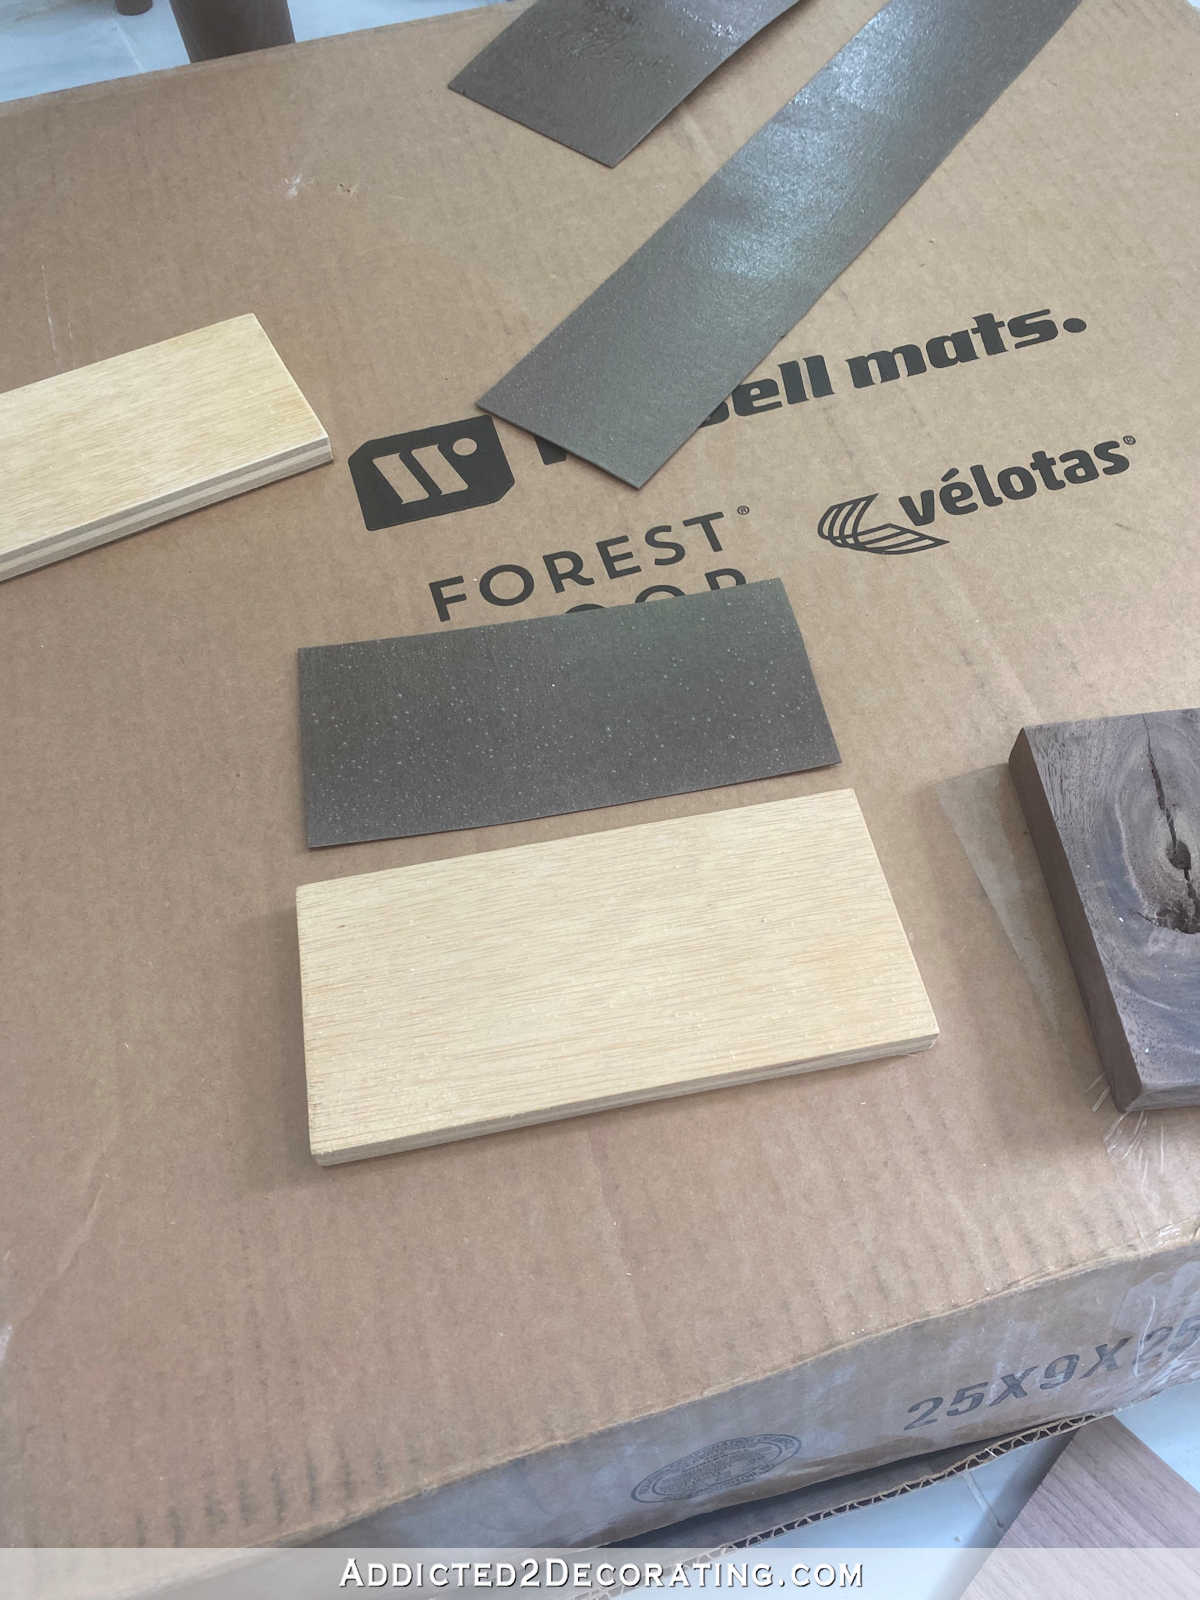
And then I carefully aligned the veneer and smoothed it onto the plywood. You only have one shot at this. If you get it on crooked, there’s really no going back. It’s pretty easy to work with these little pieces, but larger pieces require much more care and patience.

Then I got a scrap piece of walnut and sanded the edges so that they weren’t quite so sharp…

And I used that piece of walnut to burnish the walnut veneer and make sure it was perfectly flat and smooth, and there were no air bubbles or ridges of contact cement trapped underneath.

I repeated this process on the back of the plywood as well. The only difference is that for the front, I pre-cut the veneer. Since the edges of the front would be hidden by the frame, it didn’t need to be as precisely cut. For the back, I cut the piece of veneer larger than the plywood, and then after it was adhered, I carefully cut off the excess using an X-Acto knife to give those edges a cleaner and more precise look.
Then I placed the veneered plywood into the frame, and secured the pieces together with more 5/8-inch 18-gauge finish nails in the corners (which don’t show below because I forgot to take a picture of it after nailing it into place).
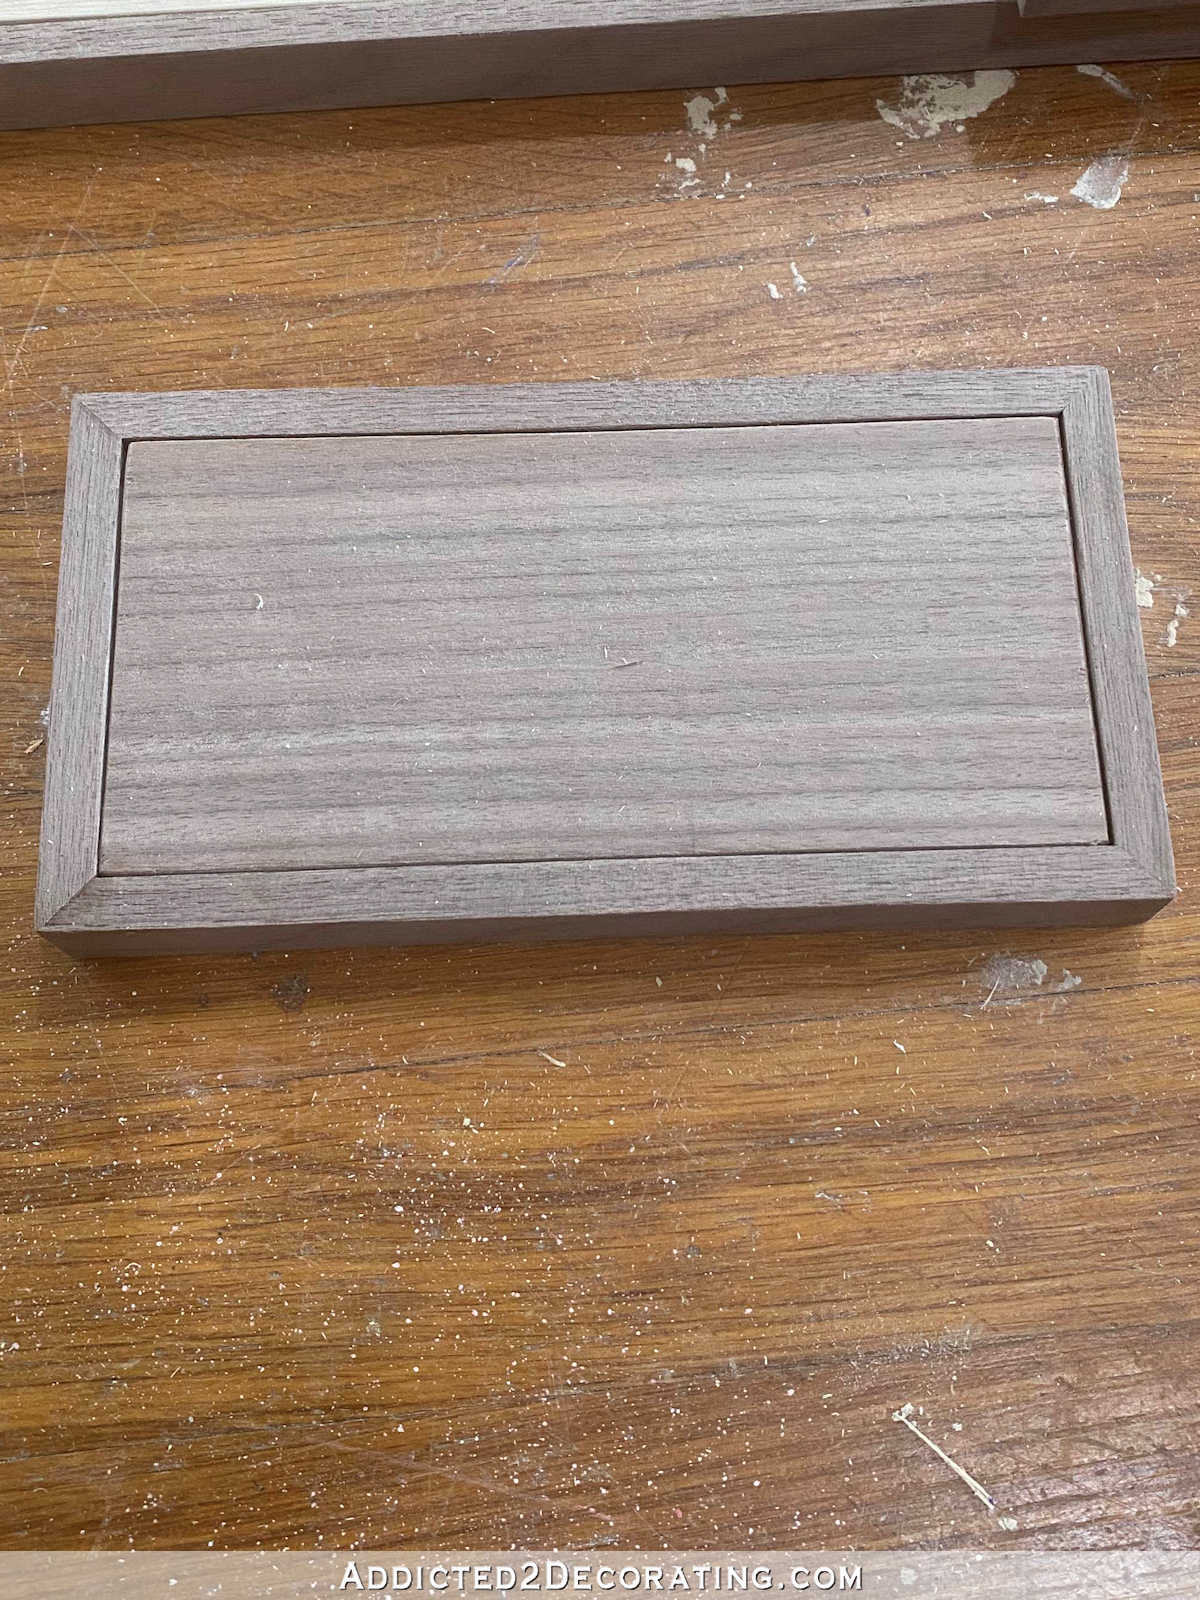
But you can see it in this picture below. I could have wood filled and sanded those little nail holes, but to be honest, they don’t bother me.
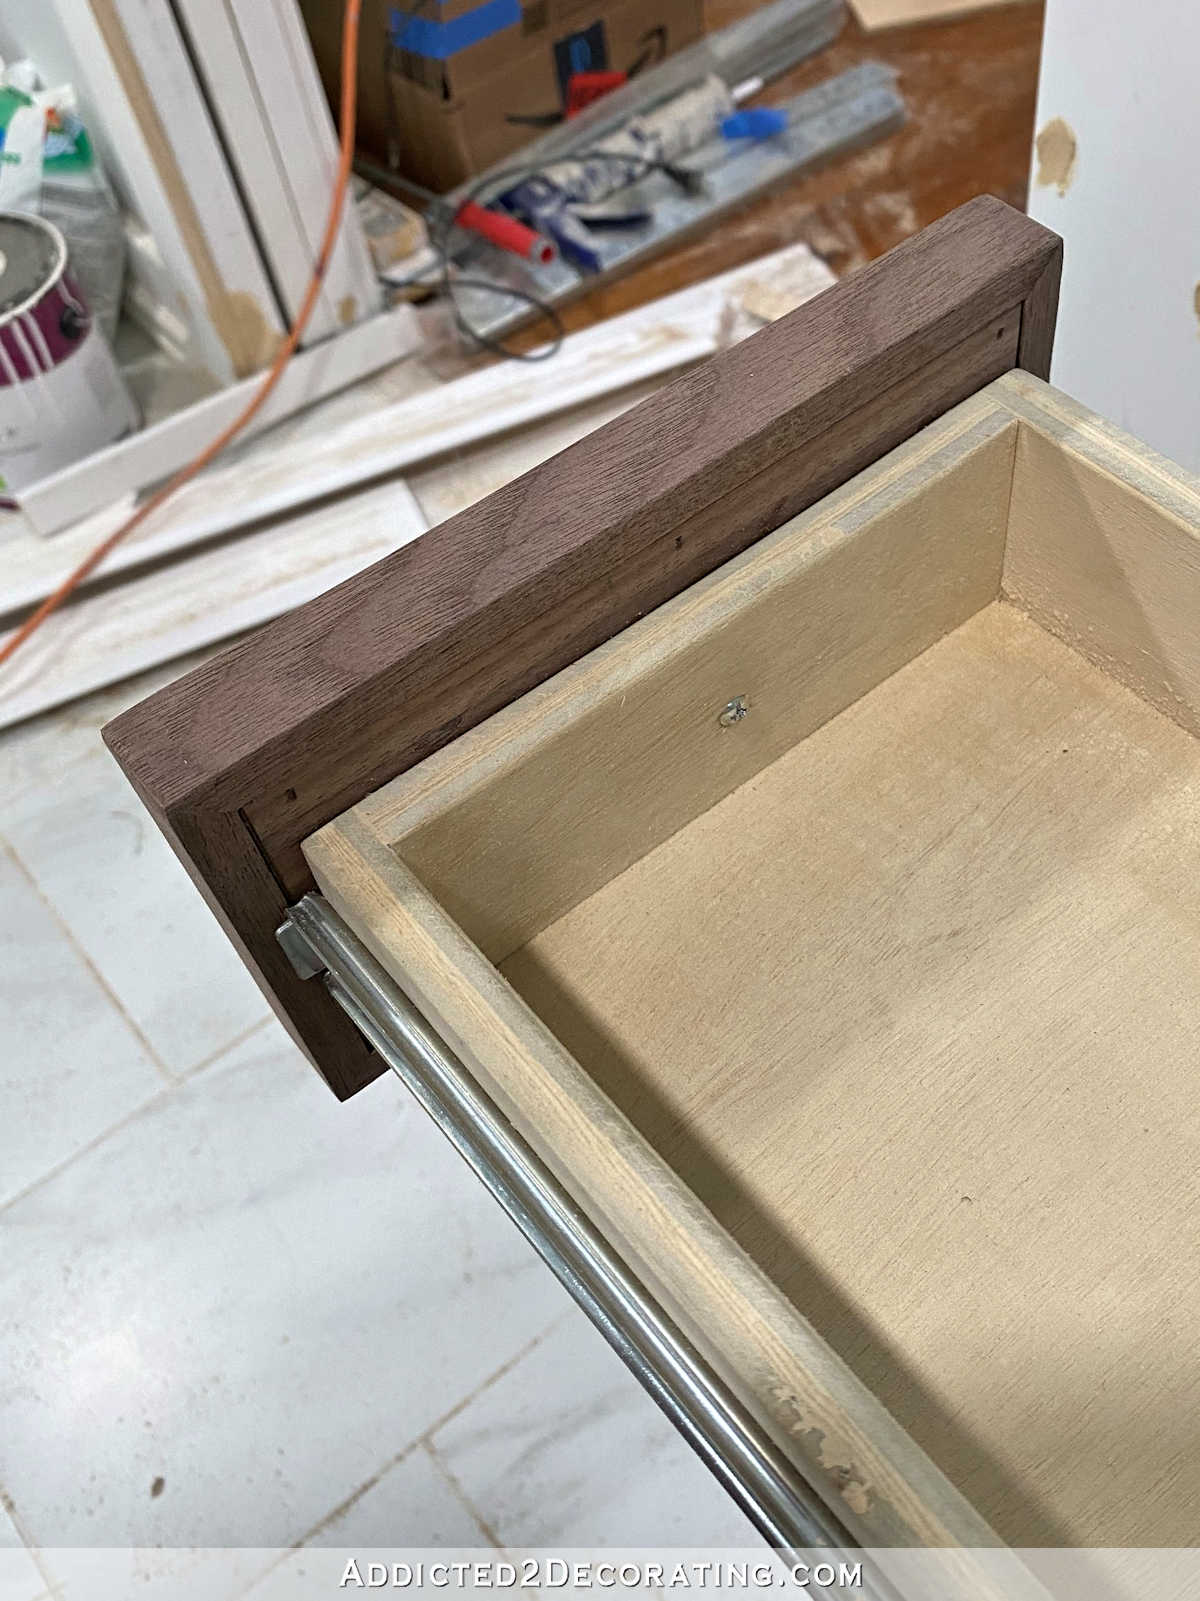
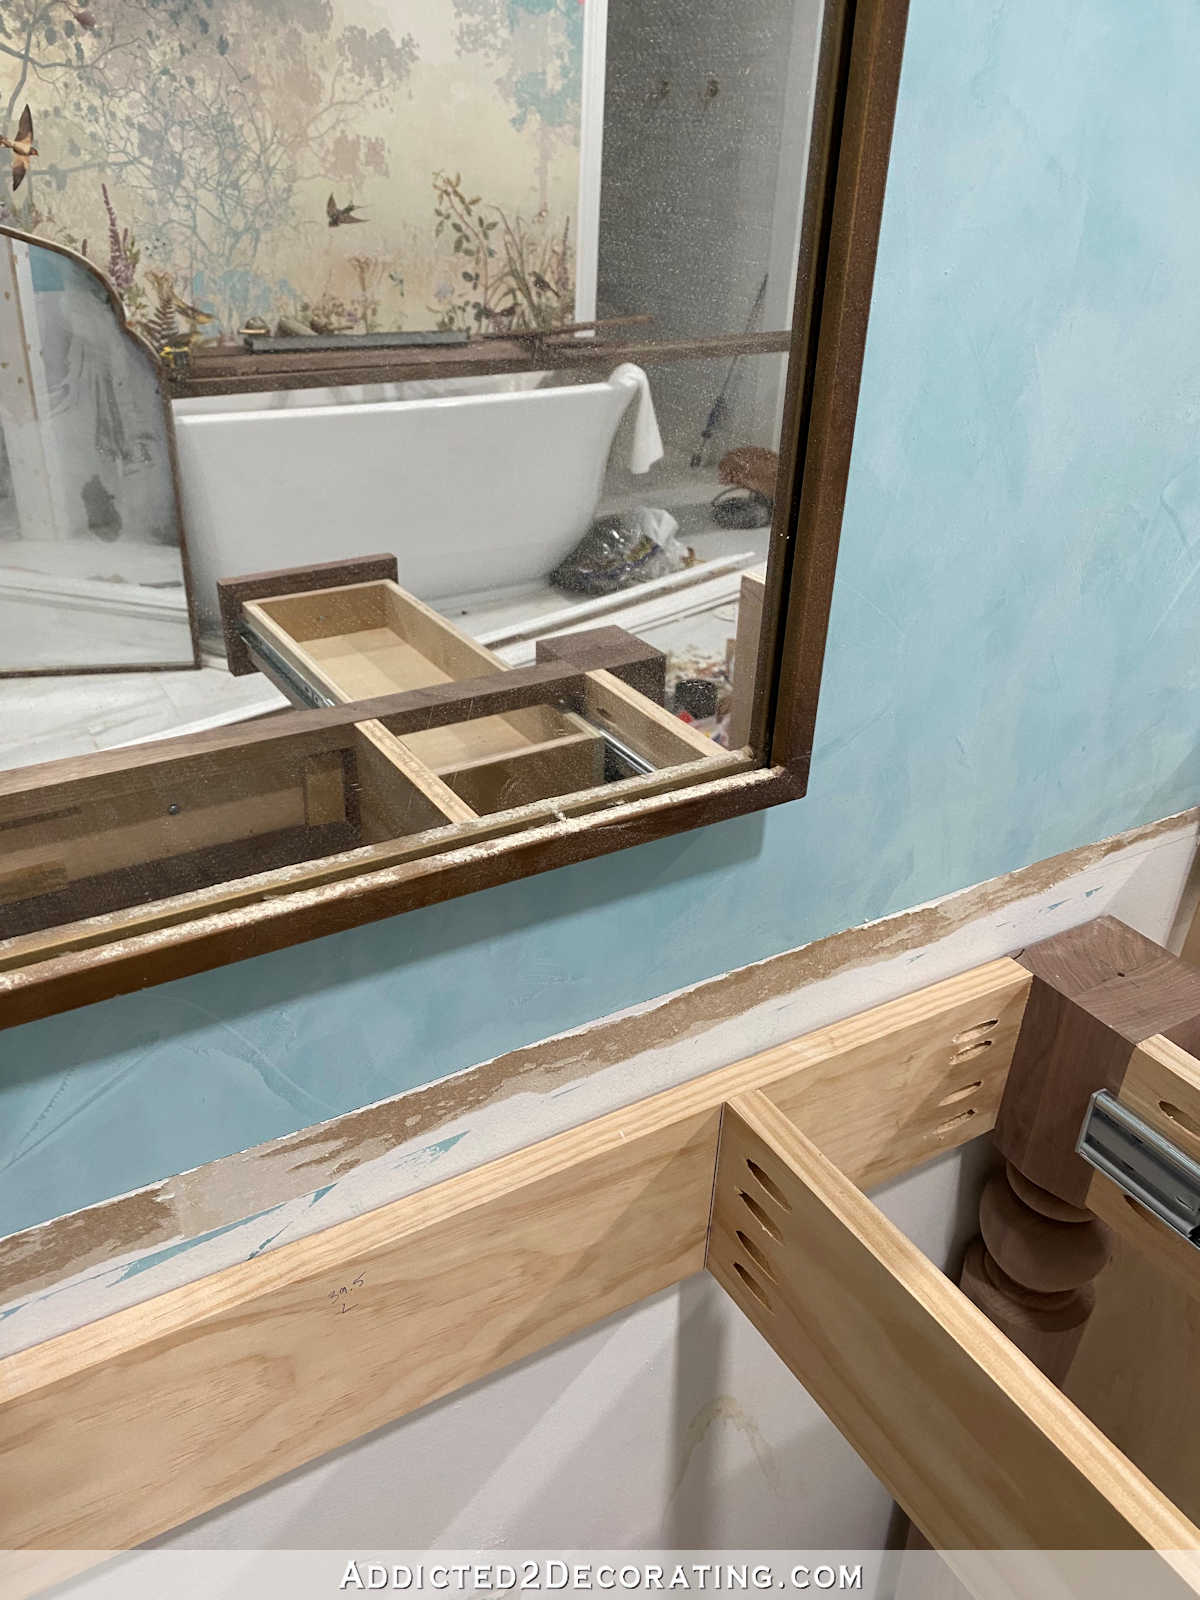
But I did want to make sure that the backs of the drawer fronts had the walnut veneer on them because the backs show in the mirror when the drawers are open.
Plus, it’s a good practice to veneer both sides of plywood. If you just do one side, your veneered plywood is more prone to warping. That’s not really an issue with tiny pieces like this, but it’s definitely an issue with larger pieces. So it’s just a good practice to always veneer both sides.
To attach the drawer fronts to the drawer boxes, I used both wood glue (slower drying but longer lasting) and hot glue (for immediate hold). Just an FYI, when I use hot glue for my projects, I’m not talking about those little craft glue guns that you get a craft store. I’m talking about the big one that you can purchase in the tool department of Home Depot.
On the center fake drawer front, I used a tiny bit of hot glue on the back of the drawer front to get it into place, and then I went back with four scrap pieces of wood, and used my hot glue gun to glue those pieces to the back of the drawer front and the side frame of the vanity base.

And then the drawers were ready for their jewelry…
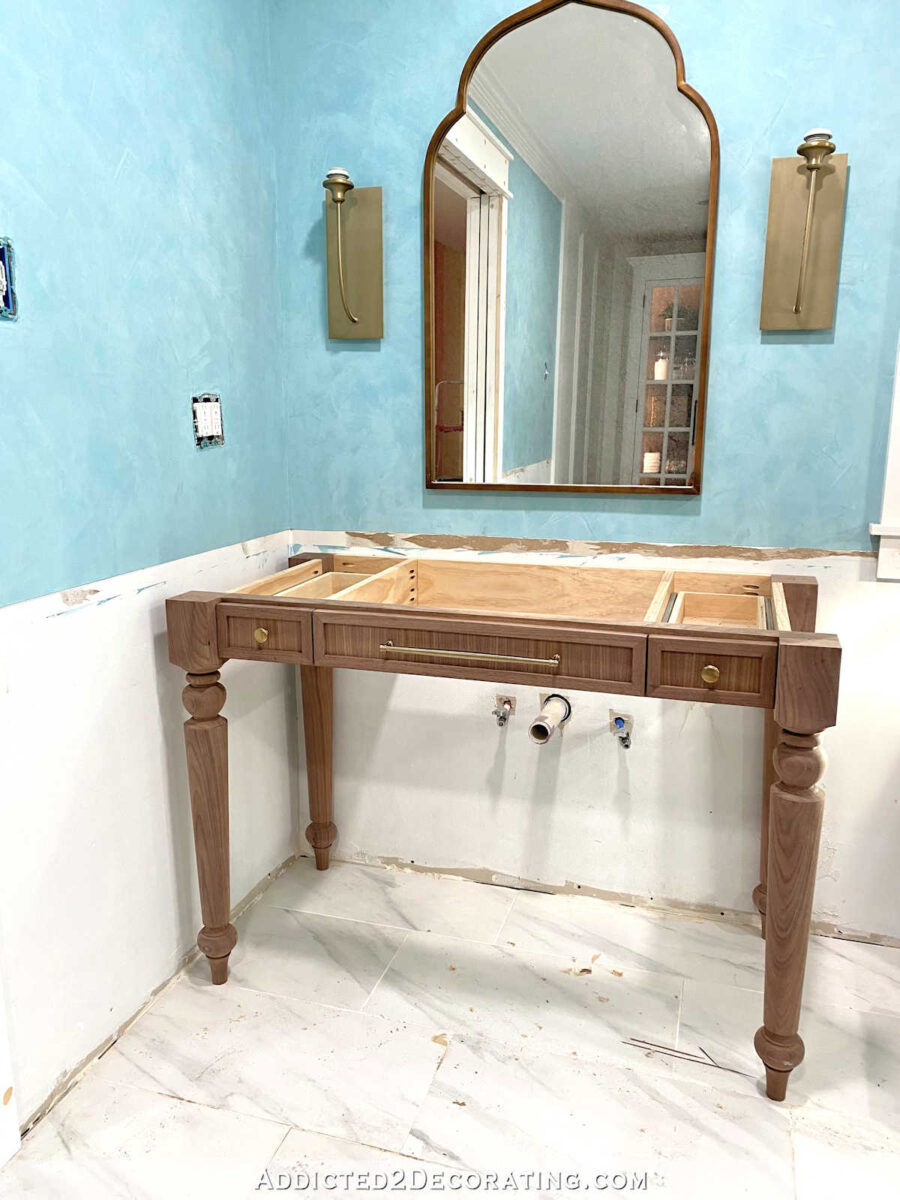
This was a very fun project, and I’m so pleased with how it turned out! Now I need one more vanity and a storage cabinet, and that will wrap up the big projects in this bathroom.

Addicted 2 Decorating is where I share my DIY and decorating journey as I remodel and decorate the 1948 fixer upper that my husband, Matt, and I bought in 2013. Matt has M.S. and is unable to do physical work, so I do the majority of the work on the house by myself. You can learn more about me here.

WOW – I had no idea how you did all that. Beautiful results! And, since you cut everything at the same time the next vanity will go much faster as well I bet. Lots of progress/exciting!
You are really on a ROLL lately! This all looks so great! I look forward to seeing the center cabinet and second vanity in place and counter, sinks and faucets. This is one of the most beautiful bathrooms I have ever seen or imagined. Awesome work! Your vanity is perfection!
You never cease to amaze me Kristi. Looks beautiful.
These are so beautiful!! You did such a stellar job!!!
I have a question about the burnishing. why did you use a piece of walnut to do it?
I had planned to use my roller that I used on the laminate tops of my work tables in the studio, but after watching many videos about applying real wood veneer, I learned that rollers aren’t the best for real wood. Instead, the preferred tool is something with a flat edge, like a putty knife. But my personal experience is that things that sharp on the edge can leave marks on the wood, and can even gouge or cause other damage (probably user error on my part). So I opted for something that was hard with a definite edge, but with an edge that could be softened a bit so that it wouldn’t gouge, leave marks, or cause any other damage to the wood veneer. The block of scrap walnut worked perfectly!
Thanks for the info. Everything about this bathroom is perfect!
It’s so beautiful! Great job!
Fantastic work Kristi! The bathroom is looking so very wonderful! Please tell me – where did you source your walnut boards and veneer?
I ordered the walnut lumber at a local lumber supply here in Waco, but the veneer came from Oakwood Veneer online. This is the exact one I purchased, and I got it with the 22.2 mil BFV backer: https://oakwoodveneer.com/walnut-veneer-quartered.html