The Final Bathroom Walls (Definitely Finished This Time!)
These master bathroom Venetian plaster walls have been such a pain, and at one point this weekend, I was almost in tears and ready to throw in the towel. But I kept at it, and after hours and hours and hours of work over the last five days, I finally have them finished.
The process itself is not hard at all. I shared that process in Friday’s post. (See: DIY Teal Venetian Plaster Wall Finish Using Modern Masters.) The problem was getting the color just right. I won’t even tell you how many more coats of the Venetian plaster finish these walls have on them just since Friday, but that’s mainly because I’ve lost count. I just couldn’t get it right. First, it was still too dark. Then it was too light. Then it was too blue. Then it was too washed out.
So after several attempts, I think I finally landed on the right color that still had enough depth of color while still being light and not washed out.
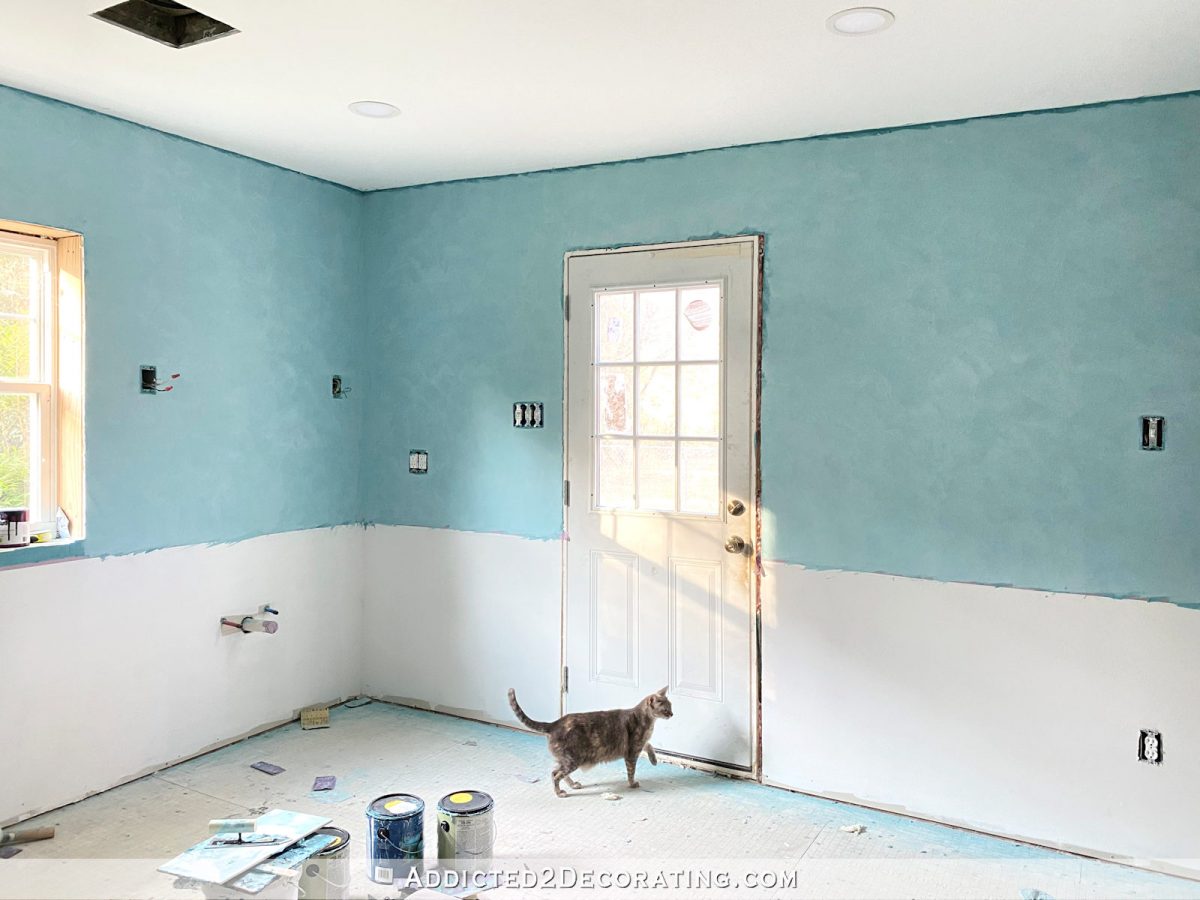
But first, a quick recap. I started out with the walls pretty dark. They were gorgeous, but most of you agreed that they took focus away from the mural.
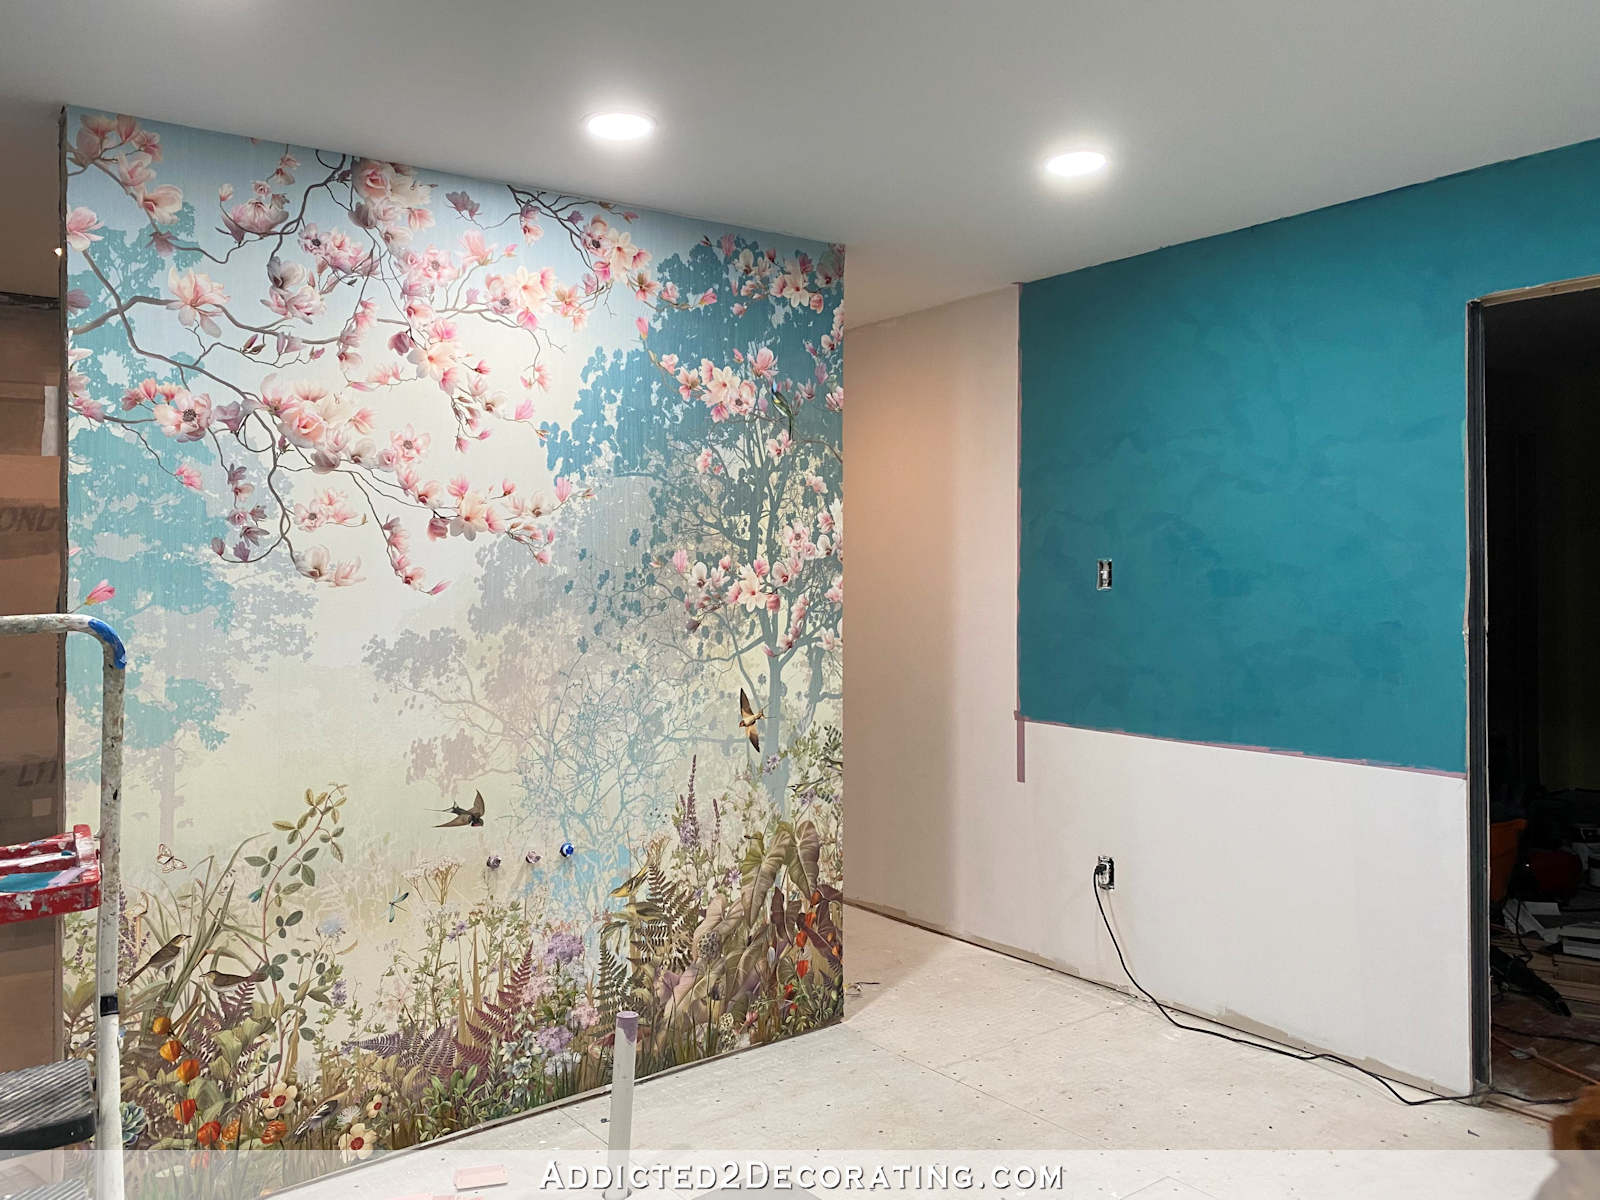
So a couple more coats later, I had lightened the color considerably.
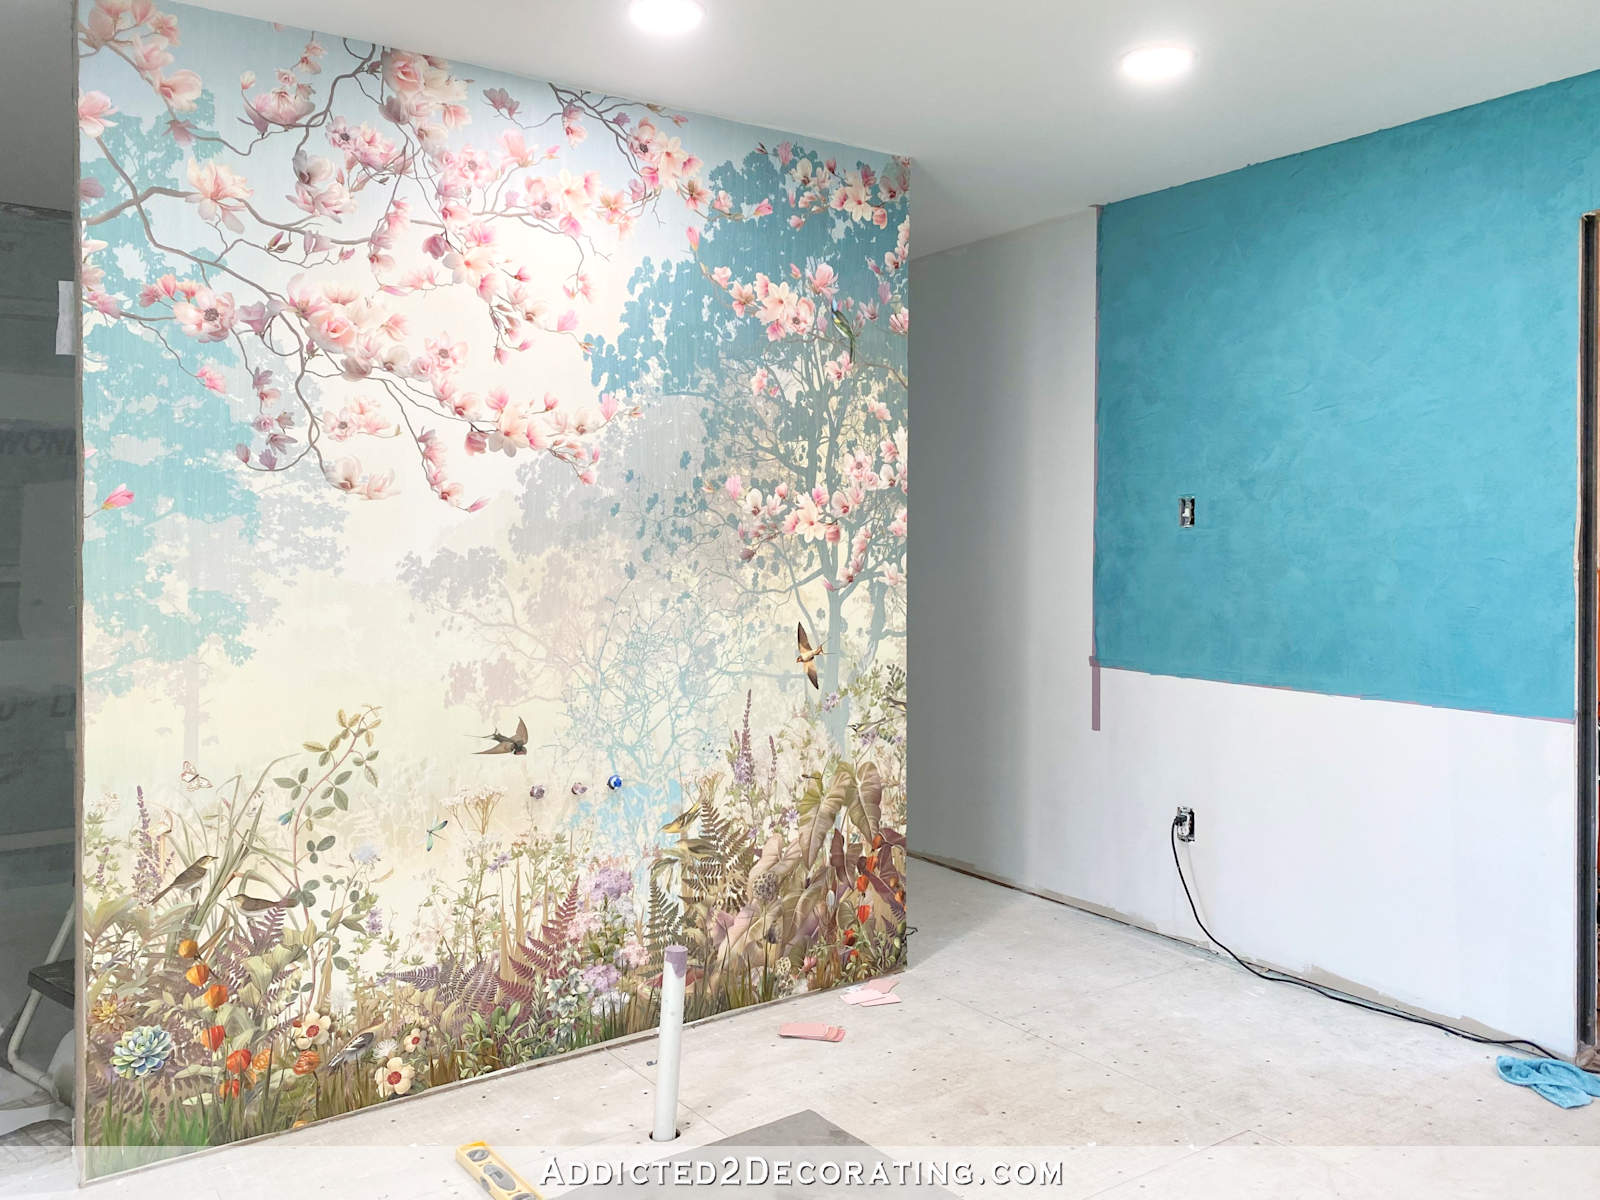
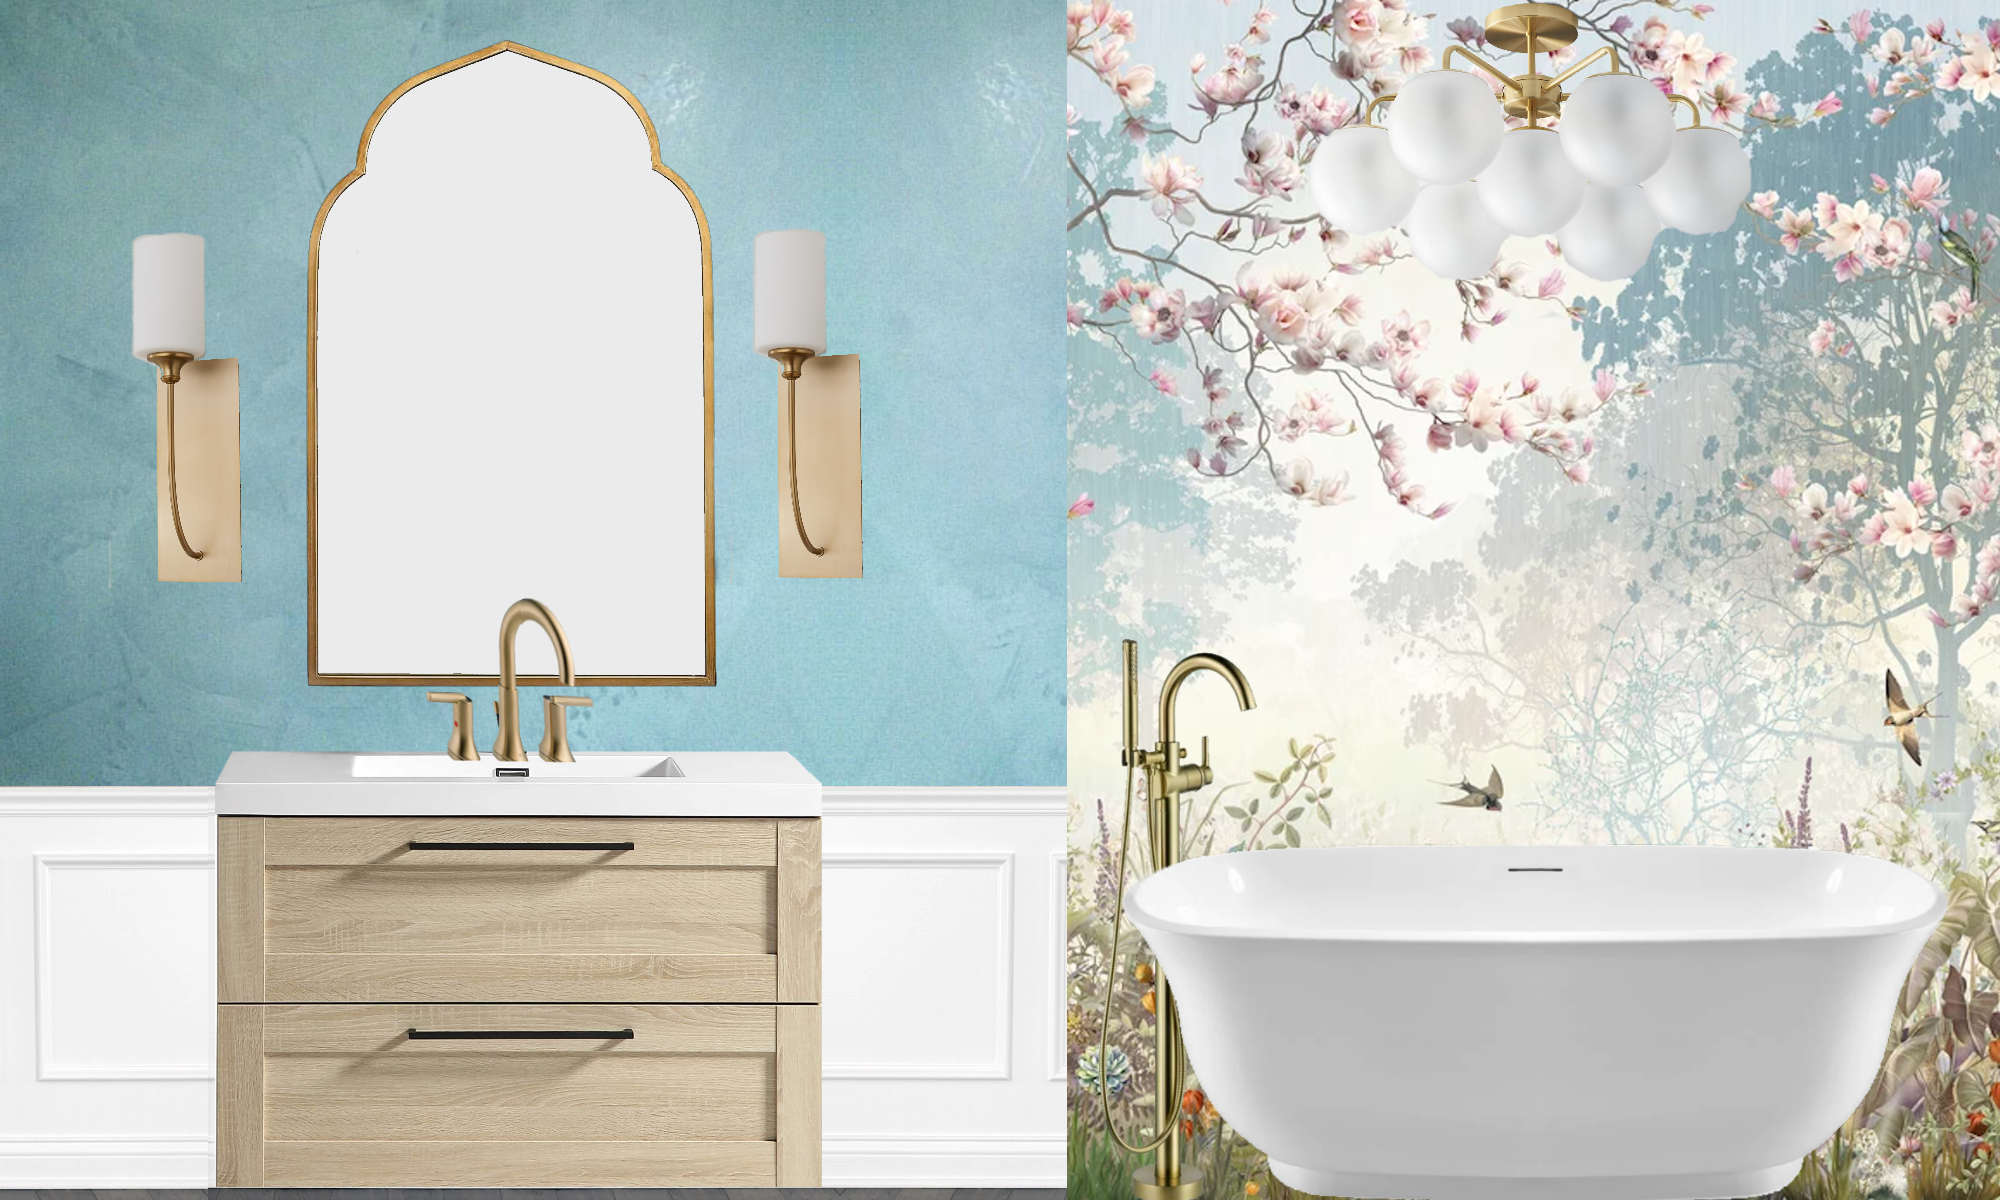
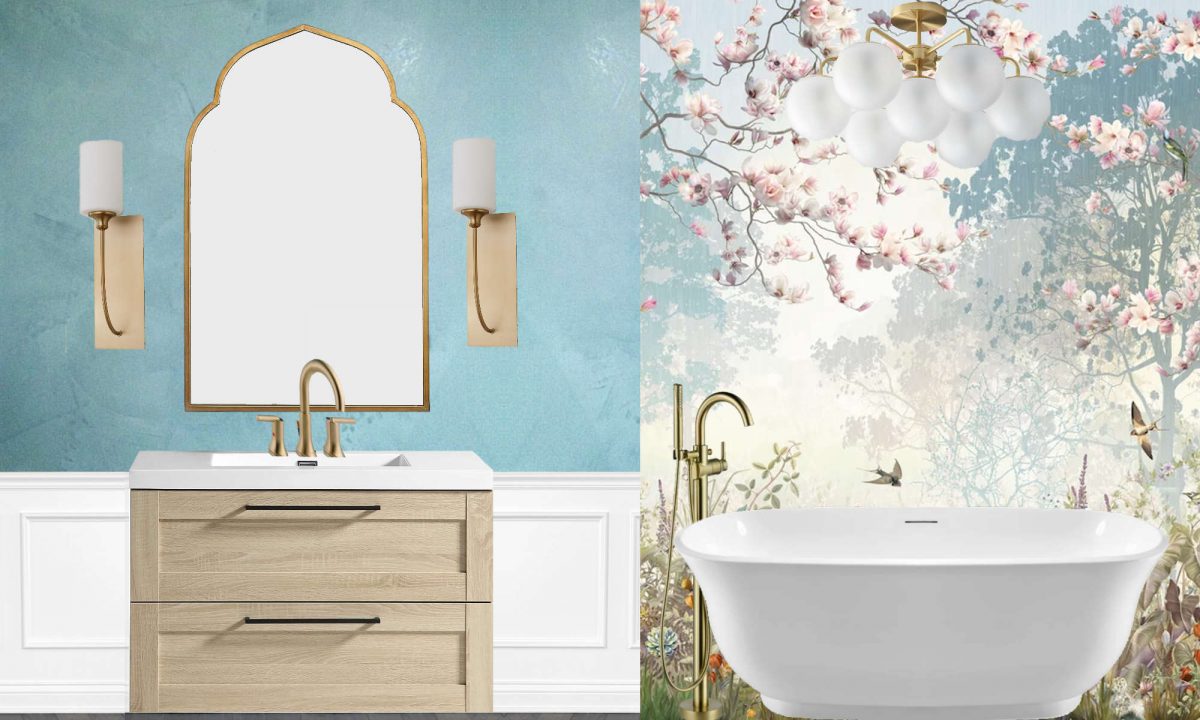
It was a pretty color, but when I looked back at my inspiration wall color, I knew I wasn’t quite finished. That inspiration wall color was still quite a bit lighter than the color I had ended up with last Friday.
So over the last few days, I was determined to get closer to that inspiration picture no matter how long it took, or how may coats of plaster I had to use on the walls.
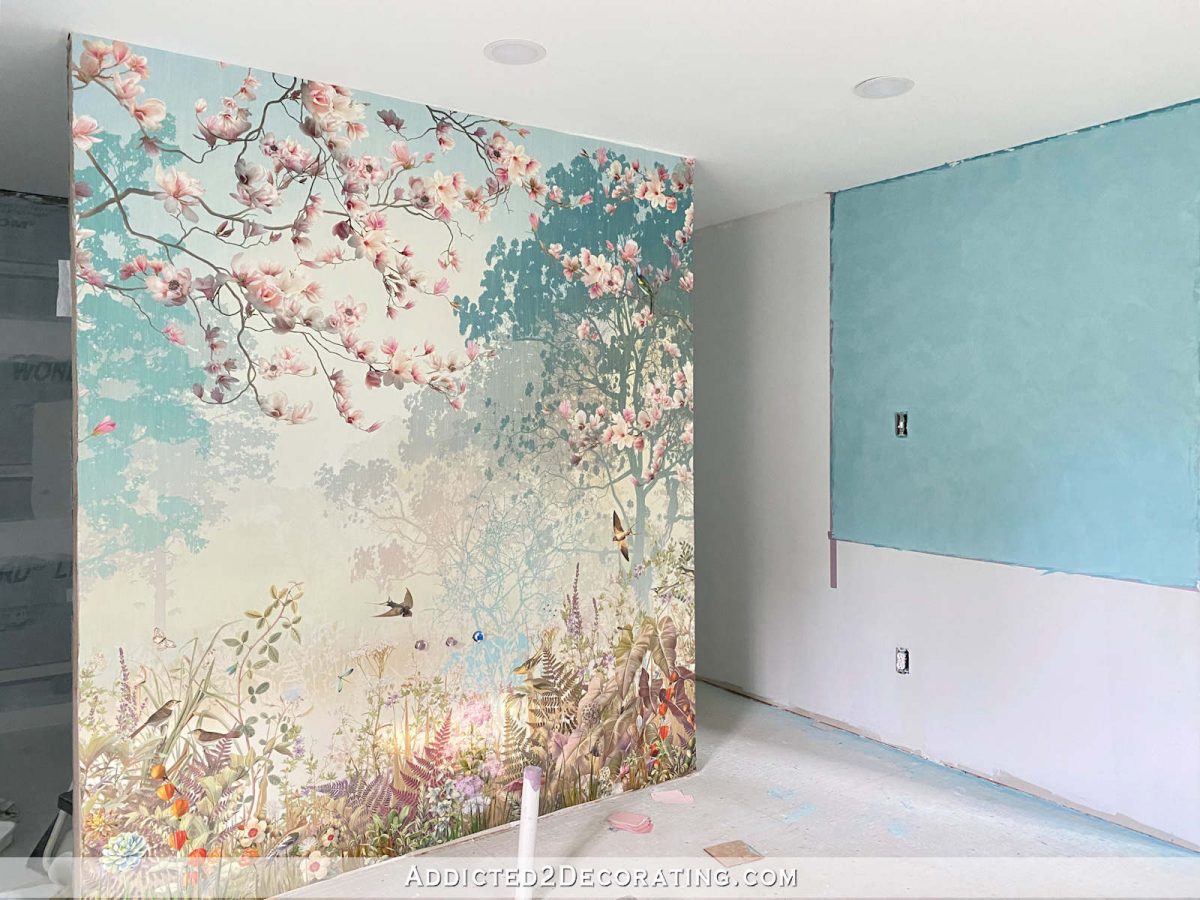
Well, I think I finally got there. It’s not an exact match, but it’s pretty darn close.
Note: If you’re reading this post on a website other than Addicted 2 Decorating, you’re on a website that steals content from bloggers, and is using my content without my permission. I’d love for you to join me on my actual website! You can click here to find this post on Addicted 2 Decorating.
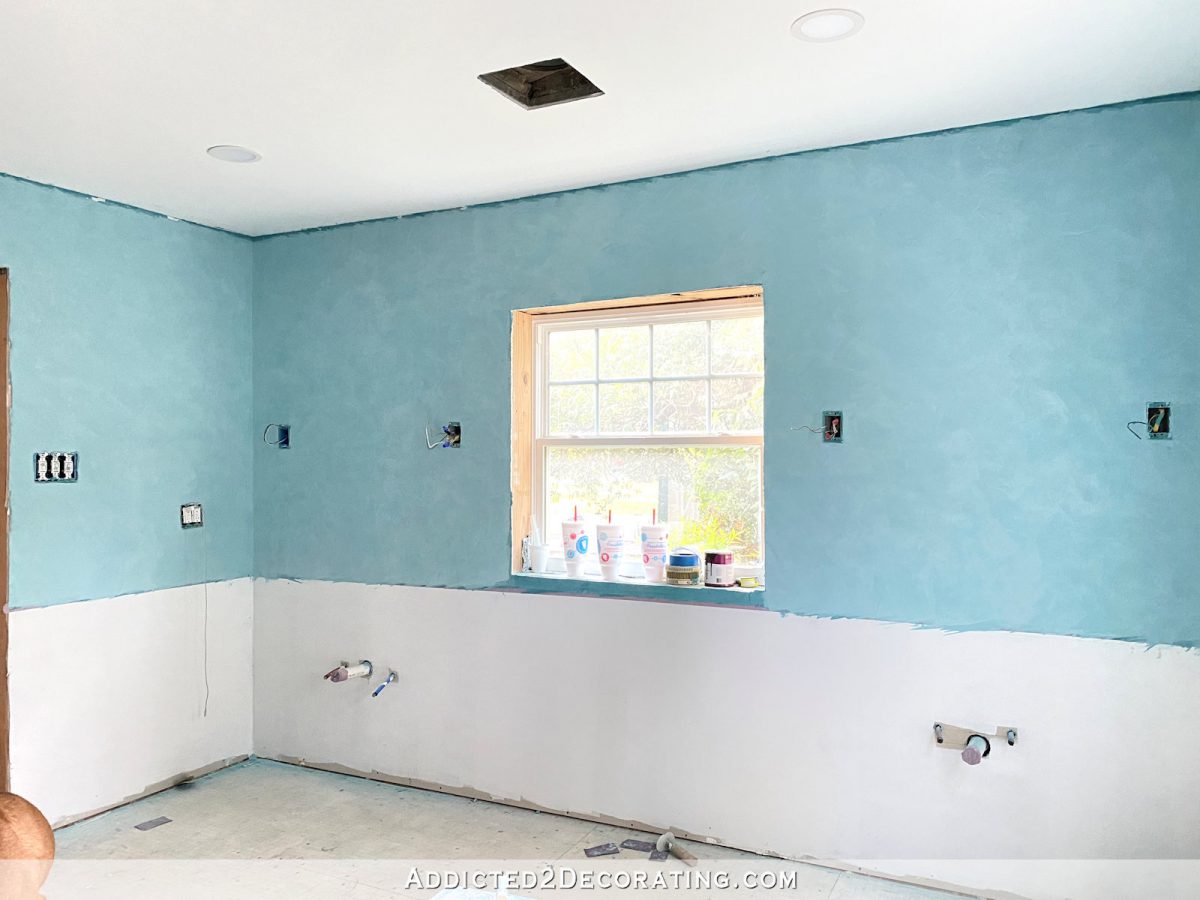
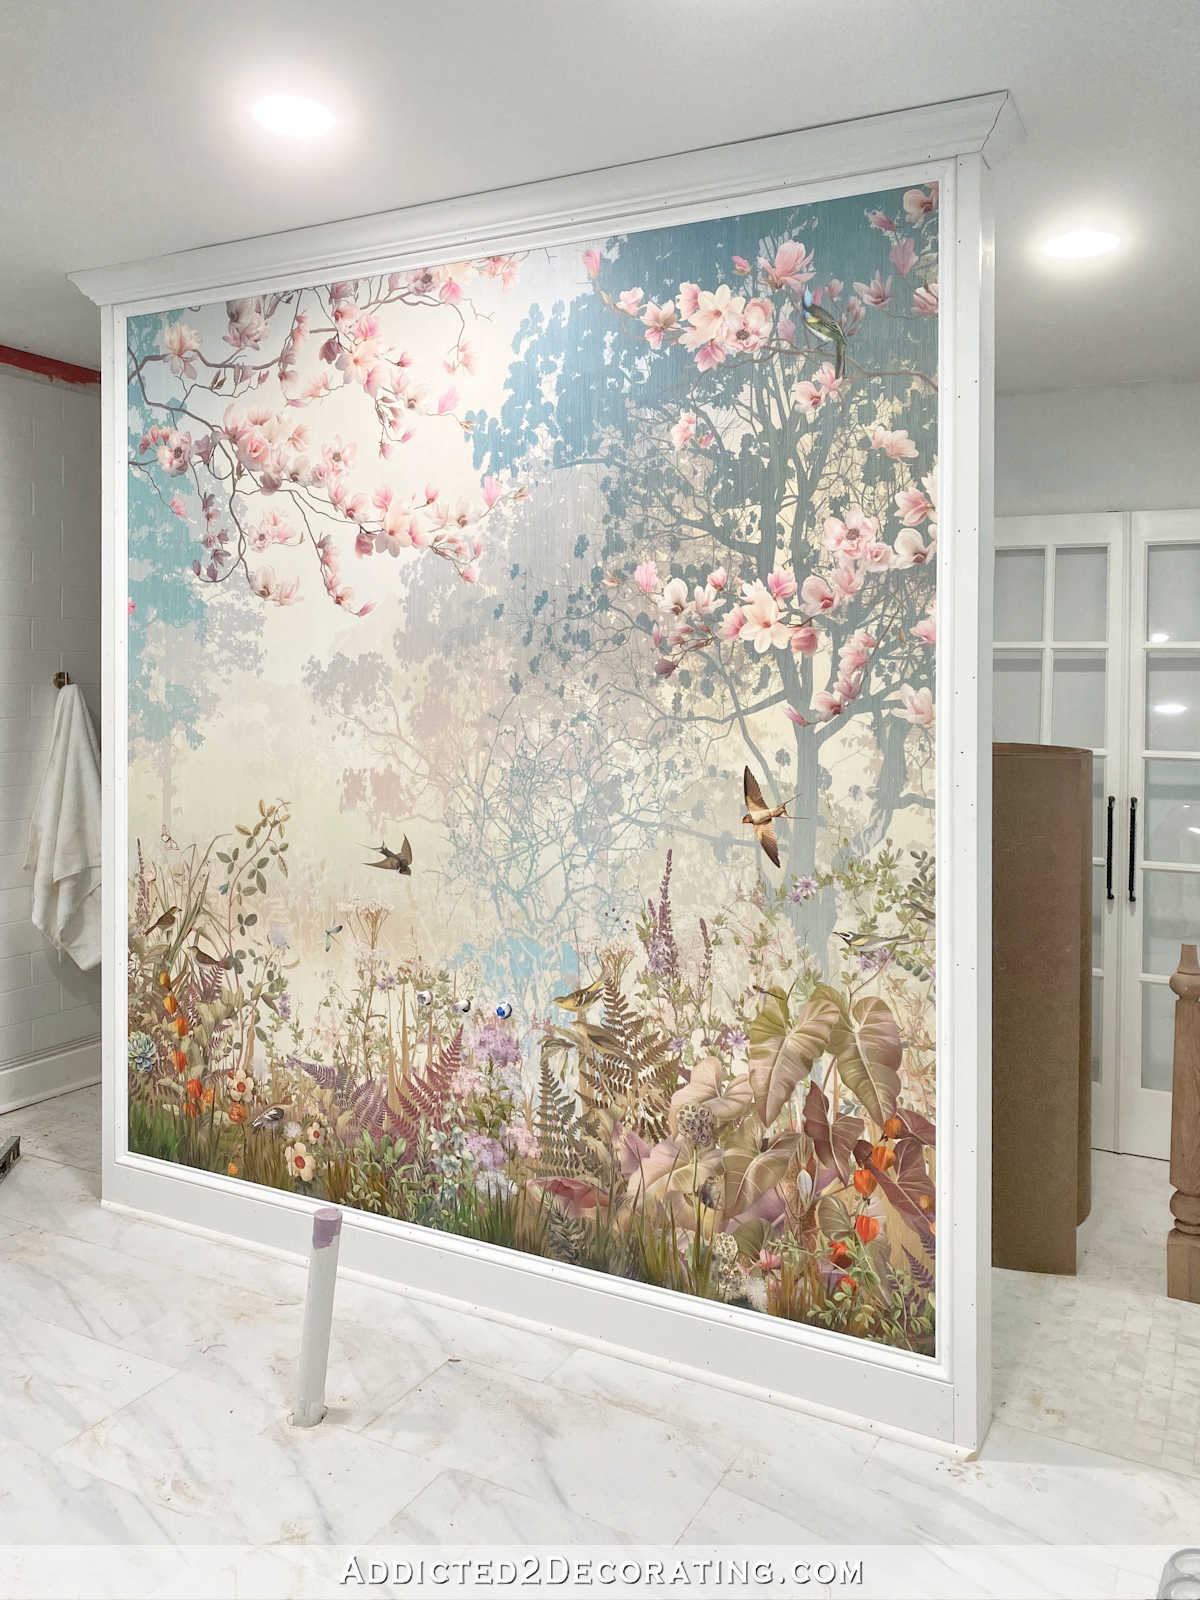
That’s a pretty good match, don’t you think? I’m so pleased with how it turned out. It took so much work and tweaking to get to a color that struck the right balance. I wanted it to have a depth of color to it while not being too dark. And it needed to be light and airy while not being too washed out. That was quite a challenge mixing and testing and mixing and testing until I found just the right color that struck that balance.
You can actually see the original color around the top of the wall next to the ceiling. It was so dark! I’m very glad I kept at it and stayed with the original plan.
This picture below is a tiny bit greener than the wall looks in person (the pictures above are much more accurate on my laptop computer screen), but I wanted to show y’all the gorgeous, subtle movement in the finish. It’s very soft and cloudlike now, which is much more what I had in mind
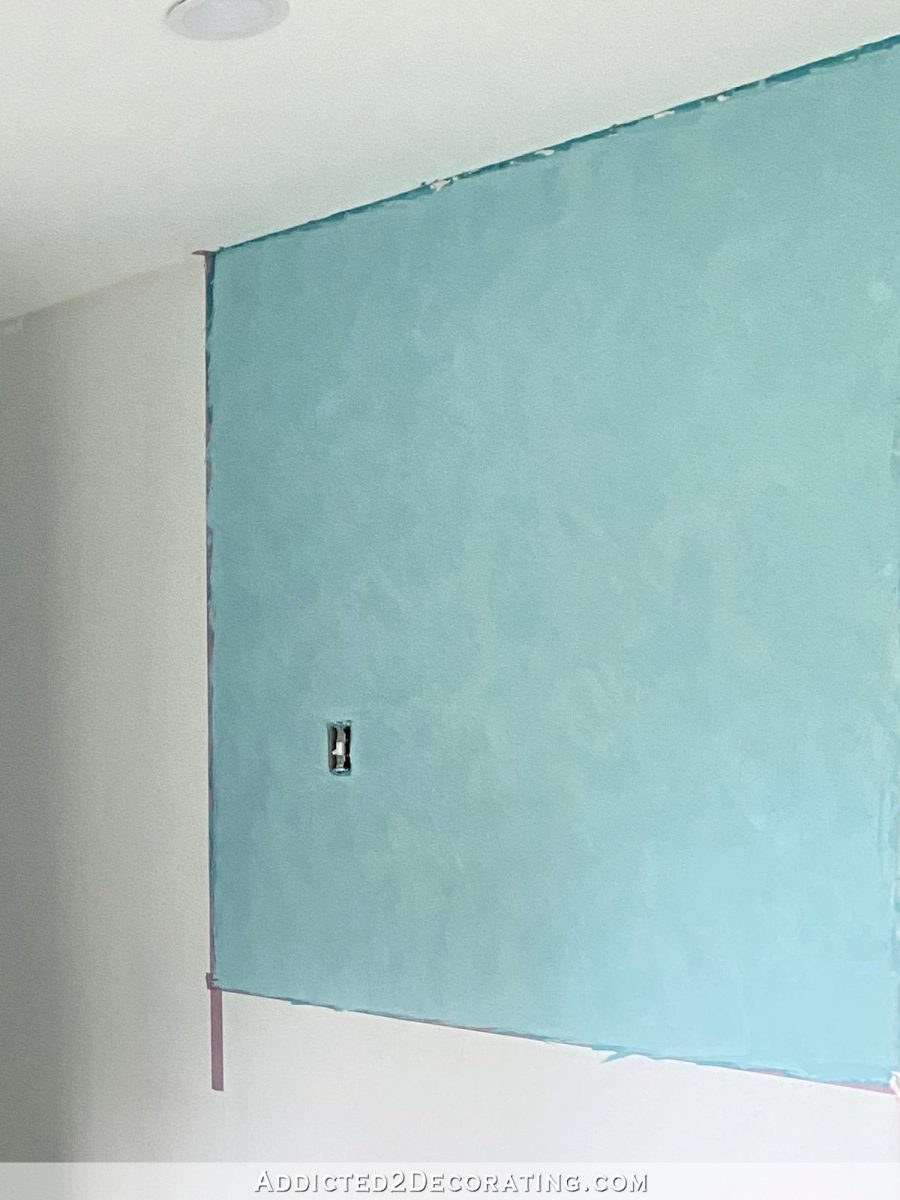
I was so determined to have that subtle finish rather than the finish with harsher variations in color that you see in so many Venetian plaster wall finishes. In fact, the “how to” video from Modern Masters has that much harsher result. Here’s a screen shot. You can find the video here.

I don’t know if that has so much color variation in it because she used a much darker color, or if it’s the burnishing step that brings out that color difference. I didn’t burnish my walls because I didn’t want to take a chance that that step would bring out those huge color variations. I was so pleased with the color of my walls without the burnishing step, and my walls are much smoother than her sample wall even without the burnishing step.
Anyway, all of that to say that it took a few extra days to get it just right, but in the end, I think those extra days paid off so that I could keep with my original vision for this bathroom.
I’m so glad this is done! Next step: shower and bathroom floor tile.

Addicted 2 Decorating is where I share my DIY and decorating journey as I remodel and decorate the 1948 fixer upper that my husband, Matt, and I bought in 2013. Matt has M.S. and is unable to do physical work, so I do the majority of the work on the house by myself. You can learn more about me here.

I’m so glad to see it lightened and closer to inspiration photo. I didn’t want to be negative but it was far too dark IMO in the beginning. Beautiful color and finish.
Your final color is simply gorgeous. All the work was worth it.
I’m sorry it was so much extra work, but the results are stunning.
I agree….stunning. you are so talented!
Looks amazing! Well worth the extra effort to get the color right!!
I love it. So glad you persisted until you got the color just perfect.
Aaaaahhh, I could float away on the soothing color, sky and clouds. You nailed it!
Oh WOW Kristi! I can’t even describe how much I love this! Just gorgeous!!
Yes, you nailed it!!! Soooo beautiful! Reminds me of a sunlight sky reflected through water in a white plaster pool or white sand beach – the perfect light teal! Just want to fall into that wall and let the water swirl around me! All that hard work paid off, great job, Kristi!
It is perfect! Just beautiful!
Oh that is gorgeous!
You nailed it!
OMG! Drop dead gorgeous color with that dreamy mural! …and that velvety texture and finish is spectacular! I am so glad you persisted to lighten the color!
Your determination is amazing! Well done.
I’m glad you went with your original color–the mural is now the star of the bathroom. Patience (and hard work and tears) got you to the next part of the dream!
Yes!! It is lovely, just right.
I am glad you did not throw in the “trowel” It is beautiful!
🤣
Love the lighter color! Can’t imagine the total effort that went into getting to your original vision, but well worth it!!!
Just like Goldilocks, this color is JUST right!!!!
Beautiful job, worth the struggle.
Did you keep adding white to the mix?
Plain white Venetian plaster to lighten the overall color, a tiny touch of pthalo blue colorant to tone down the green a bit (Benjamin Moore will let you buy an ounce of colorant), and a touch of black paint to gray down the brightness of the previous teal.
Lovely, lovely!!!
I LOVE IT!
Stunning
3 cheers for your tenacity…..👏🏻🥇🎊🎉✨💥💫…. it looks grrrrreat!
You nailed it!! Absolutely perfect and beautiful.
PERFECT!!!!!!!!!
I agree, the lighter color is perfect! It looks beautiful!
Always a perfectionist… and always worth the effort! It is stunning. I really mean that. This will be a bath that takes your breath each time you enter.
Sheila F.
PERFECTION! !!!!
Simply gorgeous!!!!!
With great admiration I say, “Perfect!”.
It looks amazing! So glad you kept going too.
Yesss! This color reflects much more of a spa feeling. PERFECT!
Absolutely gorgeous!
Oh my gosh girl, it’s a beautiful color. I can’t imagine all the work, but you aced it.
Oh yes. The color shade is what I wanted you to have. It looks terrific with the mural. All that effort paid off.
It’s perfect.
Love the color now. It looks perfect. Like you said not too washed out and it doesn’t take away from the mural.
Yes! This is IT! Just beautiful!
I liked the original color- but this one is even better! I’m sure you’re glad you went with your gut-it’s beautiful! It’s also a good testimony to why we should have inspiration boards in the first place. I have only seen the harsh look you talked about, and now seeing your softer version might have to check it out for our house.
Beautiful job!
Just beautiful, Kristi!! I’m so glad you kept at it because now that I’ve seen your finished color, that mural is absolutely the focal point. I see the color, but the mural just stands out beautifully and is not overtaken by the paint. I absolutely agree that your finish is so cloud-like, so soft appearing and ….. just perfect!! You are amazing and have such determination to get the look you are after!! You are such an inspiration to all of us to not give up in DIYing! Kudos, Girl!
You got it just right!
Gorgeous! I think you got the color just right!
Well worth it! I’m so glad that you stuck to the plan- it’s gorgeous!!!
It is so beautiful! It looks like the sky from the mural just carries on throughout the bathroom. I love it! I can’t wrap my brain around how much work that was, but from the observation deck, it was well worth it 🙂
OMG – that is GORGEOUS, and the color is perfect. Sorry it required so much work, but oh, it was worth it! I guess there is no name for that color – I wish I could buy a gallon! BUT, it is a handmade Kristi color, so I guess we won’t be matching. 😂 It is SO soothing, and pleasing. Congratulations on getting it PERFECT!
Perfect! So glad you kept lightening it up!
So glad you kept at it! It is absolutely perfect now! Love it!!!!!
It is absolutely beautiful, Kristi! xo
Perfectly spa-like!!! You DID it!!!🤗
Beautiful! A perfect match!
Perfect!
Oh Kristi, that is stunning. The final colour is perfect. So worth the extra time, effort and tears!
I have one word for your bathroom: Dreamy!
And I thought I was the only person who would paint a room 4-5 times to get just the right color! I liked the original color but I LOVE the final color. It looks beautiful with the mural.
Yep! You got it. 🙂
Fantastic! Glad you kept at it!
All the extra work was definitely worth it! Just BEAUTIFUL!!!
Practically perfect in ever way!
Absolutely PERFECT.
Your final color is simply gorgeous. All the work was worth it.
Speed-think ahead to the first languishing bath you will enjoy in that tub as you look at all the details in your beautiful bathroom. I doubt your fans will get a selfie of that happy day but do tell us what it felt like to enjoy it.
As for Matt, may he have as much fun in the shower of his dreams, which is soon to be.
Masterful work, Kristi. We are all proud of your work and determination to see it through.
Spot On!
Just love yours
The video reminds me of all that sponge painting we used to do ack!!
Ommmmmg perfection
Congratulations for not throwing in the trowel! It looks great and exactly like your planned color. I would have given up and settled for darker color but it is much more airy looking now. PS Felicity is looking adorable.
I really did love the darker color, but this lighter color is next level gorgeous. It’s stunning, tranquil and spa like with the mural. Once again Kristi, you’ve proven that your dedication and devotion gets perfection! Well done.
I knew you would get to the vision you had and it is beautiful!
Perfection, Kristi! Congratulations for your persistence and stamina.
That bathroom is a stunner; I’m crazy about that mural
Soft and soothing. Love!
So impressed with your perseverance. The result is nothing short of stunning.
Love how it turned out. It is interesting seeing how the colors in the mural changed with each variation of the wall color. I always enjoy reading about your progress on your home.
It’s beautiful! I’m so glad you stuck with it!
Love the color and it does let the mural be the star!
Yes, you nailed it Kristi! Now it has a more peaceful serene spa like feeling and the mural really shines! Kudos!
Looks awesome!! 😍
The dark wall looked velvety…. but this is SPOT ON to your sample and absolutely PERFECT!!
So Beautiful!!! So bright and spa-like!
Your master bathroom it will be just gorgeous!
The color of the venetian plaster is perfect. Calming and so elegant!
I love the finished color so much more than the first one. It is going to be so beautiful all put together.
I just read an article in Architectural Digest (from 2017, so not cutting edge), but thought you would like it since it’s full of color and some stripes. Elton John’s house in Beverly Hills:
https://www.architecturaldigest.com/story/elton-john-david-furnish-los-angeles-home-article
All your work paid off. The walls are gorgeous and complement the mural. It may have been a never-ending task but, wow was it worth it.
Congratulations.
It’s perfectly gorgeous!! Well done.
The final color is PERFECT. It’s so lovely and really compliments the beautiful mural. Gorgeous!!
Your efforts ABSOLUTELY paid off SO BEAUTIFULLY !! Congratulations! Incredibly lovely!!
Kudos to you Kristi! Looks great! Love the color.