Adding Flourish And Pretty Molding To My Closet Cabinets
I spent yesterday adding all of the pretty molding and a little flourish to my closet cabinets. I have to laugh at myself because you’d think that after 30+ years of DIYing, I’d have a much more realistic understanding of how long these things should take, and yet, it seems like I’ll never learn.
Before last weekend, I thought that I could spend a couple of hours adding all of the molding, another couple of hours priming and caulking, and then be able to paint at least some of the cabinets before the end of the weekend. But here I am on Tuesday morning, and I’ve only now gotten the pretty molding attached, I don’t even have half of the cabinets primed yet, and I haven’t even started on the caulking. Ugh. I don’t do these huge projects regularly, so in the interim, I seem to forget just how long all of these different steps actually take. But maybe…just maybe…I’ll be ready to paint the cabinets by the end of this week.
This is only one part of what will be a very long series of posts on my biggest built yet — my walk-in closet and laundry combination. If you missed the previous post, you can find that here: The Walk-In Closet Is All Trimmed Out
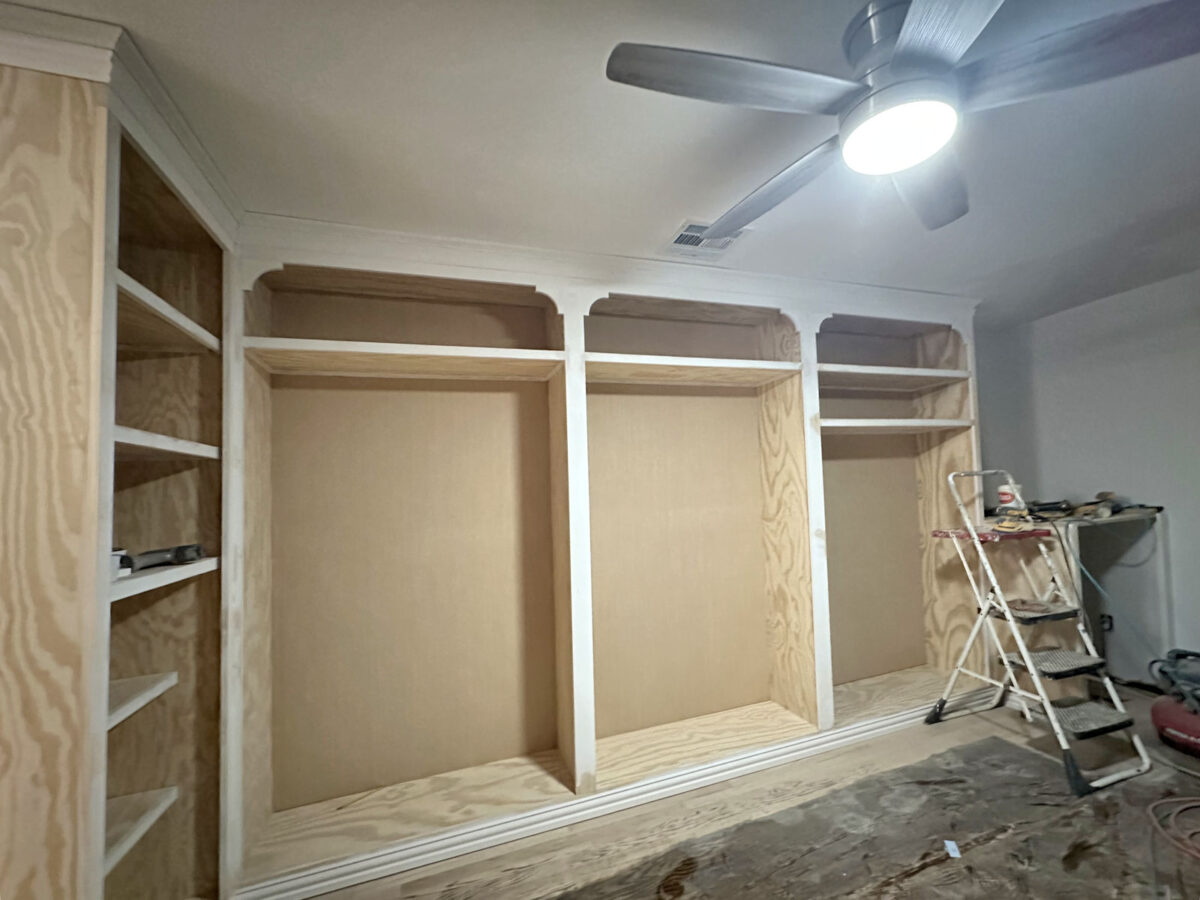
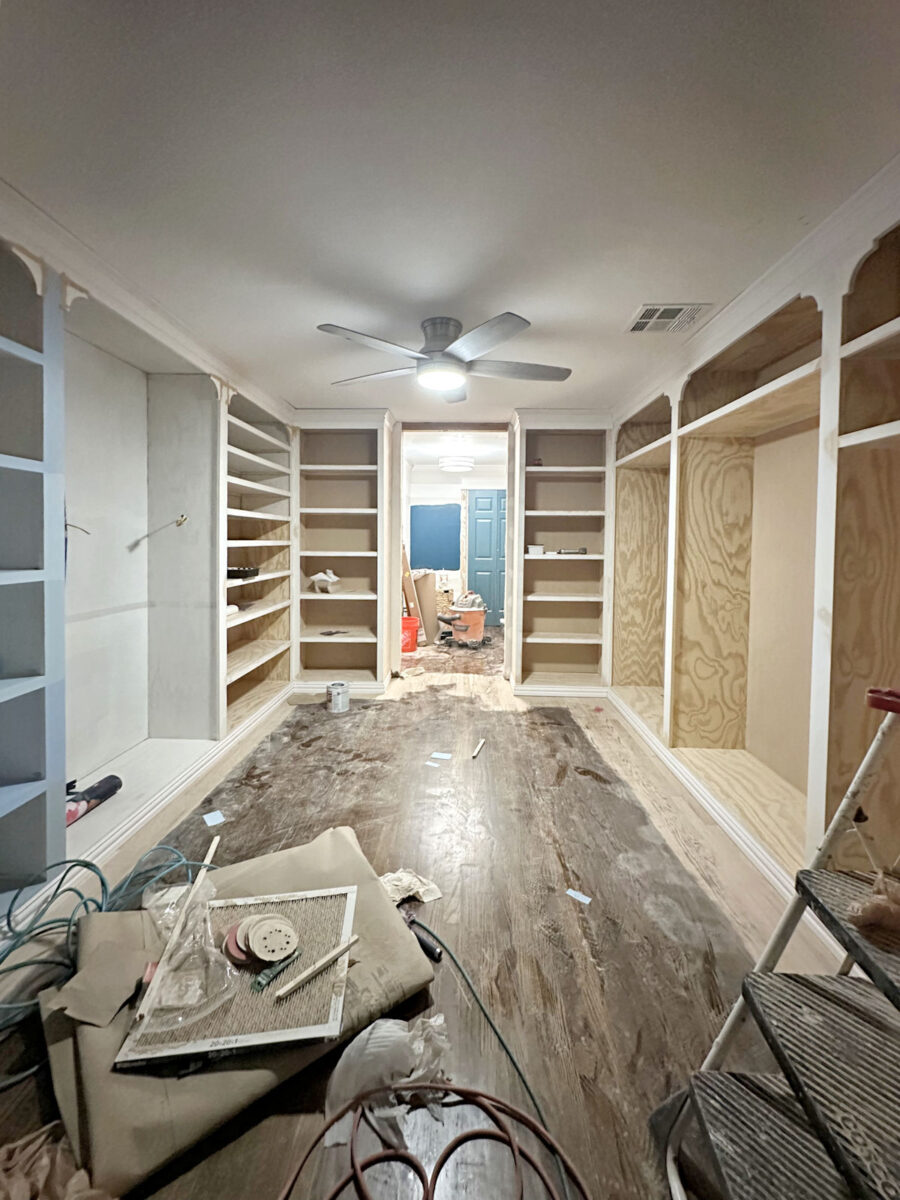
The good news is that all of the trim and molding is now installed. I will probably be adding two more shelves, and those will need trim as well. I’m still working out those details. But as far as the cabinets and shelves that are currently in the room, those are all trimmed out, and I now have all of the pretty molding installed also.
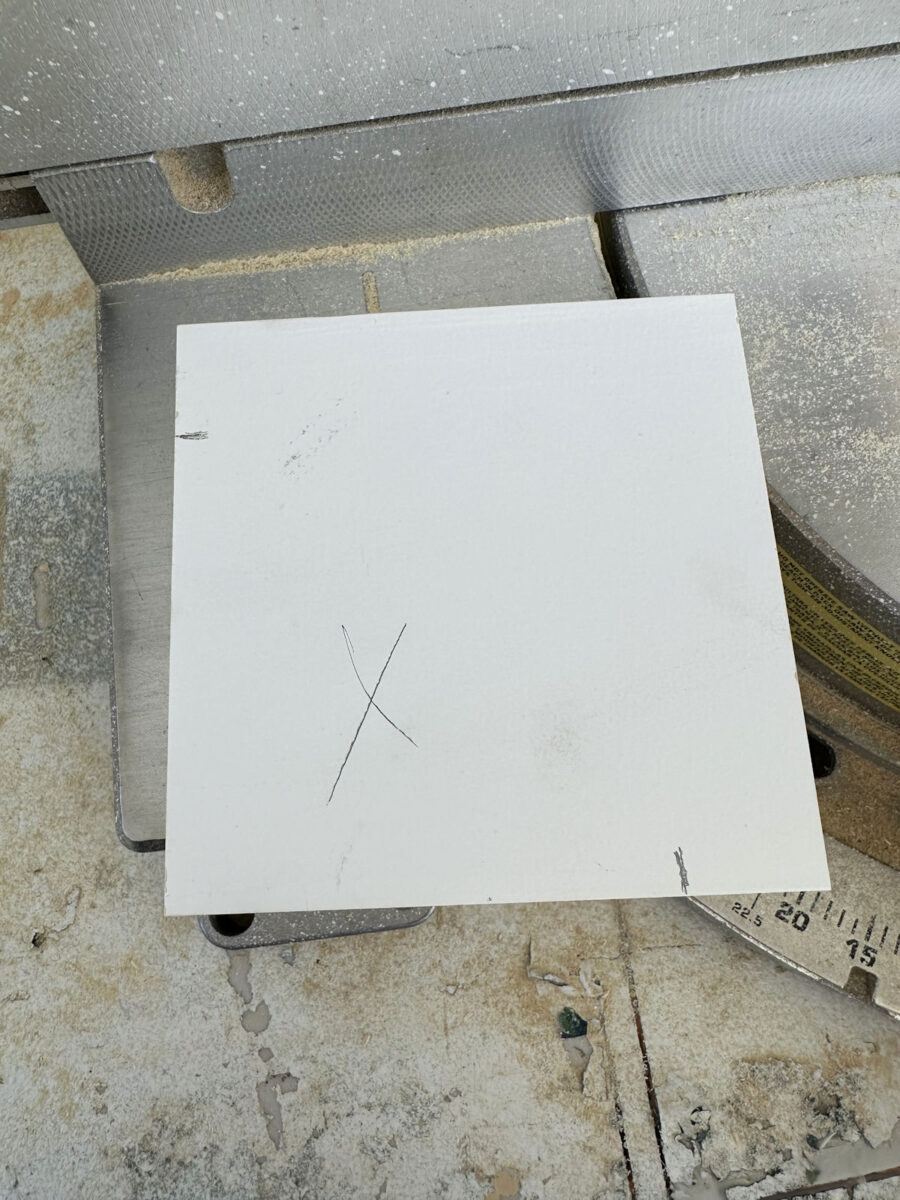
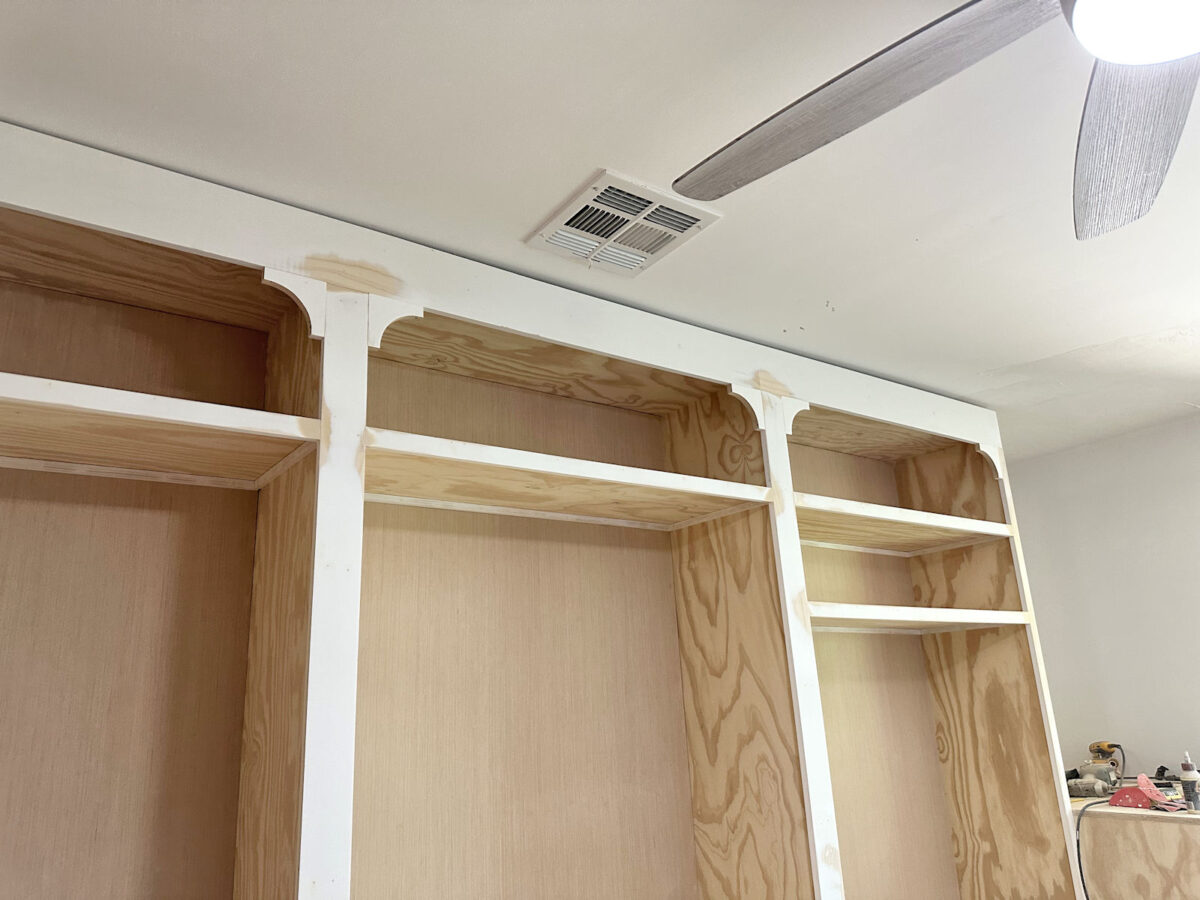
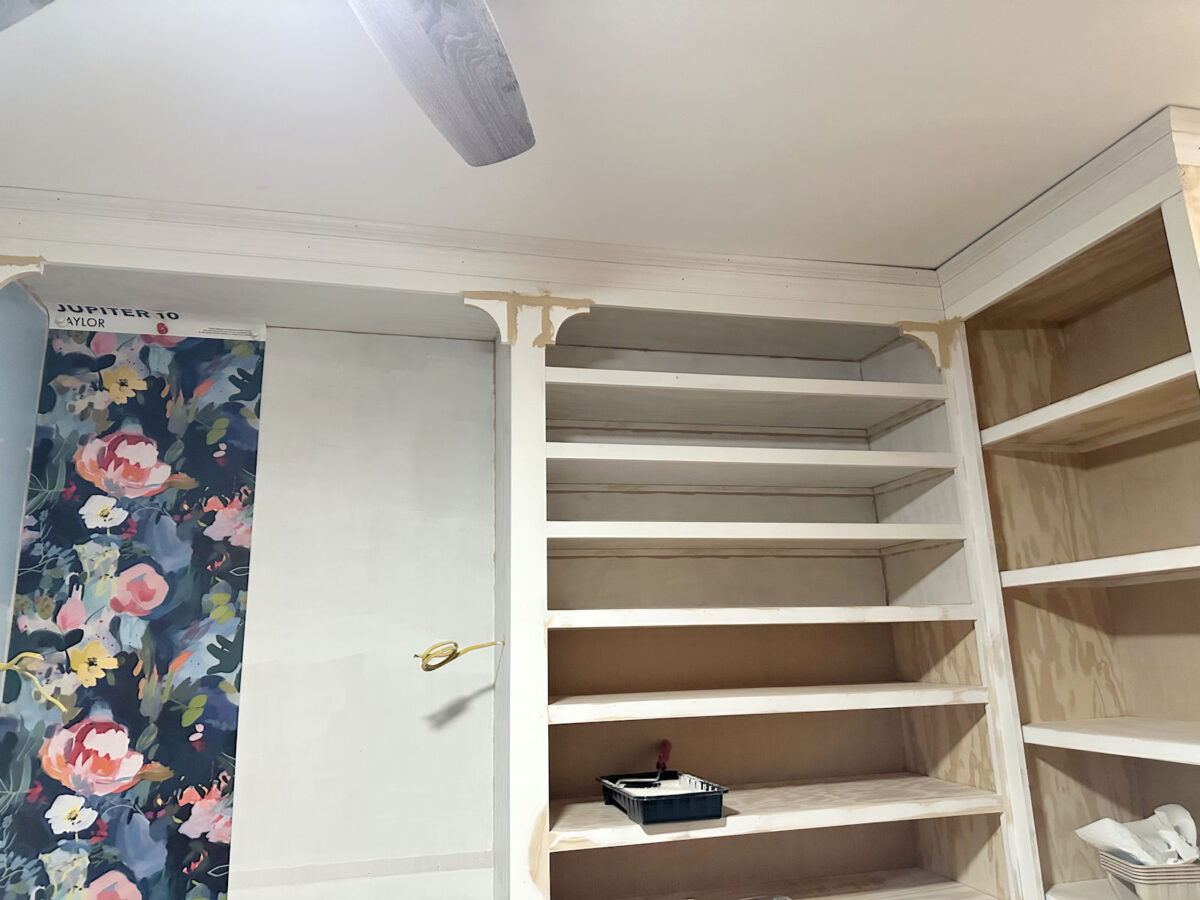
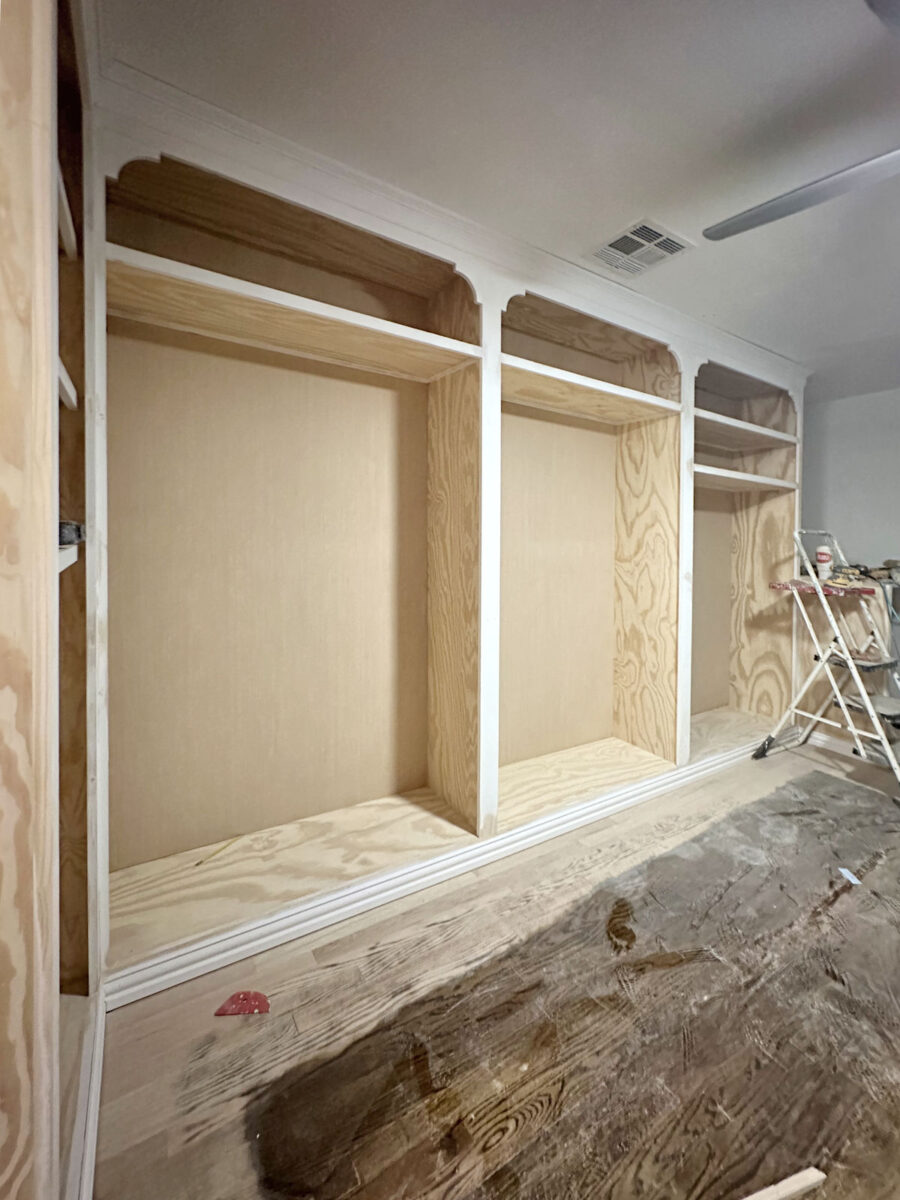
Before I installed the pretty trim, I decided to add a little flourish to the cabinets. To do this, I cut 12 pieces of 1″x5″ lumber (which is actually 4.5″ wide) into 4.5″ squares. And then I made a mark one inch on in the top left side and the bottom right side.
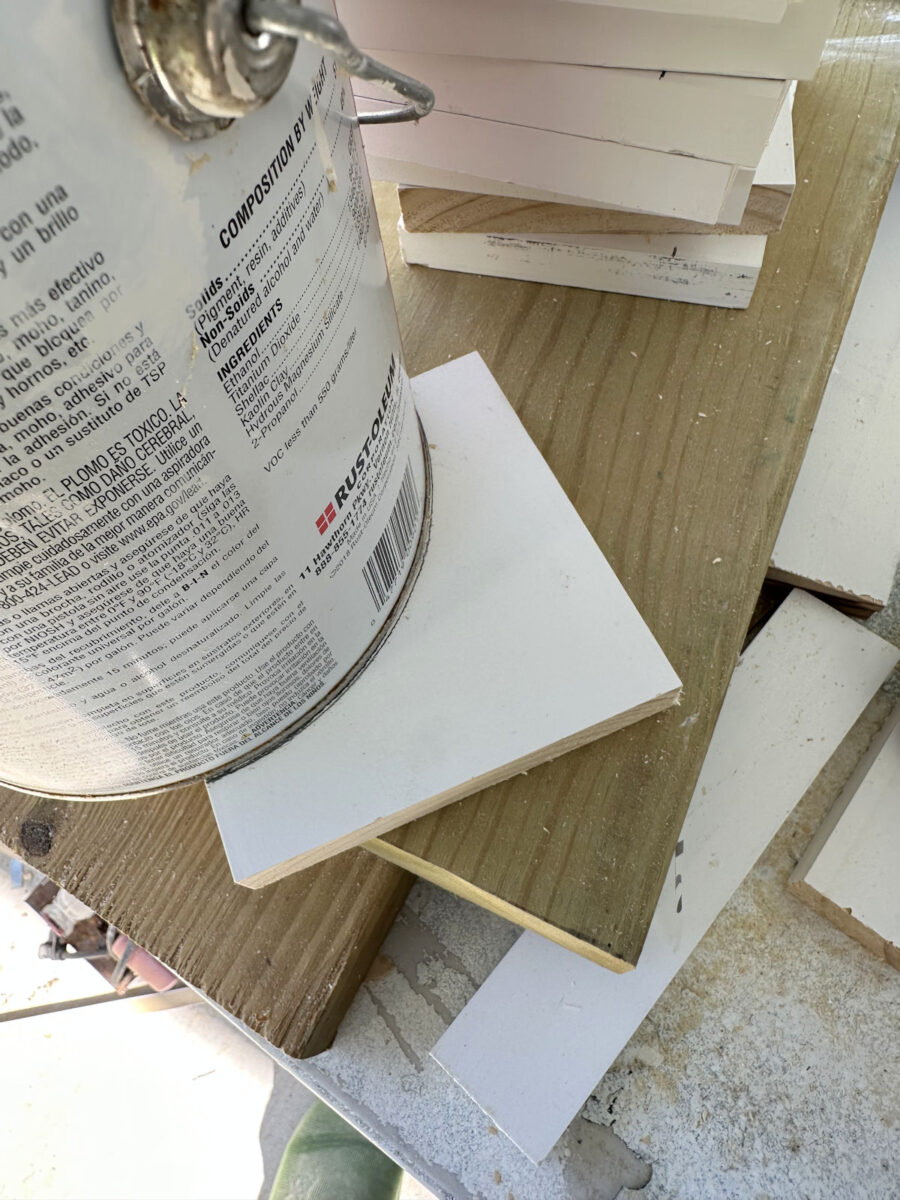
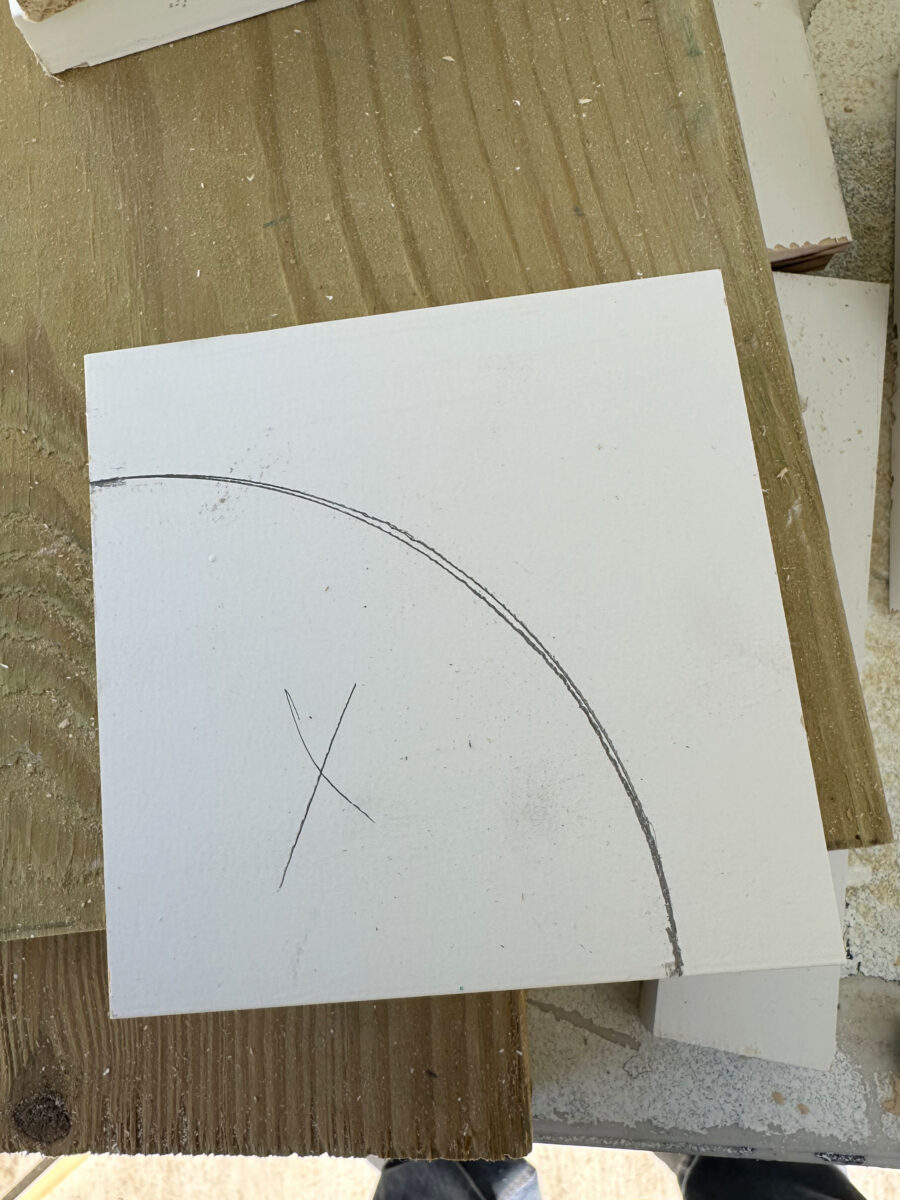
Using a one-gallon paint can, I traced a curve between those two marks.
It looked like this with the curve traced on it…
And then I used my band saw to cut the curve.
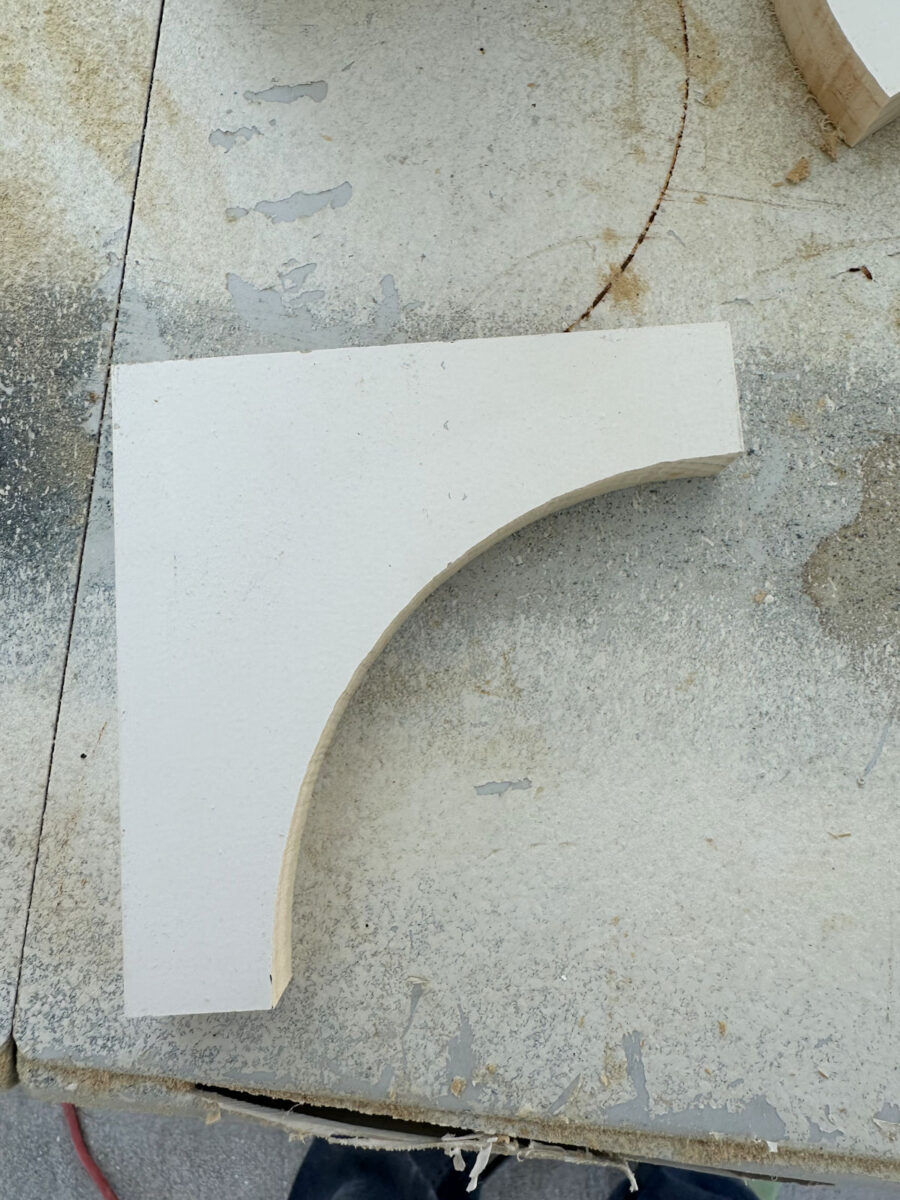
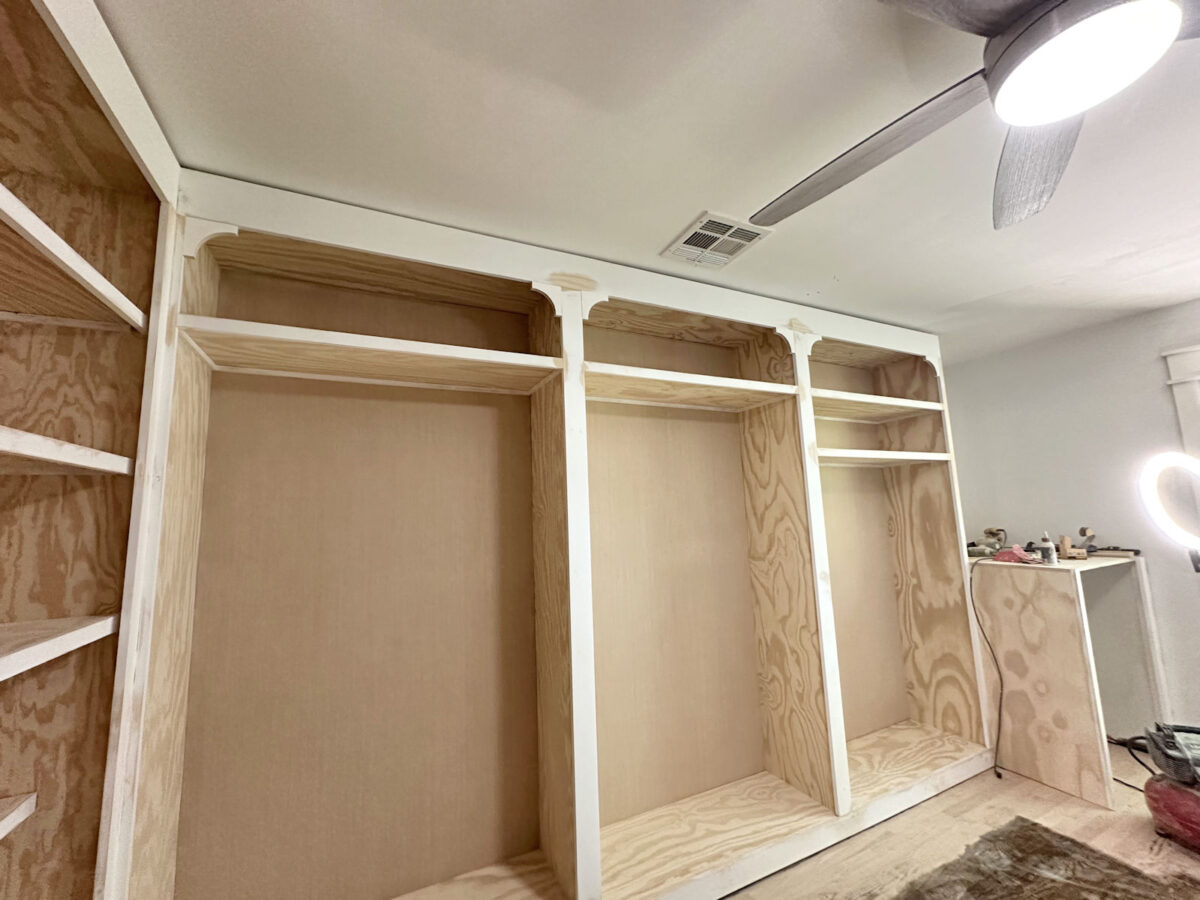
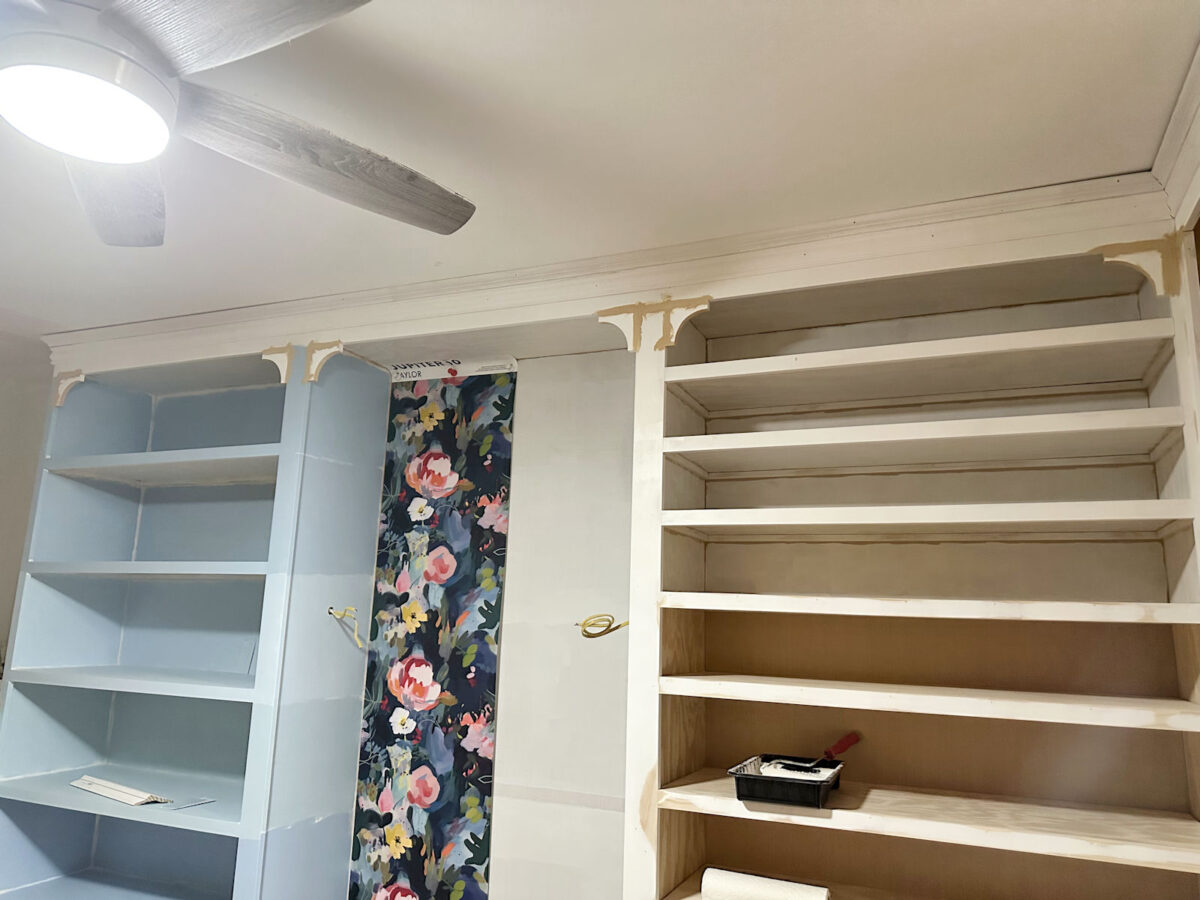
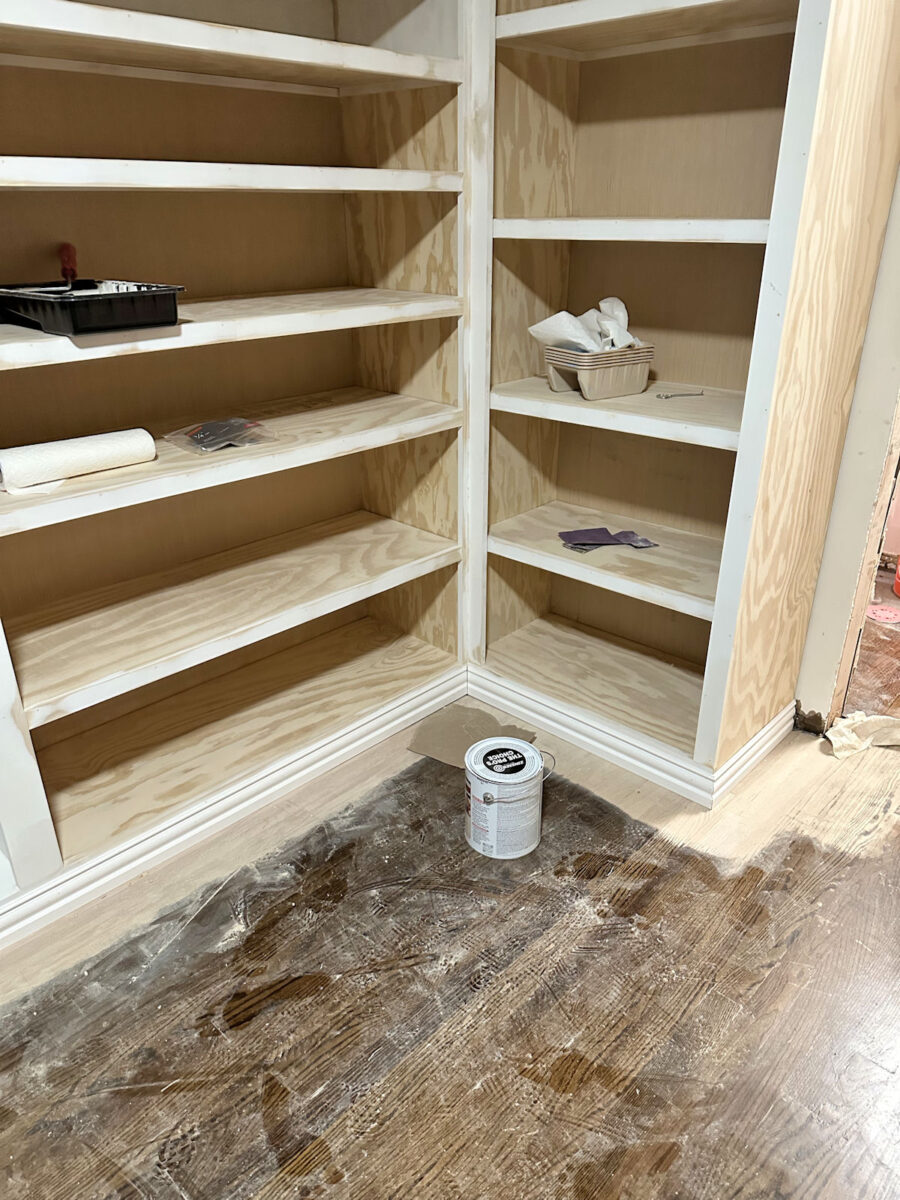
I repeated that 11 more times, and then I attached those pieces to the inside top corners of each of the six cabinet sections using wood glue and 16-gauge 2-inch nails.
I didn’t add these pieces to the cabinets flanking the door because I’m planning on adding cabinet doors to those cabinets…I think. (I have to admit that I’ve been second-guessing that decision, so we’ll see.)
I wish that I could have made these pieces a little bit bigger, but I had to use the top shoe shelf (the shortest shelf on the right section on the right wall) to determine how big these pieces could be..
I didn’t want these decorative pieces to be jammed right up against that top shelf. I wanted to leave some space between those pieces and the top shelf, so I determined that 4.5 inches was the biggest I could make them…
Once they were all attached, and the wood glue had time to dry, I piled on the wood filler…
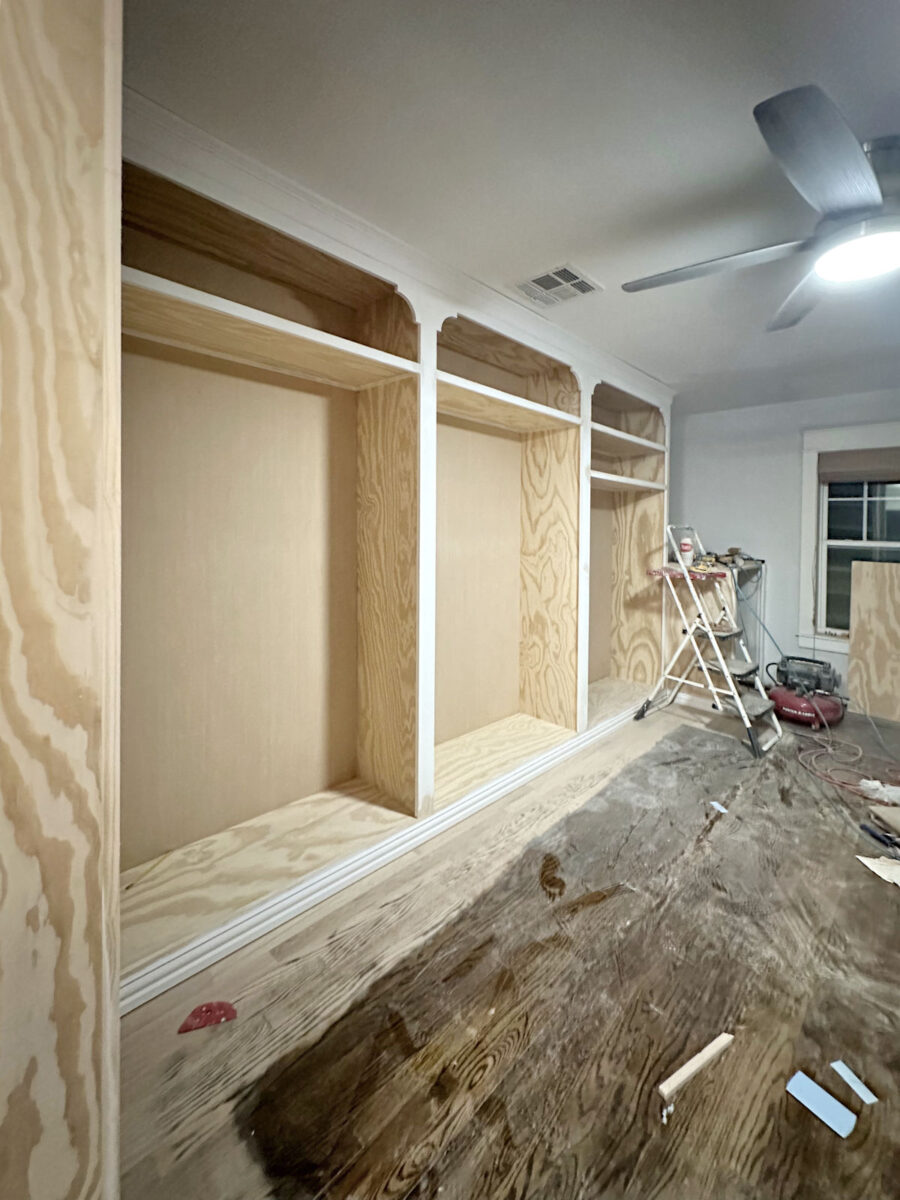
While the wood filler dried, I worked on the decorative molding. For the top molding, I didn’t use regular crown molding because I wanted to add a really big molding, but on the left side of the room, the HVAC vent is pretty close to the cabinets.
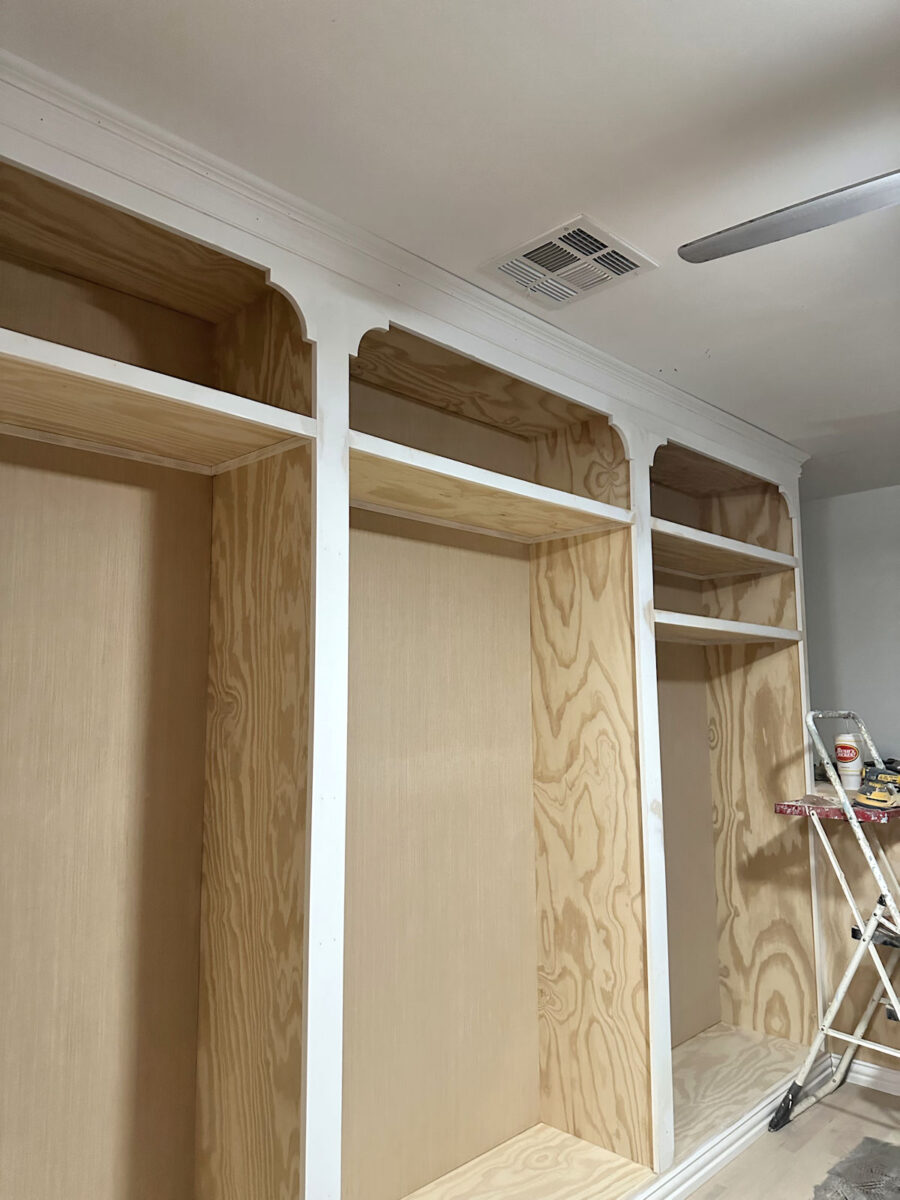
I didn’t want the molding getting to close to that air vent, so in order to fake the look of a really big crown molding, I used the same trick that I used on the cabinets in my studio by using a 3.25-inch baseboard and attaching a tiny crown molding to the top. That way, it has the appearance of a large crown molding, but it doesn’t stick out too far from the cabinets like a big crown molding would since most of the molding (i.e., the baseboard) is lying flat against the top of the cabinets. The only projection is that tiny crown molding at the very top.
The bonus is that this method of installing top molding is so much easier than installing crown molding because the two pieces are glued and nailed together first before they’re cut. So cutting them is as easy as cutting baseboards. You don’t have to figure out spring angles and cut them like crown molding, which can get complicated for non-pros.
If you want more details on this cheater method of faking the look of crown molding using baseboards, you can see that here: Studio Office Cabinet Progress – How To Make Faux Crown Molding That’s Very Easy To Cut And Install
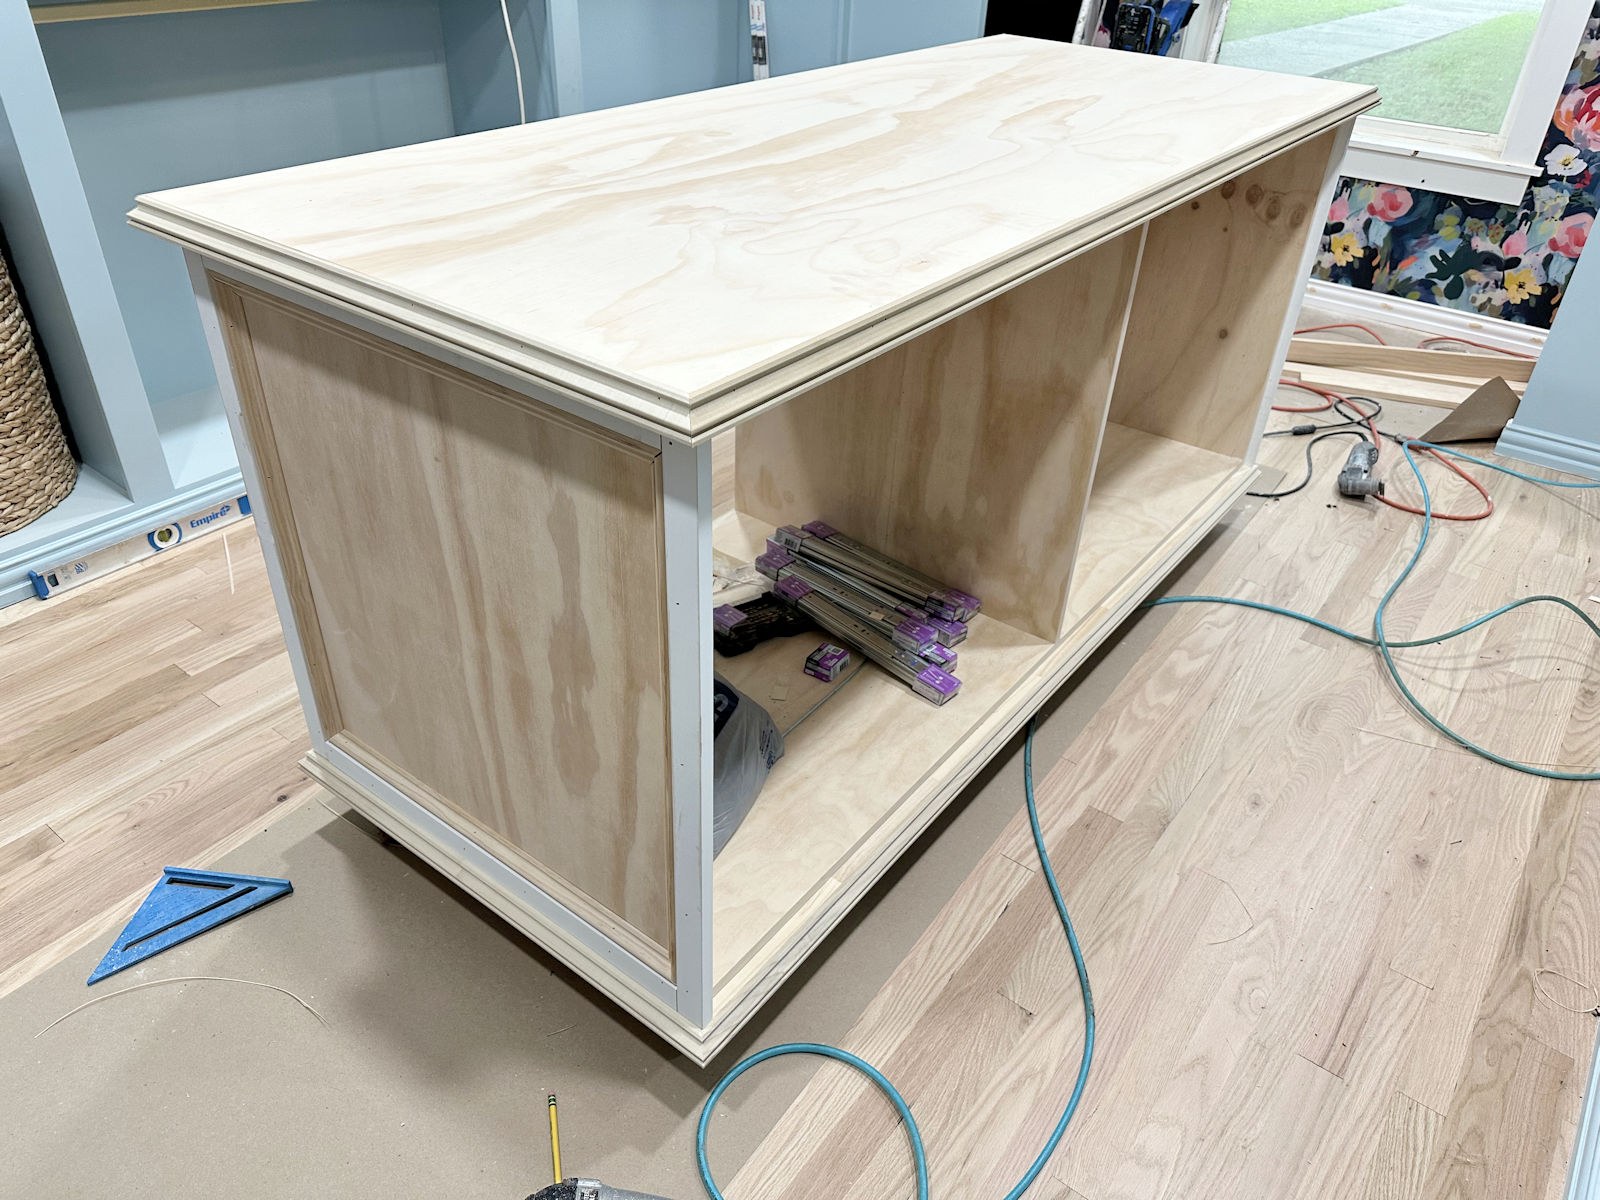
Here’s a better view of the top molding. You can see that most of the decorative parts are actually baseboard that is attached flat against the top of the cabinets, and only the top 1.5 inches is tiny crown molding that has an angle to it.
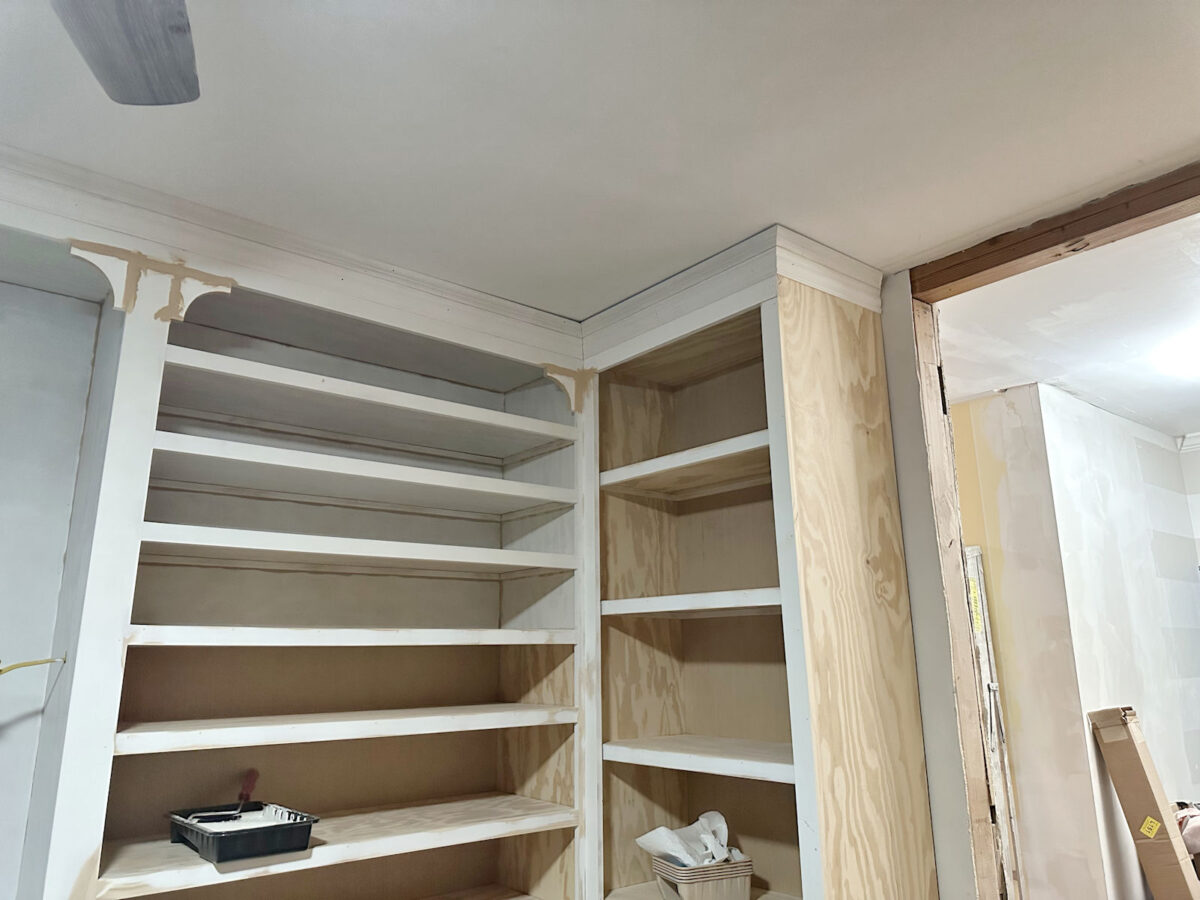
Attaching the top molding was still a bit of a challenge, though, because the ceiling in this room is just not flat. Oh, the joy of working in an old home where nothing is flat, square, or plumb! So there are areas where the molding is right up against the ceiling, and other areas (as you can see in the corner below) where the molding simply wouldn’t sit against the ceiling no matter how hard I pushed on it.
And because I couldn’t get the long piece to sit against the ceiling, I had to drop the piece connecting to it on the other cabinet down a bit as well.
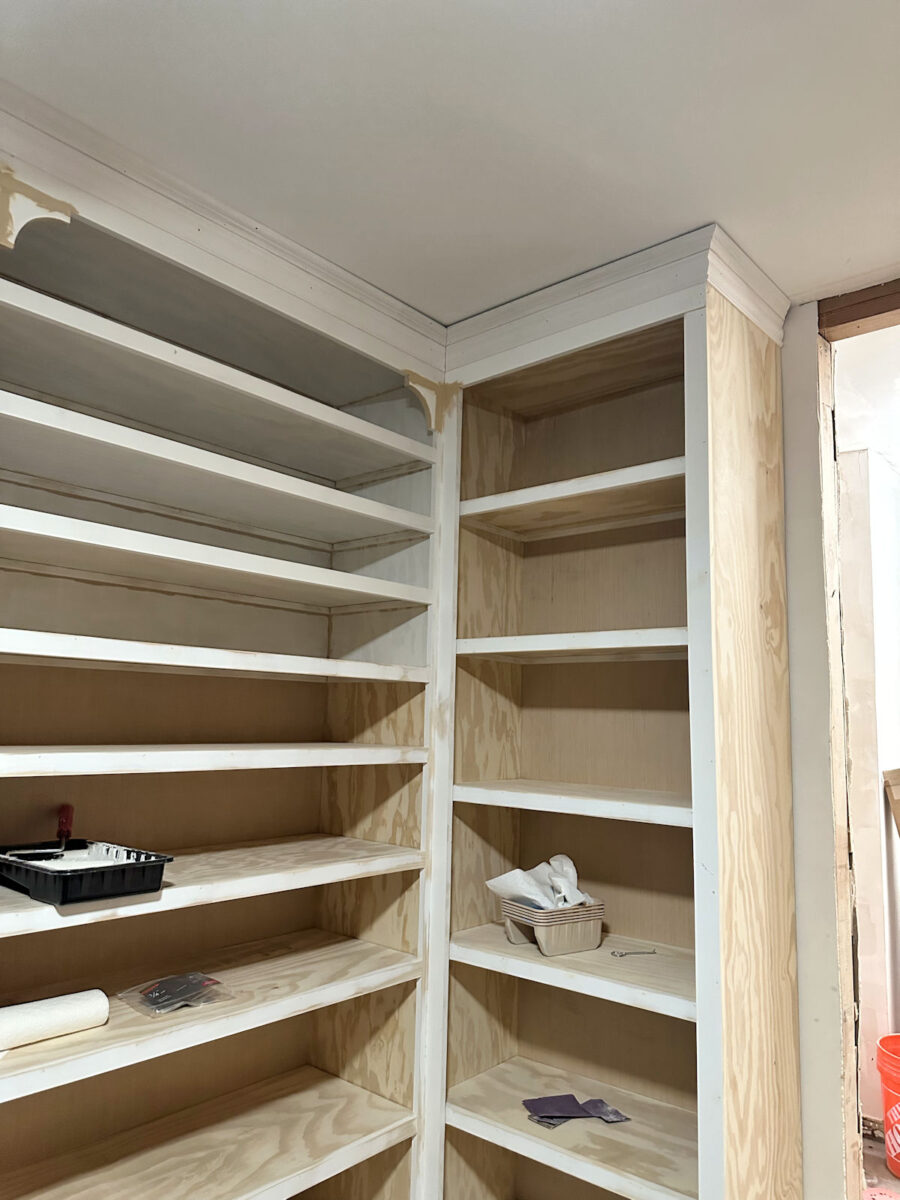
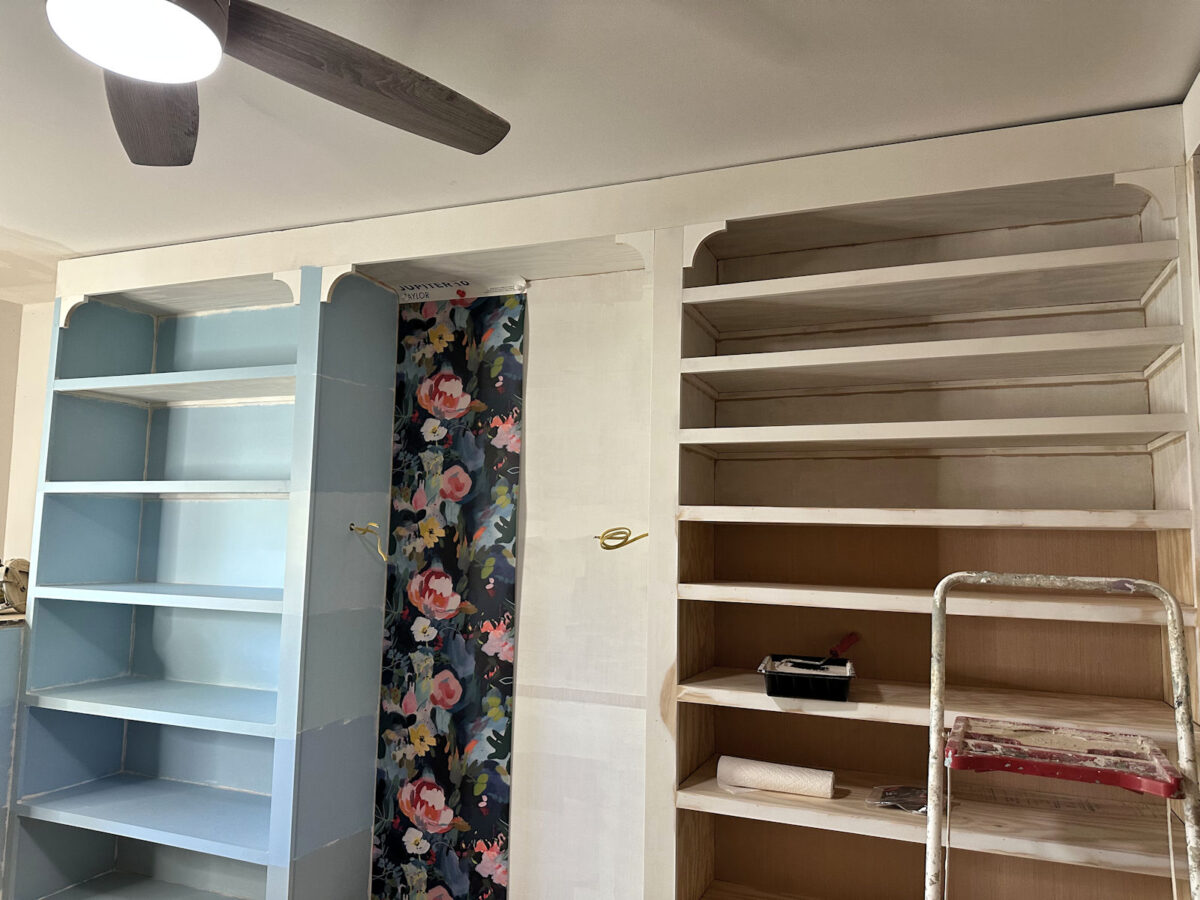
You can see that on the other end of this wall as well where there’s a gap between the molding and the ceiling.
I’m not worried about that because caulk will magically make those gaps disappear, and once it’s all painted, it will look as perfect as anything can look in an almost-80-year-old home.
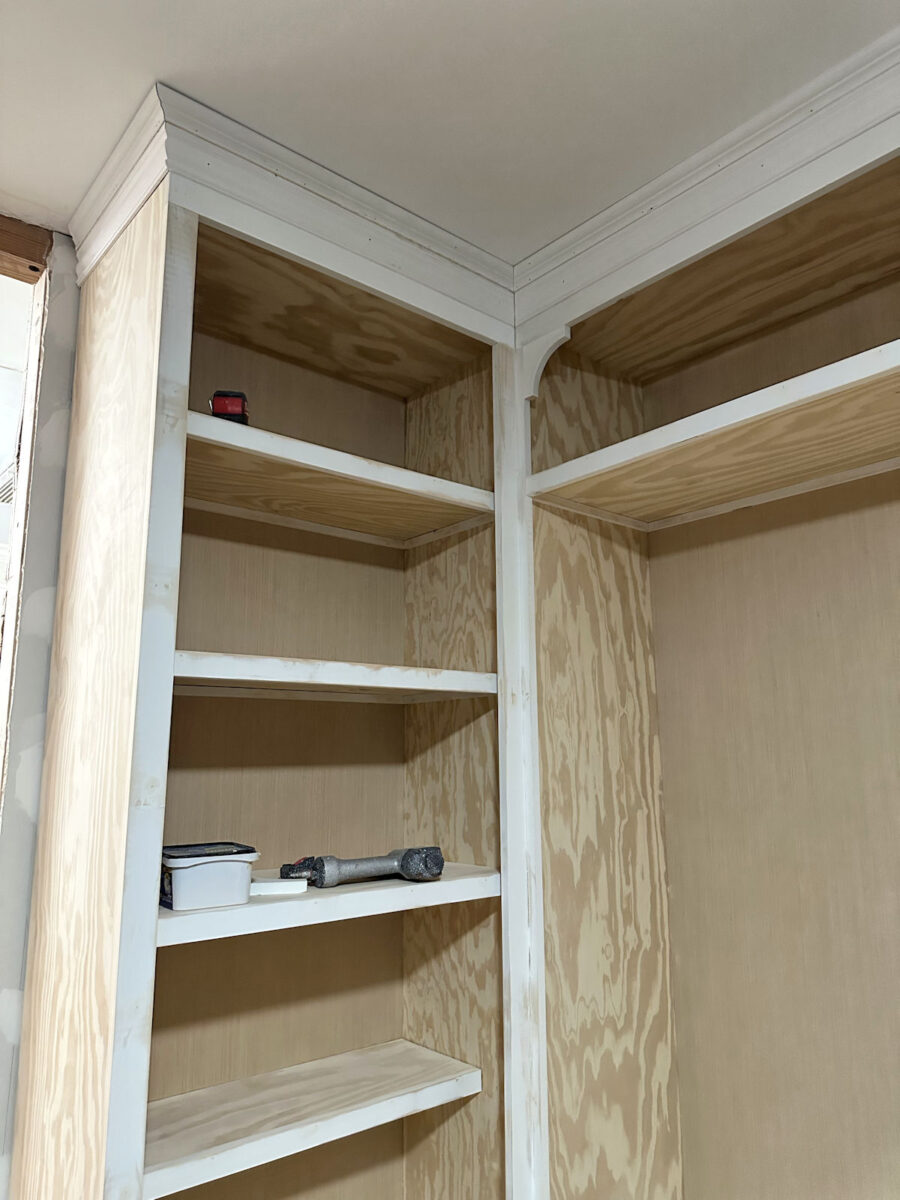
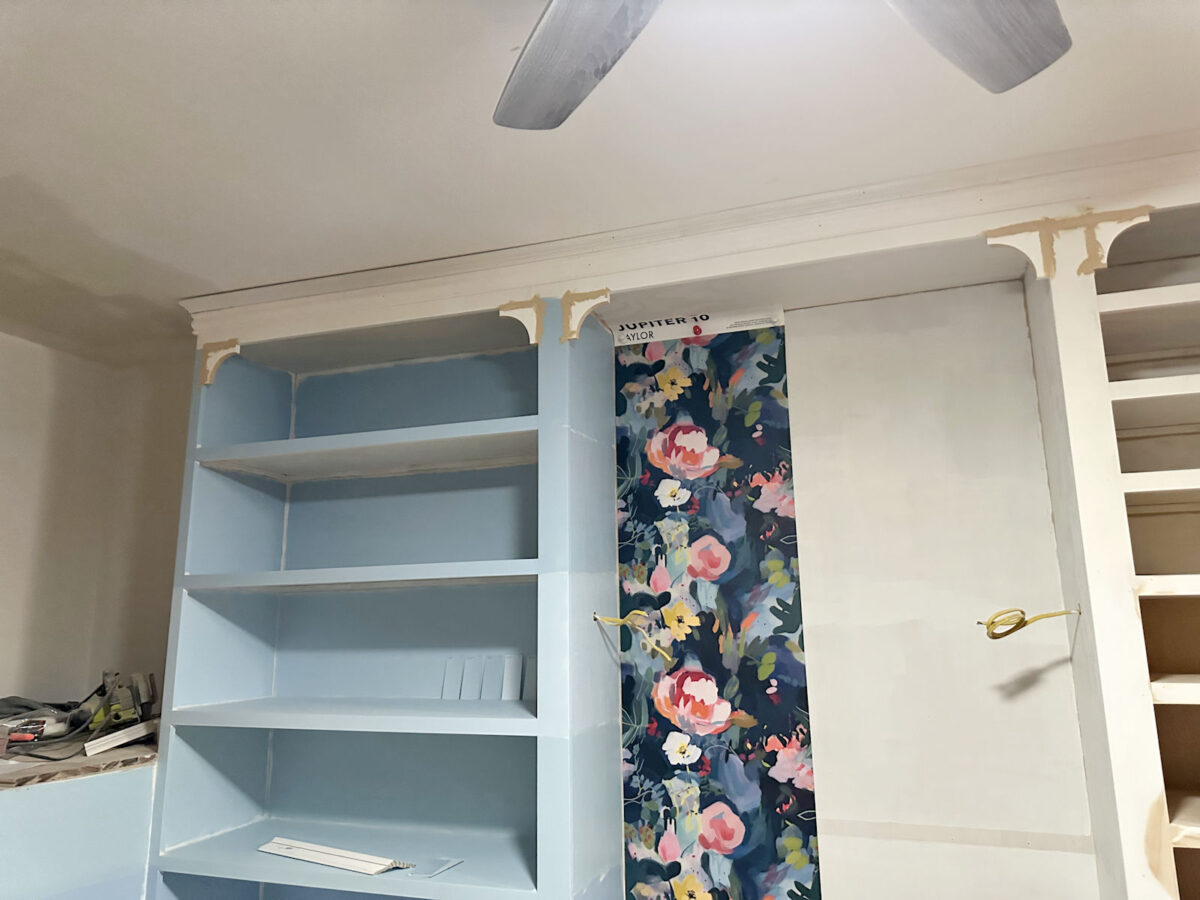
The other side of the room wasn’t quite as much of a problem. Most of the top trim on that side is against the ceiling, but I did have a bit of a problem around the cabinet flanking the doorway. But again, caulk will take care of that problem.
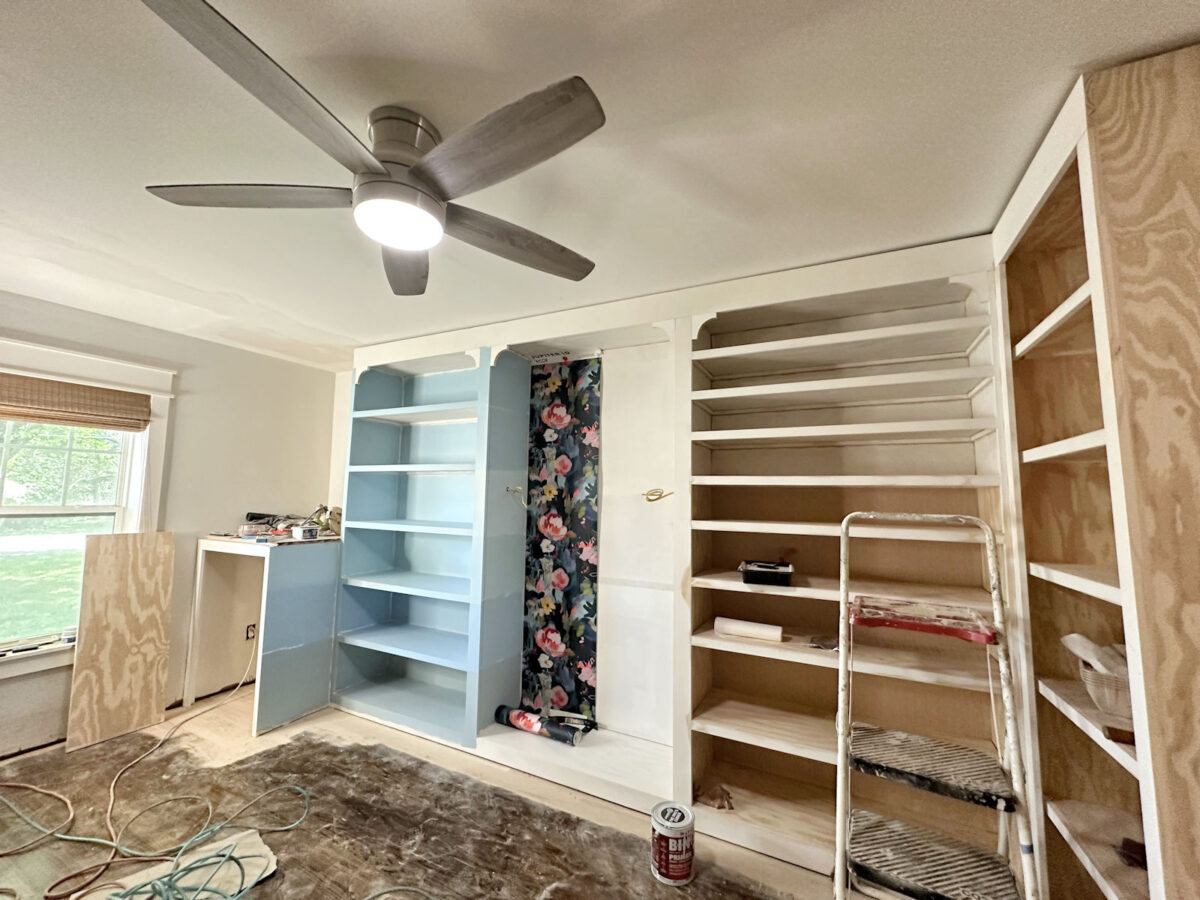
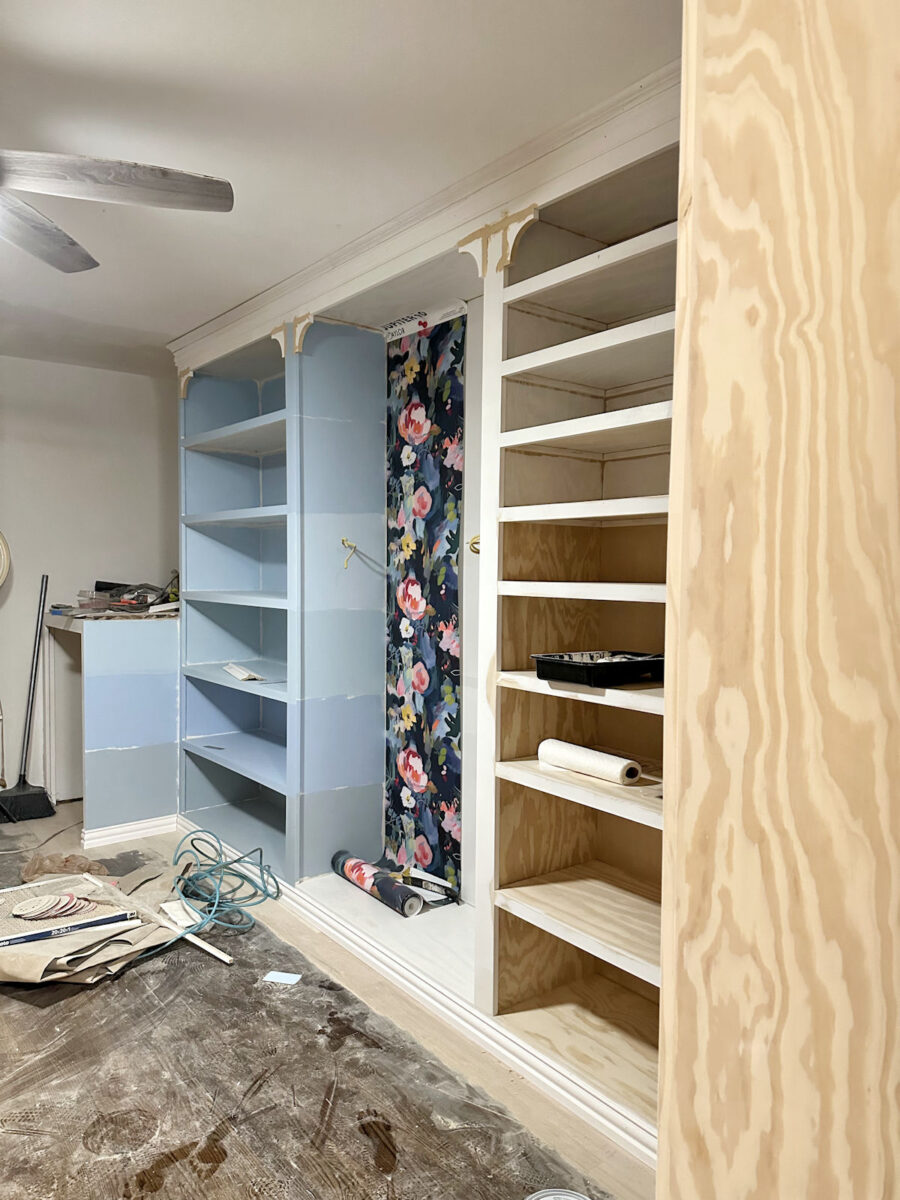
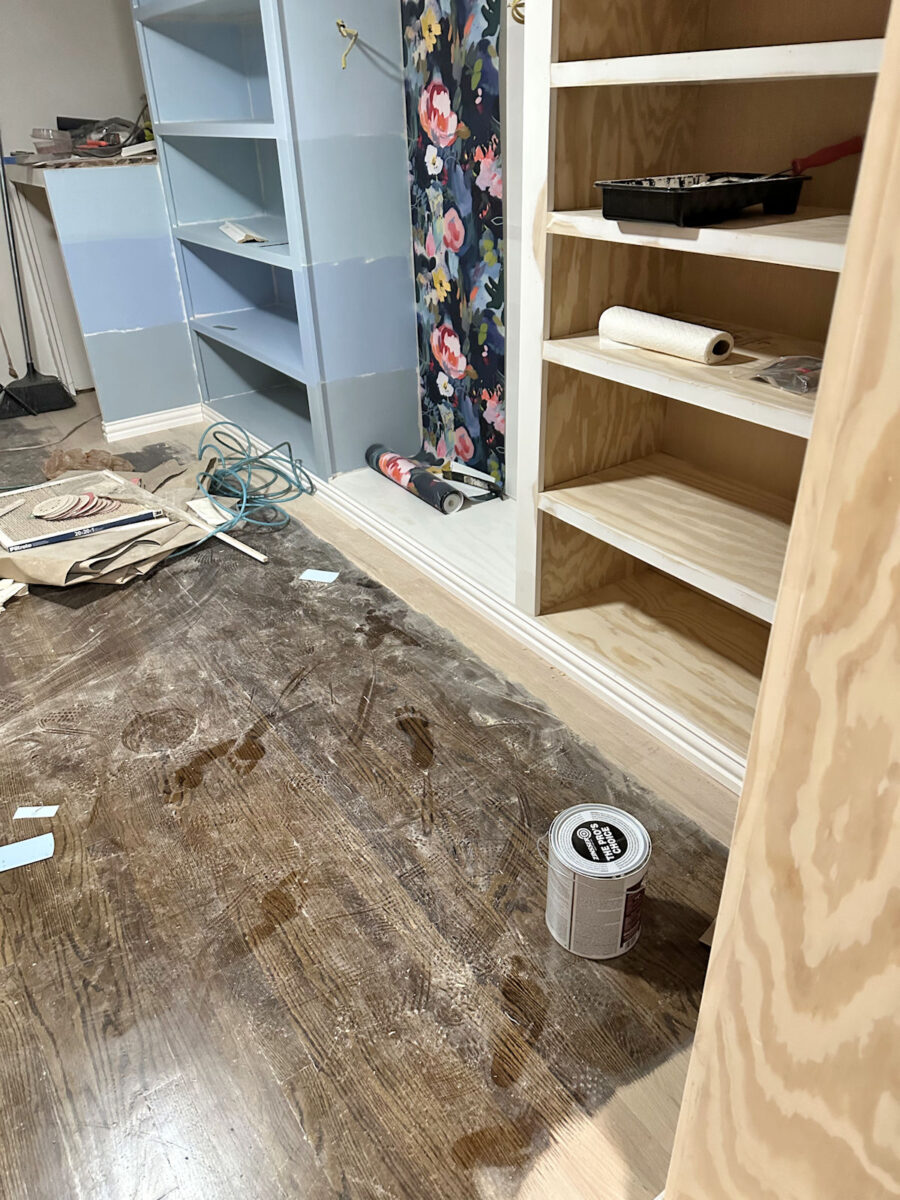
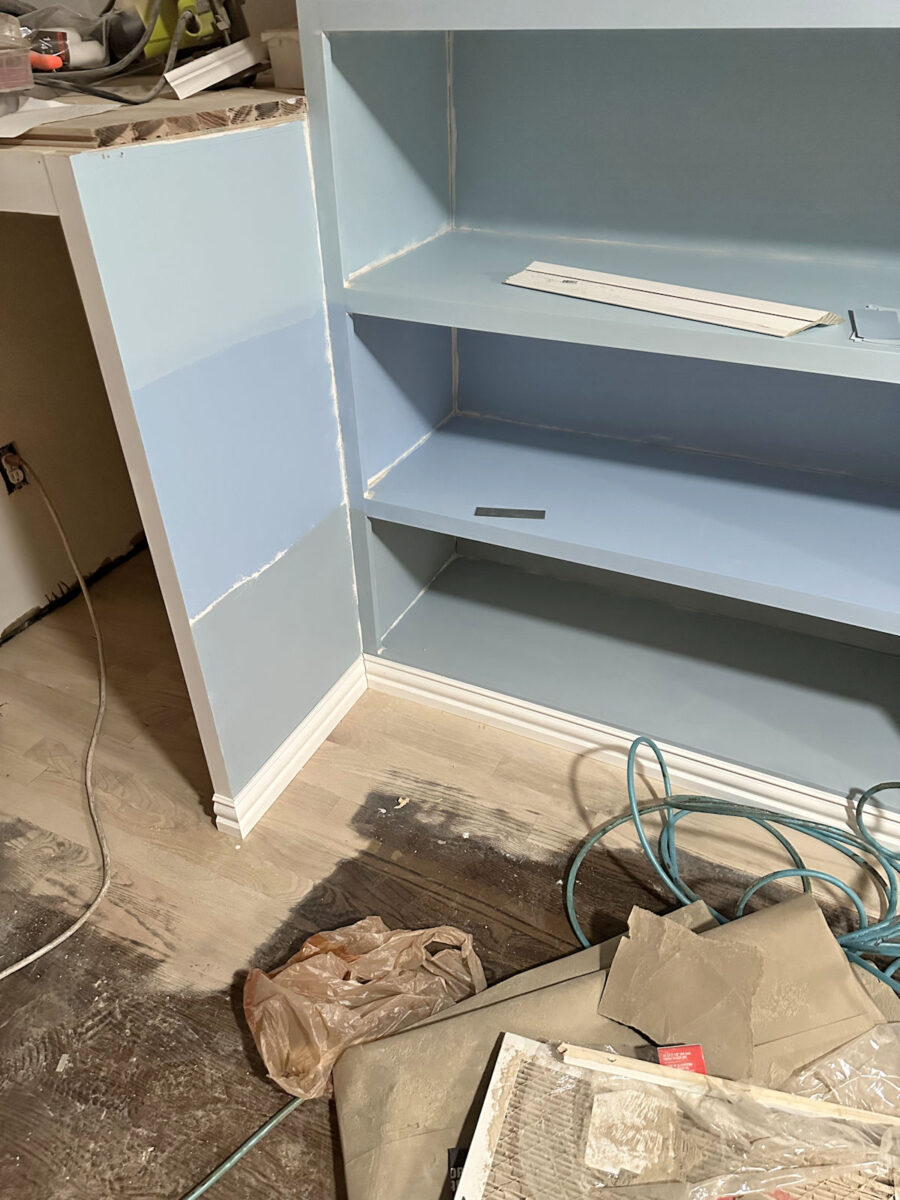
And on this side, I got the little flourishes sanded and primed, but I still need to prime the inside of the cabinets and the shelves…

I also got all of the baseboards attached around the bottom of the cabinets.
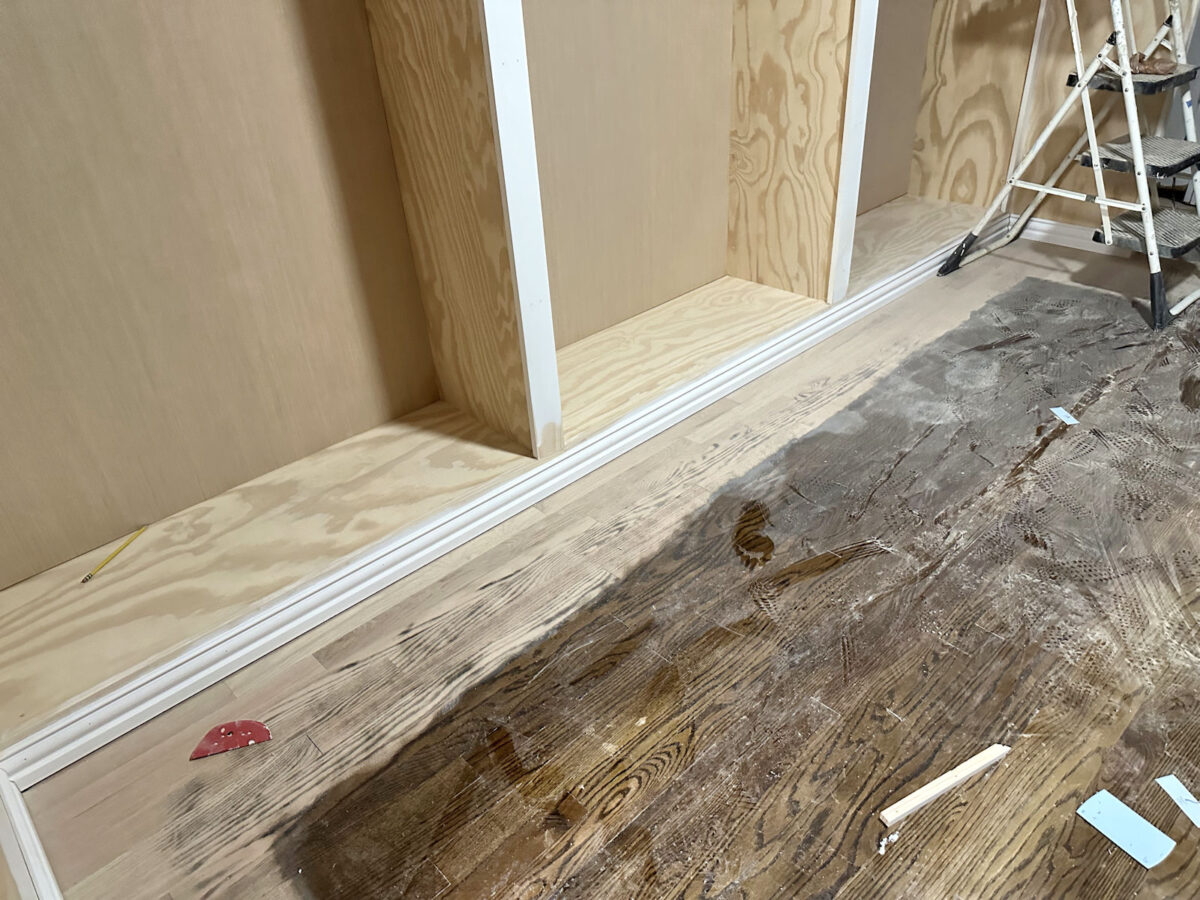
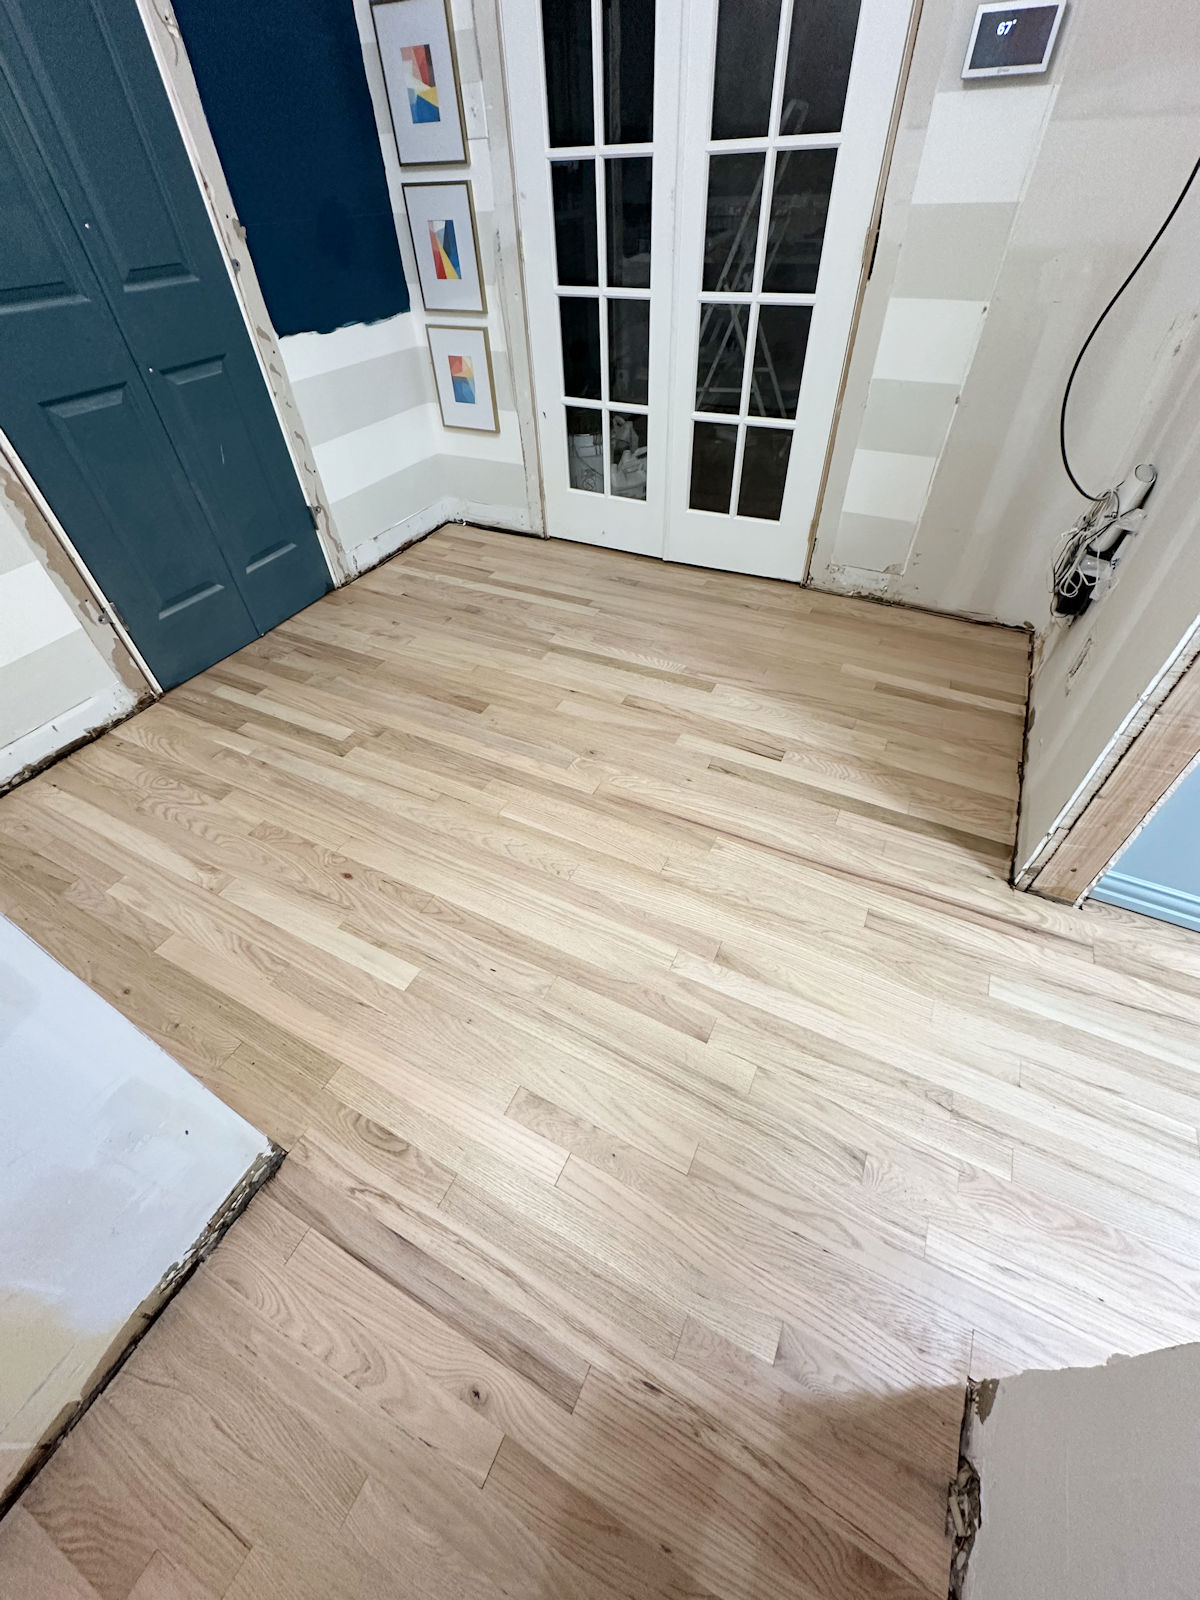
I will be adding shoe molding as well, but I need to get the floors refinished before I attach those.
And then the baseboards continue around the sides of the washer and dryer cabinets to tie them all together and finish off the bottom of those cabinets.
And here’s a look at how they wrap around to the cabinets flanking the doorway.
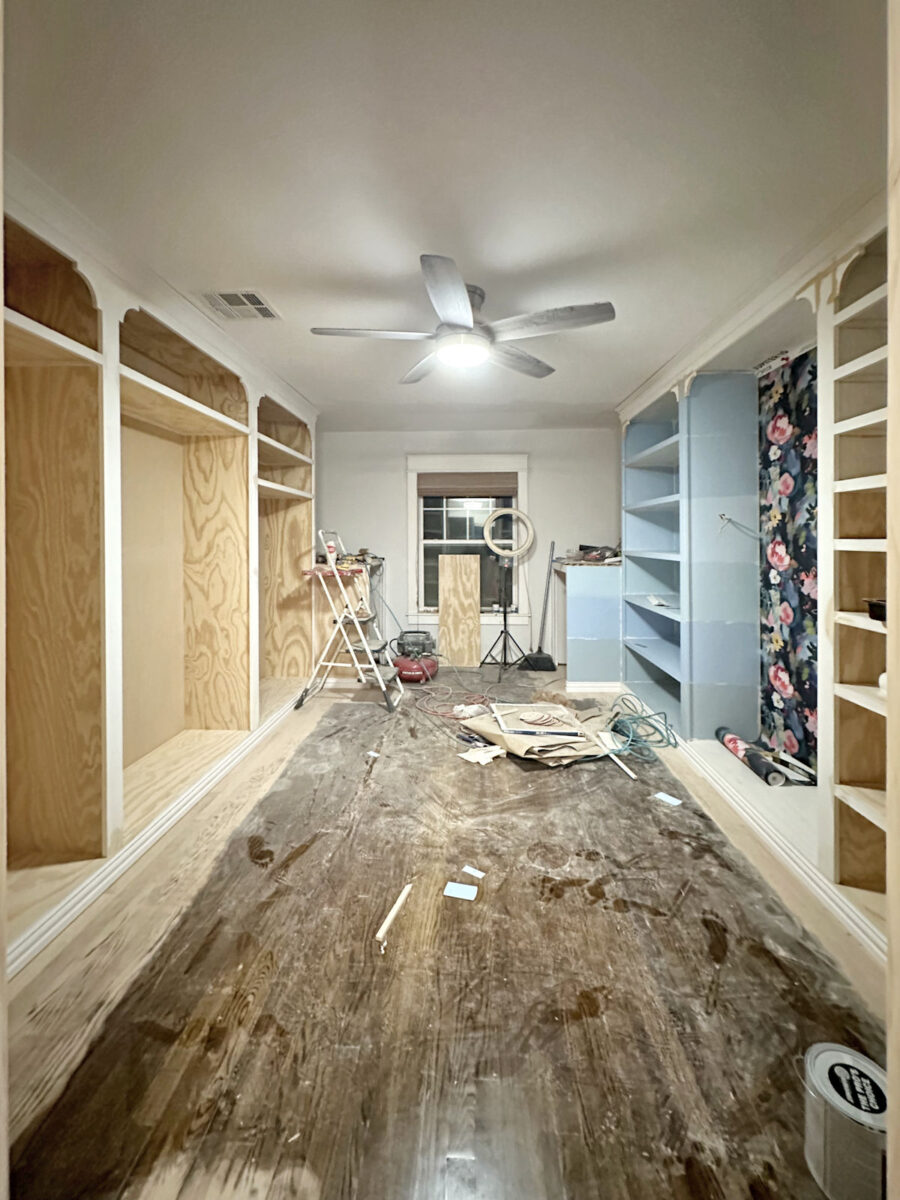
So as of last night, here’s what the left side of the room looks like with all of the trim and molding installed…
Today, I need to get those flourishes (I’m sure those have a proper name, but I don’t now what it is) on the right side of the room sanded and primed, and then continue with priming the rest of the cabinets. I also need to decide if I want to add those other two shelves because if I do, that obviously needs to be done while I’m still in this phase of the project. I don’t want to get all of this primed, caulked, and painted, and then have to go back and add two more shelves.
And I also need to decide for sure if I want doors on the cabinets flanking the doorway. I really like how it looks with the open shelves, and if I want those items out of sight, I could always use pretty baskets to store things.
I just keep thinking that we’ll eventually have an entire storage closet (the current hallway bathroom) where I can store anything I want kept out of sight, and I really like the consistency of having all of the cabinets in this room open. I just don’t know that I want to ruin that consistency by having two cabinets with doors on them. *Sigh* I hate being undecided on those things this late in the project, but that’s how my mind works. I often change my mind and make changes mid-project. I don’t mind changing plans as I go along, but I hate being undecided.
So I’ll be back at it today! More sanding, more priming, and hopefully I can get to the caulking today. And I’ll probably be adding two more shelves before the day is over.

Addicted 2 Decorating is where I share my DIY and decorating journey as I remodel and decorate the 1948 fixer upper that my husband, Matt, and I bought in 2013. Matt has M.S. and is unable to do physical work, so I do the majority of the work on the house by myself. You can learn more about me here.


That little detail looks so good! I love it.
I love the corner decorative pieces. They just add a more finished look to the cabinets. Also the crown molding looks so pretty, your little trick is so clever. I was going to suggest doors for the 2 cabinets because you were going to use them for storage and I know storage places don’t always stay neat. However if you have another place for storage I would leave the doors off. You will fill up those spaces quickly.
It is looking great. It amazes me how much those corner flourishes add to the whole look.
Ok, a few things! What a nice surprise for us! The trim design is simply beautiful! It looks amazing. I would vote keep the other cabinets open, since eventually you will have storage in the bathroom/storage that is private. Next, after following you for so long, it’s why I voted to complete one side and then the other, to give you breaks from the mundane, lol. Of course, it is probavly better to finish everything in complete phases. Finally, I couldn’t see a paint color I preferred, but looking at the pics today I wondered if painting horizontal stripes with several or even 2 colors is an option? For some reason I’m drawn to all those stripes!
If have some wood, could maybe prop them against cabinets to get look of doors.
My vote is no to cabinet doors at the end and yes to pretty baskets. The decorative corners finish it out well, and cabinet doors at the end would be passable but surely not consistent with the rest. My 2 cents.
I am team leave them open! Your trim looks so amazing I actually think the doors would take away from it. You are doing an amazing job as usual! Keep up the good work!🩷
It all looks wonderful! Well done.
Wondering if you will eventually need to add a deflector to your heat duct so you don’t get dust blowing directly on your clothes and shoes? Regardless of changing filters, etc it seems moving air stirs up pet fur, dust. Maybe only a concern for the racks immediately below. Just a thought.
I have temporary clothes rack that I put a clear plastic protective cover over (came with it). Astounds me how much dust collects on it. Once my new closet is built the rods will be more isolated, hopefully less dust. Who knows?!?!?
I’m with several others here…..team, NO doors. I believe it would take away the cohesive look that you now have. Pretty baskets or such would be so much better IMHO. 😁 As you said, you’ll have plenty of storage in the “hall” closet when that is finished.
Will you be installing lights inside your closet and shoe selves? It makes seeing my clothes and shoes much easier once we did but I’m old so…ha 😉
I’ll be adding several recessed lights in the ceiling, but no lights in/on the closet cabinets.
Kristi, it looks so good and I can’t wait to see the progress and the final!! About the doors – what about adding doors to just the bottom half of those units flanking the doorway? I recall that you planned to have your step stool in the one side, correct? Its a nice looking step stool, but do you want that to be something you see every time you leave the room? And, even though you are going to have a separate storage room eventually, you probably won’t want to go there to get that step stool every time you want something from an upper shelf in your closet. Just my thoughts. Whatever you decide, it will be amazing!!
She could always add an inset in the island for the stool storage that would not take up that much room. Or hang it on the end of the island next to the washer/dryer!
That’s what I was thinking! A couple of decorative hooks, knobs, or posts on the end of the island for hanging the stepstool. Easy on, easy off, out of the way, hidden.
It looks great with the flourishes, and with all the shelves open.
It’s all very beautiful and impressive. I’m amazed at how much you do, and also how well you document it. That also takes a lot of time. You are a very hard worker.
It may have been mentioned but if you do, doors. You can hang that stool on the back of door so you can access what is behind it easier. Also gives you a little Monica closet space.
That’s beautiful! Thanks for the tips too! For those that you were thinking of doing doors… Could you hang cute curtains to test it out? I can’t wait to see this done! You are a total inspiration and I wish I had your skills and energy!
The added trim looks so good. Makes the whole room look finished even when it is not.
I’d leave off the doors because you will be making that bathroom into storage very soon. Pretty baskets would look nice.
I see your little barefoot feet prints meaning you probably worked late. You are going to get to the end soon enough!
Have a good week.
I love the “flourishes”. That architectural detail adds so much interest to the cabinetry. The crown moulding you built up with baseboard moulding looks lovely. We used baseboard mouldings with a large crown moulding in our house and I like the extra detail they add.
An after thought. This morning picture of the blues makes #1 my favorite.
Wow, I know it feels slow to you, but I think you’re making great progress! I vote no doors. Especially since your step stool will be there, and I just think it would be so much easier to grab without a door in the way.
Flourishes – aren’t they just called brackets As for the doors, I never understood why you thought you’d need to add doors. I would forget about them and as you said, you can always use baskets or pretty paper covered boxes like hat boxes! Stripes or polka dots to compliment the wallpaper!
😍
What if the doors had mirrors on them?
I was just trying to find some images with open and closed storage, shelves etc and found this one with mirrored doors. Just another idea!
https://www.decorpad.com/photo.htm?photoId=117028
The trim work looks great – it really elevates the whole look! (By the way, newer houses aren’t all straight, level or square either…our kitchen floor is a whole 1/2″ lower on one side of the room, and our place was built right before the millenium!)
Regarding the doors on the cabinets flanking the entrance — I was thinking that mirrored doors would be a fine thing. They would bounce light from the window back into the room. They would reflect that pretty wallpaper on the window wall and thereby get more bang for that buck, so to speak. They wouldn’t have the “closed off” effect of solid paneled doors. And finally, don’t you need a full-length mirror in there to check your outfit?
I love the idea of mirrored doors on those cabinets.