
Back To The Storage Room (And Two Costly Lessons I’ve Learned From Past Room Remodels)
My outdoor projects have to be put on hold for now because of the weather. I spent a couple of hours yesterday trying to work on the exterior bedroom door, but we had gotten more rain earlier in the day, and the mud made the job much harder, slower, and dangerous. Safety tip: Never climb on an aluminum ladder with muddy shoes. So with my outdoor projects on hold until the weather clears up and the ground dries out, I decided to head back the hallway bathroom-to-storage room project and see how much progress I can make on the bathroom demolition.
If you’re new around here, here’s a quick recap to get you up to speed. This is the bathroom I’m working on. It used to be our main guest bathroom, but then I did some remodeling and turned our three-bedroom house into a one-bedroom house with all three original bedrooms subsumed into one large master bedroom suite. That left this original guest bathroom inside our bedroom suite, which is a very awkward layout, to say the least. So I’m turning this bathroom into a much-needed storage room.
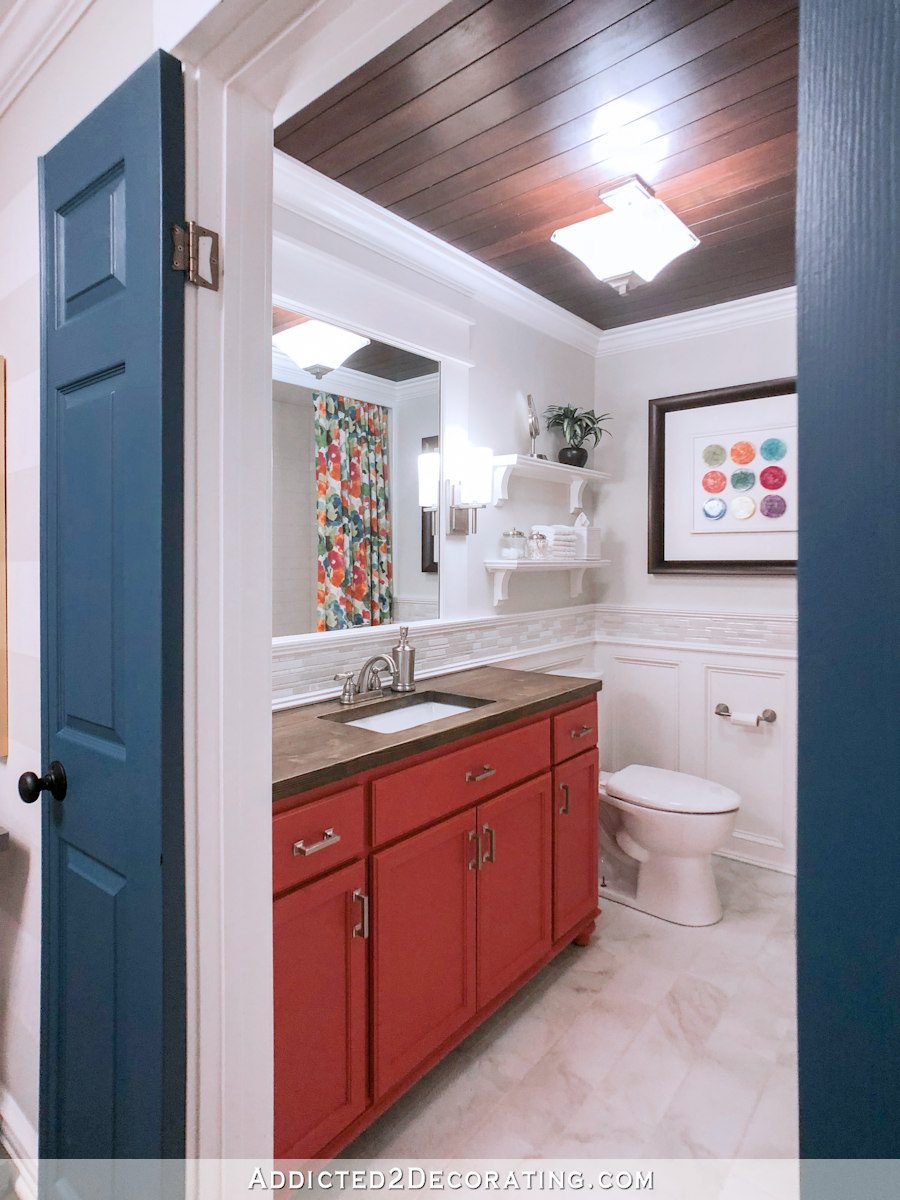
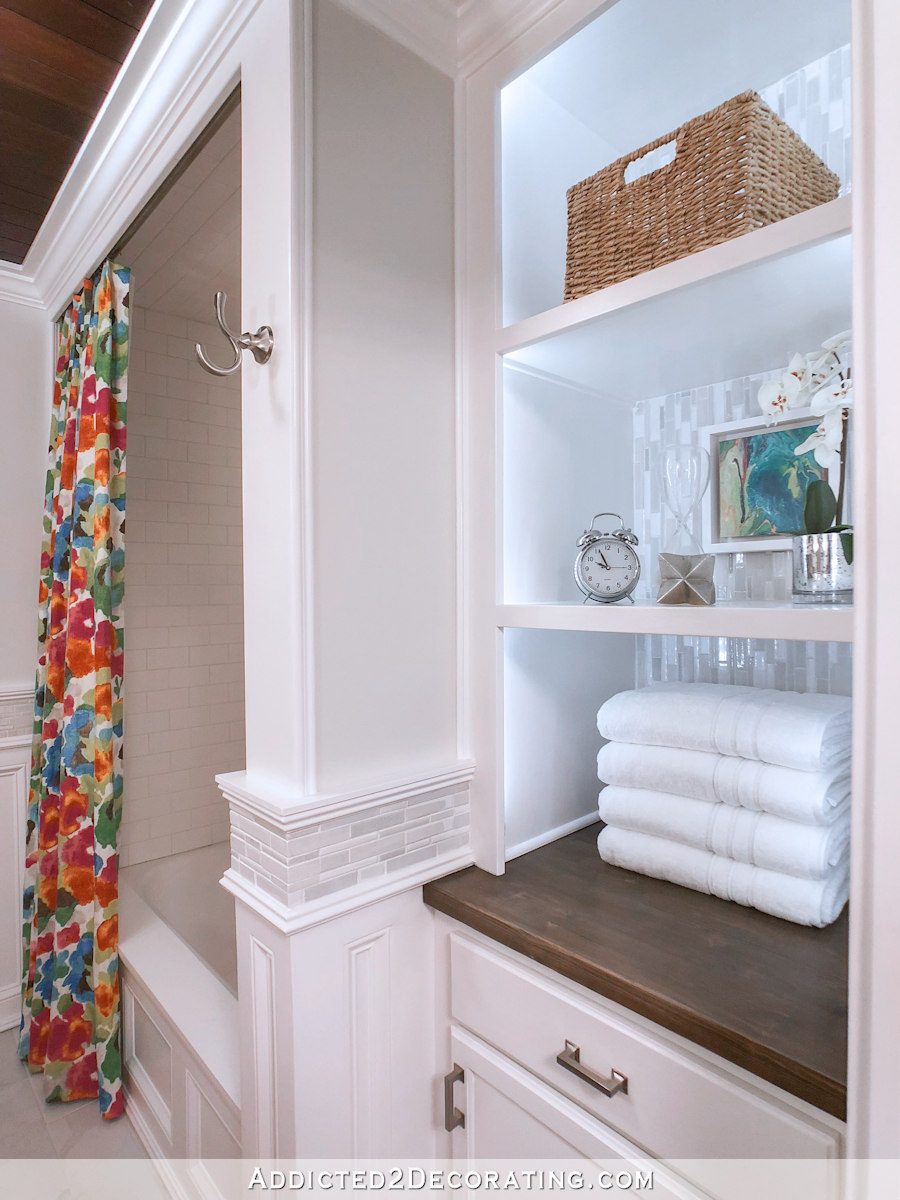
The left wall that had the vanity and toilet in the bathroom will have cabinets that look something like this…
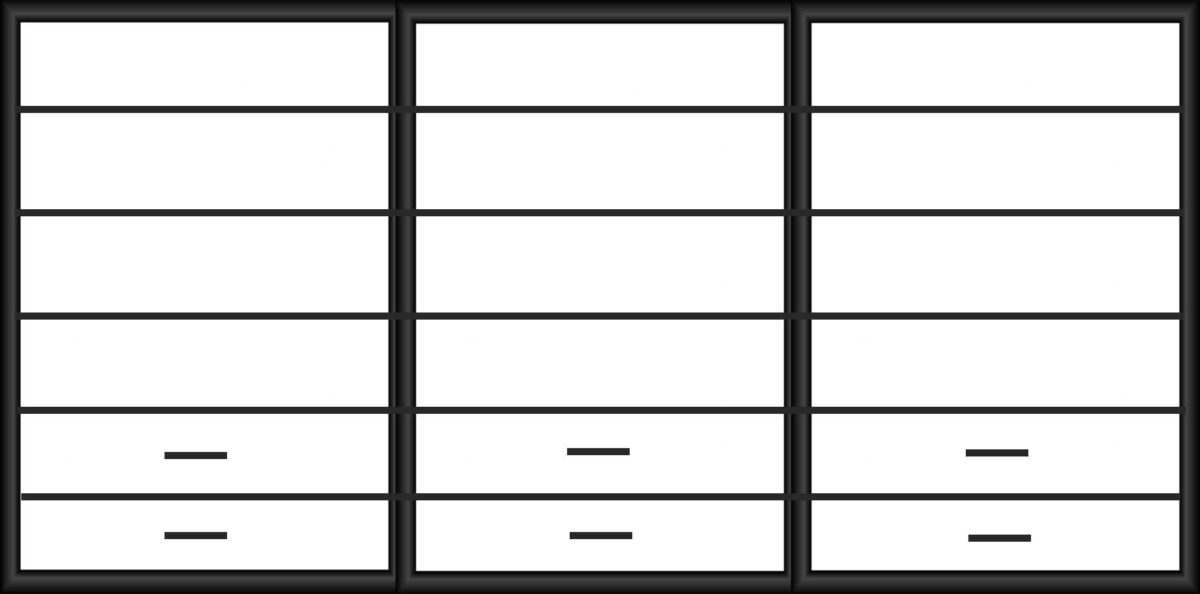
And the opposite wall that now has the bathtub will have cabinets that look something like this…
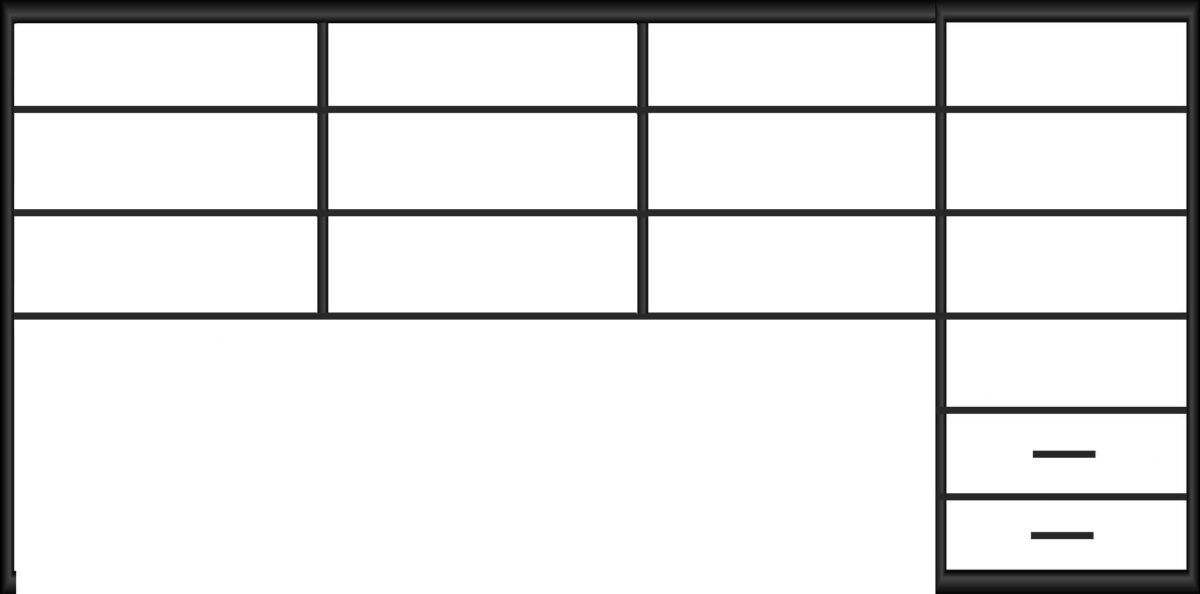
I had already done some demolition on this room a few months back, but having just finished the remodel on the rest of our bedroom suite, I decided that I wasn’t quite (mentally) ready to jump right into another big interior remodeling project. So I closed the doors and headed outside for a couple of months to work on some exterior projects. But over the next couple of weeks, it looks like I’ll be juggling this storage room project and outdoor projects as I finish up the last two exterior projects that I want to finish as the weather allows. Once those are done, I’ll be focused 100% on this storage room.
Anyway, it has shocked me a bit to find that tearing out this bathroom, which was the second room remodel that I tackled after we bought this house, hasn’t been difficult for me at all. I kind of expected to feel some sort of sadness at tearing out all of my hard work, but it’s been a decade since I did this bathroom, so I feel nothing but excitement about the future storage room.
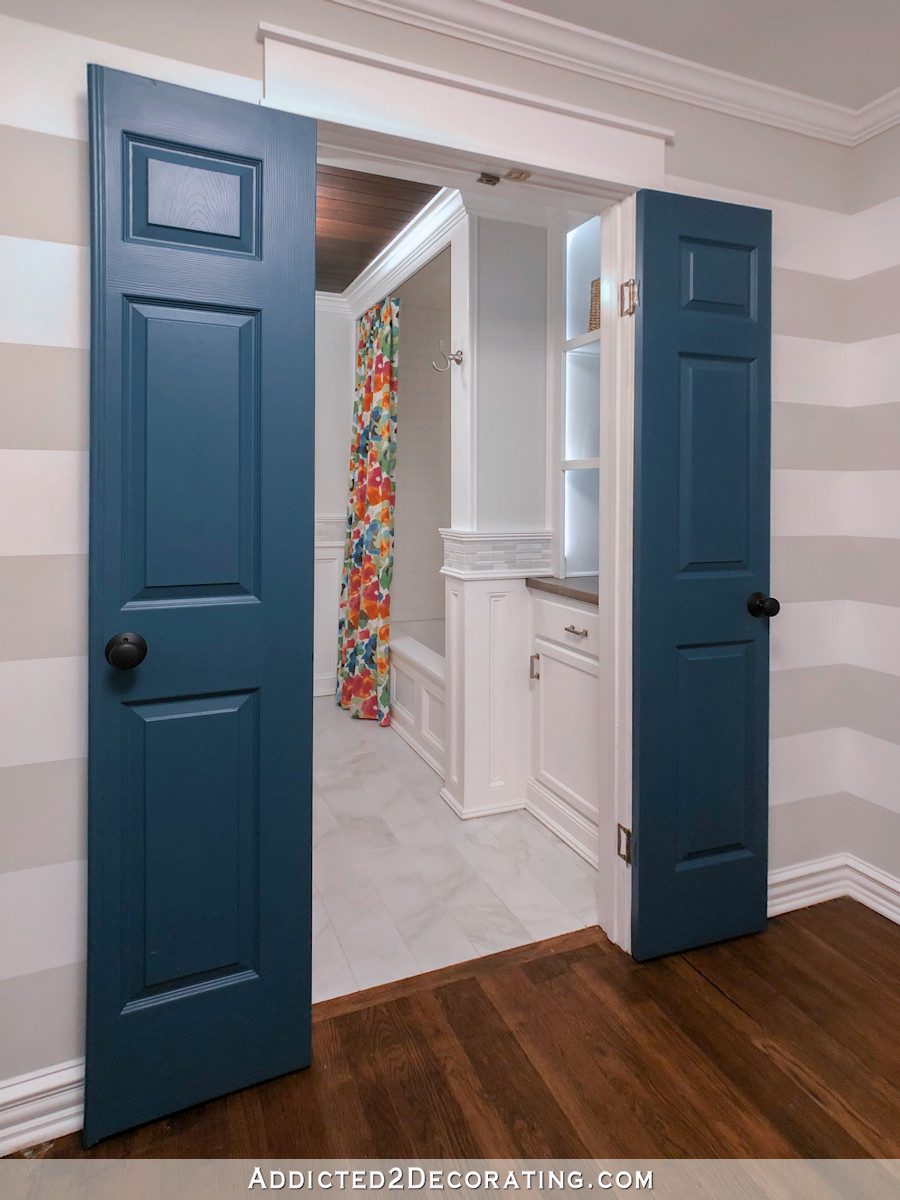
The main thing I got done yesterday was tearing out this cabinets/shelf area that was just inside the bathroom door to the right.
All of that is gone now.
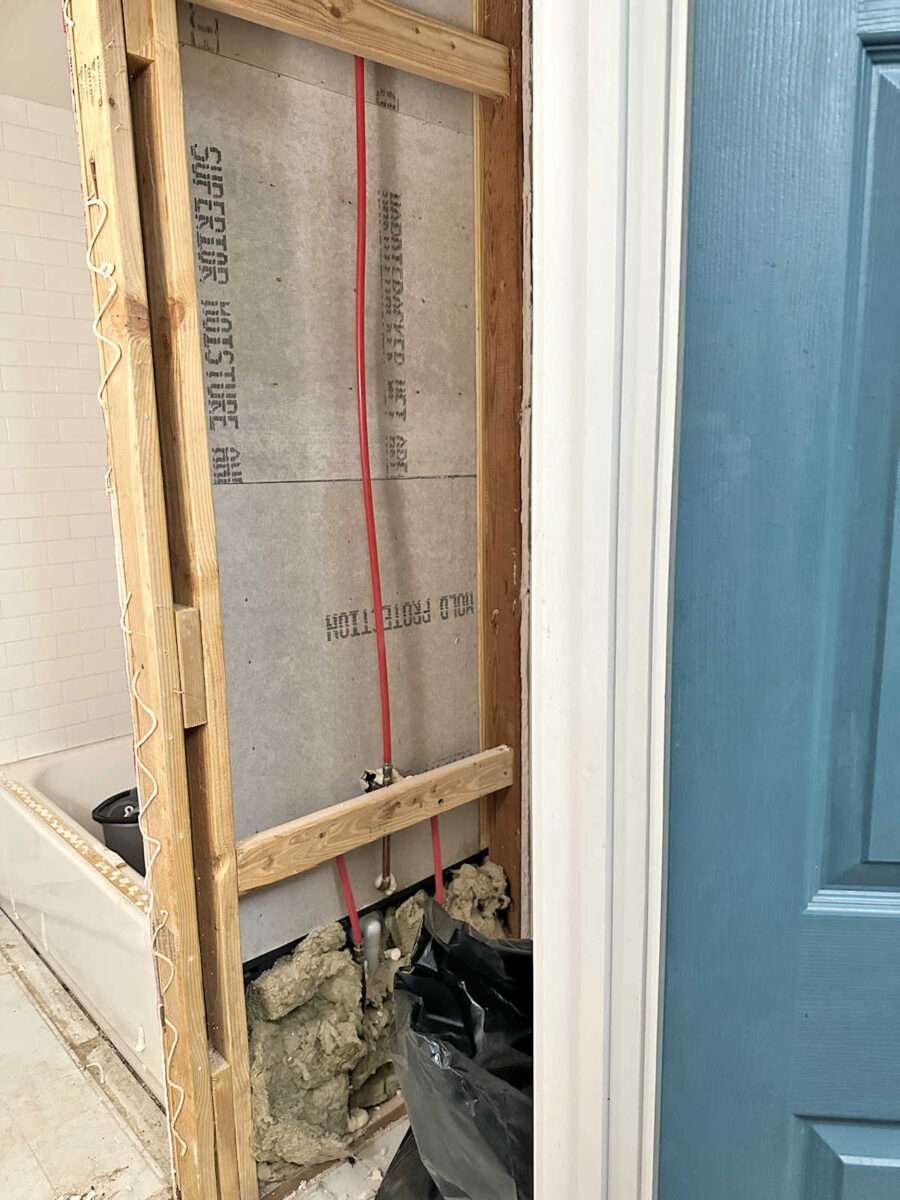
I was thankful that I was able to get all of that out with minimal damage to the drywall. I’m really trying my best to get this demolition done without having to start from scratch on all of the drywall.
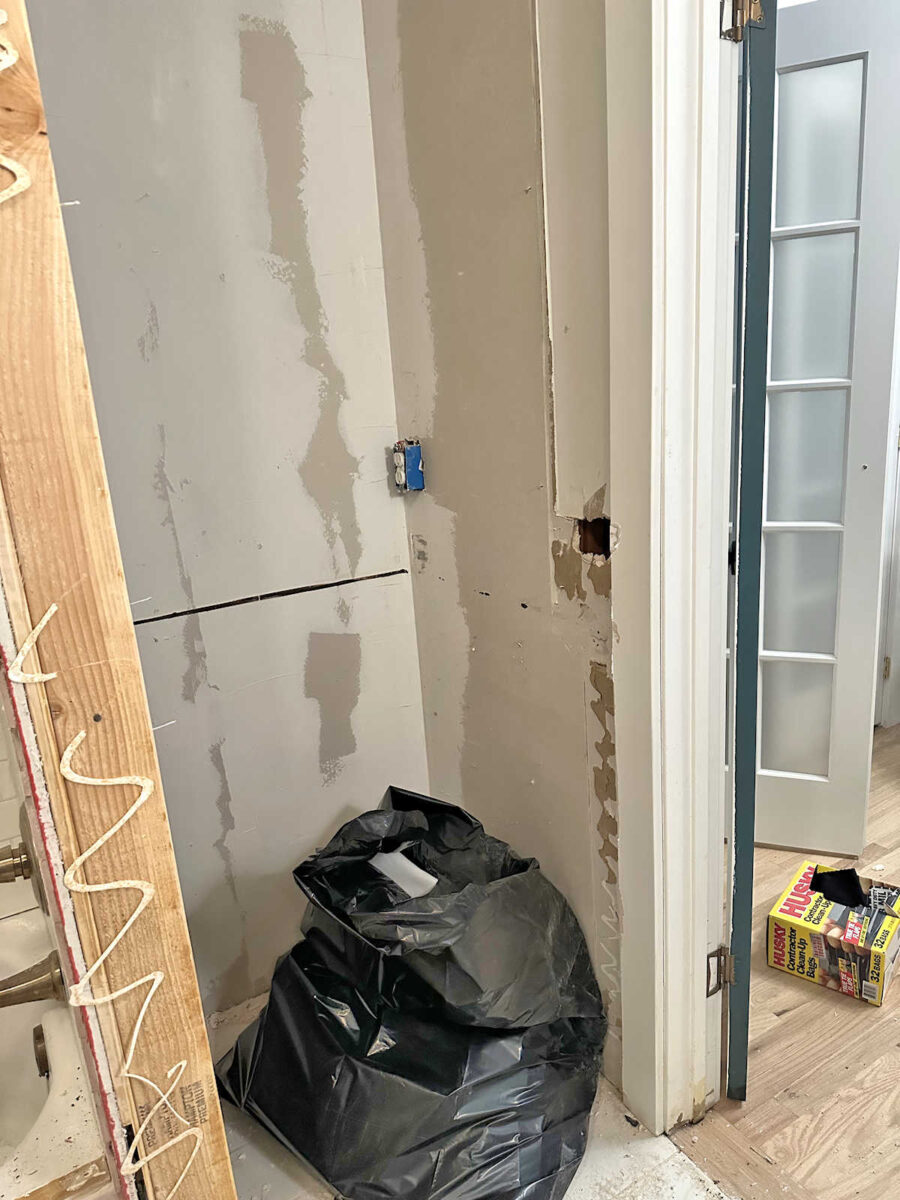
But that brings me to the first of the two big (and costly) lessons I’ve learned over my years of doing room remodels. Number one…
Construction adhesive is not needed on trim!
In my early years of DIYing and remodeling rooms, I used construction adhesive very liberally. Any time I added a piece of trim to the wall, I’d use construction adhesive before nailing the trim to the wall. I used it on every single piece.
I stopped doing this a few years back when I realized that it’s just not needed. When you install trim, you generally follow the installation with caulking around the trim and the priming and painting the trim. The nails, caulk, primer, and paint are plenty to hold that trim in place. Construction adhesive is almost always overkill. But I used to use it on everything.
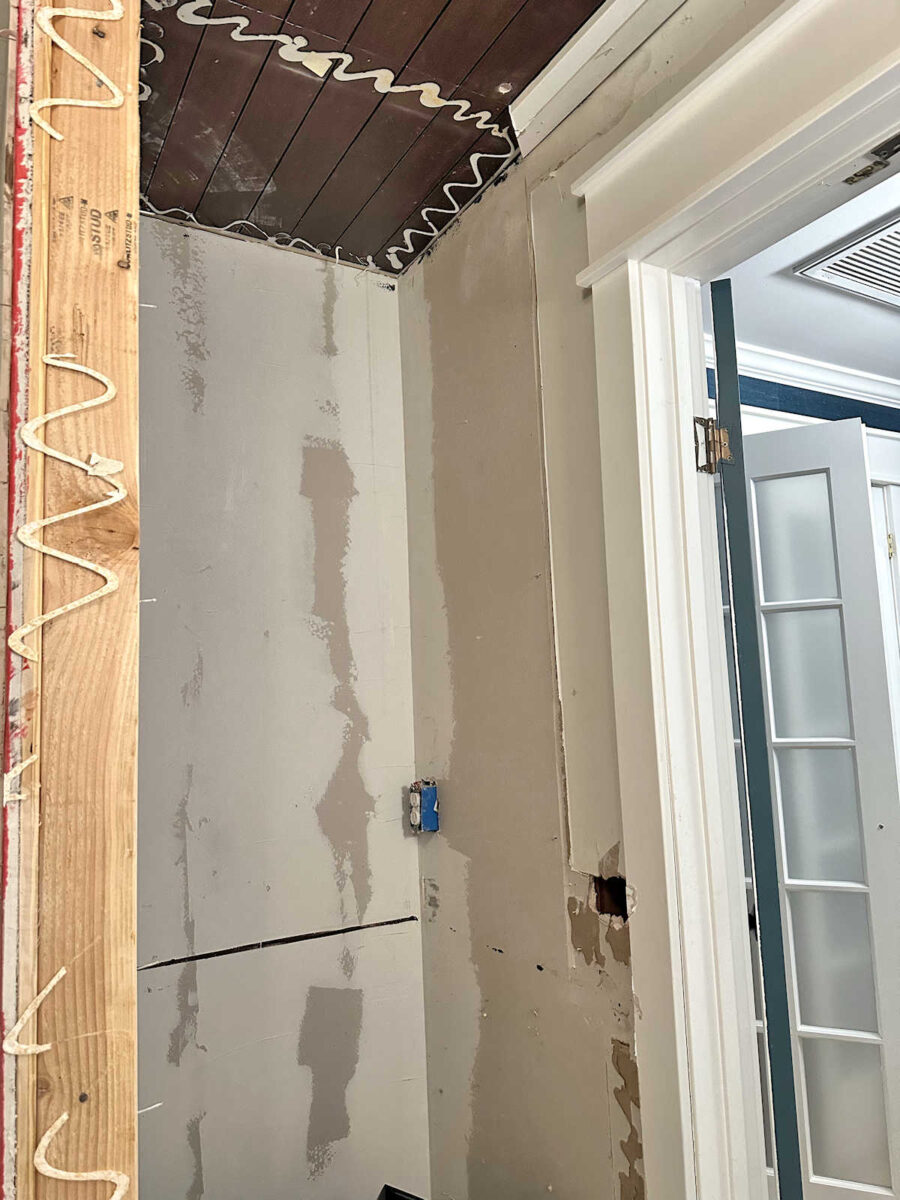
Not only is it an unneeded added cost to the project, but if and when you decide to remove the trim, that construction adhesive is nothing but a nightmare and it will destroy the drywall as you try to pull that trim off of the wall.
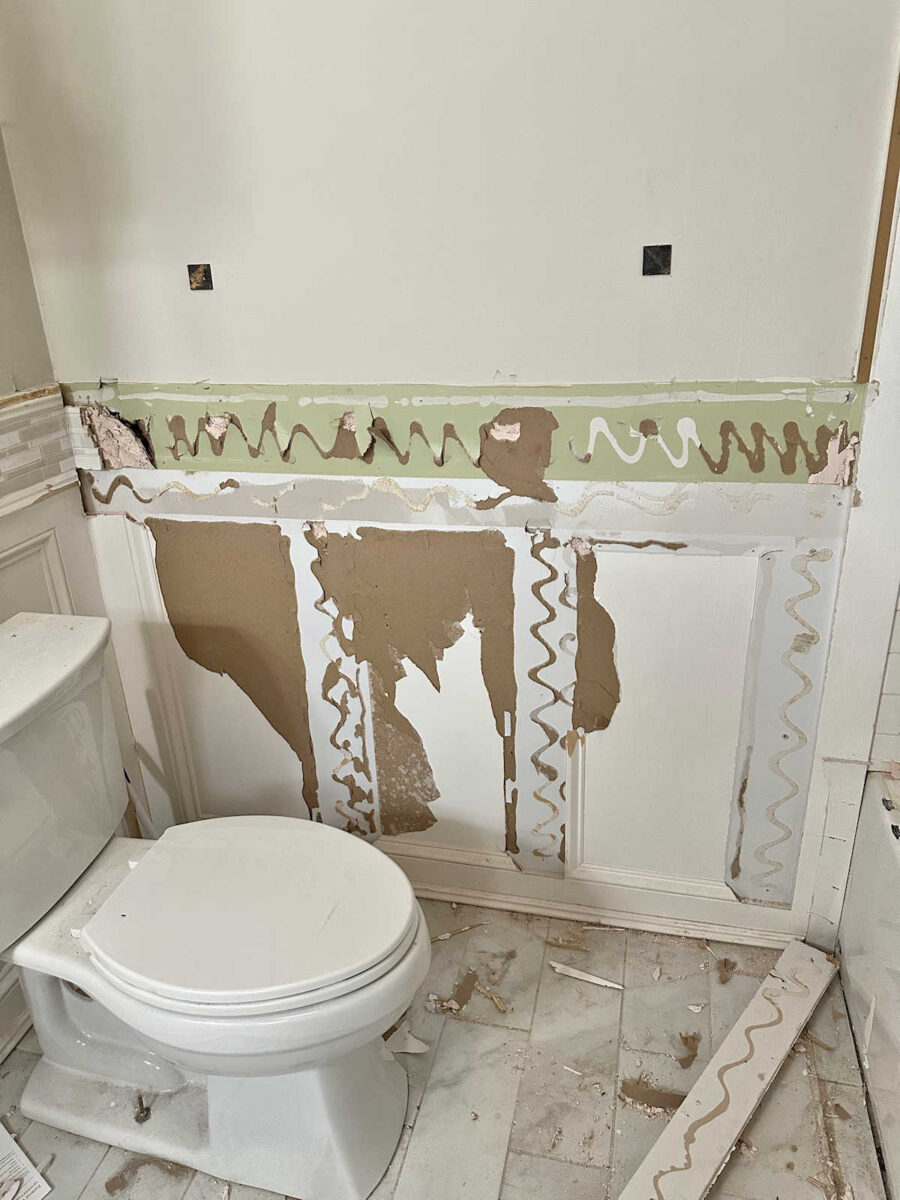
Without the construction adhesive, all of this wainscoting could have been pulled off of the walls with very minimal damage to the walls. I simply would have had to score the caulked lined with a utility knife, pull the trim off of the walls, do a bit of sanding, and then the walls could have been painted (or textured and painted if wall texture is your thing). But because of that construction adhesive, I’m left with a much bigger job.
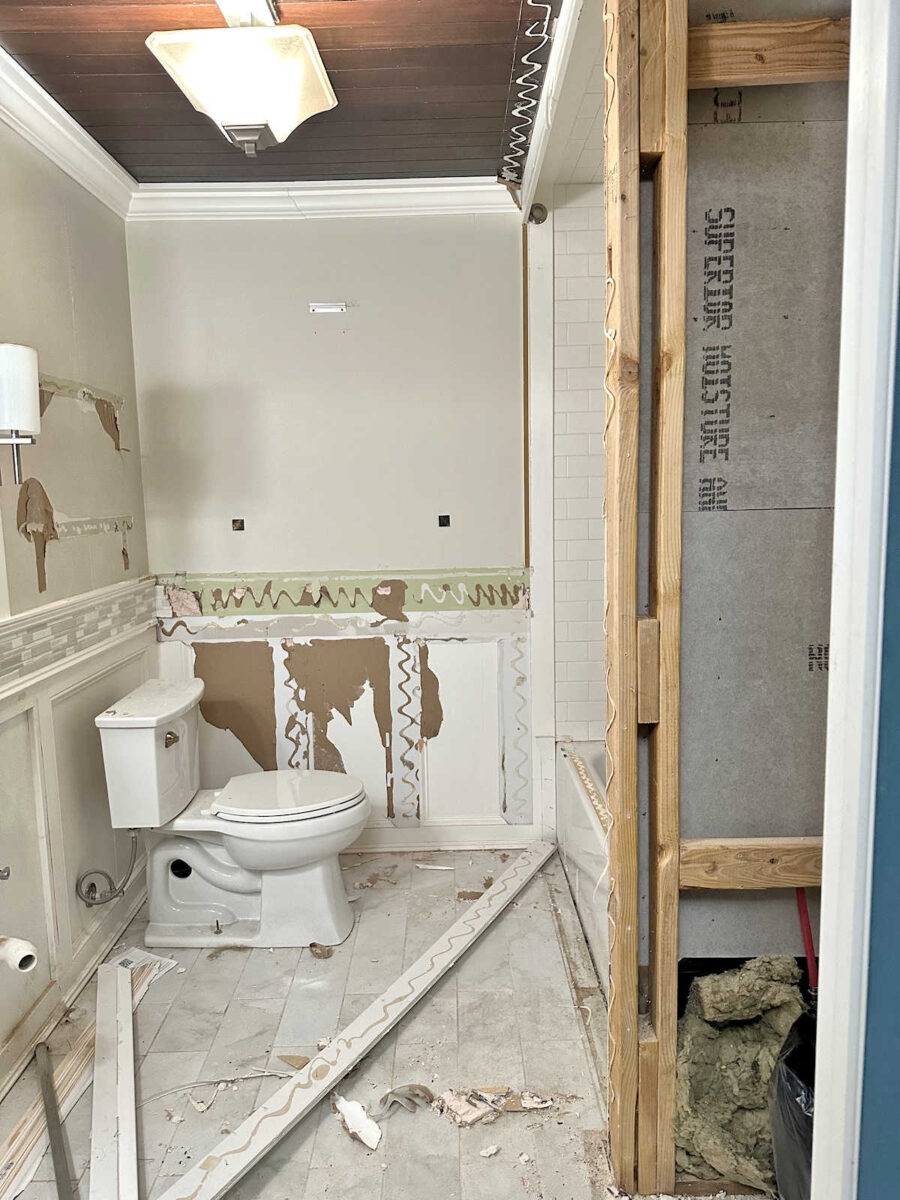
The same goes for mirror mastic. I’m not saying that mirror mastic isn’t needed in some situations. It was definitely needed on this mirror with this design that didn’t allow for mirror clips that screw into the wall. But just a dollop of mirror mastic in each corner is enough. I can almost guarantee you that I put mirror mastic on the entire back of this mirror, which will make it a nightmare to remove and will probably leave me with completely destroyed drywall once it’s off.
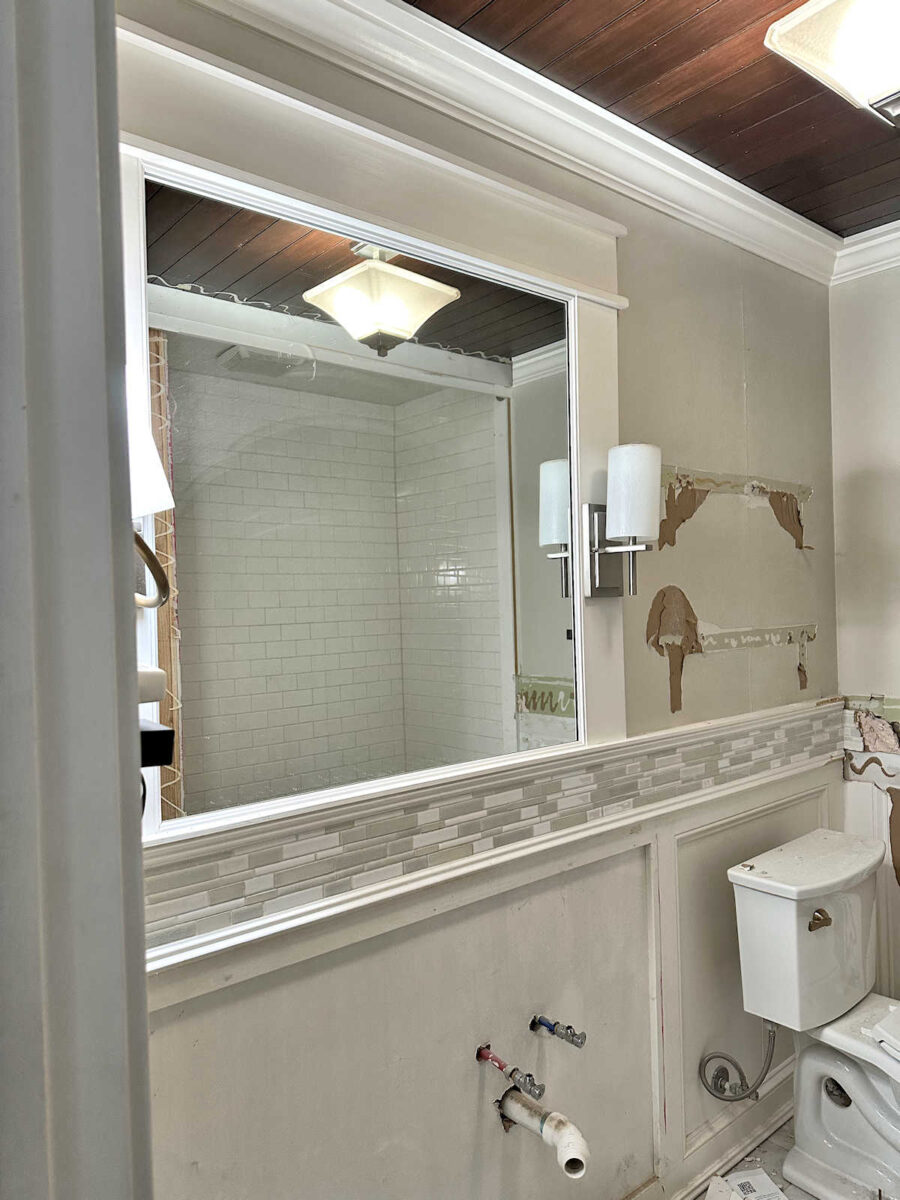
I’ve learned a lot in my years of DIYing, and one of my main lessons is that this kind of overkill will always come back to bite you. It’s just not needed, and it adds extra expense to a project.
And lesson number two…
Always install flooring first (and purchase extra to keep on hand)
I know this isn’t always possible, but I sure wish I had installed the flooring first, all the way under the bathtub, and then installed the bathtub on top of the flooring.
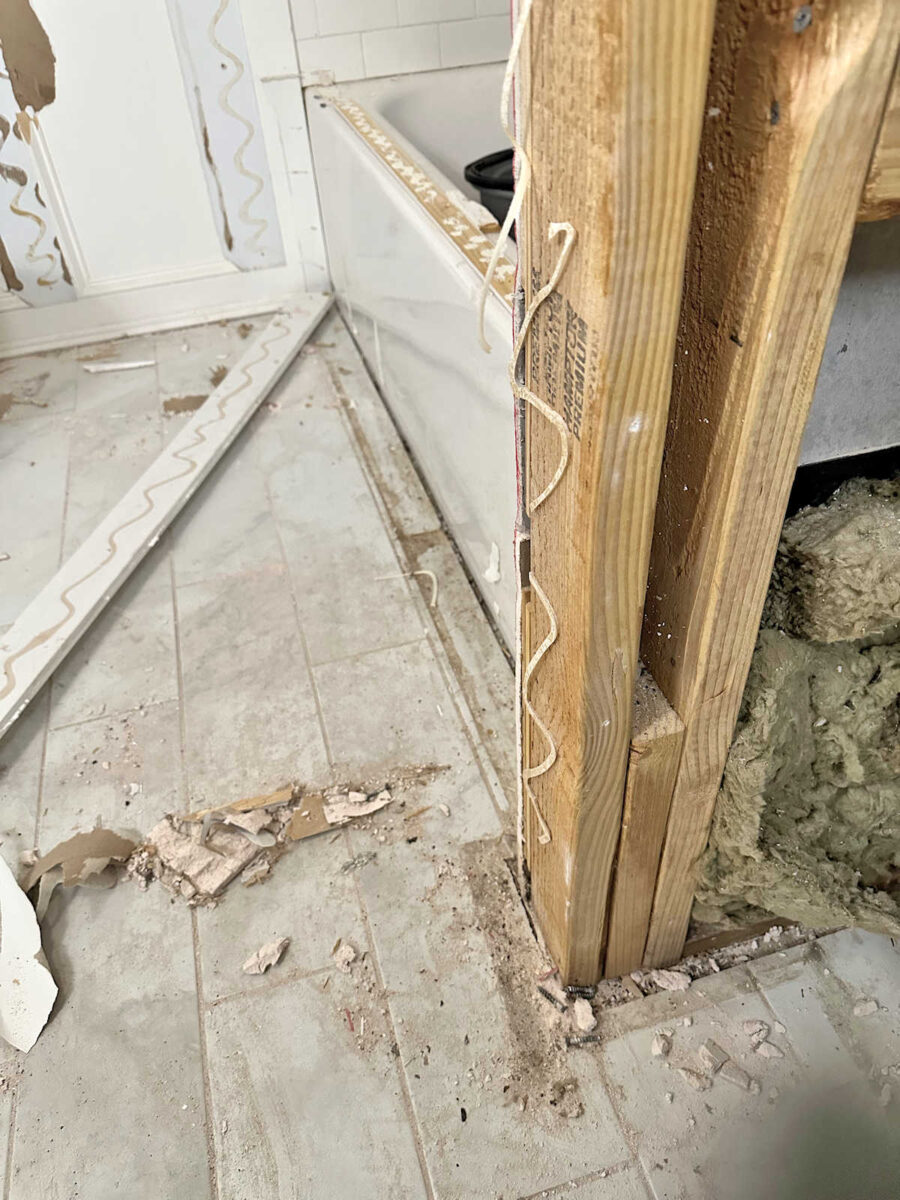
When you don’t install flooring first and you don’t take it all the way across the room, wall to wall, but instead, you place the flooring around fixed items in the room (like vanities, bathtubs, kitchen cabinets, etc.), it will always cause problems if you decide to remodel and rearrange a room.
I’ll be left with this huge area that doesn’t have flooring, so now I have to decide what to do with this floor. Since I can’t find tile to match this decade-old tile, do I fill in with tile that’s “close enough”? Do I redo the entire floor? I could have saved myself a huge headache and extra cost had I not only put the tile in first, wall to wall, before installing the tub and other fixtures. But I’ve also learned that it’s always a good idea to purchase a couple of extra boxes of tile to have on hand for this exact reason.
But unfortunately, I’m left with no tile under the tub, and no extra boxes of tile. So now I have to figure out what I’m going to do about this flooring. I could have saved myself time and money had I spent the extra bit of money back then and tiled the whole floor and purchased a couple of extra boxes of tile to keep on hand. But that’s the DIY life, right? We live and learn from our mistakes.

Addicted 2 Decorating is where I share my DIY and decorating journey as I remodel and decorate the 1948 fixer upper that my husband, Matt, and I bought in 2013. Matt has M.S. and is unable to do physical work, so I do the majority of the work on the house by myself. You can learn more about me here.
I wonder if the same brand of tile has a similar enough product that you could get enough to fill in the open spots and then paint it all (old and new) one color with durable floor paint?
You don’t have to use regular floor paint now. There is a new paint specifically made for ceramic or porcelain tile. Similar to reglazing a tub. Prep work involved.
So excited to see this little room come together. It was such a lovely bathroom, but it will be so nice to have a handy place to store things!
I am such a slow to action redecorator, that I am still wanting to do a ceiling like the one in your bathroom and have not even begun to think where I could put it! And your bathroom is already served its purpose for a decade. Yikes! Where does the time go!
Thank you for all your amazing ideas!!
I’ve got an idea for the floor. Add some tile of the same thickness to the empty spot- just pick something cheap, even if it doesn’t match. Then, you can put a nice LVP floating floor over the tile base. A good transition strip at the door will take care of the floor elevation difference. Boom! Done!
Not a bad idea! It is after all a closet.
My choice would be remove the tile and install hardwood flooring.
I’ve always loved that bathroom and am sad to see it go. I wish I could have just picked it up and dropped it in my house 😀 But time changes the needs of a family sometimes and things need to change. Looking forward to seeing the new beautiful storage room that will make your life so much easier.
Oh, me too! I’ll never have such a nice one…the tile, the little alcove shelves, the trim…and yes, that ceiling! All just so well done
If we are not learning, we are not trying, and I’d rather be trying and failing than not trying at all. Considering all the equipment that will shuffle in and out of this storage space, perhaps tile is not the best choice, look at it as win in the chance to pick something that will take that abuse, hide a multitude of sins with dog and cat hair and wheel marks, and perhaps something beautiful and exciting will show up and give you that artistic flare that you always crave and need in your projects…hey, it’s just flooring…it doesn’t have to be boring. I know, cheesy rhyme. Stay safe and enjoy the demo.
Cheers to you, Matt and the Fur Helpers!
It is good to learn new things!
Yep, those DIY lessons are sometimes difficult to learn. But wouldn’t you want the flooring in the storage closet to match the other flooring in the bedroom foyer and bedroom?
You could fill in the areas with plywood, same thickness as the tile. Lay over it with LVP. The have “tile look” LVP. That way it wouldn’t clash or be hard to match up with your hardwoods.
Or you could add any same size tile and paint the whole floor the same color.
Hard to believe that was 10 years ago. I loved that bathroom. I remember when you were doing your condo. I ordered some fabric you used to make a shower curtain- it would not meet your standards, but I still have it and get a lot of compliments on it. That was the 1st room I did to get out of the Tuscan theme I had everywhere!
Excellent lessons to pass on! I learned early on that DIYers tend to seriously overdo fasteners. IT’S NOT GOING ANYWHERE. Lay off the nail gun, the adhesive, the screws! The next person to remove your work will bless you. Live and learn… 😊