Bedroom And Foyer Progress — The Stripes Are Almost Gone
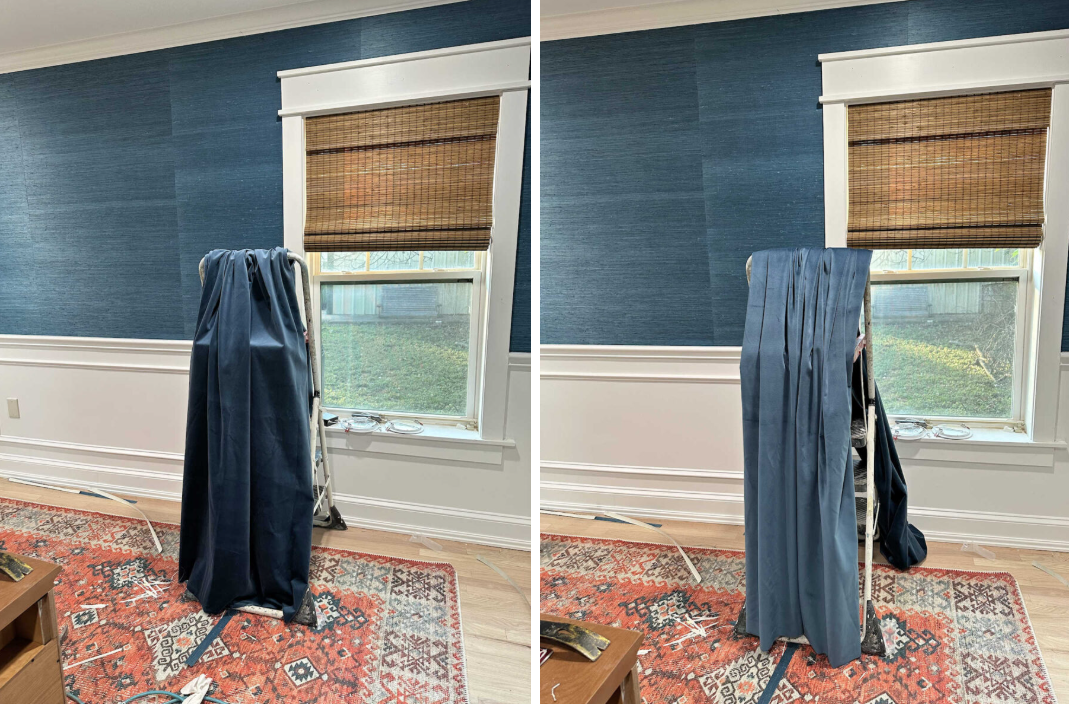
I am so close to being ready for primer on the foyer and bedroom walls. It has been quite the process getting to this point. I tried to get the walls ready for primer last week, but the plastic between the foyer and the finished closet wouldn’t stay up, so I finally just gave up and took the holiday weekend off. But this week, at the suggestion of many of you, I used thumbtacks (actually, really big pushpins) to hold the plastic to the ceiling, and that seems to have done the job.

The tape on the side cabinets still won’t stay in place, and I realized that it’s because of the force of the air movement that’s blowing into the room through the air vent, and then the pull of the air into the intake vent in the hallway. The plastic starts billowing out towards the foyer, pulling the tape off of the cabinets, and I have to keep going back and pushing it back in. But at least it has stayed attached to the ceiling, so that has made things so much easier and less frustrating. Patching those tiny holes from the pushpins won’t be difficult at all.
Earlier in the week, I finished up the sanding in on the foyer walls. They still look like a complete mess, but they’re smooth and ready for primer. And then I turned my attention to the bedroom. I couldn’t just prime over the stripes on the bedroom walls because those areas where I had taped off those white stripes left ridges. They were slight, but they would have shown through a coat of primer. I had considered filling them in with drywall mud, but I ended up sanding the walls instead to smooth out those ridges.
I was pretty shocked at how difficult it was to get those ridges smooth. I started out using 120-grit sanding discs on my little 5-inch sander, and those sanding discs did virtually nothing to that paint. Then I tried 100-grit, and while those worked better, I was having to swap out sanding discs about every two stripes.

So I finally gave the 80-grit discs a try. I was nervous to use such rough sanding discs on drywall, but it seemed like my only option. Those actually worked really well for the most part. They certainly made the job go much faster, but it took me a minute to get right.
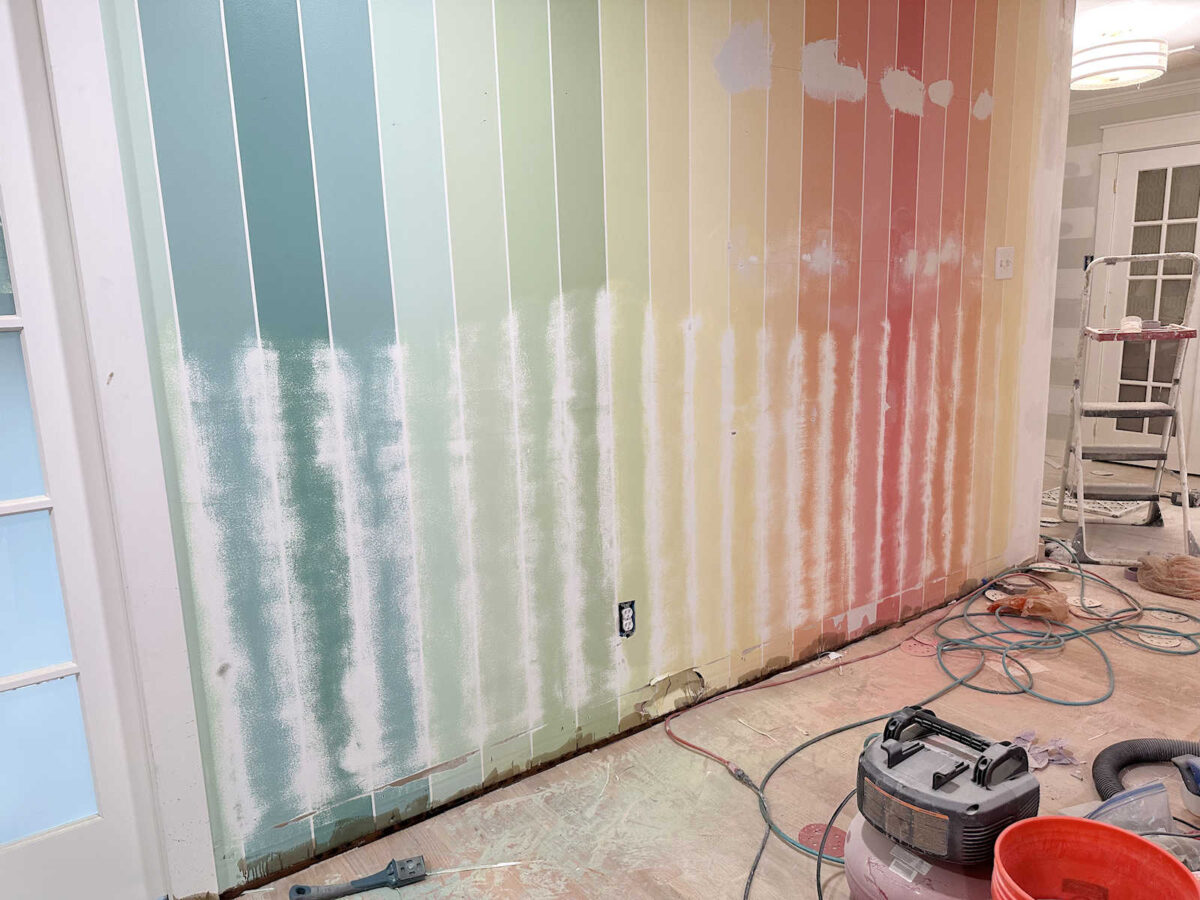
As long as I held the sander perfectly flat against the wall, it worked great. But when I use my sander, I have a tendency to put more pressure on the front of the sander, like I’m just using the edge of the sanding disc instead of the whole flat sanding disc. I’ve found that that works great when trying to sand a thick coating off of wood, but when sanding painted drywall like that, it does this.

Using my sander like that is such a habit of mine that I had to be very conscious and intentional about holding it perfectly flat so that I had fewer areas like that. If I have any areas like that under the 35-inch mark where the chair rail will go, they’ll have to be repaired before I can prime the walls. Fortunately, I don’t think I have many of those areas. I think there are about two or three that I have to fill and sand before I prime.
I decided not to sand the top portion of the walls because I’m about 99% confident that the grasscloth is thick enough that those minor ridges won’t show once the grasscloth is up. So I only sanded from about the 40-inch mark and down.

This wall caused me so much confusion at first. As I was sanding, I expected the areas that I was exposing to be white, just like they were on the other wall. I couldn’t figure out why these weren’t white.
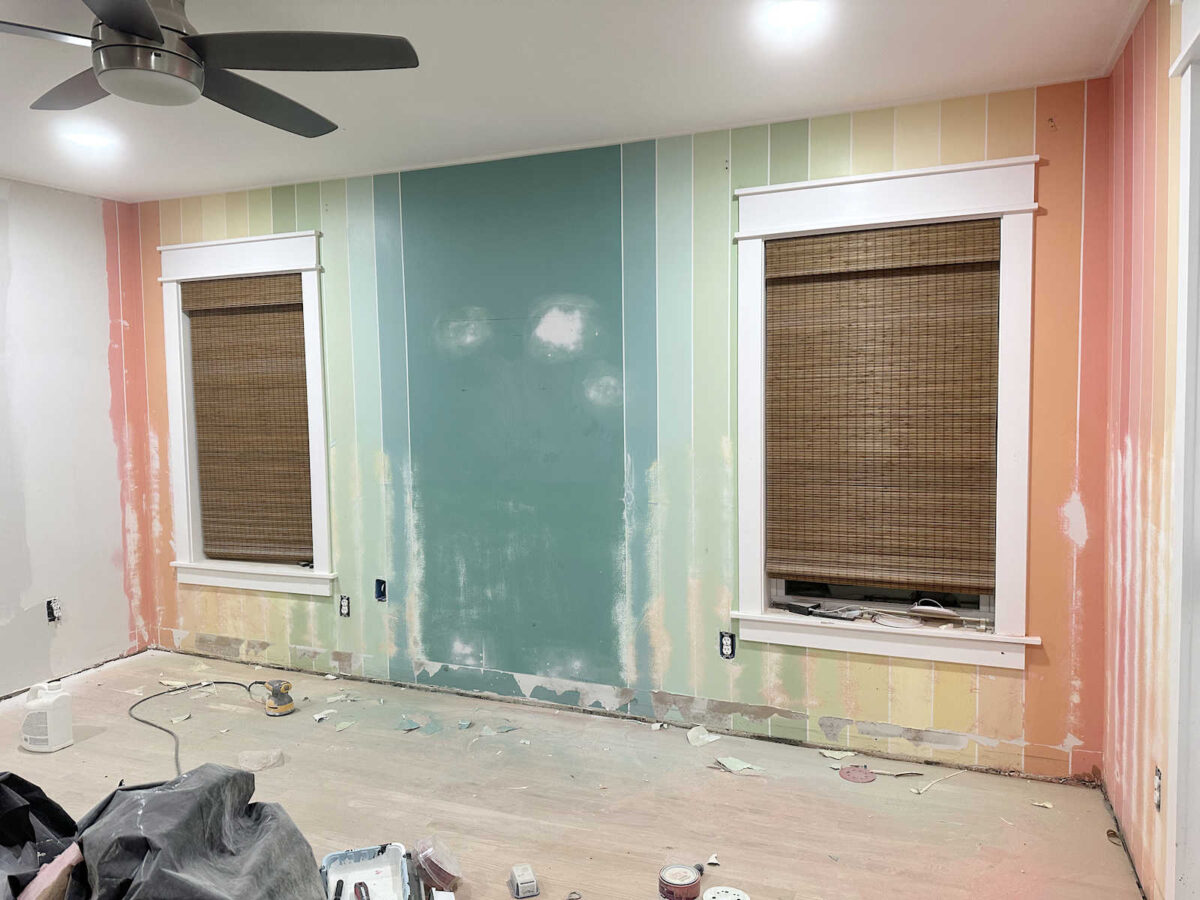
I thought maybe the sanding disc was just getting too hot, and instead of sanding the paint off, it was kind of melting the paint and the red color of the sanding disc was kind of mixing in with that melted paint. I’ve had my sander get so hot before that it started melting and smudging the painted finish rather than sanding it off.

But it wasn’t hot at all. It took me a few minutes to remember that I had originally tried painting some sort of freehand design on this wall before I went back and did the stripes. Do y’all remember this? I had completely forgotten about this. 🤣

Oh my goodness. Just one of my many wayward project attempts. Evidently, I was trying to turn our home gym into a daycare. I’m so glad I ended up going with the stripes!
This wall didn’t require much sanding at all. I still need to sand that yellow stripe, on the left side of the door, but I was too tired to do that last night. It’s so close to the area that they just finished up during the door installation, and I didn’t want to mess that up. I might actually use drywall mud on that one stripe so that I don’t take a chance of messing up the areas they just finished.
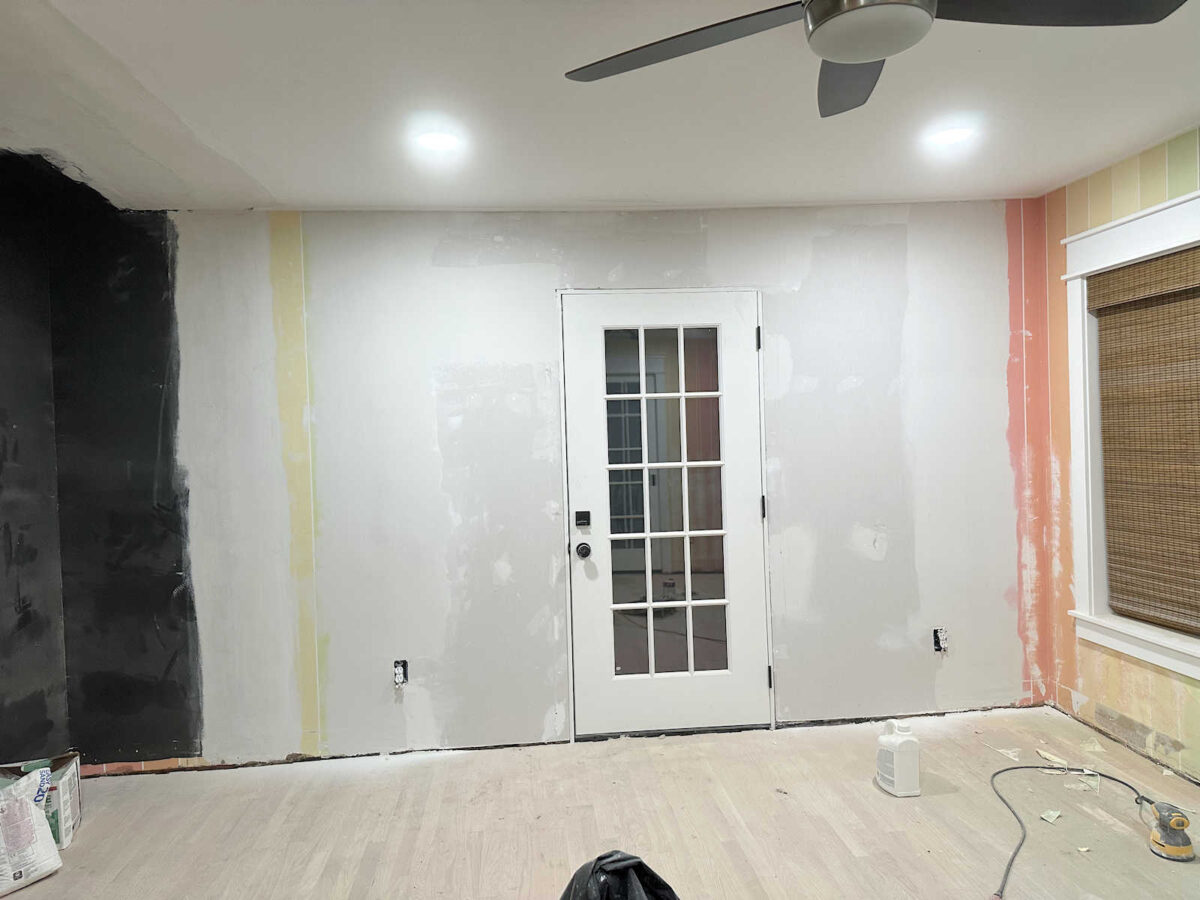
So I got all of that sanding done last night around 8:15 and thought I only needed to do a little bit more sanding today and then I could get to priming this afternoon. And then I noticed…
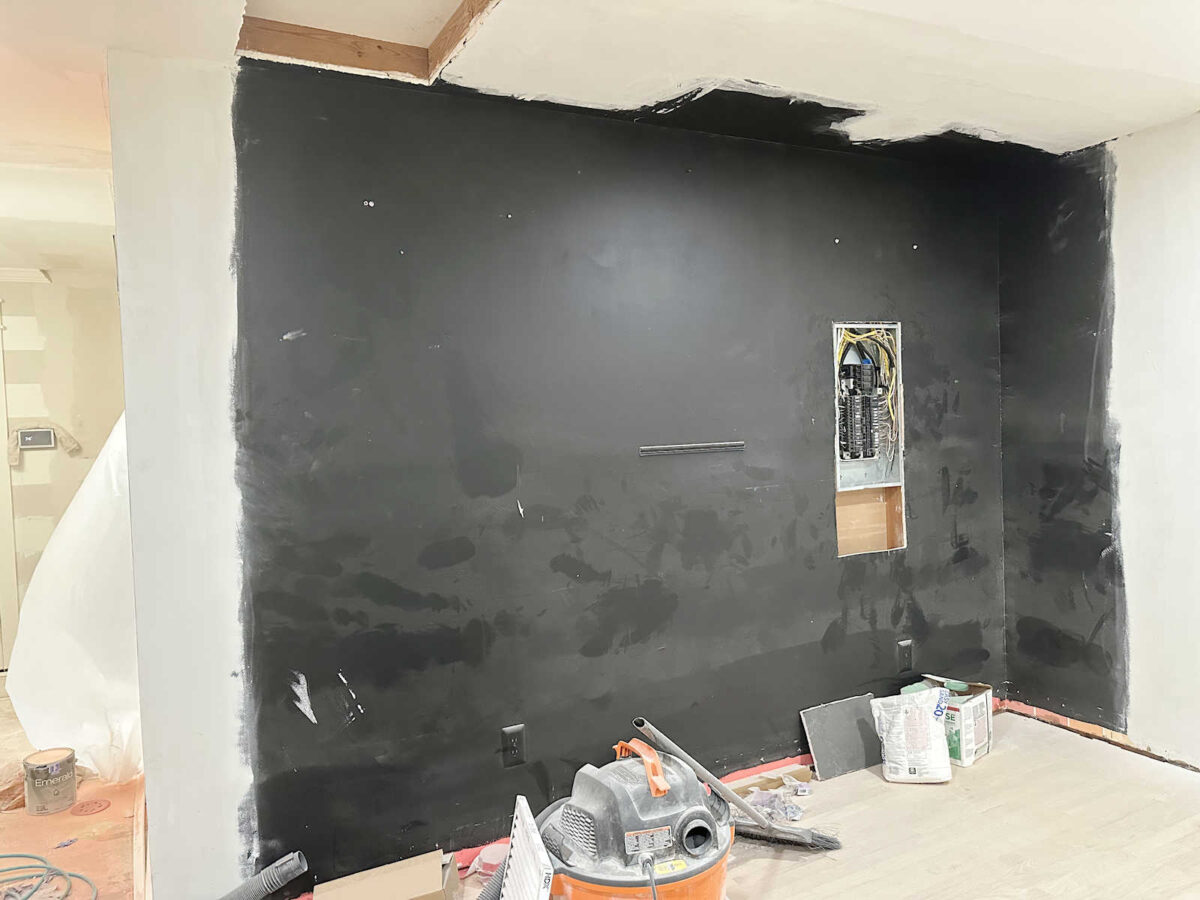
…I never did patch the drywall underneath the breaker box. UGH!!!!! Somehow, I completely overlooked it. Hopefully I can get that patched this morning, and then maybe, hopefully, the drywall mud will be dry by mid-afternoon when I’m ready to start priming the walls.
And somehow, I also overlooked those areas on the top of this wall that still need to be sanded. I was so focused on the bottom portion of the walls that I didn’t even notice those. But those will take less than five minutes to sand.

The biggest job will be cleanup, which I’ll have to do before I can even think about priming the walls. I know my mess will give some of you a panic attack. I’ll get comments, and probably even a couple of emails, about covering my floors.

Y’all know those are going to fall on deaf ears. 🤣 I’m a messy DIYer. I always have been, and I always will be. It’s just my process, but it always seems to work out in the end. A little bit of dust (or even a whole lot of dust) won’t damage these floors. I promise. 😁 But it will be quite the task to get it all cleaned up before I can prime.
So while there are still remnants of my fun striped walls at this point, they’ll be completely gone by the end of the weekend. I’m a little sad to see them go, but they’ll live on in the many pictures I have of what this room used to look like.
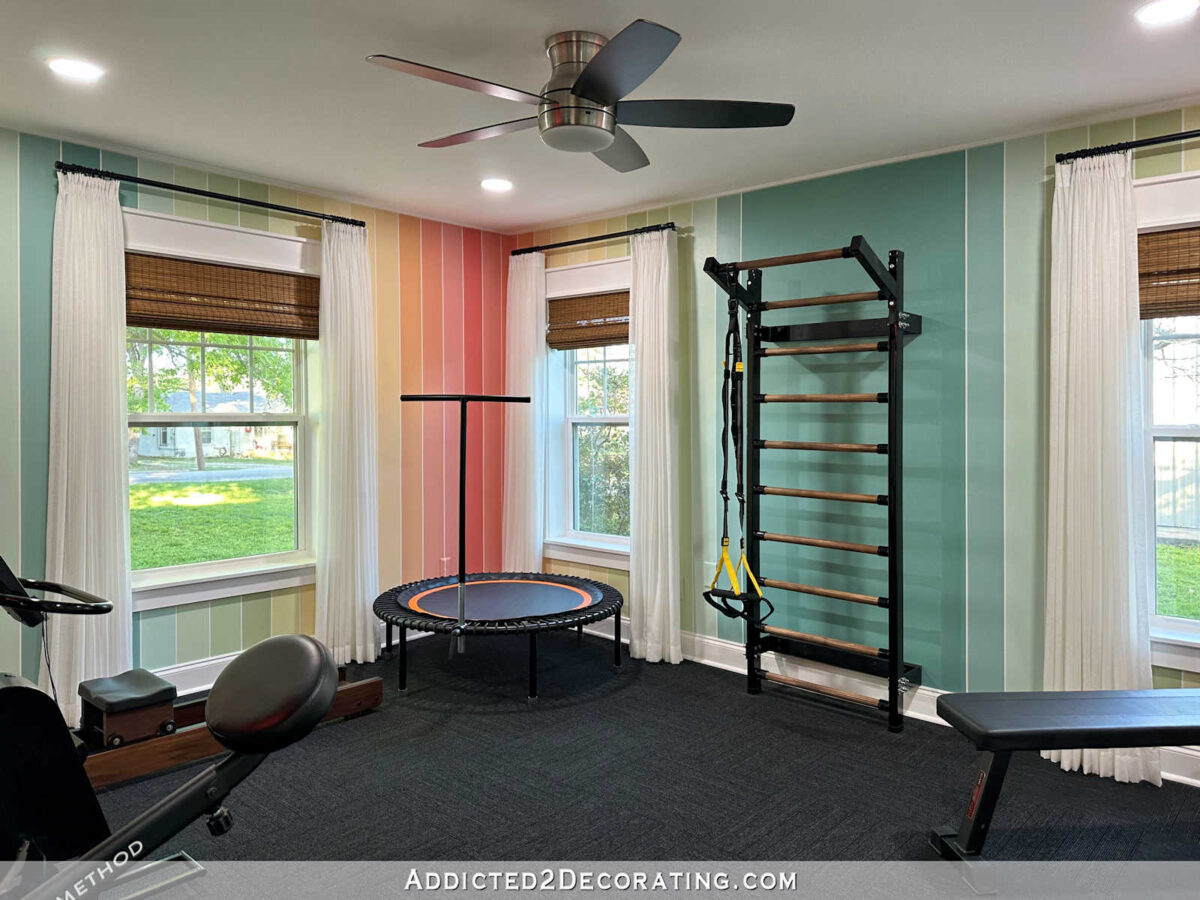

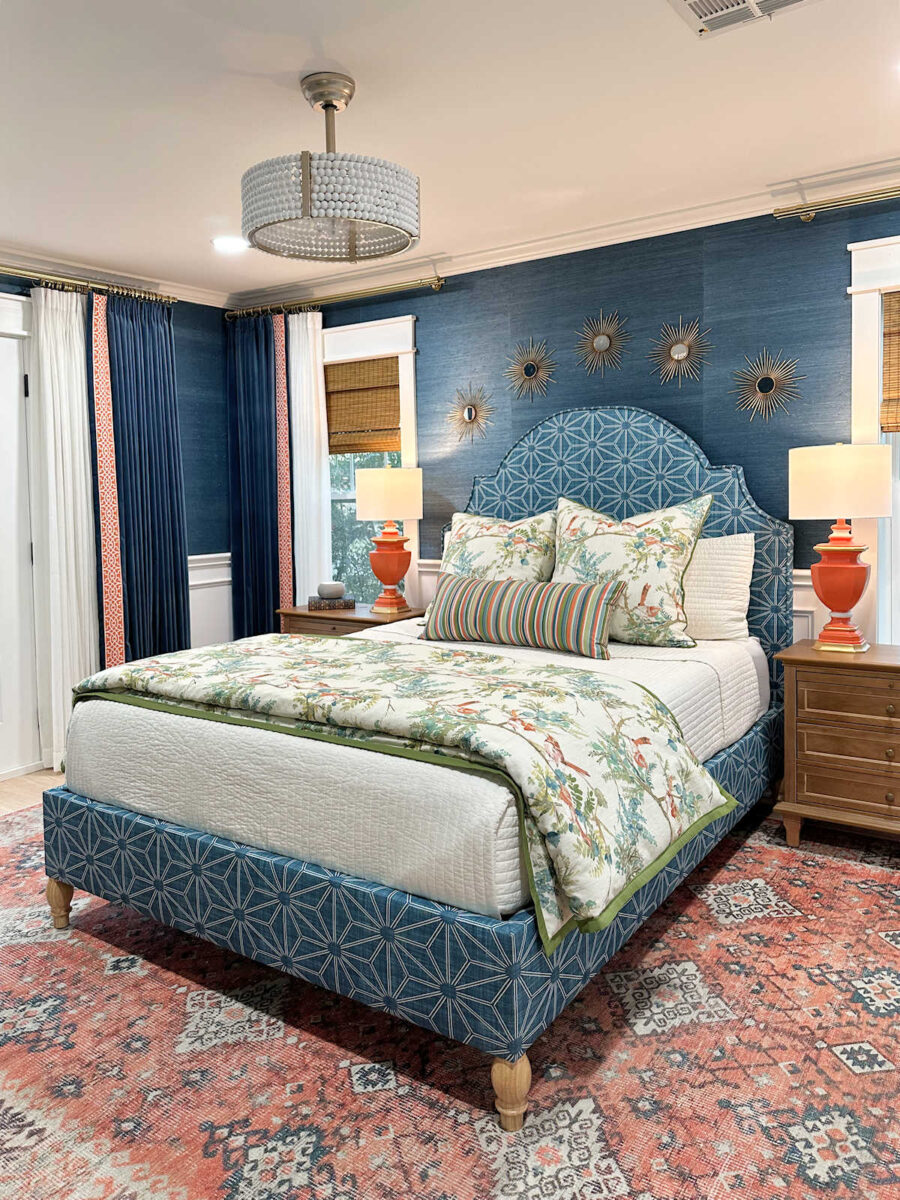
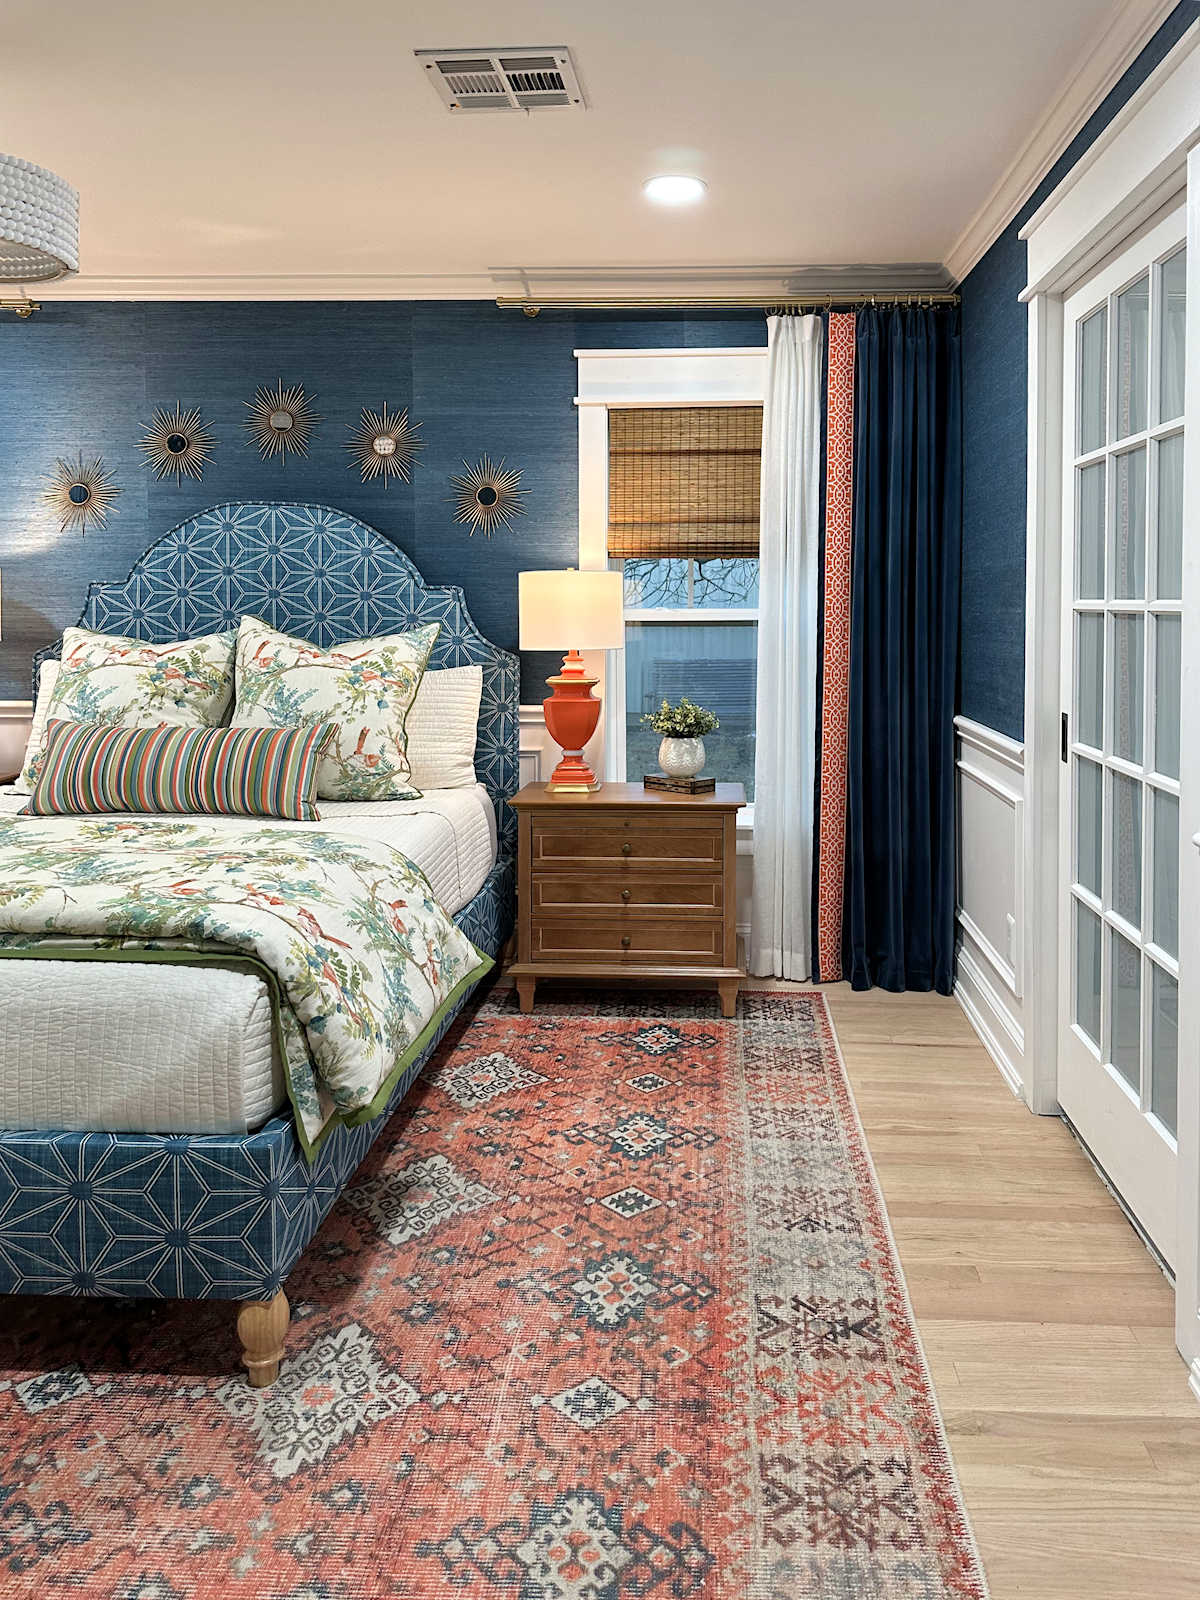
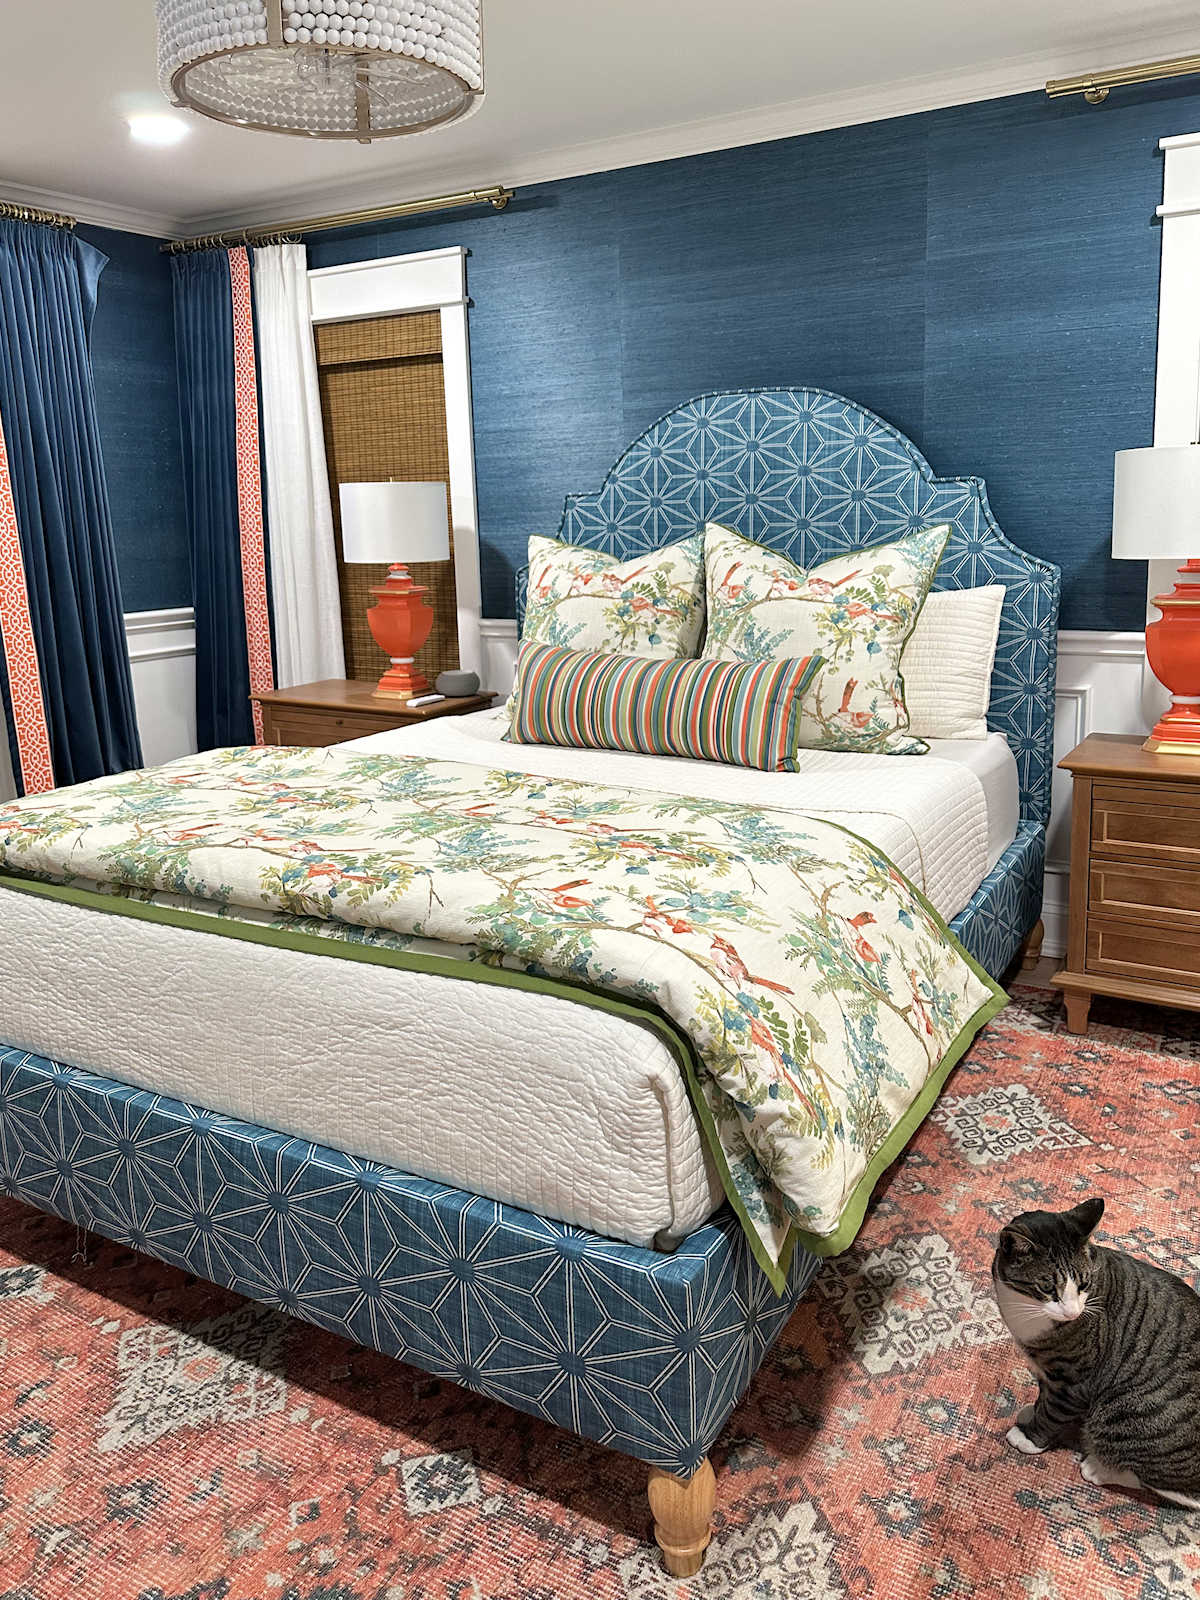
That really was a great home gym, and we got a ton of use out of it while we had it. I always felt very motivated and invigorated being surrounded by all of that color. But now we’re on to bigger and better things — a beautiful, relaxing master bedroom that will be enveloped in my favorite color of all.
More About Our Master Bedroom
see all master
bedroom diy projects

read all master
bedroom blog posts

Addicted 2 Decorating is where I share my DIY and decorating journey as I remodel and decorate the 1948 fixer upper that my husband, Matt, and I bought in 2013. Matt has M.S. and is unable to do physical work, so I do the majority of the work on the house by myself. You can learn more about me here.

Oh, my goodness! That was a lot of work sanding the walls. Making a note to myself to never paint stripes or murals on my walls. You are persistent and a hard worker and a perfectionist – all of which will pay off in a beautiful outcome when the wainscoting and grass cloth are completed.
I think DIY is all about bringing on a mess and cleaning, cleaning, cleaning said mess! But it doesn’t stop me and it definitely doesn’t stop you!
You should really invest in a Festool vacuum and sander, sooooo worth the investment!! Are you wearing a mask when doing these incredibly dusty projects😬 i worry about your lungs down the road.
Hi Kristi!
I have a completely unrelated question that your before picture brought on when I saw the exercice ladder (not sure if that’s the real name 😆). Did you use it? Is it worth it? I’ve been intrigued by them for a while but I’m just not sure I would use it. And I have the same question about the trampoline. It’s another one that I like the idea of but I’m just not sure I would use. I’d love to know your thoughts.
You’re doing so good on this project! I can’t wait to see the results! 😊